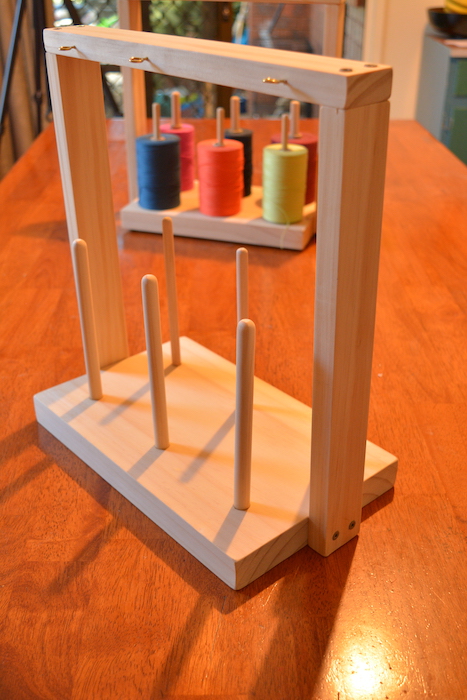
Recently my husband made me a warping stand. I had wanted one for a long time, but the store bought ones are very costly. I showed him some pictures and explained the function to him and he was more than willing to make me one.
When I showed the finished stand on social media, it received quite a response, and many of you wanted to know how to make one too. Being the wonderful man he is, my husband agreed to not only draw up plans and measurements to share with you all, but also to film a Youtube tutorial.
We only have very basic woodworking tools, but you can do a lot with a little elbow grease.
This is not a difficult or complicated project. It does not take a lot of experience or skill to complete, and it gives an excellent, functional warping tool that is sturdy and user friendly.
Along with the Youtube video, we wanted to provide some instructions here to help you understand the project.
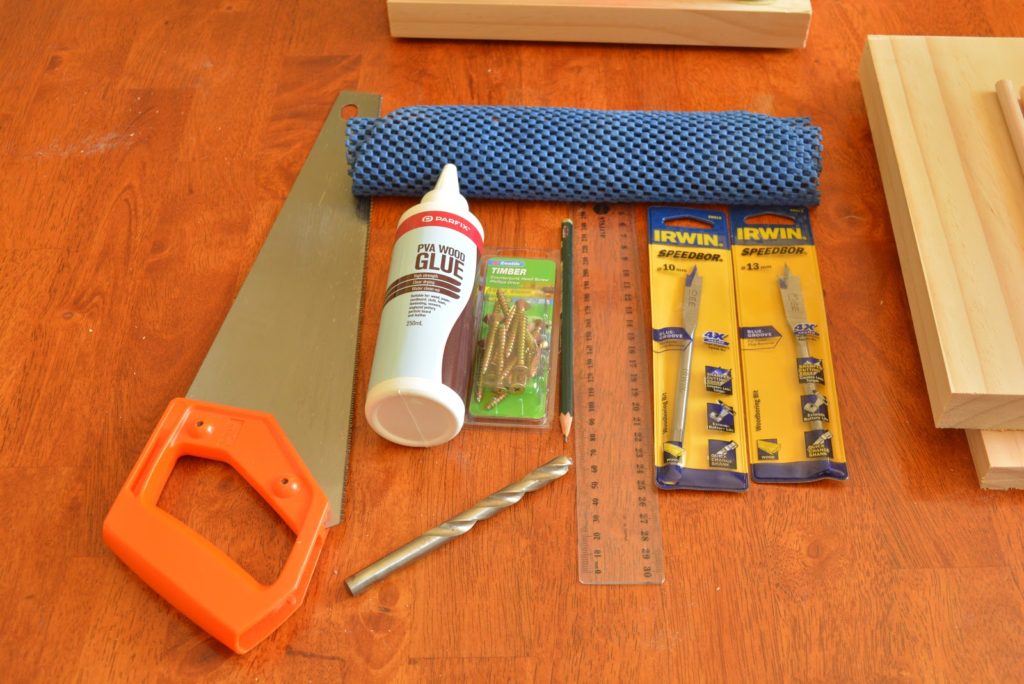
Lets start with the tools we used:
*Electric drill (this drill kit is similar to ours, affiliate link)
*Drill measuring rod (ours came with the drill)
* Wood boring bit 13mm and 10mm
*Piece of rubber or non slip matting
*6 x eye screws, 23mm length, 2mm diameter
*8 x 10 gauge, 45mm screws (we used square head)
* Square drive drill bit, no.2 (ours came with the screws)
* Drill bit same size as screw body for pre-drilling screw holes
* Handsaw
* PVA glue (small amount)
* Ruler
* Sandpaper, medium and fine
*HB pencil
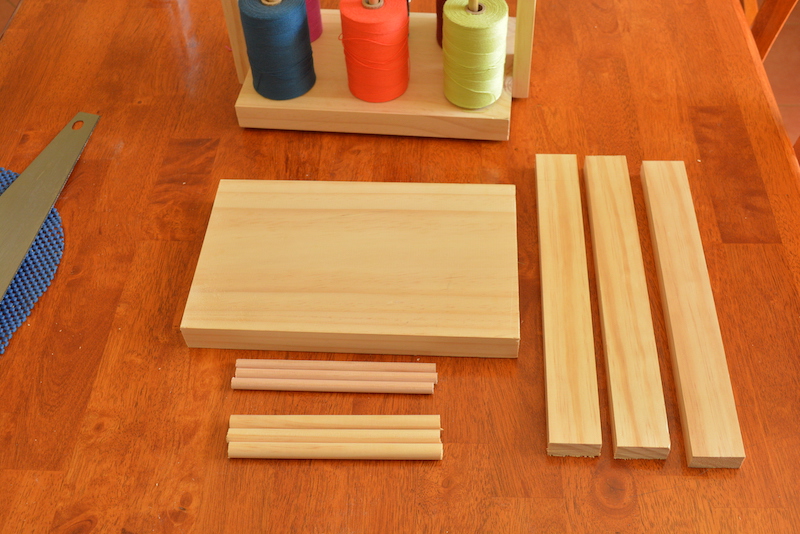
And the wood materials for the stand:
We used premium pine.
*Base piece- 30cm (11.8″) length, 19cm (7.3″) width, 3cm (1.2″) depth
*Side pieces (x2) – 34cm (13.3″)length, 4.3cm (1.6″) width, 1.9cm (.6″) depth
*Top piece (x1) – Same measurements as side pieces
*Dowel pieces thick (x3)- 17.7cm (7″) length, 12.7mm (.5″) thickness
*Dowel pieces thin (x3) – 17.7cm (7″) length, 9.5mm (.37″) thickness
Here are some little diagrams that my husband drew up that you can use alongside the video in case you get a bit lost.
He said that the measurements do not have to be exact and that you can always work around little inconsistencies, so definitely don’t obsess over the numbers, this is all more of a guide.
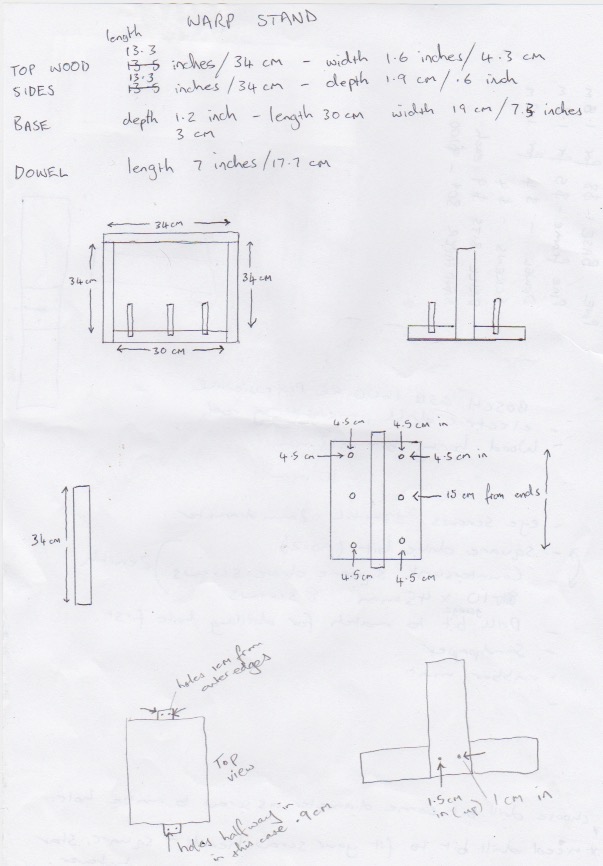
This is not a stand along blog post, you really do need to refer to the video as well, so please, use them together!
One of the best parts of this project is the overall cost comparison to store bought. If you already have some of the tools, as we did, the stand should come in at around $25 – 40, depending on where you are and the cost of materials.
If you already have the wood, tools and bits and pieces, you could be looking at a totally free project!
We hope that these instructions allow you to experience the satisfaction of making your own stand. If you have any questions, let us know!
