I’ve been making home baked bread for my family for at least 15 years (yes, I supply ALL the bread, but I have helpers too!) I started baking our bread at home for a few reasons – curiosity, nutrition, economy and self sufficiency. It is the perfect time right now to learn how to bake bread at home.
The idea of knowing exactly what was going into our bread, the superior taste and the cheapness of making it has made baking our own a priority.

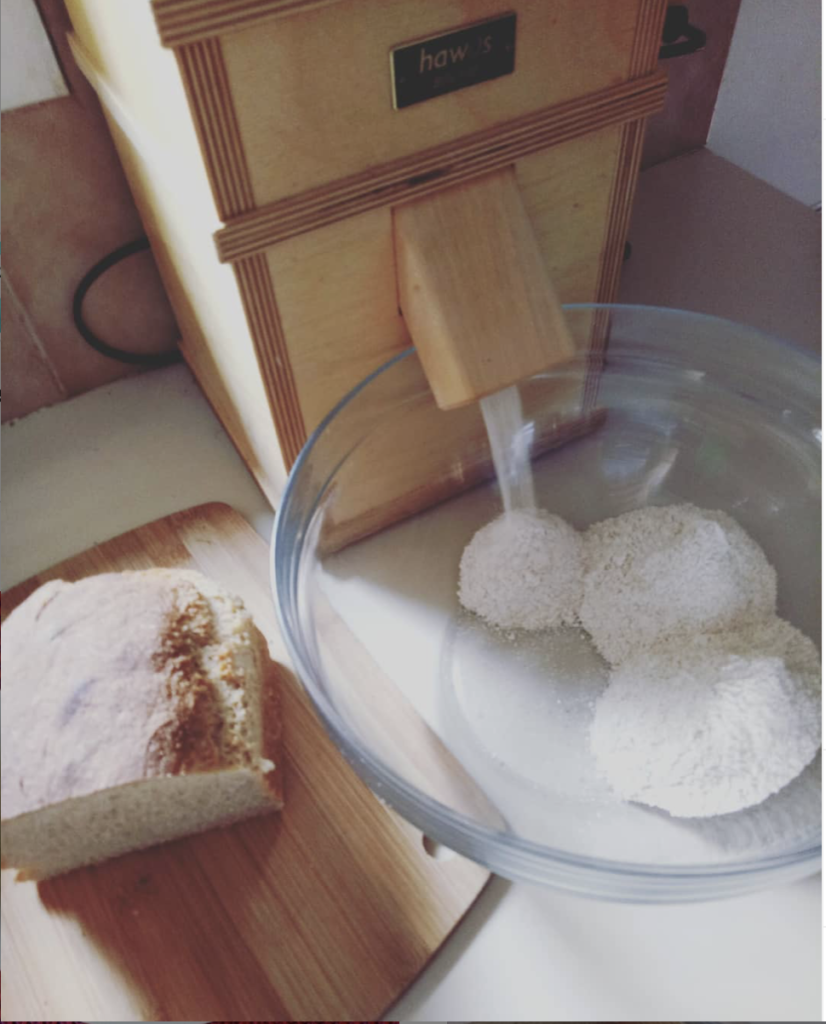
Around 4 years ago, I bought a Hawos Billy 100 grain mill after wanting one for 10 years (I’m very patient 😎). It sits out on the kitchen bench as it’s in constant use. The first time we set up the mill and ground some wheat, I tasted some on it’s own and was immediately hooked. I had bought commercial wholemeal flour from the supermarket, but grinding it fresh is really next level.
*This post contains affiliate links
I buy my wheat from Simply No Knead and have it delivered. If you’re in the U.S. and looking for some wheat to grind , you can get hard white wheat berries here. If you’re wondering about the differences between red and white wheat, check out this helpful article.
Milling our own grain is a huge blessing at this time when currently there is no commercial flour available to buy due to coronavirus related panic buying. I bulk buy my wheat in 20 kg bags and have plenty of it, I’m so thankful.
I’ve always wanted to share with you all how I make bread. Over the many years of baking for my family, I’ve devised my own methods to make the process faster, easier and more achievable. My methods are no knead, low mess, low ingredients and very straightforward. I’ve tweaked my methods to streamline the process and am very happy to share this with you!

Now, if you have flour and wish to use that, go ahead! This recipe is very adaptable and has the same basic components of flour, yeast, salt, water and oil. You can use white or wholemeal flour, or a combination, they all work. You may have to adjust your liquid amounts slightly, as wholemeal flour takes up more water.
If you prefer your bread on the sweet side, you may want to add in two tablespoons of cane sugar or two tablespoons of honey. I do this occasionally as an extra treat for the kids.
Then you will just need a large mixing bowl, a wooden spoon, 2 bread tins, and you’re ready to bake some delicious bread! If you are going to make bread a lot, you will want a good bread knife, it will take the headache out of slicing. My husband gifted me this Mundial Serrated Knife right at the beginning of my bread baking journey and I use it every single day. Alright, let’s check out the recipe!
Let’s just go over some measurements first so that we’re clear on amounts. If you don’t know how much grain to mill to get the required amount of flour, 5.5 cups of whole wheat grains grinds up to 7.5 cups of flour. This amount of grain and flour also equals 1 kilogram (2.2 pounds). 1 litre of water is equivalent to 1.05 quarts.
No Knead Wholewheat bread

- 7.5 cups Wholewheat flour (I use freshly milled)
- 1.5 tsp Instant dried yeast
- 2.5 tsp Salt
- 1 litre Warm water ((Around 1 quart))
- 3 tbsp Sunflower oil
Weigh and mill your whole wheat grain, if using. Otherwise, measure out your commercial wholewheat flour into a large bowl.
Add yeast and salt to flour and mix through with a wooden spoon.
Mix the warm water and oil together in a jug.
Make a well in the middle of your flour and pour all of the liquid in.
With a wooden spoon, mix gently to begin combining the wet and dry ingredients.
When the water is no longer "sloshy", use a chopping action with the wooden spoon to bring ingredients together. You want to eliminate any dry flour spots.
Once combined and completely wet, let the dough sit in the bowl for 3 – 5 minutes.
Using the folding technique shown in the video, fold the dough whilst turning the bowl slightly. Fold it around 5 times. Then allow dough to sit for 3 – 5 minutes again.
Repeat the folding technique 2 more times for a total of 3 times. You will notice the dough begin to change and become elastic.
Sprinkle with flour, cover with a cloth and allow to sit until approximately doubled. Depending on the temperature in your kitchen, this could be 1 – 2 hours. My dough took around an hour to double in a warmish kitchen.
Oil or flour your bench surface and tip the dough out. It will be stretchy and airy.
Fold the dough in on itself on each side. Cut in half with a sharp knife.
Shape the two pieces of dough into loaves according to the video instructions. Place in prepared loaf tins.
Sprinkle with flour and cover with cloths to rest for around 30 minutes. Begin to preheat your oven to 225 degrees celsius (437 farenheit).
Score your risen loaves with a sharp knife and place in the oven for 35 minutes.
Remove from the oven and tins and place on a cooling rack. Allow to cool completely before cutting open.
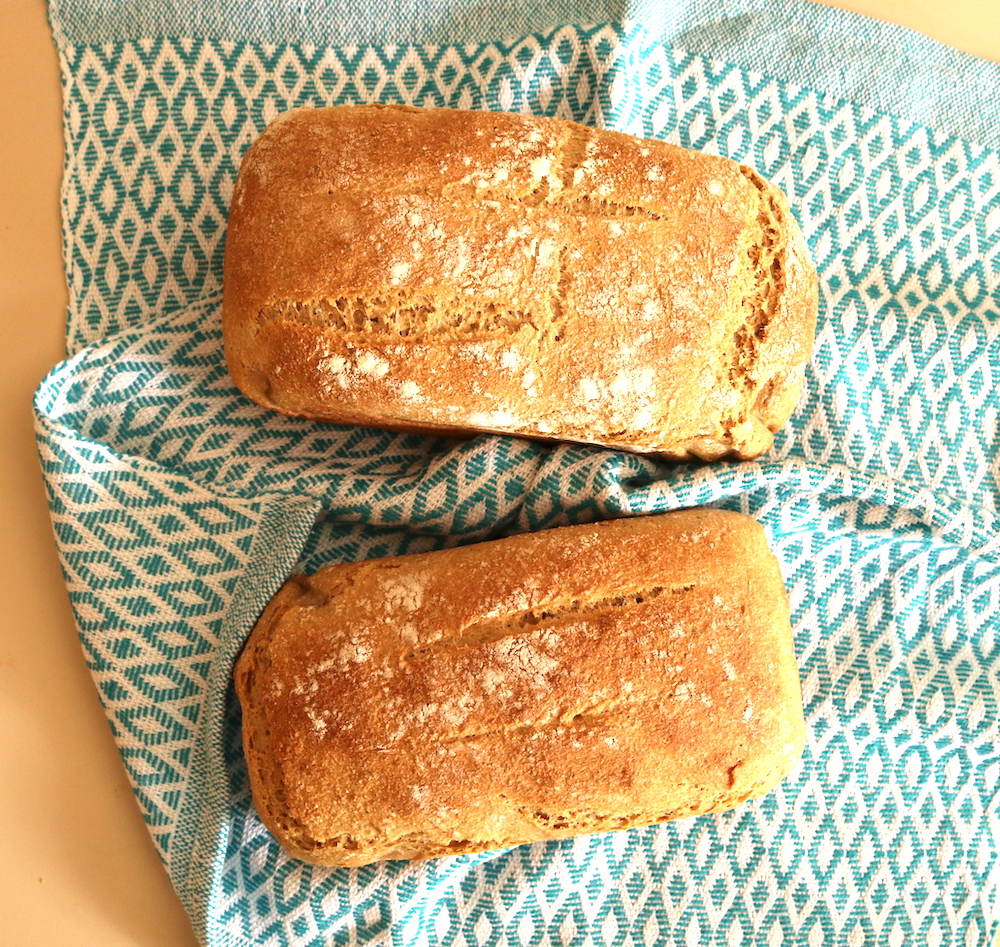
Did I tell you that this bread freezes well? I make up a batch of 4 loaves at a time, the maximum amount my oven will hold. I usually keep one loaf out for the next couple of days (if it lasts that long, often it does not) and put the rest in individual freezer bags, tie them up well and freeze until needed.
You will want to watch the video I’ve put together in order to learn the techniques I use, as these are crucial to the success of your loaves.

I hope you enjoy this recipe and bake some bread for your family! Please leave any questions in the comments section, let me know if you are going to give it a try, or if you already have. I’d love to hear from you!
Until next time…
Happy baking!