
Many hand weavers these days are keen to sew finished pieces, particularly clothing from their hand woven fabric. This is a wonderful development for any weaving journey, as sewing opens up a vast amount of finished objects the weaver can make.
One side effect of all the sewing with hand woven fabric that is starting to happen is that there will be inevitable leftovers. Sewing, particularly clothing usually requires cutting shapes out of your hand woven, meaning that you will have smaller pieces of “waste” fabric leftover. I say “waste” but it’s only waste if you waste it!
*This post contains affiliate links
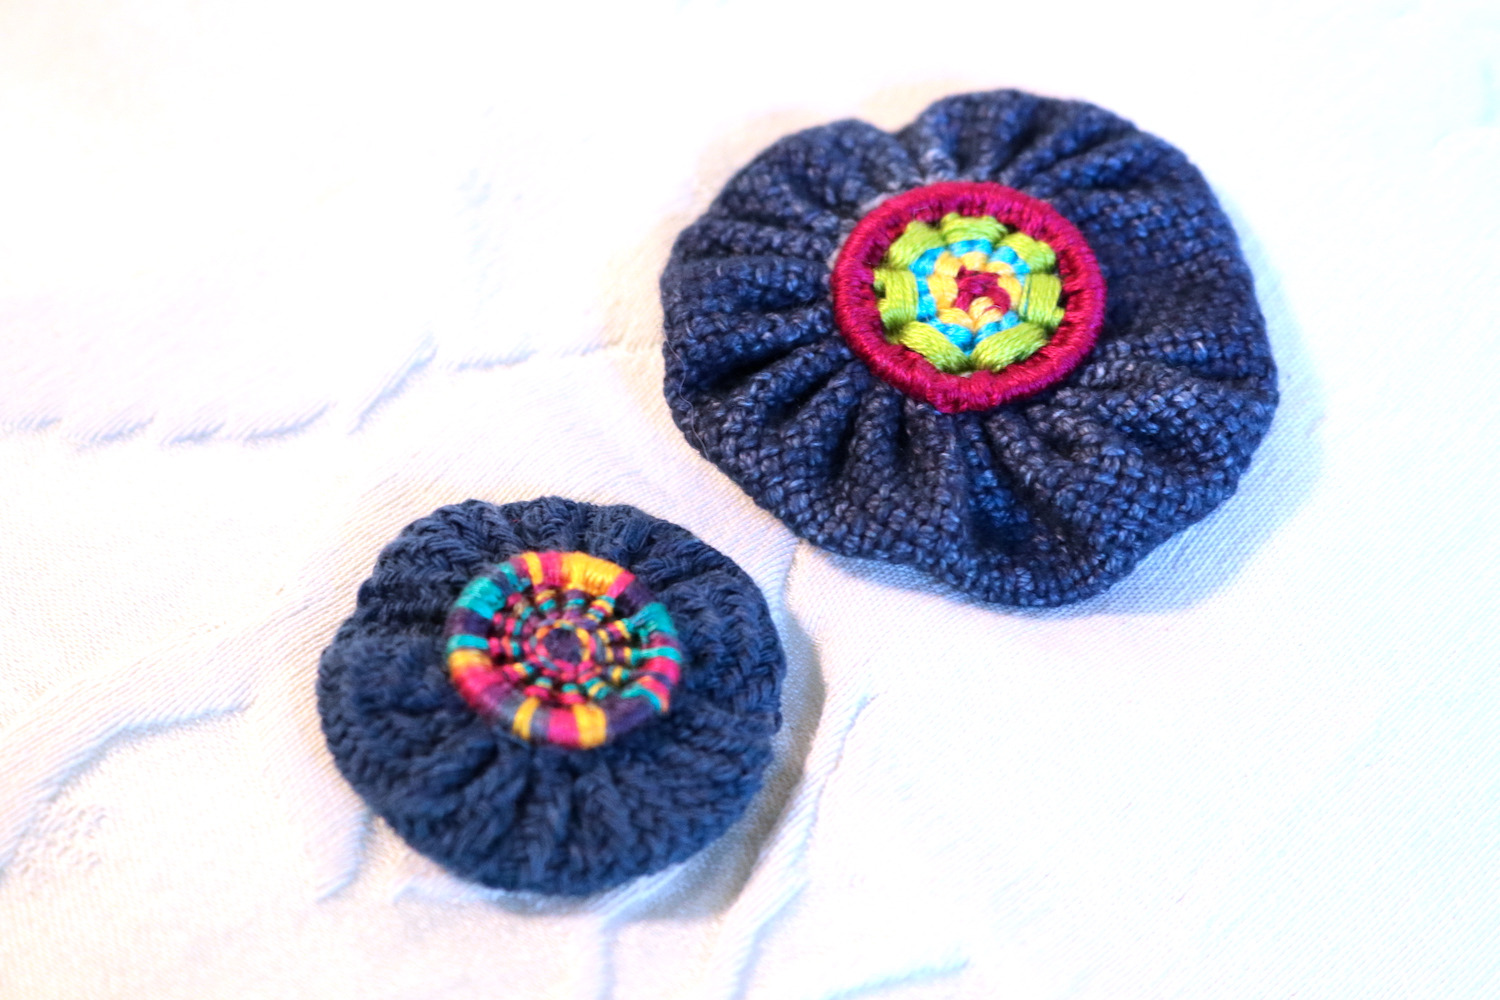
There are some fun and exciting projects that can be made even with very small pieces of hand woven fabric. One of these is the lovely Suffolk Puff or as it may be more commonly known these days, especially in America, as the Yo-Yo.


What is a fabric Yo-Yo? It’s a small, gathered circle of fabric, usually covered in the middle by a button or similar. They have been around for quite some time, seemingly dating back as far as the early 1600’s in Suffolk, England.
Suffolk Puffs were made from old clothing, quilts, bed sheets and so on, and given new life when joined together as quilts and cushion covers.
The idea is to gather a small circle of fabric at the outer edge with a running stitch. When gathered, the circle forms a sweet little “puff” that can then either be topped with another, smaller puff or a button can be sewn into the centre.
With the finished YoYo you can embellish clothing or bags, sew many of them together as in the days of old, hot glue them on to hair accessories (I’ve done this a lot for my 3 girls) or sew on a brooch backing and wear it as a one of a kind brooch.
Let’s begin with what you will need to sew a YoYo similar to mine.
*A 5 x 5″ square of handwoven (or commercial) fabric
*A 5 x 5″ square of light, fusible interfacing
*Strong sewing thread (I use Gutermann Sew All)
*A sewing needle
*A button to finish with

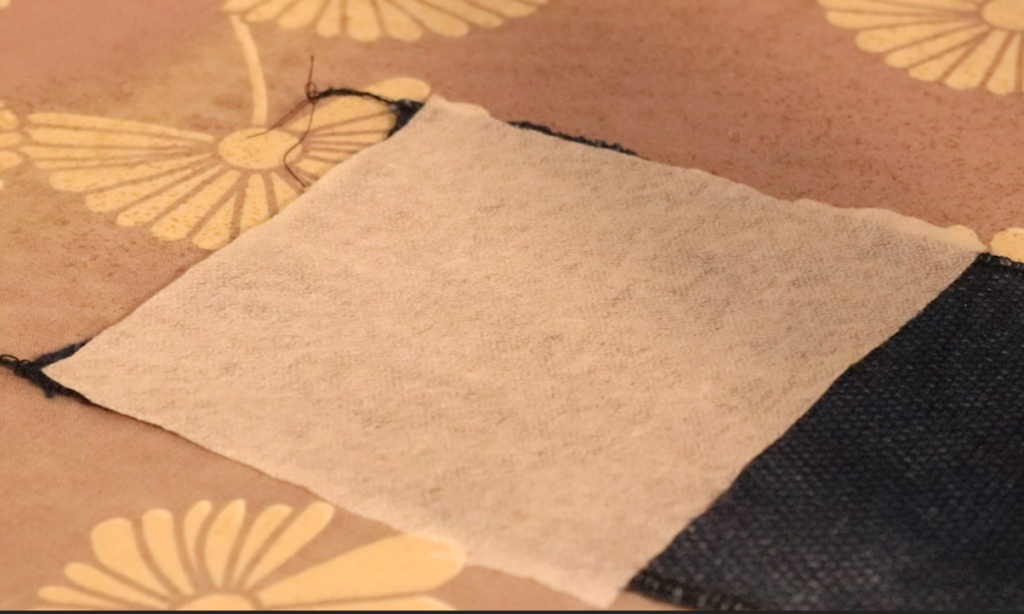
Begin by cutting the fusible interfacing to fit on the fabric piece. My original fabric piece was larger than 5 x 5″, so I place the interfacing on first. Make sure that you have the correct side of interfacing facing the fabric, otherwise you may destroy your iron! Place a pressing cloth over the top of the interfacing for extra protection. Iron it on and allow to cool once properly fused.

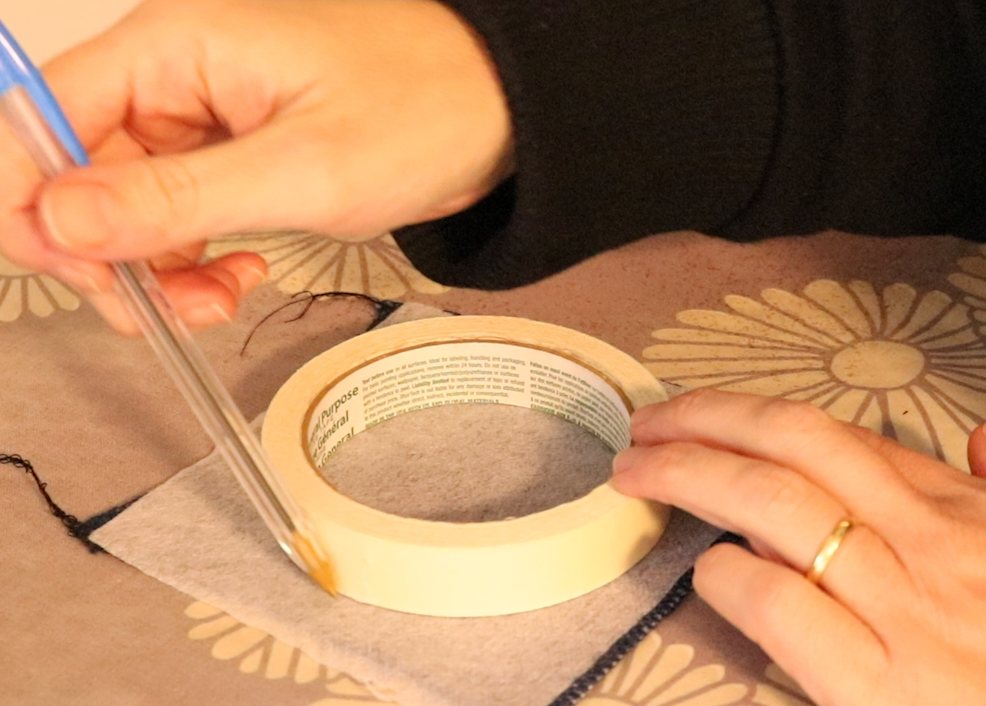
Use an object as a traceable template (I used masking tape) to draw a circle onto your interfacing. It’s fine to use pen, as it only marks the interfacing and will provide a cutting line.

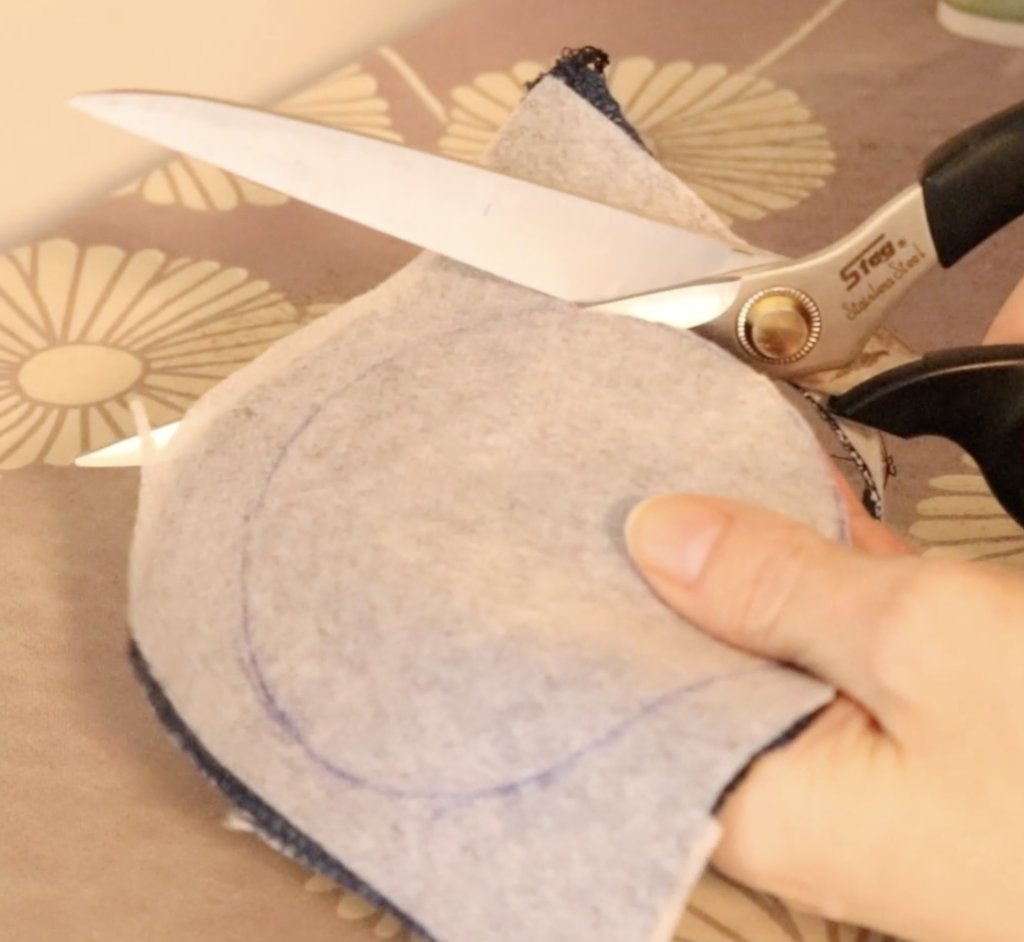
Cut out your circle. Sharp scissors are very handy at this point.


Thread your sewing needle with around a 15″ length of thread and knot the end. Take the needle down through the interfacing side, about 1 centimetre in from the edge.

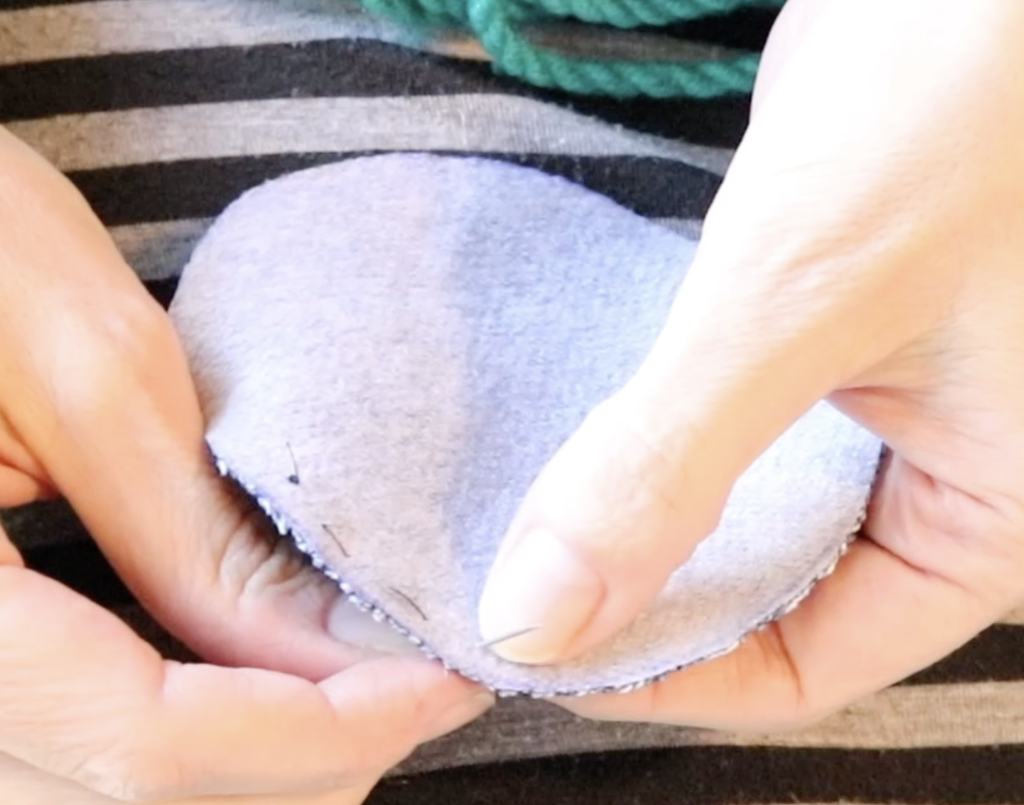
Stitch a running stitch, making the length of your stitch also around a centimetre in length and maintaining a fairly consistent distance between the stitches.

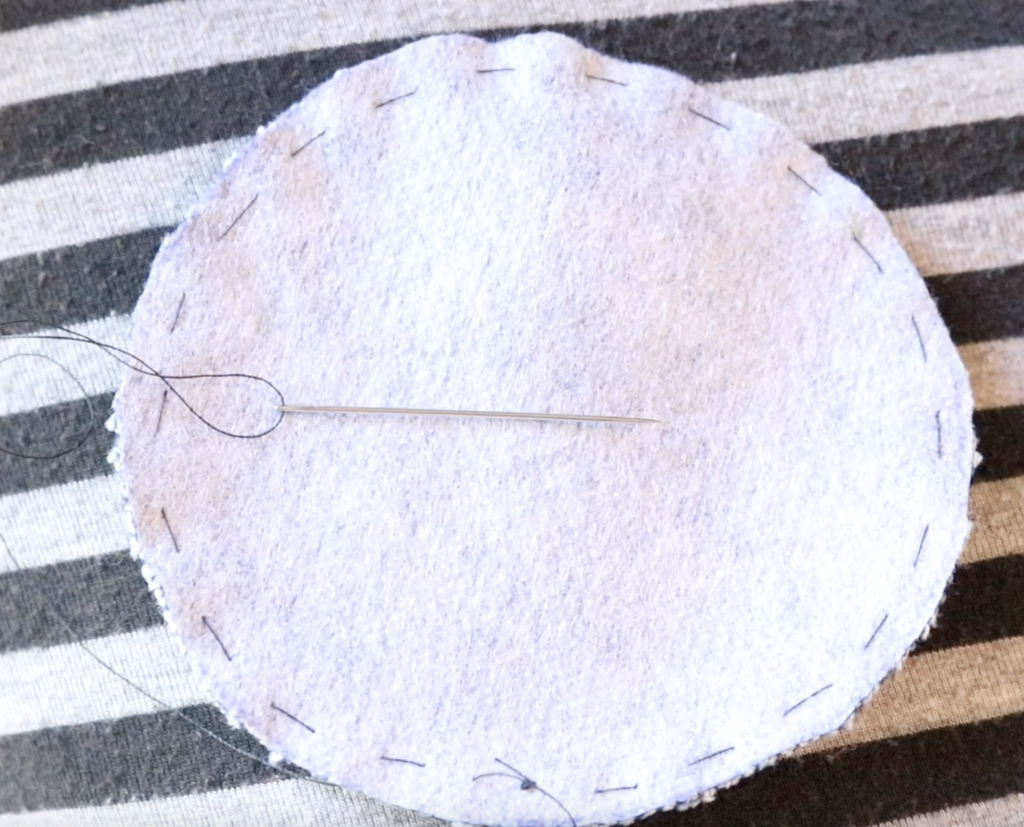
Continue all the way around the circle.

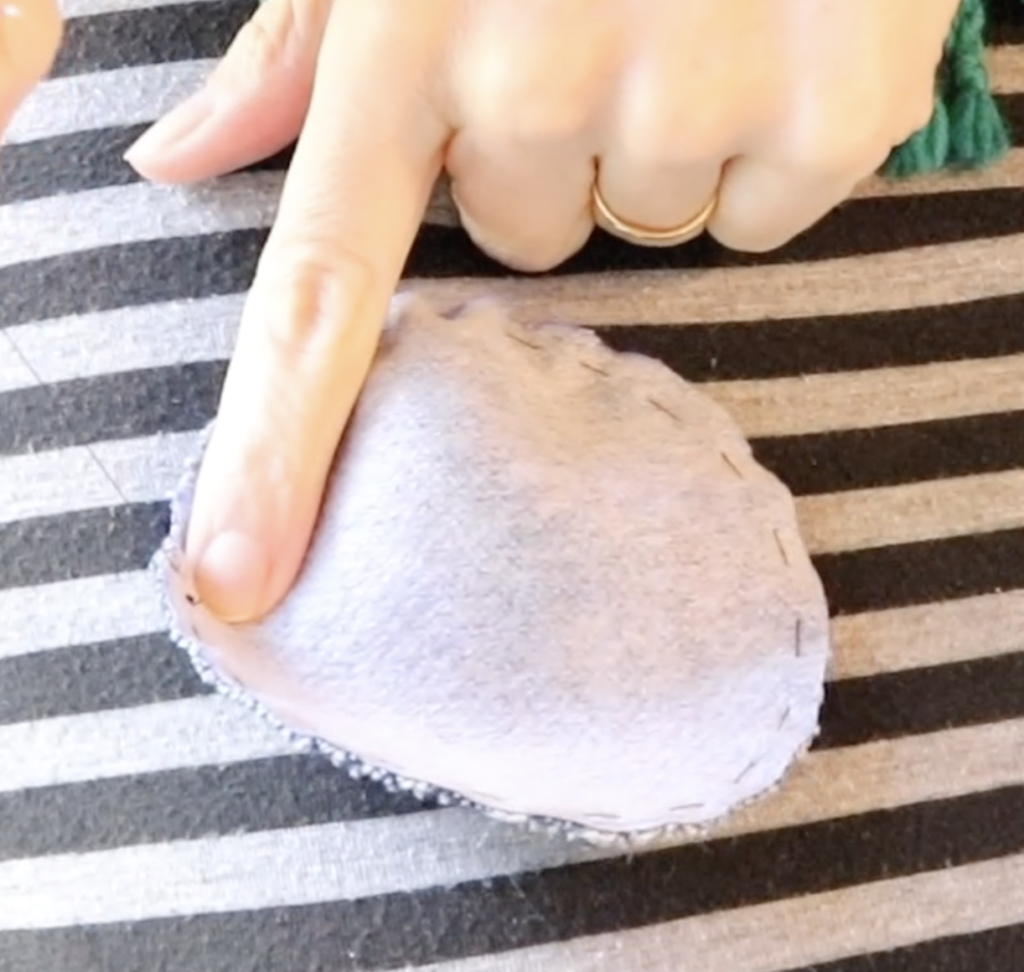
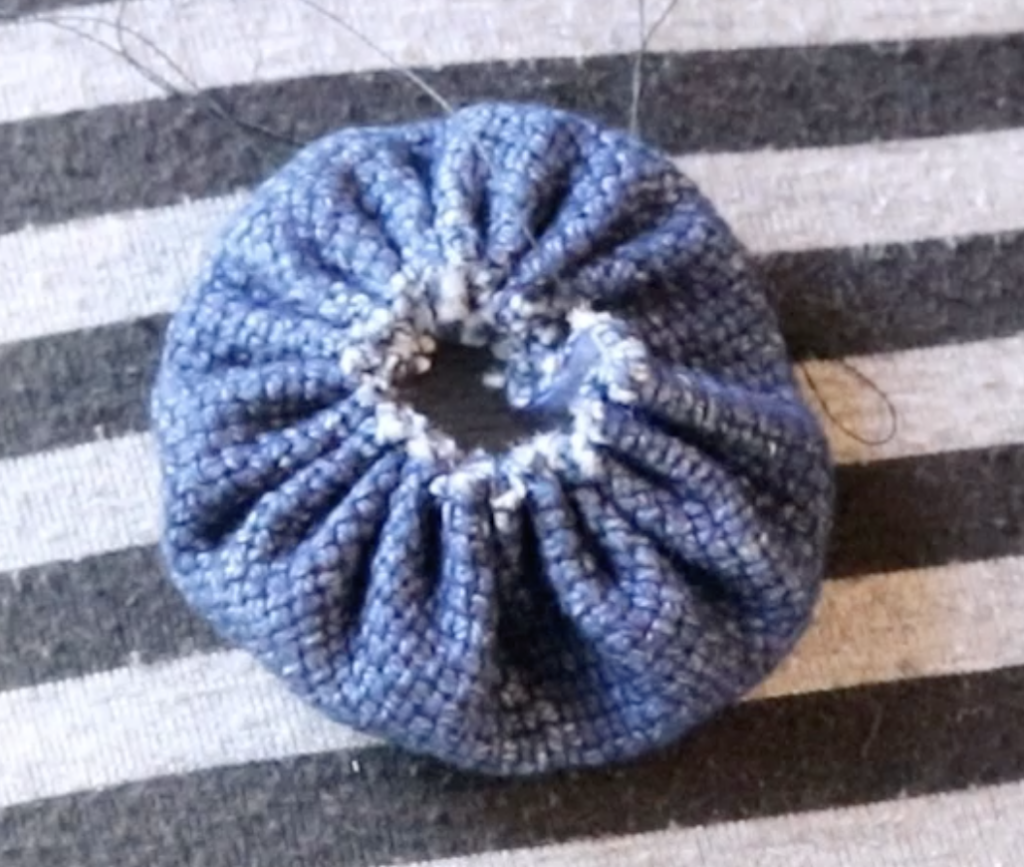
Pull gently on the end of your thread and the fabric will begin to gather up.

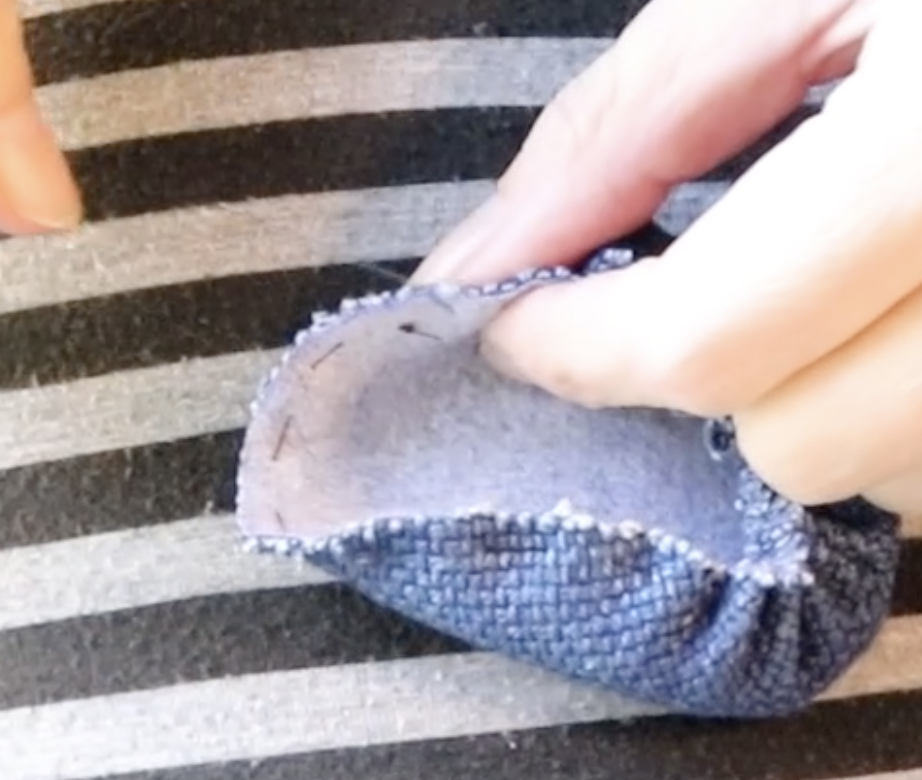
Continue gathering until the fabric forms a hole in the centre and can’t gather anymore.

Now you can decide what you will place in the middle. I’m using a Dorset button that I made previously. If you’re interested in learning more about Dorset buttons or making one yourself, I recommend GinaB Silkworks.

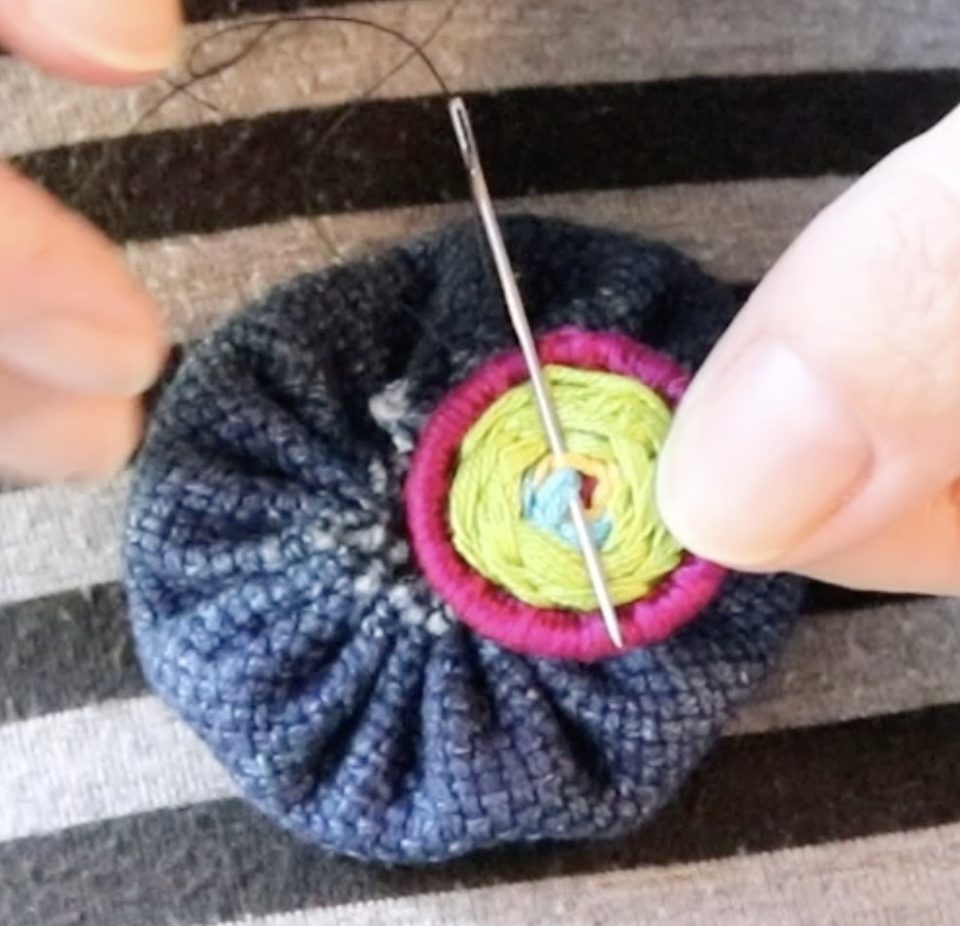
My button is flat backed, so I’m taking my still attached thread through the back of it to begin stitching it on.

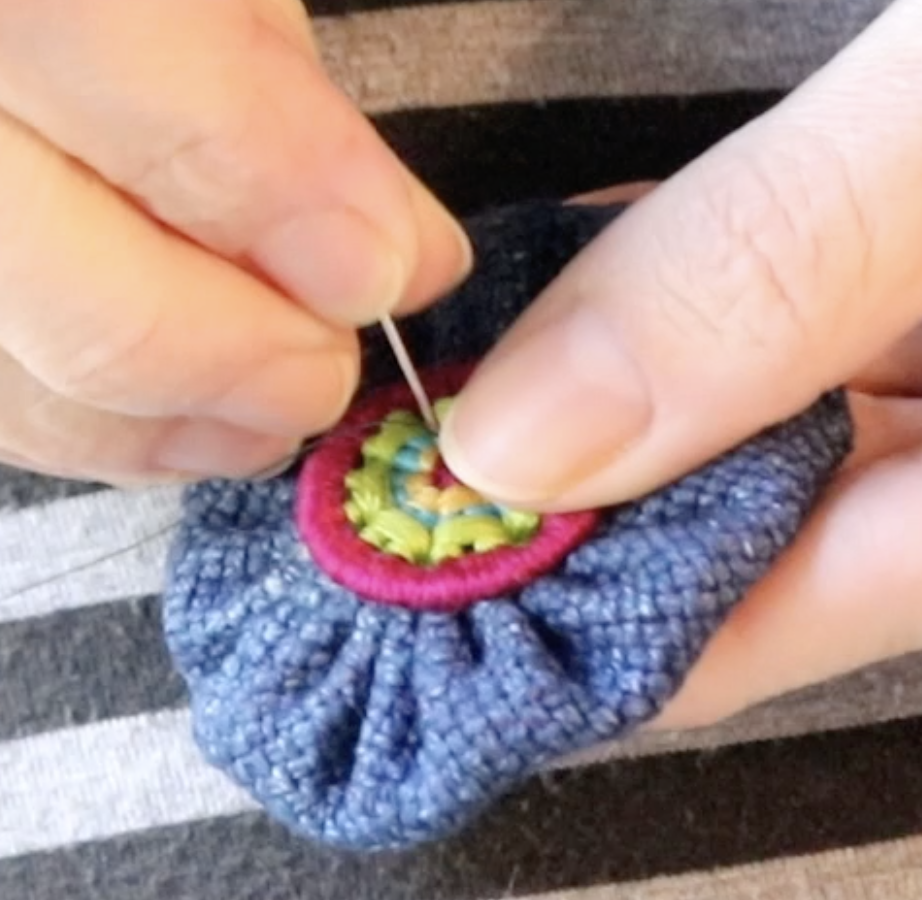
Continue to stitch through the button to the back of your puff with small stitches until it’s fully attached and none of the raw edges of your circle hole are showing. Knot off the thread and sink it into the back of the puff where it won’t be seen.

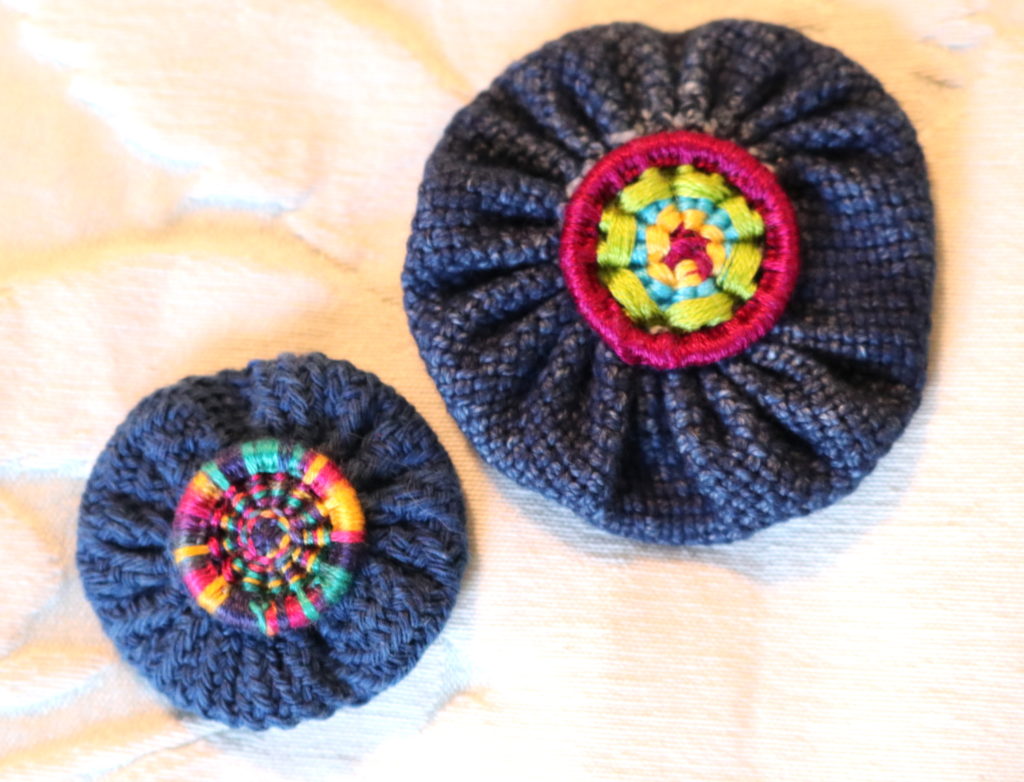
Ta da! What an easy peasy use of scrap fabric! I think these ones should be made into brooches so they can be shown off well.

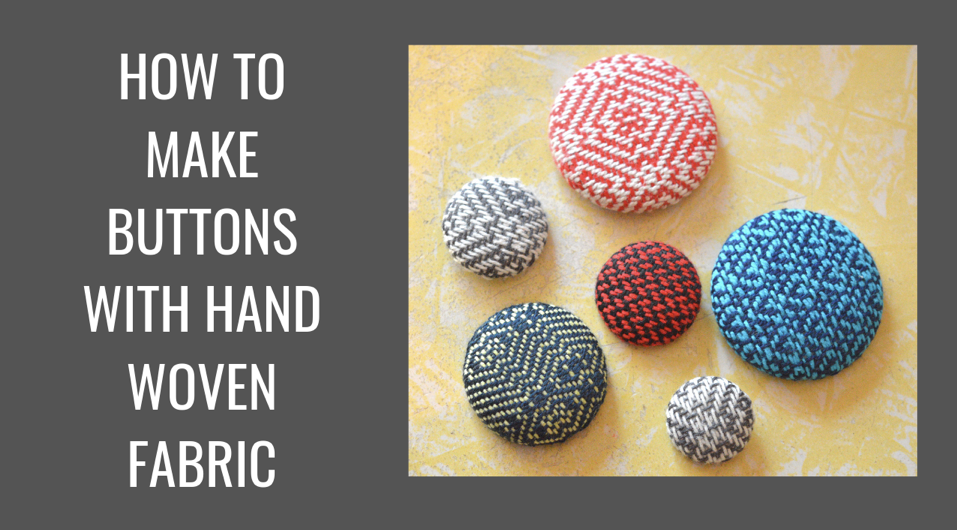
If you are interested in learning how to make buttons with your hand woven fabric, I have a members only class that shows you how to do that.
This tutorial is available in video format here-

What do you think? Do you have any scraps of hand woven that could be used to make a YoYo? And what about the Dorset buttons, are you interested in having a go at those too? Let me know in the comments, I love to hear from you!
Until next time…
Happy Weaving!