Double width is one of those weaving techniques that can seem like some kind of sorcery to a new weaver.
It can be both very exciting and extremely daunting, all at the same time!
*This post contains affiliate links. For more information, please see my disclosure policy.
I remember how overjoyed I was early in my weaving journey to discover that my 24″ rigid heddle loom was actually capable of weaving fabric twice as wide. Wow, what a revelation!
With two heddles of the same size and two pick up sticks, you too can weave cloth double width.

If you’re interested in knowing more about what weaving with two heddles can achieve, I’ve written a previous article with details and examples of all the various things you can do with two heddles. You can read that article here.
My Weaving With Two Heddles class is one of my Online Weaving School best sellers, and it’s not hard to see why. Weaving double width can open up a whole new world of possibilities on any size rigid heddle loom.
Although weaving double width can be a challenge, I believe it is very achievable with the right tools and knowledge. And practice, of course!
Over the past few years, I’ve heard all of the common problems that students run into when attempting this technique. I’ve run into most of them myself at some point too.


So, today I want to give you my best tips for successful double weaving to help you have the best experience and hopefully avoid some common frustrations.
I’ll start with one common misconception from newbie double weavers:
Technically, your cloth will not be twice as wide.
Let me explain!
My rigid heddle loom is a 24″. The assumption then, is that if I’m weaving double width, I will end up with a 48″ wide piece of fabric. Not so. The 48″ figure does not allow for draw in and shrinkage. Just as I do when I weave a single layer of fabric on my 24″ loom, I have to calculate and allow for these differences. Depending on my yarn, I could have up to a 20% loss. This would make my double width cloth closer to 38″ in width.
This is something to consider in the planning stages of your double width piece. You may find it worth the time to weave a smaller sampler first, putting it through the wet finish and drying process and recording all the measurements before and after in order to determine the shrinkage and loss for your particular yarn.

And now for my tips!
Great warp tension makes all the difference.
I will say this for any weaving project, but it becomes all the more important for double width. Get you tension as good as you possibly can while winding on your warp.
This doesn’t mean get the warp as tight as you can, but more as firm and consistent as you can. This might mean that you need a helper to assist you in holding the warp while you wind on. It might mean using weights on the warp while you wind on. It will certainly mean packing the back beam very well as you wind (I would recommend a roll of craft paper that fits the width of your loom for this).
If your warp tension is not consistent enough, when you try to adjust the tightness to begin weaving, you will find some threads are tight enough and others are loose. Threads will not all be in their correct sheds, and you may be confused about thread positioning.
This can be super frustrating but is avoidable by taking extra time and effort over your warping process. Trust me, it’s worth it!
Choose your yarn carefully.
Choosing the right yarn for your double width project is going to save you a lot of headaches later on!
Firstly, you need a yarn that is a suitable size for the heddles you are using.
Next, you DO NOT want a sticky yarn for this weave structure. A yarn that sticks to itself too much, is frizzy or fluffy, will interfere with the cleanness of your sheds and turn you into one very frustrated weaver!
To find out more about different types of yarns, some I do or don’t recommend, and more general weaving yarn information, you may want to check out these articles:
Choosing and Using Yarns in Weaving…
3 Yarns New Weavers should never use!…
You also want to be careful about a yarn that has too much stretch. I like to use wool for double width weaving because it’s elastic, but bounces back, so it’s very forgiving.
If your yarn is elastic, but stretches without returning or bouncing back, then you have a problem. It will be next to impossible to maintain proper tension on the loom. This will make droopy sheds and you won’t be able to properly see which threads are in the right sheds or not.

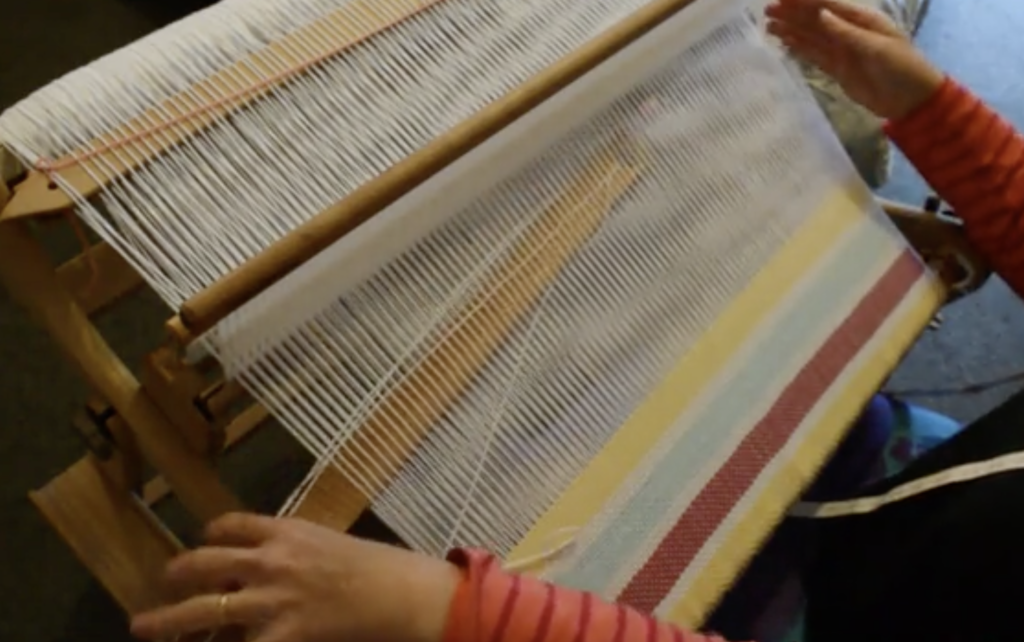
Your fold may not always be the same.
The fold is kind of a big deal in double width weaving. This is because, once you remove your piece from the loom and open it up, that fold is on display for all to see! You can certainly weave a next to invisible fold, but there are some things you need to know first.
Yarn. Again, the yarn you use will impact on how your fold turns out. For example, I have found that a cotton will bunch together more tightly at the fold than wool does. This is because cotton is more rigid and less lofty/bouncy. So my strategy at the fold changes according to the yarn I’m using. I need to be less firm at the fold when using a more rigid cotton, to give it a little more space to settle into place. Again, a sample can be your best bet to success.
Consistent weft tension at the fold is really important. Try to find a good rhythm and stick with it. Not too tight, not too loose. Practice, practice, practice! You won’t get to really see your fold until you remove the piece, so it is challenging to know how it’s going to turn out. But practice will give you a good feel for what is too much or too little weft tension.
Clear your sheds if you’re concerned about floats.
Coming back to the possibility of sticky yarn or threads being in places they shouldn’t, it could be a good idea to use an extra stick shuttle or pick up stick to clear sheds before weaving them. You could do this for every shed if you need to, or just for those you have determined to be troublesome. When you open a new shed, insert your extra stick and wave it around. Or place it in flat and pull it towards you then slide up towards the heddle. This should sort out any naughty threads.
If things still don’t seem right, you can place the stick behind the heddle when the new shed is open and slide the stick up towards the back beam, then take it out. As long as your threading is correct, this works very well for putting threads in their correct places.
To check for floats, you will want to view your work from underneath at intervals. You can’t see how things are looking underneath as you weave, so either use a mirror or your phone to check. If you’re feeling energetic, you can hop off your chair and pop under the loom for a look. I’ve done all of these, and they all work fine, the main thing is to do checks periodically to see if you’re getting floats or to know if anything looks a bit off.
Now I want to address a question I get a lot.


Can I weave patterns or other weave structures in double width?
The very short answer is yes.
But…(there had to be a but, right?) the rigid heddle loom is best suited to double width in plain weave. There is a good reason for this.
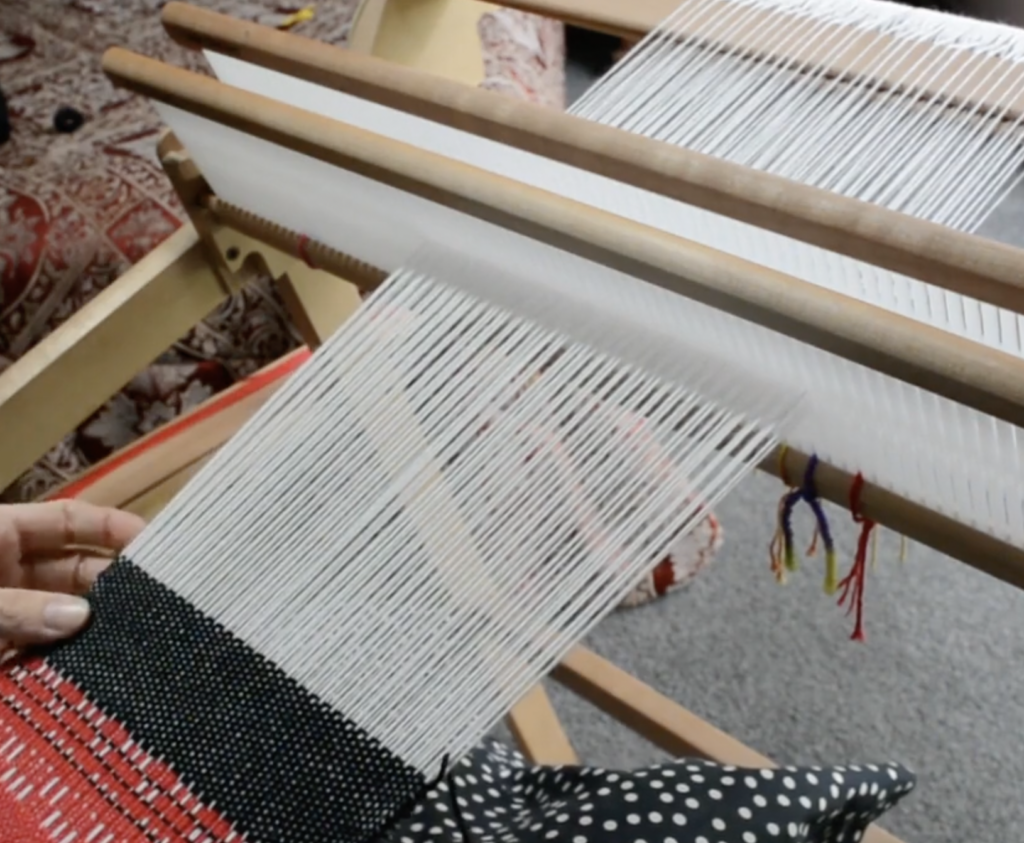
A rigid heddle loom is a two shaft loom. When we weave double width, we are using 4 shafts (which is why we need two heddle plus two pick up sticks). Quite doable on a rigid heddle.
But, if you want to weave another pattern, that will often require 4 shafts to begin with. A rule of double width weaving is that you must have twice the number of shafts initially required. So, that 4 shaft pattern just became 8 shafts.
If you’re on of those thrill seeking rigid heddle weavers, and want to adapt 8 shafts for your loom, I wish you all the best. It can be done, but that is one thing I choose not to do myself. Although a voice in the back of my mind keeps telling me that I will and must do it one day, just for the challenge. Most of the time I try to keep that little voice at bay, it asks too much of me sometimes 😆
Suffice to say, setting up for a 4 shaft double weave on a rigid heddle loom is no picnic in the park. But, I do have another suggestion that I think you will like.
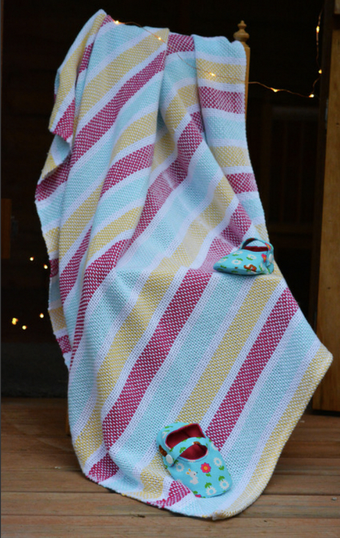
Colour and weave! If you’re unfamiliar with the term, check out this article. To explain it simply, colour and weave uses colour techniques to create interesting fabric and can easily be done on plain weave threading. You can combine warp and weft colour combinations to weave really beautiful items that look more complicated than your everyday plain weave.
This can easily be applied to your double width project. In my Doubleweave Baby Blanket class, I employ the use of weft stripes, but you can take that further by introducing more colour to warp as well.
The only thing you really need to know is that you will have to be particular about the colour placement at your fold, remembering that a warp stripe placed at the fold will be twice as wide as a single layer fabric.

That brings me to my very last tip.
If you find the fold challenging, incorporate a distraction!
So, you’ve been practicing folds for a while, but you’re still not happy with your results? Or you find that the fold is always too visible?
Try doing what I just mentioned, and add stripes to your warp, or colour arrangements. Ensure that these are arranged correctly at the fold. My reasoning behind this is that a piece of fabric that has colour or pattern will be “busier to the eye, and distract the view away from any less than perfect aspects of the piece.
Now I have some additional resources for you if you’re eager to start your own double width journey.
Book:
Jane Patrick’s “The Weaver’s Idea Book” has a whole chapter dedicated to many aspects of double weave. I highly recommend this book for any rigid heddle weaver, it is so comprehensive and inspiring!
Classes:
Members only classes:
The Plaid Double Width Blanket Ebook is a fantastic 44 page resource that includes a beautiful blanket project plus a ton of comprehensive and useful information:
Plaid Double Width Blanket Ebook

So tell me, have you tried double width weaving yet? Perhaps these tips have inspired you to give it a go? Let me know in the comments below, I would love to hear from you.
Until next time…
Happy Weaving!