Working with finer threads on a rigid heddle loom can be quite challenging when it comes to adequate tensioning.
Why is this?
A rigid heddle loom does not hold the same amount of tension that a table or floor loom will. Particularly when weaving with thinner and rigid weaving yarns like 8/2 cotton you may encounter some frustrations like the following:
- Tension too loose, especially in the down shed
- Sections of warp that are more loosely tensioned than others
- Single warp thread/s that are more loosely tensioned than others
Now let’s go over some tips that are going to make a big difference when you experience these issues.


Avoid snagging threads with your stick shuttle by using correct technique.
Due to the shape of a stick shuttle (usually with “prongs” on each end) you can accidentally snag a thread or threads when weaving a pick. Snagging will usually result in a saggy thread, as it is stretched and pulled tighter than the other warp threads.
*This post contains affiliate links. For further information please see my disclosure policy.
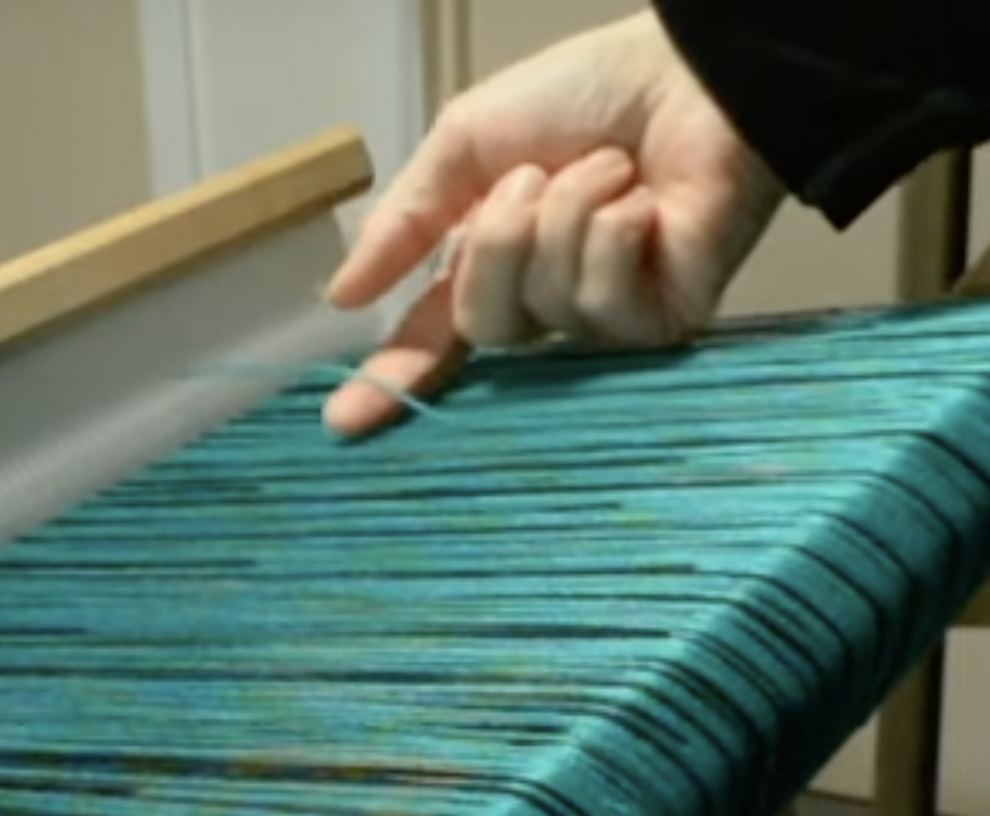
This can be avoided with correct technique. When entering the shed, I have the stick shuttle on a slight angle upwards initially, and ensure the end of the stick shuttle is touching the plastic part of the heddle.


Entering the shed in this way means that you are utilising the widest part of the shed, giving plenty of space for the stick shuttle. Roughly half way across, I then flatten the shuttle out.


At this point, if the tension is good you can “shoot” the shuttle across the rest of the way and it will slide beautifully on the bottom of the shed to the other side.
What if I have already snagged a thread? 🙁
Don’t panic, we can fix this! This is where you will need to make friends with an “S” hook or similar weight. I love “S” hooks because they can be hung over a thread and are an ideal weight. You can pick them up from a hardware store or online.

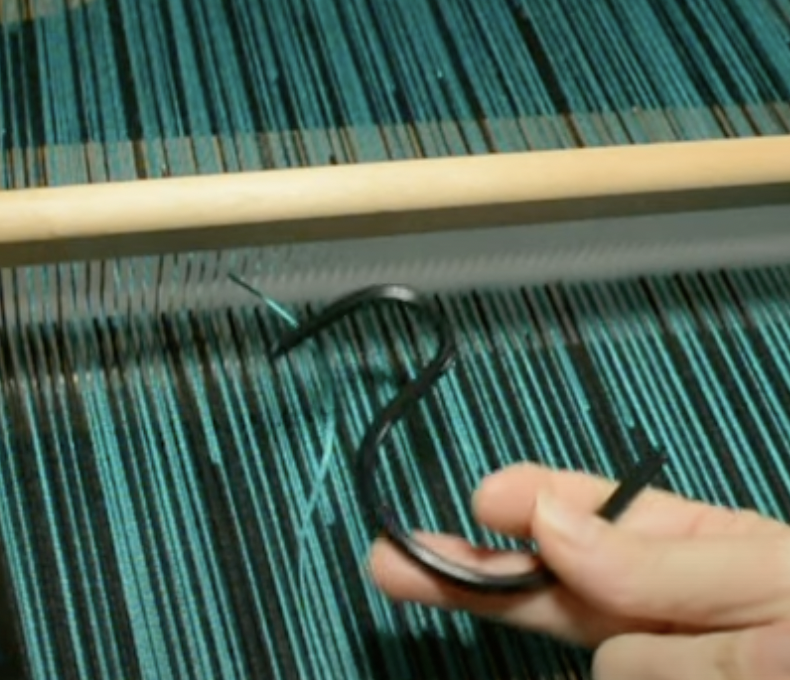
Locate and isolate the slack thread at the back of the loom.

Loop one end of your “S” hook over the slack thread so that it hangs off the back of your loom.


Yes, it’s really that simple.
Weighting general threads.
The weighting of a single thread can be used not just for snagged threads, but in the event that you have one or several threads that are looser than others.
Usually you will only need to take action on a looser thread if it is actually impacting on the quality of your weaving. The 2 main ways this problem will present are:
- Bunching of the loose thread as you beat your weft. It will show as little vertical lumps as the slack of the warp thread is caught between weft picks. How noticeable this is depends on how loose the warp thread/s are.
- The thread/s sag out of the shed they should be in, resulting in floats in your weaving.
Dealing with loose sheds.
This is one of the biggest issues that the rigid heddle weaver will run into when using finer threads. One shed will always be looser than the other, commonly this happens when you put your heddle in up and find that all your down shed threads (the slot threads) are lacking good tension.
The first step to improving this situation begins in the warping process, make sure that you are using adequate warp separation as you roll it into the back beam. You can use cardboard separators, but my preference is thick brown craft paper on a roll for continuous separation.
To address the problem on the loom though, we can use various forms of tensioning. Here is one that works really well:


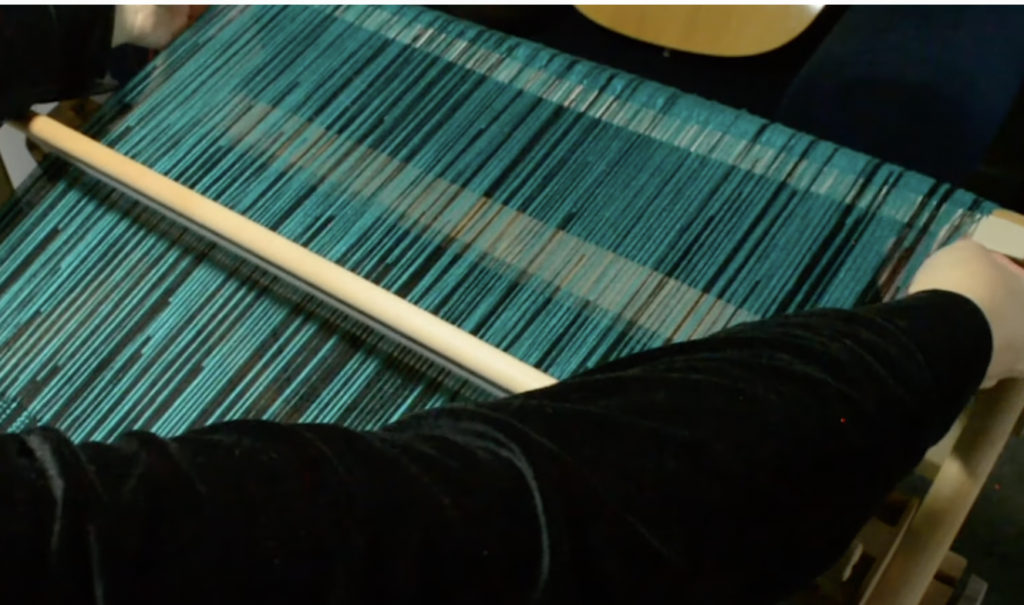
Open a shed by placing your heddle up or down. Insert a pick up stick or spare stick shuttle into the opened up space behind the heddle. Turn the stick on edge to prop the threads up, then insert a cardboard separator or similar into the space behind the pick up stick.
Push the separator right to the back of the loom so that it’s firmly in place, then continue weaving. This separator will need to be repositioned as you advance your warp forward.
Here is another form of wedging to try that helps in a similar way:

Place your heddle in the neutral position. Use a cardboard separator or similar and take it underneath the whole warp. Wedge it under the threads at the back beam and continue weaving. This will also need to be repositioned as you advance the warp.
What about loose sections?
Sometimes while you are weaving you will be presented with loose sections in the warp. This commonly occurs at the middle of the warp, where it is trickiest to maintain tension while winding on.
If it happens that you have a section of warp that is looser than the rest, then you can employ targeted wedging.
This is just what it sounds like – wedging, but targeting a specific area that really needs it. I have a full video tutorial on Youtube that goes over the technique if you need to see how it works.
Basically, you want to take smaller sections of whatever you’re using for wedging material and place it in the specific areas that need help. I find paper folded up is great because you can really customise the width and thickness according to your needs. Smaller cardboard stick separators or pieces of large ones (I sometimes cut up old ones when they’re not in great condition anymore) can be used for this too.

I hope these ideas are helpful to you and that you give them a try. I think you will be pleasantly surprised with the results.
Until next time…
Happy Weaving!