


The rigid heddle loom is such a versatile and adaptable loom. Although rigid heddle looms are basic in construction and set up, there is more to them than meets the eye and you can achieve both simple and complex weaving patterns.
Remember the “Choose your own adventure” books from the early 1980’s? Gosh, I loved those books as a kid! Being given the ability to choose to keep the story small and simple or keep the fun going by selecting a longer and more adventurous continuation.
You could start out as a student on a regular school day, going to classes and planning to meet friends later and end the day by having fought and defeated incredible beasts and monsters! So much fun 😊
The beauty of the humble rigid heddle loom is that you, as the weaver, can choose your own adventure!
You can start out with the very beautiful plain weave, at some point introduce a pick up stick or two and before you know it, you’re wrangling multiple heddles, sticks and rods!
Maybe you just enjoy the plain weave so much that you choose to stay in that groove.
Or maybe you find that you need more of a challenge, and so you start looking at multi shaft patterns and how you might adapt some of them to the 2 shaft rigid heddle loom.
Whichever ways suits you is the best way, remember, we all choose our own adventures.
Today we’re going to discuss simple and more complex patterns you can achieve weaving on a rigid heddle loom – what is involved in the set up for each and the considerations you need to make before embarking on different patterns. I have so many resources and tutorials to get you started on either the simple or more complex path, and I’ll be sharing these with you too.
We’ll begin with the most simple patterns and work our way up to the more complex.
PLAIN WEAVE
The most simple pattern you can weave on your rigid heddle loom is plain weave. This is what the rigid heddle loom was built for, and excels at. To weave plain weave, you need only 2 shafts. This is made possible on a RH loom with just one heddle because of the unique design of the reed or heddle.

When we thread a rigid heddle loom, we thread both the slots and the holes. Then, once we’ve tied the warp onto the loom, we create 2 different sheds or spaces in which our shuttle can pass through. It’s these sheds, or more specifically, what the warp threads are doing in those sheds, that determine the pattern.
Plain weave is achieved by placing the heddle in the “up” position, passing the shuttle through the shed, then beating the weft down into place (the heddle is also used as a beater). For the next shed, the heddle is placed in the “down” position, the shuttle is passed through and the weft beaten down. Then back to “up” again, and so on. Doing this gives you an over, under interlacement that is both lovely to look at and also a very stable fabric.
This fabric can be used for a huge array of purposes, from a scarf to kitchen towels, to fabric to sew clothing with.
Starting out on a rigid heddle loom can be a bit of a learning curve, but is made so much easier if someone with a wee bit of experience shows you how. In my From Woe to Go! online beginner’s course, I share everything you need to know to get up and weaving on your rigid heddle loom, plus I show you all the helpful things you didn’t know you needed to know!
Some weavers will find that they tire of only weaving plain weave, but there are techniques that can easily be introduced without the need to learn more specialist skills or purchase any extra equipment (let’s face it, that particular rabbit hole goes very deep!)
The first that comes to mind is the wonderful technique of colour and weave. In it’s most basic form, this is simply the introduction of colour, strategically placed in your warp and weft. You don’t need any additional tools, just a little bit of patience as the warping takes extra time. Boy, is it worth the effort when you get to the weaving though!

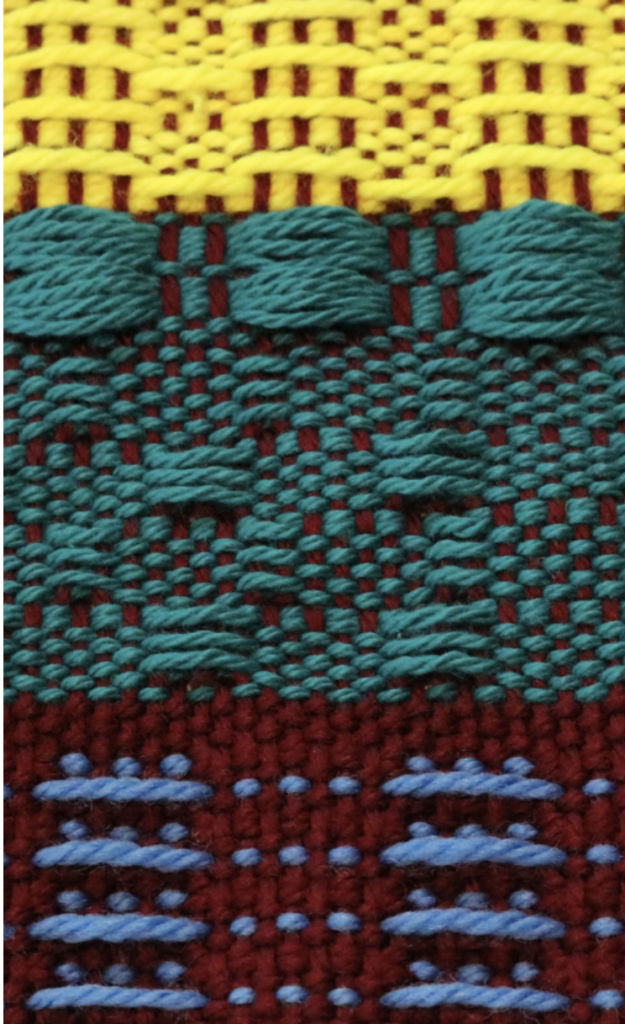
Log Cabin and Houndstooth are gorgeous examples of colour and weave. And yes, it’s still just plain weave!
Another option for taking your plain weave setup further is finger controlled (FC) techniques. These are just SO fun because again, you don’t need extra tools, just extra patience, you weave them on a plain weave set up, so you can introduce them to your plain weave warp at any time (use as a border feature within the plain weave piece, OR combine the plain weave and FC technique, OR weave the entire piece using the FC technique).
Some examples of finger controlled techniques include Brook’s Bouquet, Danish Medallions and Leno. I have a free tutorial for how to weave Leno here if you’re interested in checking that out.
PICK UP STICKS
Pick up sticks are a really natural progression from plain weave because, again, you can use pick up techniques on a plain weave warp. You do need extra tools this time, in the form of a pick up stick or two, but these are very affordable and some weavers will make their own from scrap wood or paint stirring sticks.
This humble length of timber can open up your design possibilities like you wouldn’t believe! And you don’t even need to understand what you’re doing to get started!
Basically, you use slot threads and a pick up stick to create extra sheds (spaces) through which your shuttle can pass. These spaces will be different to your regular plain weave sheds and will give you different weave interlacements. I know some weavers feel intimidated by the idea of using pick up sticks but really, it’s so simple and easy.
If you want to see how non scary it really is, check out my free tutorial here. I also have an online class, Pick Up Perfection.

As I pointed out before, you don’t need to understand exactly what is happening on the loom when you use pick up sticks, just follow the instructions you have to get the results. The understanding can come later, if you want it to, or if you’re happy to keep following directions, do that!
But if you are interested in understanding the why, I can give a simple explanation. You know that the rigid heddle loom has 2 shafts available (holes and slots). By using a pick up stick, you are creating an extra shaft (shed/space). The slot threads that are already threaded in your heddle are free to move up and down, the hole threads are not. So, we can make use of those slot threads by placing some of them onto a pick up stick. When operate the pick up stick, I’m giving the loom a chance to make new interlacements beyond plain weave. This creates pattern.
Think of it like this:
Hole threads – shaft 1 (shed 1)
Slot threads – shaft 2 (shed 2)
Pick up stick threads (shed 3)
Now you have turned your 2 shaft loom temporarily into a 3 shaft loom! What if you add another pick up stick? Hello 4 shafts! 😀

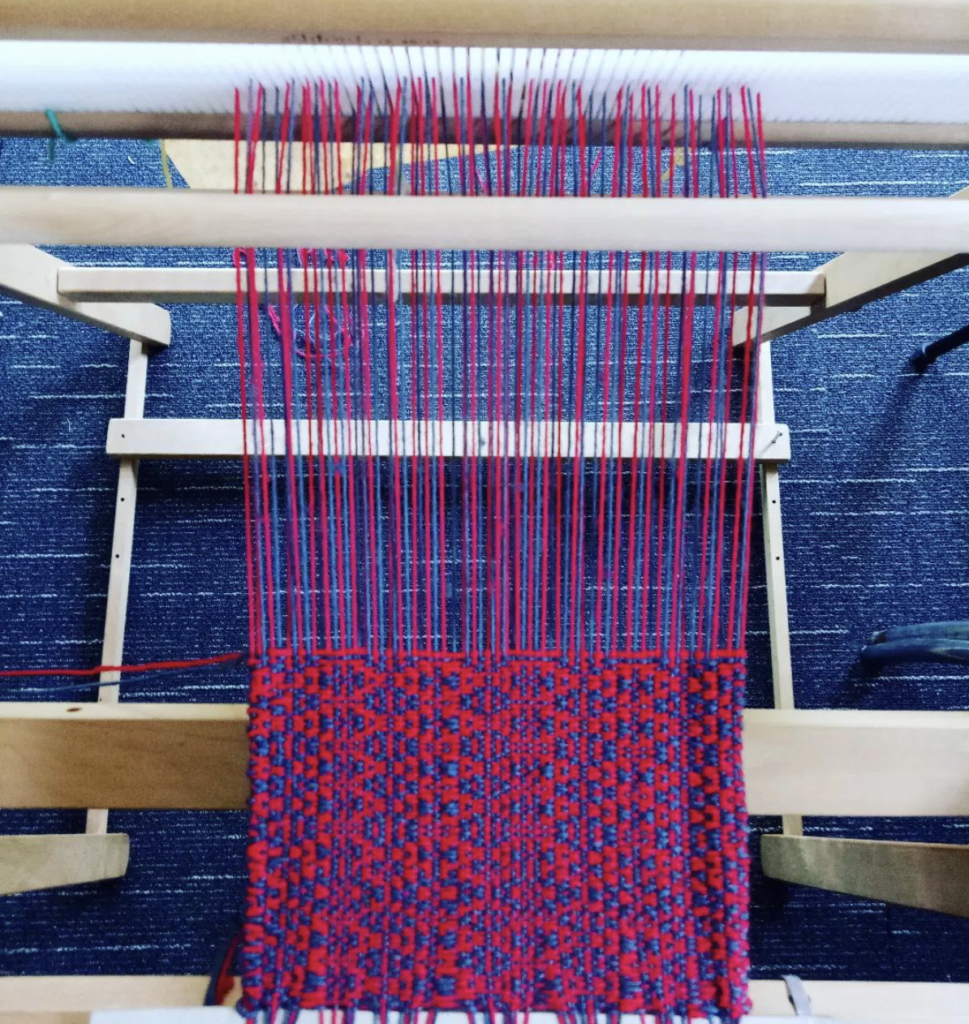
MULTIPLE SHAFT PATTERNS
Now we come to the more complex component of this post, weaving 3,4 or more shafts on a rigid heddle loom. Is it possible? Yes, of course! Just like in the previous section on pick up sticks, we just need to make more shafts (sheds).
Let’s look at the 2 main ways we can do this:
- Heddle, rods and sticks
Besides the 2 shafts available with a single heddle (holes and slots), if you want extra shafts, you’re going to have to make them! A simple and economical way to do this is with pick up sticks. However, after inserting one pick up stick, you will often find that the sheds you have created will not allow the pick up sticks to slide past one another to open up the new sheds you need to create your pattern. How frustrating!
But not to fear, this is where the heddle rod steps in to save the day. A heddle rod is just another way of creating an extra shaft by placing the threads from a pick up stick onto a rod with string heddles. The only materials you need to do this is some wooden dowel and extra yarns suitable for making string heddles. I have a lot of resources for making heddle rods but I recommend you start here. It can be used in combination with a pick up stick, as it will allow the pick up stick to slide freely back and forth.
Here is just one example for how a 4 shaft pattern set up might look on your rigid heddle loom:
- Shaft 1 – heddle holes
- Shaft 2 – heddle slots
- Shaft 3 – heddle rod
- Shaft 4 – pick up stick
Let’s look at another method for weaving complex patterns:
- Additional heddles
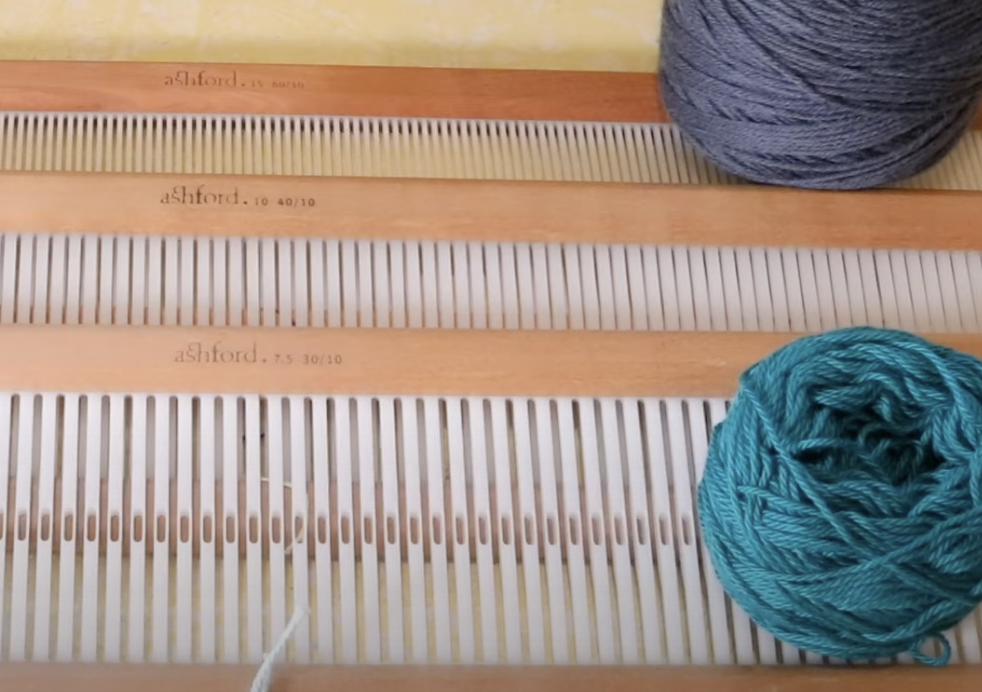
Most rigid heddle looms can accommodate three heddles (there won’t usually be space for more than that) and many 4 shaft patterns can be woven with just those three heddles. Some 4 shaft patterns need to include tabby (plain weave), such as overshot, and for these patterns it can be easier to use a combination of heddles and a pick up stick to make the lift combinations or weaving sequences more possible.

Purchasing extra heddles if obviously not the cheapest option and one of the rules to weaving this way is that ALL the heddles need to be the same dent. So, 3 x 10 dent heddles or 3 x 7.5 dent heddles, depending on your individual project.
Here is an example of how a 4 shaft pattern might be set up on the RH loom with 3 heddles:
- Shaft 1 – heddle 1, holes
- Shaft 2 – heddle 2, holes
- Shaft 3 – heddle 3, holes
- Shaft 4 – heddle 1,2 &3, slots
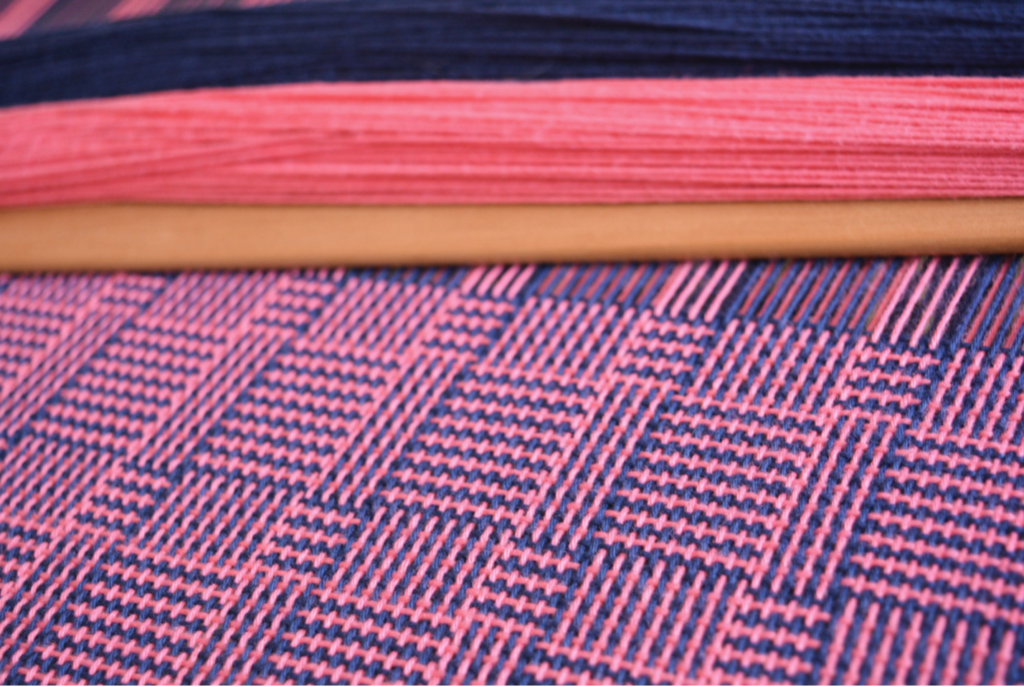
One of the challenges with rigid heddles is that they are, well… rigid! When you’re using them as multiple shafts, you as the weaver have to decide on warp thread placement. Rather than flexible heddles that are fixed to shafts (like on a table or floor loom) we have to make our threads fit within a fixed space. We also have to make sure that they don’t space too close together or too far apart. All these decisions will impact on the finished look of your pattern.
If you are interested in beginning to weave like this on your rigid heddle loom, I have made specific resources to help with that:
Converting Drafts to the rigid heddle loom, online course
Weaving 3 and 4 shaft patterns on a rigid heddle loom, ebook
Your next question may be, “well, how many shafts exactly can I weave on a rigid heddle loom?” I can’t give a definitive answer, but I’ve seen weavers set up for 8 shaft patterns. Have I done it? No.
I am spoiled with loom choices, so for anything over 4 shafts I always choose my table loom or one of my floor looms, after all, they are set up with 8-10 shafts already and are purpose built for that.
I keep saying that one day I will see how far I can challenge myself on the rigid heddle loom, but whether it’s moving up to 6, 8 or 10 shafts remains to be seen!
I hope this article was super helpful to you in your weaving journey and that the additional links provided help you continue to learn. If you have any questions or just want to leave a comment down below, I would love to hear from you!
Until next time…
Happy Weaving!