

Make sure you follow the Light Rye Sourdough loaf recipe steps, but I am adding some further details below for clarity.
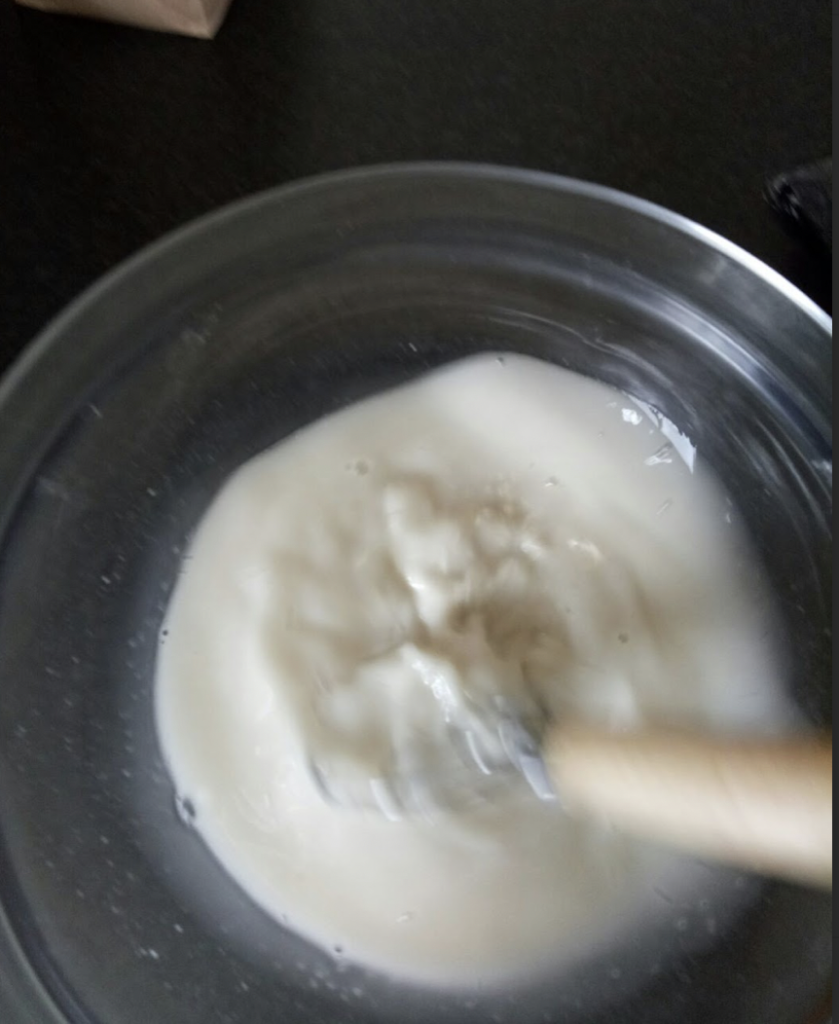
Start by whisking your honey (I use locally produced honey) into the water. I always make sure that my water is at room temperature. Then add your sourdough starter and whisk.
I like to use my danish dough whisk for this step, it helps to combine the starter and water beautifully. Ideally, you won’t have any lumps of starter. If you don’t have a dough whisk, you can use a balloon whisk or a regular old spoon.

In the next step you add the salt and flours and mix to combine, again the dough whisk works great for this. You don’t need to over mix, you just want the wet and dry ingredients combined so that there are no surprise pockets of dry flour left.

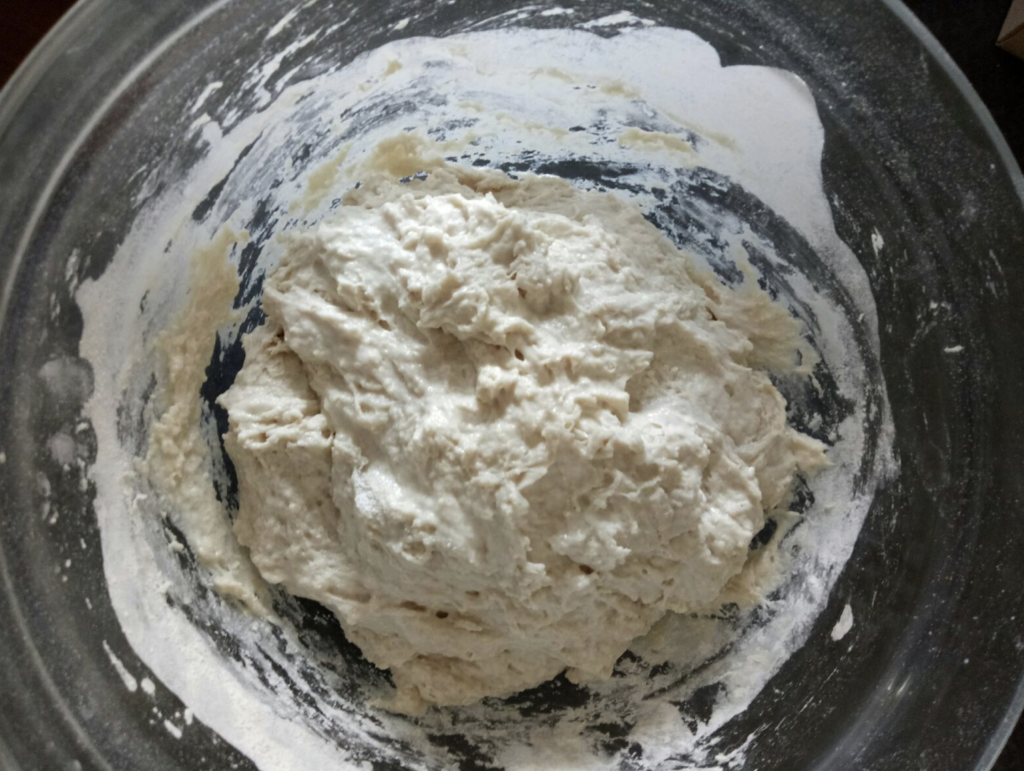
Your dough will look kind of rough and shaggy. Now that the flours are incorporated, cover the dough (I use plastic wrap for this as it creates some humidity and prevents drying out) and leave it to sit for around 1 hour.

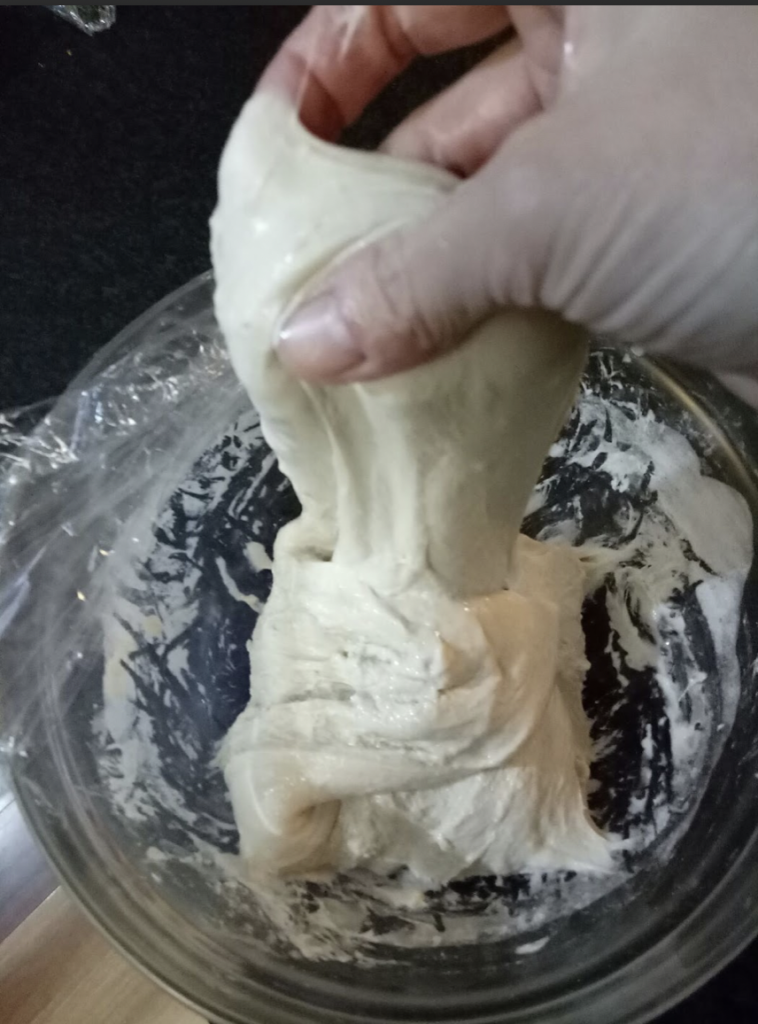
Now we start stretch and folds at half hour intervals, for a total of 5 times. If you’ve never heard of stretching and folding dough, check out this Youtube video (though I don’t do it as neatly and carefully as they do!) Wet hands are a must for stretch and folds.

By the time you do your last stretch and fold you should have a lovely smooth and glossy dough. Cover and allow to sit until the dough has increased by around 30%. Setting it in a warm place helps. It’s tricky giving an exact time for how long this will take, due to room temperature variables. Suffice to say, it will take longer in winter than it will in summer!
When your dough has increased sufficiently, you can shape (again, Youtube is your friend for this – search “shaping a boule”).
Now you can complete the second rise, which can either be done in the fridge overnight (as detailed in the recipe below) or on the bench, covered with plastic wrap or a damp towel for a “same day” bake.
I only bake on the same day when the weather is warmer, otherwise the dough will take a long time to rise. On a warm day, I will let it second rise for around 2 -4 hours.
The refrigerator method can be convenient for “next day” baking as you can wake up in the morning, remove your dough from the fridge, warm your oven and have fresh bread by lunchtime (just remember to allow for cooling time).

Light Rye Sourdough
Ingredients
- 160 grams Active sourdough starter
- 350 mls Water (room temperature) * More water may be needed
- 1 tbsp Raw honey
- 200 grams Light rye flour
- 300 grams Strong white baker's flour
- 1 & 3/4 tsp salt
Instructions
Make the dough
- Place water and honey in large bowl and whisk together to combine.
- Add sourdough starter to water and mix until starter is dispersed in water.
- Add flours and salt and mix until a shaggy dough forms. If the dough seems dry, add some water in small amounts.
- Cover the bowl and allow to sit for around 1 hour.
Stretch and folds
- With wet hands, stretch and fold the dough, rotating the bowl 4 times total.
- Cover and sit for 30 minutes.
- Continue the stretch and folds, followed by a 30 minute rest for a total of 5 times. (Total time – 2 hours).
- Cover and allow the dough to prove at room temperature. The amount of time will depend on how warm your kitchen is. This stage may take 1 hour, it may take 6 hours. You want your dough size to increase by around 30% – not to double.
- At the end of this step, your dough should look light, slightly puffy and glossy. You may see bubbles, this is a good sign.
- Tip the dough onto a well floured surface and shape. Place into a bowl lined with baking paper/non stick parchment paper or a banneton basket and place in refrigerator overnight, covered.
- In the morning, remove the dough and place on bench.
- Heat a cast iron dutch oven with the lid on at your hottest oven temperature. I use a fan forced oven at a temperature of 240 degrees celsius. I place the dutch oven in the middle of the oven.
- After 30 minutes, remove the dutch oven and take off the lid. Careful, it's very hot!
- Slash the dough using a knife or lame. I do this before it goes near the dutch oven, to avoid the possibility of burning myself. Use the baking paper as a kind of sling to move the dough to the dutch oven.
- Turn the oven down to 220 degrees.
- Place the lid back on and put the dutch oven back in the oven for 20 minutes of covered baking.
- Remove the lid and continue to bake uncovered for another 25 minutes.
- Take the dutch oven out and again, use the baking paper to pick up the loaf and place it on a cooling rack, removing the baking paper as you do.
- Allow the loaf to cool completely before slicing.
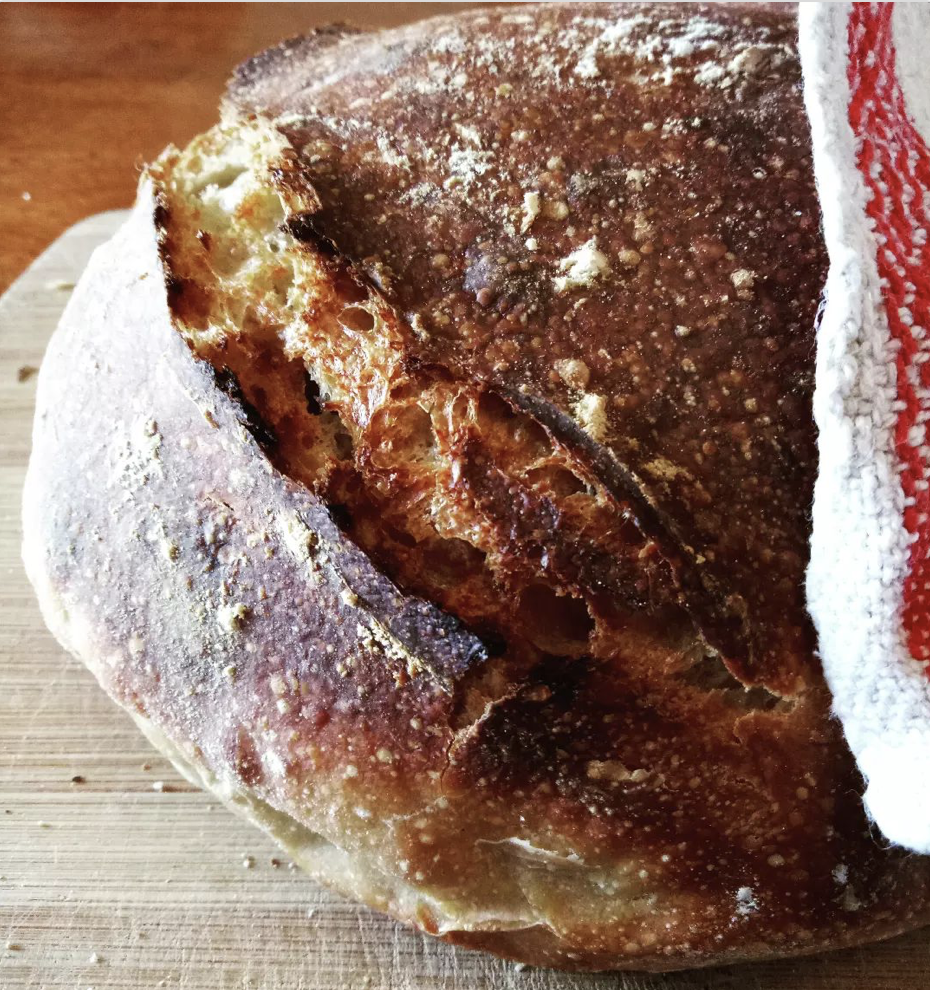
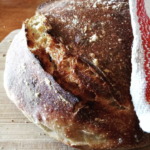
I hope you enjoy this bread as much as my family does!
Until next time…
Happy Baking!