It’s bound to happen. That moment when you realise there is a little or large or even gaping hole in one of your hand wovens.
I love using my hand woven towels in the kitchen. I mean, if you’re spending a lot of time doing menial tasks ie. dishes, you might as well be doing it with something special and beautiful.
We don’t have a dishwasher, and with 6 family members we tend to wash and dry a lot of dishes every day.
The first time it happened, I may have gasped, my eyes may have goggled a little and my head may have drooped. Just for a moment. But, one thing you learn through being a parent is to not be too precious about your material possessions. It’s likely they will get broken or damaged at some point. I would still rather use things than have them sit in a drawer somewhere.

So, anyway, two of my not very old, fairly recently finished hand woven towels had, shall we diplomatically say, “person inflicted holes”? Likely pierced by a sharp knife in the act of drying it?
I began contemplating what could be done about the said holes and I thought of the wonderful old art of darning, something our Grandmother’s did all the time and my own mother avoided like the plague. Needless to say, this art was not passed on to me. But, since having children, I’ve done my fair share of mending clothes with usually passable results.
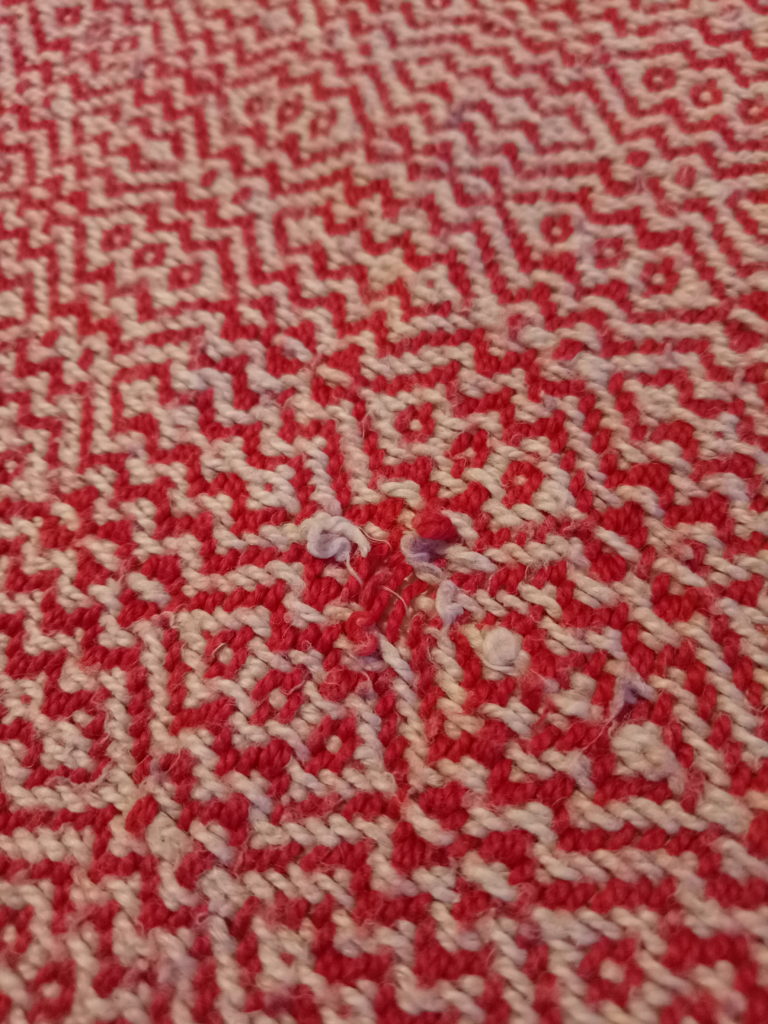
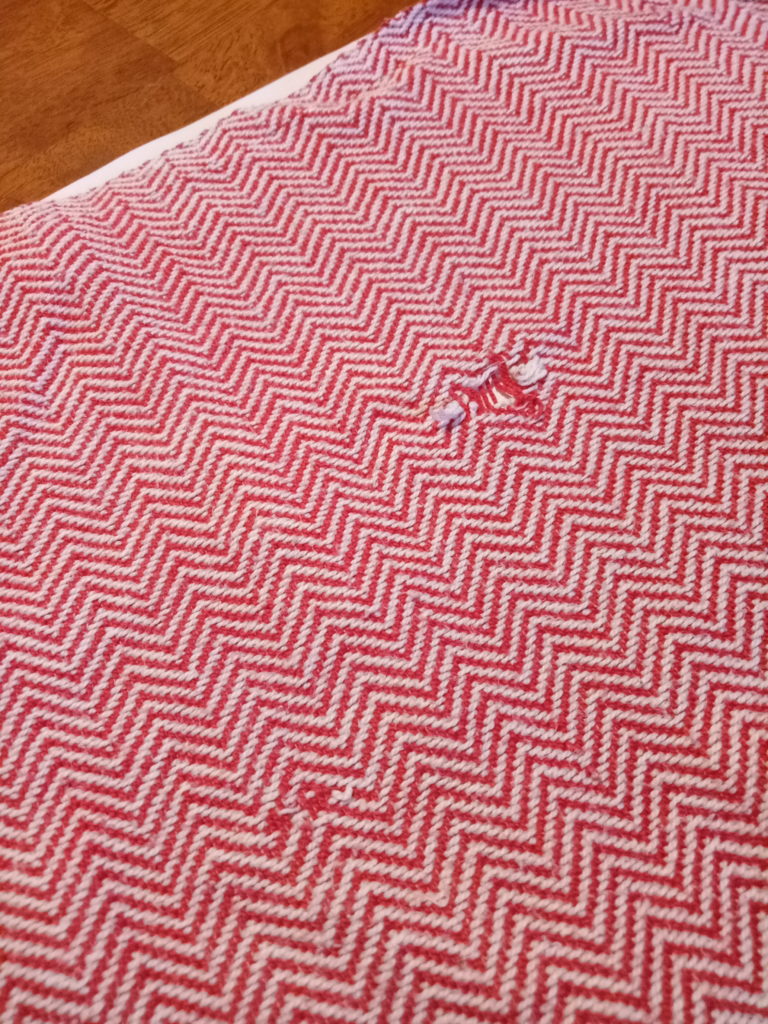
The trick with handwovens is to try to trace the original path that the broken or snapped threads took. Easier to do if you have a good understanding of the weave structure you used, but you can still get on alright by observing the threads that are still intact.
Once you’ve observed the pattern of the threads and determined how many warp threads and how many weft threads are broken, you can start tracking where these threads should have been and try to follow their original path.
*This post contains affiliate links, meaning if you click on one of these links and purchase, I receive a small percentage of the sale at no extra cost to you.
Using a needle (I used a tapestry needle) and matching the original threads as closely as possible, (I wasn’t able to do this as I had run out of the original threads, but I found some pretty good matches amongst my stash) start your thread 1 -2 inches out from the hole. Doing this also usually allows you to follow the path of the original thread up until it reaches the hole where it is broken.

It doesn’t matter whether you start weaving in warp of weft threads first. After you have woven through and past the hole (hopefully in a pattern very similar to the one that was broken) you continue to follow the pattern with the needle for another inch or two out the other side. Leave tails hanging out from where you began and finished.

This technique worked really well for my smaller holes. Although I didn’t get an exact copy of the original pattern, I was able to replace the broken threads in a way that didn’t look terrible!


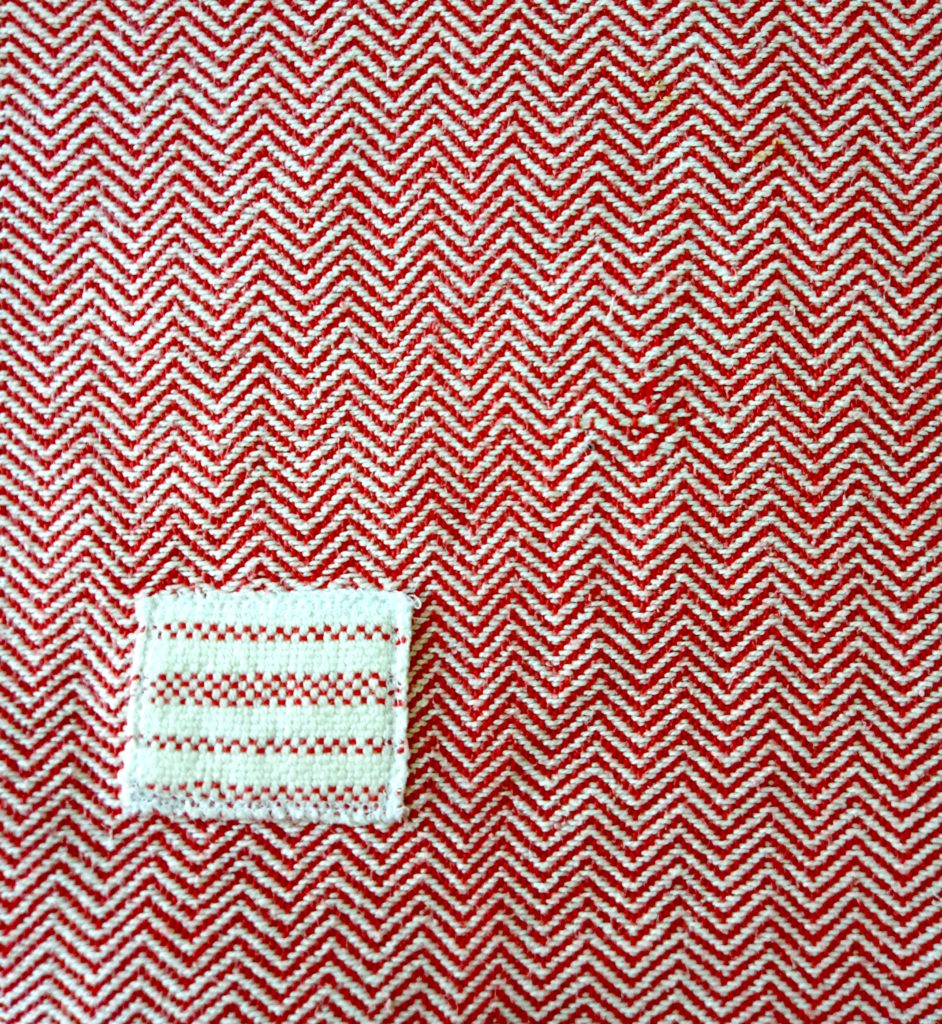
For the gaping hole I needed to try something else. Subtle mending was not going to suffice for this one, there were many severed warp and weft threads and the gap was wide. I tried. I really did. But it was ugly – perhaps uglier than before I started trying to replace the threads.
At this point I decided to embrace the “Visible Mending” movement. I didn’t have any matching fabric, having woven just this one towel with those particular threads and structure. I hunted in my scraps and samples pile and came out with a couple of pieces that were acceptable – at least they had the same colours!
I cut out the patch sizes I needed – one for each side of the hole and serged the borders of each piece. I used the wonderful sewer’s helper Heat n Bond to attach a patch to either side of the hole. When cool, I machine zigzagged around the edges. Not perfect, but at least I don’t have to look at my botched mending job anymore and the towel is functional in my kitchen once again!

Once I completed the surgeries, I put the towels through a hot (60 degrees celsius) machine wash, dried and ironed. I cut all the tails (including the original leftover broken threads) as close to the fabric as possible, without cutting the actual fabric. Don’t accidentally snip too close and undo all your hard work!
Oh, and in case you’re wondering, I’m very grateful to have children who wash and dry dishes for me, even if there are occasional accidents!
Until next time….
Happy Weaving!