• Skip to main content
  • Skip to primary sidebar

Kelly Casanova Weaving Lessons

  • Hi! I’m Kelly!
    • Disclosure
  • Online Weaving School Class Index
    • Common account issues
    • Common technical issues
    • What do I get with a membership?
  • New to rigid heddle weaving? Start here!
    • Never heard of the rigid heddle loom?
    • How to weave neat edges on the rigid heddle loom
    • Rigid heddle weaving
    • Rigid Heddle Weaving Patterns
  • Patterns
  • Subscribe

floor loom weaving

How to use a metric weaving raddle

by Kelly 2 Comments

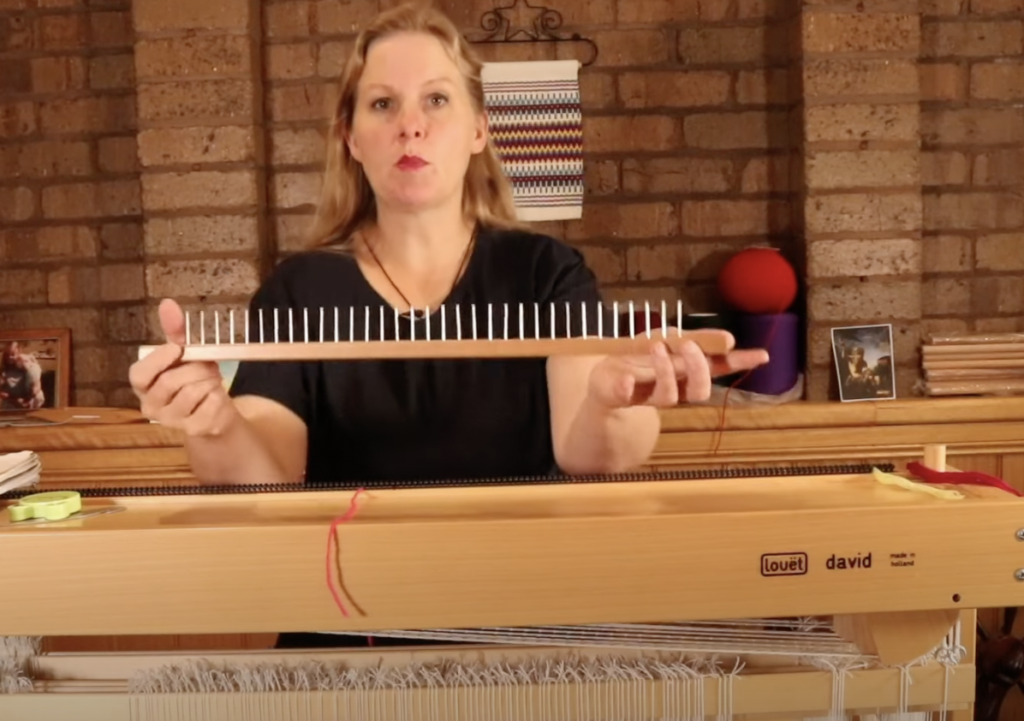
A raddle is a simple device that allows the weaver to space out warp threads in order to dress the loom at the desired warp width.

Most available raddles are based on imperial methods, so it can be a surprise when you find yourself the proud owner of a metric one!

*This post contains affiliate links. Please see my disclosure policy for further information.

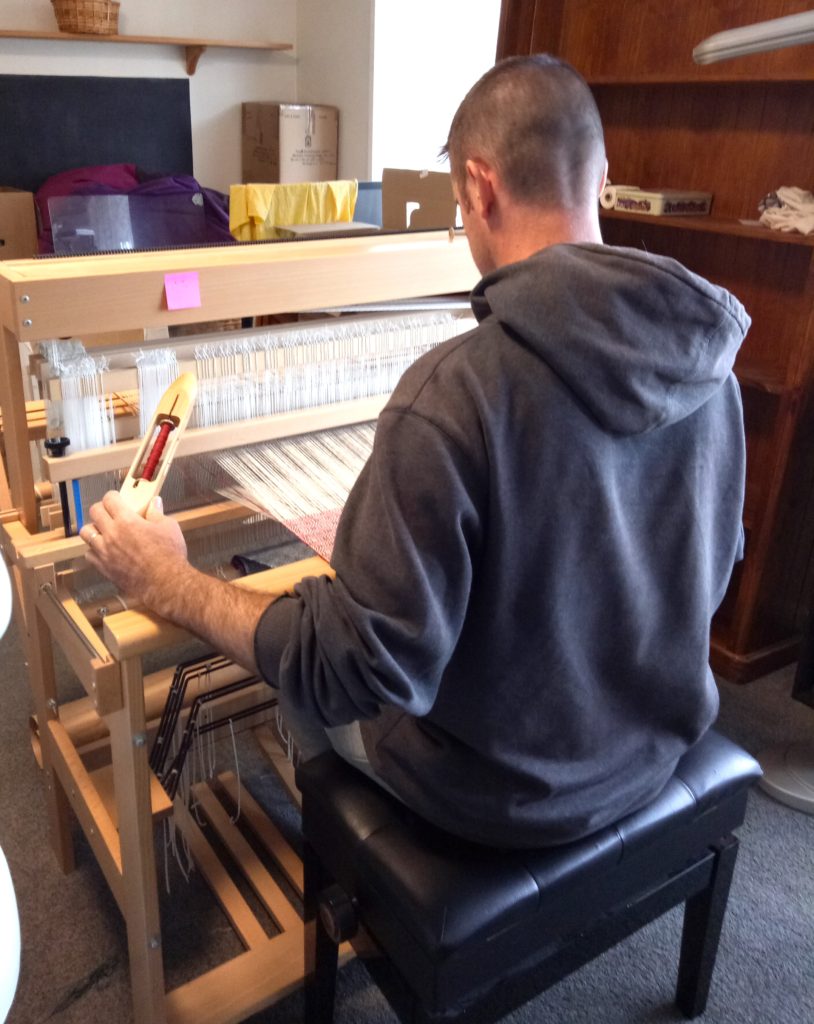
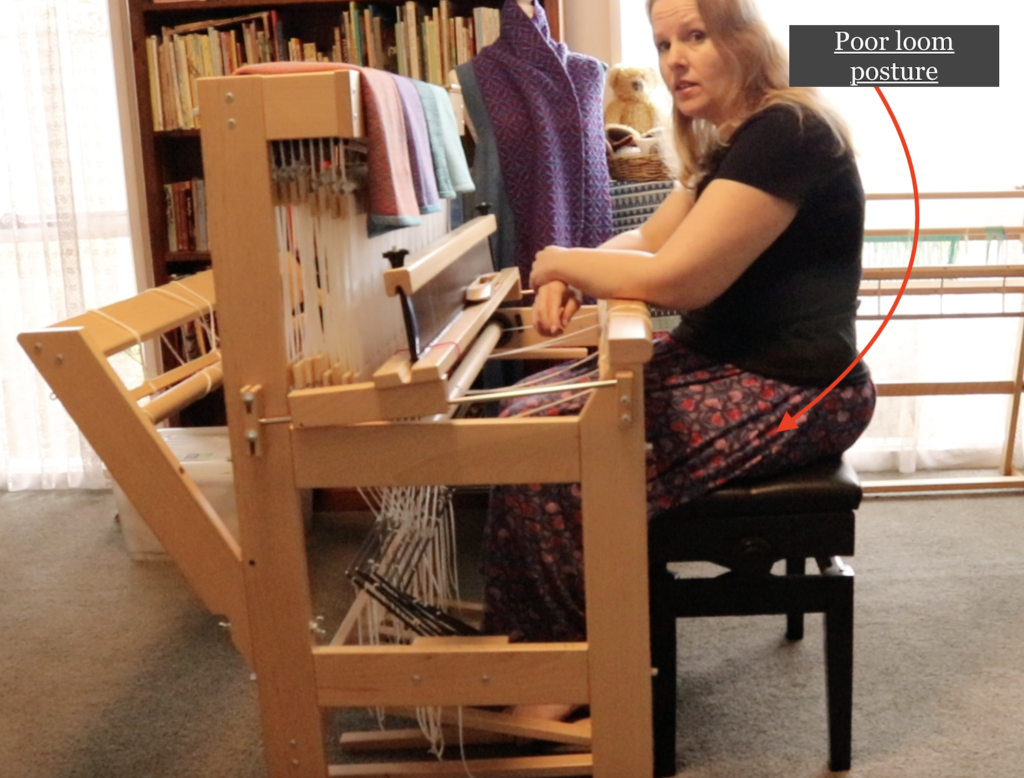
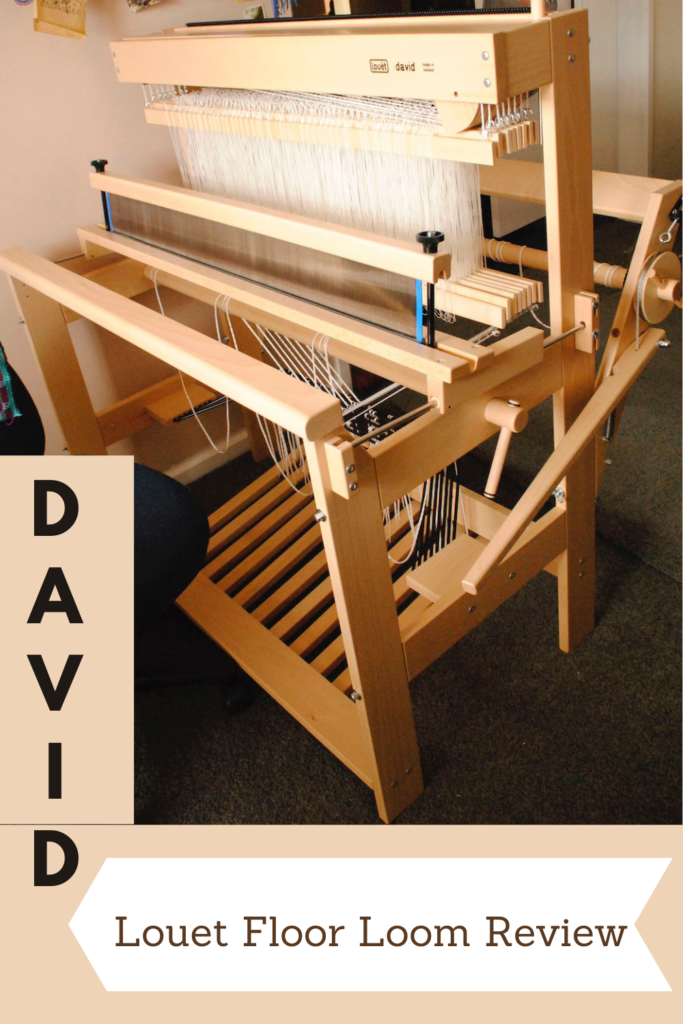
Louet looms, like my Louet David come with a metric raddle built into the top of the loom. The Ashford raddle kit, which I use with my Ashford table loom, has an imperial raddle.

Personally, I find the imperial measurements easier to use in weaving (even though I was brought up using the metric system) just because most weaving information is formulated for the imperial system.

The Louet David raddle and the Ashford raddle

Today I’m going to show you my process for easily spacing my warp threads in my metric raddle.

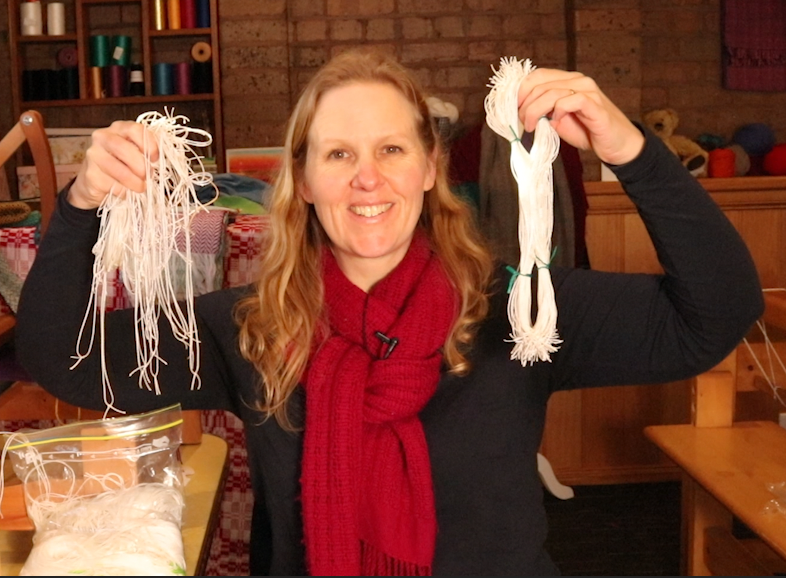
I have two yarns to use as an example –

  • 8/2 cotton
  • Fingering weight wool

The first step to starting a new project is to do the calculations. If you’re a rigid heddle weaver, I have a free printable calculations sheet, plus a short class on how to use it.

Included in your calculations are the width of the item on the loom and the ends per inch (sett) you intend to weave at – these calculations are particularly relevant to the raddle.

You can determine your ends per inch by doing a wrap test with your desired yarn. Then, if you are weaving plain weave, you simply divided the wraps per inch in half to get your ends per inch. This determines how close together your warp yarn will be on the loom.

The 8/2 cotton wrapped 28 times around the inch ruler. My equation then looks like this –

28 ÷ 2 = 14

Now, as a little disclaimer, and because I’ve used 8/2 cotton extensively in my own weaving, I want to point out that I would not normally weave at 14 ends per inch, it would be more like 20-24.

But let us use that figure of 14 for our example.

What it means is that, when my warp is spaced out in the raddle, ready to be wound onto the loom, I want to have approximately 14 ends of yarn in every 1 inch increment.

If I was using an imperial raddle with half inch dents, all I would need to do to space my warp is place 7 threads in every raddle space. Over 1 inch, that would give me 14.

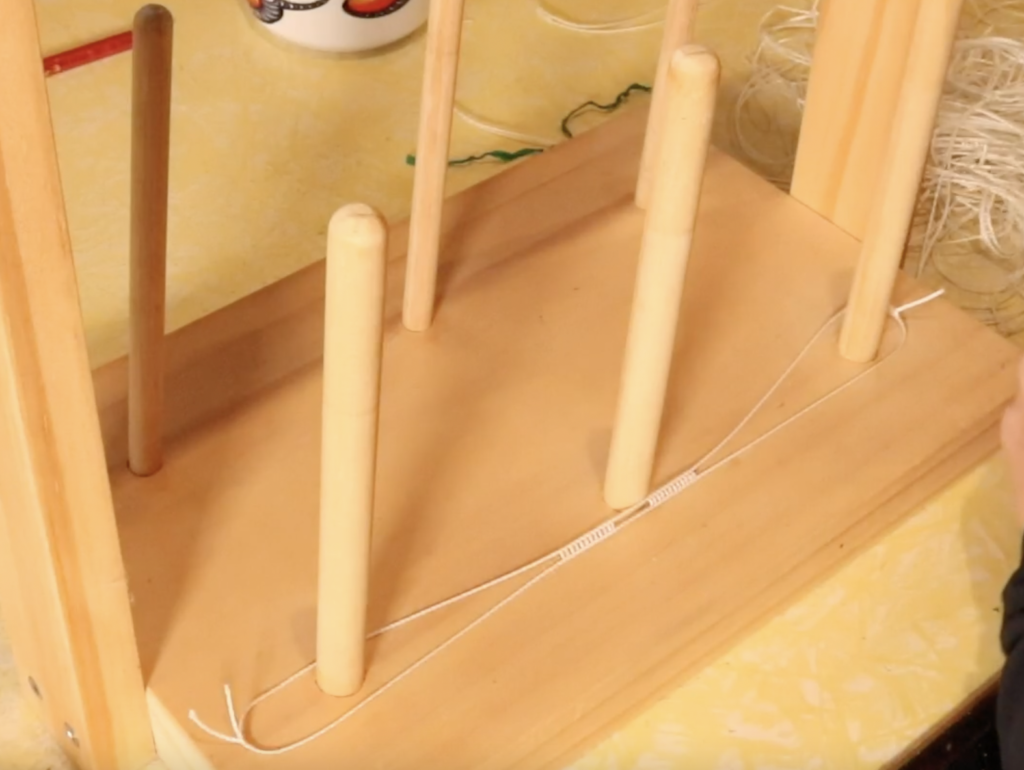
But the metric raddle has many more, smaller spaces, so here is how we deal with that:

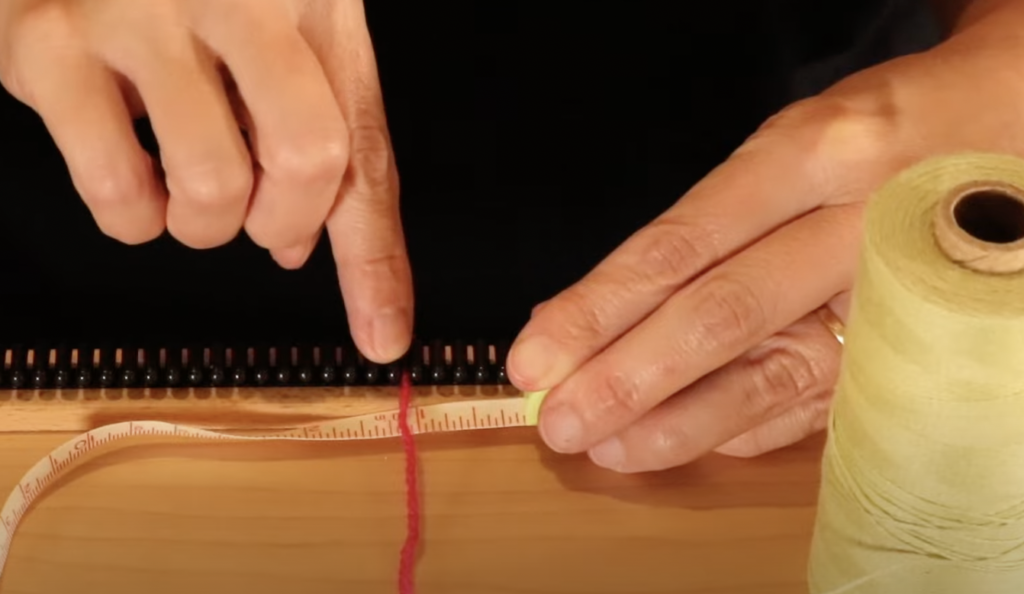
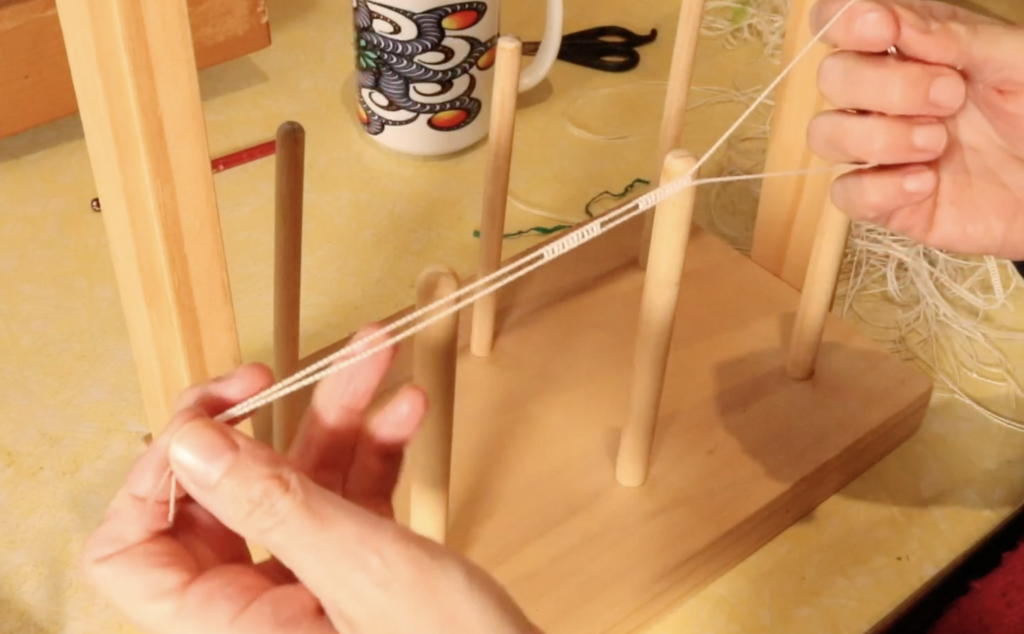
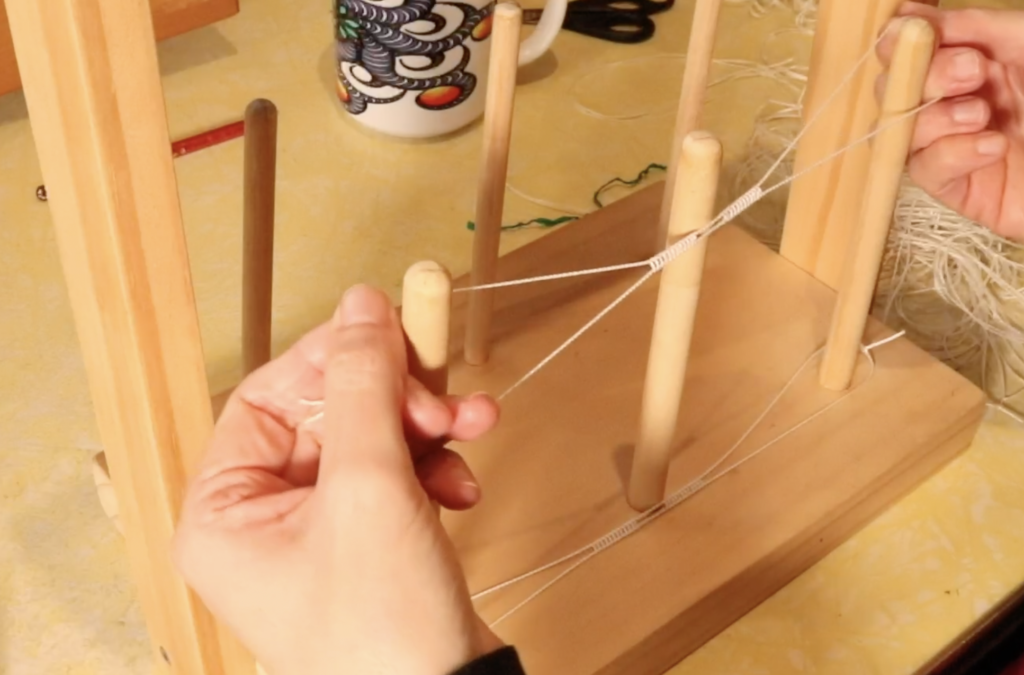
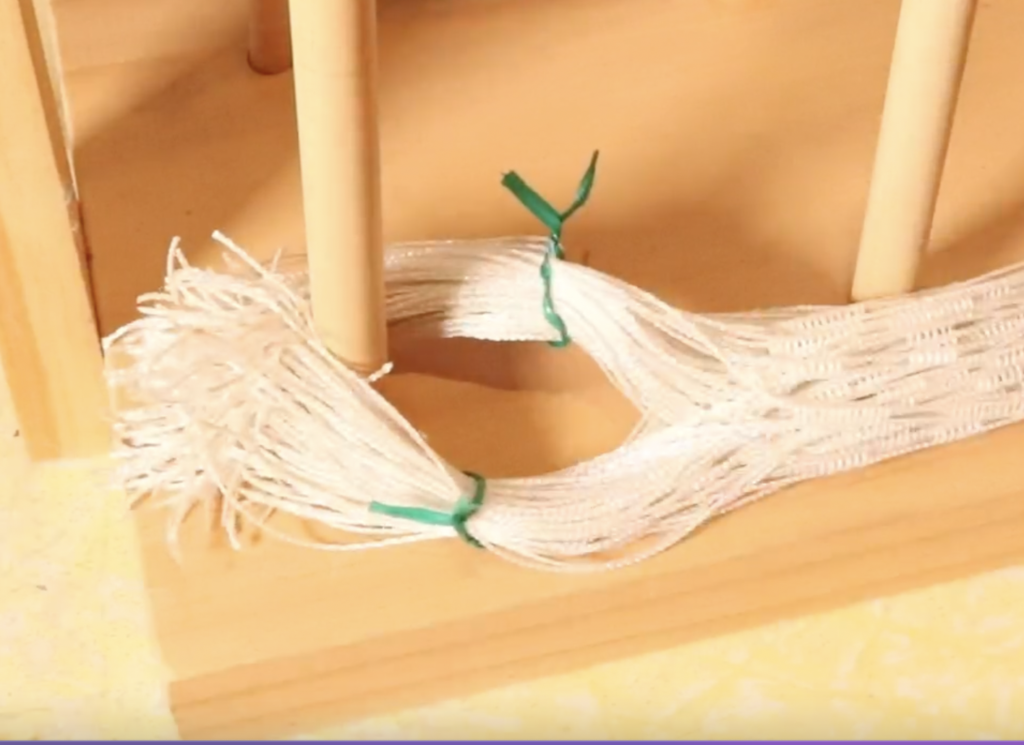
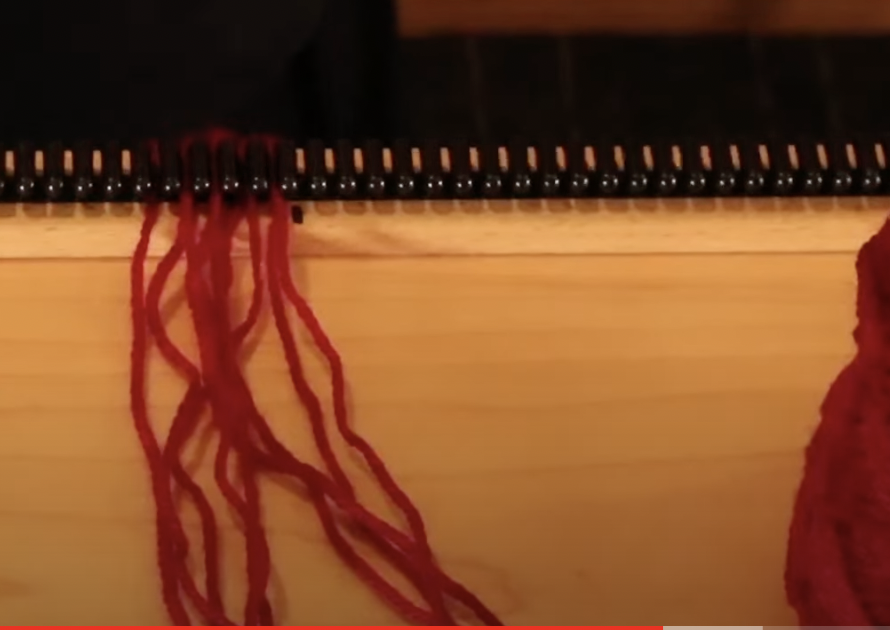
From the middle of the raddle, use a tape measure to measure out 1 inch along the raddle. Place a marker, like a piece of waste yarn to keep the spot for you.

Now you can count the number of raddle spaces that are within that one inch of measurement. I counted 5 spaces on my raddle. The next step is to be able to place my 14 ends into those 5 spaces.

You have probably figured already that it’s not going to be exact, but that is just fine. The raddle is to space our threads to the width we want our item to be on the loom, but that doesn’t mean that every raddle dent has to contain the exact same amount of threads. We have some wiggle room here 😉

You can either calculate the number of threads first, or you can “wing it”. I’ll explain both ways.

To calculate, I would divide 14 by 5, which gives me 2.8.

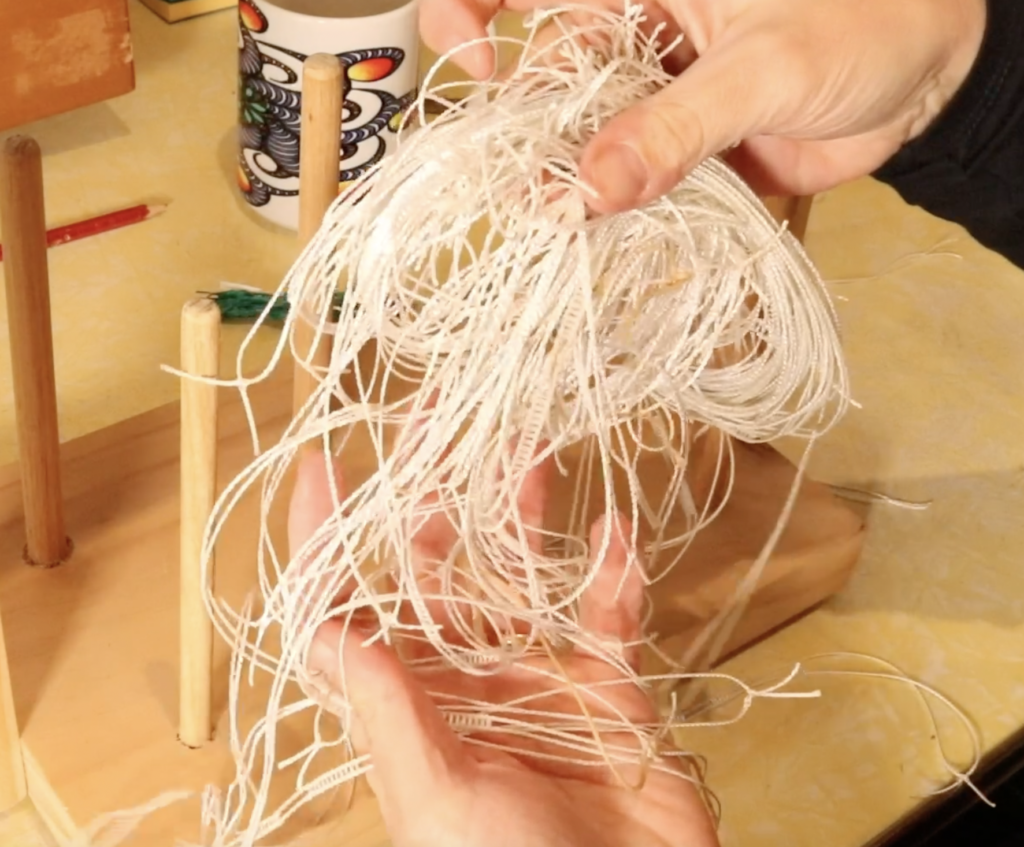
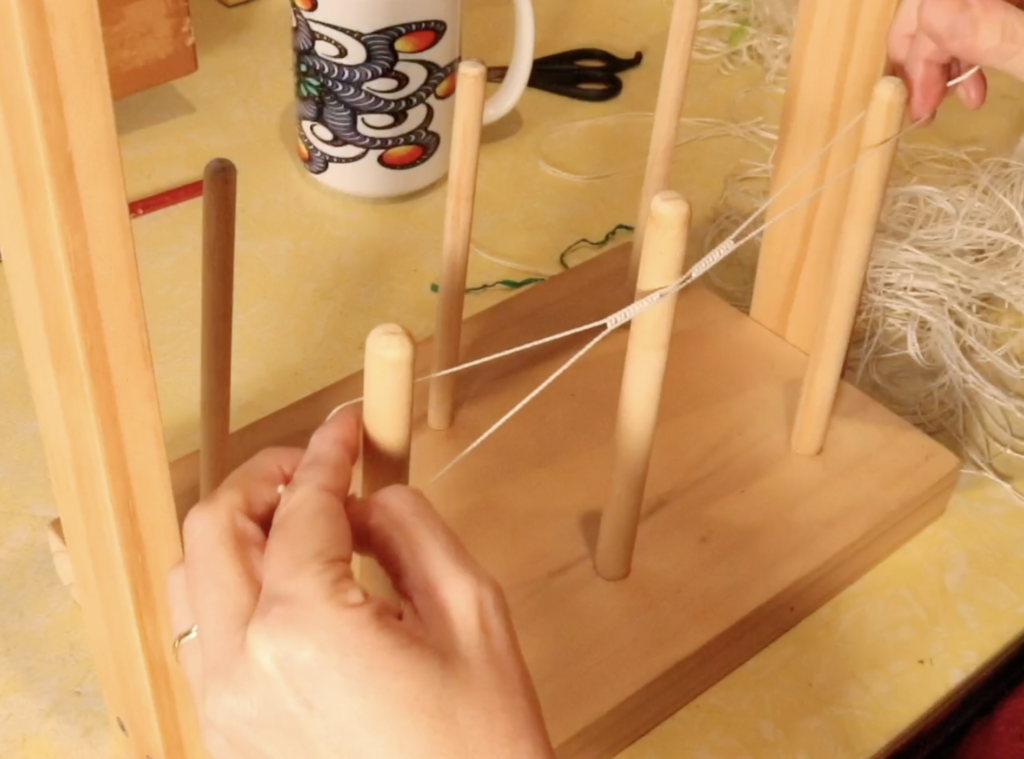
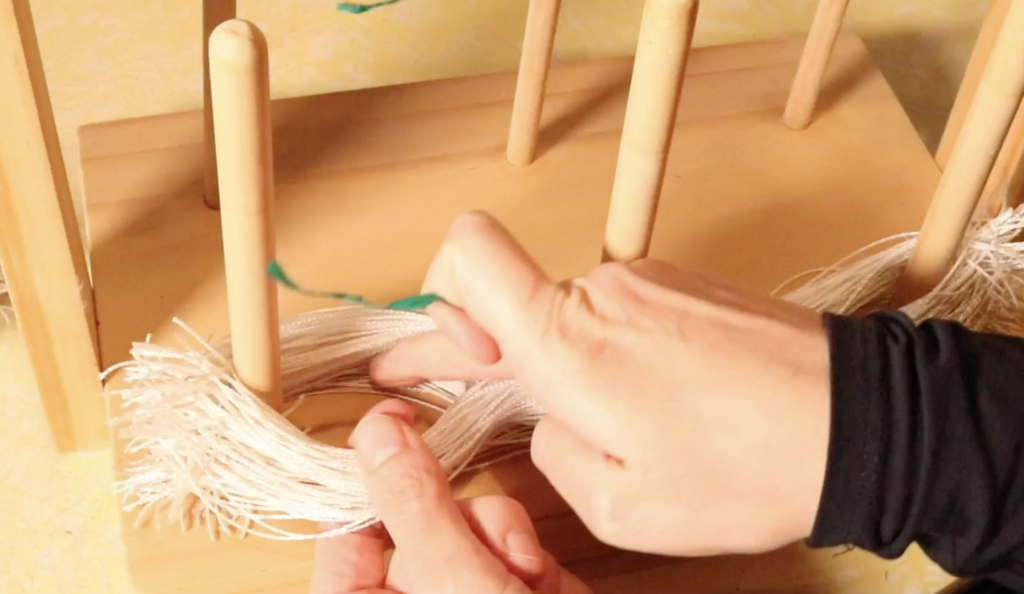
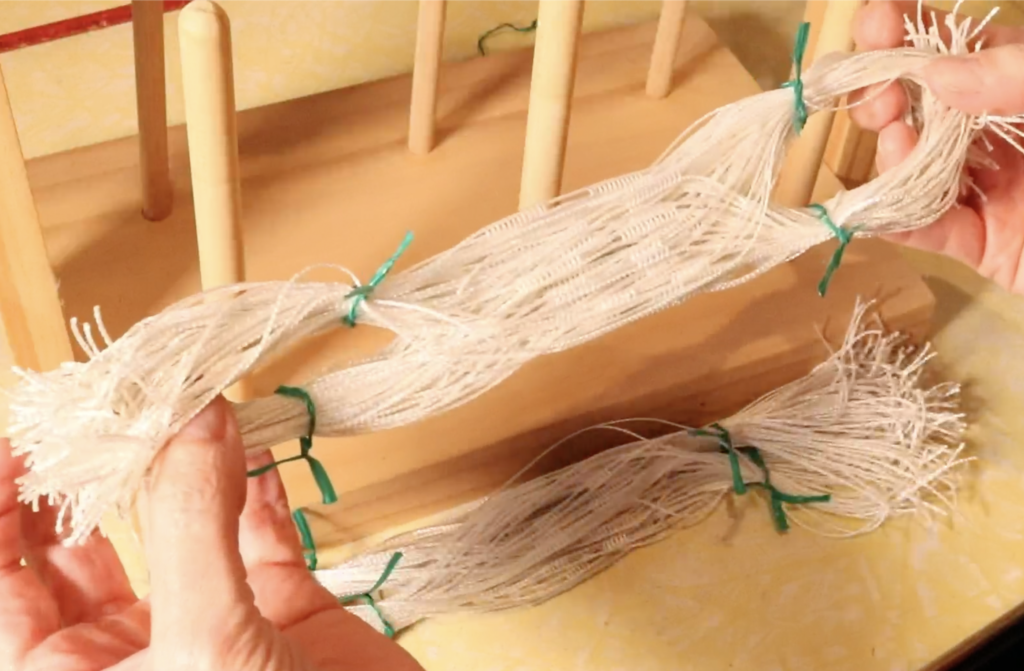
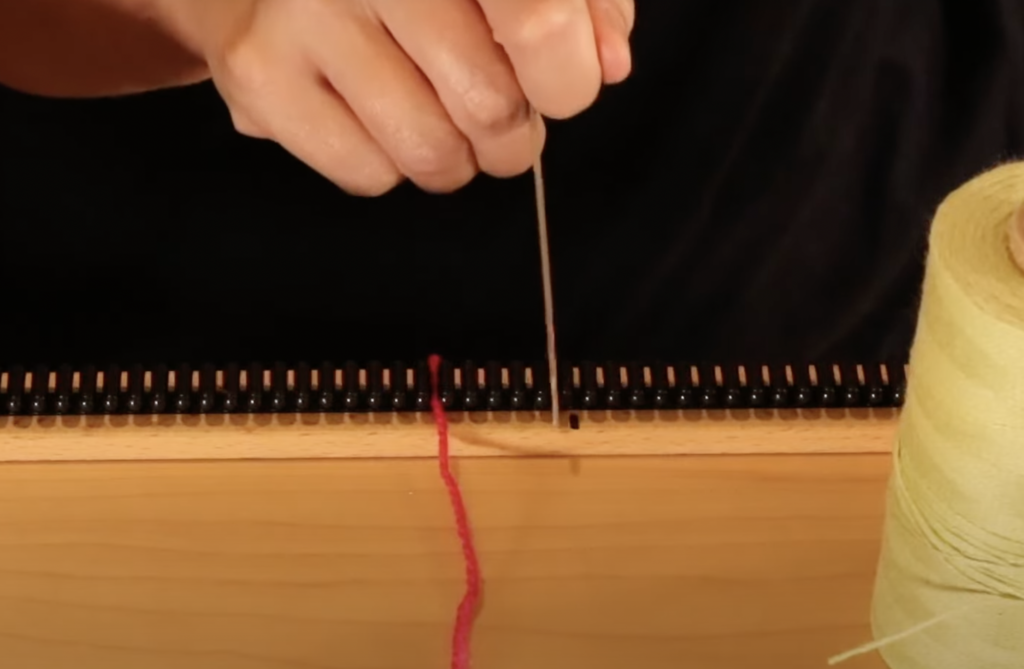
I cut some short lengths of my yarn to simulate an actual warp. I began by laying in 2 threads in each raddle dent (as the “2” in the 2.8 figure lets me know that at least 2 threads are needed in each dent initially).

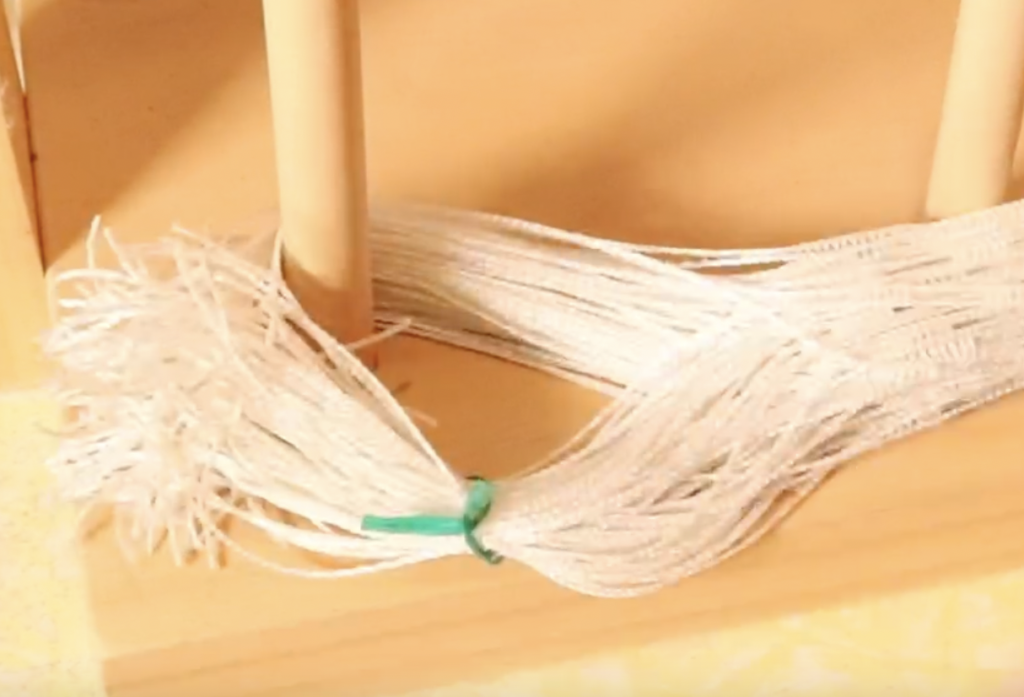
After all my spaces were full, I had 4 threads left over. So, I started laying them in, one at a time, until I ran out. This meant that I had 3 threads in all the spaces except for the last one, which just had 2.

Doing this showed me an established pattern I could follow for accurately spacing my threads across the desired width. 4 spaces with 3 threads, 1 space with 2 threads. That becomes the spacing pattern to repeat over and over until all the threads are in the raddle.

Now we will look at the fingering weight wool. The wrap test showed me that I could wrap this yarn 18 times, so that is 18 wpi (wraps per inch).

Using a plain weave example again, I divide the 18 in half to get my ends per inch, which is 9. I need to do the same as before, make those 9 ends fit as evenly as I can into the raddle spaces.

9 ÷ 5 = 1.8

That tells me that I need at least one thread in every raddle space, and I’m going to have some left over to figure out afterwards.

Using the exact same method as before, I lay in those ends one at a time, then go back and lay in the leftovers. For this yarn, that meant that I had two in every space, except for the last space which only had one. So once again, I’ve established my pattern for spreading the yarn in the raddle.

Now, a couple of things I need to mention:

I did say earlier that you can use a “wing it” method, but this is best done in practice, with short pieces of your yarn as I have done here. That way you can visualise how the yarn will be laid out prior to actually doing it with a real warp. For a real warp, you really should have all of your calculations done first so there are no surprises.

To “wing it” you would simple cut your little lengths of yarn, as many as you need for the inch space (you get this figure from your “ends per inch”). Then you can measure out your inch on the raddle and just start laying your yarn pieces in, one at a time, continuing back and forth across the inch until they are all laid in, then count them up and see how many you end up with in each space.

The next thing I want to mention is odd numbers. I’m not a fan of using odd numbers in weaving, I always find it easier to round things up or down to simplify. An example is that for the fingering weight I used in this example, instead of 9 ends per inch I could have chosen to round up to 10.

This would simplify the raddle process, as I would be able to place 2 threads in every heddle space (given that there are 5 raddle spaces in and inch and 2 multiplied by 5 is 10 😊)

These are the kind of decisions I make in the planning and calculating process before I actually begin the warp.

If you would prefer to view this article in video format, please watch here-

I hope that this article was useful in showing you how you can use a metric raddle in a simple way. Feel free to leave your questions or comments down below!

Until next time…

Happy Weaving!

Filed Under: All about looms, Floor Loom Weaving, Free tutorial, Warping, Weaving Tagged With: David louet, floor loom weaving, imperial raddle, metric raddle, raddle

How to organise string heddle bundles

by Kelly 2 Comments

String heddles are commonly made of texsolv nowadays, making them very strong and simple to use.

String heddles will generally arrive tied in neat bundles when you purchase them brand new. These bundles are very orderly and can just be slipped right on to your shafts. They can then be cut apart and ready for use

But there are times when your string heddles may be less than organised. I call this “string heddle spaghetti!” Having your string heddles in a pile and out of order is not ideal (not to mention a bit of a time waster) but there is a simple way to get them organised into lovely neat bundles once more.

*This post contains affiliate links. For more information, please see my disclosure policy.

Once you know how to make these bundles, you can continue to use the technique to ensure that your string heddles are always in order and ready to use.

I recently purchased some used string heddles, and many of them arrived packed into a bag singly and without order. Time to make some bundles!

I use my warping stand (if you’re interested in making your own, check out this tutorial). A raddle also works really well if you have one. Two warping pegs, clamped to a table would also work. Even a box with 2 chopsticks is a suitable alternative!

You also need some twisty ties. If they are a different colour to your string heddles, that improves visibility, but if they are the same colour, don’t worry, you can still use them.

If your string heddles are already separated, grab one and have a look at it. There should be 2 large loops on either side that you can hold on to. There should be the eye of the heddle in the middle of these loops. When you hold the loops, you want the whole string heddle to lay flat – no twists!

Keeping the string heddle flat, place one of the looped ends over the left peg (or raddle nail or chopstick).

Place the loop at the other end over the right hand peg. If you have a central peg like I do, it doesn’t matter which side of it the eye of the heddle rests against. It is best however, to have it rest on the same side of the central peg for each heddle, to keep the laid out order the same.

Drop the loops so that the string heddle rests on the base of your pegs.

Grab your next string heddle and repeat the same action of holding the loops and placing them on the pegs. Pretty simple? 👍 I like to keep going until I’ve laid out around 100 heddles.

When you have enough to make a bundle, take a twisty tie and take one side of the larger loops on one end of the bundle. Because of the way the heddles are laid out, you will easily be able to see the separated sections.

Take the tie and twist it around this section, twisting the ends of the tie together to secure it.

Take another tie and do the opposite side of the same loop, securing it in the exact same way. Do the same for the loop at the other end of the bundle so that you have 4 ties total.

Slip your bundle off the pegs and it’s ready to use!

If you would like a video tutorial on how to make bundles, check out the one below:

I hope this tutorial was useful to you, please leave your questions or comments down below.

Until next time…

Happy Weaving!

Filed Under: Floor Loom Weaving, Free tutorial, Table loom weaving, Tutorials, Weaving Tagged With: floor loom weaving, string heddles, tutorial

New towels for our new home!

by Kelly 19 Comments

I had two reasons for warping up my floor loom for some new towels recently.

With our house moving date looming closer, I felt the need for a “sanity project”. While all of my yarns and equipment were being packed away, I kept a few cones aside so that I would have something to weave during the in between time of packing up house and moving to the next one.

*This post contains affiliate links. Please see my disclosure policy for further details.

I also wanted to have some brand new kitchen towels to adorn our “new to us” kitchen, as all my current towels are ageing and starting to look a little shabby. I wanted special new towels for our special new place. This project turned out to be special in another way, but I’ll tell you about that shortly.

I chose one of my all time favourite drafts for kitchen towels, a 4 shaft twill on M and W threading. I love the design and I love the resulting fabric so I didn’t have to think too hard on that one!

The threading for this draft is not difficult and the tie up is a regular twill tie up – all things that I’m very familiar with and that make the process easy for me. I used my Louet David 2 Floor loom (link is for the new David 3), which has 8 shafts but for this project I wove on 4 shafts.

Having woven kitchen towels with this draft before, I was also sure of the yarn I wanted to choose. My favourite weaving yarn for soft and absorbent tea towels is 8/2 cottolin. The cottolin I use is 60% organic cotton and 40% linen. It’s a great yarn for those who want to incorporate a little linen but want something that is a bit easier to use than 100% linen.

For the warp I used:

Maurice Brassard 8/2 cottolin in Blanchi

For the wefts I used (one colour for each towel):

Maurice Brassard 8/2 cottolin in Charcoal

Maurice Brassard 8/2 cottolin in Magenta

Maurice Brassard 8/2 cottolin in Royal

Maurice Brassard 8/2 cottolin in Brick

…………………………………………………………………………………………………………………………………………………………..

Tips for working with cottolin:

  • Cottolin sheds a lot of fibre whilst on the loom. It is a more course yarn than just cotton on it’s own, which is very smooth. I sometimes opt to wear and apron while weaving and try not to wear anything black! The shedding nature may be irritating to some who are sensitive, it’s not a big problem for me but does make me sneeze sometimes! It also means that you will want to vacuum your loom when your project is finished or even during the project if the tiny stray fibres bother you.
  • It feels quite stiff on the loom. I remember the first time I wove with cottolin, I felt disappointed that the towels felt a bit rough. A hot machine wash was like a touch of magic – the towels softened up and the pattern came together beautifully. This is another thing that I love about cottolin, it softens more with each wash.
  • Your first one or two uses of your towels to dry dishes will not be optimal. The cottolin can leave small fibres on your dishes initially, and the towels are not as absorbent as they could be. Don’t lose faith! With a bit of use and a couple of washes, they will become a huge asset to your kitchen!

…………………………………………………………………………………………………………………………………………………………………

C

I tried some different techniques in the weaving of these towels, to help counteract some of the issues arising as I wove.

Firstly, I doubled my floating selvedges – something I haven’t done before. My reasoning for this was that for the towels I’ve woven in the past, the first place they would start to wear down was at the edges. A doubled floating selvedge gave a more defined, and stronger edge to the fabric.

Secondly, I switched to beating on an open shed. It is very much my habit to beat on a closed shed, but my beats were feeling a little stiff and the weft wasn’t settling as nicely as I would like. As soon as I switched to open shed beating, everything settled down and became much more fluid. Lesson learned – Don’t be stuck in your ways, be open to experiment from project to project as needs dictate 😉

And thirdly, when hemming my towels, I decided to also hem the long edge. I have never done this before, but as I already mentioned, the edges are susceptible to wearing and I think this single turned hem will make a difference. Time will tell, but perhaps I will make this a regular technique for my towels.

Hemming the long side of the towel with a single fold hem.
Finished hems. The ends of the towel have a double fold hem.

I mentioned that this project turned out to be special in another way. My husband has been interested in having a go on the floor loom for some time now, so I decided the last towel of the warp would be a good opportunity. I wasn’t too worried if it didn’t turn out well, as it was just for us.

Imagine my surprise when he took to it like a duck to water, quickly declared that it was “fun” and promptly finished off the second half of the towel I had started on! After giving him a few basic pointers, he surprised me with how quickly he picked up the steps. Now he is very interested in weaving more and even learning how to dress the loom. Victory! 😀

If you love this pattern draft as much as I do, you can find it on page 88 and 89 in Anne Dixon’s Handweaver’s Pattern Directory – a most excellent book and awesome resource for 4 shaft drafts.

I also recommend Patti Graver’s Next Steps in Weaving for weaving at this level.

If you’re interested in getting started in floor loom weaving, check out my Introduction to Floor Loom Weaving, my Follow Up Floor Loom Weaving, or save by purchasing a bundle of the two courses together.

I made a little video to compliment this blog post to help you feel confident about cutting your hand woven fabric. I explain my 3 Key Ingredients to cutting without fear:

If you have any questions about my towel project or using cottolin, let me know in the comments below!

Until next time…

Happy Weaving!

Filed Under: 4 shaft weaving, Cutting Hand Woven Cloth, Inspiration, Neat edges, Weaving, Yarn Tagged With: 4 shaft weaving, cutting cloth, cutting hand woven cloth, floor loom weaving, hand woven towels

Avoiding back pain at the floor loom

by Kelly 24 Comments

This is an issue close to my heart, as I have a lower back injury. Over my years of weaving, I’ve had to find the best ways to avoid pain while being able to indulge in as much weaving as possible.

The more time you spend thinking about and implementing comfortable weaving, the more time you will be able to spend actually doing it into the future.

Firstly I’m going to talk about seating.

There are a few important factors here. Generally, a regular chair cannot be used for weaving on a floor loom, so we have to look at the best suitable alternatives.

So, what are these alternatives?

Most floor loom manufacturers also make weaving benches that can be purchased separately but are made specifically for your loom. Benches can be very pricey.

I’ve seen some weavers seated on exercise balls for threading the loom, which allows you to get very close to the shafts – I don’t intend to try this myself, but it’s another option.

I have been fortunate to find the perfect seating option for me. I use an adjustable, padded piano bench. Let me tell you why I love this option:

  1. It’s height adjustable.

    An adjustable bench is important because it allows you to adjust your seated height to suit the loom. Your posture at the loom is crucial to your long term back health. Your elbows should be able to rest on the front cloth beam without you having to raise them up. Your hips should be higher up than your legs (like they are when you’re driving a car) because otherwise you’re going to have to exert more pressure when treadling and then – hello back pain!

2. It has ample seating space.

When I was looking at buying a weaving bench, all I could think when I saw commercial weaving benches is “they obviously weren’t built for weavers with generous lower proportions!” The piano bench accommodates my… ahem… ample behind (🙈) very well because it is wide enough, but not so wide as to be a difficulty.

3. It’s padded.

I can’t imagine sitting on a non padded bench, ouch. If you can get something with padding built in, that is better because you don’t have to contend with it slipping around. 

4. It has 4 legs.

This is really useful for the threading stage, as I can angle the bench so that two legs sit inside the front of the loom, allowing me to be closer to the shafts and therefore putting less strain on my back.

If you purchase an adjustable piano bench, try to spend a bit more to get good quality. I did not do this, and am constantly having to tighten bolts because the bench is not as stable as I would like. Eventually I’ll invest in a good one!

Also, don’t get the cheap, fold out piano bench. I do have one of these for my kids to use at the piano, and it’s surprising strong, but you want a bench with four legs, as I already mentioned.

Now let’s discuss some other tips and strategies for keeping your back pain free at the loom.

If you already have pain:

  • Firstly, if your lower back is on fire REST IT! I can’t stress this enough. Do not sit at that loom again until your back has settled down, you will only make it worse. I know it’s hard to take a break but it really is necessary.
  • Take anti inflammatories if needed, use ice or heat – whatever works for you to get your back moving towards normal again. If you’re using medications due to a flair up, do it sensibly and in consultation with a medical professional.
  • If your flare up does not settle down, you may need to see someone who can help you. This may be a chriopractor, a physical therapist, a masseuse – there are options to try and you don’t have to suffer alone!

    As you weave:
  • Try to move a little or shift your weight from side to side as you weave rather than keeping your body really rigid – follow the shuttle with your body, especially if it’s a wide warp.
  • Throw and catch your shuttle in a way that is not causing you to raise your arms unnecessarily or at weird angles.
  • Get in close to the loom. The closer you are, the nearer your reach. You can also naturally brace yourself against the breast beam to beat.

Treadle positioning:

A couple of years ago we bought a new (secondhand) van following an accident where our existing van was written off. The new van was the same company and make as the last one, but was a slightly updated model.

As soon as I began driving the new van, I noticed a difference in the height of the accelerator. The new accelerator was so much higher than the old one! I had to lift my foot higher to depress the pedal. And, guess what? Yep, the hip pain started up and is still a problem. I try to limit my driving, but when I do drive I use cruise control as much as possible so that I’m not having to lift my right foot so much.

My point? The higher you have to lift your feet to operate your treadles, the more stress you will place on your legs and ultimately, your back. If your treadles are very low to the floor (as they are for my floor loom) you will not have that stress on your body.

You may find that older looms not only have treadles sitting high, you also have to depress them quite firmly. If you do have an older loom, I recommend looking at any modifications you can do to get those treadles lower to the floor.


Take regular breaks.

It’s tempting to stay in the weaving groove and forget about time, but breaks are necessary. Get up, walk, stretch. Don’t sit at the loom for so long at one time that you feel sore and stiff when you get up. Anticipate the stiffness (even set a timer if you need it) and be kind to your body by resting it.

Batching tasks:

This goes hand in hand with the last point on taking breaks. Plan out your project so that you can batch tasks.

For example, if you’re threading for a full width project, unless you are Speedy Gonzales, you have to expect that the threading will take several hours. Plan to do a certain amount at one time or on one day. Make an agreement with yourself like: “Today I will aim to thread half of this project, taking regular breaks. If I start to experience pain, I will stop or only do a quarter of the threading”. You’re still making progress, but you’re not overdoing it.

Another example: “I will aim to make my warp today, dress my loom tomorrow, do half of the threading the next day and the second half the following day etc”. Break the tasks down to keep them achievable. You may end up doing more than you planned because you are pain free, but the point is to have a plan in place.

Accept bodily limitations:

This is a hard one! I’m sure we all wish that we were completely fit, healthy and pain free. But we need to be realistic and accept that we are not perfect. Accept the physical limitations you may have and don’t push yourself beyond them. Work with what you can do and make that your focus.

Sit up straight!

Did you ever here those words from your mother at the dining table? Well, she was right! 😆 You want to sit naturally, not rigidly at the loom, but you also want to keep your back nice and straight. If you find yourself slumping often, go back and check the seating points I discussed. It may be that your bench is not at a correct height.

Overall loom posture is really important. Remember – elbows on the breast beam, hips higher than knees, back straight!

I hope this post has been helpful to you. I have made a companion video so you can see just how I sit at my loom. You can view that here:

If you want to get started in floor loom weaving, my Introduction to Floor Loom Weaving course is perfect. It takes you through step by step processes to give you the confidence to get weaving!

Want to know more about my floor loom? Check out my review by clicking here.

Let’s keep the conversation going! Do you have any helpful tips to add? Any questions? I would love to hear from you in the comments.

Until next time…

Happy Weaving!

Filed Under: 4 shaft weaving, 8 shaft weaving, All about looms, Floor Loom Weaving, Health and home, Online Weaving School, Reviews, Weaving Tagged With: avoid back pain, back pain, floor loom weaving, posture

Floor Loom Review – David 2 Louet loom

by Kelly 13 Comments

I’ve had a lot of people ask me to do a review of my David 2 by Louet floor loom.

This post is not sponsored or endorsed by Louet, it’s just an honest review for your own information or research.

I have written about this loom and floor looms in general before, and also about what to expect when your loom arrives, but this article gets into the specifics of the Louet David.

If you purchase a new David in 2024 or after, you will be buying the David 3, not the David 2. The David 2 has been retired. But this is still a very useful review as there are only a couple of minor differences between the 2 and 3.

If you are purchasing a used David, it may well be a David 2 and would be exactly like my floor loom.

I must admit that when I was looking for a floor loom to purchase it was kind of hard to get information on this particular loom. All I really had to go on was a little amount of information on the Louet website.

*This post contains affiliate links. Please see my disclosure policy for further information.

I knew that I wanted something compact enough to fit in the smaller space I had available and due to my lack of experience with floor looms at the time, I wasn’t confident that a second hand, possible fixer upper would be a sensible choice.

One of the reasons that I was interested in the David is because I live in Australia and there are somewhat limited choices when it comes to looms and most have to be custom ordered and imported.

The Schacht Baby Wolf was a very strong contender in my decision making because it was more familiar to me and it was easier to find information on it.

To further complicate the issue, I had never woven on a floor loom (true story!)

Through a good deal of googling, I had found an agent in Sydney who could order a David for me. Not only that, she and her husband delivered the loom in person and brought it into my home, even though they are from another state! Amazing customer service!

I will be going over the loom discussing a few different features and then giving you my opinions on the positives and negatives. There are not many negatives, but maybe the things that I’d like you to think about if you’re considering purchasing the same loom.

The first thing that I do love about this loom is the compact size. I’ve had it in a couple of different positions in my studio, and it’s easy to move and fits a variety of spaces. The weaving width is 90cm (35″) which is a good width for many different projects.

You need a certain amount of space at the front and back of the loom for warping – I think a 1 metre clearance at the front and back of the loom is optimal. You can get away with less, but it may be a little cramped.

The next thing I love about this loom is the quality of make. I can’t fault the quality at all, from the wood, the finishing to all of the pieces that go with it, it’s just beautiful quality and design.

My husband actually put it together for me – I’ll admit that because my brain is not very wired for putting things together and following set written instructions, but my husband is very good at that. He didn’t have any trouble following the directions. It did take quite a few hours to put together, but that is to be expected with a loom of this size and type.

The David loom comes with texsolv heddles and cords. I personally really love texsolv as it is so light and quiet. Metal heddles can be heavy and noisy, but this is a personal preference and not to suggest that one is better than the other.

Treadling on the David is very light and easy. It is not the least bit clunky when treadling because of the spring system and it’s easy on your body. Speaking of treadling, I like the texsolv tie up system which is simple to learn to use and quite quick to tie up. There is no real “tying” up, you just pop the texsolv cord holes over the treadle screw heads and away you go. The texsolv cording is strong so you don’t have to worry about breakage while treadling.

The David has a gliding beater, meaning that your beater is positioned on metal rods. It “glides” back and forth on the rods, so it is level and steady. I’ll admit that it took me a bit of getting used to. The Ashford table loom I had been weaving on previously had an overhead beater, which is loose and swinging.

The gliding beater is not as easy to use in some ways, as it is rigid and set on the tracks of the metal rods. Now that I’ve been using it for a number of years, I am used to it and have found ways to weave most effectively with it. I do think that once you’re accustomed to it, it does result overall in a more even beat.

One thing that really helped was using a small amount of lubrication on the rods. I couldn’t find much information on whether or not this was a good idea, but to me the beater was feeling quite stiff and not so enjoyable to weave with.

So, I applied a very small amount of lubricant with a dry, clean rag. The difference was amazing! I now usually lubricate between projects. The beater now really does feel like it’s gliding. Just be sure to use a non silicon lubricant that won’t build up a residue on the metal rods. I use the Australian made Inox lubricant spray.

Always apply the lubricant to the rag, not directly to the metal.

Another way to work successfully with the gliding beater is to find the right warp tension. Too tight and the beater doesn’t glide as well. Just like on any loom, there is a sweet spot for tension that you discover through experience. I am careful when I advance my warp to advance to the spot that feels right for me – not too far towards the front beam or, once again, the beater will struggle and the look of your weaving will suffer.

I advance in small increments and adjust gently towards a firm tension. I hope that makes sense!

This loom came with a 10 dent reed. I haven’t purchased another reed at this point due to the expense and lack of space to be able to store yet another piece of weaving equipment. When I need to use a different sett, I just adjust the number of threads in my reed to accommodate. I very often weave at 20 epi, so I simply double my ends in the reed.

The reed and beater are removable for warping and threading, as is the front breast beam. This is really handy when you get to the threading stage, as you can get in really close to the heddles to thread which saves my back from days of pain afterwards!

One feature that I’ve found particularly great is the ability to put add or remove heddles to the shafts after warping. With my table loom I have to collapse the castle (the upright part of the loom) and tilt it in order to adjust heddle numbers. Not so practical.

On the David, if I have miscalculated the heddles for my project and I need a few extra all I have to do is unhook the texsolv cords on the top and bottom of the shaft, slide the new heddles on and hook the cords back on.

Another feature I particularly like about this loom is the friction brake. I can be weaving away and when I’m ready to advance my warp all I have to do is lean over the side and pull up the friction brake to release the warp tension. Then I use a handle also on the right hand side to advance my warp forwards.

Louet looms have a built in raddle, which is a unique feature. It means that instead of taking your warp off the warping board and then taking it to a table to lay into a raddle, then tying the raddle onto the loom to begin warping, you just take the warp from the warping board directly to the loom. When you wind on the warp, you can then tension the warp over the top of the loom, which can be quite handy if you are using weights to assist with tensioning.

I usually have to break up my time placing threads in the raddle, as standing for a longer amount of time wreaks havoc on my back!

I hope to eventually purchase a sectional warp beam for my David, as I prefer to warp floor looms with my Sawyer Bee Warping Square.

You receive a pair of lease sticks and some wooden separator sticks with the loom. I have devised my own methods for using the lease sticks, as initially I found it way too fiddle trying to deal with the sticks while warping and threading. I didn’t have the extra pair of hands to hold the sticks steady, so I now use stretchy bands (like the Ashford bands that they call “helping hands”) and these make a huge difference. I also like to use metal rings that open and close through the holes in the ends of the sticks to help keep them together and hold them steady.

I use the wooden warp separators mostly at the front of the loom as I advance my warp. At the back I use a roll of brown craft paper which does an excellent job.

I feel that I have a new appreciation for my David loom since purchasing a much larger floor loom. The David is simple to dress and weave on and so light to treadle.

Those are all the basics of the loom, I could definitely talk about other features but this article is already getting long!

Now, you may be wondering what the cost of this loom is?

Bear in mind that I bought this loom a number of years ago now and inflation is crazy.

At the time of purchase, my loom cost around $4000AUD. That included the cost of importing. That price does not include the extras I needed such as boat shuttles, extra heddles, weaving bench etc.

There are also optional extras available like an extra cloth beam (for longer warps), sectional beam and a Louet weaving bench. I don’t have any of these. I use a piano stool as a weaving bench, it’s much more affordable.

Revolution Fibers in the US list a current price from $4,770USD (at the time of writing this article).

In Australia, you can purchase from Thread Collective at a current price of $6,780AUD.

These prices don’t include shipping and can vary according to the rise and fall of the Australian dollar.

If you would like to know even more about this loom, I have a number of videos that will interest you.

This is my first video review of the Louet David which I filmed a few years ago. You get to see the parts of the loom, although some of the information is different to this article as my opinions may have changed over time:

I also have a demonstration to show how quiet this loom is:

And a fun little video that I made not too long after I purchased the loom. It’s nice for me to look back and see how much faster I weave now!

I hope this article has been informative and interesting for you! If you have any questions, please leave a comment below, I love to hear from you 😊

Until next time…

Happy Weaving!

Filed Under: 8 shaft weaving, Floor Loom Weaving, Weaving Tagged With: floor loom weaving, loom review, louetdavid

Should I buy a larger loom?

by Kelly 19 Comments

One of the number one questions I’m asked by either brand new or seasoned weavers is “Should I buy a larger loom?”

In this post I will take you through the main points to consider when you’re wondering whether a size upgrade is the right choice for you.

*This post contains affiliate links.

The first consideration is what type of loom we’re talking about. Most people who ask me are rigid heddle weavers. So I’ll cover rigid heddle looms first, specifically Ashford looms, as they have the largest sizes available.I often recommend my 24″ loom as a great starting point for a beginner who wants a decent, but not huge width. It is wide enough to weave smaller width items like scarves but just large enough to weave kitchen towels and bags.

You can, of course weave yardage to sew with (to make your own clothes and larger items) but that involves sewing panels together to make wider widths. Depending on the item you plan to sew, this may or may not work well.

Beyond the 24″, the next size up is the 32″ rigid heddle loom. The largest currently available is the 48″ rigid heddle loom.

When considering a larger loom, consider the following points:

  • Do you have the physical space for a larger loom?

If you buy a rigid heddle loom 24″ (that is the size I have) or above, I would definitely recommend to also purchase a stand with it.

I personally would not enjoy using a larger loom trying to lean it on the edge of a table or similar, and I don’t think that this would allow you to maintain a beneficial weaving posture. A good posture is really important – even if you have no physical injuries or problems, know that you could develop problems long term through repetitive poor setup and practices. So a stand is well worth the investment.

But, this means that your loom will be free standing rather than packed away. Do you have a space where you can set up a loom of that size and leave it on the stand when finished? Or does your living space/s dictate that your loom would need to be packed away in between uses?

  • What is your budget?

This is a pretty important consideration for most of us! Naturally, the larger your loom, the more it will cost. And not just the initial outlay for the loom, but addition tools or pieces that you wish to add along the way. Every time you buy a different sized heddle/reed, a pick up stick, a stick shuttle – these are all going to be larger to compliment and fit your loom and that will cost more.

Here are a couple of examples as a comparison. I’ll list the 24″ loom specifics as compared to the 48″. All prices are in US dollars.

24″ RHL and stand – $394 USD (you can sometimes find a combo deal of the loom and stand together for a slightly cheaper price).

24″ 10 dent reed/ heddle – $37.50

22″ stick shuttle – $7.50

48″ RHL and stand – $695

48″ 10 dent reed/heddle – $89

48″ stick shuttle $40

Uh huh, big price differences!

  • What do you intend to weave?

Some new weavers don’t really consider this when purchasing. Not being familiar with the possibilities or not having used a loom before, it can be very difficult to know what items you will end up enjoying weaving. If you only intend to weave scarves and smaller items, why go to the expense of the largest loom?

On the other hand, you may find that your absolute favourite thing to weave is baby blankets or afghans, therefore making the larger loom well worth your consideration. What if you make the decision to buy a smaller loom but after a little experience find that you want something larger?

Well, the good news is that rigid heddle looms are easy to resell. If you have kept it in good condition, it should be easy to find an eager new weaver willing to take it off your hands for a fair price. You can then use this money to invest towards the larger one.

  • How is your back?

Back or shoulder problems? Neck trouble? Then you need to consider carefully whether a larger loom is the right choice for you. A larger loom means a much wider reach with a shuttle.

As an example, I can sit very comfortably at my 24″ on it’s stand, extend each arm out to insert the stick shuttle and not have to move forward in my seat.

As someone who has a back injury and regular flare ups, if I had to lean forward or to the side every time I wanted to throw a pick, that would be a real problem for me. It would be a much greater strain on my body. I prefer to accept my limitations and be grateful that I am able to weave on the 24″ and plan my projects accordingly.

That brings me to the next related topic, the table or floor loom.

I’ve written a large number of articles on this topic, here is a list of those posts if you’re interested in researching more.

When I had my 8 shaft, 32″ table loom it was a little more difficult to weave on when I had it fully warped, but with the correct height adjustable chair, it was more than manageable. I still miss that loom, I sold it to make space and provide extra funds for my floor loom. I’ve since replaced it with a smaller 16″ table loom that I can use for teaching purposes – perfect!

Now that I have my Louet David 2, 35″ floor loom, even though it is the widest loom I have owned, it is a good fit for me width wise. It is wide enough to weave baby blankets and wide shawls.

Recently I wove yardage on it for my Clothtober project, which was a tunic for me and it worked out well. So, why is this loom not a problem for my back? Well, I always use a boat shuttle with this loom.

Because the tension is excellent, I can shoot my boat shuttle back and forth with ease. I am also seated on an adjustable piano bench and find that I develop a slight rocking motion as I get into the weaving rhythm. Although my shoulders do get a little sore if I put in a long weaving session, it is not excessive and generally my back is fine as long as I’m not in a dreaded flare up phase.

The action of throwing a boat shuttle is quite different to passing a stick shuttle. Yes, you an use a boat shuttle with a rigid heddle loom too, but I generally don’t because it can’t hold the same tension so I end up mostly passing the boat shuttle through anyway.

I should also add, if you do have a rigid heddle loom that is a little smaller than you would like, you always have the option of double width weaving. Although somewhat limited, it is a really terrific way to double the width of your fabric. I have two classes that teach you how to do this – Doubleweave Baby Blanket and Weaving with Two Heddles. I also have the Rainbow Lap Blanket, which is woven entirely on a Sampleit loom.

I certainly didn’t intend to write such an epic post when I sat down to address this topic today, but there is a lot more to be said about it than I realised! I hope my ramblings have been of use to you.

As always, leave me a comment with any questions or additional points you may have to add. I appreciate your input!

Until next time…

Happy Weaving!

Filed Under: 4 shaft weaving, 8 shaft weaving, Floor Loom Weaving, Rigid heddle weaving, Weaving Tagged With: buying a loom, floor loom weaving, rigid heddle weaving, table loom weaving

8 shaft Strickler sampler

by Kelly 2 Comments

If you follow me on Instagram you will have been viewing the progress I’ve made on my 8 shaft sampler.

*This post contains affiliate links, meaning that if you click and purchase, I will receive a small commission at no extra cost to you.

I didn’t have any specific plan for this sampler other than to explore some 8 shaft drafts on a rose path threading from Carol Strickler’s 8 Shaft Pattern Book.

If you’re not familiar with rose path threading, it is a point twill variation and can be used for both 8 and 4 shaft patterns. An example of rose path threading for 4 shafts would be 1,2,3,4,1,4,3,2,1 and for 8 shafts 1,2,3,4,5,6,7,8,1,8,7,6,5,4,3,2,1.

Something I really love about having an 8 shaft loom is the range of patterns or motifs that can be woven. I wanted to explore:

  1. Which combinations of yarns would be most effective for the designs I wanted to weave.
  2. How many different patterns I could weave on 8 shafts by changing my tie up often.

Once you have threaded a multi shaft loom, there is no going back, no changing the order of threading (unless you want to go back and start again and no one wants to do that!) By changing the tie up though, you can vary the combinations of shafts as you’re weaving, therefore changing the pattern without having to change the threading.

By “tie up” I’m talking about attaching my treadles to various shafts with texsolv cording. Different types of looms have different ways to tie up the treadles and one thing I love about my Louet David is how simple it is to tie up. This means that if I want to change the tie up to alter the pattern, it doesn’t take long and isn’t hard to do.

My loom is a sinking shed loom, so I was aware that the actual pattern would be woven on the underside. I didn’t mind that (in other words, I couldn’t be bothered messing around with the treadling to make sure the pattern would weave the right way up). Interestingly, I discovered that I often preferred the weaving on the underside to the right side anyway.

I started with 8/2 unmercerised cotton for the warp in white and warped at 20 ends per inch. I made my warp around 10 inches wide on the loom, as I like to have plenty of space to see my pattern. A narrow warp doesn’t always give enough pattern repetitions to give a good representation.

Beginning on page 30 of the book, I randomly picked motifs to weave according to the number of treadles required. My loom has 10 treadles, so 8 were tied up for the pattern weft and 2 were tied up for tabby.

Right side
Under side

I initially started weaving with some dk weight cotton (pink) and Bambu 7 (blue) and changed to 8/2 Cottolin (grey). For these designs I used tabby throughout (which means that following every pattern weft row is a row of plain weave) in an 8/2 mercerised cotton in a very light blue which looks mostly like white in these photos.

I wasn’t too thrilled with the initial results but it showed me something valuable. For the designs to have more impact I needed to use a heavier weight of yarn for the pattern weft and to choose my colours with intention. I wanted bold, not “meh” designs!

Right side
Under side

I switched the tie up and the yarn, and presto! Much better result this time. I alternated between a variegated orange/pink and teal fingering weight hand dyed wool, keeping my pale blue 8/2 cotton tabby. The top design is a burgundy dk/light worsted wool. I find both sides of this design equally pleasing. Between the hand dyed and burgundy you can see that the design looks slightly different – this is as a result of changing the treadling around but keeping the same tie up. So many variations are possible! If you’re looking for this design in the book, it is number 132 on page 32.

Right side
Under side (Space Invaders?!)

For this design I once again changed the tie up and swapped to a black fingering weight wool. This design is number 133 on page 32. The red design is number 128 and was worked in a dk/light worsted weight cotton. You can see how different this one looks on each side! I also tried it in a lighter weight and colour of cotton, which sort of just shrunk into the background.

Right side
Under side

This design is one of my favourites – number 139 on page 33. I changed treadling and yarn again for this one, using dk/light worsted weight wool (I had figured out by now that a heavier weight wool gave the kind of effect I liked).

Right side
Under side

I finished up with design 120 on page 31. The Strickler design looks like little trees, but mine are upside down and look more like balloons, which I find quite cute. I experimented with my tabby yarn by using a hand dyed, variegated tencel against the blue wool. I quite liked the effect (you can see the rainbow-ish colours in the middle of the panel.

This was a really fun project. I loved having something on the loom that had no particular commitment and didn’t need finishing quickly – it was purely for my own enjoyment and learning. That’s the kind of weaving I like!

I may just keep this as a sample or I may cut it up and use it for a small project. For now, I like the way it looks just hanging off my studio shelf.

If you are intrigued by multi shaft or floor loom weaving, I have a very popular class for beginners, the Introduction to Floor Loom Weaving. It takes you through all the step by step basics of getting started on your loom and weaving a beautiful cowl project. There is also a follow up class to go onto afterwards. You can even purchase the two classes together for a special price.

If you take out a Yearly Membership or Monthly Membership to my Online Weaving School, the floor loom classes are included.

I hope you found this post interesting and inspiring!

If you have any questions about this post or my Online Weaving School, please leave me a comment below.

Until next time…

Happy Weaving!

Filed Under: 8 shaft weaving, Inspiration, Weaving Tagged With: 8 shaft weaving, floor loom weaving, rose path, weaving

Darn it! Mending hand woven towels.

by Kelly Leave a Comment


It’s bound to happen. That moment when you realise there is a little or large or even gaping hole in one of your hand wovens.

I love using my hand woven towels in the kitchen. I mean, if you’re spending a lot of time doing menial tasks ie. dishes, you might as well be doing it with something special and beautiful.

We don’t have a dishwasher, and with 6 family members we tend to wash and dry a lot of dishes every day.

The first time it happened, I may have gasped, my eyes may have goggled a little and my head may have drooped. Just for a moment. But, one thing you learn through being a parent is to not be too precious about your material possessions. It’s likely they will get broken or damaged at some point. I would still rather use things than have them sit in a drawer somewhere.

Towel 1 was the worst with one large hole and one small hole.

So, anyway, two of my not very old, fairly recently finished hand woven towels had, shall we diplomatically say, “person inflicted holes”? Likely pierced by a sharp knife in the act of drying it?

I began contemplating what could be done about the said holes and I thought of the wonderful old art of darning, something our Grandmother’s did all the time and my own mother avoided like the plague. Needless to say, this art was not passed on to me. But, since having children, I’ve done my fair share of mending clothes with usually passable results.

Towel 2 was in better shape with just one smaller hole.

The trick with handwovens is to try to trace the original path that the broken or snapped threads took. Easier to do if you have a good understanding of the weave structure you used, but you can still get on alright by observing the threads that are still intact.

Once you’ve observed the pattern of the threads and determined how many warp threads and how many weft threads are broken, you can start tracking where these threads should have been and try to follow their original path.

*This post contains affiliate links, meaning if you click on one of these links and purchase, I receive a small percentage of the sale at no extra cost to you.

Using a needle (I used a tapestry needle) and matching the original threads as closely as possible, (I wasn’t able to do this as I had run out of the original threads, but I found some pretty good matches amongst my stash) start your thread 1 -2 inches out from the hole. Doing this also usually allows you to follow the path of the original thread up until it reaches the hole where it is broken.

It doesn’t matter whether you start weaving in warp of weft threads first. After you have woven through and past the hole (hopefully in a pattern very similar to the one that was broken) you continue to follow the pattern with the needle for another inch or two out the other side. Leave tails hanging out from where you began and finished.

This technique worked really well for my smaller holes. Although I didn’t get an exact copy of the original pattern, I was able to replace the broken threads in a way that didn’t look terrible!

Not perfect, but not too shabby!

For the gaping hole I needed to try something else. Subtle mending was not going to suffice for this one, there were many severed warp and weft threads and the gap was wide. I tried. I really did. But it was ugly – perhaps uglier than before I started trying to replace the threads.

At this point I decided to embrace the “Visible Mending” movement. I didn’t have any matching fabric, having woven just this one towel with those particular threads and structure. I hunted in my scraps and samples pile and came out with a couple of pieces that were acceptable – at least they had the same colours!

I cut out the patch sizes I needed – one for each side of the hole and serged the borders of each piece. I used the wonderful sewer’s helper Heat n Bond to attach a patch to either side of the hole. When cool, I machine zigzagged around the edges. Not perfect, but at least I don’t have to look at my botched mending job anymore and the towel is functional in my kitchen once again!


Once I completed the surgeries, I put the towels through a hot (60 degrees celsius) machine wash, dried and ironed. I cut all the tails (including the original leftover broken threads) as close to the fabric as possible, without cutting the actual fabric. Don’t accidentally snip too close and undo all your hard work!

Oh, and in case you’re wondering, I’m very grateful to have children who wash and dry dishes for me, even if there are occasional accidents!

Until next time….

Happy Weaving!

Filed Under: 4 shaft weaving, Sewing, Weaving Tagged With: darning, floor loom weaving, kitchen towels, mending, towels

4 shaft weaving and sampling

by Kelly Leave a Comment

This week I’ve been working on the sequel to my Introduction to Floor Loom weaving class.


This class will focus on 4 shaft weaving and begins with an optional sampler. I always felt that a sampler was a waste of time and effort, but I have definitely changed my ways! I do a lot of sampling, particularly now that I use a lot of my own designs and need to see and feel how the fabric is going to be before I put it out there to my students. Since I realised what a fantastic learning tool sampling can be, I always recommend it to my students. It can pretty much make or break a project!


Plus, when you’re finished with a sample, you can either cut it up and use it for small project, or keep it to refer back to. Either way, it’s useful!

The next part of the class will move onto 4 shaft kitchen towels,  which I designed. Each towel is a little different but equally lovely. 
We will weave 4 towels all together.


Here is a sample of the first towel, isn’t it gorgeous? 
The towels tie in happily with my #weaveforme plans for April,  as I will be keeping them for my kitchen 😊

If you’re interested in the next floor loom weaving class, make sure you are signed up to my email list for announcements and special offers. Instagram is also a great place to keep up with what I’m doing.

Do you have plans for your #weaveforme project yet? I’d love to hear about it!


Filed Under: 4 shaft weaving, Weaving Tagged With: #weaveforme, floor loom weaving, Kelly casanova weaving lessons, sampling, weaving

Interview with Goose Nest Weavers

by Kelly 8 Comments

Today I have the honour of interviewing Jessie from Goose Nest Weavers. I first came across Jessie and her husband Lemuel on Instagram. I was instantly smitten with their beautiful images of old looms, stunning weaving and the fact that this husband and wife team are sharing the joy of weaving, faith and life together. 

They have inspired me in many ways and I’m sure you will find them equally fascinating.


I love that you and your husband work and weave together. Which of you started your weaving journey first, and how did it all begin?

I began weaving after I was encouraged by a dear friend to give it a try. I bought a small loom and struggled to learn pretty much on my own. After I retired from my job, my husband and I found a really super school where we could spend a week at a time and have personal instruction.  We began at the beginning and not only was I in love with the entire process my husband turned out to be a natural at it too. As a small child my Mom had a friend that was an older lady that made rugs for the community on a loom that went back in her family for several generations.  I watched her and itched to be allowed to try.  I was 10 at the time, so thank goodness she knew not to allow me any where near the loom.  Nearly 30 years later after the lady’s death I now have been able to acquire that loom and that was  our first antique loom. 


Goose Nest Weavers is a wonderful name for a business. How did your business start and what was your inspiration for the name?

Naming the business was easy.  We live in a rural area and over the years there have been small villages that have come and gone.  We have a small farm and on the property there was once a small settlement that was called Goose Nest.  It has become sort of part of our identity now too. Hence, the only proper name it seemed to us, was Goose Nest Weavers.

To be totally honest we are probably the worst business people in the world.  We do some custom work on order but as you well know the time required to begin and follow to completion a hand weaving project is time consuming to say the least.  So once you have made people aware that an overshot coverlet is not an on demand kind of thing, that there is probably a month or more involved in producing it , the folks that want to go ahead are the fuel for the creative fire. I really get a buzz from folks that see and understand and appreciate the product as well as, the process.

You and Lem weave specifically on beautiful antique looms. Was this a conscious decision for you?

 As I explained I had  acquired our first barn loom and after very carefully taking it down and numbering and labelling all her parts I quickly realized that there was very little that I could transfer from my knowledge of the modern loom I had been working on. So I set to looking for a place where I could gain the expertise that was going to be required. I guess you could say that we chose the old looms. 

We went to study at the Marshfield School of Weaving. The prime reason being that there you work on 18th century looms. It was the best thing we could have done.  The folks there walked us through a project and at the end of the week we were feeling very confident.  Kate Smith the director of the school has been a great resource for the looms. We have acquired several from her.  Most of them came from someone’s barn or attic.. They look like a pile of sticks when we first see them.  We bring them back to Lem’s workshop for some TLC and before long they are up and functioning again.  Currently we have four old looms that we are weaving with plus one new loom.  There are about 4 or 5 more that are waiting to be given a good cleaning and be put to work.


Have there been any challenges or difficulties in working with old looms?

Oh you know, these “old ladies” are quite the characters.  Sure there are tricks and tweaks that you have to acquaint yourself with each.  Because they are generally pretty old, we have several that are now more than 200 years old, they have been built with a combination of woods, each species reacts differently to temperature and humidity, the “Girls” can be temperamental.  

We do our best to keep everything environmentally on an even keel.  But, that being said there is nothing more satisfying than sitting down to spend time with  a piece of equipment that has become like an old friend and allowing her to glide through a job just as she has for the past two hundred years. You can very nearly feel all the hands that have asked her to work for them over the centuries guiding your hands. We were told early on that looms have a feminine nature.  As you move your hands and feet to get her to do your work it is very like dancing with a lovely lady. So it is imperative that you treat her as you would a “lady”. I must admit it seems to work the charm. 

Do you have any favourite fibres or threads?

We both prefer natural fibers, we use a great deal of cotton and linen in conjunction with wool in several weights.


What items do you love to weave the most? Do you have a favourite weave structure?

Lemuel enjoys weaving heavier projects. He especially enjoys making rugs, either the traditional rag rug or we have become acquainted with a Venetian pattern that dates back to a weaver in the 1700’s. 
I prefer making household linens. Towelling and blankets. However, my all time favourite is Overshot and Summer & Winter coverlets.

           What did you and Lem do before your weaving business?

My goodness we have been jacks of several trades.  Lemuel worked with his family on the family farm and when his health dictated a change he had his own business as an Equine Dentist.

As the wife of a farmer I worked on the farm too, while working as a medical office receptionist and later as a letter carrier for the Postal Service on the side.


What plans do you have for the future of your business?

Go slowly.  Enjoy what we are producing.  Make sure that what we are asking the looms to produce is something that we will proud to put our names on and be associated with for many years maybe generations to come. 
We have become aware of several 18th and 19th century weavers that worked in our community. Once folks found out what we doing they have brought us their family treasures to share with us the skills of the generations of their families. We want to be producing coverlets and rugs of a quality that will allow the folks that own them to pass them down their families with pride.


Do you have some advice for those who are interested in learning to weave?

I would say don’t worry about starting a business. Allow yourself to fall in love with the craft. It requires a steady hand, the time to do a thing properly. If you will do those things you will find that there is so much that artistically you can explore.  Color, texture, fibers, more and more.
  
Find someone who you can depend on to mentor you. I’m old school and a real person is good for me but you younger minds can probably make the internet work for you. The craft of weaving has been around since before the pyramids and the process is essentially the same,  the only difference is that the creative spark that you have is yours alone and it can make a very big impression if you set it free. 


You can visit Goose Nest Weavers on Instagram 
                                  and
                check out their Etsy shop.


Filed Under: Interviews Tagged With: antique looms, floor loom weaving, goose nest weavers, interviews

  • Page 1
  • Page 2
  • Page 3
  • Go to Next Page »

Primary Sidebar

Categories

Archives

Meta

  • Log in
  • Entries feed
  • Comments feed
  • WordPress.org

Copyright © 2025 Kelly Casanova Weaving Lessons on the Foodie Pro Theme