• Skip to main content
  • Skip to primary sidebar

Kelly Casanova Weaving Lessons

  • Hi! I’m Kelly!
    • Disclosure
  • Online Weaving School Class Index
    • Common account issues
    • Common technical issues
    • What do I get with a membership?
  • New to rigid heddle weaving? Start here!
    • Never heard of the rigid heddle loom?
    • How to weave neat edges on the rigid heddle loom
    • Rigid heddle weaving
    • Rigid Heddle Weaving Patterns
  • Patterns
  • Subscribe

floor loom weaving

Monk’s Belt Magic!

by Kelly 9 Comments

Sampling can be a sensitive topic among weavers. Why, when it takes you so long to set up and weave a piece, would you subject yourself to dressing your loom “just for a sampler”? 
Believe it or not, as a newer weaver, those were my thoughts exactly. When I read or heard a teacher recommending sampling before beginning the actual project, I would secretly snicker to myself “yeh, right, as if that’s ever going to happen, I just want to get to the REAL weaving!”


But if there is one thing that weaving has taught me over the years is patience! Oodles of patience. And, I’ve messed up enough times to know that, at least for some projects, sampling is a super good idea.

*This post contains affiliate links. For more information, please see my disclosure policy.

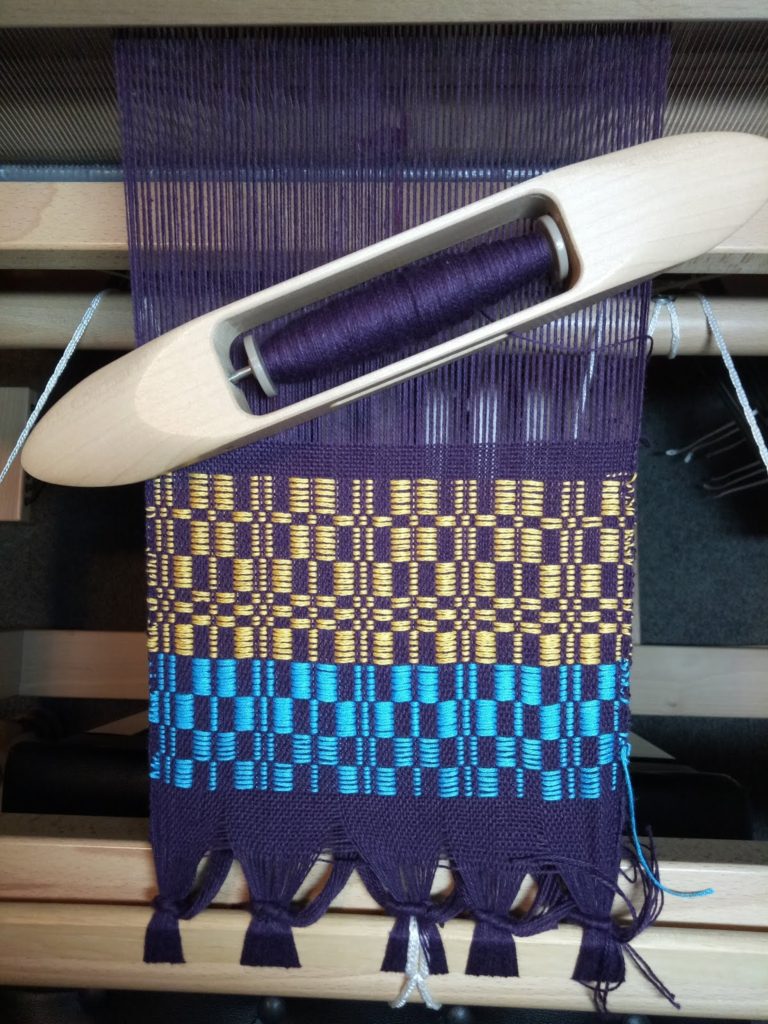
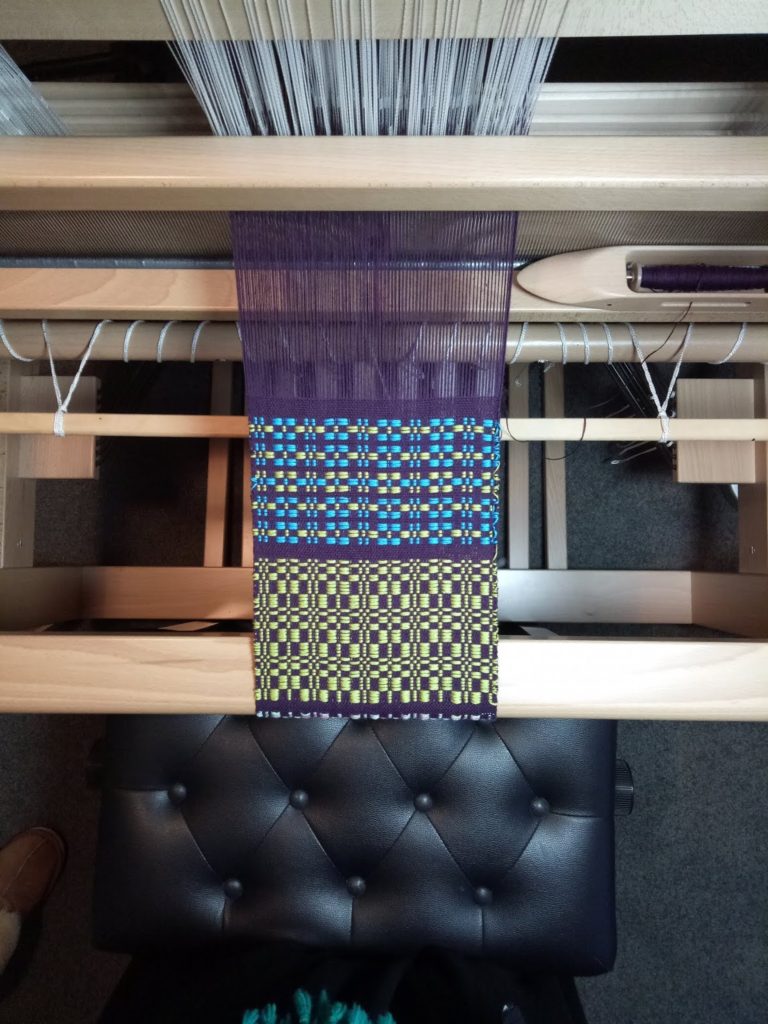
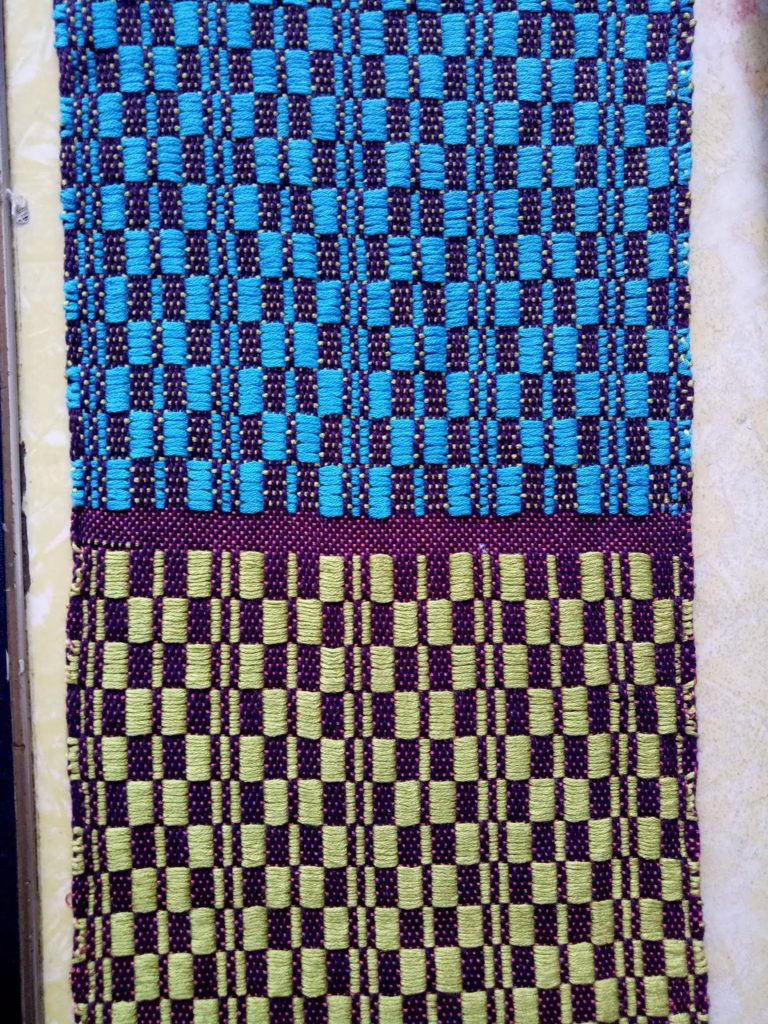
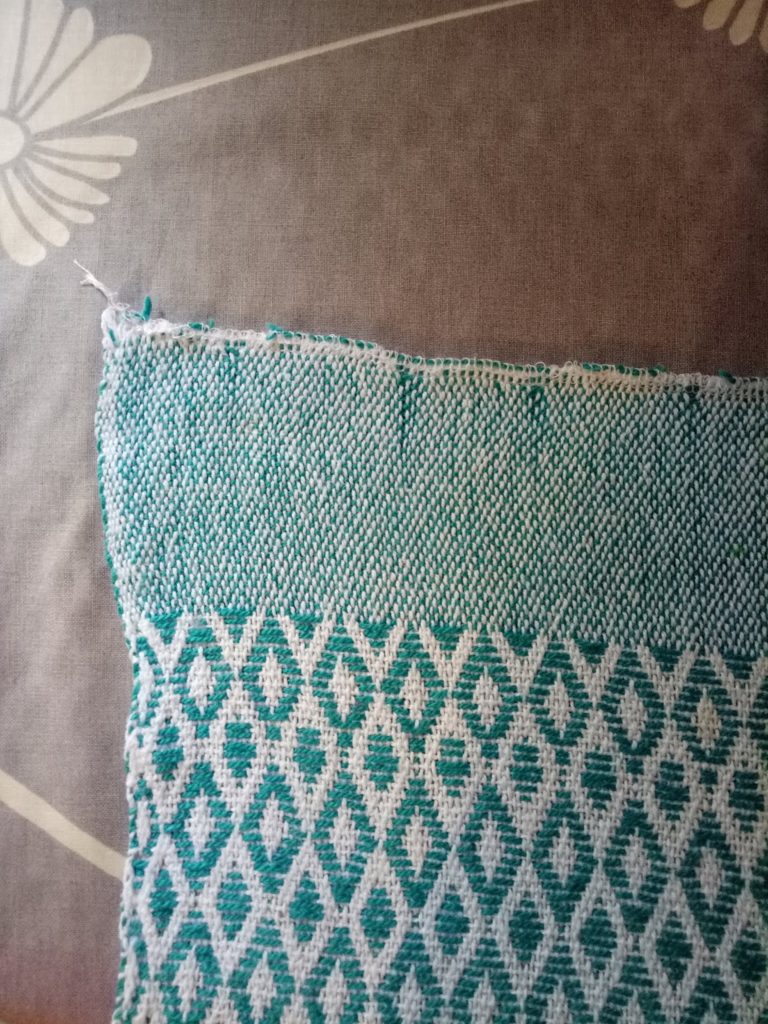
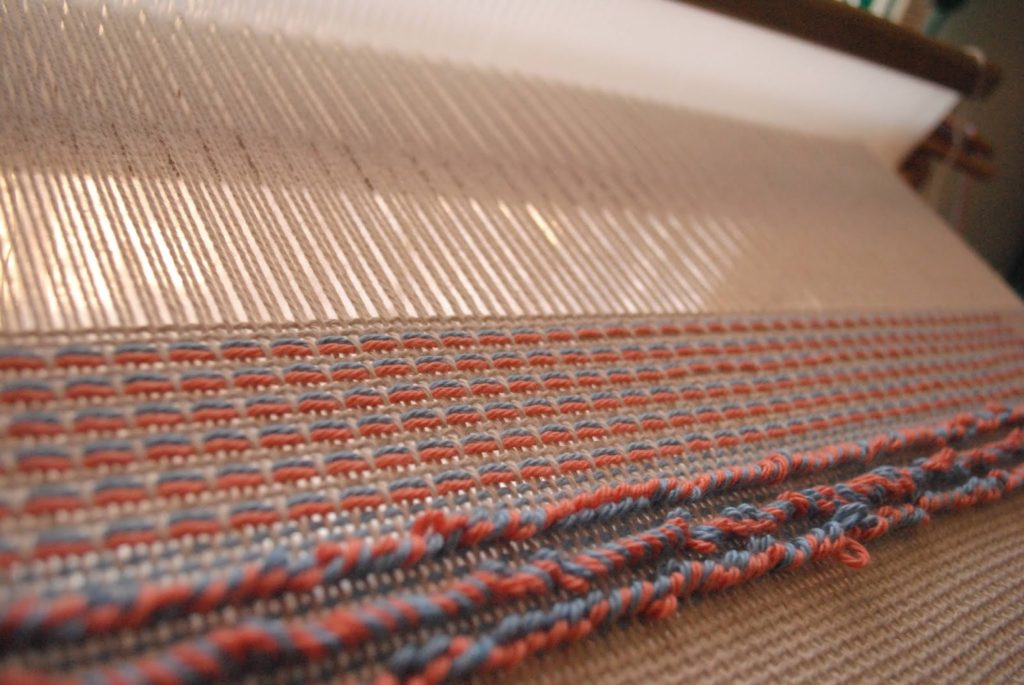
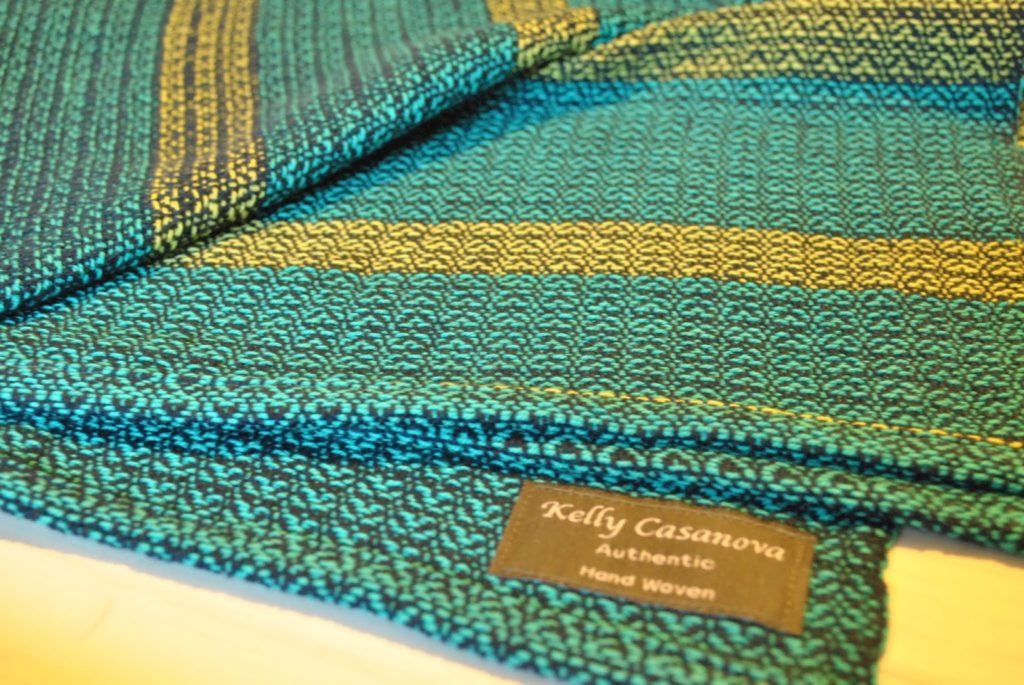
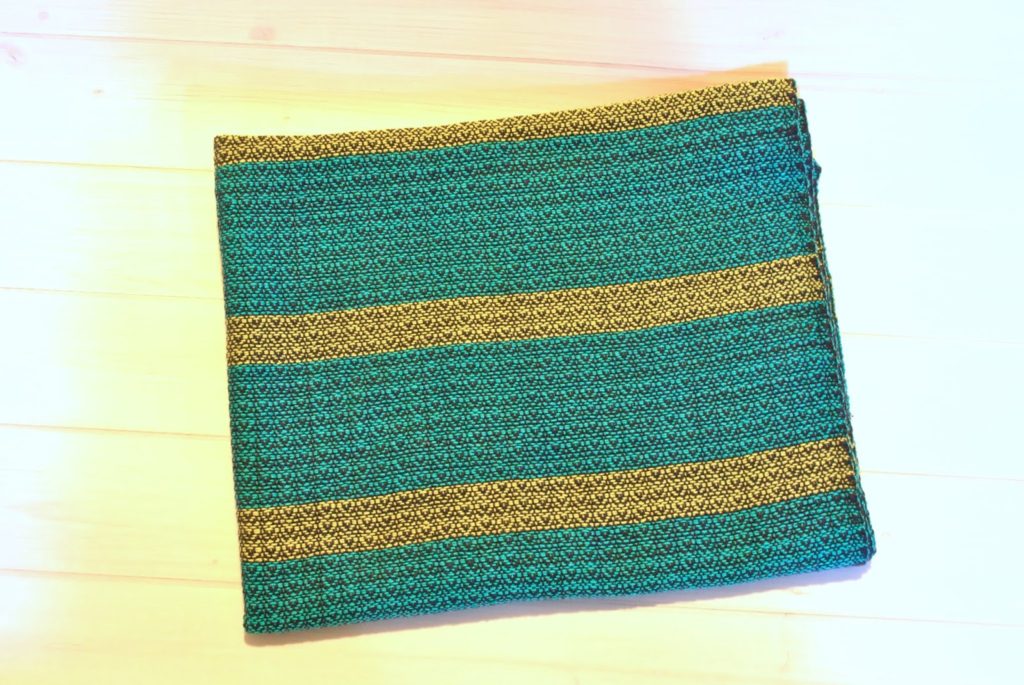
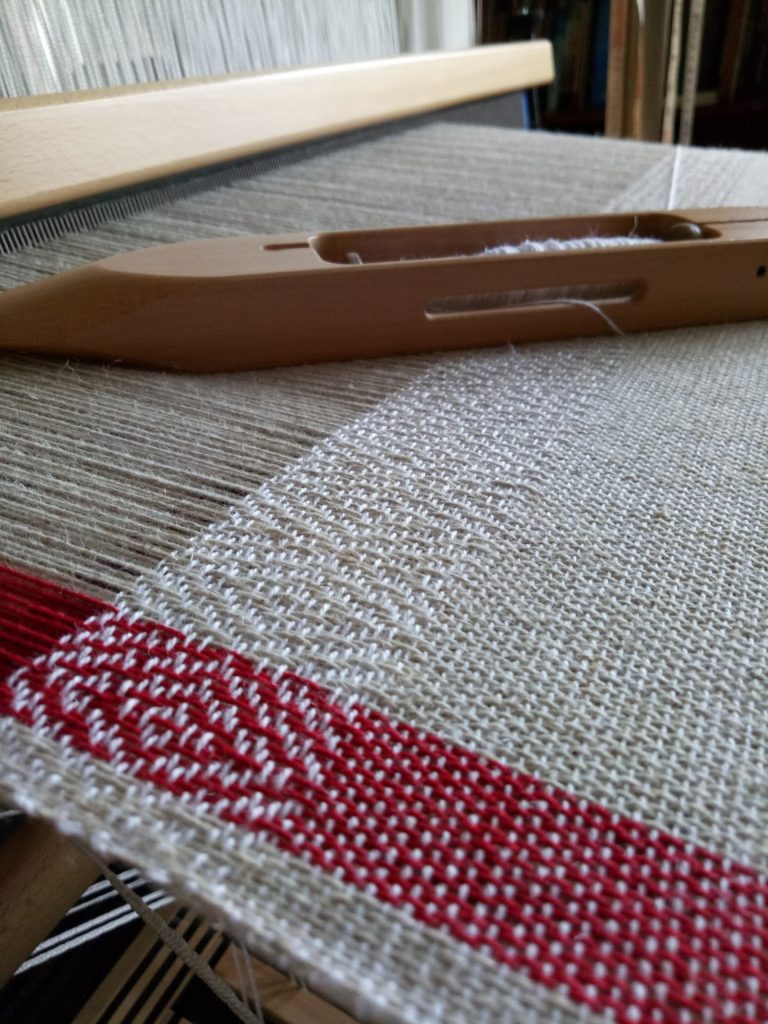
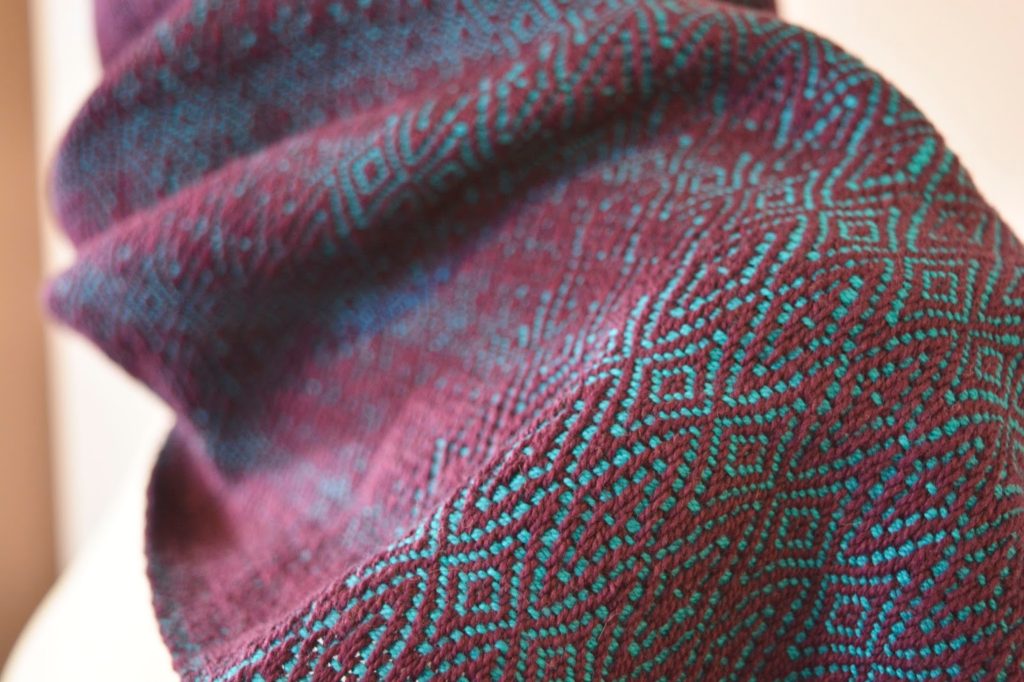
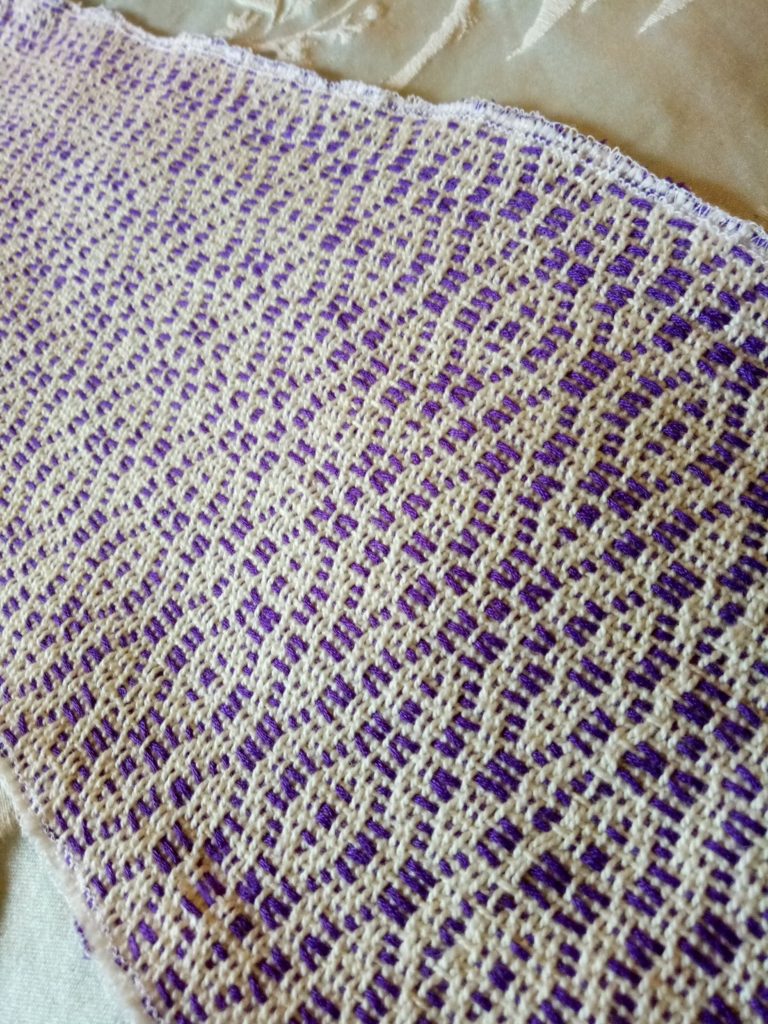
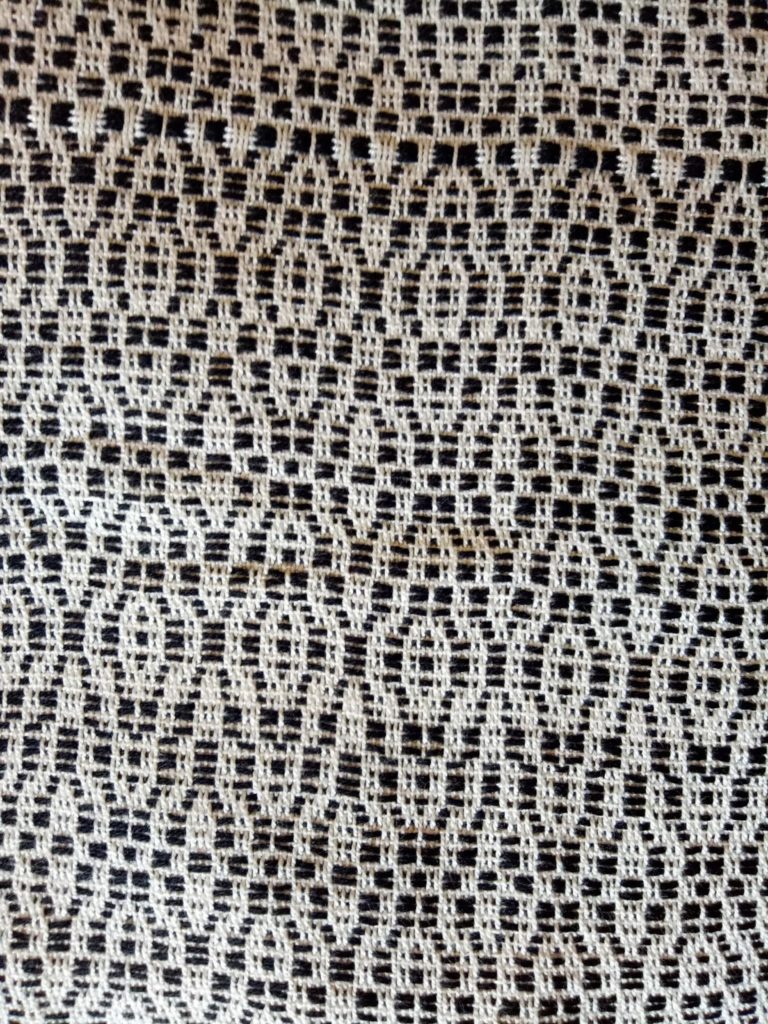
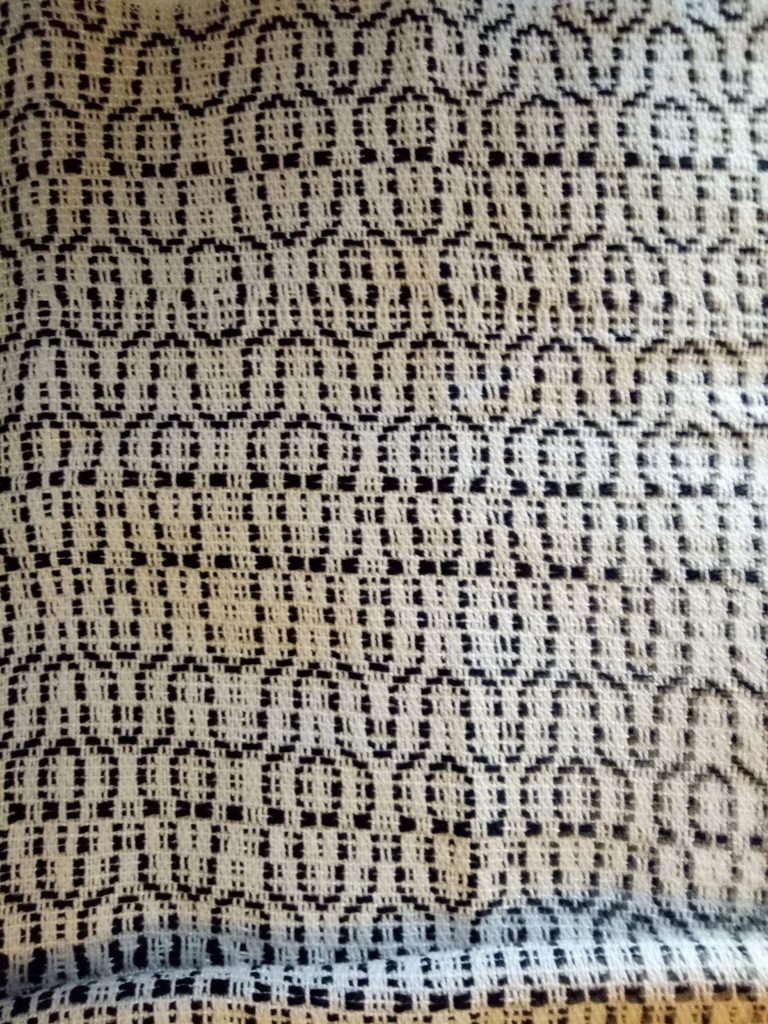
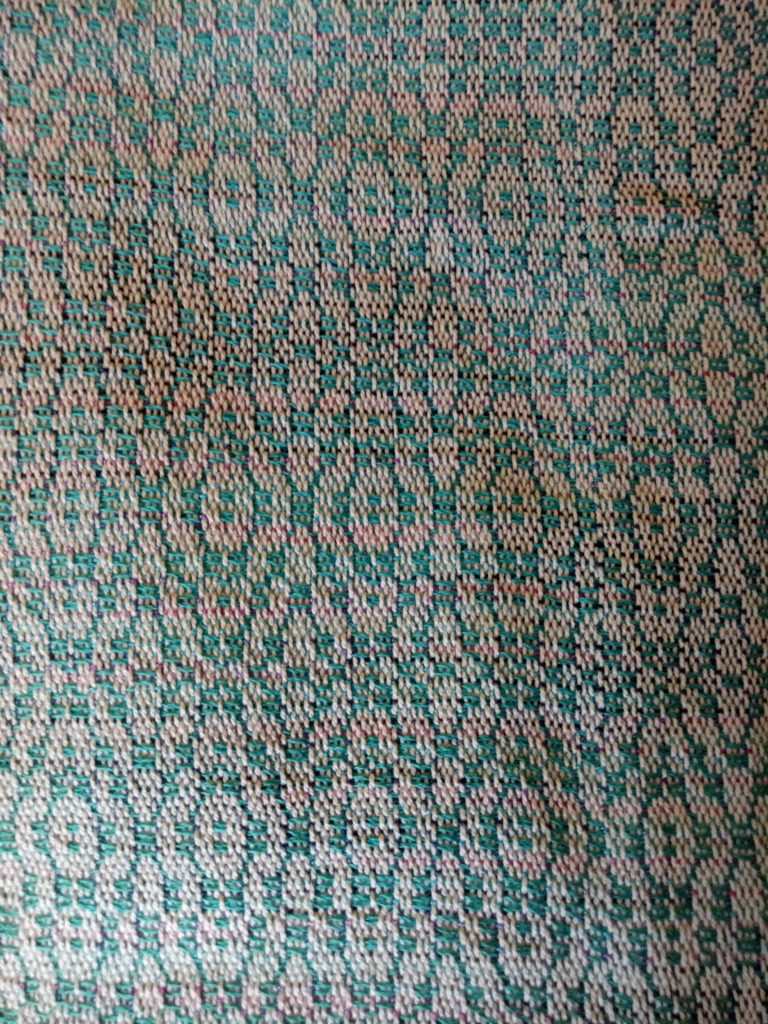
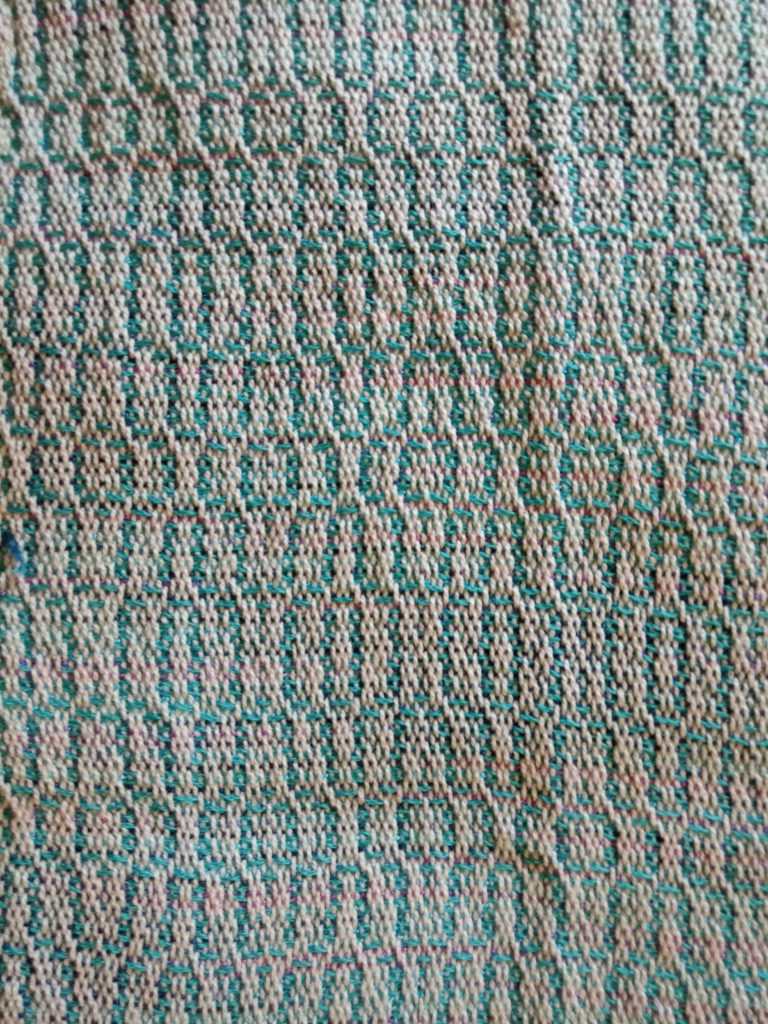
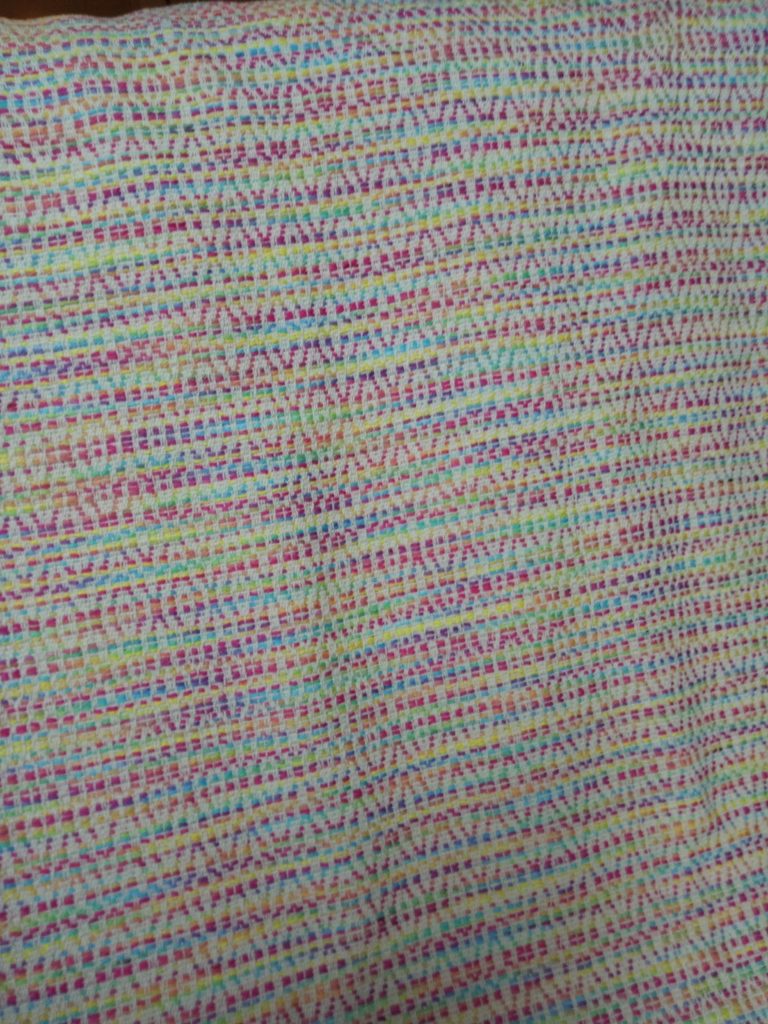
So, that brings us to my recent Monk’s Belt sample. Monk’s Belt is a very old weave structure and has been used in a variety of ways, according to time period and types of looms available. 


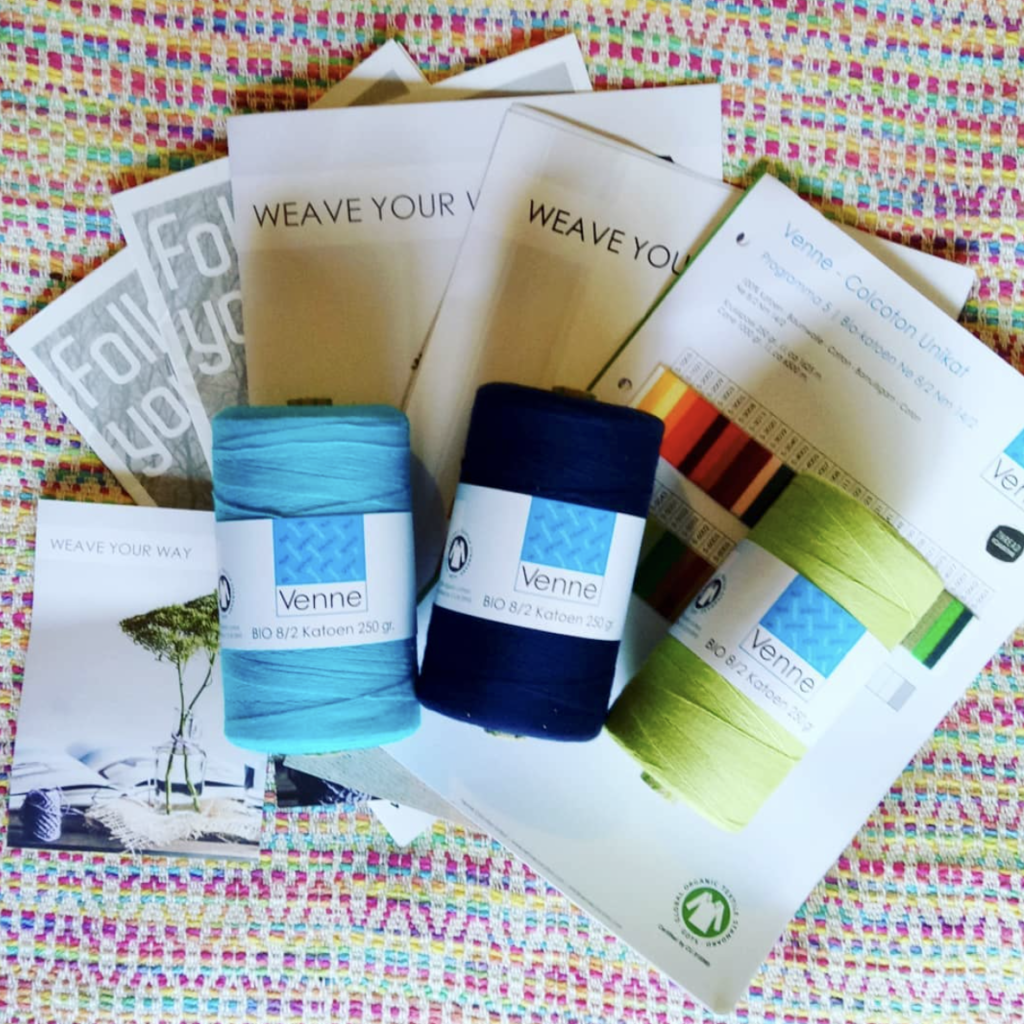
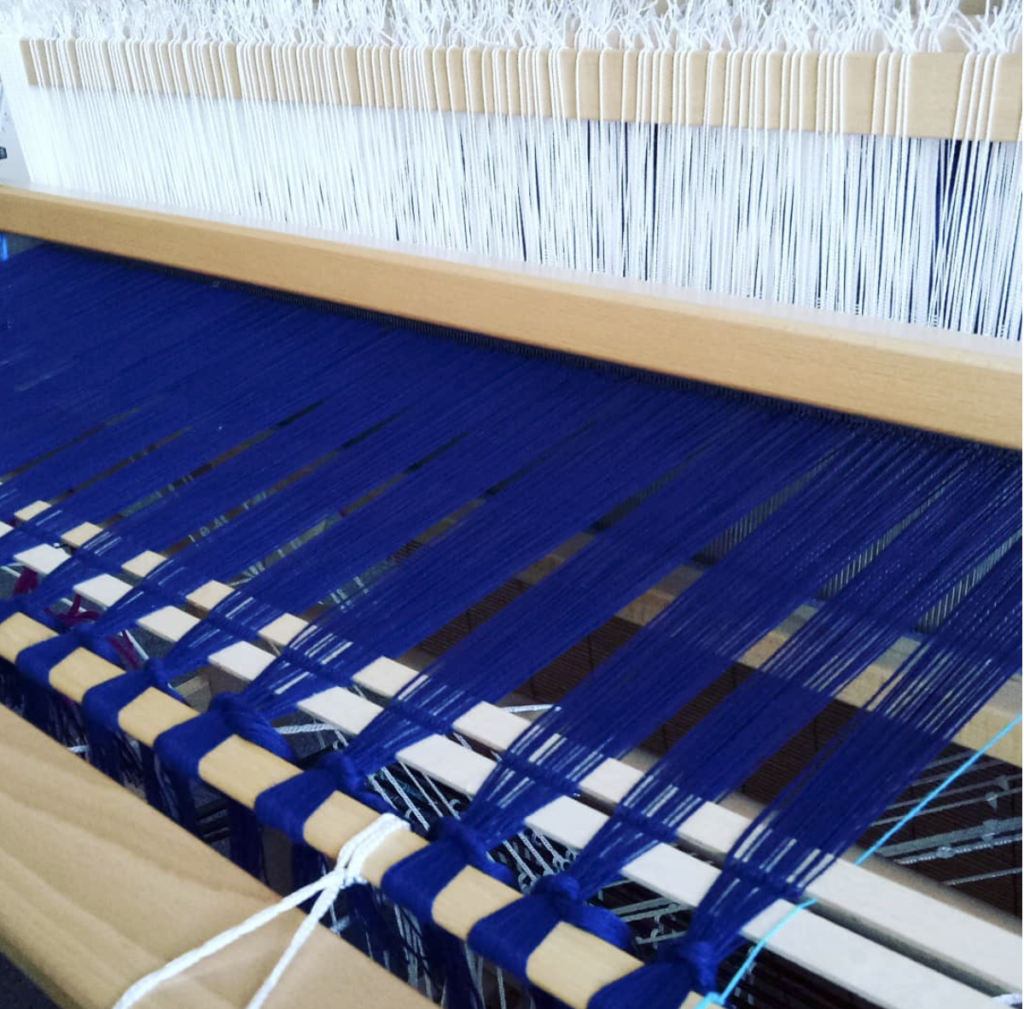
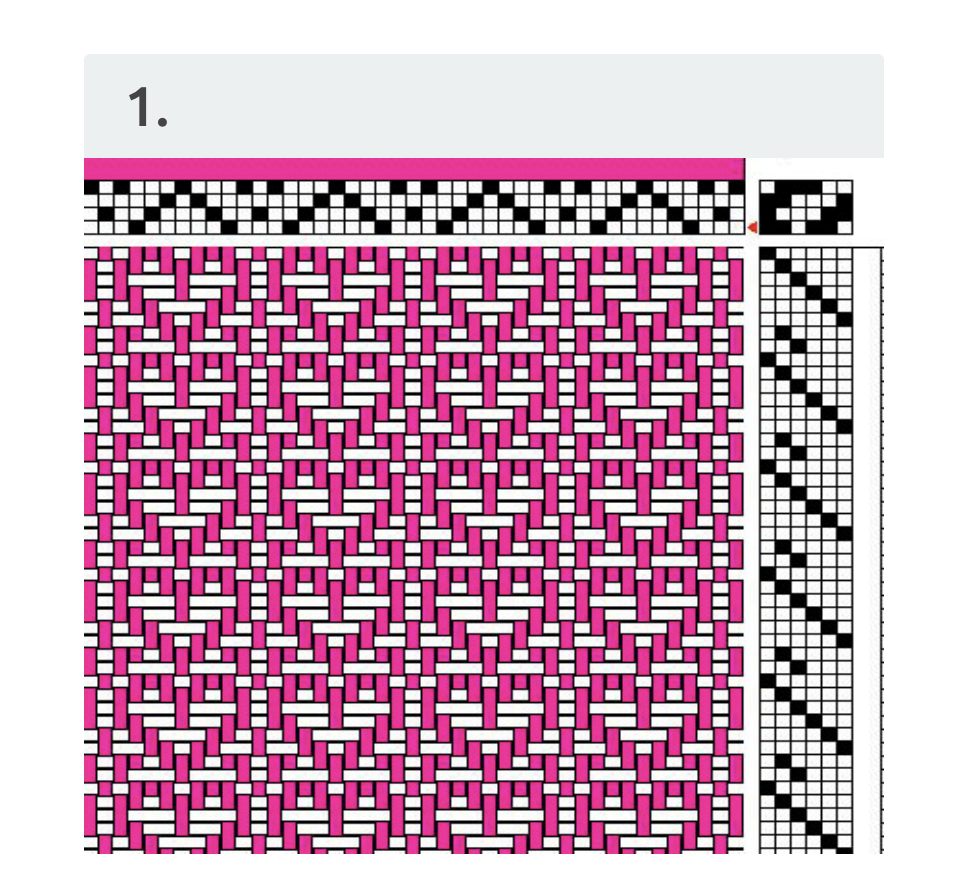
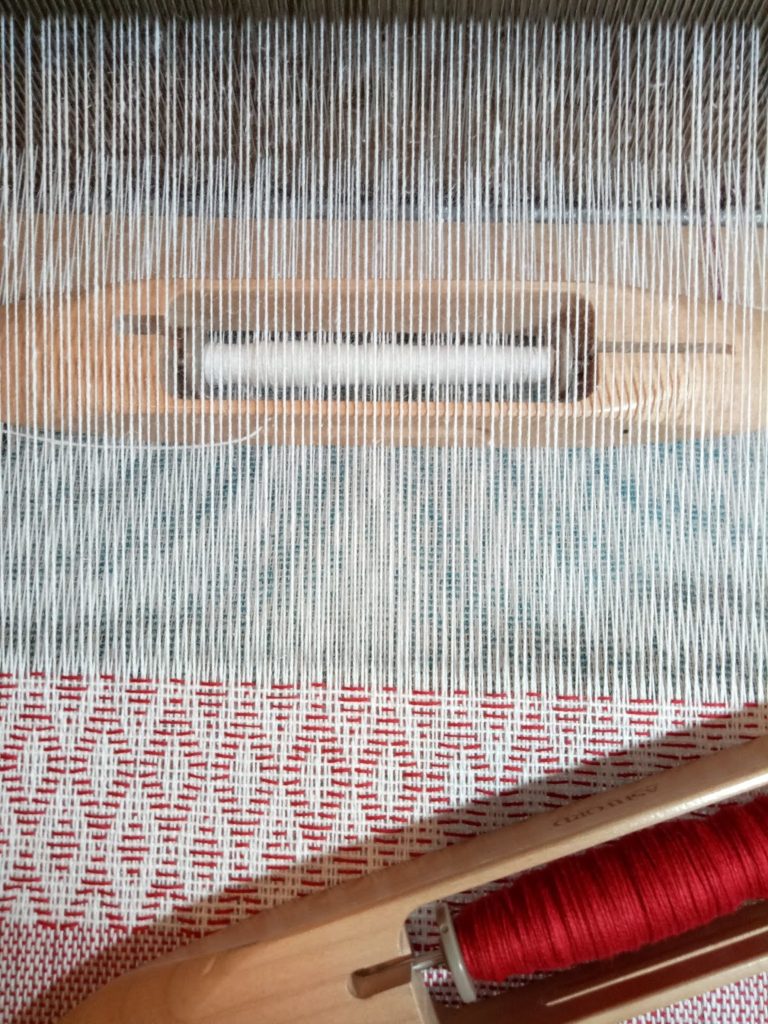
My sampler used 4 shafts and 6 treadles. The threading is quite simple, as you thread in blocks, which means there is plenty of repetition. My warp is 8/2 cotton, sett at 20 epi. The finished sampler measures 7 x 44″. Tabby is used throughout.

Monk’s belt designs are usually instantly recognisable, due to the bold, geometric shapes created by series of floats (these are where the block threading comes in). My aim in doing a relatively long sampler was to give myself plenty of time to experiment with treadling, but especially with yarns. I started out with yellow, mercerized cotton. I quickly found that this was not ideal, as it tends to sit quite straight as a float, rather than blooming and blending with itself. I also found that a single weft was not sufficient to make the pattern pop, so for each subsequent yarn type, the weft was doubled, to a much better effect.
The blue in the above photo is bamboo, which I found to be one of the most optimal yarns due to the thickness, sheen, softness and beautiful bloom.
The multicoloured weft above is hand dyed tencel, which gave a lovely effect, but like the mercerized cotton, doesn’t quite stack up in the “bloom” department. 
Bamboo again, and you can really tell the difference, it’s as though it was made for this! I had been following some standard treadling, but for this one I started branching into my own treadling, writing it down as I went.
I had been using single colours and decided to try 2 colours for the blue/green part above. I love the effect of 2 colours! Technically, I was using 3 colours if you include the purple (warp colour) I used for tabby.
Ah, silk! I combined orange and magenta 60/2 silk and my own treadling pattern for this one. Even though the silk is very fine, as a doubled weft it gave very good coverage. The blend of colours is also very eye catching.
For this one, I went back to my green bamboo for the pattern weft, but instead of using my purple 8/2 cotton for tabby as I had previously, I changed to my 2 strands of silk. This gives the effect of cute, luminous dots among the main pattern.
I have had some gold chenille sitting on my shelf for a while, and thought “aha!” Perfect time to try it, this will look brilliant. Except it doesn’t! I had pictured something quite sophisticated looking, but instead got strange. furry caterpillars that look slightly “off” in colour.
Not that I mind, this is the beauty of sampling – now I know that I don’t like chenille in a block weave!
The blue at the top is bamboo once again, but this time I swapped out the purple tabby for green bamboo. It gave an interesting effect but the green bamboo was a little too thick and kept my weft floats apart more than I would like. However, the texture is pretty cool and really changes the look of the weave.
The versatility of Monk’s Belt is awesome. Because you are set up for plain weave (tabby) as well as the pattern, you can break them up and just use the pattern as a border if you wish. I think plain weave towels with a border such as the one above would be really striking.
More treadling and yarn experiments, there is just so much you can do!
The big test was how the fabric would feel after wet finishing. I suspected that it would be quite stiff and more suited to cushions, bags etc. But, happily, I was wrong. The fabric softened up wonderfully and has a lovely drape. It looks great on the back too. It struck me that a sampler like this, with a bit more length, would make an amazing scarf!
I hope you enjoyed this post. I have made a companion video just for my Weaving School members, where I go over this blog post in more detail. If you are a member already, you will find the video HERE.
If you wish to join up, I would love to have you! Monthly  , 6 monthly and Premium memberships are available and include hundreds of hours of classes, access to a private Member’s group on Facebook, giveaways, live videos and a wonderful community of weavers.
I also now have a Monk’s Belt course just for table loom weavers. 
And, just before I finish up, I have a couple of book recommendations for you. These are affiliate links, meaning I get a small commission if you click through and purchase, but I do actually own and love these books.
The Handweaver’s Pattern Directory by Anne Dixon.
Anne has a couple of pages on Monk’s Belt, different threadings and treadling options, as well as excellent photos to show you how the weave looks.
A Handweaver’s Pattern Book by Marguerite Davison
Marguerite has quite a few pages on Monk’s belt with a lot of different drafts. The drafts in this book can be a little more difficult to read if you are not accustomed to reading older drafts.
Until next time…
Happy Weaving!

Filed Under: 4 shaft weaving Tagged With: 4 shaft weaving, floor loom weaving, Kelly casanova weaving lessons, monk's belt

Kelly’s hand woven, perfectly hemmed technique.

by Kelly 23 Comments

*This post contains affiliate links
I won’t tell you how long these towels have been sitting on my creative table waiting to be hemmed. What is it with final techniques and me? I go to all that trouble to weave something beautiful and then let it sit there for who knows how long before I get around to hemming!  
Anyway, lets focus on the positives. The towels ARE hemmed now, and I’m going to share my simple but effective hemming techniques with you!
Firstly, always weave a little extra where you intend to hem, and don’t forget to factor in hemming allowances to your overall calculations. I like to make a little contrast weave at the beginning and end of a piece that I’m going to hem. Here I’ve woven plain weave borders at either end. There are 2 advantage to this – 
1. The contrast looks nice.
                                                                       2. The border is less bulky and therefore makes a more crisp and pleasing hem.
You can see that my raw edge is secured on a serger to prevent any unravelling during the wet finishing process. It is helpful to give the whole woven piece a good press before beginning, it’s always easier to work with pressed fabric.
This is what I call my “dog ear” technique.  Fold in a corner on each side of the hem and press down with an iron. There are 2 reasons for this also – 
1. The corners can get ugly and a bit ragged in the washing process – I want to hide them!
             2. Towels have a tendency to be wider at each end. This reduces a little of that “flared out” look.
Once my dog ears are pressed down neatly, I take the raw edge and fold it over, usually around 1/4″ but more if it’s particularly raggy. Press with the iron.
Now I fold again, this time 1/2″ or more and press. Now all raw edges and corners should be completely encased and hidden. Once pressed, you can also place pins along to hold everything in place if you wish.
Take it to the sewing machine (different towel in this photo but the same process). I use Gutermann sewing thread. I learned early in my sewing journey that life is too short to sew with cheap threads that will break over and over! Sew with a straight, medium stitch close to the folded edge (roughly 1/4 – 1/8″).
You can use a different stitch if you want to, I just like the professional looking finish a medium straight stitch gives. Don’t forget to reverse stitch at the start and finish.
For an almost invisible finish, you can hand hem with a needle and thread, you can find that tutorial here.
Seeing as we’re on the subject of towels, if you’re on the hunt for your next towel project, you may want to try one of my classes or patterns.
Online class:
Happy Fibonnaci Towels
                                                                       Colour & Weave Towels
      Diamond Stripe Towel Weave Along (currently only open to members of the Online Weaving School)
PDF Patterns:
Lux Hand Towels
Happy Fibonnaci Towels
                                                                           Diamond Stripe Towels
                                                                        Bright & Beautiful Towels
Drop me a comment to let me know if this post has been helpful to you, I love feedback!
Until next time…
Happy Weaving!

Filed Under: Weaving Tagged With: floor loom weaving, hemming, kitchen towels, rigid heddle weaving, Sewing, weaving

I have a rigid heddle loom, why would I consider buying a floor loom?

by Kelly 2 Comments

I was asked this question in one of my Facebook groups. I started to type a response, then decided it would be better answered in a blog post as it’s not a simple question!


It is true that the Rigid Heddle Loom is capable of a lot (even an 8 shaft pattern if you really want to) but there are many reasons why I love to have both a RHL and a floor loom. 


I wrote a series recently that compared different types of looms that you may wish to review:


The Rigid Heddle Loom


The Table Loom


The Floor Loom


Now, I said the rigid heddle loom is capable of weaving 8 shafts, but does that mean that I would actually want to? To achieve that would mean multiple heddles, multiple pick up sticks and a pretty painstaking process that would have me leaping on to my floor loom in no time. Because the floor loom is made for this, it’s set up for more complex weaves, that is it’s job. So, while the RHL can be utilised for more complex weaves, that doesn’t mean that it’s the ideal choice.


Next, the RHL has yarn size limitations. The smallest dent heddle currently available is a 15 dent by Ashford. Yes, you can still double threads or use extra heddles to increase the available sett, but that is another difference to a floor loom and a consideration if you like to weave with fine threads.


Finally, the floor loom is a full body experience. That sounds a bit weird and new age doesn’t it?! But what I mean is that you are using your head (eyes to read the pattern as you weave, if you need to), your hands to throw and catch the shuttle (your body naturally sways slightly from side to side as you get into the rhythm) and your legs (as your feet move or “walk” the treadles to operate the shafts). It’s actually a bit of a workout!


Because of this “full body” approach on a floor loom, you are able to operate many actions at once. And that is the real beauty of floor loom weaving, the harmony of actions that allow you to work fast to achieve sometimes quite amazing results.


Don’t forget that there are pros and cons to all types of weaving and I try not to promote one over the other because I believe each weaver needs to find the right fit for their particular needs. If it seems that I am promoting the floor loom in this article, it is only within context of answering a question.


To recap, why would I buy a floor loom? 
1. Intricacy of pattern
2. Finer threads
3. Speed and efficiency


I hope this article helps you, thank you for reading!

Filed Under: Floor Loom Weaving, Rigid heddle weaving, Weaving Tagged With: floor loom, floor loom weaving, rigid heddle loom, rigid heddle weaving

Baby Blanket Project

by Kelly 6 Comments

I finished my baby blanket just in the nick of time, the day after my gorgeous new nephew was born. I already knew the baby was a boy and chose the colours accordingly. 
 
I told Nicky from Thread Collective what I wanted to weave and she recommended Venne Organic 8/2 cotton. I’m so glad I went with it, it may be a little more expensive, but for good reason! It is soft but I didn’t have a single broken warp thread, it was strong and just lovely to weave with. 
*This post contains an affiliate link. Please see my disclosure policy for further information.
 
 
I warped with the royal blue. I’m not sure why, but I started discovering errors from this point on. Too many distractions perhaps?
 
Error 1: I missed a part of the threading sequence in one spot. 
The fix: I had missed threading 3 heddles, so I made the missing heddles out of tapestry cotton and inserted them in place. Then, I measured out the missing warp threads, threaded through my string heddles, and weighted them over the back of the loom. Not ideal, but it worked!
The weighted threads.
Error 2: I re-sleyed the reed 3 times (yes, 3!!) because I kept missing a slot or doubling up. This was really frustrating as I just wanted to get weaving at this point. Even after the 3 re-sleys, I still ended up with one slot doubled up with threads. So, the blanket has a fault running through vertically. Rather than go back and re-sley again, I decided to just live with it!
My idea for weaving was to experiment with the weft, initially I thought I would do one shot of turquoise and one of green. I didn’t like the way that looked though. I experimented further (this is why it’s always great to warp a little extra for sampling) and decided on 3.5 inch stripes of blue, alternating with 1 inch stripes of green. It has a nice balance.
 
Here you can really see the hearts, aren’t they cute?! This is one side.
And this is the other side. Originally I had planned to back the blanket with flannelette once it was off the loom, but in the end I couldn’t decide which side of blanket I liked better, so no backing. It will be a light blanket instead 🙂 
You can find a copy of this draft here. It is also pinned to my Weaving board on Pinterest.
The weaving draft is very easy to follow, both the threading and treadling follow repetitive, simple to memorise sequences.
 
The dimensions of the finished blanket are:
Width – 27.5″
Length- 44″
 
The approximate cost of the project:
I used almost a whole 250 gram cone for warp. For the weft, I alternated between the turquoise and green cones, using less of the green. I estimated the total cost at around $55AUD, which covers the threads, postage cost on the threads, sewing supplies and label.
 
What I learned:
*I don’t work well with deadlines. On one hand, needing to be finished by a certain date is a good motivating factor but on the other hand, rushing causes stress and mistakes. 
*I learned that I definitely want to work with Venne organic cotton again.
*I would also like to use this draft again and I think it could be adapted to all sorts of projects. 
*I already knew this, but this project reminded me that weaving with quality threads is expensive!
*Perhaps most importantly, I learned that, once again most mistakes or errors in weaving are totally fixable if you can just find or think of a work around.
 
If you are interested in floor loom weaving or are a newbie floor or table loom weaver, be sure to check out my Introduction to Floor Loom Weaving course to get you up and weaving!
 
This pattern draft is not from a book, but if you love to weave baby blanket’s, I recommend 
Hand Woven Baby Blankets by Tom Knisely.
 
There is a huge selection of blankets, from 2 to 8 shafts and many different yarns and colours. It’s a lovely and inspiring book. 
 

Filed Under: 4 shaft weaving, Floor Loom Weaving Tagged With: 4 shaft weaving, baby blanket, floor loom weaving, hearts, organic cotton

The week in review, phew!

by Kelly 2 Comments

The week started out well and then WOOSH, I turned around and it was almost over already. A lot of weeks are like that these days. But it doesn’t trouble me, as long as the week is well spent.

Autumn is well and truly upon us and the cold has crept in. This does not trouble me either, I am quite fond of cool weather and it inspires me to surround myself with fibre.
We celebrated our son’s 18th birthday with much cheer and delightful dishes. I was reminded of the great blessing he is to our family, and what a fine young man he is. It is certainly bittersweet having your children grow up.
I finally launched my newest class, Rigid Heddle Garment Making! I was so thrilled to finish what had become a lengthly undertaking and I was so happy with the end project.

The response has been enthusiastic, as many students have been asking me to put this class together.

In other weaving news, this is what I have on the floor loom. The warp is plain white cottolin and hemp and I’m changing up the cotton weft colours as I go. The draft is an 8 shaft from Carol Strickler’s 8 shaft pattern book. It took me ages to get going with this and I had to re-sley the reed THREE times due to silly mistakes. I’m happy to say that the weaving is all going smoothly! I’m making a set of towels.

The threading is rose path and the weaving is very much like an overshot – one pattern pick (red)…

followed by a tabby pick (white). Rather lovely!

I almost forgot, I also have a new Youtube video! The topic is a very popular one – weaver neater edges. 

So yes, a very busy week indeed with lots happening.
I have two new projects in the planning stages. One will be my next Etsy pattern (speaking of Etsy – my sales passed 400 this week and continue to climb!), the other will be a new online class with a difference. You will have to wait and see what the “difference” is, I have a lot of work to do before I reveal more details!

I hope you have had a great week, rich with blessings, family, good health and of course, a good dose of weaving!


Filed Under: Floor Loom Weaving, Rigid heddle weaving Tagged With: floor loom weaving, Kelly casanova weaving lessons, rigid heddle weaving

Which loom to buy, part 3 – the Floor Loom

by Kelly 3 Comments

It’s hard to know where to start the discussion on floor looms for a few reasons. There are many, many types of floor looms available from many different loom companies. Out of the three types of looms I have discussed in this series, a floor loom is the one that requires the most research on the part of the buyer to ensure the right loom is purchased.
My floor loom is the David 2 by Louet
There are 3 main types of floor loom available –
* Countermarch
*Counterbalance
*Jack
 
I’m not going to go into the specifics of each loom here, (my Introduction to Floor Loom Weaving course does that) but there are obvious differences between each one that should affect your decision making. 
 
Lets have a look firstly at the benefits of a floor loom in general:
*Complex patterns can be achieved
*There are many choices for how many shafts, with many looms having upgrades to more shafts later.
*They are large and sturdy pieces of equipment
*They can take long warps and most looms have the ability to install a second warp beam for even longer warps.
*You can weave fast because your feet are operating the treadles, which in turn operate the shafts and there is no need to set the shuttle down in between picks.
*There are many resources available for floor loom weaving, in the form of books, online classes and face to face classes.
*Materials and parts and generally readily available.
*There are so many choices, from a basic 4 shaft to a computerised loom (depends on your budget!)


And, the negatives:
*Many floor looms are large and heavy, so not portable
*Depending on the loom, it can take up a lot of space – so you need to have room to house the loom as well as clearance space so that you can move around the loom for warping etc.
*A floor loom can be very expensive.
*The warping/threading process can be hard on your back.
*Warping is a long process, it takes a while to get used to this fact!


Would I recommend buying a secondhand floor loom? 
Yes and no! If you already have a working knowledge of floor looms so that you can make an educated decision, then absolutely look for a secondhand loom, which can literally save you thousands of dollars.
BUT…
If you are completely new to floor loom weaving, have never used one and are not familiar with the parts and what they do, I would be very cautious about buying secondhand. Many people sell looms from a deceased estate or similar and they really know nothing about weaving or looms – even whether it is in working order. This can actually work in your favour if you are educated because the vendor may sell cheaply, not understanding the value of what they are selling!
 
When looking at a second hand loom ask yourself – 
*Does it have all the necessary parts? If not, what is the make of the loom? Are these still made? Am I going to be able to get replacement parts? If the loom is in pieces – when was it last put together? Am I able to put it together? If the reed is rusty, am I confident that I can return it to it’s former glory? Am I going to regret this purchase because I have not researched enough? And, so on!
 
A great way to buy second hand can be through a weaving guild. The loom will generally have been well cared for and in use. The seller may be willing to give you a lesson on setting up. You can try it out before you buy in many cases. They will know the history of the loom. 
 
Try not to be impatient, wait for the right loom at the right price.
 
The best advice I can give to someone who is in the market for a new or used loom is DO YOUR RESEARCH! Talk to people, read articles, get advice.
 
I hope this series has helped you to understand more about different types of looms.
 
For more on floor loom weaving, check out my free Youtube videos:
 
Tools for floor loom weaving
David 2 by Louet Review
Just me weaving
 
How noisy is the David 2?
 
Or have a look at my Introduction to Floor Loom Weaving Course. 
 
Until next time, Happy Weaving!


Filed Under: Floor Loom Weaving, Weaving Tagged With: floor loom, floor loom weaving

Towels just for moi!

by Kelly 3 Comments

 I recently completed a project that I undertook just for me. Most of my weaving is for classes, patterns or customers, so to set aside the time to weave something for myself was pretty special!


As you may already know, I make bread for my family. I use kitchen towels to cover the rising dough and to cover the finished loaves as they cool. Perfect! Bread towels were what I needed!
I warped with 22/2 cottolin in natural with a red cotton stripe to accent.

Then I decided on M & W threading and some 2/2 twill variations.


I changed up the colour for each new towel so that some have bold patterns and others subtle.


For this one I changed both the colours and the treadling for a feature border.
To finish off, a little embroidery.


I am very happy with my new set of towels. Being hand woven with quality yarn, I know these will last many years in my kitchen.

How about you? Do you find that you’re always weaving or making for someone other than yourself? Perhaps you want to follow my lead and put aside some time to make something special just for you!

Filed Under: #weaveforme challenge, 4 shaft weaving, Floor Loom Weaving, Weaving Tagged With: 4 shaft weaving, floor loom weaving, weaving

New Introduction to Floor Loom Weaving course

by Kelly 5 Comments

I am so excited to bring you the news that this course is now available! The Introduction to Floor Loom Weaving course is my biggest class yet, with almost 4.5 hours of video instruction plus printable PDFs.


I designed this course for new floor loom weavers, or those who simply want to “make friends” with their loom and gain confidence weaving. 
The topic list is huge, but includes loom anatomy, calculations, reading drafts, warping, dressing the loom, the mechanics of weaving, and much more! 


The course is project based so participants will end up with a beautiful 3 shaft double cowl scarf. 

I hope to make follow up classes to take students through 4 and 8 shaft projects in the near future.

If you’re interested in this course, visit my Online Weaving School, where you can watch a preview for the class. It is available as a single purchase, or, if you are a subscriber, this course is included in your subscription, simply login to view.

Happy Weaving!

Filed Under: Floor Loom Weaving, Weaving Tagged With: floor loom weaving, Kelly casanova weaving lessons, learn to weave, online weaving class, scarf

Shop update

by Kelly 2 Comments

I don’t get much time to update my little Etsy shop these days, and I must admit, it’s not my favourite task and gets put off a fair bit. But today I have some new items and they are all beautiful, so please take a moment to browse!

My favourite first – my newest silk scarf, oh boy, do I love this one! A blend of 60/2 silk in purple, fuchsia and orange woven in an undulating twill. Pure luxury!

Next up, hand dyed tencel (you have my permission to drool) combined with mercerised cotton in advancing twill.


Love the colours, love the sheen.

Another scarf, this time in cotton and a beautiful diamond twill variation.
This beauty was a labour of love – woven from my hand dyed, hand spun local Australian merino. The colours remind me of Monet’s Garden.

Is that enough to whet your appetite for now? There are more than what is pictured here, you will have to visit my Etsy shop to see the rest!

Filed Under: Uncategorized Tagged With: Etsy, floor loom weaving, hand woven, weaving

Overshot uh-oh!

by Kelly 1 Comment

I tried overshot on 4 shafts for the first time. I put on a massive 8/2 cotton warp (my first mistake – too wide, too long!) thinking I would have a couple of table runners or plenty of baby blankets by the time I was done.
The threading was somewhat complicated, but I got through that and started weaving.
I don’t know, maybe I just don’t enjoy weaving overshot or maybe it’s a bit of inexperience, but this project became a struggle.
Some threading errors became apparent and then the breaking warp threads started. My progress was slow, very slow!
The errors stick out like a sore thumb, but I still wanted to share these photos, firstly to share the disappointments and imperfections, but also in appreciation of the pattern, which is actually pretty cool. The above piece was woven with black bamboo for the pattern and white bamboo for the tabby.
The back of the same piece. 
This was my favourite piece, I used a hand dyed, variegated tencel for the pattern and a mercerised cotton for the tabby.
The back of the same piece.
And this piece I quite like also. I used a thicker hand dyed cotton (8ply) for the pattern and a white bamboo for the tabby.
 
So, what did I learn from this humbling experience? That I’m not as good as I thought I was? Definitely. That my slow progress on the floor loom is starting to frustrate me? Uh huh. That I want to do something about it? Yes!
I’m not giving up, I’ll keep trying and I think that, for now, that is the best I can do.

Filed Under: 4 shaft weaving, Floor Loom Weaving, Weaving Tagged With: 4 shaft weaving, floor loom weaving, weaving, weaving yarn

  • « Go to Previous Page
  • Page 1
  • Page 2
  • Page 3
  • Go to Next Page »

Primary Sidebar

Categories

Archives

Meta

  • Log in
  • Entries feed
  • Comments feed
  • WordPress.org

Copyright © 2025 Kelly Casanova Weaving Lessons on the Foodie Pro Theme