• Skip to main content
  • Skip to primary sidebar

Kelly Casanova Weaving Lessons

  • Hi! I’m Kelly!
    • Disclosure
  • Online Weaving School Class Index
    • Common account issues
    • Common technical issues
    • What do I get with a membership?
  • New to rigid heddle weaving? Start here!
    • Never heard of the rigid heddle loom?
    • How to weave neat edges on the rigid heddle loom
    • Rigid heddle weaving
    • Rigid Heddle Weaving Patterns
  • Patterns
  • Subscribe

4 shaft weaving

Open vs Closed Boat Shuttle: What’s the Difference & Which Should You Use?

by Kelly Leave a Comment

If you’re new to weaving or upgrading your toolkit, you might be wondering: What’s the difference between an open and closed boat shuttle—and does it really matter which one I choose? In this post, I’ll walk you through the key differences, the pros and cons of each style, and tips on choosing the best shuttle for your weaving projects.

🧵 What Is a Boat Shuttle?

A boat shuttle is a weaving tool used to pass weft yarn through the shed (the opening created when you raise or lower the warp threads). It typically holds a bobbin or quill on a metal spindle that allows the yarn to feed off smoothly as you weave.

Boat shuttles are most commonly used with floor looms or table looms, but can also be advantageous for rigid heddle weaving.

There are many types of boat shuttle but today we’re going to discuss open and closed boat shuttles with a side feed.

What is warp diving?

I have to explain what I mean by “warp diving” as I’m going to use the term a number of times! It sounds like a whole lot of fun but it’s really not! 😆 So, a warp dive is when your shuttle angles downward at some point during it’s transition from your hand to the opposite side of the loom.

This causes the tip of the shuttle to break through the bottom shed of the weaving and, well, you can probably imagine the outcome.

Warp dives range from minor (phew, the cloth beam fabric caught it in mid dive) to spectacular (picture yourself, or me if you like, crawling around under the loom trying to locate the exact landing position of the shuttle).

OK, that should be crystal clear to everyone now? 😆

What Is an Open Boat Shuttle?

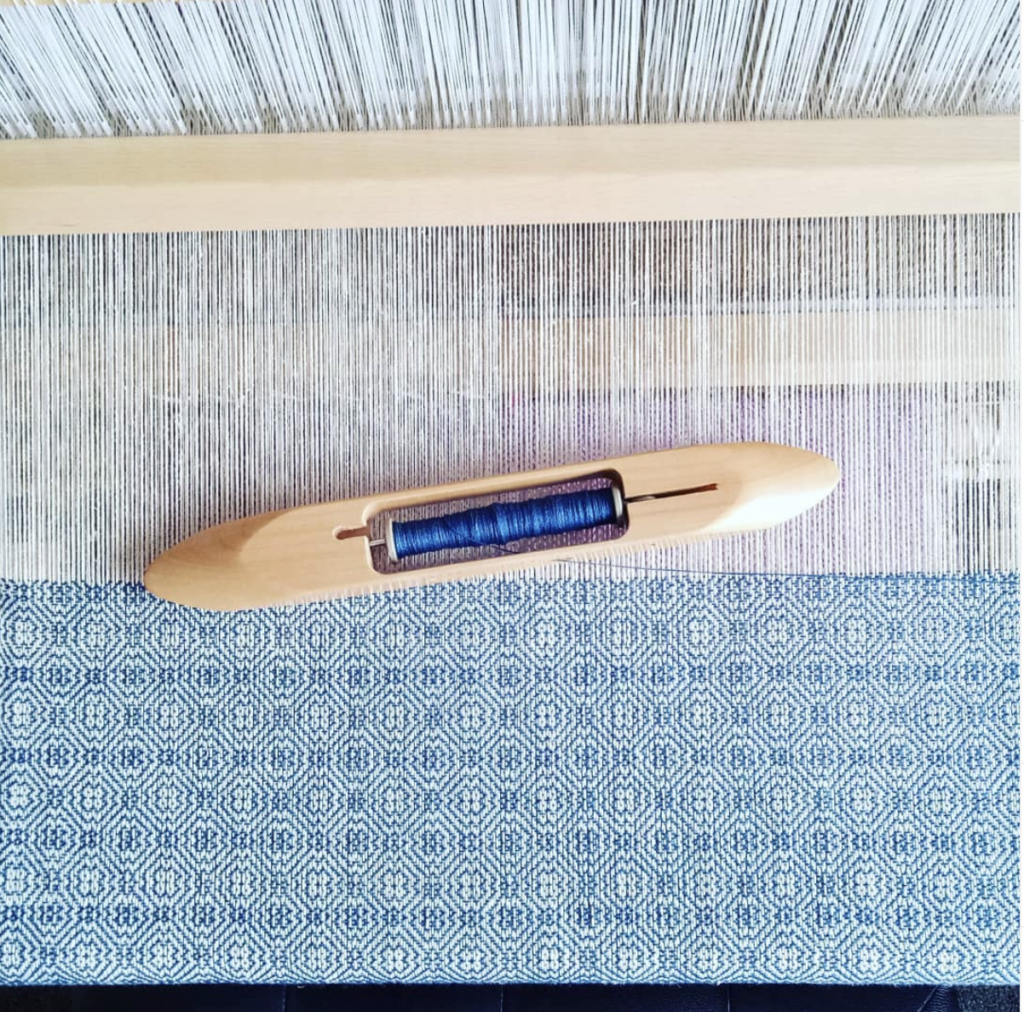
An open boat shuttle is open on the top and the bottom, allowing the bobbin to be visible and easily accessible. You can pop the bobbin in and out quickly, because you can push on it from underneath, which makes unloading and reloading a breeze.

✅ Pros of an Open Boat Shuttle:

  • Easy bobbin changes – slide one out and another in with minimal fuss.
  • Good visibility – see how much weft yarn you have left at a glance.
  • Lightweight shuttle – Without the additional wood to enclose the bottom of the shuttle, an open boat shuttle will usually weigh less and be light to handle.
  • Finger control – Some weavers (I don’t use this technique myself, but many do) like an open shuttle for it’s tactile aspect. They like to have more of a feel for how the thread is feeding off the shuttle.
  • Slimline design – The height of an open shuttle is usually lower, making it great for a small shed.

⚠️ Cons:

  • Slightly more exposed, so the bobbin can jump around a little if the shuttle isn’t smooth-running. It’s important not to overload your bobbin so that it ends up protruding beyond the bottom of the shuttle and rubbing up against your warp threads.
  • May not be as suitable for wider warps – Due to the light weight of the shuttle, some weavers may find it difficult to throw far enough when weaving on a wide warp. This can depend on the length of the shuttle too. A longer shuttle is more appropriate for a wider warp.
  • More likely to warp dive – This can depend on the design of the shuttle, but my experience has been that warp diving is more common with an open shuttle.

What Is a Closed Boat Shuttle?

A closed boat shuttle has a more enclosed body with smaller slots or holes where the yarn exits. The bobbin is housed inside, which can give a smoother glide through the shed in some setups.

✅ Pros of a Closed Boat Shuttle:

  • Smooth and solid – glides easily over the warp, especially on high-tension looms.
  • Protects the bobbin – less chance of yarn catching or bobbin misalignment.
  • Prevents warp diving! – A nicely shaped closed shuttle can glide so straight and smooth that you will never have to experience the pain of a warp dive!
  • Heavier construction – Due to being enclosed, the closed shuttle will be slightly weighted than an open shuttle.

⚠️ Cons:

  • Can be slightly slower to change bobbins – If there is no finger hole, changing a bobbin can be fiddly as you can’t adjust from underneath.
  • Heavier – this is not necessarily a con, just something to point out for consideration!
This closed shuttle by Pickers Ridge has a super handy finger hole for pushing the spindle up to load a new bobbin.

Size and Weight Comparison

Here are a few examples from boat shuttles I personally own:

Ashford 11″ open boat shuttle – 71 grams

Ashford 13″ open boat shuttle – 113 grams

Ashford 15″ open boat shuttle – 181 grams

Pickers Ridge hand crafted 13″ closed boat shuttle – 117 grams

Pickers Ridge hand crafted 13″ open boat shuttle – 105 grams

Leclerc 15″ flying shuttle – 494 grams

Schacht 15″ end feed shuttle – 189 grams

Which Shuttle Should You Choose?

Here are a few quick tips to help you decide. Take these with a grain of salt because at the end of the day, shuttle choice is heavily influenced by personal preference and specific project needs:

SituationBest Shuttle
You are challenged by warp divesClosed boat shuttle
Your loom has a smallish shedOpen boat shuttle (lower profile)
You like to see and feel how much yarn is leftOpen boat shuttle
You use a high-tension floor loom with a wider weaving widthClosed boat shuttle
You want a quick and convenient workflow for narrower warpsOpen boat shuttle

Of course, many weavers like to own both types and switch depending on the project.

Bonus Tip: Choose Quality

Whether you choose open or closed, make sure your shuttle is:

  • Well-balanced and glides easily across the warp.
  • Made of smooth, durable wood to be long-lasting.
  • Compatible with your loom’s shed height.
  • Not just pretty to look at but also comfortable and practical to use.

A good-quality shuttle can make a big difference in your weaving speed and enjoyment.

*This post contains affiliate links. For further information, please see my disclosure policy.

Make the choice that fits you best!

There’s no one-size-fits-all answer—but understanding the pros and cons of open vs closed boat shuttles helps you make an informed decision that suits your weaving style. If you’ve never used a boat shuttle before, see if you can try one out at a weaving supplier, guild or with a friend.

If you are a rigid heddle weaver you might be wondering if boat shuttles are a tool that you could use? Well, head on over to this article next to find out all about using a boat shuttle with a rigid heddle loom!

👉 Have a favorite shuttle? Let me know in the comments! Share the details so other readers can learn and make informed choices 😊

Until next time…

Happy Weaving!

Filed Under: 4 shaft weaving, 8 shaft weaving, Floor Loom Weaving, Rigid heddle weaving, Weaving Tagged With: boat shuttle, boat shuttle comparison, closed boat shuttle, open boat shuttle

Welcome to The Online Weaving School

by Kelly 59 Comments

Are you new to the Online Weaving School – Kelly Casanova Weaving Lessons? This is a guide to help you get started and find the right class for you.

Already a member? Log in here!

Hi, I’m Kelly!

I am very blessed to be able to pass my passion for weaving on to thousands of students all over the world.

At Kelly Casanova Weaving Lessons I teach in a way that is relaxed and unrushed. I share everything that I can think of to help you grasp a concept, and most classes are step by step, project based learning.

I don’t feel like a teacher, more a weaving friend who is eager to show you some really cool things!

So, grab a cuppa, pull up your weaving chair, and let’s get learning!

New to rigid heddle weaving? Start here!

Quick course guide finder

Memberships

Premium Membership
6 Month Membership
Monthly Membership

Would you like to know more about memberships and how they work? Please click here.

Free classes

All free classes

All classes

Full class library

Classes by loom type

Rigid Heddle Loom
Table Loom
Floor Loom
Inkle Loom

Classes by weaving level

Beginner
Experienced
Advanced

Frequently Asked Questions

FAQ’s

Teachable Tutorial

How to use the site

Technical issues

Fixing common technical issues

Account issues

Common account issues

Popular Classes

Filed Under: 4 shaft weaving, Floor Loom Weaving, Online Weaving School, Weaving Tagged With: learntoweave, onlineclasses, onlineweavingschool

New towels for our new home!

by Kelly 19 Comments

I had two reasons for warping up my floor loom for some new towels recently.

With our house moving date looming closer, I felt the need for a “sanity project”. While all of my yarns and equipment were being packed away, I kept a few cones aside so that I would have something to weave during the in between time of packing up house and moving to the next one.

*This post contains affiliate links. Please see my disclosure policy for further details.

I also wanted to have some brand new kitchen towels to adorn our “new to us” kitchen, as all my current towels are ageing and starting to look a little shabby. I wanted special new towels for our special new place. This project turned out to be special in another way, but I’ll tell you about that shortly.

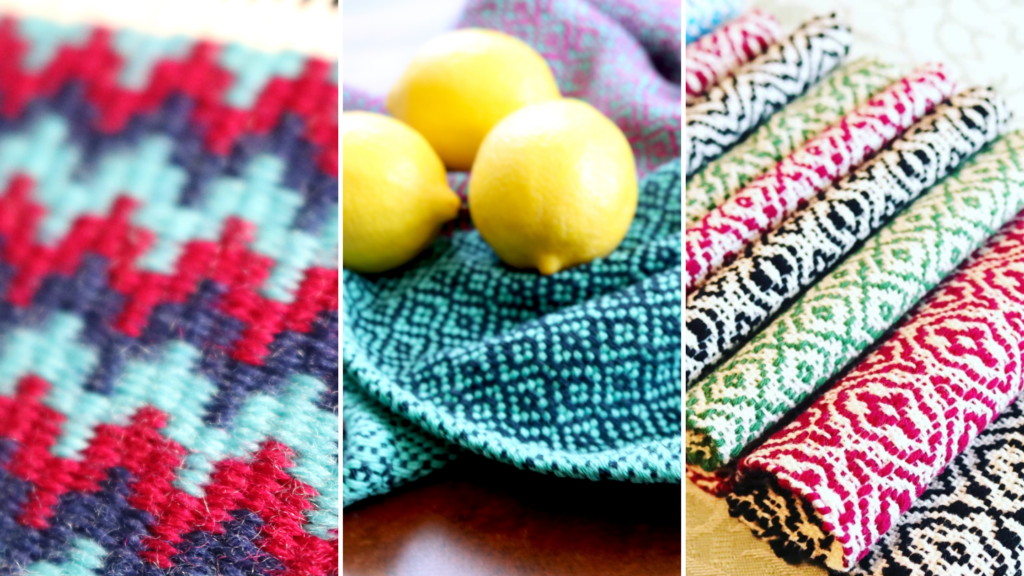
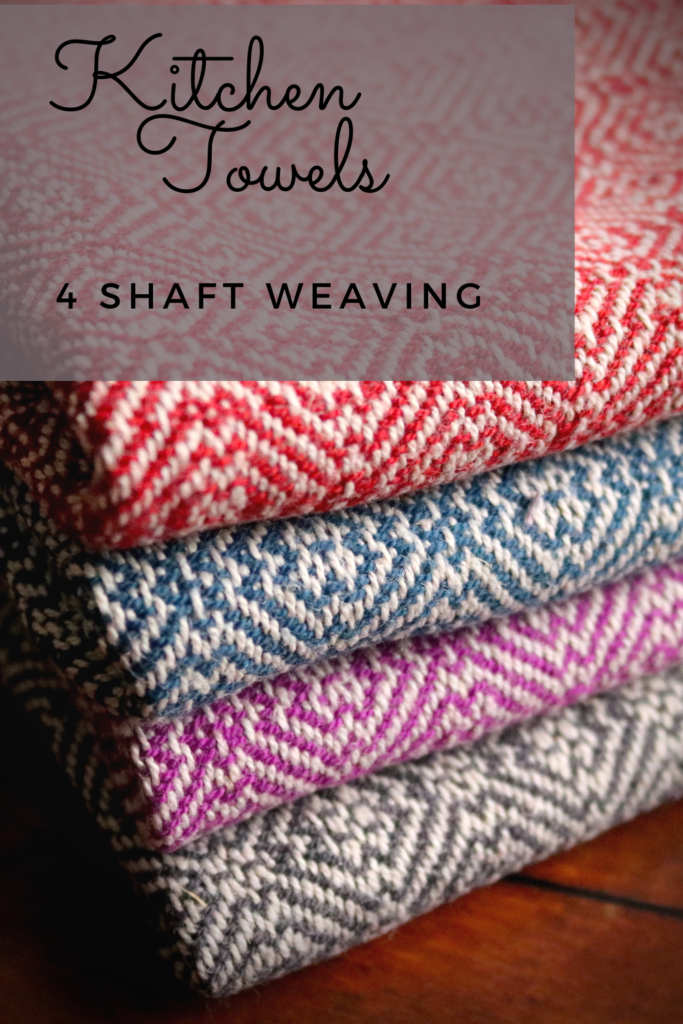
I chose one of my all time favourite drafts for kitchen towels, a 4 shaft twill on M and W threading. I love the design and I love the resulting fabric so I didn’t have to think too hard on that one!

The threading for this draft is not difficult and the tie up is a regular twill tie up – all things that I’m very familiar with and that make the process easy for me. I used my Louet David 2 Floor loom (link is for the new David 3), which has 8 shafts but for this project I wove on 4 shafts.

Having woven kitchen towels with this draft before, I was also sure of the yarn I wanted to choose. My favourite weaving yarn for soft and absorbent tea towels is 8/2 cottolin. The cottolin I use is 60% organic cotton and 40% linen. It’s a great yarn for those who want to incorporate a little linen but want something that is a bit easier to use than 100% linen.

For the warp I used:

Maurice Brassard 8/2 cottolin in Blanchi

For the wefts I used (one colour for each towel):

Maurice Brassard 8/2 cottolin in Charcoal

Maurice Brassard 8/2 cottolin in Magenta

Maurice Brassard 8/2 cottolin in Royal

Maurice Brassard 8/2 cottolin in Brick

…………………………………………………………………………………………………………………………………………………………..

Tips for working with cottolin:

  • Cottolin sheds a lot of fibre whilst on the loom. It is a more course yarn than just cotton on it’s own, which is very smooth. I sometimes opt to wear and apron while weaving and try not to wear anything black! The shedding nature may be irritating to some who are sensitive, it’s not a big problem for me but does make me sneeze sometimes! It also means that you will want to vacuum your loom when your project is finished or even during the project if the tiny stray fibres bother you.
  • It feels quite stiff on the loom. I remember the first time I wove with cottolin, I felt disappointed that the towels felt a bit rough. A hot machine wash was like a touch of magic – the towels softened up and the pattern came together beautifully. This is another thing that I love about cottolin, it softens more with each wash.
  • Your first one or two uses of your towels to dry dishes will not be optimal. The cottolin can leave small fibres on your dishes initially, and the towels are not as absorbent as they could be. Don’t lose faith! With a bit of use and a couple of washes, they will become a huge asset to your kitchen!

…………………………………………………………………………………………………………………………………………………………………

C

I tried some different techniques in the weaving of these towels, to help counteract some of the issues arising as I wove.

Firstly, I doubled my floating selvedges – something I haven’t done before. My reasoning for this was that for the towels I’ve woven in the past, the first place they would start to wear down was at the edges. A doubled floating selvedge gave a more defined, and stronger edge to the fabric.

Secondly, I switched to beating on an open shed. It is very much my habit to beat on a closed shed, but my beats were feeling a little stiff and the weft wasn’t settling as nicely as I would like. As soon as I switched to open shed beating, everything settled down and became much more fluid. Lesson learned – Don’t be stuck in your ways, be open to experiment from project to project as needs dictate 😉

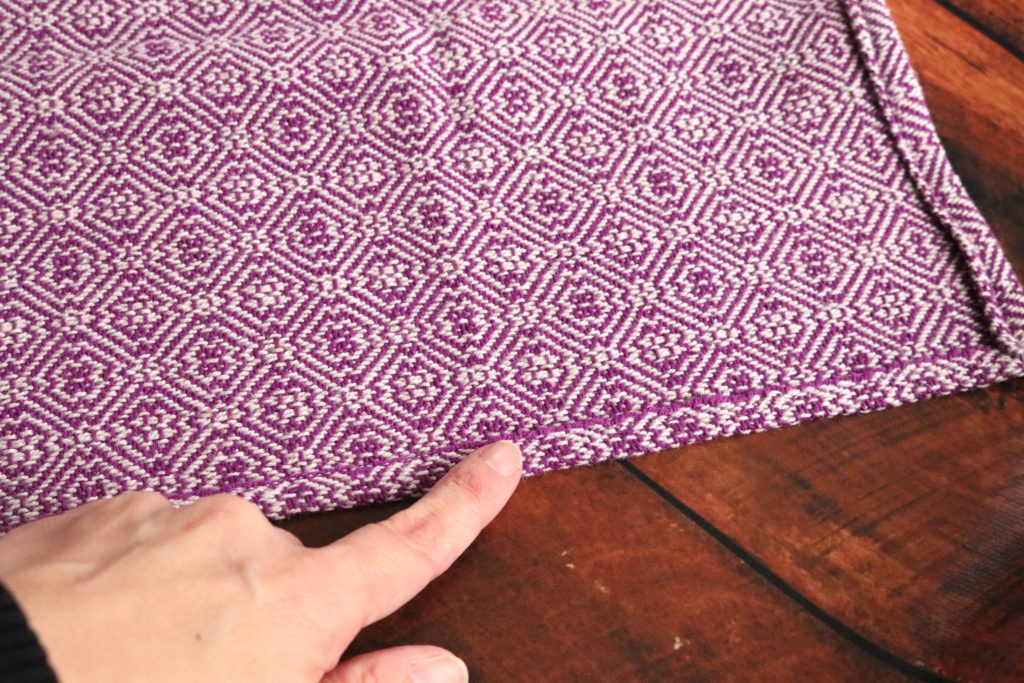
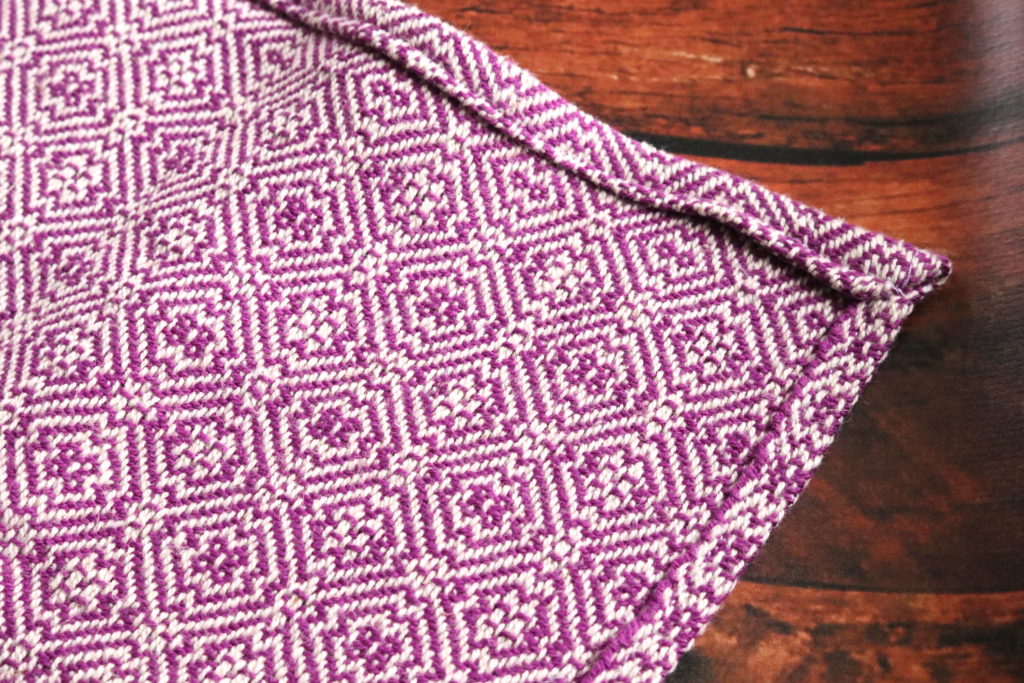
And thirdly, when hemming my towels, I decided to also hem the long edge. I have never done this before, but as I already mentioned, the edges are susceptible to wearing and I think this single turned hem will make a difference. Time will tell, but perhaps I will make this a regular technique for my towels.

Hemming the long side of the towel with a single fold hem.
Finished hems. The ends of the towel have a double fold hem.

I mentioned that this project turned out to be special in another way. My husband has been interested in having a go on the floor loom for some time now, so I decided the last towel of the warp would be a good opportunity. I wasn’t too worried if it didn’t turn out well, as it was just for us.

Imagine my surprise when he took to it like a duck to water, quickly declared that it was “fun” and promptly finished off the second half of the towel I had started on! After giving him a few basic pointers, he surprised me with how quickly he picked up the steps. Now he is very interested in weaving more and even learning how to dress the loom. Victory! 😀

If you love this pattern draft as much as I do, you can find it on page 88 and 89 in Anne Dixon’s Handweaver’s Pattern Directory – a most excellent book and awesome resource for 4 shaft drafts.

I also recommend Patti Graver’s Next Steps in Weaving for weaving at this level.

If you’re interested in getting started in floor loom weaving, check out my Introduction to Floor Loom Weaving, my Follow Up Floor Loom Weaving, or save by purchasing a bundle of the two courses together.

I made a little video to compliment this blog post to help you feel confident about cutting your hand woven fabric. I explain my 3 Key Ingredients to cutting without fear:

If you have any questions about my towel project or using cottolin, let me know in the comments below!

Until next time…

Happy Weaving!

Filed Under: 4 shaft weaving, Cutting Hand Woven Cloth, Inspiration, Neat edges, Weaving, Yarn Tagged With: 4 shaft weaving, cutting cloth, cutting hand woven cloth, floor loom weaving, hand woven towels

Avoiding back pain at the floor loom

by Kelly 24 Comments

This is an issue close to my heart, as I have a lower back injury. Over my years of weaving, I’ve had to find the best ways to avoid pain while being able to indulge in as much weaving as possible.

The more time you spend thinking about and implementing comfortable weaving, the more time you will be able to spend actually doing it into the future.

Firstly I’m going to talk about seating.

There are a few important factors here. Generally, a regular chair cannot be used for weaving on a floor loom, so we have to look at the best suitable alternatives.

So, what are these alternatives?

Most floor loom manufacturers also make weaving benches that can be purchased separately but are made specifically for your loom. Benches can be very pricey.

I’ve seen some weavers seated on exercise balls for threading the loom, which allows you to get very close to the shafts – I don’t intend to try this myself, but it’s another option.

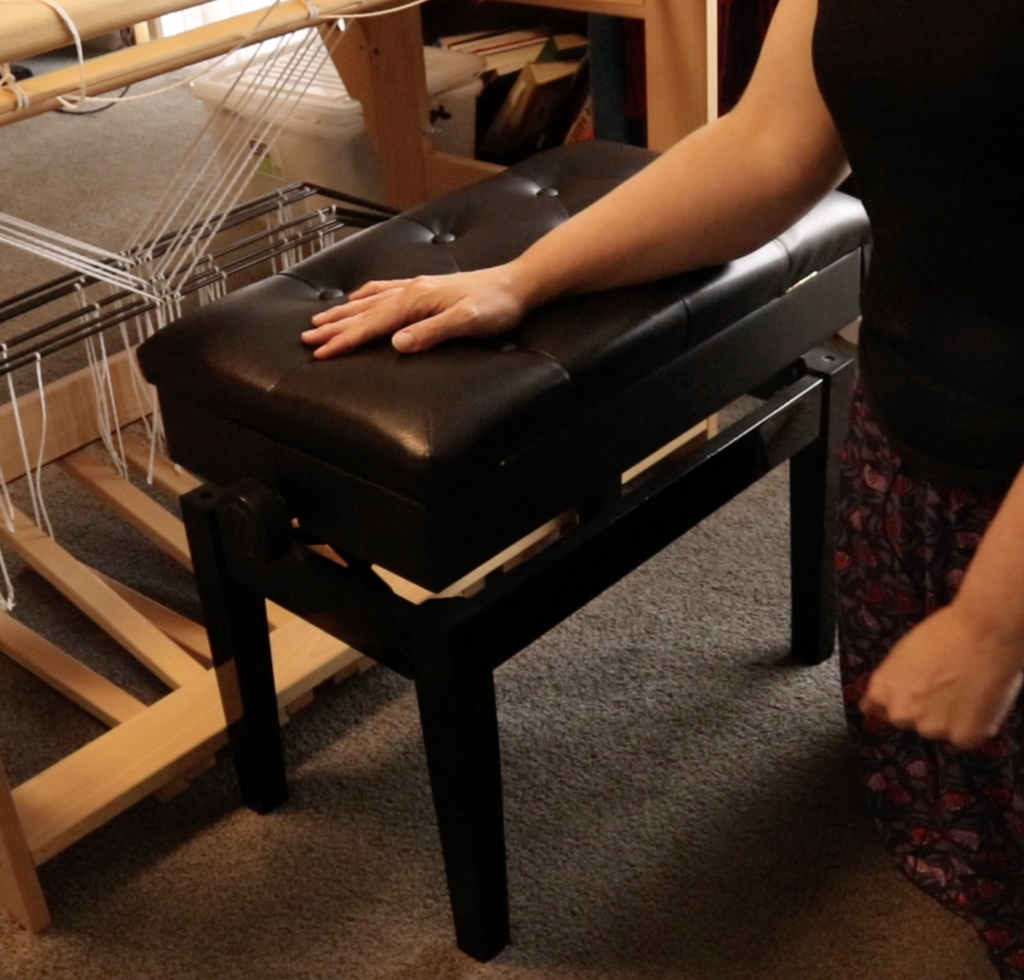
I have been fortunate to find the perfect seating option for me. I use an adjustable, padded piano bench. Let me tell you why I love this option:

  1. It’s height adjustable.

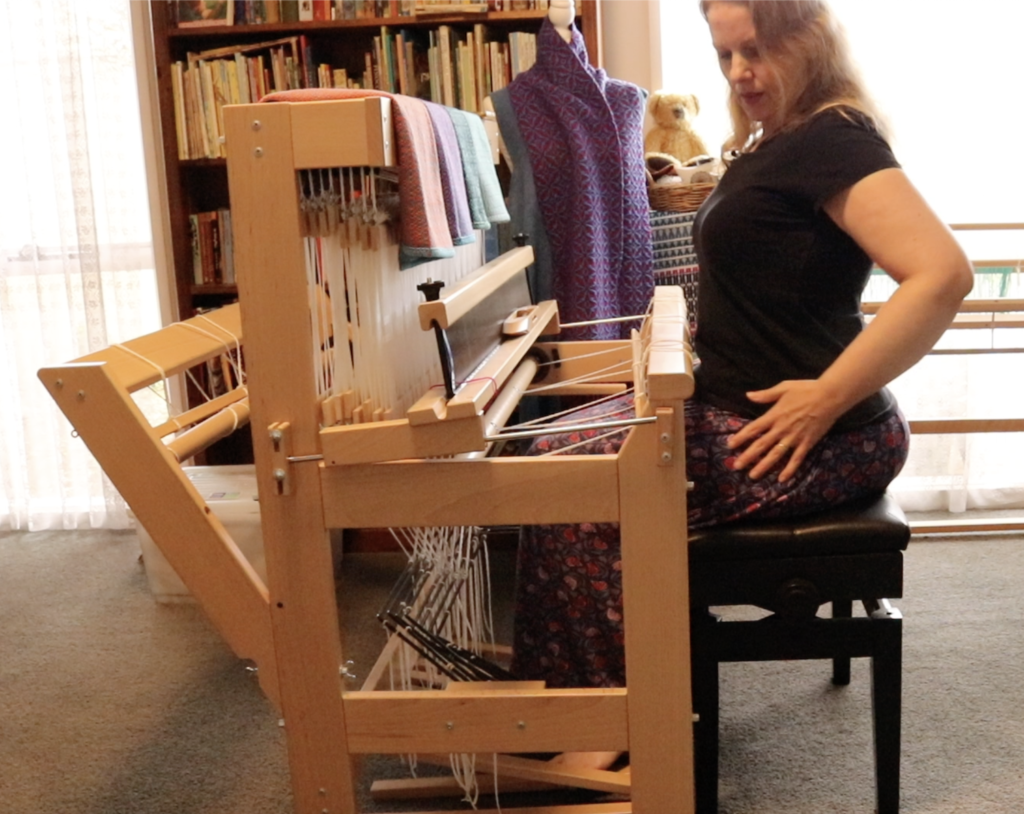
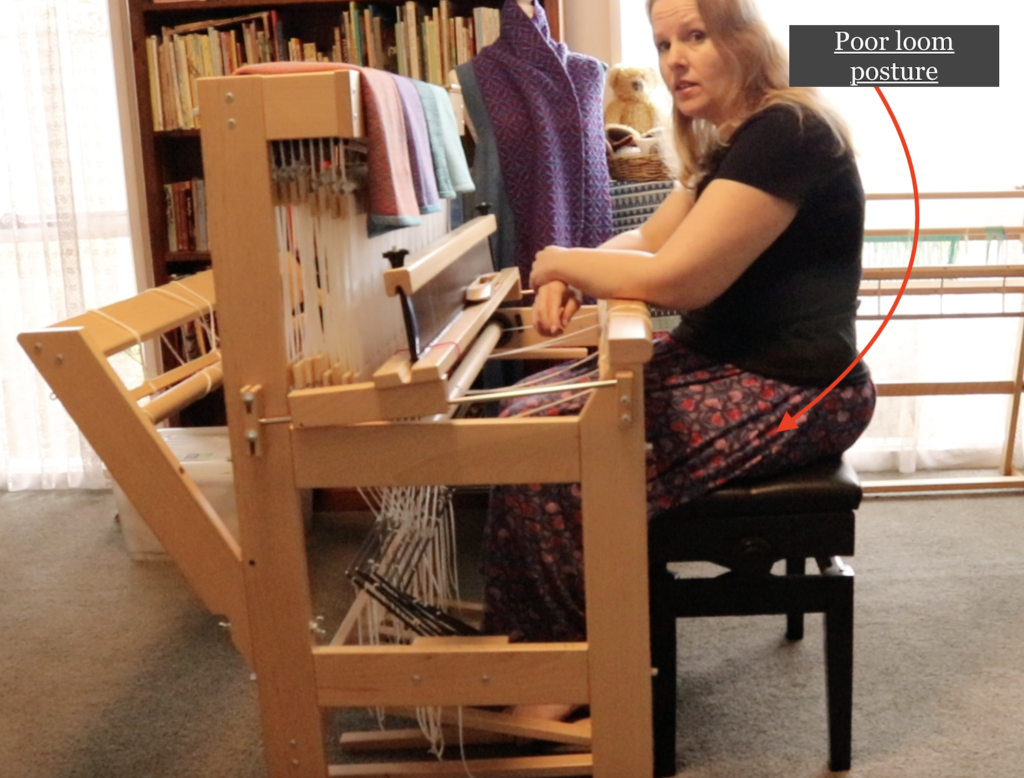
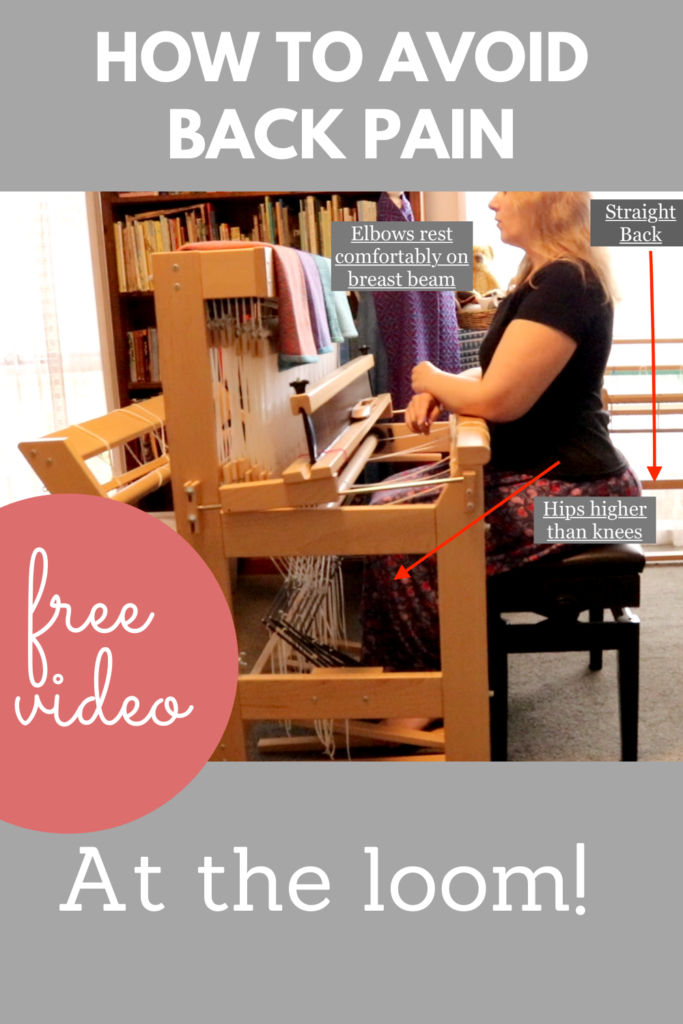
    An adjustable bench is important because it allows you to adjust your seated height to suit the loom. Your posture at the loom is crucial to your long term back health. Your elbows should be able to rest on the front cloth beam without you having to raise them up. Your hips should be higher up than your legs (like they are when you’re driving a car) because otherwise you’re going to have to exert more pressure when treadling and then – hello back pain!

2. It has ample seating space.

When I was looking at buying a weaving bench, all I could think when I saw commercial weaving benches is “they obviously weren’t built for weavers with generous lower proportions!” The piano bench accommodates my… ahem… ample behind (🙈) very well because it is wide enough, but not so wide as to be a difficulty.

3. It’s padded.

I can’t imagine sitting on a non padded bench, ouch. If you can get something with padding built in, that is better because you don’t have to contend with it slipping around. 

4. It has 4 legs.

This is really useful for the threading stage, as I can angle the bench so that two legs sit inside the front of the loom, allowing me to be closer to the shafts and therefore putting less strain on my back.

If you purchase an adjustable piano bench, try to spend a bit more to get good quality. I did not do this, and am constantly having to tighten bolts because the bench is not as stable as I would like. Eventually I’ll invest in a good one!

Also, don’t get the cheap, fold out piano bench. I do have one of these for my kids to use at the piano, and it’s surprising strong, but you want a bench with four legs, as I already mentioned.

Now let’s discuss some other tips and strategies for keeping your back pain free at the loom.

If you already have pain:

  • Firstly, if your lower back is on fire REST IT! I can’t stress this enough. Do not sit at that loom again until your back has settled down, you will only make it worse. I know it’s hard to take a break but it really is necessary.
  • Take anti inflammatories if needed, use ice or heat – whatever works for you to get your back moving towards normal again. If you’re using medications due to a flair up, do it sensibly and in consultation with a medical professional.
  • If your flare up does not settle down, you may need to see someone who can help you. This may be a chriopractor, a physical therapist, a masseuse – there are options to try and you don’t have to suffer alone!

    As you weave:
  • Try to move a little or shift your weight from side to side as you weave rather than keeping your body really rigid – follow the shuttle with your body, especially if it’s a wide warp.
  • Throw and catch your shuttle in a way that is not causing you to raise your arms unnecessarily or at weird angles.
  • Get in close to the loom. The closer you are, the nearer your reach. You can also naturally brace yourself against the breast beam to beat.

Treadle positioning:

A couple of years ago we bought a new (secondhand) van following an accident where our existing van was written off. The new van was the same company and make as the last one, but was a slightly updated model.

As soon as I began driving the new van, I noticed a difference in the height of the accelerator. The new accelerator was so much higher than the old one! I had to lift my foot higher to depress the pedal. And, guess what? Yep, the hip pain started up and is still a problem. I try to limit my driving, but when I do drive I use cruise control as much as possible so that I’m not having to lift my right foot so much.

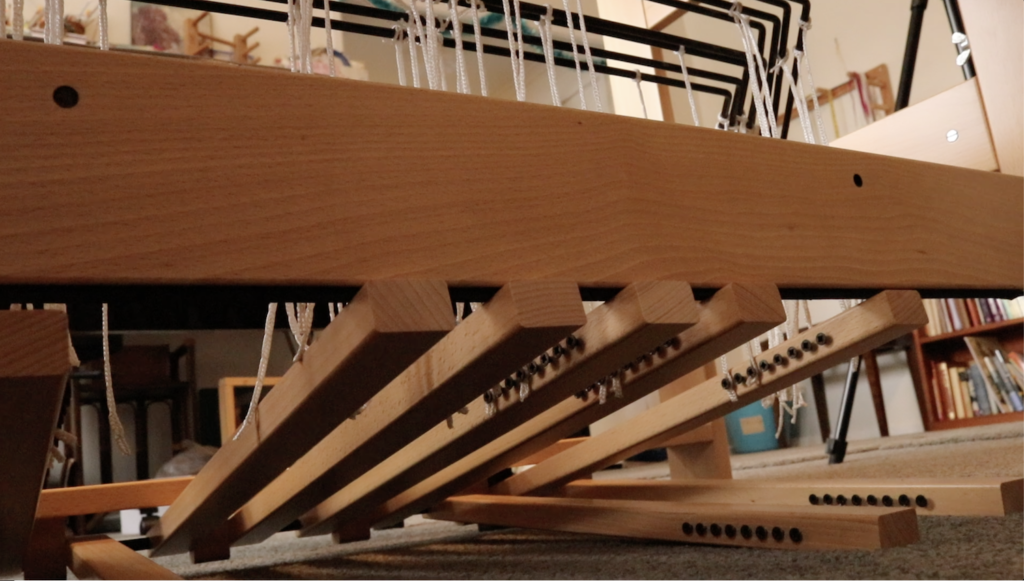
My point? The higher you have to lift your feet to operate your treadles, the more stress you will place on your legs and ultimately, your back. If your treadles are very low to the floor (as they are for my floor loom) you will not have that stress on your body.

You may find that older looms not only have treadles sitting high, you also have to depress them quite firmly. If you do have an older loom, I recommend looking at any modifications you can do to get those treadles lower to the floor.


Take regular breaks.

It’s tempting to stay in the weaving groove and forget about time, but breaks are necessary. Get up, walk, stretch. Don’t sit at the loom for so long at one time that you feel sore and stiff when you get up. Anticipate the stiffness (even set a timer if you need it) and be kind to your body by resting it.

Batching tasks:

This goes hand in hand with the last point on taking breaks. Plan out your project so that you can batch tasks.

For example, if you’re threading for a full width project, unless you are Speedy Gonzales, you have to expect that the threading will take several hours. Plan to do a certain amount at one time or on one day. Make an agreement with yourself like: “Today I will aim to thread half of this project, taking regular breaks. If I start to experience pain, I will stop or only do a quarter of the threading”. You’re still making progress, but you’re not overdoing it.

Another example: “I will aim to make my warp today, dress my loom tomorrow, do half of the threading the next day and the second half the following day etc”. Break the tasks down to keep them achievable. You may end up doing more than you planned because you are pain free, but the point is to have a plan in place.

Accept bodily limitations:

This is a hard one! I’m sure we all wish that we were completely fit, healthy and pain free. But we need to be realistic and accept that we are not perfect. Accept the physical limitations you may have and don’t push yourself beyond them. Work with what you can do and make that your focus.

Sit up straight!

Did you ever here those words from your mother at the dining table? Well, she was right! 😆 You want to sit naturally, not rigidly at the loom, but you also want to keep your back nice and straight. If you find yourself slumping often, go back and check the seating points I discussed. It may be that your bench is not at a correct height.

Overall loom posture is really important. Remember – elbows on the breast beam, hips higher than knees, back straight!

I hope this post has been helpful to you. I have made a companion video so you can see just how I sit at my loom. You can view that here:

If you want to get started in floor loom weaving, my Introduction to Floor Loom Weaving course is perfect. It takes you through step by step processes to give you the confidence to get weaving!

Want to know more about my floor loom? Check out my review by clicking here.

Let’s keep the conversation going! Do you have any helpful tips to add? Any questions? I would love to hear from you in the comments.

Until next time…

Happy Weaving!
Filed Under: 4 shaft weaving, 8 shaft weaving, All about looms, Floor Loom Weaving, Health and home, Online Weaving School, Reviews, Weaving Tagged With: avoid back pain, back pain, floor loom weaving, posture

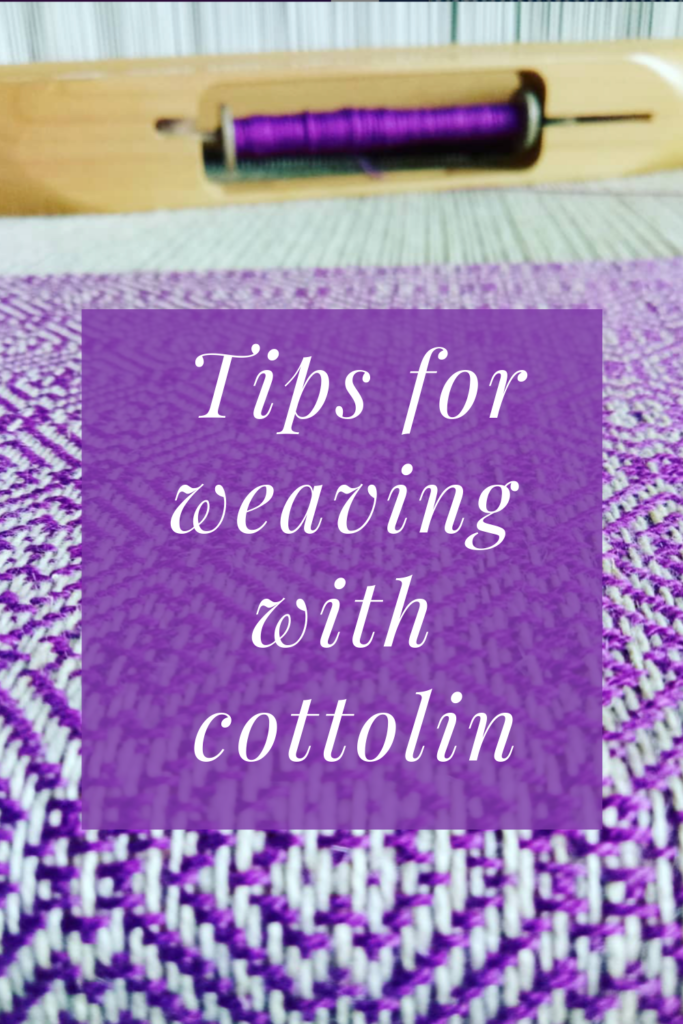
Tips for weaving overshot

by Kelly 9 Comments

One of the great things about having been a blogger for 12 years (did I actually just admit that?!) is that you occasionally get to look back and see how very far you’ve come.

Over three years ago, when my David Louet floor loom was still somewhat new to me, I wrote this post on overshot. If you read it, you will discover that my initial relationship with overshot was not a very positive one.

This post contains affiliate links. For more information please see my disclosure policy.

Back then, I was a little harder on myself as a learning weaver. By now, I’ve realised that weaving, just like life, is a journey that has a beginning but no end. Back then, I thought that my ultimate goal was to be a “master weaver”.

Honestly, I don’t even really know what that means but it no longer matters to me. I just want to be the best weaver I can be, but even more importantly, to continue to be fulfilled, challenged and rewarded by doing it.

Hang on, am I here to talk about overshot or not? Yes, I am!

The happy ending to the initial overshot sob story is that I can weave overshot now. Quite well, in fact! And I also teach it. And I happen to love it, very, very much. Don’t you love a happy ending?

I don’t think there was any particular moment where I thought to myself “I can weave overshot now!” I didn’t even weave any overshot for quite some time after that initial attempt. But slowly it tempted me back, and we started over. It was just a matter of sticking with it, employing some specific techniques and practice, practice, practice until it feels like an old friend.

My love of overshot has only increased with my more recent discovery of American Coverlets. I loved the look of the coverlets and the history behind them before I realised that so many of them were woven in the wonderfully humble 4 shaft overshot.

I’ve put a lot of research time into coverlets this year and have made it a big weaving goal of mine to weave my first coverlet, which is quite an undertaking, but I relish the thought.

I’ve also spent a lot of time actually weaving overshot this year. I released the very successful Overshot on a Rigid Heddle Loom class not long ago.

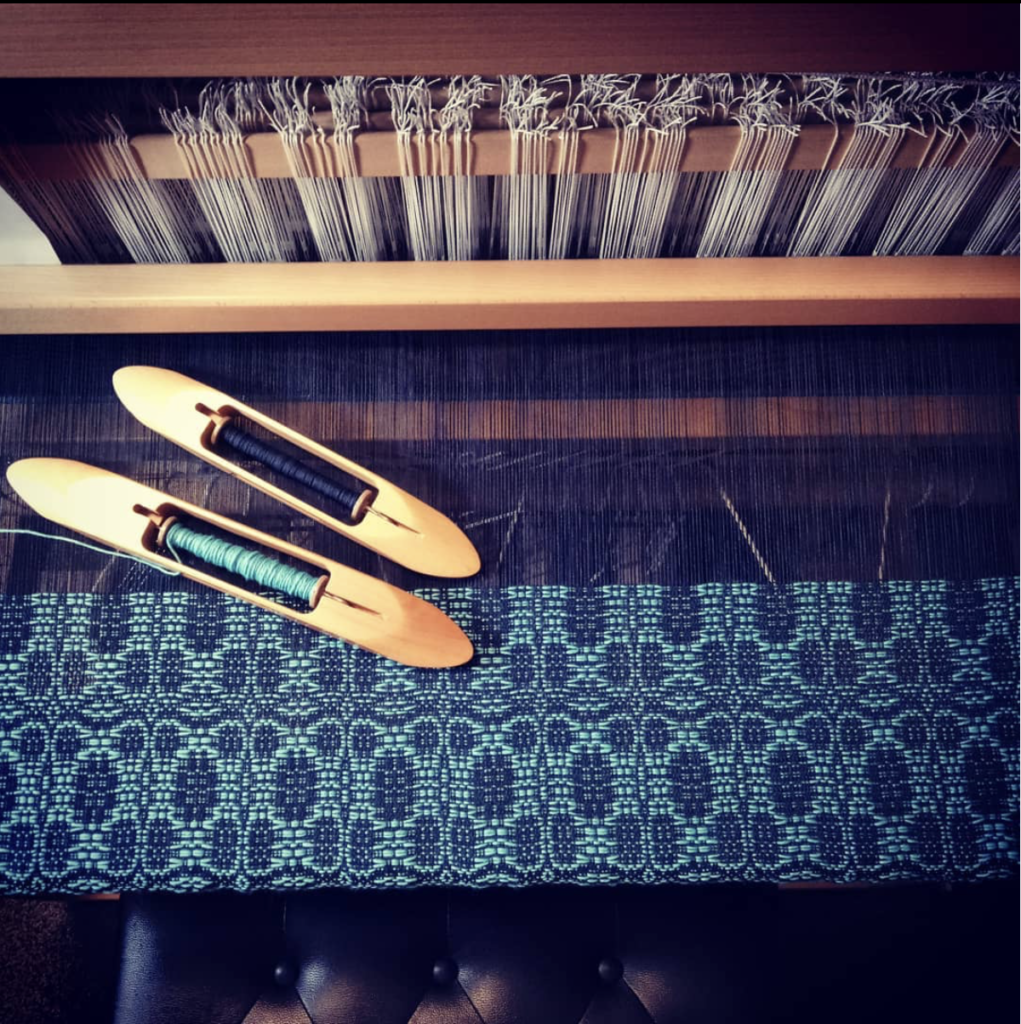
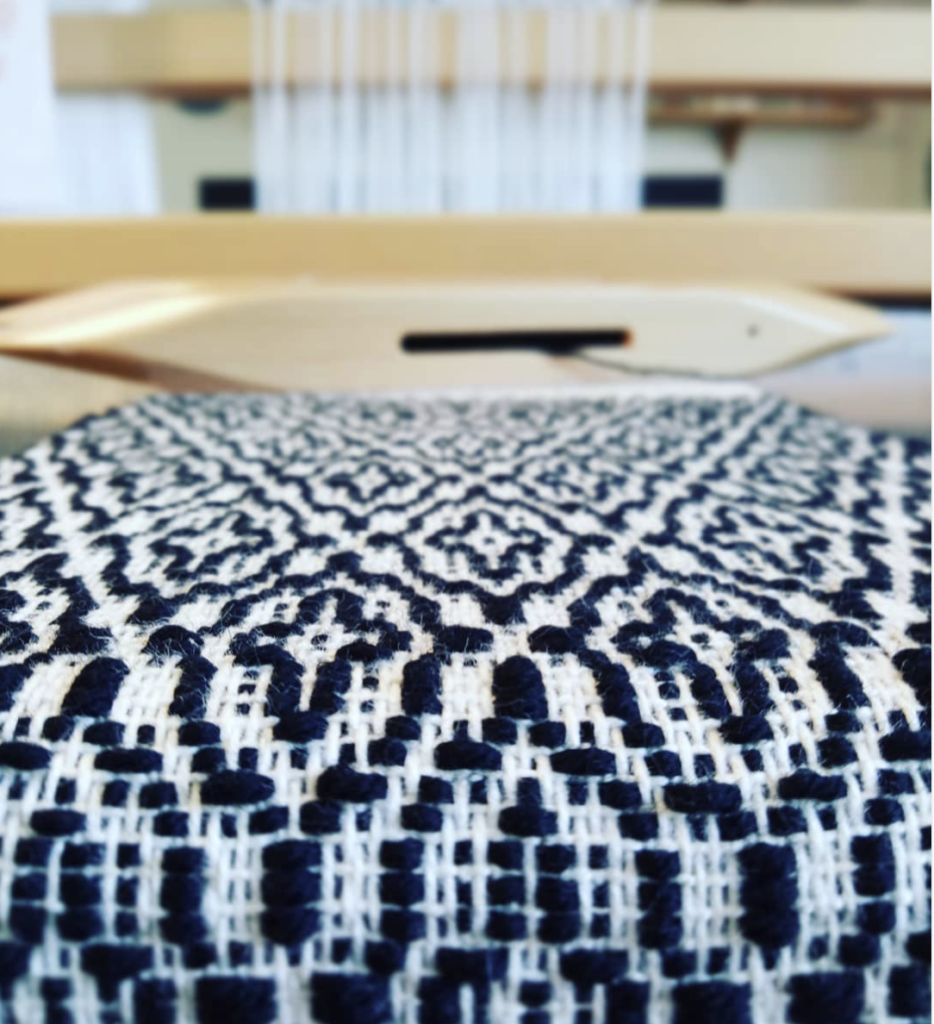
I’ve just completed this magnificent piece on my floor loom for my brand new Overshot on a Floor Loom class.

Incidentally, this photo is now one of my most popular posts on Instagram! I guess other people love it as much as I do.

Now that I have quite a lot of experience weaving overshot, I want to share my best overshot tips with you in hope that you too will fall in love with this wonderful weave structure.

Tip 1 – Take the time to sample

I know, I know, sampling takes time and yarn, it’s true. But it teaches you so, so much. It can also be more economical, as you can test your yarns out for suitability before committing to a larger project. Trust me, sampling is so well worth the time!

Tip 2 – Use appropriately sized yarns

To weave overshot you need a warp yarn, a tabby yarn and a pattern weft yarn. Using the same yarn for warp and tabby works perfectly. For the pattern weft, I like to use a yarn that is twice the size of the tabby/warp yarn. I have experimented with using doubled strands of tabby/warp yarn in a contrasting colour, but it just doesn’t look as good. A thicker pattern yarn is the way to go.

As an example, my current favourite yarn combinations for weaving overshot are:

Warp – 8/2 cotton

Tabby – 8/2 cotton

Pattern weft- fingering weight wool

There are certainly other combinations you can use, and once again, I recommend sampling to find what you love.

Tip 3 – Consider the scale of the pattern

What will the size of your item be? A miniature overshot pattern may get lost in a blanket, but may be perfect for a scarf. As a general rule, a good way to estimate the size of one repeat of your pattern just by looking at the draft is to see how many repeats are in one threading repeat. Also consider the thickness of your yarns and the sett you intend to weave.

Just to give you an idea, my current project is woven at 20 ends per inch with 8/2 cotton for warp and tabby and fingering weight wool for the pattern weft. The weaving draft has 50 threads in one threading repeat. My design repeats on the loom are around 2.5″ wide and just under 5″ long, which is a great size for the 30″ x 99″ throw I’m weaving.

Tip 4 – Give your weft picks plenty of room

I throw my picks gently to avoid drag on the selvedges and therefore preventing excessive draw in. I give a generous angle to the weft pick and keep it soft at the edges. I do adjust the picks at the edges before beating when necessary, but mostly I prefer to leave them alone and let them settle into place on their own.

Tip 5 – Floating selvedges are a must!

This is a non negotiable for overshot if you want neat edges and less headaches! You get used to using floating selvedges very quickly, so don’t stress if you have no experience with them.

Tip 6 – Don’t twist weft threads

This is another selvedges tip. I’ve experimented with crossing the two weft yarns at the selvedge to see whether it gives a neater edge, but it doesn’t, at least for me. So, instead of twisting the two wefts at each selvedge when throwing a new pick, I just let them follow one another sequentially and my edges are much neater that way.

Tip 7 – Will the pattern weft bloom?

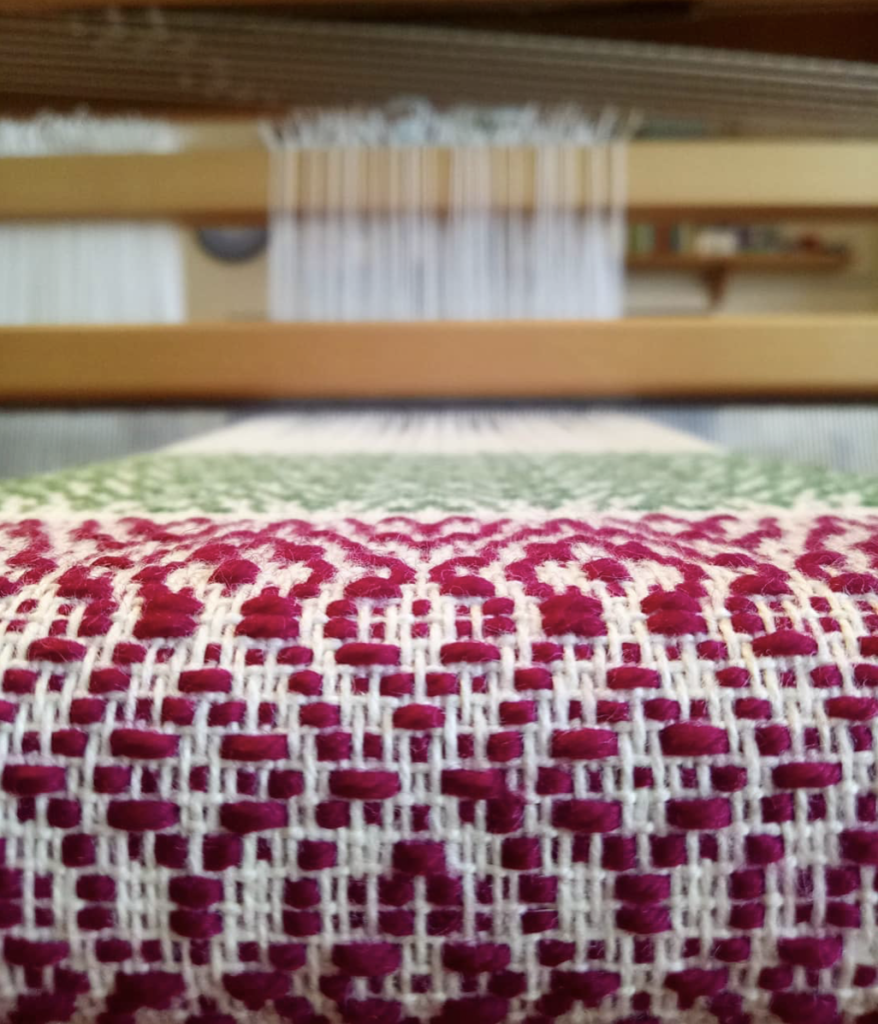
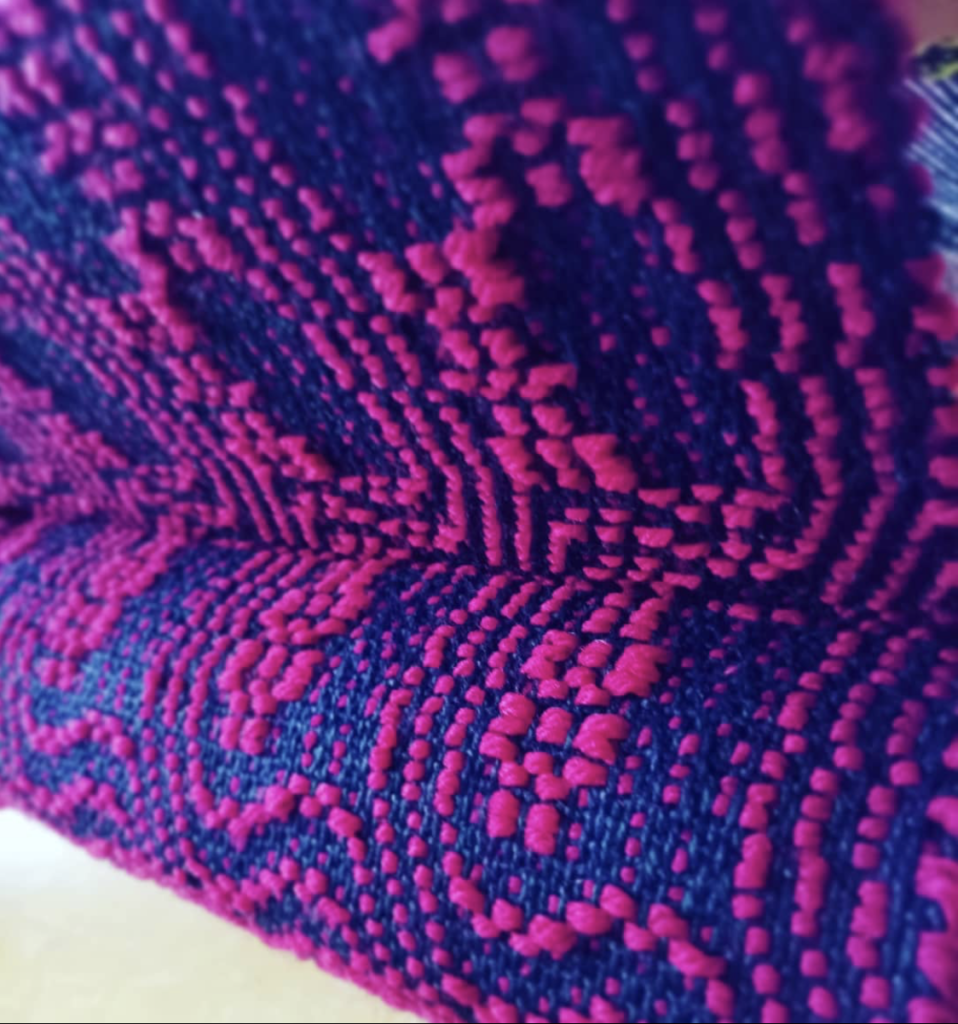
Besides the thickness of the pattern weft yarn, you will also want to consider what kind of bloom it may have after wet finishing. For example, I know that my fingering weight wool blooms beautifully, whereas a cotton of the same size would not bloom in the same way. I very much like the contrast of the 8/2 cotton background with the plump wool pattern weft.

I’m going to sound like a broken record, but once again, a sample will show you everything you need to know about how your yarn will behave as a finished piece.

Tip 8 – Beware running colours

I’m often surprised by the potential of yarns to leach dye in the wet finish process. I’ve had certain yarns that I’ve used frequently that will leach dye sometimes and not others.

This is a particular problem if your colours and white on red or navy on white – you want to preserve that white and not have it come out of the wash as a pink or light blue!

The best way to avoid this is through vigilance, especially in the first 10-15 minutes of your woven piece making contact with water. If you see dye beginning to run, take it out of the warm wash and rinse in cold water until the water runs clear. Place back in the warm water and maintain your watch on it. Repeat the rinsing process if needed.

Tip 9 – Set up the treadles ergonomically

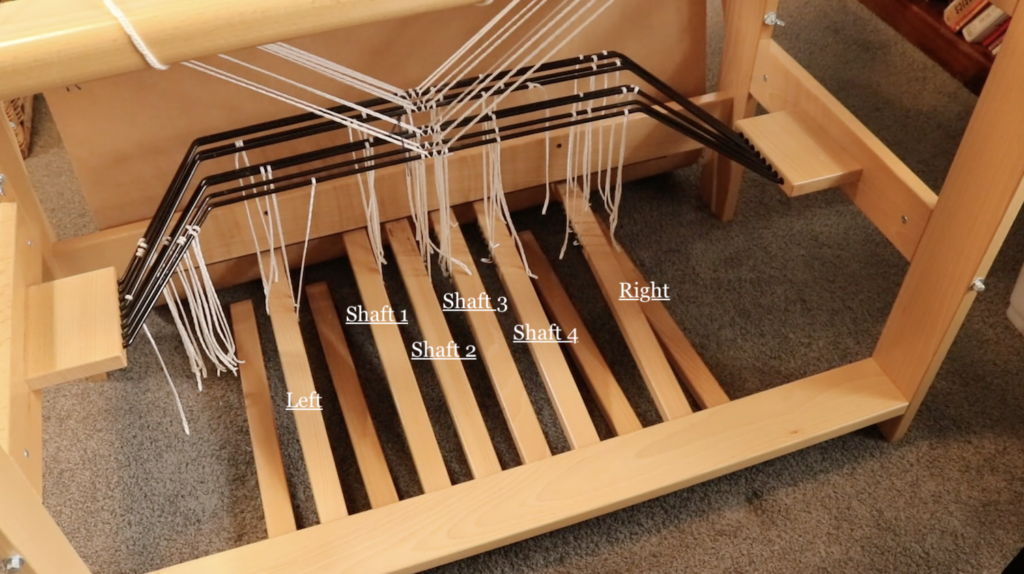
There are 6 treadles needed for overshot, even though you weave on 4 shafts. The two extra treadles are for the tabby weave. I always set up my pattern treadles in the centre of the loom – two on the left and two on the right. Then I set up a “left” tabby and a “right” tabby treadle. To do this on my 8 shaft loom I leave a gap between the pattern treadles and the tabby treadles so that my feet can “see” and differentiate between a pattern and tabby treadle.

Tip 10 – Advance the warp often

I like to advance little and often. You will find your own preference or “sweet spot” for weaving, but I find that with overshot I advance a lot more frequently at a much smaller amount than I do usually.

Tip 11 – Experiment with the beat

The firmness of beat will depend on a few things. Your chosen yarns, the weave structure, the width of the project and the tension your warp is under are all important considerations. I let the project dictate.

An example of this is that I wove an overshot sampler right before Is started my main project (the throw). It was a narrow warp (around 8″) and a different overshot threading and treadling than I’m using for the project.

I found that the sampler required a light beat, where I was pushing or placing the weft into position.

But for my throw project, I am beating harder and sometimes having to beat twice. Because of the width of the project, I need to be careful that I’m beating evenly, and that is easier to do if I’m beating more firmly.

Tip 12 – To temple or not to temple?

I personally do not use a temple. Some weavers will say they won’t weave without one. I’ve tried using a temple on many of my projects, particularly if I’m getting broken edge warp threads (signs of tension problems and too much draw in). But I will avoid using one wherever I can get away with it, and I don’t use one for weaving overshot.

I find that if I’m careful with weft tension and warping evenly, I do not get excessive draw in. It is something I’m constantly aware of while weaving and remind myself of tip 4 so that my weft picks are not pulling in at the edges.

I hope these tips have been helpful to you! If you are interested in overshot, here are some additional resources for you to check out:

Overshot on a rigid heddle loom class

Overshot on a floor loom class

Talking overshot (free video)

The Handweaver’s Pattern Directory, Ann Dixon

A Handweaver’s Pattern Book, Marguerite Davison

Next Steps in Weaving, Pattie Graver

Miniature Overshot Designs, Bertha Graysons Hayes (as a disclaimer, I do not own this book yet, but have heard very good things about it).

Until next time…

Happy Weaving!
Filed Under: 4 shaft weaving, Books, Floor Loom Weaving, Inspiration, Online Weaving School, Overshot, Weaving Tagged With: weaving tips

Italian Hemstitch

by Kelly 4 Comments

You all know that I love hemstitching, right?

I have quite a lot of resources available on the topic, including articles and videos, some of which you can find in this post.

In addition to the basic hemstitch we all know and love, there are variations for an even more visually decorative, but still functional hemstitch.

*This post contains affiliate links. For more information, please see my disclosure policy.

The hemstitch doesn’t have to just be a way to secure your warp threads so that the weft doesn’t unravel when you remove your weaving from the loom. It can also be used within the weaving as a feature.

In the member’s only “How to Hemstitch” series, I have a separate class just to highlight and demonstrate how you can use hemstitch as a feature in your woven piece.

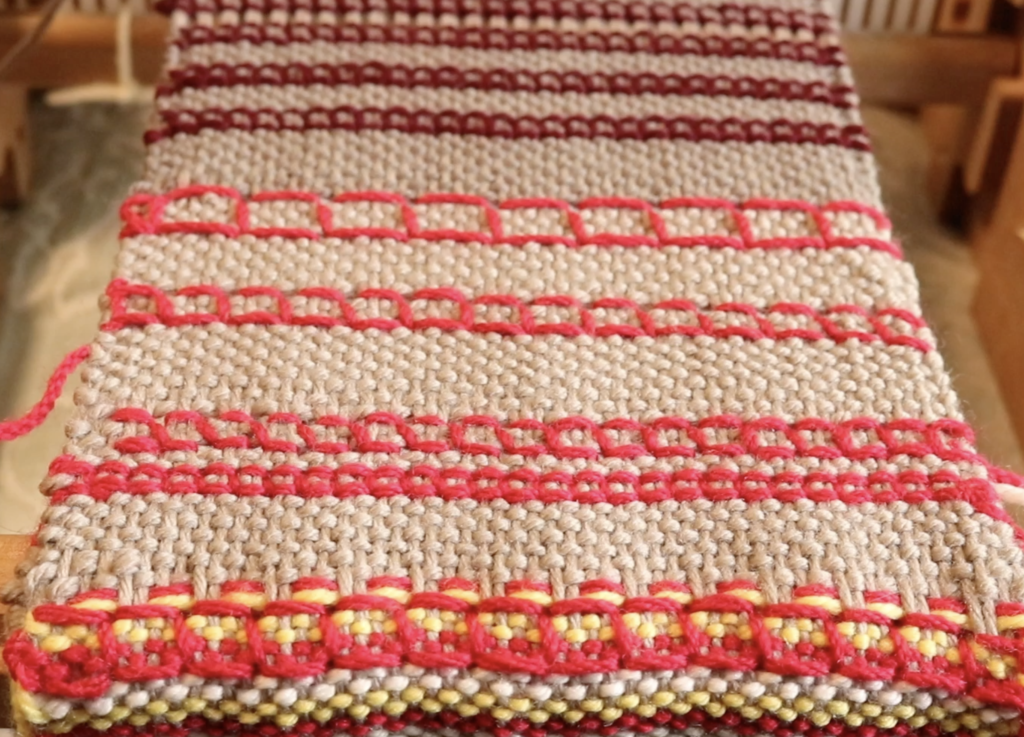
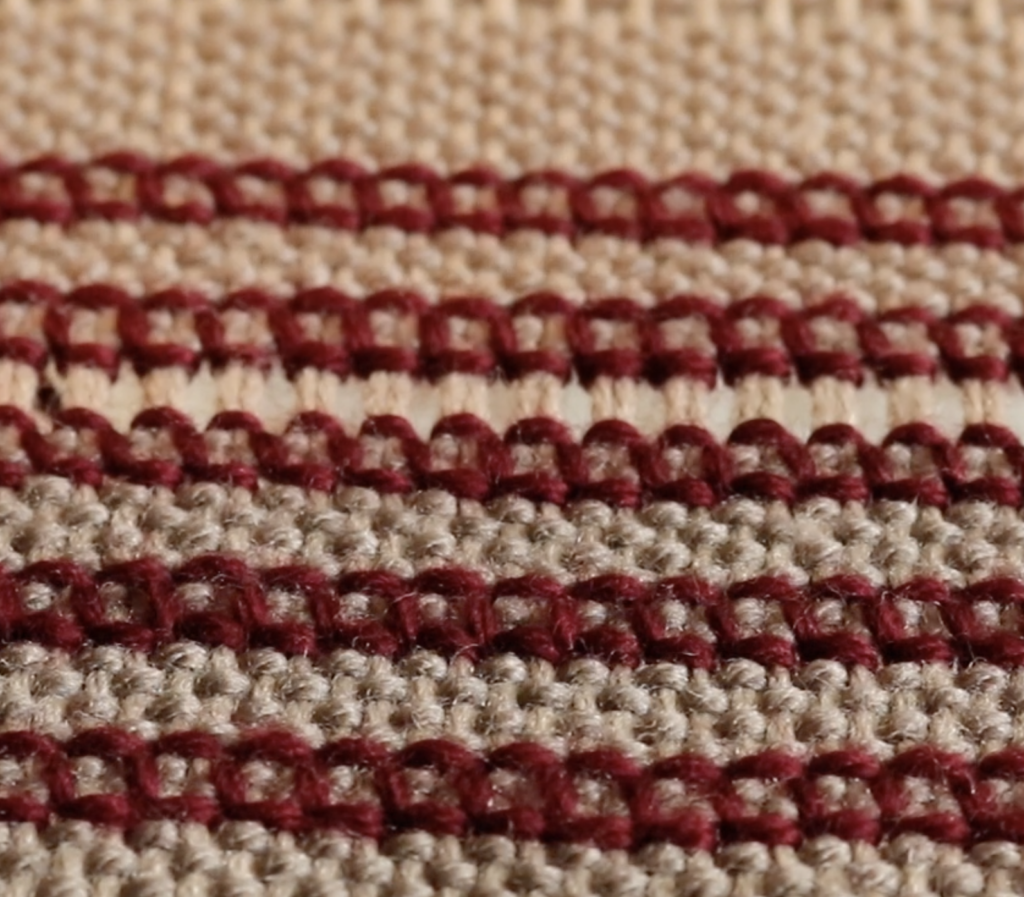
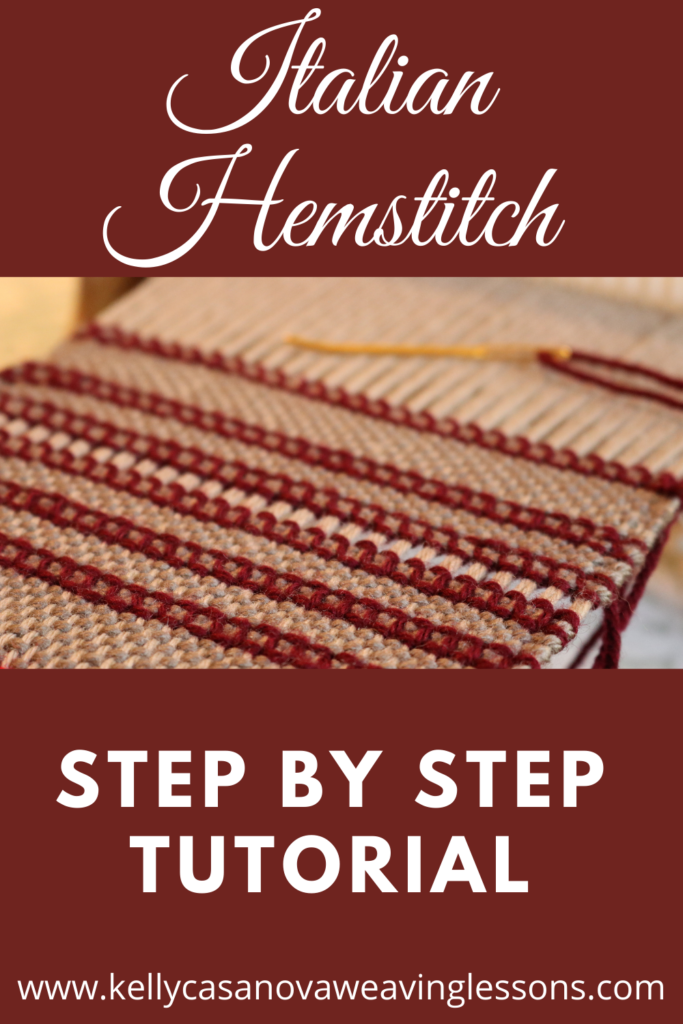
That brings me to today’s topic – the Italian Hemstitch. This is a gorgeous, decorative and functional stitch. It secures your warp ends just like an ordinary hemstitch does, but it stands out as a real feature. Embroidery lovers, this one is right up your alley!

Italian hemstitch looks great either as a single row at each end of your weaving or as rows within the weaving. It can be stitched in a variety of sizes, depending on how large you want it to look. It looks wonderful both from the front and from the back.

I love the way Italian hemstitch looks on a plain weave background, using a contrasting yarn so that it stands out and takes centre stage. You could choose to use a weight of yarn that matches the weight of your warp and weft, or something thicker, or something thinner. Experiment and see what your own preferences are!

For this tutorial I’ve used a light worsted wool for warp, weft and hemstitch, just in different colours. I’m going to be working a 2 x 2 Italian hemstitch.

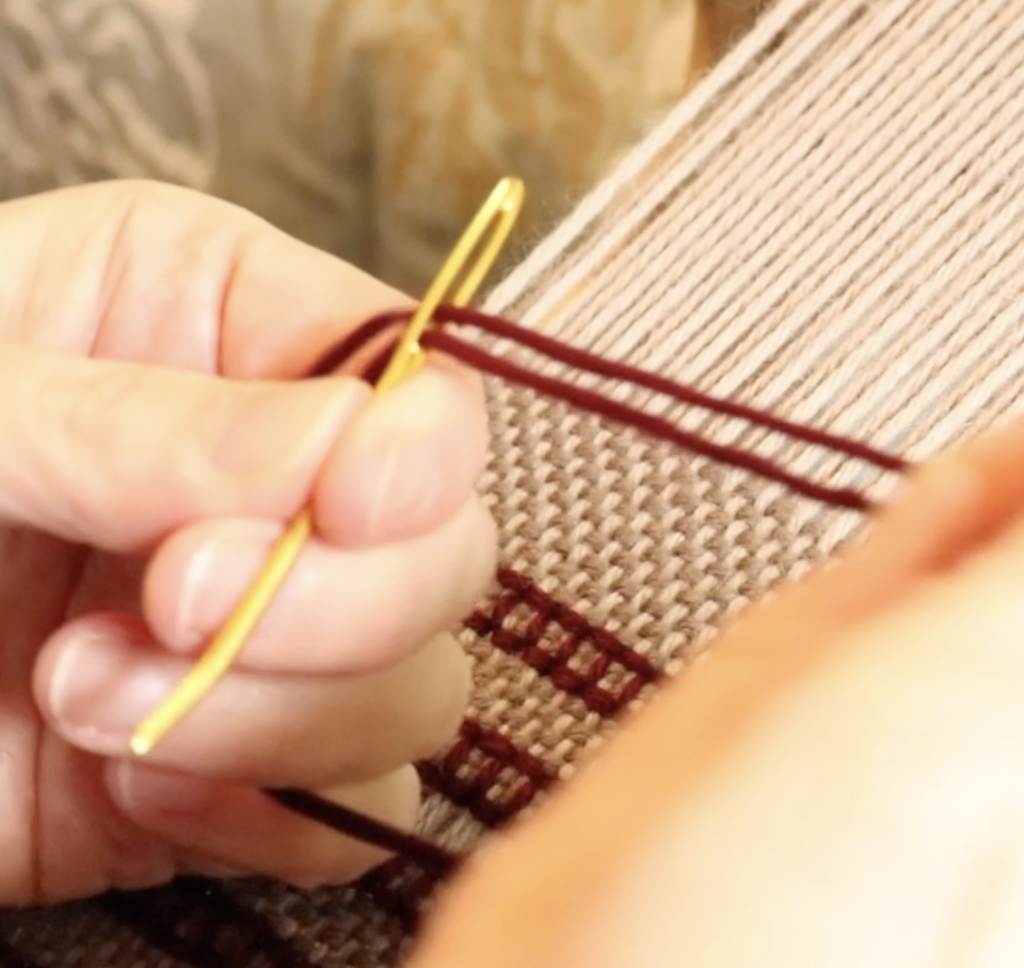
Start by threading up a tapestry needle with the yarn you want to stitch with. Make the length around 5 times the width of your warp (I like to have a little more rather than run the risk of running out part way through).

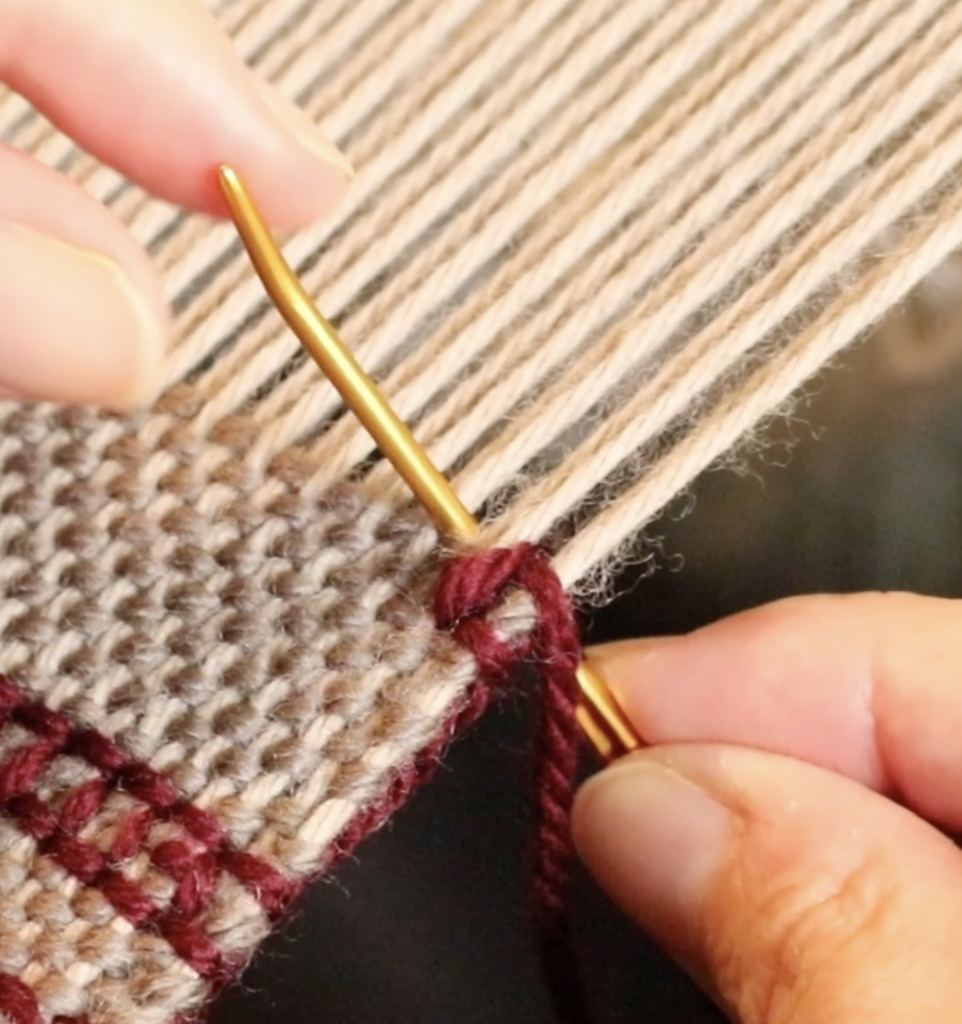
I have to take a moment to extoll the virtues of this Clover Jumbo Bent Tip Needle. I used a regular tapestry needle for a long time before I purchased a pair of these needles, and wow, what a world of difference it’s made to my hemstitching! The large size, the coating that slips through your weaving just beautifully, and the bent tip all come together to make it a perfect tool to hemstitch with.

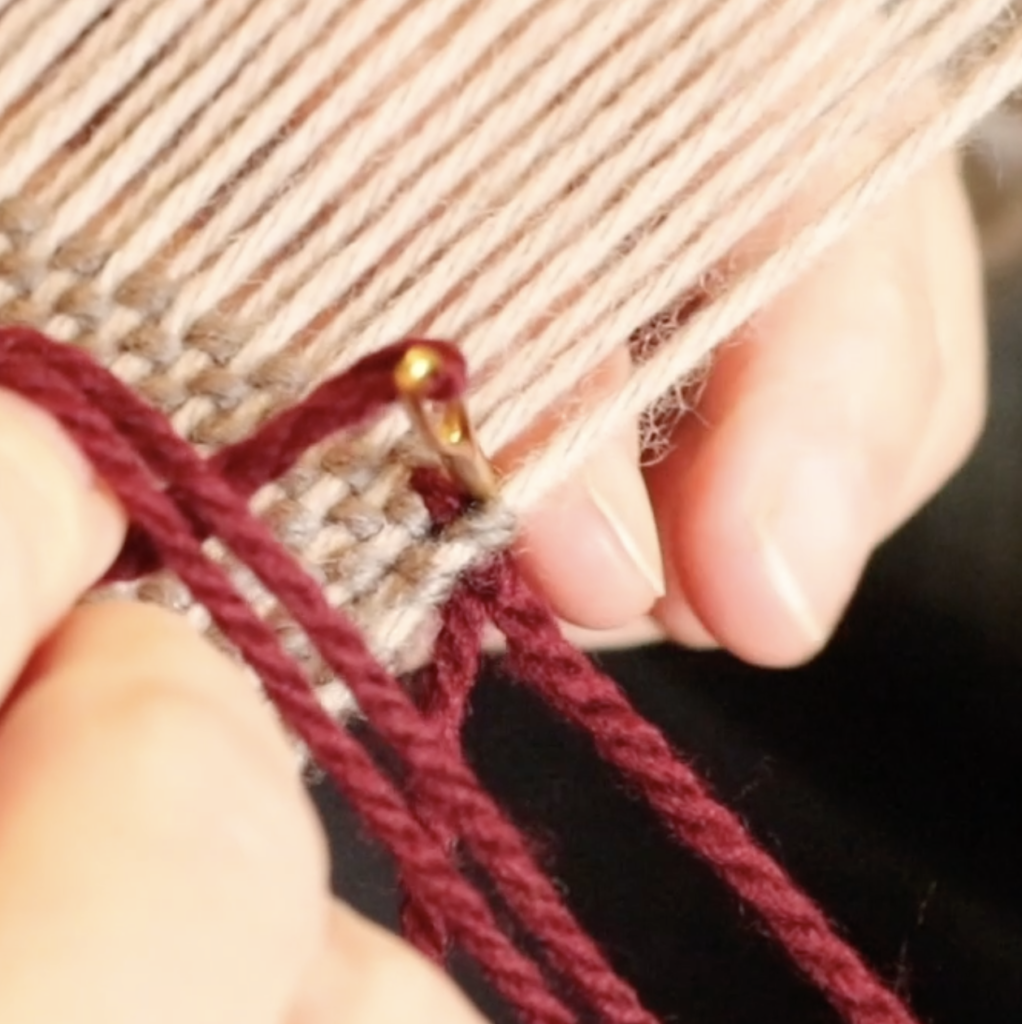
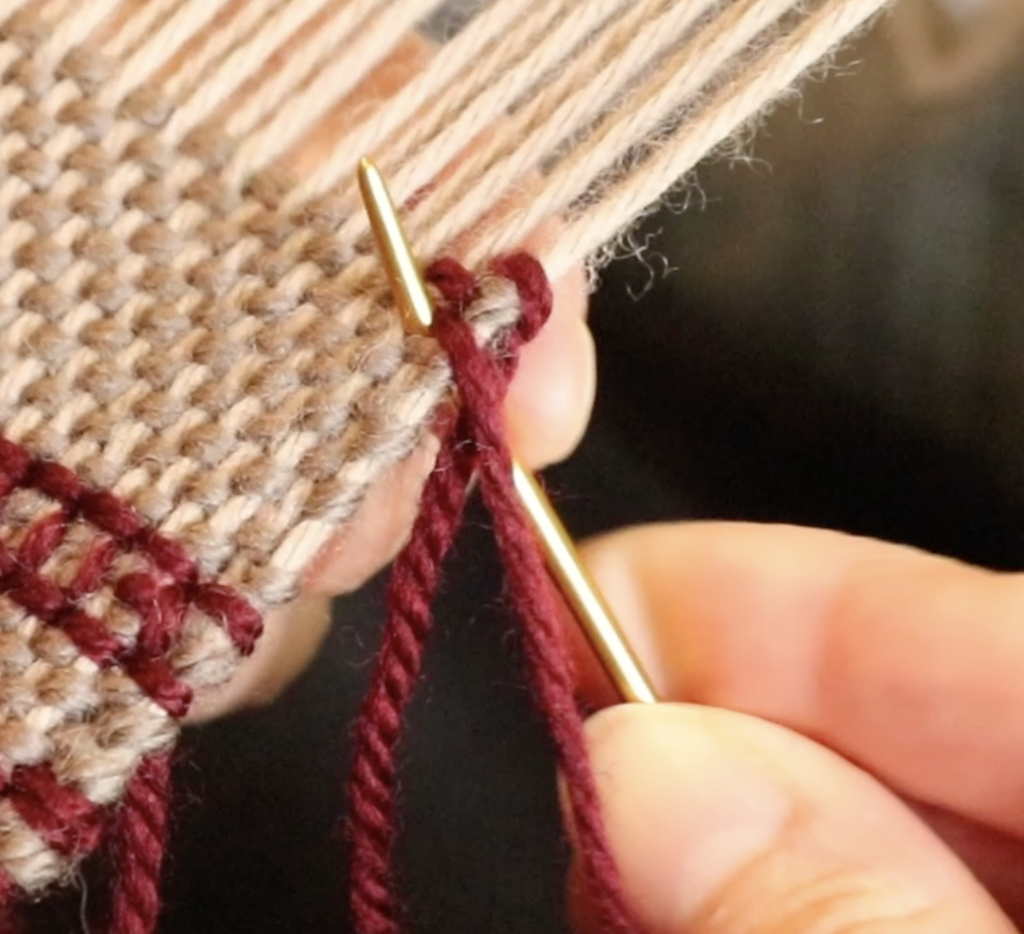
Secure the hemstitch yarn in your weaving, bringing the needle through to the front from the back. You can see one way that I work lock stitch in this free video. I work this about 2 – 3 warp threads in from the edge on the right hand side.

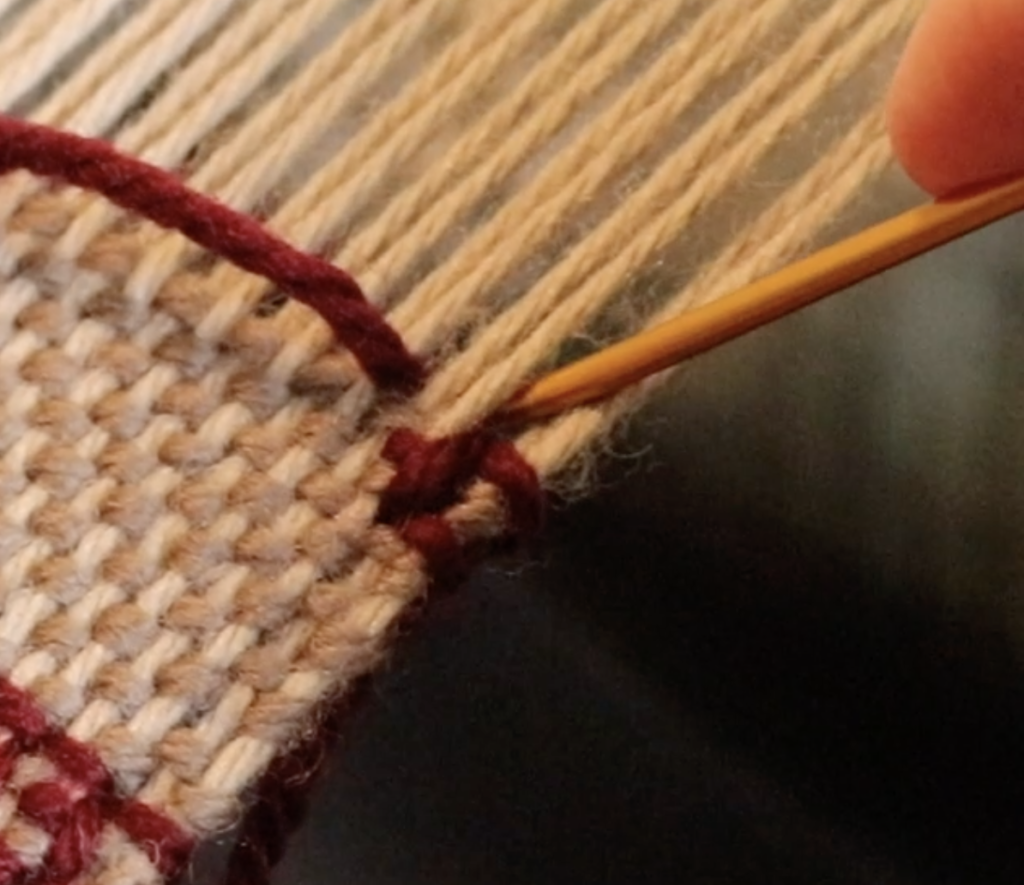
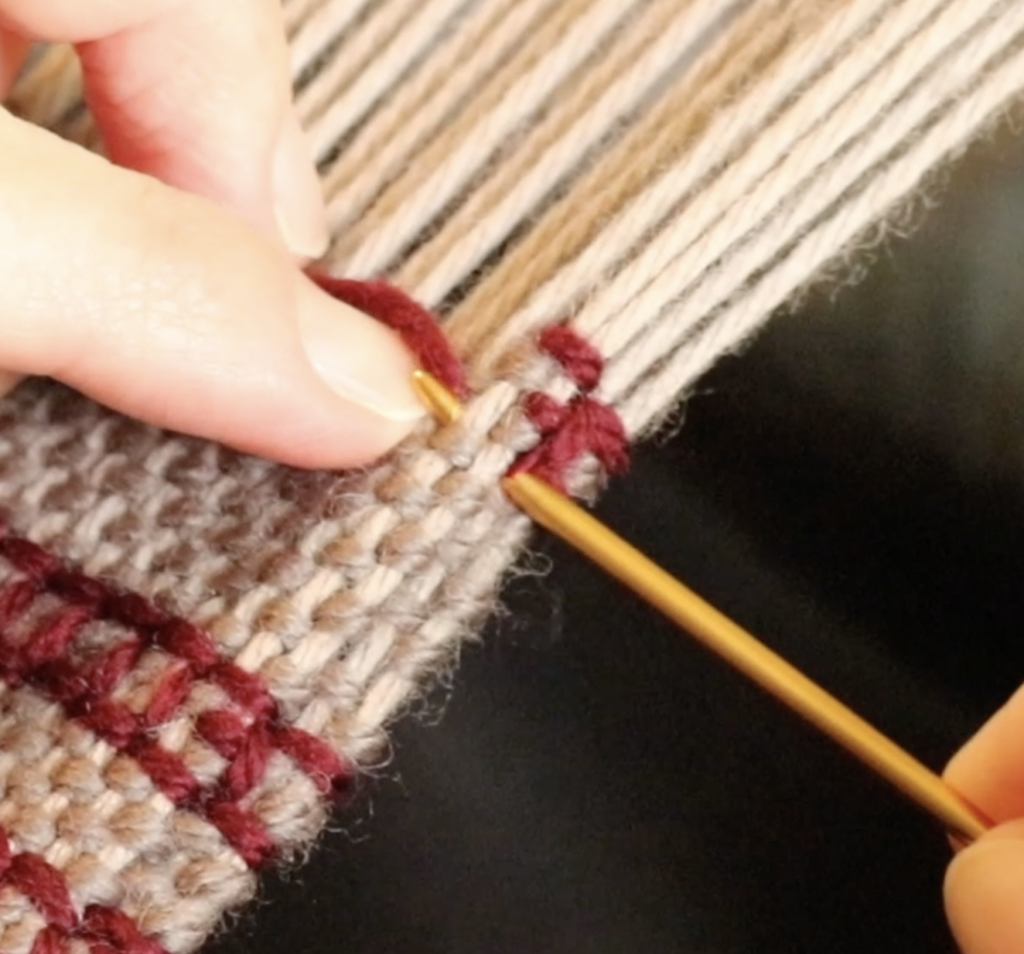
Count 2 warp threads in from the edge (above your last woven pick) and take the needle down through the gap to the back of your weaving.

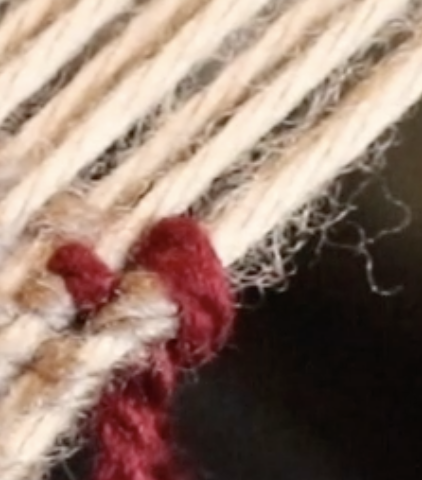
When you pull the yarn through, there will be a loop around those first two warp threads, right at the top of the fell (where you last wove your weft).

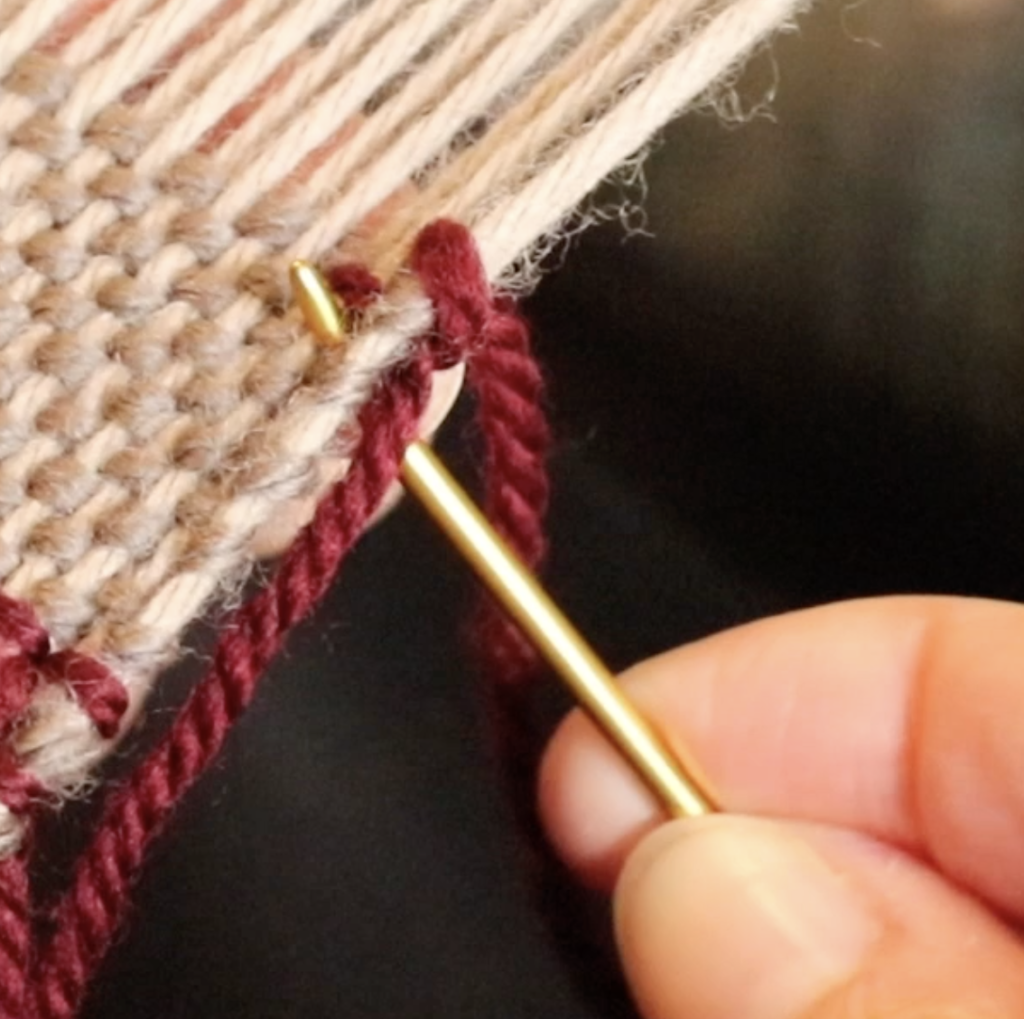
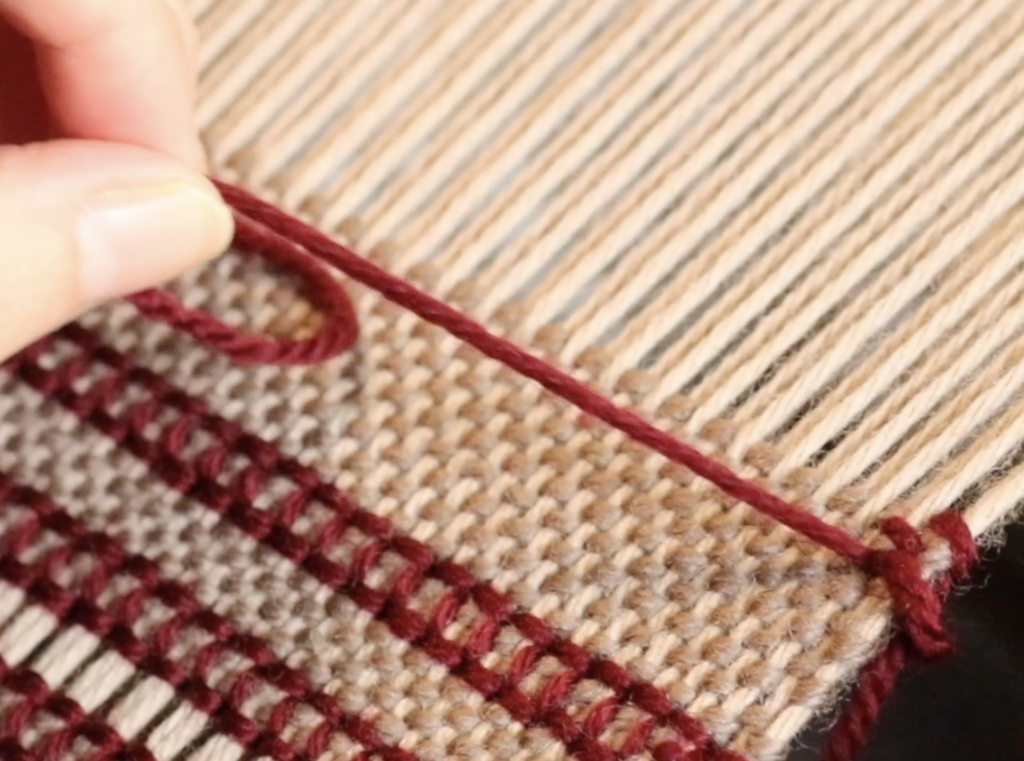
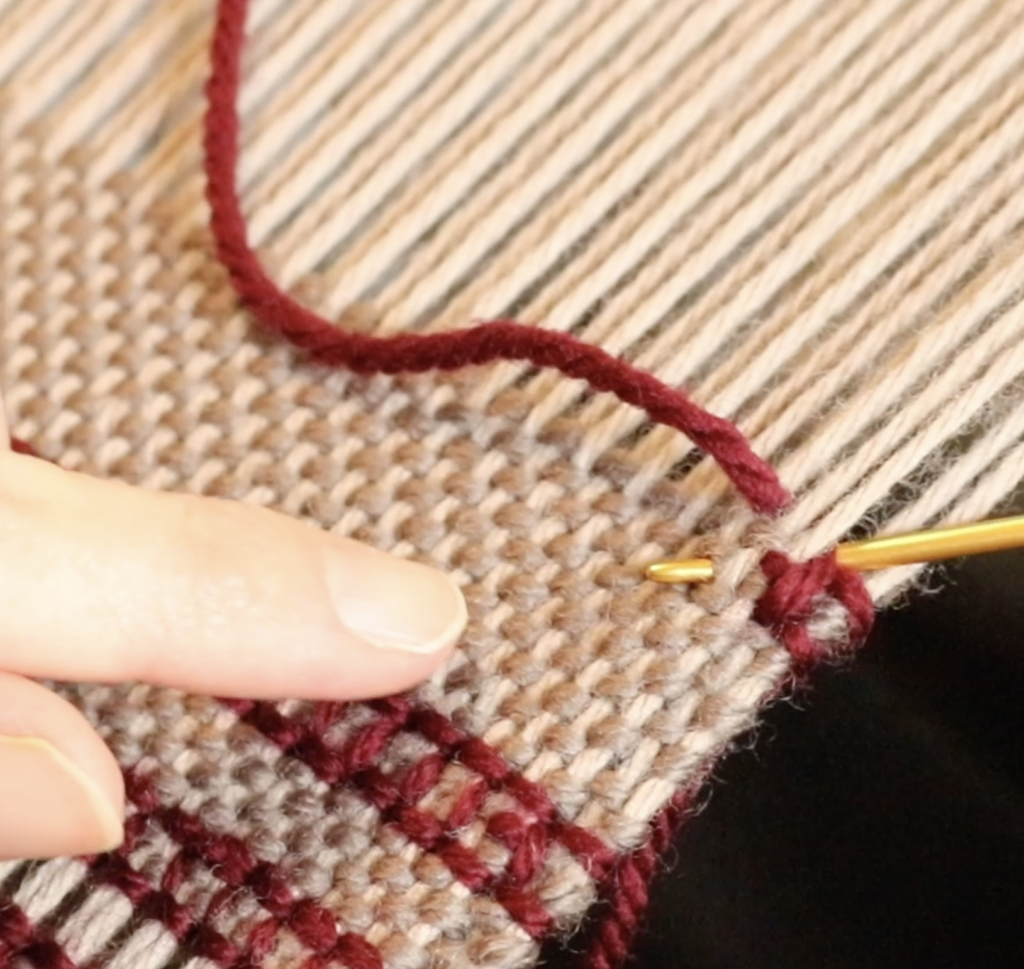
Count across 2 warp threads again, but this time count down 2 weft threads. Bring the needle up from the back through that space.

Here is how this step looks once the needle and thread have been pulled through.

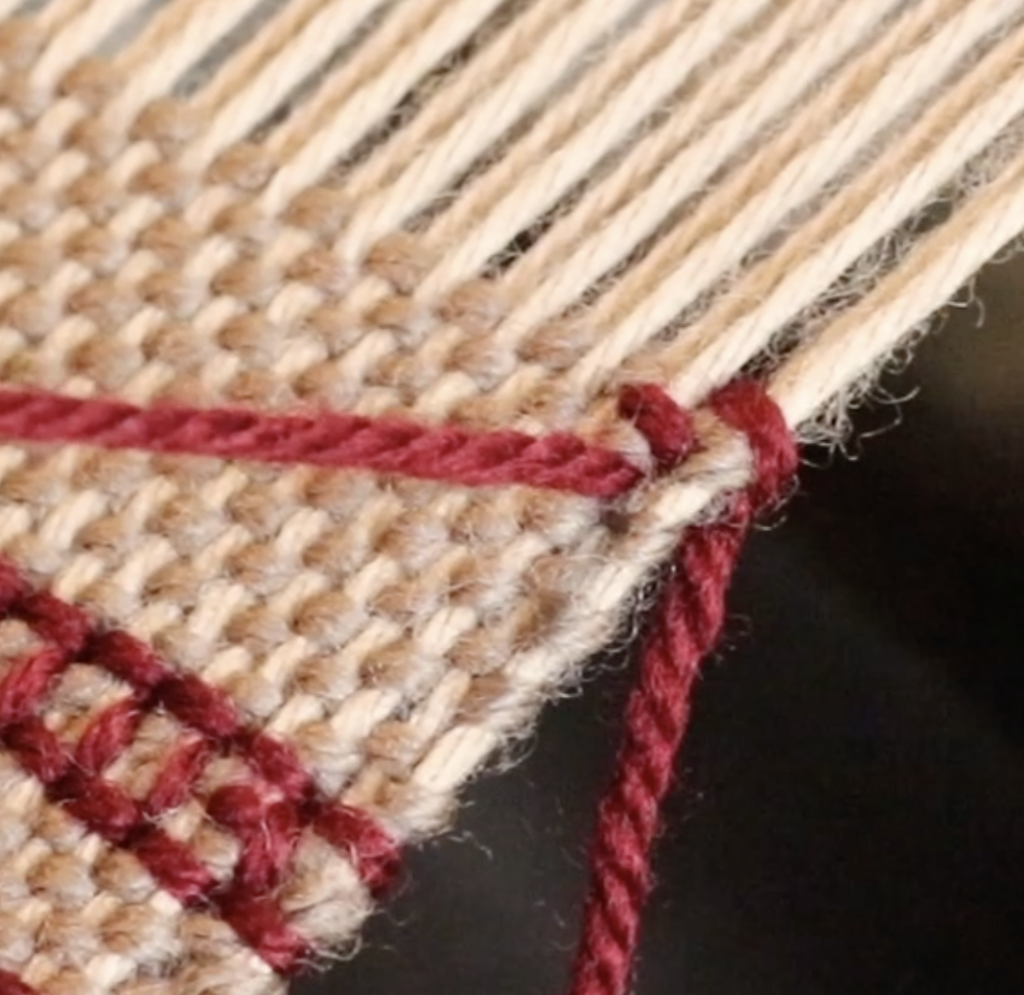
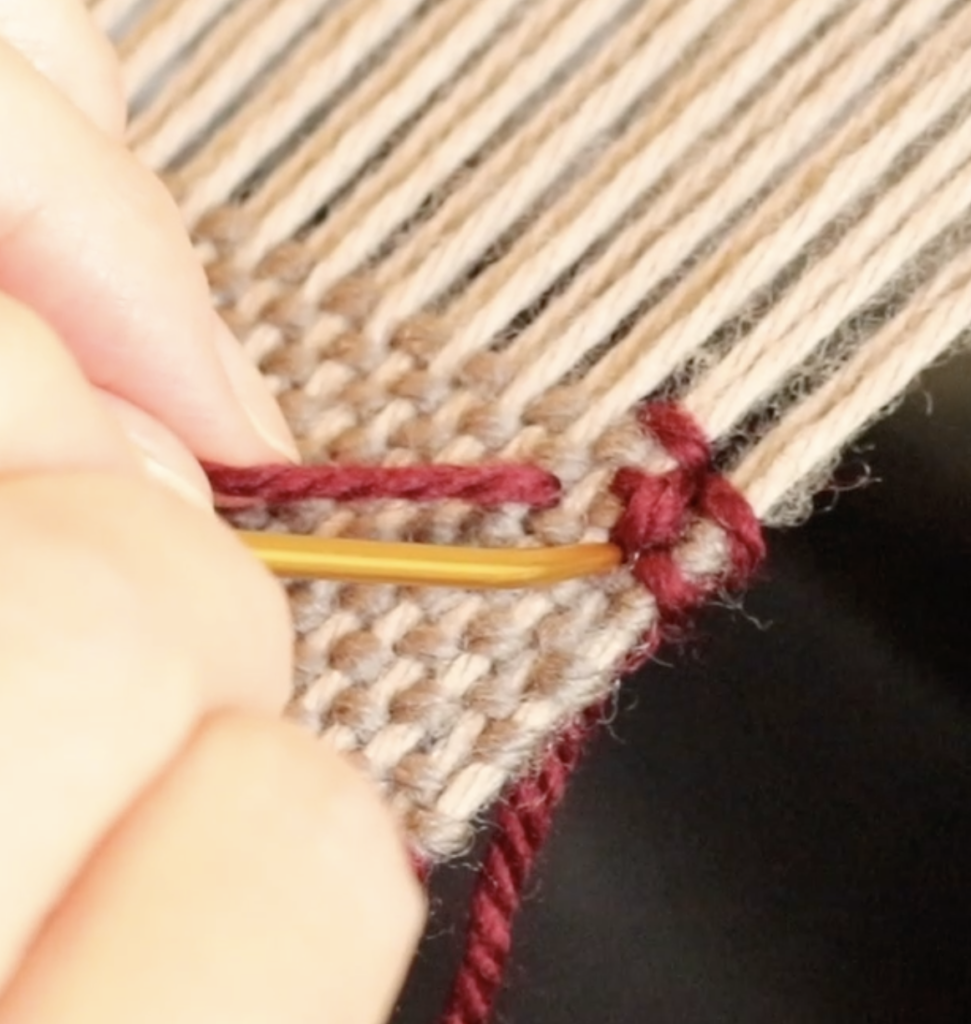
Take the needle and yarn back to the right edge. Now bring the needle up from behind, through the exact same hole that your last stitch came out of. This will make a new loop as you pull the needle through once more.

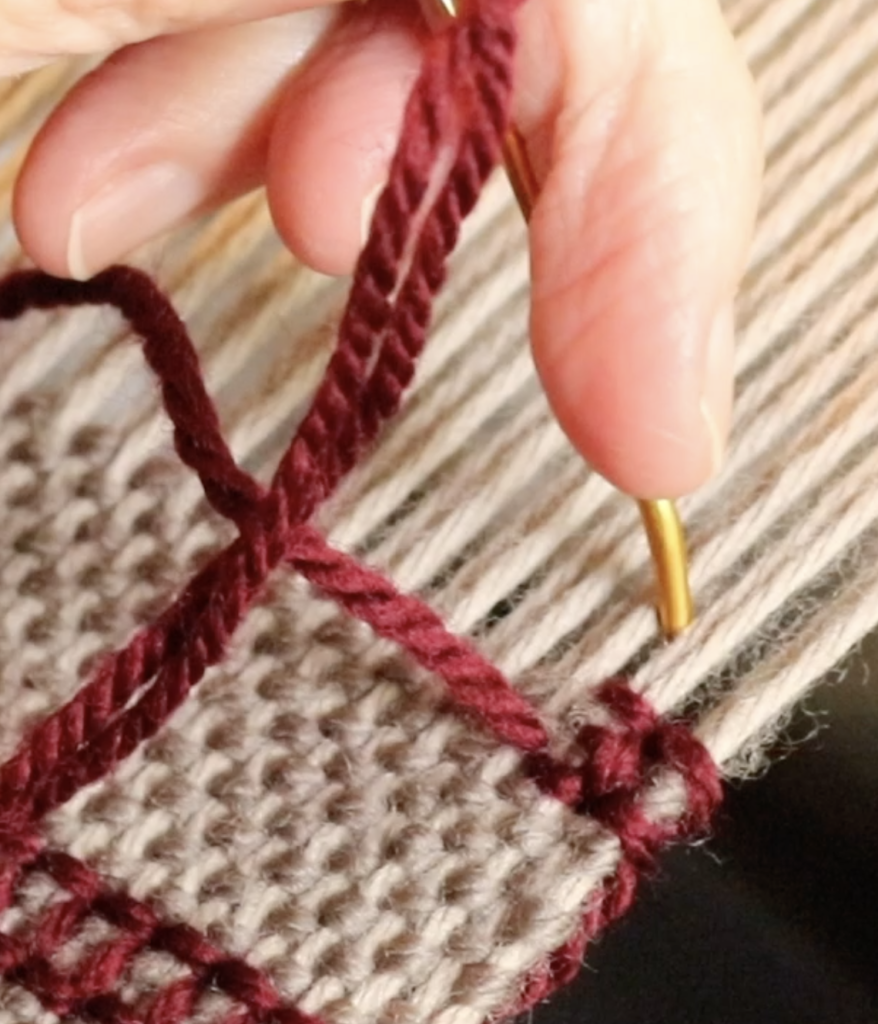
Pull on this loop to tighten it up a little. That gives us 2 horizontal lines – 2 sides of our box shape. Now we need to make the 3rd line as a vertical to close the box shape.

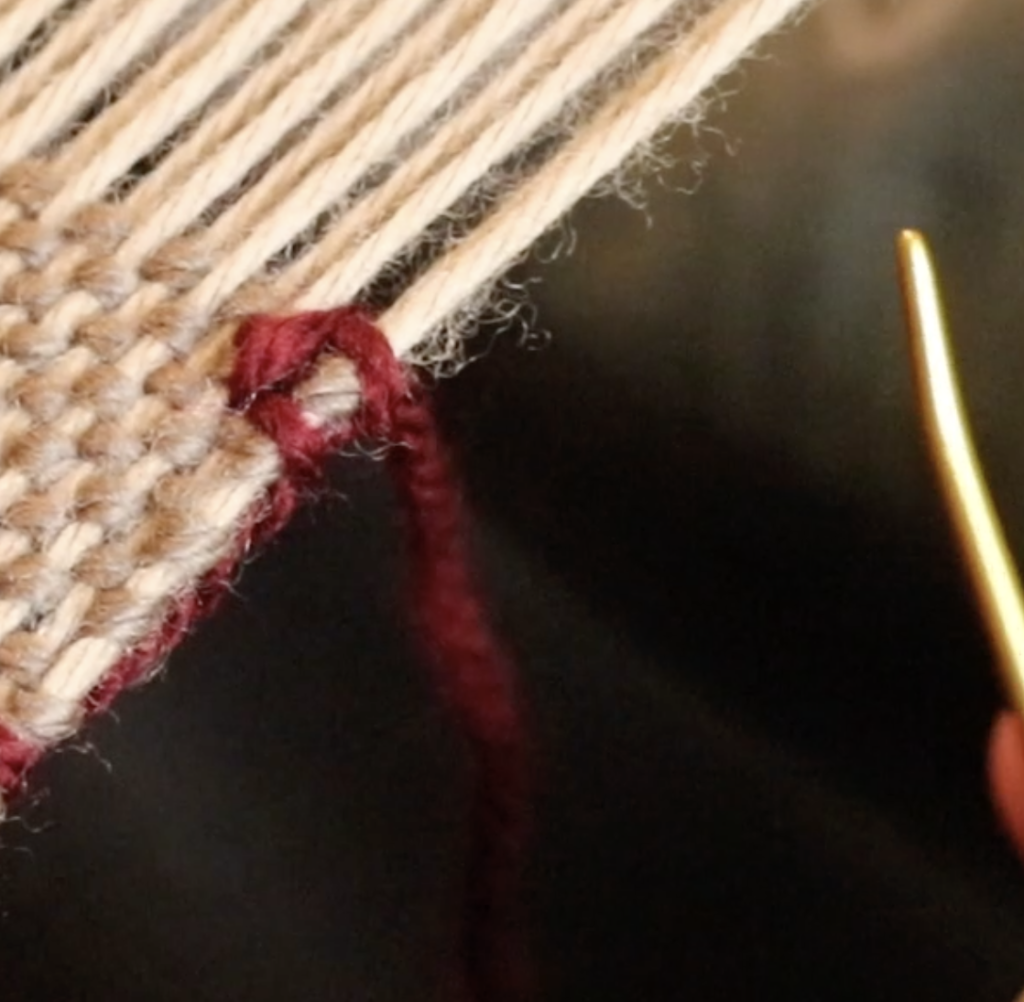
To get the vertical stroke of thread, we take the needle straight up to the left of those first 2 warp threads and pull through.

Now you can see your first block/box shape. Each box at the very edges of your weaving will be open ended on one side, the rest will be closed.

To continue working the boxes, count off the next 2 warp threads, bring the needle up and pull the needle and yarn through.

Take the needle back to the start of the second set of 2 warp threads and underneath.

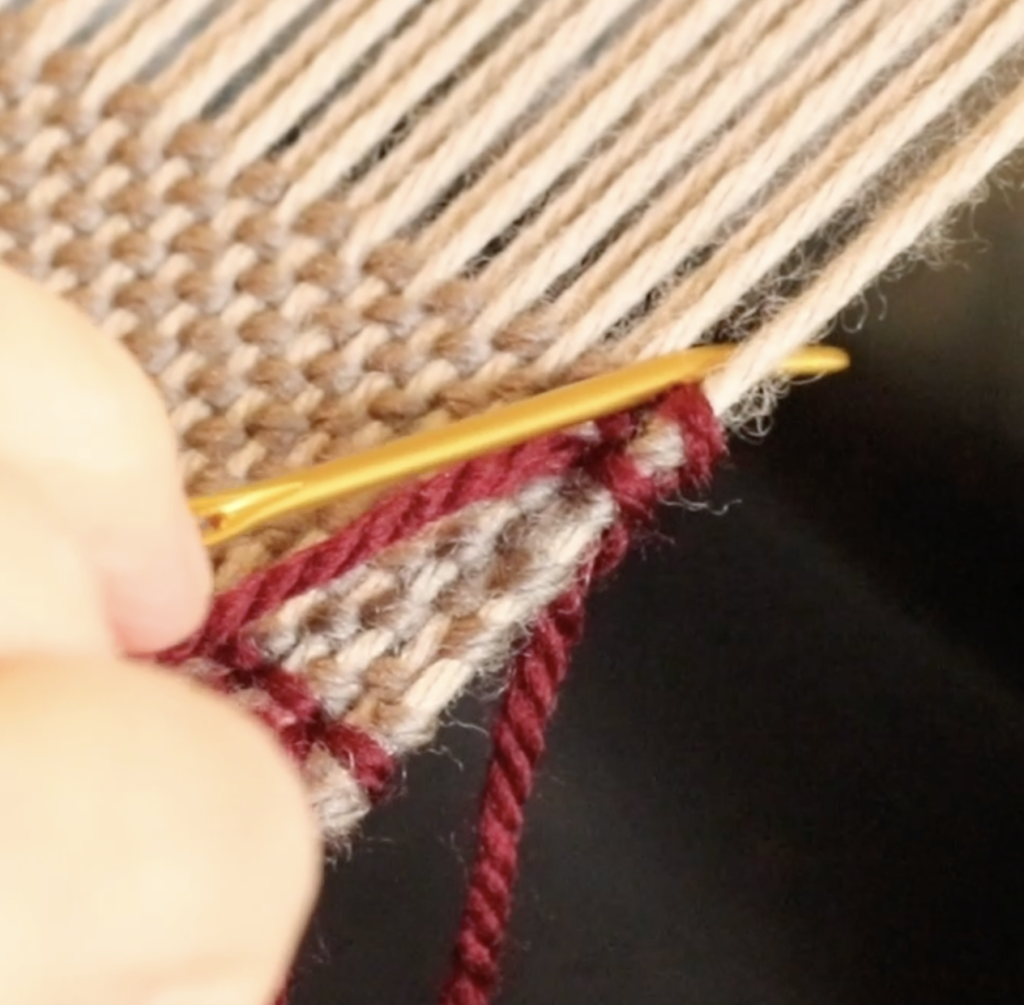
Bring the tip of the needle (this is where that bent tip makes your life a whole lot easier!) up 2 weft threads down, in line with the 2 warp threads you have counted off.

Pull yarn through and tighten the loop. Take the needle back to the start of the pair of warp threads and down into the previous stitch’s hole.

Now bring the needle back up (thank you again bent tip needle!) through the hole that the working thread is in and pull through.

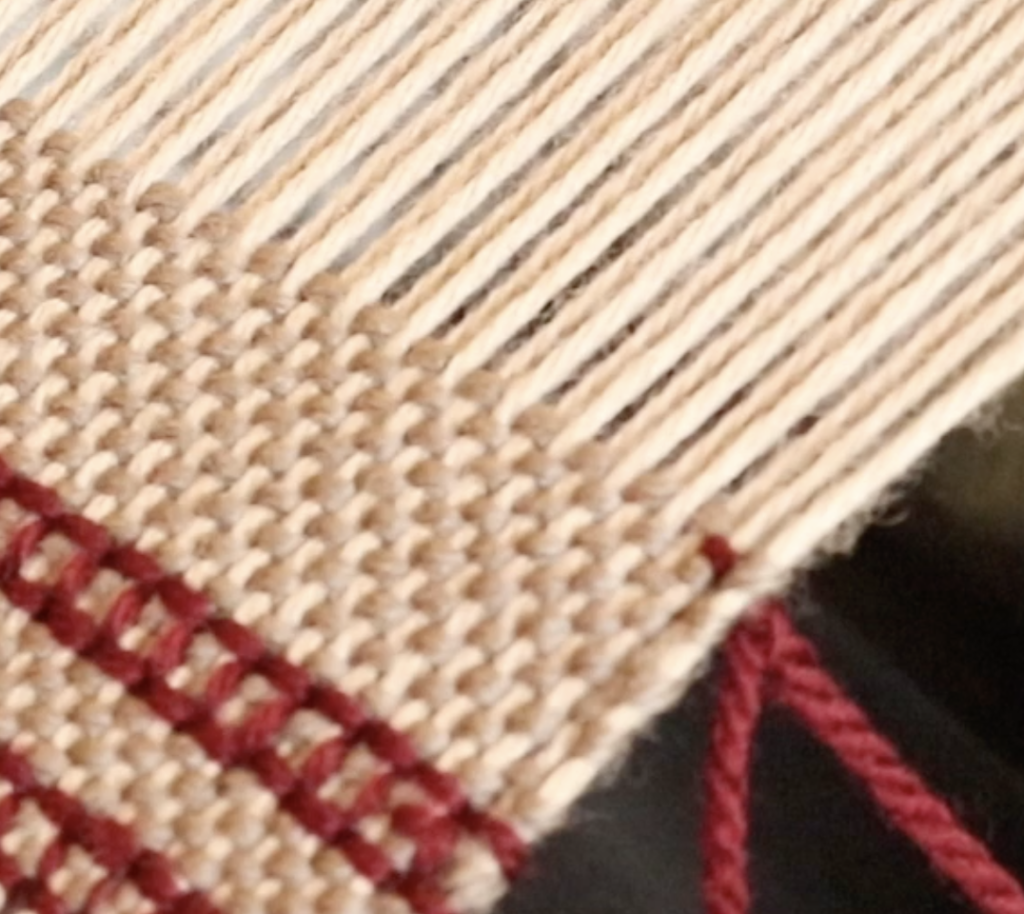
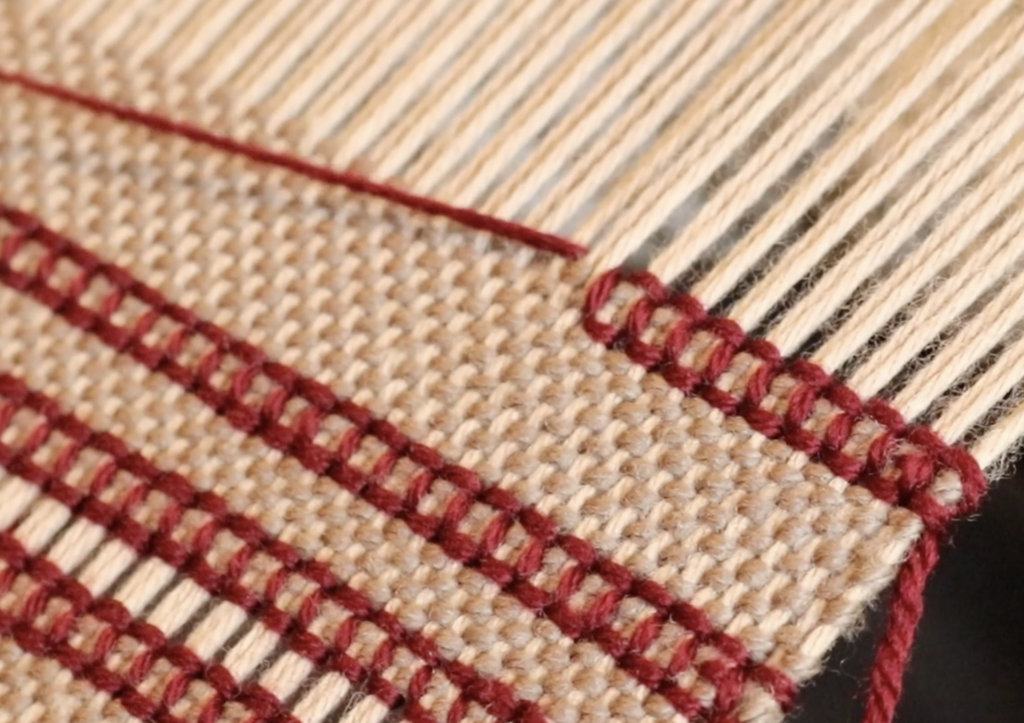
Finish off the box shape with a vertical thread again, by taking the needle down to the left of the warp threads just worked. Continue on across the warp and before long you will have something that looks like this:

It may seem a little complicated at first, but it’s really only a couple of steps more to complete than the regular hemstitch, and once you’ve “got it” your needle will fly!

If you would like a detailed, step by step video on how to work the Italian hemstitch, you may want to consider signing up for a membership at my Online Weaving School to access this and other great tutorials and classes.

The Italian Hemstitch class is available to all members of the Online Weaving School. It is a bite sized, technique focused class to further your learning in the wonderful world of weaving!

Thanks for stopping in for a visit today, if you have any questions or comments, please leave them below, I always love to hear from you!

Until next time…

Happy Weaving!
Filed Under: 4 shaft weaving, 8 shaft weaving, Floor Loom Weaving, Free tutorial, Hemstitching, Inspiration, Online Weaving School, Rigid heddle weaving, Tutorials, Weaving Tagged With: hemstitch tutorial, how to hemstitc, Italian hemstitch

How to make the most of your membership

by Kelly 2 Comments

Have you ever purchased a gym membership?

Let me guess, when you signed up you imagined yourself on the treadmill or pumping iron regularly. A few days a week, if not every day! You took out a 12 month membership because everybody knows that this will be the clincher – once you’ve paid you have to get your money’s worth!

A gym membership (you thought) was just the motivation you needed to get going and finally get fit and stay fit.

Young woman exercising at the gym with weight

What happened next? One of two things:

  1. The first day you went was great, you felt awesome and on top of the world. Day 2, rolling out of bed early to fit in a session, you didn’t feel so crash hot about the whole thing. Day 3, you decided you really needed that sleep in, but you would definitely get back to the gym tomorrow. That was 6 months ago.

2. You made a plan and started slowly. You decided that 3 sessions a week was realistic for you and that you needed some guidance to start with. You wanted to build gradually towards a good level of fitness, free of injury or exhaustion. 6 months later, you maintain this plan and feel really great about your health and the steps you took to achieve your goals.

All of this is hypothetical of course, especially considering that I myself have never so much as stepped inside a gym – the very notion makes the hairs on the back of my neck stand up. Give me a healthy walk in the fresh air any day!

But I wanted to use the gym analogy today because it coincides pretty well with what I want to say about my Online Weaving School.

What does working out have to do with learning to weave? Quite a bit, actually.

  • Both require a commitment. And not short term, just as you don’t achieve fitness overnight, you don’t become a great weaver overnight.
  • Both take effort and patience.
  • Both involve goals setting and time investment.
  • Both are extremely rewarding and produce wonderful results if all of the above are adhered to.

I will be the first to admit that I absolutely love the fact that memberships in my Weaving School are thriving at currently over 800 students. I’m amazed and so grateful that so many new and seasoned weavers want to learn with me.

But, I have to tell you that the figure of over 800 students is only a vanity metric if most of those students are not actually engaged, making the most of their memberships and learning exciting new techniques.

Because this is not all about how much money I can make from the volume of students I have. That is not why I started all of this (you can read more about my story here and a more recent version here) and it’s not why I work so hard to make my school the best it can be.

The thrill and enjoyment that I get seeing a student have a lightbulb moment, weaving something beautiful or falling hopelessly in love with this craft, is why I do what I do. You really can’t put a price on that.

If you are already a member, please, use the tools that I’ve provided to make your membership the very best learning experience I can provide. Join the membership community, interact with the other students, plan your class list and start working though them.

Know that if you are having trouble, there is support available. Members receive personal support from me when needed, and also from the community of other members.

So, what will you get with a membership?

You will get a HUGE variety of weaving classes to choose from that you can work through in your own time, in your own way. You can stop the videos any time you need to and rewatch again and again. There are countless printable PDF information sheets.

You will get to join a friendly and helpful community of weavers at all different levels. Some are absolute beginners, others have been weaving for years. And they will all cheer you on!

What won’t you get with a membership?

You will not get a babysitter. I don’t mean that to sound harsh, but just like a gym membership, the results are up to you. You will see improvement and success if you put in the time and effort it takes. But you have to show up, have a positive attitude and be ready to learn.

If you are interested in taking out a membership or perhaps checking out one of the free classes available at my weaving school, here are so links for you to have a look at:

Gold Membership

Yearly Membership

Monthly Membership

6 Monthly Membership

Free classes:

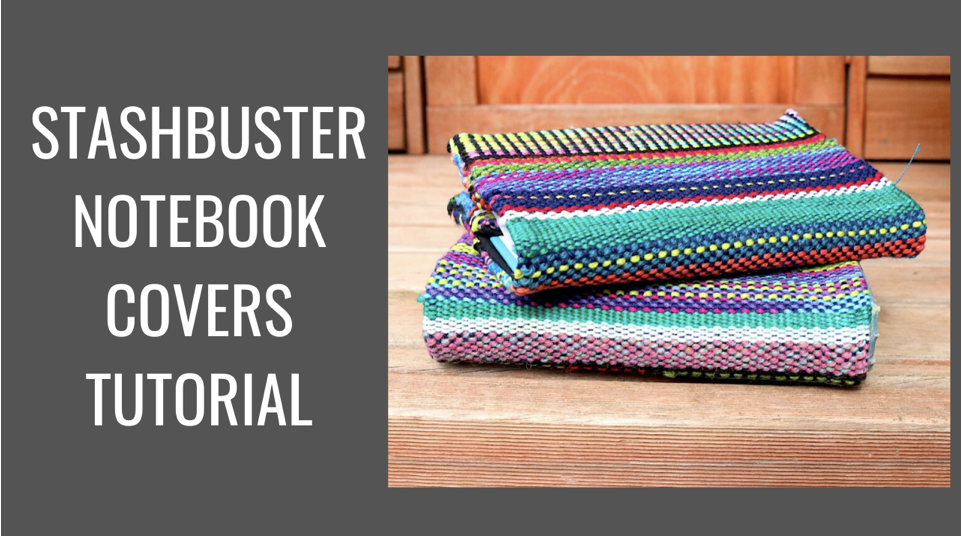
Stashbuster Notebook Covers

Kitty Cats on a rigid heddle loom

Waffle Weave for rigid heddle loom

Wave and Zigzag shuttle weaving

Heart wallhanging

Calculating Warp for the rigid heddle loom

Honeycomb on a rigid heddle loom

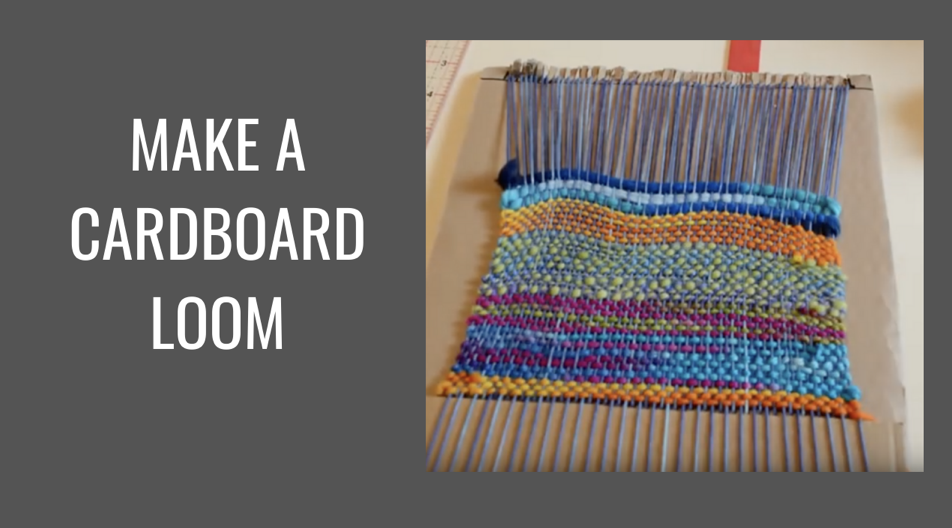
Cardboard Loom tutorial

Honeybee Cushion

Do you have a membership already? What are your strategies for ensuring you make the most of it? Share in the comments below, I would love to hear from you!

Until next time…

Happy Weaving!
Filed Under: 4 shaft weaving, Floor Loom Weaving, Inspiration, Online Weaving School, Rigid heddle weaving, Tutorials, Weaving Tagged With: learn to weave, membership, online learning, online weaving school

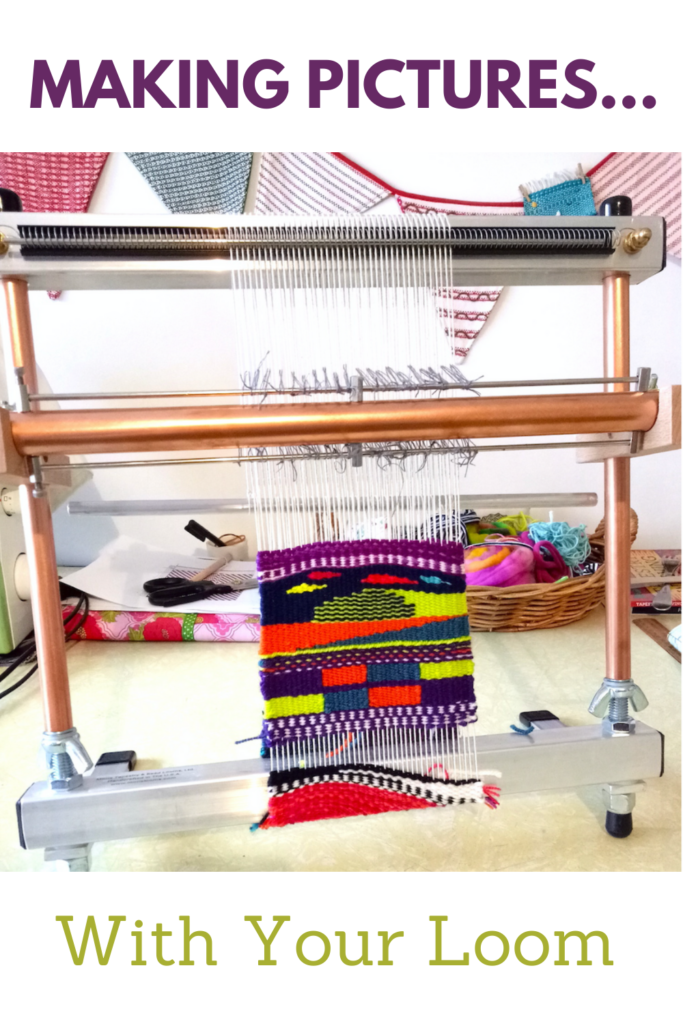
Making pictures with your loom

by Kelly 10 Comments

Something that really captivated me before I even started weaving, was the idea of using artistic creativity in weaving.

When I was younger I loved to draw and paint. In my adult life, I have not made a lot of time to devote to making art, but I have been happy to discover that there is a huge crossover with art and weaving.

This post contains affiliate links.

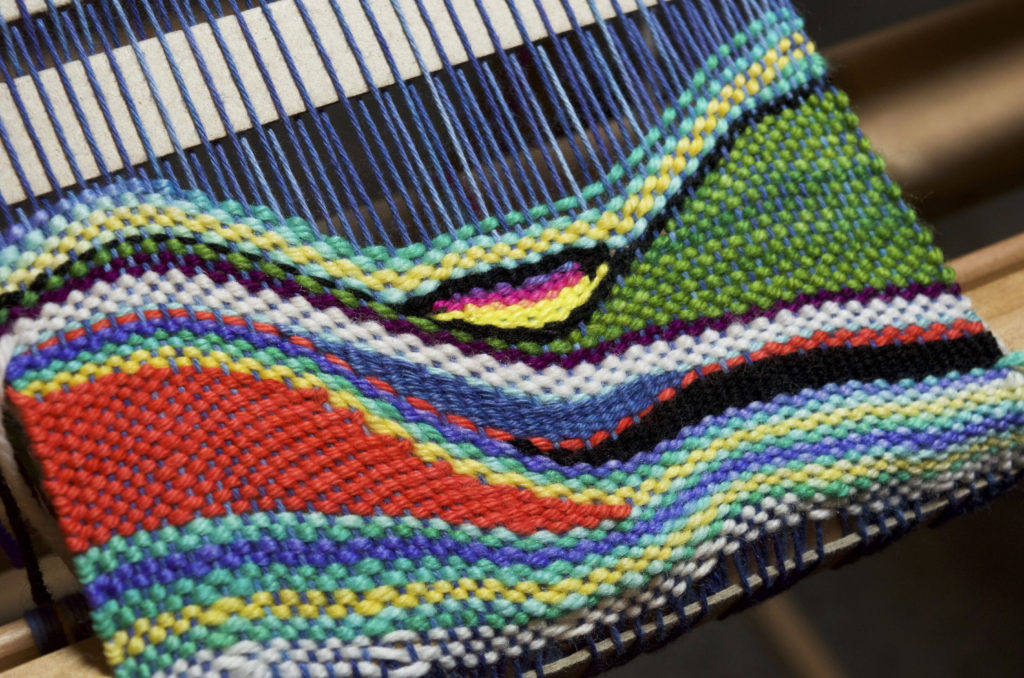
One of the most obvious forms of weaving that this crossover takes place in is tapestry weaving. In tapestry, the weaver can have total artistic licence through the use of colours and shapes. The shapes can be basic or complex. Colours can be blended on the loom. And, tapestry can be woven on many different types of looms.

I purchased a Mirrix Big Sister last year, as I wanted to develop my tapestry techniques and also have a dedicated tapestry loom. It is an excellent loom for tapestry, as even though it’s small, I find the available weaving room quite spacious and the tension is awesome.

Before I bought the Mirrix, I wove tapestries on my rigid heddle loom.

I had a lot of fun using different yarns and styles. My most popular Youtube series details how to weave in a free and unplanned style with a variety of yarns and colours.

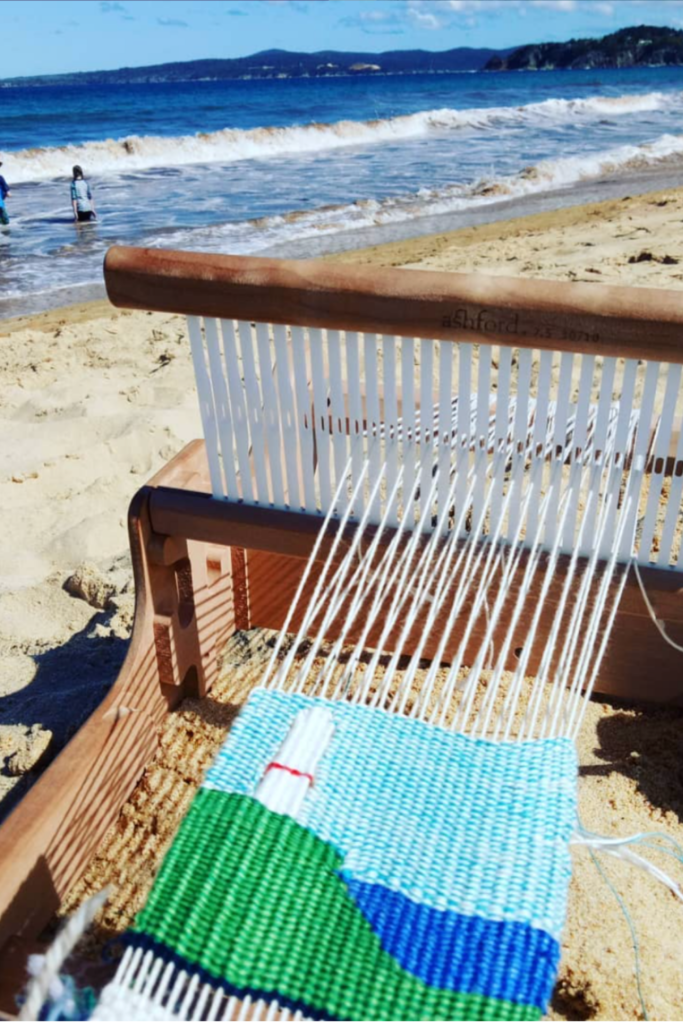
I’ve also explored more tradition tapestry techniques on the rigid heddle loom. I particularly enjoyed taking my Sampleit on vacation, which enabled me to sit on the beach, watch the kids enjoy the waves and weave. What bliss!

My adventures with tapestry on the rigid heddle loom gained so much interest on social media, that I developed a course to show others how to do it! The course includes all the basic tapestry techniques you need to know, plus how to use all of these techniques to weave a finished project. If that sounds interesting to you, the course is available here.

Another way to get started in tapestry without breaking the budget, is with a more affordable tapestry loom. Depending on your budget, you could opt for something like the Schacht Tapestry Loom, or even just an el cheapo like a Melissa and Doug simple frame loom. Some people choose to make their own by building a simple frame or repurposing a wooden picture frame or similar. Just be aware that the more tension the loom holds, the better it is for tapestry and if you go down the cheap route, well, you tend to get what you pay for.

A resource that I found to be great when starting out with tapestry, and still use for inspiration, is Kirsten Glasbrook’s book, The Art of Tapestry Weaving.

Aside from tapestry, are there other ways to make pictures with your loom. Oh, yes indeed!

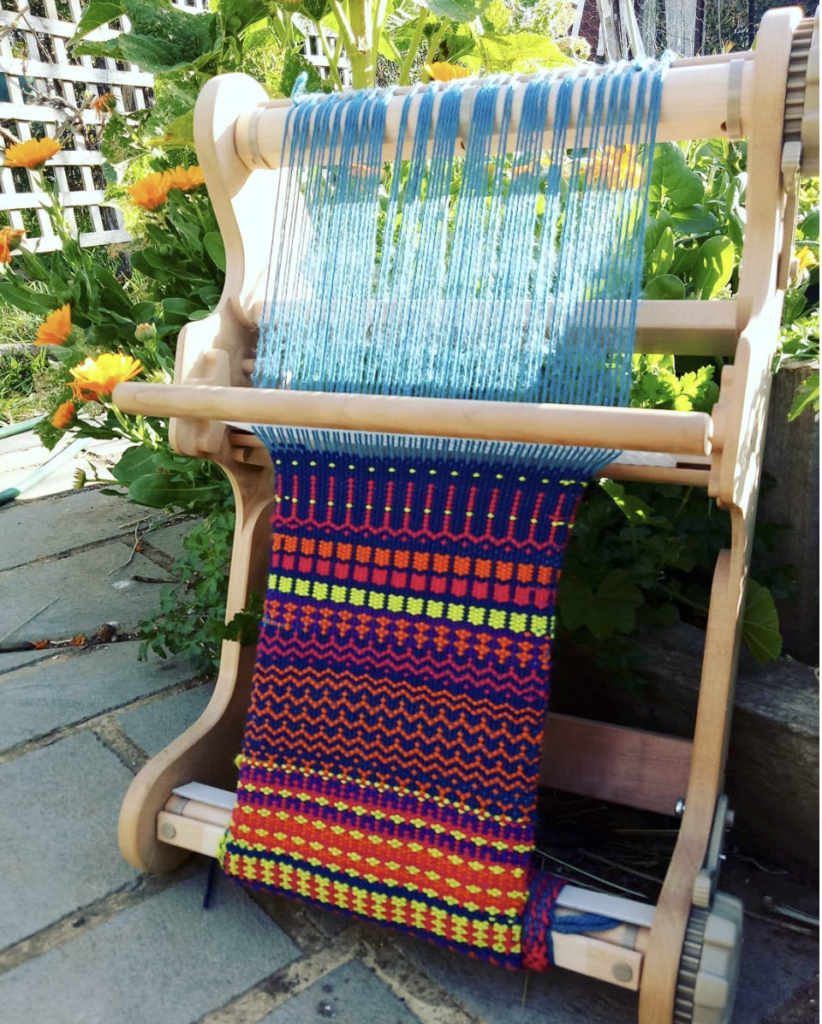
If I haven’t already gushed about krokbragd on this blog enough times, here I go again! If you’re interested in going down my blog rabbit hole on this topic, start with this post. Krokbragd is a weft based, most of the time but not always 3 shaft, weft faced weave. You repeat the same order of treadling over and over, but can vary your yarn colour combinations to produce simple and complex shapes and images. It is seriously cool, and that is why I’m always gushing about it.

Many of the shapes are open to interpretation, as they can be slightly non specific, but there is really so much to explore. One of my goals for this year is to weave a striking krokbragd wall hanging using my floor loom. Can’t wait for that one! Debby Greenlaw has written a terrific book, Krokbragd: How to Design and Weave.

I have a number of Youtube lessons on krokbragd using my rigid heddle loom, but if it’s new to you, start with the above video.

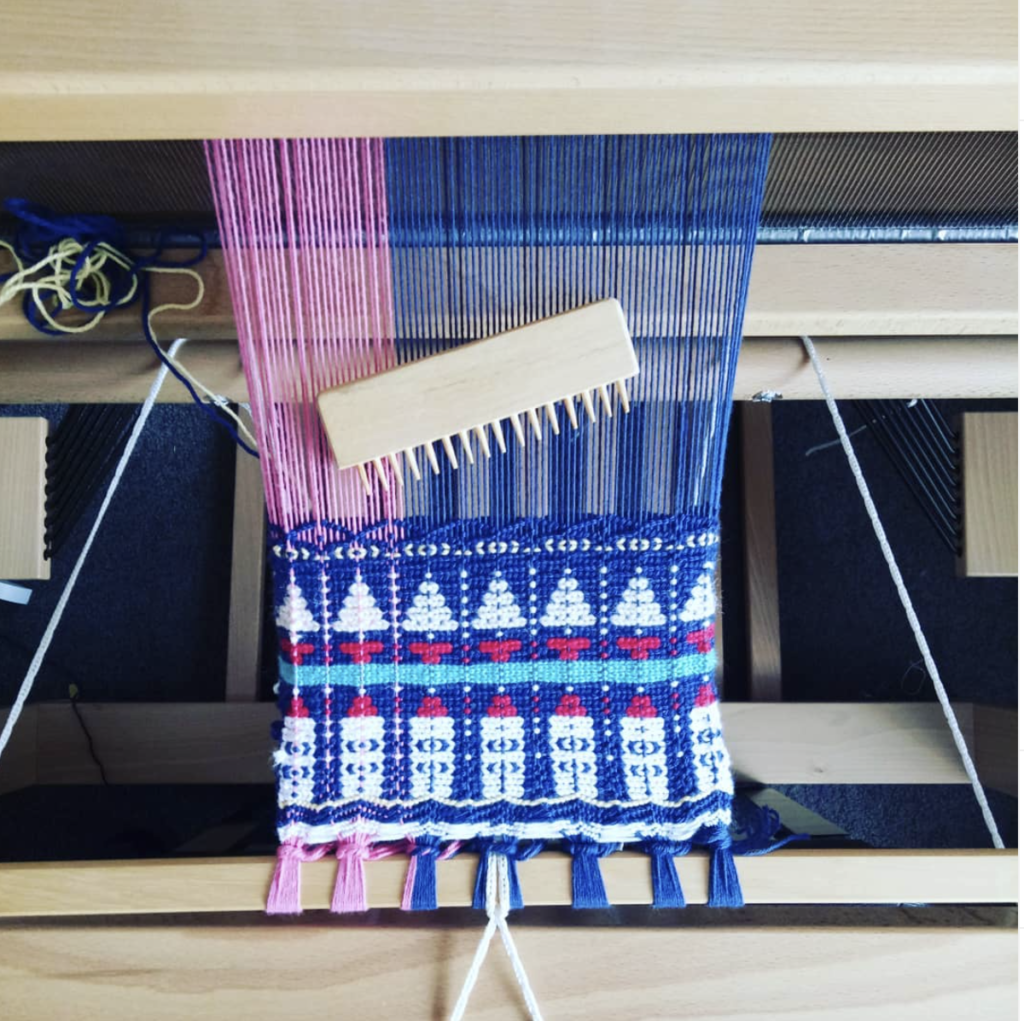
Boundweave is another weft faced weave that is very adaptable and versatile. It can be woven on 4 or more shafts (so it’s possible on a rigid heddle loom). The picture possibilities are endless. I have been playing around with bound weave on rose path threading and 6 shafts recently on my floor loom.

I’m using Nancy Arthur Hoskins’ Weft Faced Pattern Weaves book for guidance. My goodness, what an extensive book – so much to learn! This was my first attempt and I’ve now branched out with some more random designs, which is all very interesting. Slow, but interesting.

There is a lot more to be said about making pictures on your loom, but I hope this post has inspired you with some of the possibilities. Have you tried any of these techniques? Which is your favourite? Let me know in the comments!

Until next time…

Happy Weaving!
Filed Under: 4 shaft weaving, 8 shaft weaving, Floor Loom Weaving, Krokbragd, Rigid heddle weaving, Tapestry Weaving, Weaving Tagged With: boundweave, pictures, tapestry

Table loom options

by Kelly 27 Comments

When it comes to selecting a table loom to purchase, we are not as spoiled for choice as we may be for rigid heddle looms.

This can actually be a positive rather than negative thing, as it can be easier to choose when the selection is more narrow.

In this post I’m going to provide details for table looms currently available commercially (if I miss any brands it would be because they are obscure and not easy to obtain.) I will also give the retail prices of each so that you can compare.

*This post contains affiliate links

As a little disclaimer, the only brand of table loom I have actually used and am really familiar with is Ashford. So, I’m not giving an opinion or appraisal on the other brands, but rather providing available information and pricing.

Most of the looms I mention here do not come with extras like stands, benches or raddles. These things are available as separate purchases.

Let’s dive in!

I’m going to start with Ashford table looms, for the reasons already given above. There are quite a few options with Ashford and pricing is quite reasonable by comparison. Please note that the photographs are all courtesy of the manufacturers and all prices do not include stands.

All prices are in US dollars.

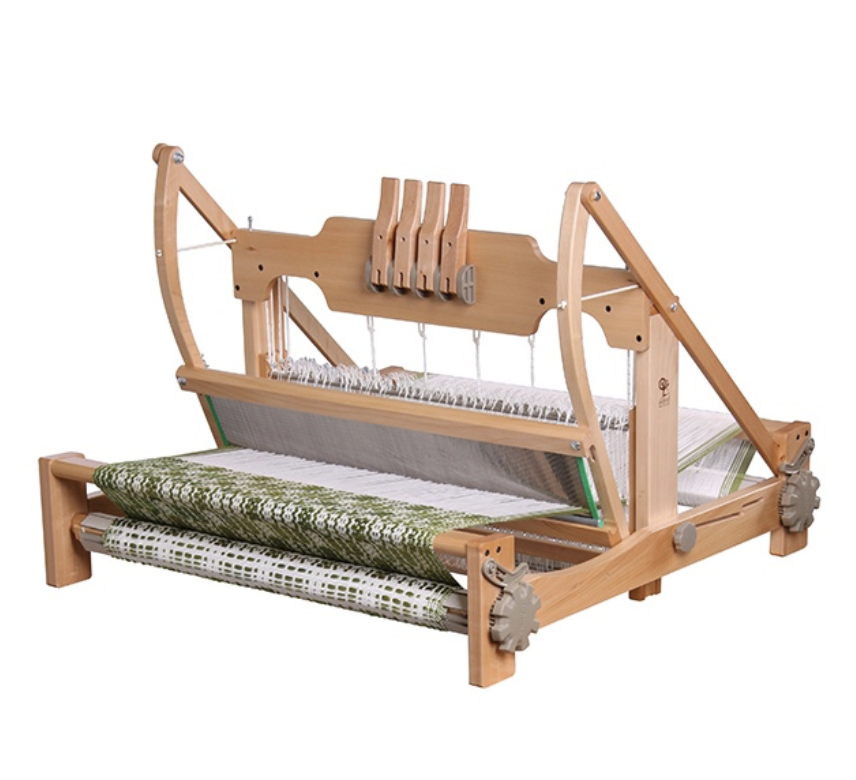
The entry level table loom from Ashford is a 4 shaft and is available in weaving widths of 16, 24 (pictured) and 32 inches. Prices start at around $840USD for the 16″.

The cool thing about a 4 shaft is that there is room on the castle front to upgrade to 8 shafts later if you choose to, so if you’re not sure you can always start out on 4 and see how you go.

There are also stands available separately, and these come with the option of also purchasing a treadle kit for more of a floor loom experience.

Then we have the 8 shaft range, also available in 16 (pictured), 24 and 32“. 8 shaft prices start at $890USD.

There is even a 16 shaft table loom for those who love the idea of having lots of shafts to play around with.

All the Ashford table looms have a folding castle for compatibility, meaning they are a good travel or teaching loom. The beater is overhead and easy to use. Each loom comes standard with a stick shuttle, threading and reed hook, 10 dent beater and 640 texsolv heddles to get you started. All Silver Beech wooden pieces come lacquered and ready to assemble.

If you need help to assemble your new Ashford table loom, I have instructional videos:

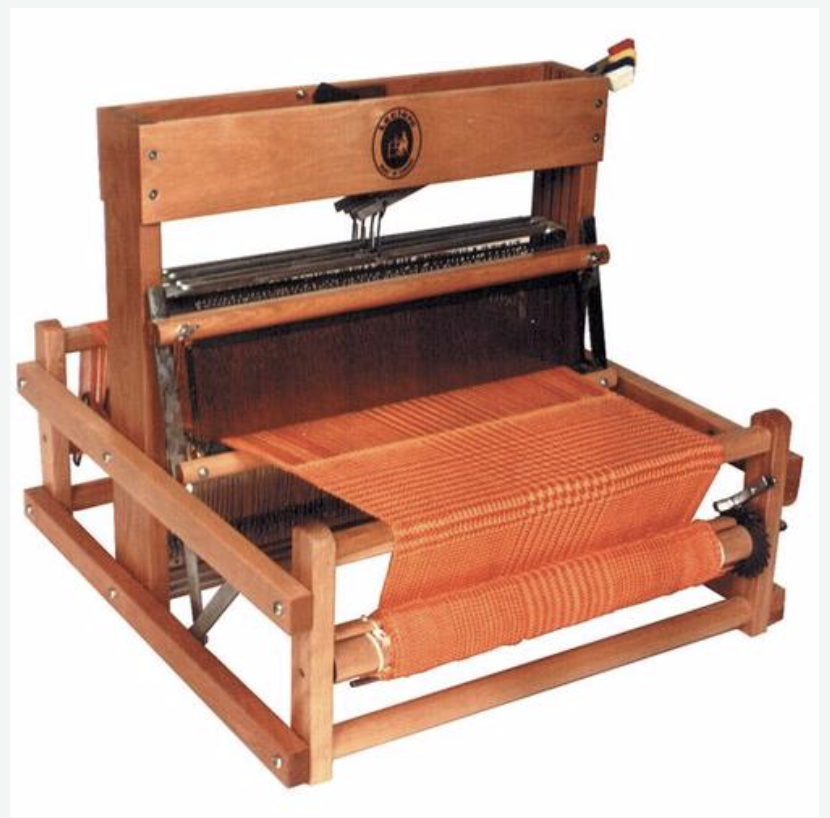
Le Clerc has several table loom options. Their looms look to me to be made in a more traditional style with dark wood, straight lines and metal heddles plus a boat shuttle included.

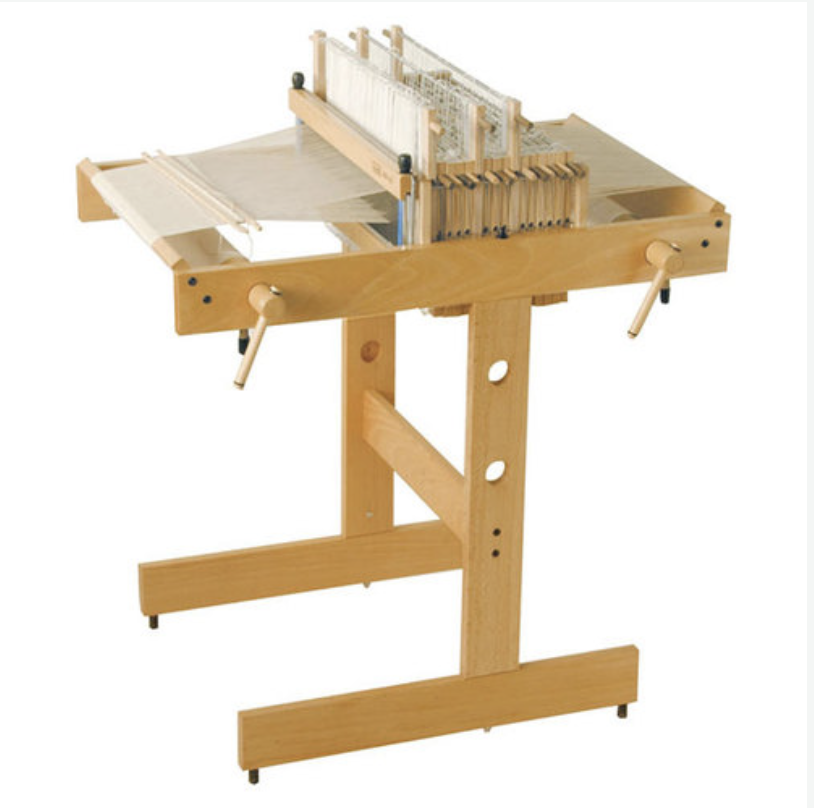
The Dorothy table loom comes in 15.75 or 24″ weaving width and may have 4, 8 or 12 shafts. Starting price is $750USD. Le Clerc also make the Voyageur, which goes right up to 16 shafts. You have the option of buying a stand with these looms and I must say that I really like the way their stands are basically a sturdy little table with side shelves – shelves are a great thing to have with any loom in my opinion! There is also the option here to purchase a treadle stand.

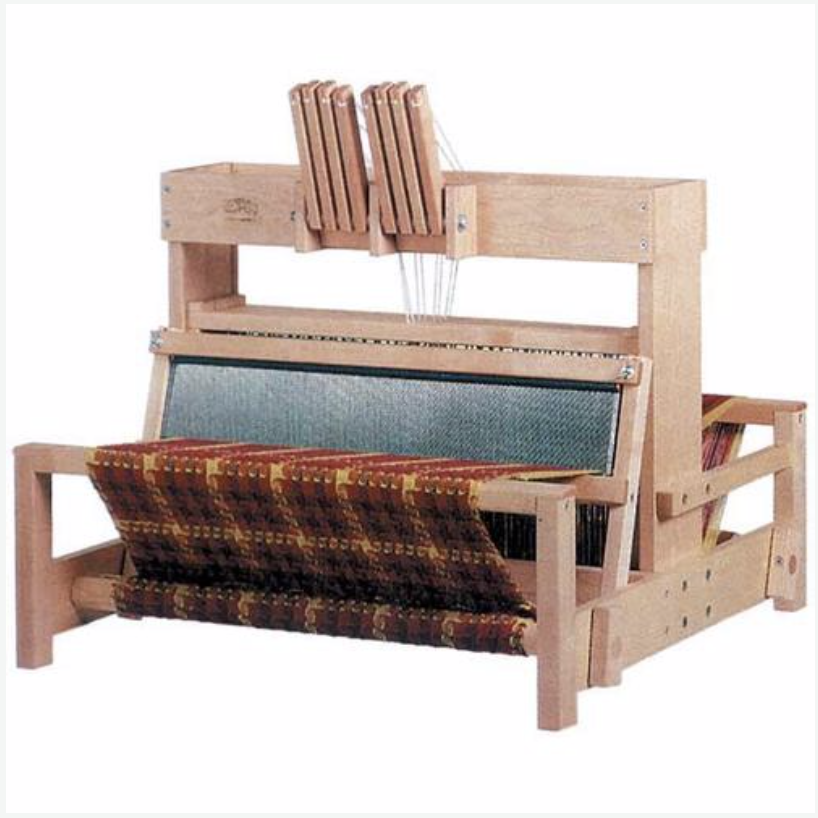
Your options for table looms with Schacht are a little narrower, to be the best of my knowledge they just make one model of table loom, but in a variety of weaving widths and a choice of 4 or 8 shafts. These looms are constructed with maple wood and you actually get a choice of reed size, which is a nice bonus! Prices start at $742USD. A stand is available for separate purchase, as is a double back beam kit.

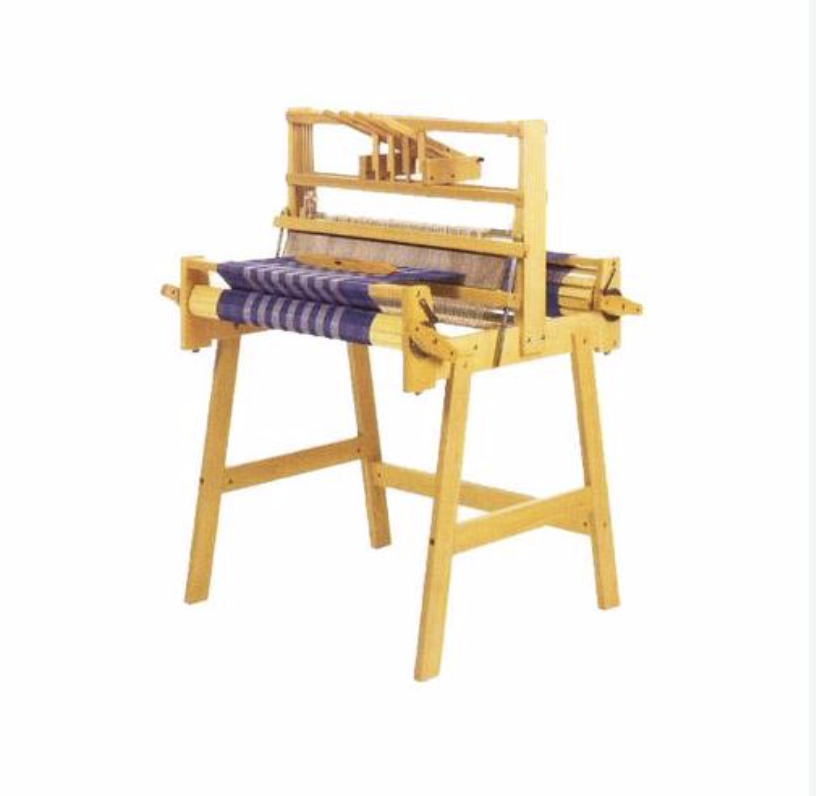
Glimakra makes the Victoria Table Loom. Once again, there is not a lot of variation as this is their only table loom and it is only available in 4 shafts with a 27″ weaving width. Something I find interesting about this loom is that it doesn’t fold and isn’t very portable, but just looking at it you can see that it’s a solid, sturdy loom. The starting price for this loom is $1,100USD and once again you have the option of purchasing a stand and treadle kit.

Toika makes a table loom in only one size (23.6″) but with a choice of 4 or 8 shafts. It comes with an 8 dent reed and 200 texsolv heddles. The levers for this loom look a little different as the ends that you grip on to for shaft manipulation are rounded pegs. At first glance, I wonder whether the shape of these pegs cause hand fatigue for the weaver, I do think that would be a possible problem for me. Prices start at $825USD. This loom can apparently be mounted on a stand, however I don’t think Toika actually make a stand specifically for this loom.

Lastly, Louet make a few different table looms. I have to mention the Klik Table Loom first, as it’s such a different concept to your regular table loom. The shafts are actually operated (raised) from the side based on a spring and click system. Then you beat with a swinging beater. The loom comes with 4 shafts, but up to 16 shafts can be added to the space. This loom looks very lightweight and portable, which would make it an ideal “take with you” loom. A couple of thoughts that spring to mind though. 1. You have to lean around to the side to operate the shafts, possibly not good for back or shoulder injuries? 2. The loom looks like it would sit flat on a table, but at the same time the shafts look lower than the bottom edge of the loom? And what about those handles, could you not do a full rotation if the loom was on a table? Therefore, would it possibly be necessary to purchase the stand to use this loom effectively? So, while the concept is very interesting, I would definitely want to try this loom before buying. Price for the Klik is $750USD.

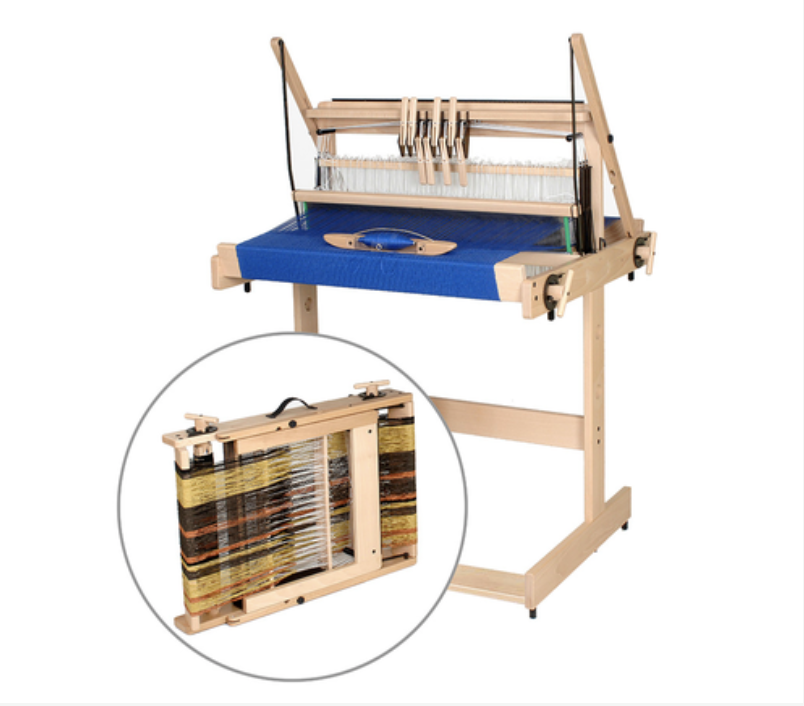
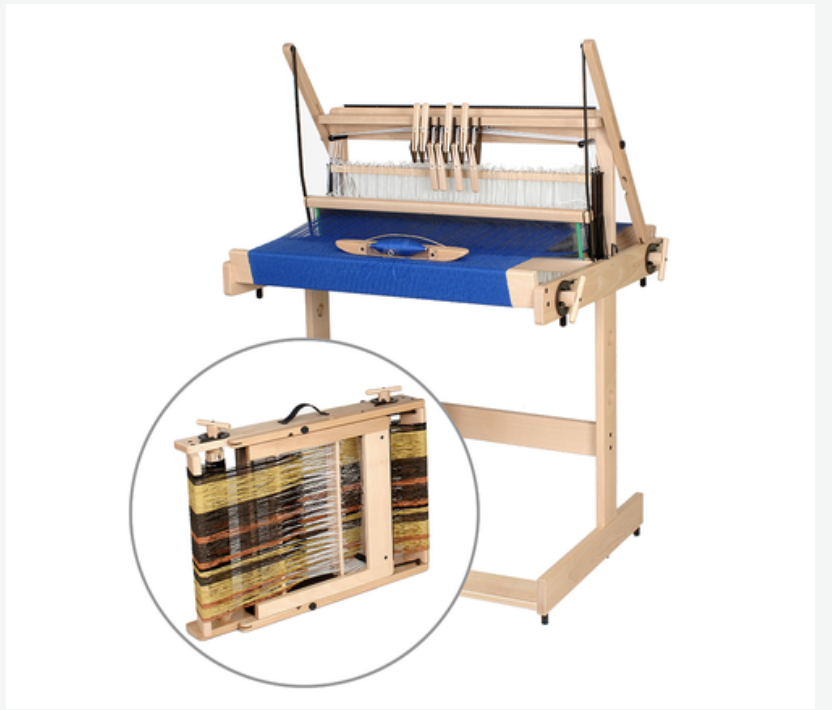
Louet also make the Jane (pictured) and the Erica table looms. I have heard very good things about these two looms and they are definitely gaining popularity. The Erica starts at $555USD for the 4 shaft or you can start with the 2 shaft at $370USD and upgrade to 4 later. The Jane comes standard with 8 shafts in 2 different weaving widths, and a built in raddle (no separate purchase for that) starting at $1,195USD. These looms fold down and are light weight to transport.

The links I’ve provided in this post are from Amazon and The Woolery.

If you are in Australia and interested in purchasing an Ashford loom, I recommend Tracy from Knit Spin Weave.

If you are in Australia and it’s a Louet you’re after, I recommend Nicky from The Thread Collective.

Have I missed any table looms that should have been mentioned? If so, please tell me in the comments below.

If you are interested in table loom weaving or already own one but need help to get going, my Table Loom Weaving course would be perfect for you!

I hope this has been useful to you!

Until next time…

Happy Weaving!
Filed Under: 4 shaft weaving, 8 shaft weaving, Table loom weaving, Weaving Tagged With: table loom weaving

What is a table loom?

by Kelly 39 Comments

A table loom enables multi shaft weaving without the space or financial investment that a floor loom requires.

*This post contains affiliate links.

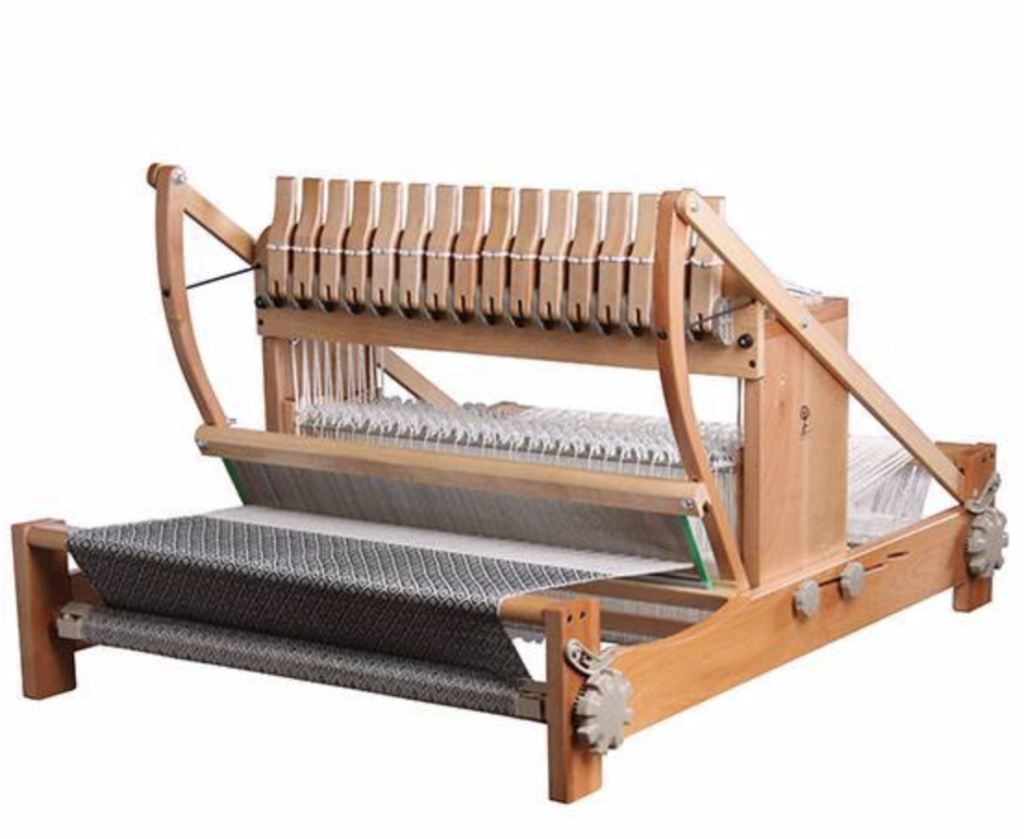
A table loom usually comes with four or more shafts. Four and eight shaft looms are the most common, but they can have more. Ashford, for example, manufacture a 16 shaft table loom!

Ashford 16 shaft table loom. Image from Ashford website.

Table looms are often favoured for their portability and affordability. They make a great loom to take along to workshops, or anywhere you want to take a multi shaft loom. Some will come with a handy carry bag and many will fold down to be even more space efficient. They are also often used for sampling, as you can test out your yarns or pattern before committing it to the floor loom.

Table looms come in a variety of sizes, meaning that if you only require one for sampling or you have a very small space to fit the loom, you could choose a 16 inch or lower weaving width. This size would also be suitable if you only wanted to weave narrower pieces like scarves.

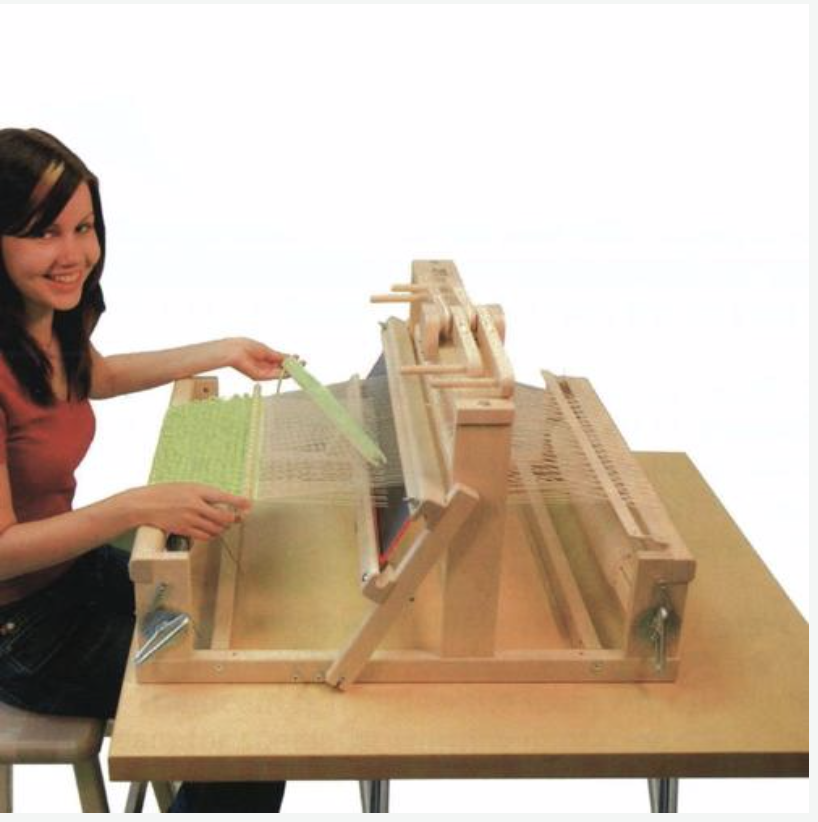
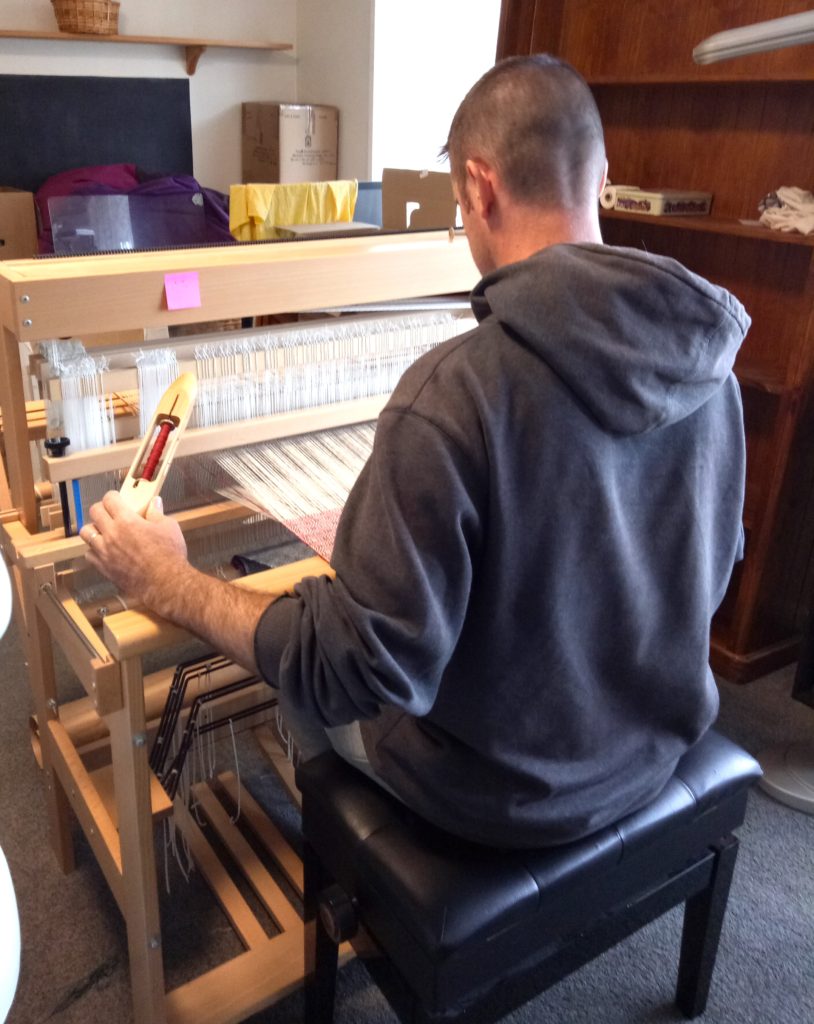
The mode of operation for weaving on a table loom differs to other looms and makes it instantly recognisable. The shafts, rather than being operated by raising or lowering a heddle/reed (as in rigid heddle weaving) or being foot controlled (such as treadling on a floor loom) are raised by the manoeuvring of levers that sit at the front of the castle (the upright part of the loom) and are tied to the shafts underneath. These levers are very simple to operate and as lever 1 corresponds with shaft 1 and so on, it is visually simple – you are actually looking at the levers right in front of you, making it difficult to mix up and get the pattern wrong.

Table looms are also adaptable. In the last paragraph I explained that the levers are hand operated, however if you want more of a floor loom experience, you can purchase a stand along with treadles. The treadles are tied to the shafts in place of the levers, allowing you to lift the shafts by depressing treadles with your feet.

Some looms can be purchased as a four shaft and upgraded to an eight shaft later on. This is a terrific option for those who:

  1. Wish to start out on four shafts only OR
  2. Don’t wish to make the financial commitment of an eight shaft loom right away.

To weave on a table loom, you will need a few things apart from the tools that come standard with the loom:

*A table space to keep the loom on whilst weaving (unless you also purchase a stand, which is available separately). If weaving at a table, some weavers choose to stand. My back is no good for standing so I like to use an adjustable height office chair that I find comfortable.

*A warping board. A table loom is warped indirectly, so you make your warp on the board and transfer it to the loom.

*A raddle kit. This is necessary for spacing your warp before taking it to the loom. You can buy the raddle kit that fits your size of loom. Some weavers choose to make their own.

You can see a short overview of the Ashford 8 shaft, 32″ table loom here-

And you can see a demonstration of me using the loom here-

I have some exciting news regarding table looms too! I recently purchased the Ashford 16″ 8 shaft table loom to use for teaching. My husband and I made a two part video that shows you how to assemble it.

But that is not all! My primary purpose for buying this new loom is because I have had so many requests for a table loom class and I am happy to say that I’ve put together a very comprehensive class, Weaving on a Table Loom.

I hope this post has been useful to you, let me know in the comments if you have any questions or simply want to leave me a comment.

Until next time…

Happy Weaving!
Filed Under: 4 shaft weaving, 8 shaft weaving, Table loom weaving, Weaving Tagged With: table loom

  • Page 1
  • Page 2
  • Page 3
  • Go to Next Page »

Primary Sidebar

Hand crafted boat shuttles

Categories

Archives

Meta

  • Log in
  • Entries feed
  • Comments feed
  • WordPress.org

Copyright © 2025 Kelly Casanova Weaving Lessons on the Foodie Pro Theme