• Skip to main content
  • Skip to primary sidebar

Kelly Casanova Weaving Lessons

  • Hi! I’m Kelly!
    • Disclosure
  • Online Weaving School Class Index
    • Common account issues
    • Common technical issues
    • What do I get with a membership?
  • New to rigid heddle weaving? Start here!
    • Never heard of the rigid heddle loom?
    • How to weave neat edges on the rigid heddle loom
    • Rigid heddle weaving
    • Rigid Heddle Weaving Patterns
  • Patterns
  • Subscribe

Krokbragd

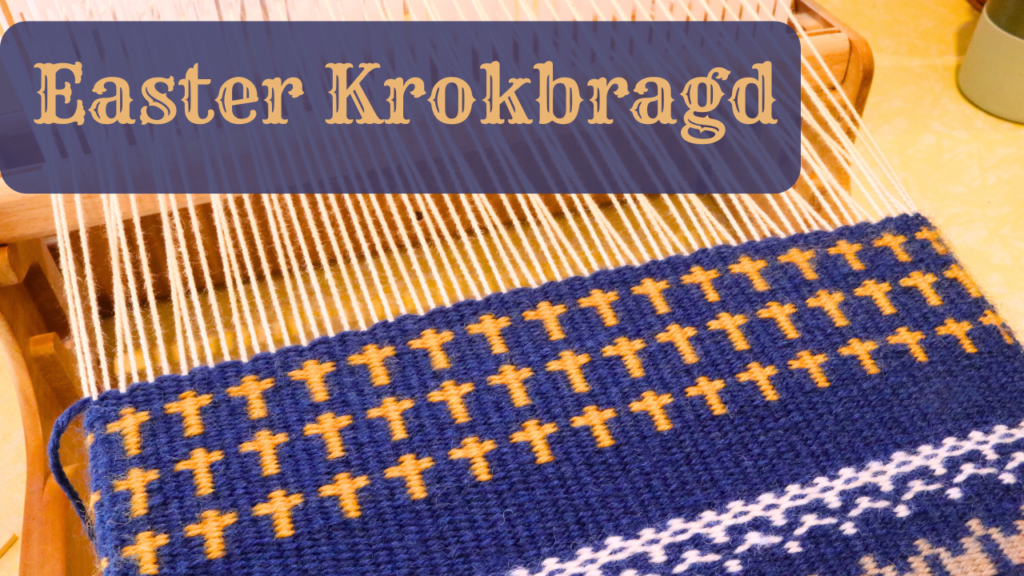
How to weave krokbragd crosses

by Kelly Leave a Comment

Here we are with yet another krokbragd weaving tutorial! It is close to Easter and so the design I chose to weave is in honour of our Lord Jesus Christ ❤️

I won’t explain what krokbragd is, because I have done that already, many times! Instead, if you want to know more, check out some of these links below:
How to weave krokbragd…

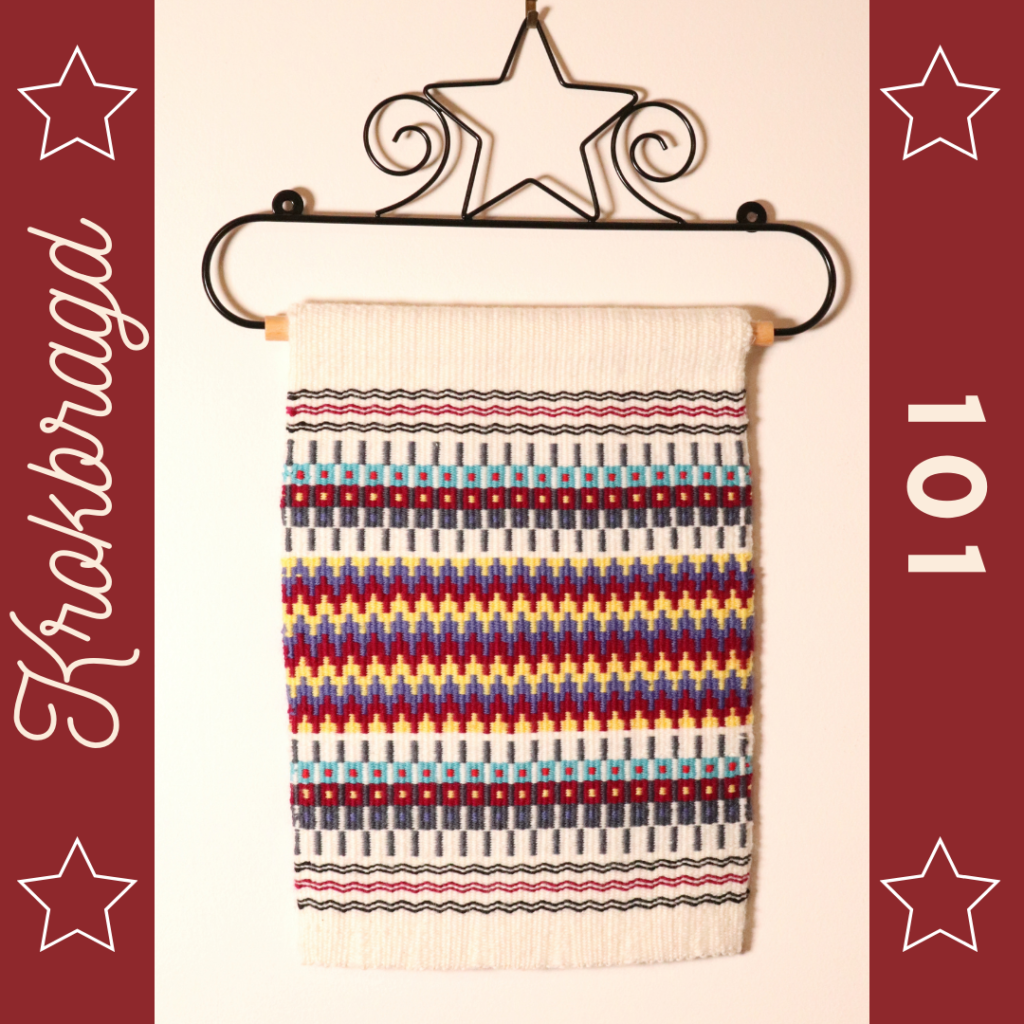
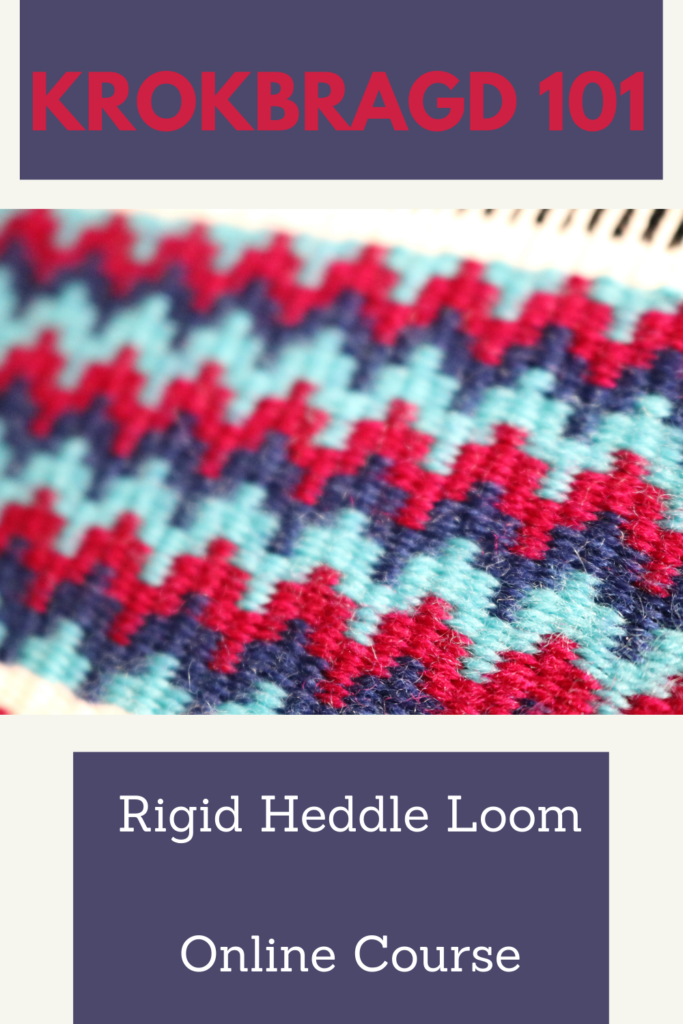
Krokbragd 101 Online Course…

Krokbragd Youtube Playlist…

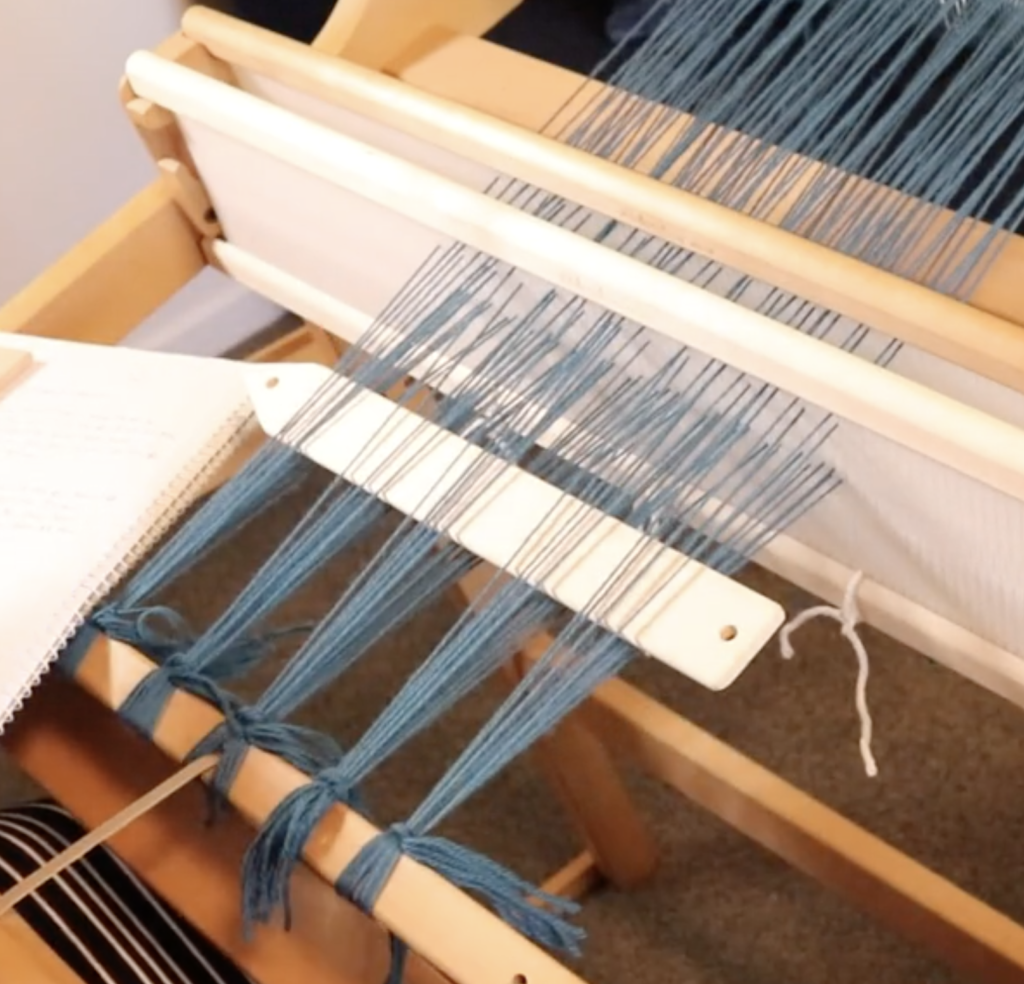
In this tutorial I am weaving krokbragd with two heddles, but you can absolutely use another setup such as a single heddle, pick up stick and heddle rod. Both of these methods are outlined in detail in my Krokbragd 101 course.

What you need for this tutorial

  • A rigid heddle loom (I’m using my Ashford Sampleit)
  • Two heddles of the same size
  • Additional beater, such as a tapestry beater or fork
  • Two shuttles (or use little yarn balls or butterflies if you prefer)
  • Two contrasting weft yarns

There are all kinds of tapestry or additional beaters, and yes, a household fork works just fine. An additional beater is really essential for krokbragd though, as it is a weft faced weave structure and a regular rigid heddle/reed is not sufficient to beat the weft right down.

I beat the weft down every 3 weft rows – it saves time and is just as effective. Use your heddle to “place” the weft but use the additional beater to pack it down.

We only need 2 weft colours for weaving, so choose one colour that you would like your crosses to be and the other as the background. Make sure your colours have enough contrast to ensure boldness of the design.

You can place your weft yarns on stick shuttles, roll little balls or use yarn butterflies – all these methods work just fine.

Here is how the weft looks after weaving 3 weft rows and prior to packing the weft down.

And here is how it looks once packed down. You want to aim to cover the warp completely.

Now, how to weave.

If using two heddles, your heddle positions will be:

  1. Heddles 1 & 2 up
  2. Heddle 1 down
  3. Heddle 2 down

The colour sequences will be as follows (check colour key for abbreviations):

Colour key: Yellow (Y), Navy (N)

  1. Y,N,N x 5
  2. Y,N,Y x 2
  3. Y,N,N x 2
  4. N,N,N x 3

Exactly how you use the design is up to you – You can weave bands of crosses or repeats of crosses or a row of crosses embedded in strategically, there are so many options!

If you would like to see this sequence in action, check out the following video on Youtube:

I hope you enjoy weaving this design, if you have any questions or comments please leave them down below ⬇️

Until next time…

Happy Weaving!

Filed Under: Krokbragd, Rigid heddle weaving, Rigid Heddle Weaving Patterns, Weaving Tagged With: easter, krokbragd, rigidheddleweaving, rigidheddleweavingtutorial

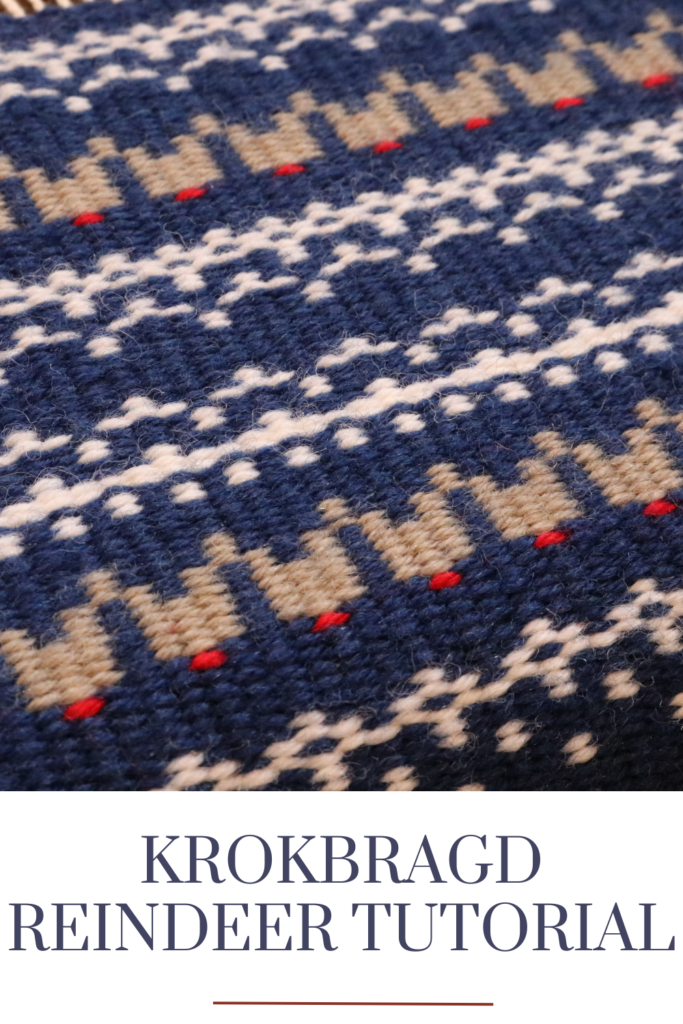
Krokbragd Reindeer Tutorial

by Kelly 2 Comments

It’s that wonderful time of year again, when thoughts start turning to festive project and gift ideas.

A number of years ago I released a How to weave Reindeer on a rigid heddle loom on Youtube and it has proved to be very popular! In that video we use pick up sticks in front of the heddle to achieve the shapes we need to build some little reindeer.

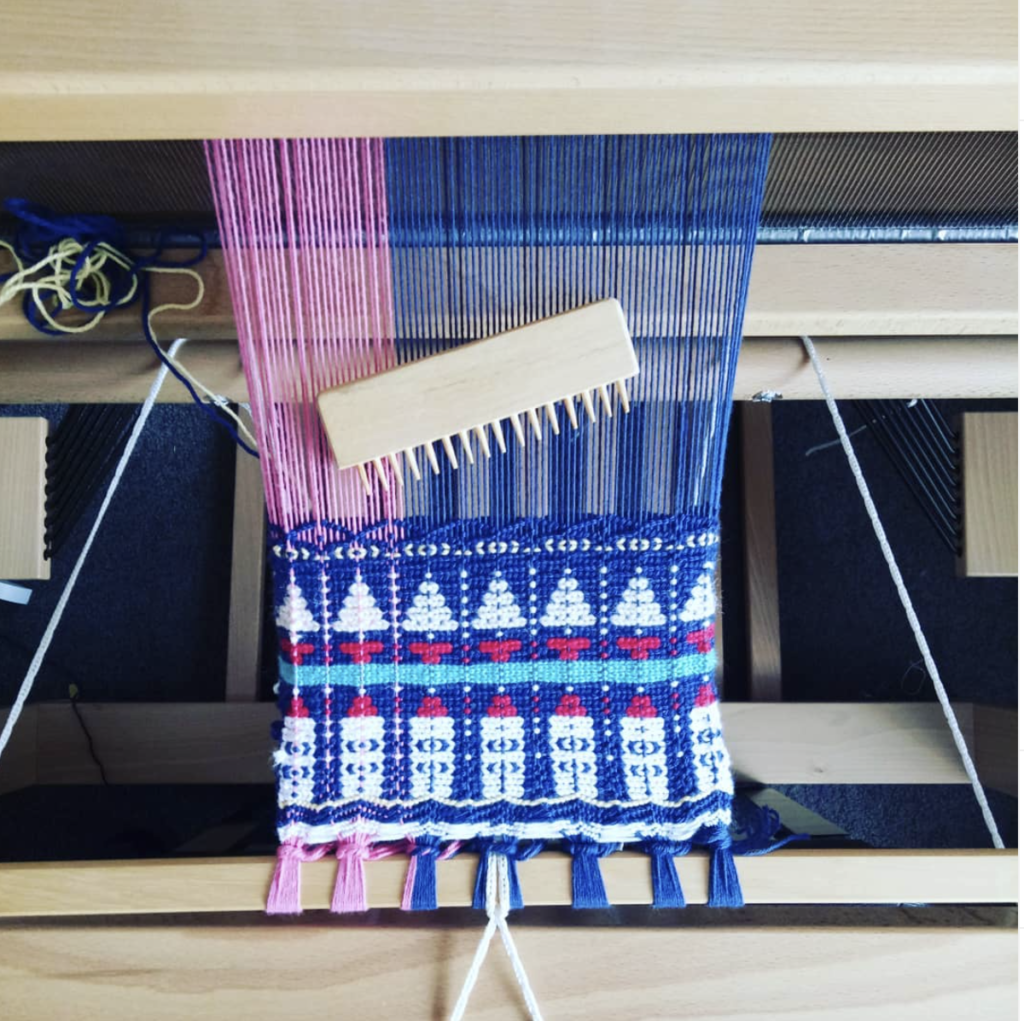
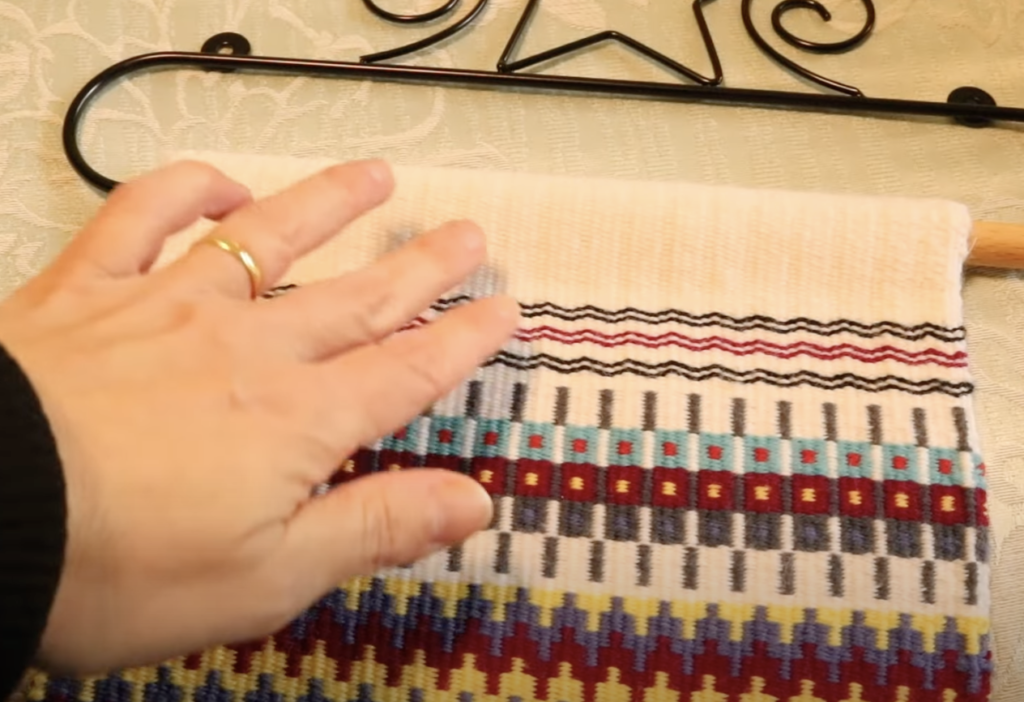
For my Christmas video this year, I decided to again weave reindeer but use a different weave structure for a different look. I already had my Sampleit loom warped for a krokbragd sampler so I set about designing some cute reindeer ensconced in a lovely Fair Isle inspired border.

This tutorial uses 4 colours for the weft – navy, white, red and beige. I used Bendigo Woollen Mills Luxury 4 play, which is a fingering weight wool. The warp should be a strong and thinner than the weft, I use a #12 seine twine.

Krokbragd-Reindeer-tutorial-PDFDownload

Be sure to watch the free Youtube tutorial so that you can follow the weaving sequence along with the printable PDF.

If you’re looking for further krokbragd learning resources, check these out:

Krokbragd 101 Online Course…

Krokbragd Youtube Playlist…

All About Krokbragd…

*This post contains affiliate links. For further information, please see my disclosure policy

Until next time…

Happy Weaving!
Filed Under: Krokbragd, Rigid heddle weaving, Rigid Heddle Weaving Patterns, Weaving Tagged With: Celebrations, christmas, krokbragd, reindeer, rigidheddleweaving, tutorial

Krokbragd Patterns Interview and Giveaway!

by Kelly 287 Comments

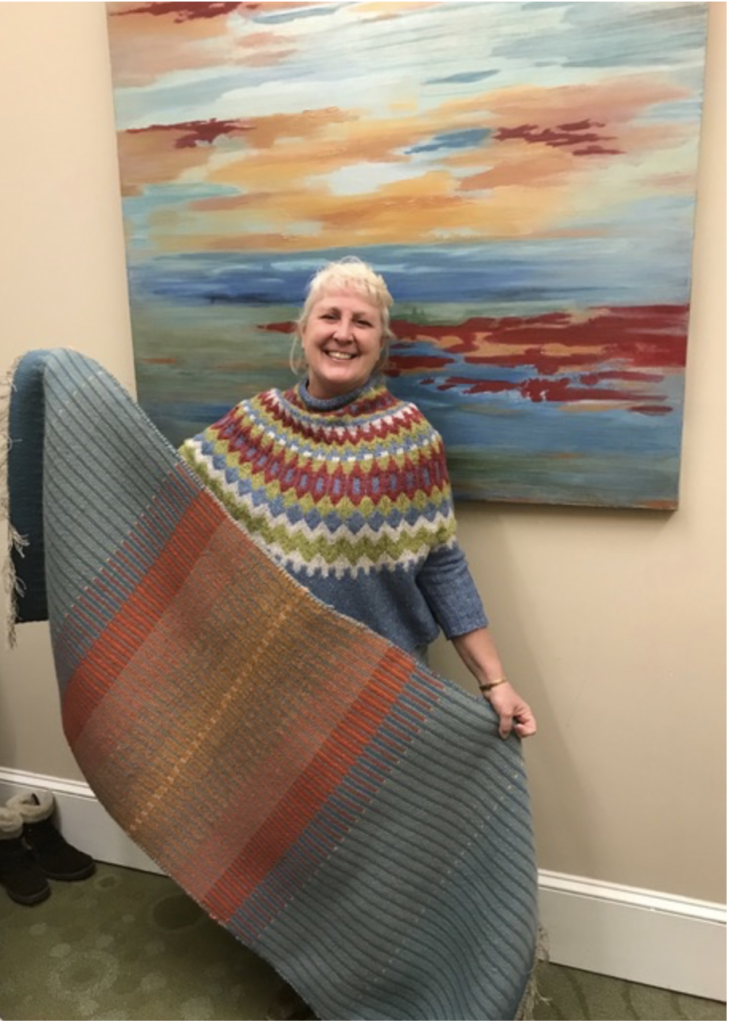
Have you all met Debby Greenlaw before? I hope you have, but if not, you may want to read over this post where I reviewed Debby’s first book, the wonderful “Krokbragd – How to Design and Weave”.

*This post contains affiliate links. For further information, please see my disclosure policy.

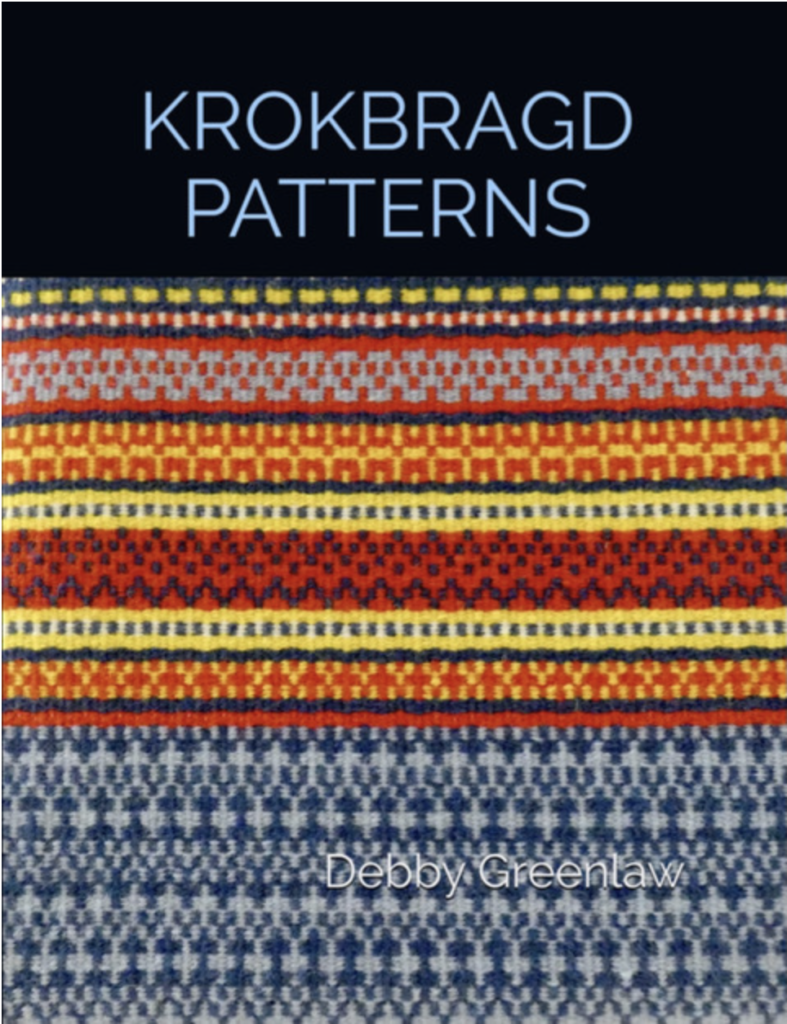
I am so excited to share the news that Debby has written and released a brand new follow up krokbragd book, titled “Krokbragd Patterns”.

I am doubly excited to announce that, thanks to Debby’s generosity, one of you lucky readers will have the chance to win a personally signed copy of Krokbragd Patterns! Entry details are available at the end of this post.

I thought it the perfect time to have a chat with Debby so that you can all get to know her a little better and find out more about the new book, so grab a cup of tea and get comfy!

Thank you for taking the time to be my blog guest today 😊 Can you start by telling us a little about your weaving journey so far?

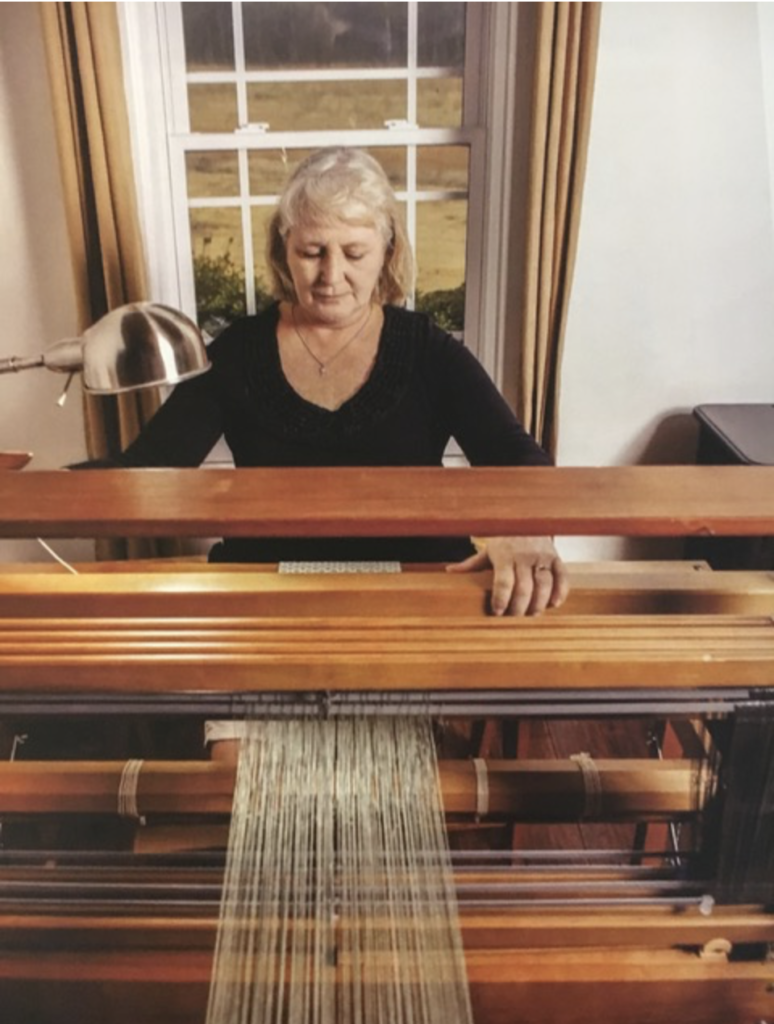
“Weaving was my entry into the wonderful world of fiber arts. I am a relatively “late bloomer” in this area, not starting the journey until I retired in 2016 after a 40+ year career as a nurse/nurse practitioner. I purchased an Ashford Sampleit loom at a local fiber festival just to see if I would like this weaving thing . . . I loved it. That lead to a floor loom, a dye garden, a spinning wheel, and eventually knitting needles and crochet hooks!”

What looms do you have and which one gets the most use?

“I have a Leclerc Nilus 4-shaft floor loom, a Kromski Harp Forte rigid heddle, and a Louët Jane 8-shaft table loom. By far the Jane gets used the most!“

You are perhaps most well known for your krokbragd weaving. What is about krokbragd that you love?

“First, I’m drawn to the Scandinavian aesthetic. My heritage says I’m German through and through, but I think there must be some Norse hidden in there. I love the simplicity of design and the color combinations of Scandinavian weaving. Krokbragd embodies both of those characteristics.”

Your first book, “Krokbragd: How to Design and Weave” had been immensely popular. What lead you to write a book all about krokbragd?

“Simply, there wasn’t a book written on the subject. In fact, several years ago, there were very limited resources available on krokbragd. I saw a social media post that said, “someone should write a book,” and I thought I can do that!”

You are just about to release your second book, “Krokbragd Patterns”. Did you decide to write a follow up book based on the feedback received from your first book? What excites you the most  about this book?

“You’re absolutely correct.  I received emails, comments, and even a review asking for a krokbragd pattern book.  

Hmmm . . . what excites me the most. It would have to be the test weavers. Eighteen delightful women answered my request to be test weavers for the book’s projects. Seeing my designs come alive in their talented hand was so exciting. Their feedback, enthusiasm, and encouragement were invaluable to me during the designing and writing process.”

You are blessed to live in a beautiful location. How do you most enjoy spending your days? What should visitors to your region look out for as a “must do”?

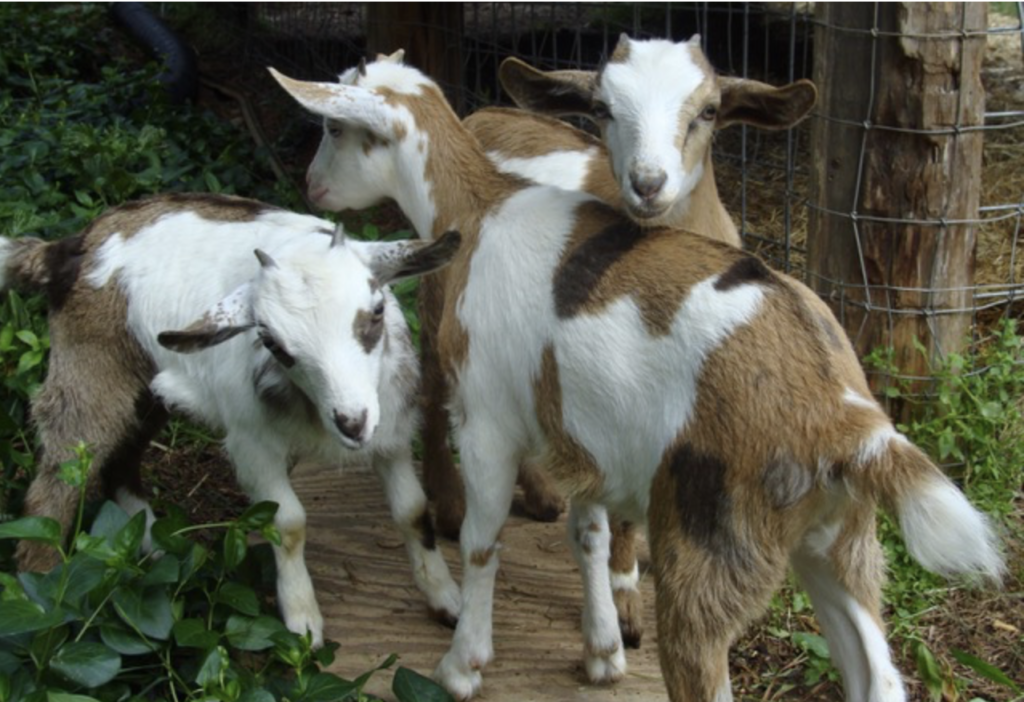
“God has graciously blessed my husband and me with a beautiful place to live, a small farm in rural South Carolina. We share our space with 21 dairy goats, a mini donkey, chickens, a barn kitty, and a playful pup! There are many routine farm chores to keep up with, along with the occasional urgency/emergency. I’ve found my nurse practitioner skills translate well to farm animals! In addition to fiber arts, I also like to garden.  

South Carolina is diverse in natural beauty. It is one of the smaller U.S. states but stretches from the seashore to the mountains. It is also rich in history and historical sites and gardens.”

You can find more great weaving information on Debby’s blog, Flora & Fiber. Books can be purchased through the blog, on Amazon or in selected stores.

Purchase Krokbragd – How to Design and Weave

Purchase Krokbragd Patterns

Now, about that giveaway! To enter, leave a comment below that describes why you would love to win a signed copy of Krokbragd Patterns. If your comment doesn’t show up right away, don’t worry, I will approve it when I see it (I have to keep those spammers at bay!)

Open to anyone worldwide.

I will draw the lucky winner on the Saturday 17th of April, 2021.

  • THE GIVEAWAY HAS NOW CLOSED. CONGRATULATIONS TO THE WINNER, CHERI SUTHERLAND!

Until next time…

Happy Weaving!
Filed Under: Gift Guide, Giveaways, Inspiration, Interviews, Krokbragd, Weaving Tagged With: giveaway, interview, krokbragd

Can you weave plain weave on krokbragd threading?

by Kelly 9 Comments

My answer to this question is: “Yes… but are you sure you want to?”

There are times when you’re weaving krokbragd and you want to have a little area of just plain colour, whether it’s to break up a busy design or as a border section.

*This post contains affiliate links. For more information, please see my disclosure policy.

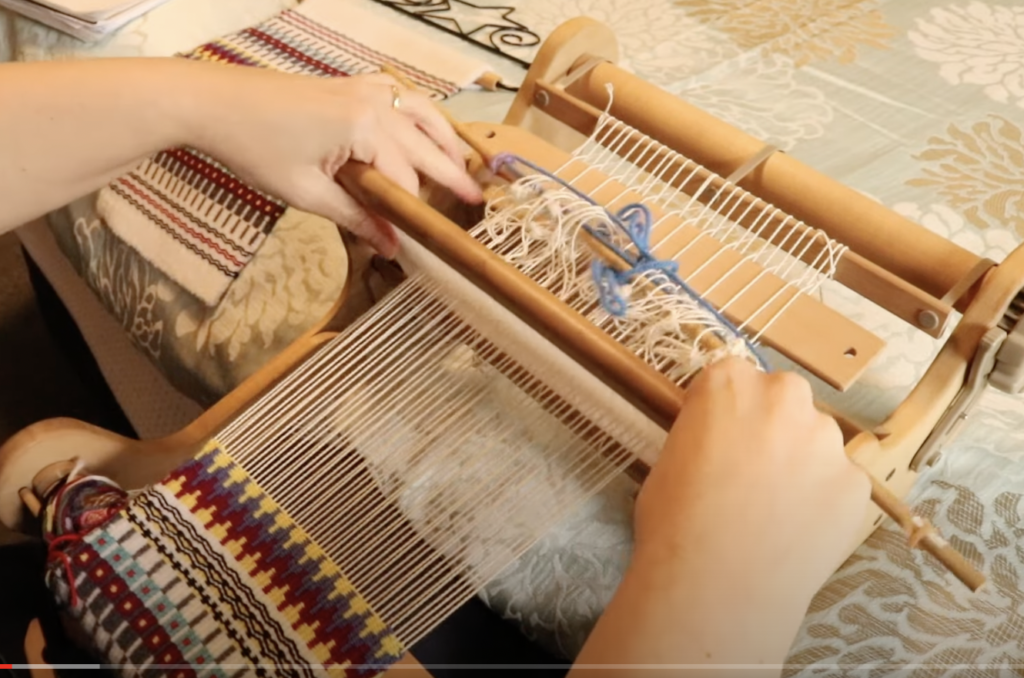
My wallhanging piece pictured above has some larger bands of solid white at the top and the bottom to act as borders. The top section was also woven in order to fold over and form the sleeve for my quilt hanger.

You might naturally think that for weaving a solid band of colour, you would choose plain weave. If you have your rigid heddle loom set up with a single heddle, heddle rod and pick up stick, plain weave is easy.

Single heddle, heddle rod and pick up stick loom setup

All you have to do to achieve plain weave on this setup is:

  1. Heddle up
  2. Heddle down

However, plain weave is definitely not the best option (in my opinion) and I’m going to tell you why.

Plain weave is a balanced weave

By it’s very nature, the amount of warp showing compared to the amount of weft showing is equal, ie. balanced! Now, consider the very weft faced krokbragd you have been weaving all this time. The weft completely covers the warp so that all you see is the colours of the weft forming patterns. If you suddenly throw a band of plain weave in there, it’s not going to match up so well with the krokbragd.

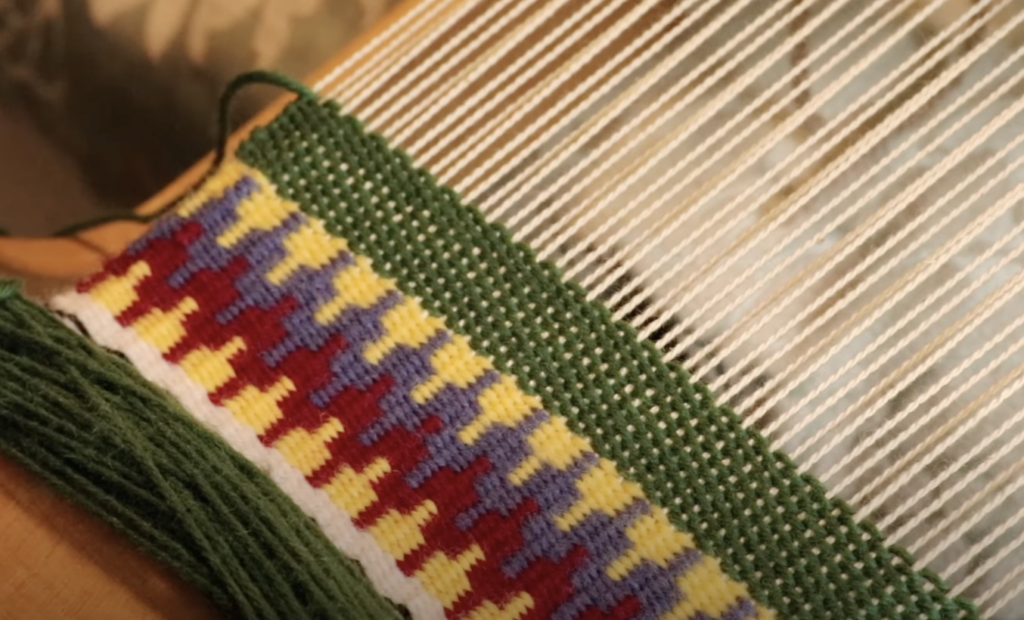
Compare the band of green plain weave just woven with the rest of the krokbragd underneath. See the problem?

The warp is showing through, and considering we have spent the rest of the piece carefully beating down the weft to cover the warp, the plain weave now sticks out like a sore thumb! If the entire piece was plain weave, it would be desired that the warp is showing through at the same rate as the weft, but not for krokbragd.

Plain weave is a lighter weave structure

It’s not only the visual aspect of the plain weave that is different to the krokbragd either. Weft faced fabrics are generally quite stiff and dense. There is a great difference in texture between the two weave structures on this piece, with the plain weave section being thin and light.

Changing the weave structures changes your edges

This difference in weight of the woven piece affects the fabric in other ways too. Krokbragd has more draw in than plain weave, so suddenly my edges are no longer consistent and look slightly bulgy in the plain weave section.

So, how do we solve this problem?

Thankfully the answer is extremely simple. All you have to do is keep weaving krokbragd!

Just use the solid colour that you want for your band of colour and move through the 3 step krokbragd weaving sequence. Don’t change your colour until you have the desired amount of weaving.

You can now compare the two sections of weaving in green – the part where the warp is showing is the plain weave and the more uniform looking part on top is the krokbragd. Also, because the green krokbragd follows the previous weave structure, it looks much more uniform and “like it belongs” there.

If you want to learn more about weaving krokbragd on your rigid heddle loom, check out my Krokbragd 101 online course.

If you would like to view this blog post in video format, please view here:

I hope you enjoyed this article! Perhaps it gave you some new ideas for krokbragd design? Or perhaps it has inspired you to give krokbragd a try? Let me know in the comments section below!

P.S. Have you seen the share buttons at the top of this post? You can easily share this article to Pinterest, Facebook or via email with one click. The more shares, the more weavers I can help! Thank you!

Until next time…

Happy Weaving!
Filed Under: Krokbragd, Neat edges, Online Weaving School, Rigid heddle weaving, Rigid Heddle Weaving Patterns, Tutorials, Weaving Tagged With: krokbragd, plainweave, rigid heddle weaving

Krokbragd 101 Online Course

by Kelly 13 Comments

It’s been in my mind for a long time to make a complete “from start to finish” style rigid heddle krokbragd class to add to my Online Weaving School.

My krokbragd videos on Youtube are some of my most popular videos, but many of you have asked me for more. Considering krokbragd is one of my favourite weave structures, I am more than happy to oblige!

*This post contains affiliate links. Please see my disclosure policy for further information.

My aim for this course is to introduce newer weavers to this fabulous weave structure, but also to help more seasoned weavers learn and enjoy weaving krokbragd. I provide two different loom set ups to accommodate for personal preferences, for the equipment you may have on hand and as an additional learning experience.

The first section is a sampler woven with a single heddle, a pick up stick and a heddle rod. This is how you will see me weaving krokbragd in my Youtube videos.

The second section is the exact same sampler, but woven using two heddles of the same size.

The student can choose to either weave the sampler twice, practicing both methods of setting up the loom, or weaving the sampler once, choosing the set up method they prefer.

Whichever set up method you choose, step by step instructions are provided.

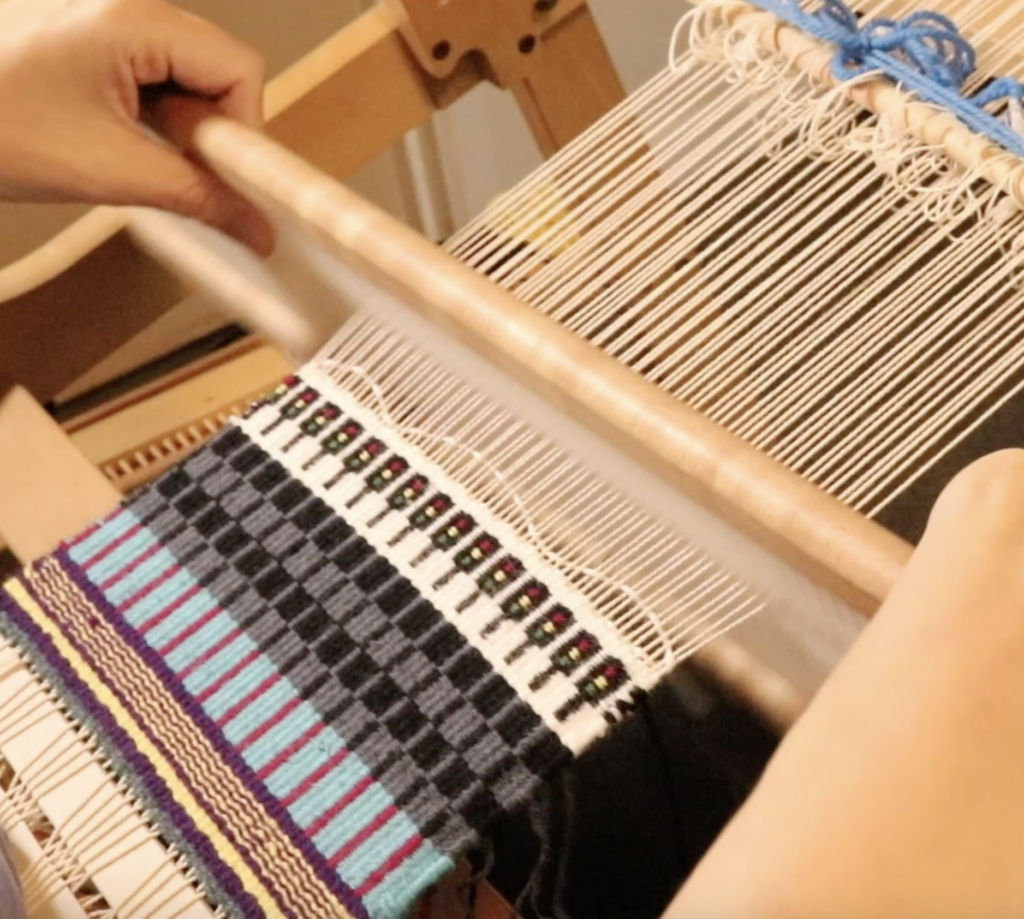
In the sampler we learn to weave some really fun and beautiful designs, including:

  • Columns
  • Squares
  • Stripes
  • Flowers
  • Flame point, and even
  • Traffic lights!

You then have the space and freedom to practice these designs on the same warp or to try some of your own designs!

In this course we will be looking at common krokbragd issues like beating tension, appropriate yarns, colour and neat selvedges.

There will be additional visual threading diagrams as well as the video demonstrations.

The course culminates in a final project which will be a beautiful, one of a kind wall hanging. I have always wanted to weave a krokbragd wall hanging as an artistic feature for my home and I can’t wait to share this project with all of you!

Krokbragd is so fun, relaxing and rewarding, I just know you are going to LOVE this course!

Gold members of the Online Weaving School have early access to the course as it is being made and uploaded. If you are a Gold member, go to your curriculum list and look for “Krokbragd 101” under “K”. Alternatively, click here for the direct link.

This course will become available to other members upon the release date. It will also be available for single, non member purchase.

This class is now open and can be purchased here.

If you are interested in krokbragd and want to know more prior to the course opening, I have a lot of free resources for you! Start with this post for more information.

Until next time…

Happy Weaving!
Filed Under: Krokbragd, Online Weaving School, Rigid heddle weaving, Rigid Heddle Weaving Patterns, Weaving Tagged With: krokbragd, krokbragdweaving

What is a heddle rod? Part 2- how to install the rod

by Kelly 4 Comments

Last week we talked about how invaluable a heddle rod is to the rigid heddle weaver.

I showed you how to make string heddles for the heddle rod. If you missed that post, please click here.

*This post contains affiliate links. For more information, please see my disclosure policy.

Now that we know how to make our own string heddles, we can learn how we use them on a heddle rod.

The actual rod needs to be wider than the width of the piece you’re weaving. It can be either flat or round. It should be fairly lightweight and not so large that it is difficult to pick up. It should be smooth but not slippery.

For this tutorial I’m using a smooth but not lacquered wooden dowel measuring 9mm (3/8 of an inch) around. The dowel was purchased at a local hardware store.

Begin by picking up the threads you want to place on the heddle rod according to the pattern or instructions you’re using. It is easiest to pick up the threads in front of the heddle first using a pick up stick. Make sure your heddle (or if you’re using more than one, heddles) are in the down position. This brings slot threads up, and it’s the slot threads we want to pick up.

Once your threads are picked up, slide the front stick towards the heddle and place it on it’s edge. This props up the heddle rod threads at the back of the heddle and differentiates them from all the other threads.

Now you can insert another pick up stick (or stick shuttle if you don’t have the extra pick up stick) into the shed that has been created by the propped up threads behind the heddle/s.

You will need your piece of dowel or whatever you’re using for the heddle rod plus your string heddles handy.

You may find it easier to sit or stand behind the loom for this next part. Working from either right to left (it makes no difference) pick up the threads in order from one side to the other. Keep your pick up stick in place as your visual guide – you can clearly see which threads need to be picked up. Have a string heddle ready at this point.

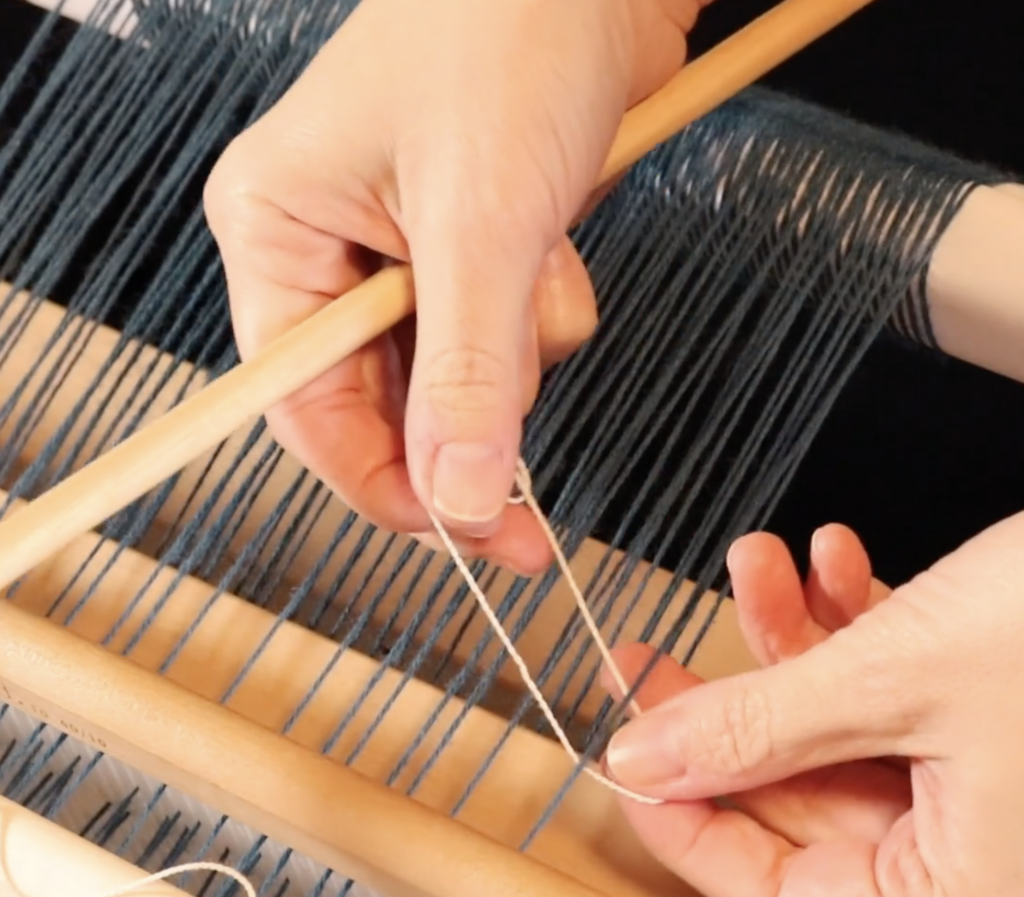
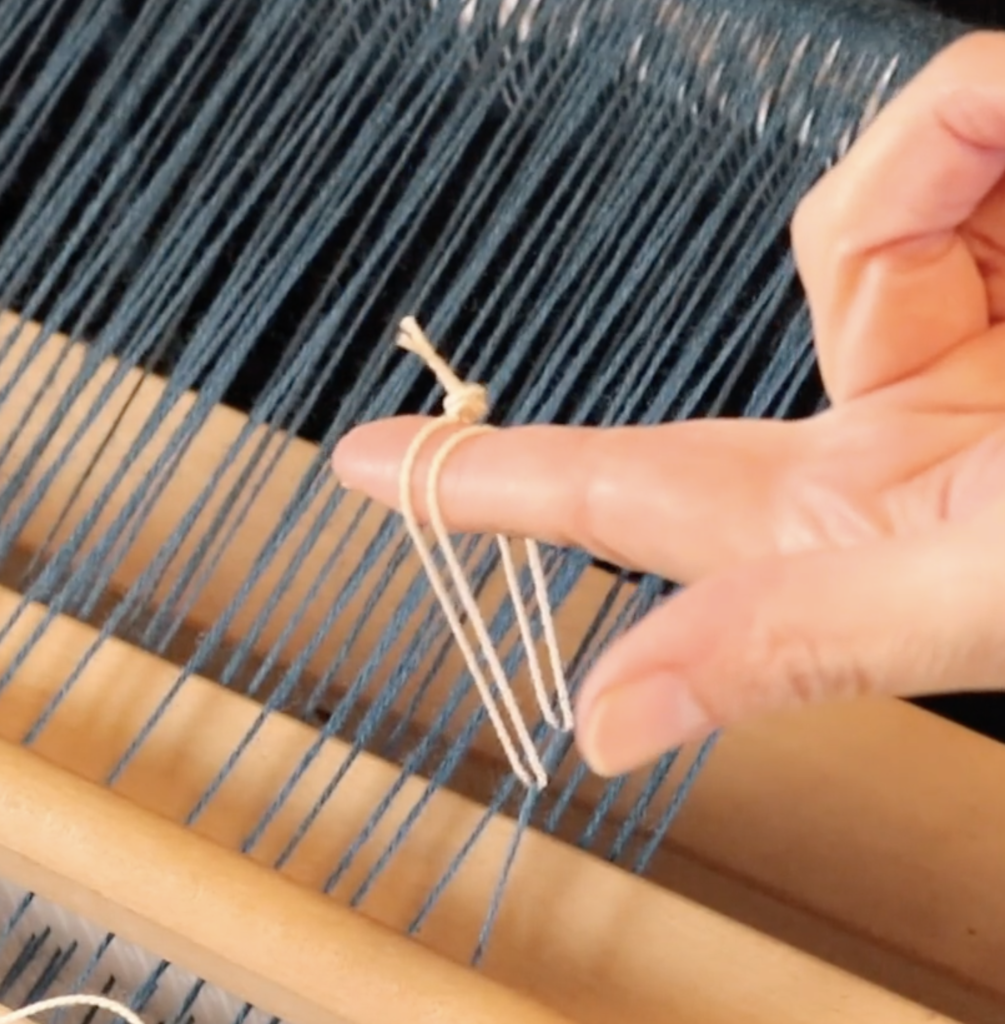
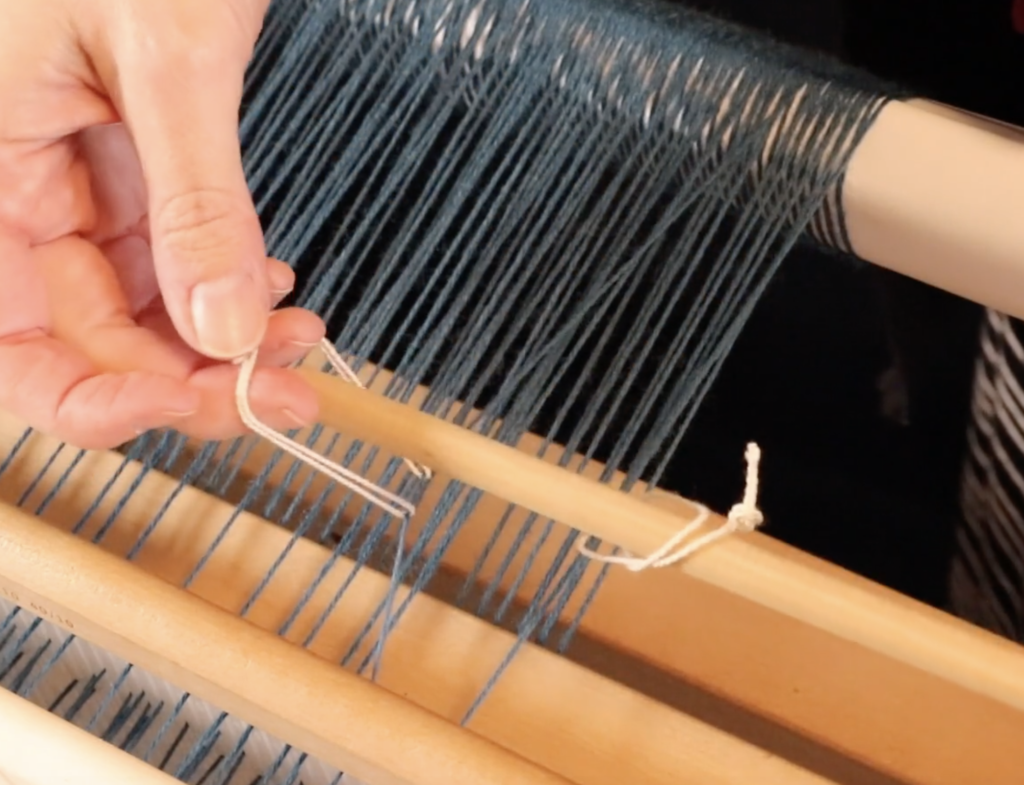
Bring a string heddle underneath the first thread so that it has a loop on either side of the thread. One loop will be smooth, the other will contain the knot. It is very much preferable not to have your knot near the thread. You want to arrange it so that it will sit on top of the heddle rod.

Bring the two loops of the string heddle together at the top. Note how my knot is sitting at the top rather than at the bottom or underneath the warp thread.

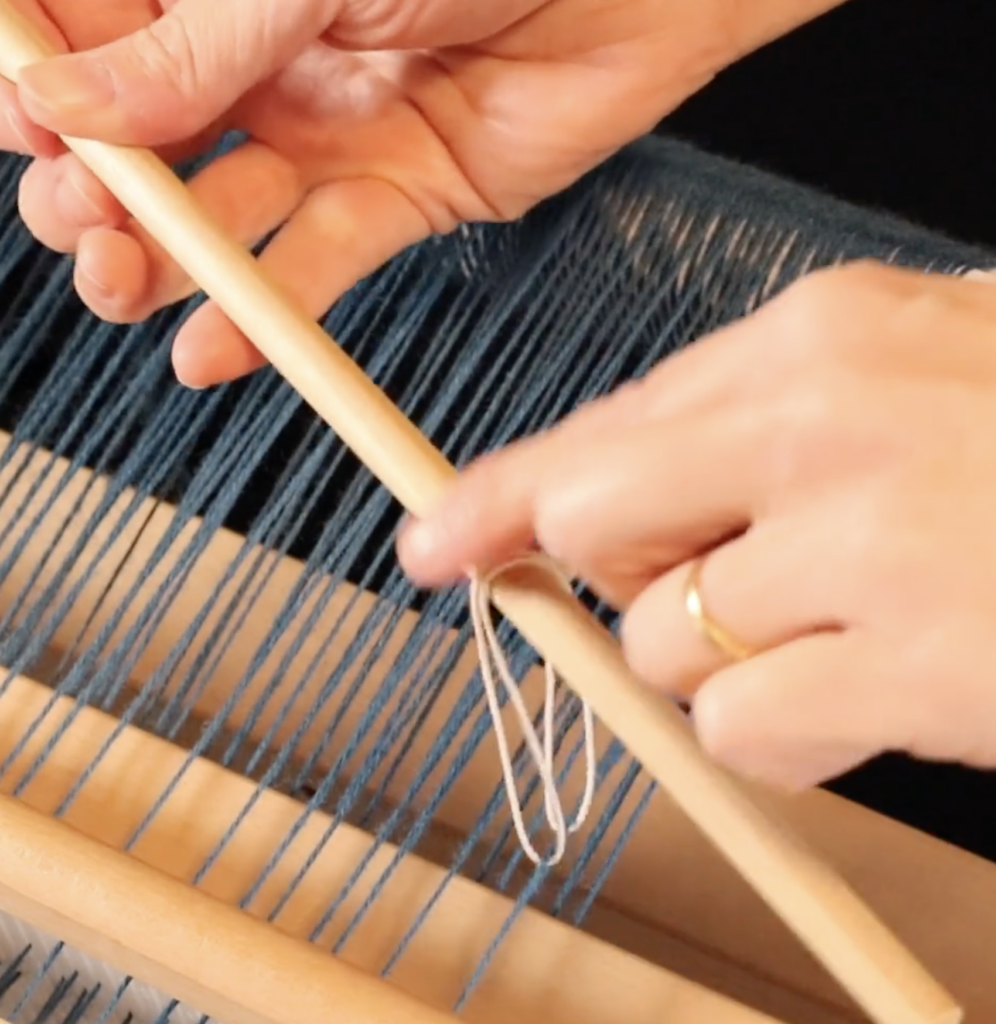
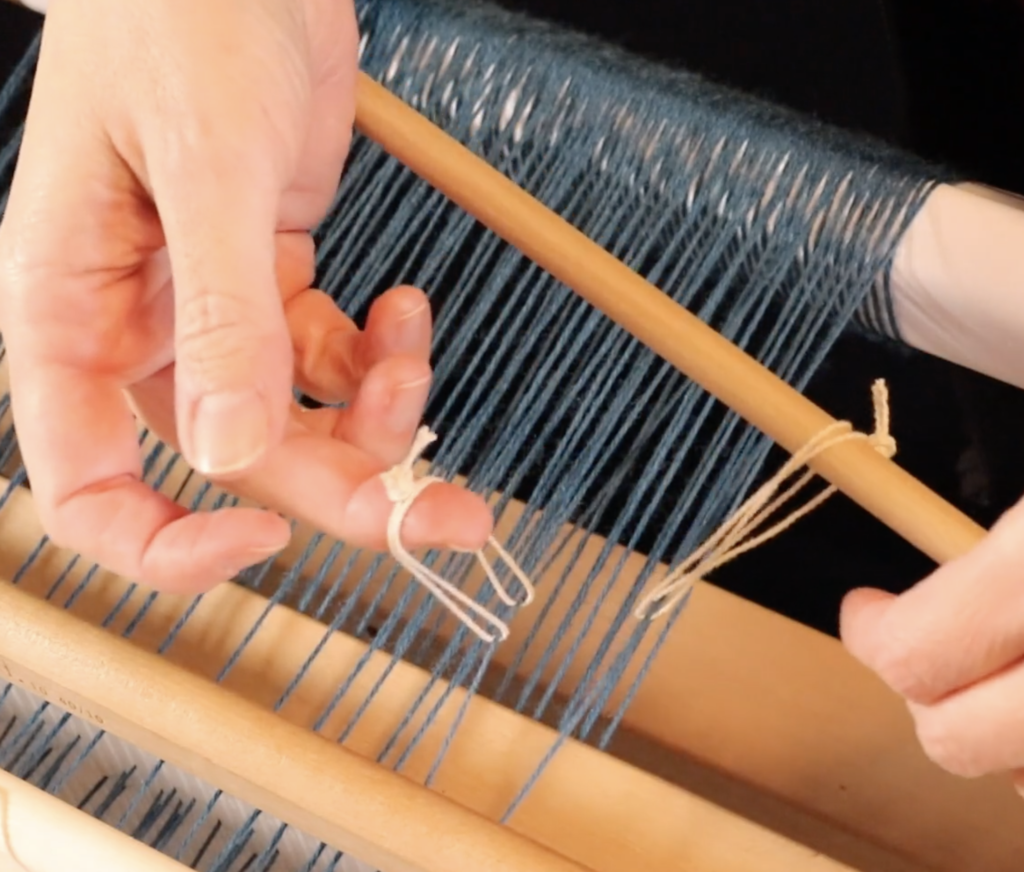
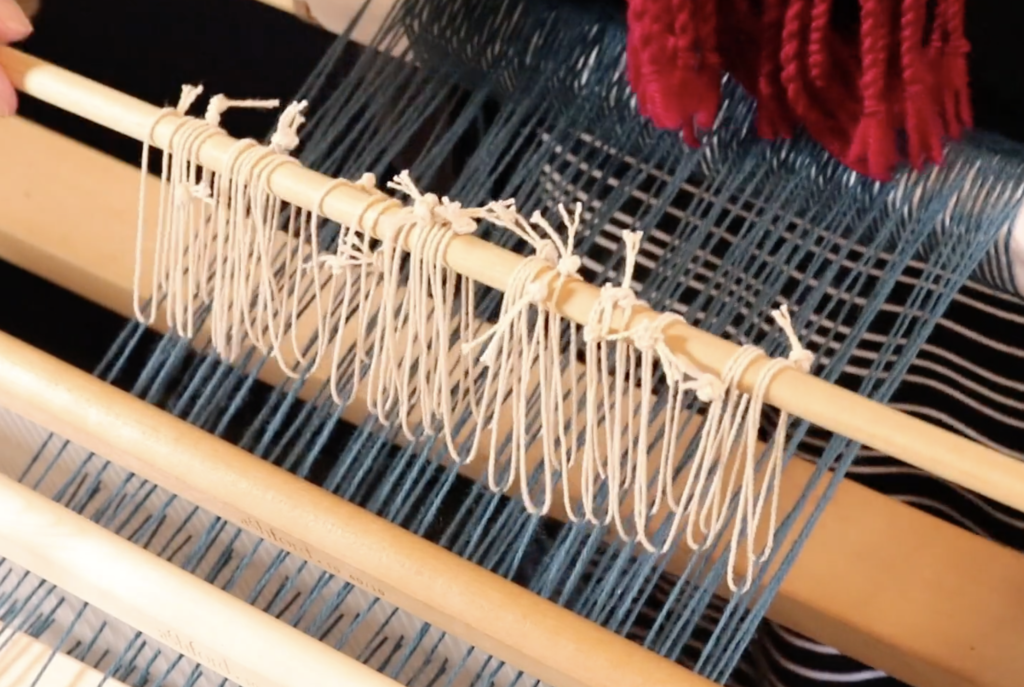
Bring in the heddle rod and slip the loops of the string heddle over it.

Now repeat this step with each warp thread that is sitting on your pick up stick, sliding them onto the heddle rod as you go.

Some of you may like to put the rod down on top of the warp as you organise each string heddle, I like to keep the rod in my left hand while managing the string heddles with my right. It’s a bit fiddly, but I do find it faster. You might need a bit of practice under your belt before you use my approach this though.

Once you have all your string heddles on the rod, you will want to secure them as it is all too common for that heddle rod to slip and then you lose all your hard work!

Some weavers like to use some masking or painter’s tape and place it across the top of the heddle rod.

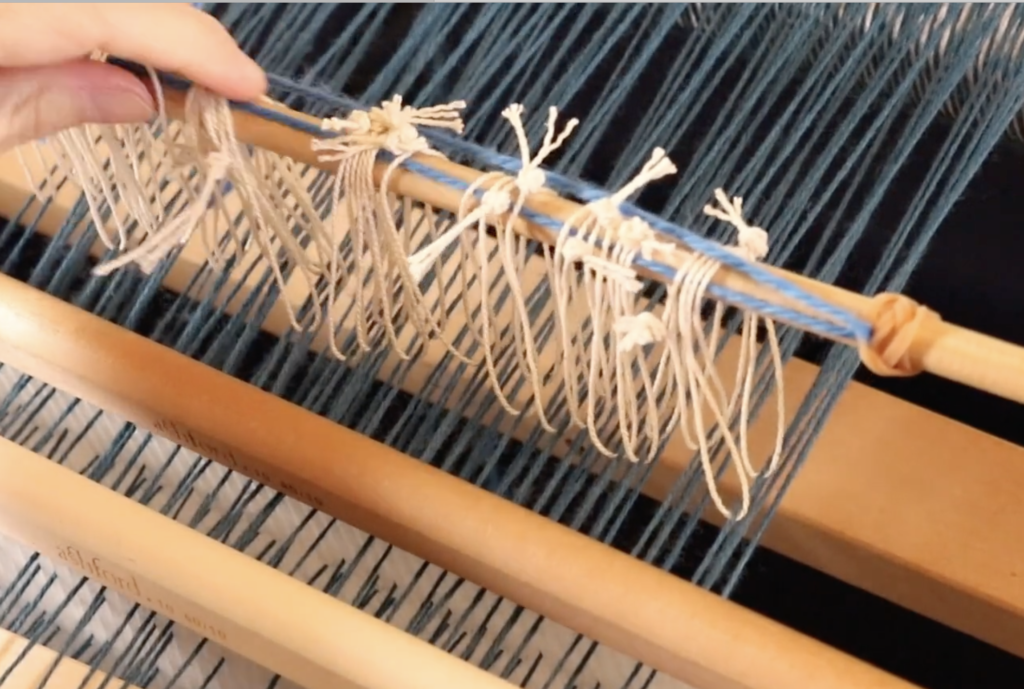
I have a different and perhaps peculiar method, but it sure does work! I place a rubber band on each end of the rod, close to the string heddles.

Then I run a piece of waste yarn right through the middle of the string heddles, pulling each end of the waste yarn through a rubber band on each end. Then I pull the cut ends of the waste yarn up and tie a bow.

Using this method, my string heddles don’t move and are completely secure on the rod. And no annoying, sticky tape.

If you want to see a video tutorial of this process, you can watch here-

I have a number of classes that make use of heddle rods:

Converting Drafts to a rigid heddle loom

Overshot on a rigid heddle loom (coming soon)

Pinwheels on a rigid heddle loom

All of my free Krokbragd videos on Youtube are set up with a heddle rod too-

I hope you enjoyed this two part heddle rod series, don’t forget to catch the first post on making string heddles here if you haven’t already.

Be sure to leave any questions or comments below, I love to hear from you.

Until next time…

Happy Weaving!
Filed Under: Free tutorial, Krokbragd, Online Weaving School, Pinwheels, Rigid heddle weaving, Rigid Heddle Weaving Patterns, Tutorials, Weaving Tagged With: heddle rod, rigid heddle weaving, weaving tutorial

How to weave Krokbragd on a rigid heddle loom

by Kelly 8 Comments

Krokbragd weaving has captivated my weaving heart and mind ever since I first laid eyes on it. So, what is it krokbragd? And how is it pronounced?!

Krokbragd is a twill weave structure that has Scandinavian origins. It is woven on 3 shafts and is weft faced (meaning the weft is dominant, covering most of the warp).  It is pronounced “croak-brod”, or sometimes “croak- brog” or “croak bra-rg”, “crok -brog” or “crok – brag”. Clear as mud? 😂

I was thrilled when I discovered years ago that krokbragd could be easily woven on my rigid heddle loom. The idea of weaving this colourful, detailed cloth without having to use a bunch of shafts and without having to purchase extra tools was very appealing to me.

*This post contains affiliate links. Please see my disclosure policy for further information.

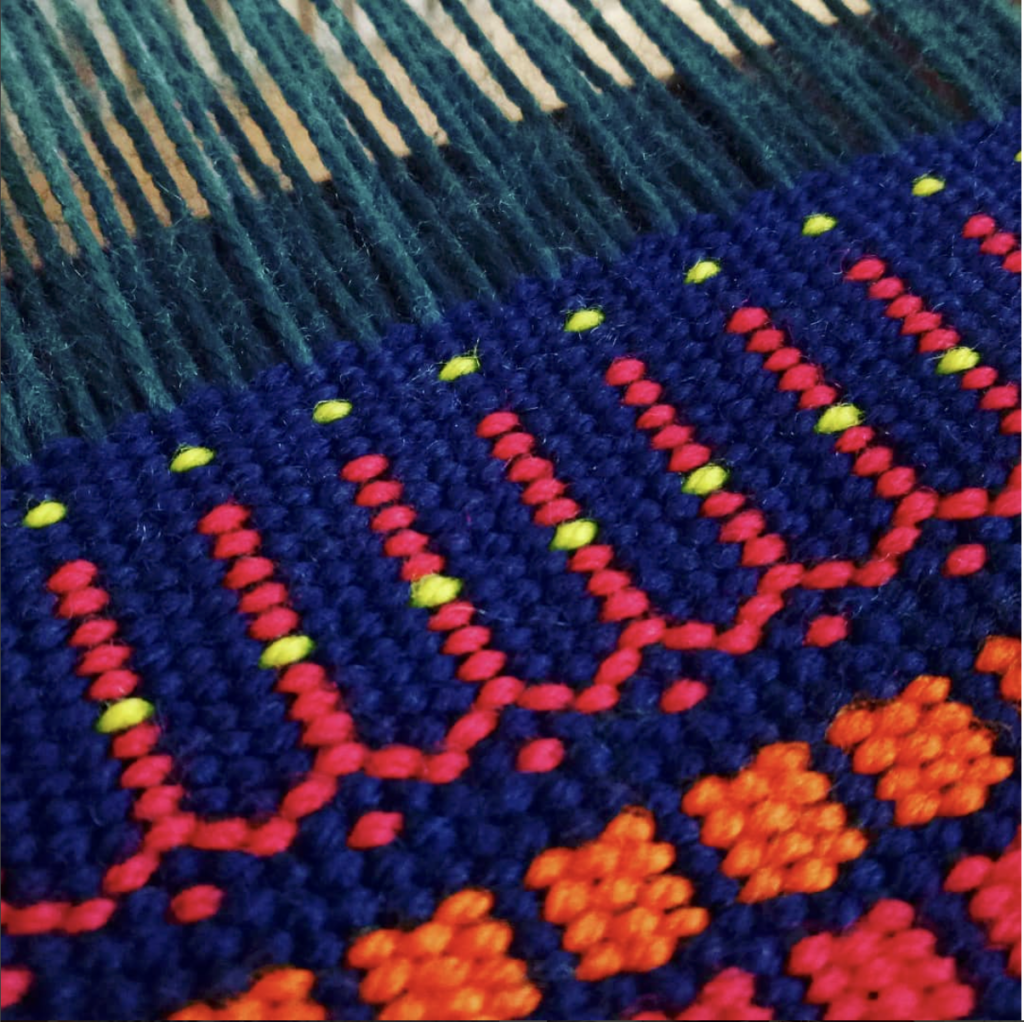
This weave structure produces bold and colourful patterns. These patterns can be built into little pictures as well. The weaving sequence has three simple steps and does not change, so the patterns are formed by changing colours. It’s quite magical!

The more you experiment with krokbragd, the more you feel that the possibilities are really endless. Choosing contrasting colours is one of the keys to success, as this keeps the patterns distinct. Another important consideration is to ensure your warp yarn is thinner than your weft yarn to ensure good coverage. The aim is to not have any warp yarn showing at all.

Because the weft is packed in, krokbragd produces a dense, heavy fabric. Historically, in Scandinavia, items with this structure were mainly heavy duty pieces such as chair and travel cushions as well as for warmth in the form of bed coverings. It was also used artistically, mainly for wallhangings. It is likely that some wallhangings served a double purpose of keeping the home more cosy, as hangings were sometimes used as door coverings to keep out cold draughts.

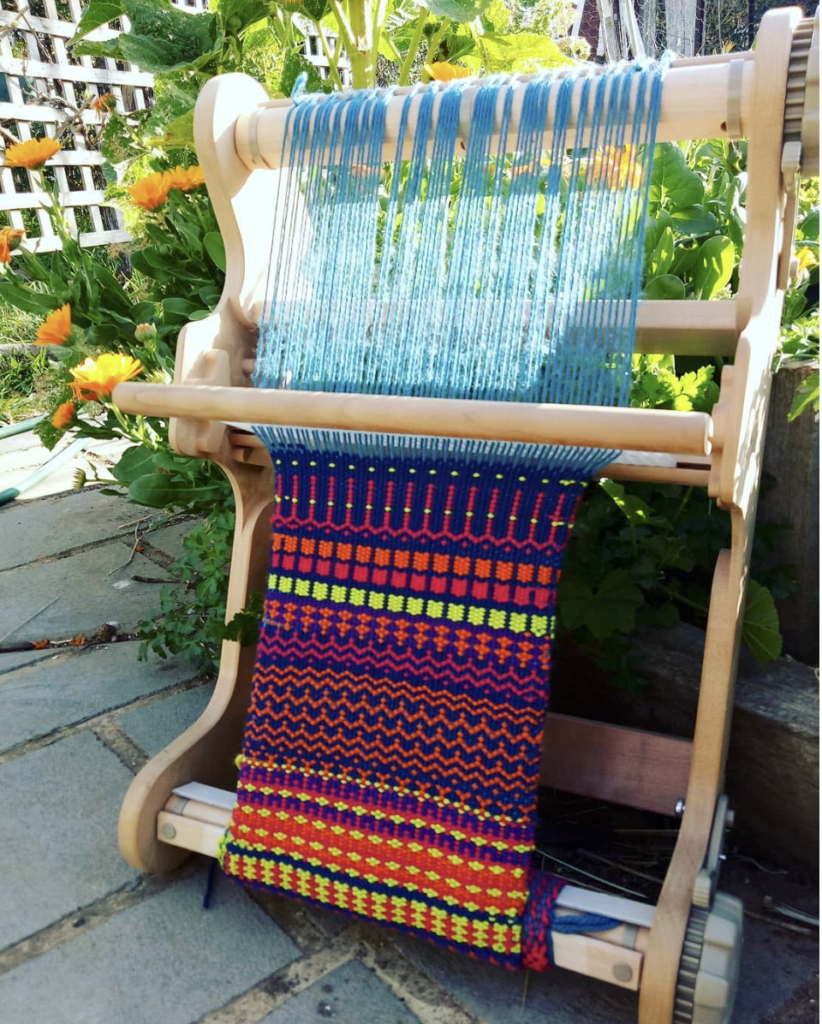
I wove this beautiful krokbragd sampler on my Sampleit loom.

Once your rigid heddle loom is set up and threaded for krokbragd (which can be done either with a single heddle, pick up stick and heddle rod OR with two heddles), the same three step sequence is woven over and over, the only thing that changes is your weft colours. This is how you build patterns, by altering the colours. Three rows of weft passes equals one completed krokbragd sequence.

Let me give an example:

If I weave my 3 pick sequence in just one colour (lets say blue), I will have a solid row of blue once I’ve packed the weft down with my tapestry beater. The instructions would look like this: (“B” stands for blue)

  1. B,B,B x 1

If in my next sequence I introduce another colour, I will start building a pattern: (“Y” stands for yellow)

  1. B,B,Y x 1

Even better than trying to explain how it works is to show you how it works. This free beginner video will show you how to get started, give you the information you need to set up your loom and then give a basic krokbragd pattern for you to try-

Once you’ve mastered the basics, you can move on to some more adventurous, but still fairly simple patterning, like these little birds-

And one of my favourites, tulips!-

Once you have been through these videos you can start to design some of your own krokbragd pieces. There are a couple of ways to do this – either on the loom, as you are weaving or as a separate design, either on graph paper or using weaving software. I like both methods for different reasons!

Designing on the loom is very intuitive and relaxing, You can write down the colour changes as you go, that way if you find a design you love you can revisit it later because you have the instructions ready to go.

Designing off loom is also very beneficial. It allows you to plan out very specific designs to try on the loom. If this concept interests you, I recommend Debby Greenlaw’s book Krokbragd – How to Design and Weave, which I reviewed in this post.

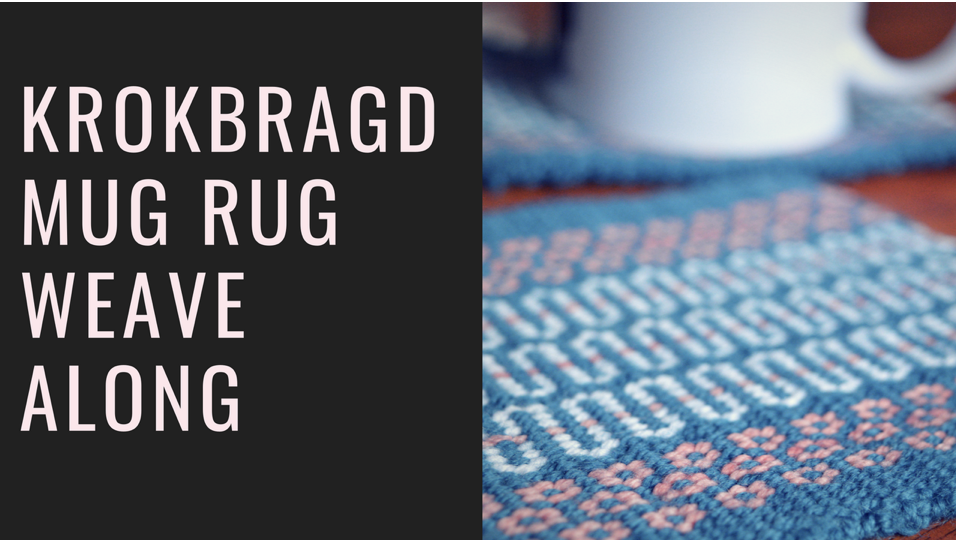
Over at my Online Weaving School, there are three krokbragd classes available. The first one, is the Krokbragd Mug Rug Weave along, which is available to members only. This is a great class that provides instructions for different threading methods, so you can choose to use pick up sticks and a heddle rod or instead use two heddles.

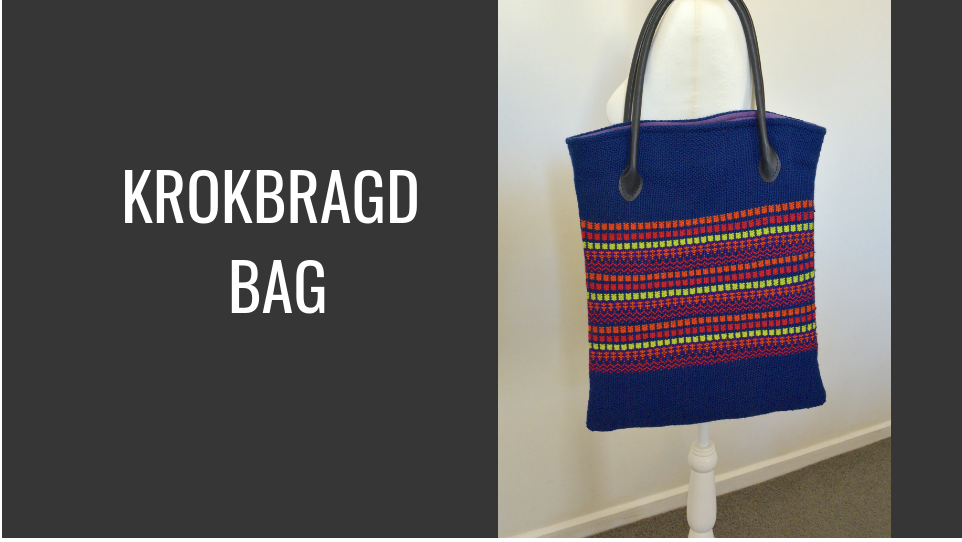
Then there is the Krokbragd Bag, which is a gorgeously fun and functional project. This class uses two heddles to achieve the three shafts, which is not as difficult as it sounds! You can see a roundup of some of student’s beautiful pieces from this class in this post.

And thirdly, my newest offering is Krokbragd 101, which is an “all you need” comprehensive course to get you weaving beautiful krokbragd.

Krokbragd can even be woven on an inkle loom by turning the warp faced draft into a weft faced draft. I wrote about a Krokbragd inkle band I wove in this post.

Krokbragd is such a captivating and addictive weave structure, I hope you will love it as much as I do. If you have any questions or comments, please leave them down below, I love to hear from you!

Until next time…

Happy Weaving!
Filed Under: Krokbragd, Rigid heddle weaving, Tutorials, Weaving Tagged With: krokbragd, krokbragdweaving, rigid heddle weaving

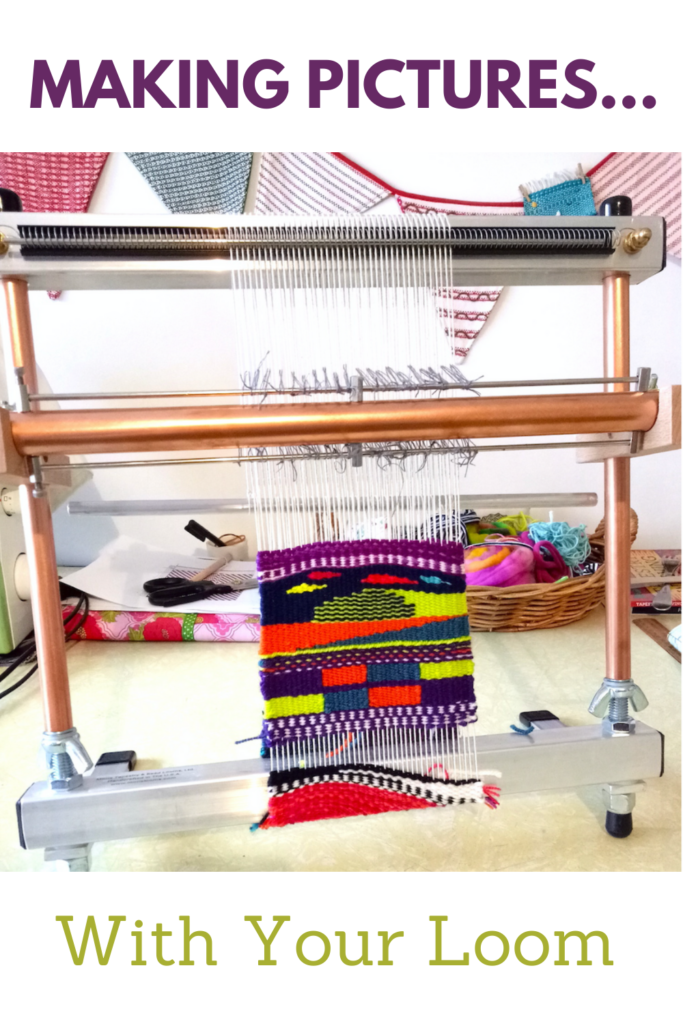
Making pictures with your loom

by Kelly 10 Comments

Something that really captivated me before I even started weaving, was the idea of using artistic creativity in weaving.

When I was younger I loved to draw and paint. In my adult life, I have not made a lot of time to devote to making art, but I have been happy to discover that there is a huge crossover with art and weaving.

This post contains affiliate links.

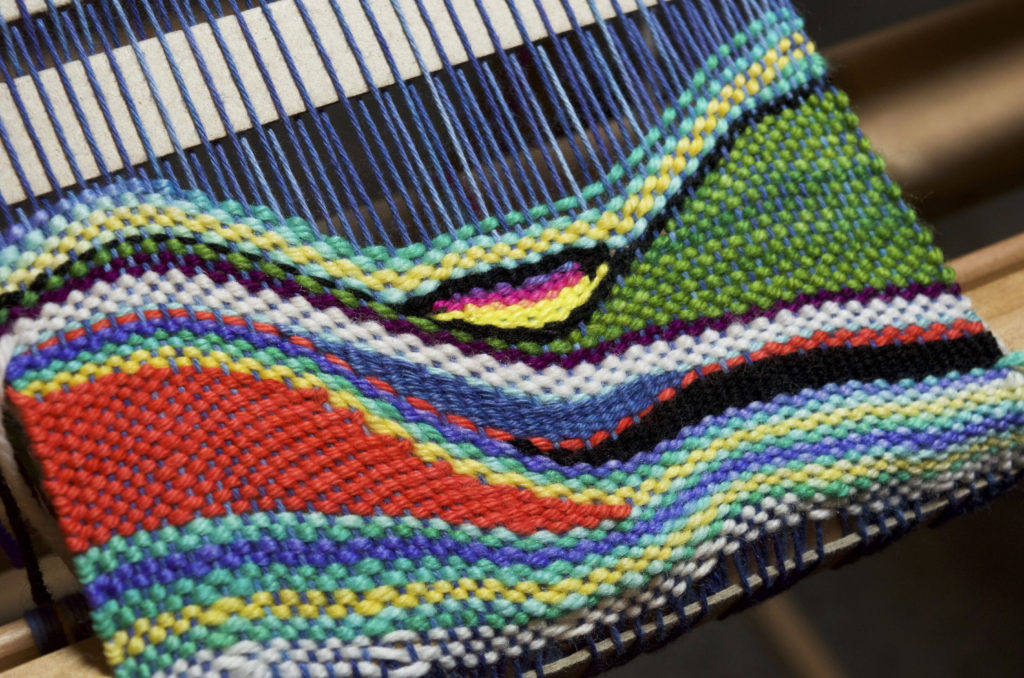
One of the most obvious forms of weaving that this crossover takes place in is tapestry weaving. In tapestry, the weaver can have total artistic licence through the use of colours and shapes. The shapes can be basic or complex. Colours can be blended on the loom. And, tapestry can be woven on many different types of looms.

I purchased a Mirrix Big Sister last year, as I wanted to develop my tapestry techniques and also have a dedicated tapestry loom. It is an excellent loom for tapestry, as even though it’s small, I find the available weaving room quite spacious and the tension is awesome.

Before I bought the Mirrix, I wove tapestries on my rigid heddle loom.

I had a lot of fun using different yarns and styles. My most popular Youtube series details how to weave in a free and unplanned style with a variety of yarns and colours.

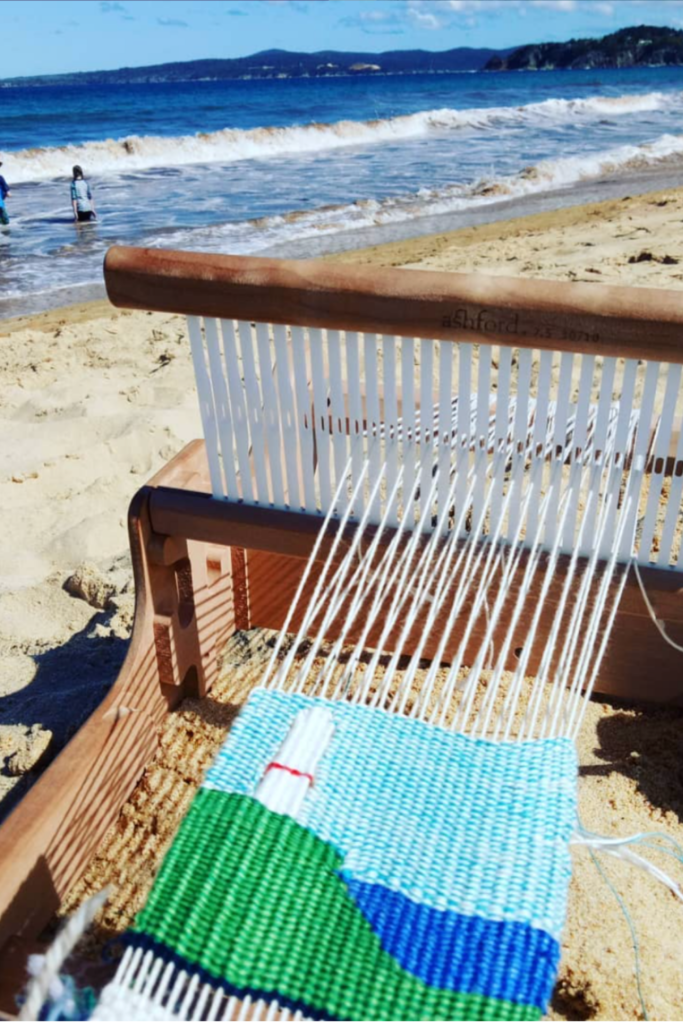
I’ve also explored more tradition tapestry techniques on the rigid heddle loom. I particularly enjoyed taking my Sampleit on vacation, which enabled me to sit on the beach, watch the kids enjoy the waves and weave. What bliss!

My adventures with tapestry on the rigid heddle loom gained so much interest on social media, that I developed a course to show others how to do it! The course includes all the basic tapestry techniques you need to know, plus how to use all of these techniques to weave a finished project. If that sounds interesting to you, the course is available here.

Another way to get started in tapestry without breaking the budget, is with a more affordable tapestry loom. Depending on your budget, you could opt for something like the Schacht Tapestry Loom, or even just an el cheapo like a Melissa and Doug simple frame loom. Some people choose to make their own by building a simple frame or repurposing a wooden picture frame or similar. Just be aware that the more tension the loom holds, the better it is for tapestry and if you go down the cheap route, well, you tend to get what you pay for.

A resource that I found to be great when starting out with tapestry, and still use for inspiration, is Kirsten Glasbrook’s book, The Art of Tapestry Weaving.

Aside from tapestry, are there other ways to make pictures with your loom. Oh, yes indeed!

If I haven’t already gushed about krokbragd on this blog enough times, here I go again! If you’re interested in going down my blog rabbit hole on this topic, start with this post. Krokbragd is a weft based, most of the time but not always 3 shaft, weft faced weave. You repeat the same order of treadling over and over, but can vary your yarn colour combinations to produce simple and complex shapes and images. It is seriously cool, and that is why I’m always gushing about it.

Many of the shapes are open to interpretation, as they can be slightly non specific, but there is really so much to explore. One of my goals for this year is to weave a striking krokbragd wall hanging using my floor loom. Can’t wait for that one! Debby Greenlaw has written a terrific book, Krokbragd: How to Design and Weave.

I have a number of Youtube lessons on krokbragd using my rigid heddle loom, but if it’s new to you, start with the above video.

Boundweave is another weft faced weave that is very adaptable and versatile. It can be woven on 4 or more shafts (so it’s possible on a rigid heddle loom). The picture possibilities are endless. I have been playing around with bound weave on rose path threading and 6 shafts recently on my floor loom.

I’m using Nancy Arthur Hoskins’ Weft Faced Pattern Weaves book for guidance. My goodness, what an extensive book – so much to learn! This was my first attempt and I’ve now branched out with some more random designs, which is all very interesting. Slow, but interesting.

There is a lot more to be said about making pictures on your loom, but I hope this post has inspired you with some of the possibilities. Have you tried any of these techniques? Which is your favourite? Let me know in the comments!

Until next time…

Happy Weaving!
Filed Under: 4 shaft weaving, 8 shaft weaving, Floor Loom Weaving, Krokbragd, Rigid heddle weaving, Tapestry Weaving, Weaving Tagged With: boundweave, pictures, tapestry

What is krokbragd weaving and how do I get started with it?

by Kelly 11 Comments

Krokbragd weaving has captivated my weaving heart and mind ever since I first laid eyes on it. So, what is it krokbragd? And how is it pronounced?!


Krokbragd is a twill weave structure that originated in Scandinavia/Norway. It is usually (but not exclusively!) woven on 3 shafts and is weft faced (meaning the weft is dominant, covering most of the warp).  I have heard it pronounced in several different ways, from “croak-brod”, to “croak- brog” or “crok – brag”.


This weave structure produces bold and colourful patterns. The  weaving sequence has three simple steps and does not change, so the patterns are formed by changing colours. It’s quite magical!

The more you experiment with krokbragd, the more you feel that the possibilities are really endless.
Because the weft is packed in, krokbragd produces a dense, heavy fabric.
Historically, in Scandinavia, items with this structure were mainly heavy duty pieces such as chair and travel cushions as well as for warmth in the form of bed coverings.
It was also used artistically, mainly for wallhangings. It is likely that some wallhangings served a double purpose of keeping the home more cosy, as hangings were sometimes used as door coverings to keep out cold draughts.
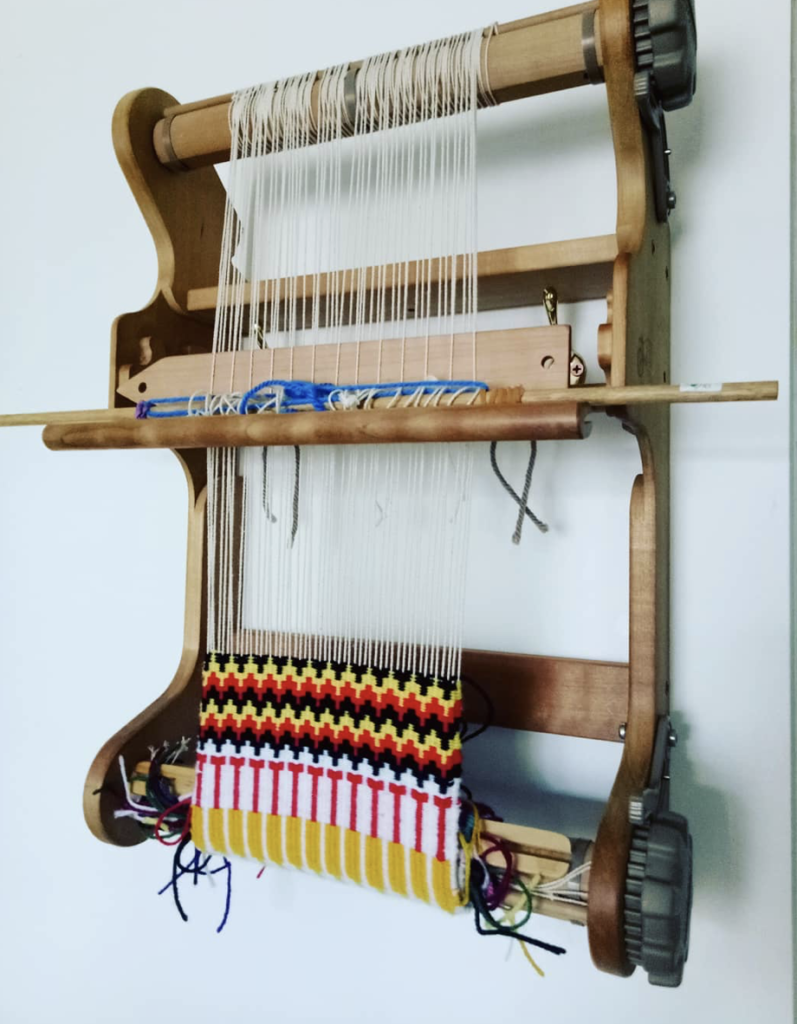
Krokbragd lends itself beautifully to the rigid heddle loom and there are a number of ways you can set up your loom to achieve the three shafts you need for basic krokbragd.
If you find this weave structure as fascinating as I do, you may want to visit my free krokbragd tutorials for the rigid heddle loom on Youtube.
Weaving tulips is lots of fun!

My Krokbragd 101 online course is now available! This is a step by step course that will have you weaving beautiful krokbragd in no time!
Here are some other great krokbragd resources to help you get started:
Krokbragd – How to Design and Weave by Debby Greenlaw
Krokbragd Patterns by Debby Greenlaw
Krokbragd Bag Online Class
Krokbragd Mug Rug Weave Along Online Class (members only)
Krokbragd 101 Online Course
How to weave krokbragd on a rigid heddle loom
Until next time…
Happy Weaving!
Filed Under: Krokbragd Tagged With: Kelly casanova weaving lessons, krokbragd, rigid heddle weaving, rigid heddle weaving tutorial

Primary Sidebar

Categories

Archives

Meta

  • Log in
  • Entries feed
  • Comments feed
  • WordPress.org

Copyright © 2025 Kelly Casanova Weaving Lessons on the Foodie Pro Theme