• Skip to main content
  • Skip to primary sidebar

Kelly Casanova Weaving Lessons

  • Hi! I’m Kelly!
    • Disclosure
  • Online Weaving School Class Index
    • Common account issues
    • Common technical issues
    • What do I get with a membership?
  • New to rigid heddle weaving? Start here!
    • Never heard of the rigid heddle loom?
    • How to weave neat edges on the rigid heddle loom
    • Rigid heddle weaving
    • Rigid Heddle Weaving Patterns
  • Patterns
  • Subscribe

weaving tutorial

Supplemental Fringe Tutorial

by Kelly 7 Comments

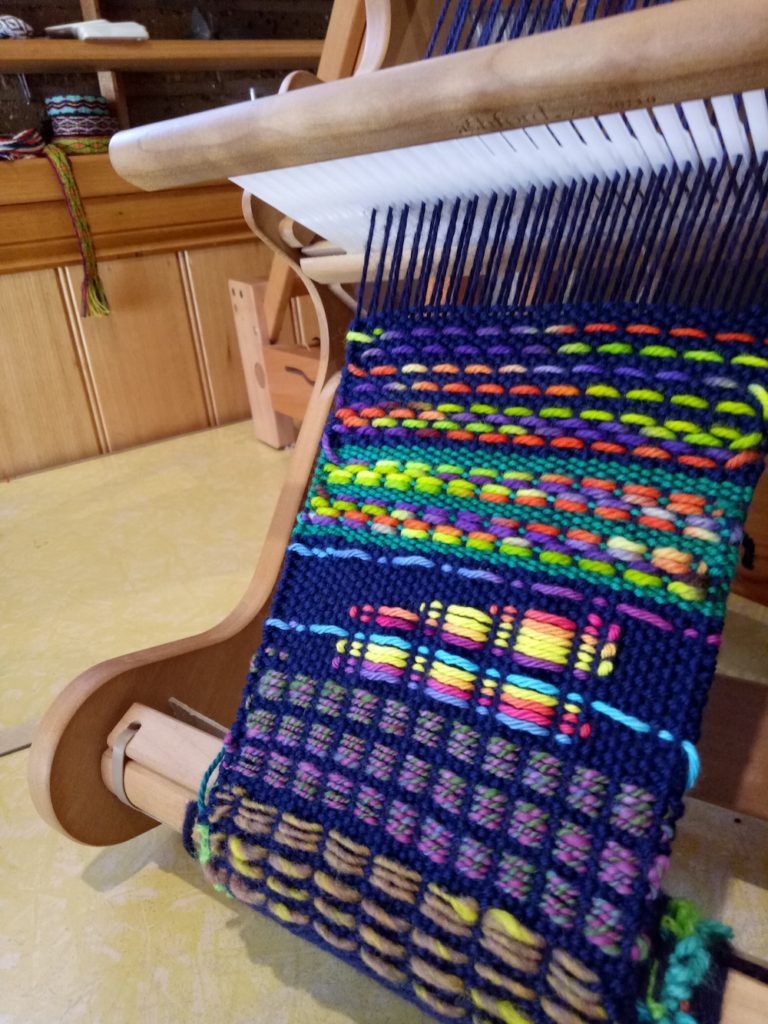
A supplemental fringe is simply some additional fringing that you as the weaver may decide to add in to a finished piece.

The supplemental fringe (that’s what I call it – I just mean that it’s extra fringe in addition to the original) can be brought in after the woven piece is off the loom. It’s fast and easy to secure to your weaving.

But you may be wondering – in what kind of situations would a supplemental fringe be used? And why would I want to add extra fringe when there is one already existing?

Well, sometimes when you finish a project, you might just feel like it needs a little something extra. You might feel that your existing fringe is a little sparse or even just a little bit dull.

If you’re stuck for how to pick colours for the supplementary fringe one idea would be to have a look at the colours that are in the actual piece. Are there any that stand out to you? And really pop? You could coordinate the colours from your piece with your supplemental fringe?

Or you could pick up a yarn that you just really like and you think would look great alongside existing fringe. No rules here!

It can be helpful to be able to practice the technique first on a sample piece (I used a sampler from the Pick Up Perfection online class) if you happen to have one just so that you can ensure you get the most pleasing results, it helps because it will show you things like what different yarn thicknesses and colours look like, how many repeats you want to do and also allows you to practice the knotting.

What you will need to incorporate a supplementary fringe:

  • Yarn (I used Noro Ito, there is such a fantastic colour range)
  • Woven piece to add the fringe to
  • Crochet hook (size is not too important, it just needs to be able to go through your weaving and pick up the supplementary yarn
  • A book or similar to use as a fringe template
  • Scissors

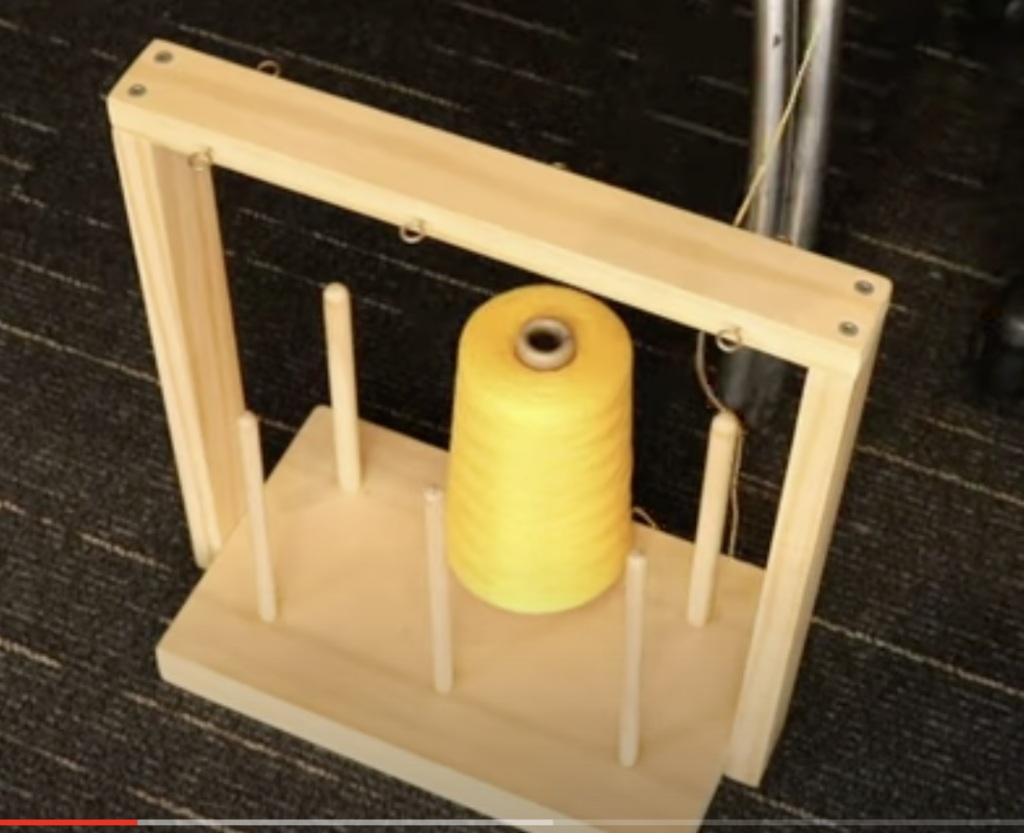
Once you decided how long your want your supplemental fringe pieces to be, you can use a book as a template to quickly and easily wind off your pieces. Make them twice as long as the actual fringe length you need because we’re going to be doubling them over when attaching.

I chose to place my supplemental fringe every 4 warp threads of the existing fringe. Your choice may be completely different, it just depends on what you want to do.

I also chose to go in with the crochet hook 2 weft threads deep – again this is optional but I feel that having 2 weft threads makes for a sturdier edge for my extra fringe.

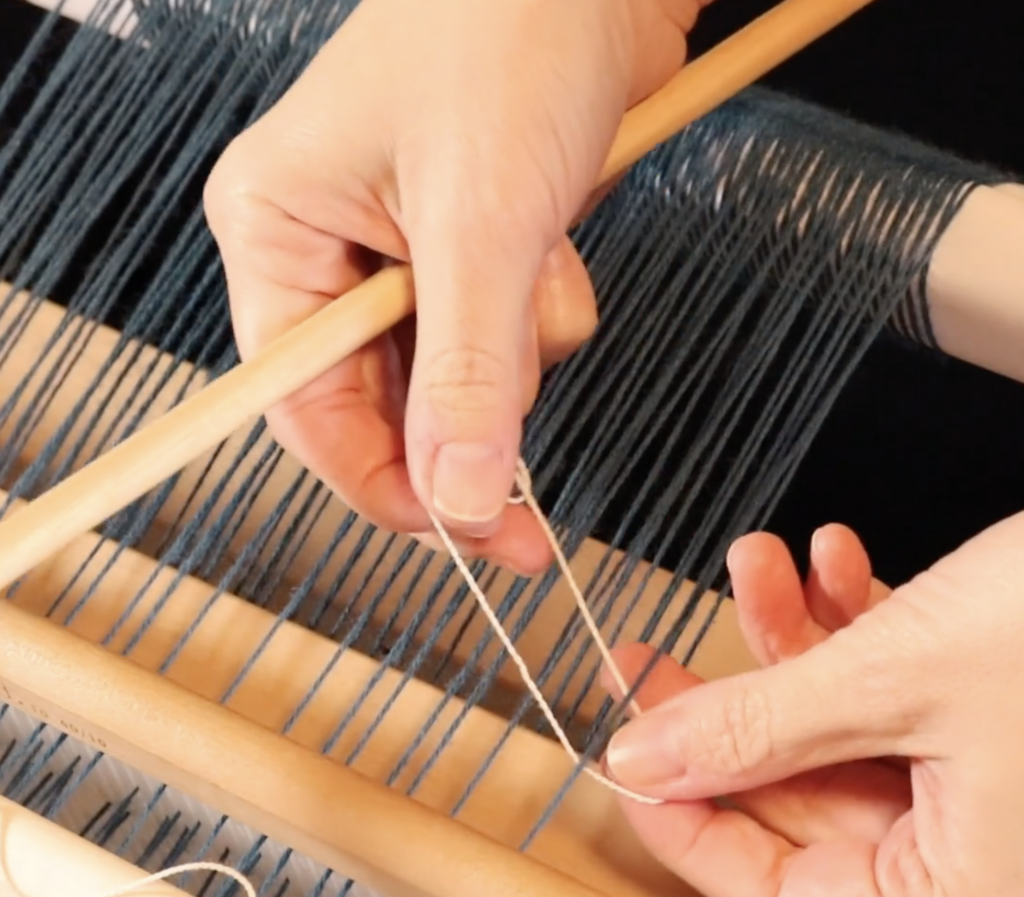
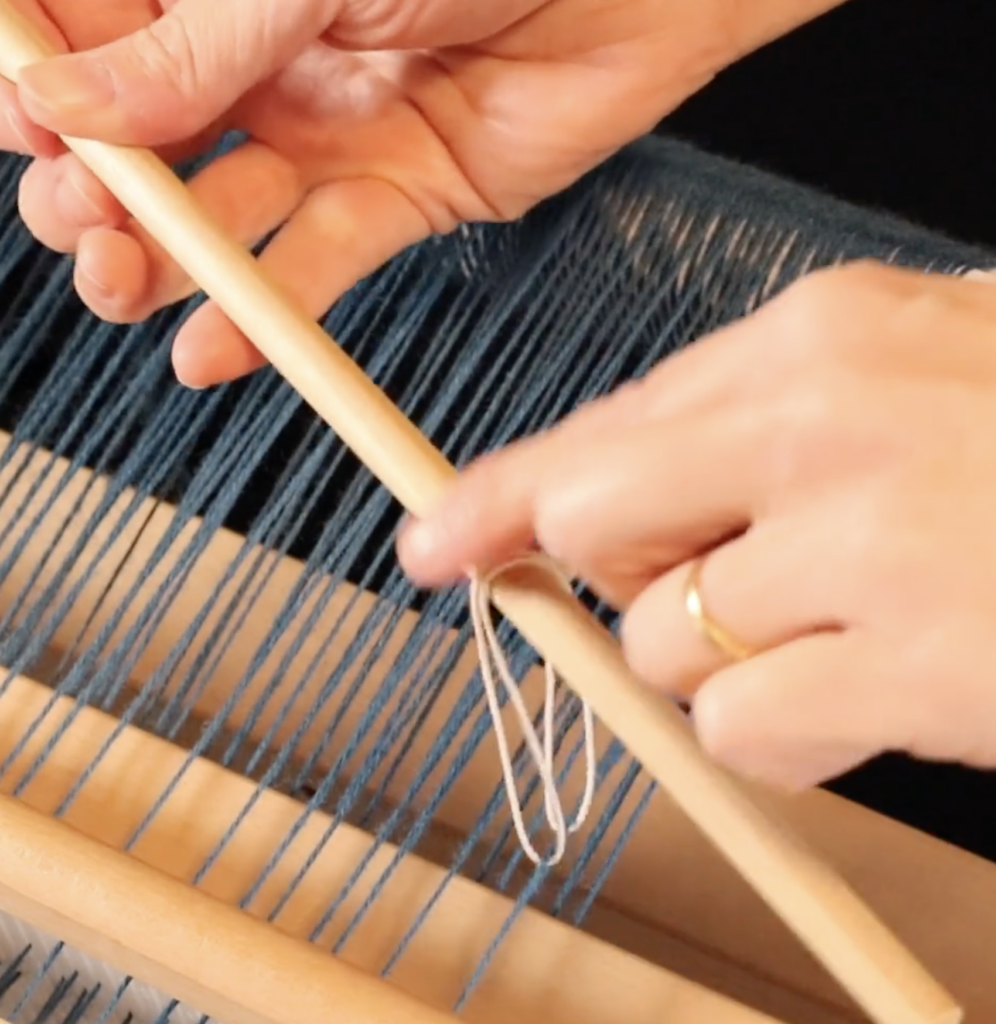
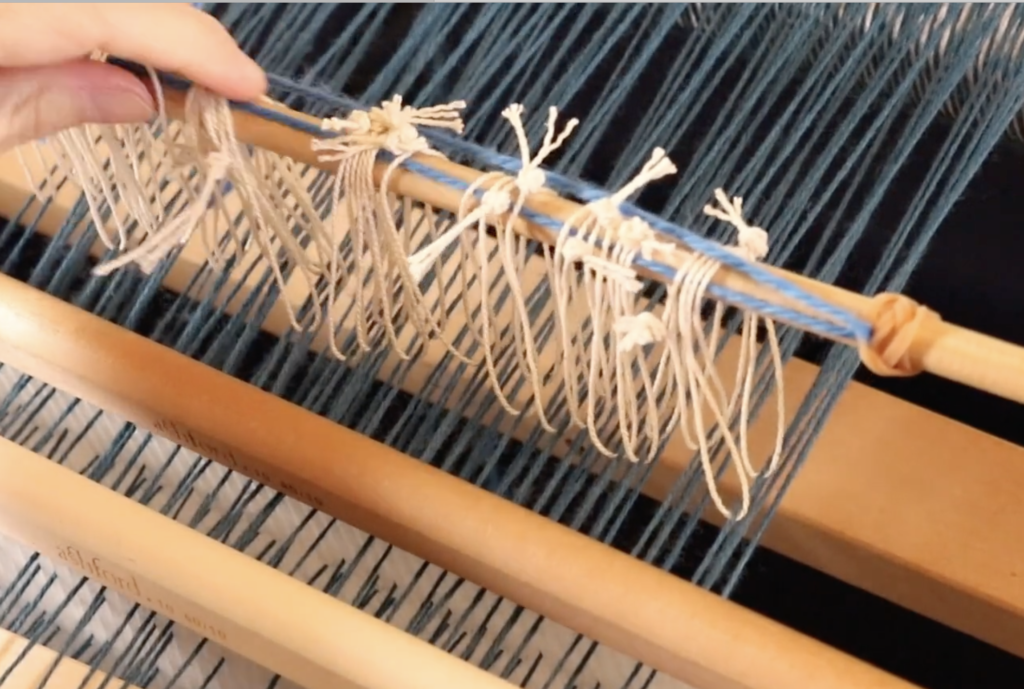
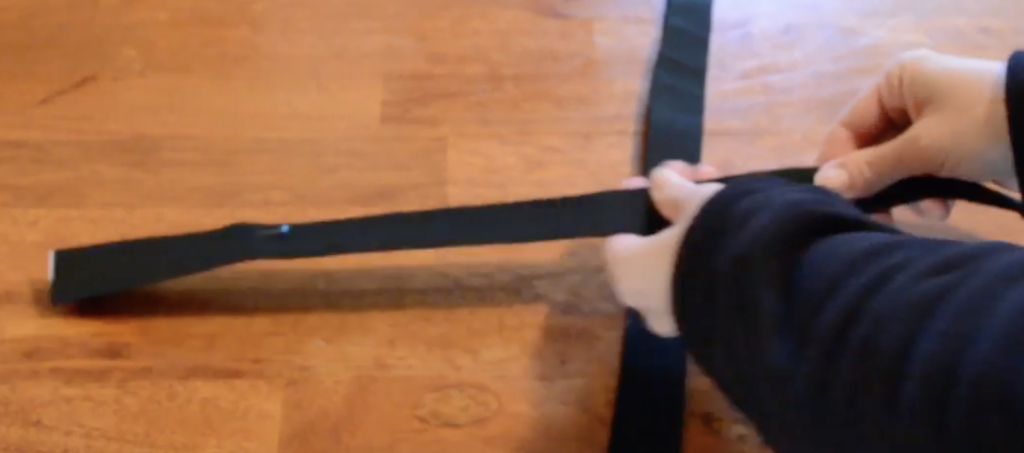
Grab your first fringe loop and hold it with the hook.

Pull the fringe loop through the 2 weft rows. Continue to pull through until you have a loop large enough to fit your fingers into, but not so large that the tail ends are pulled though.

About this sized loop is good.

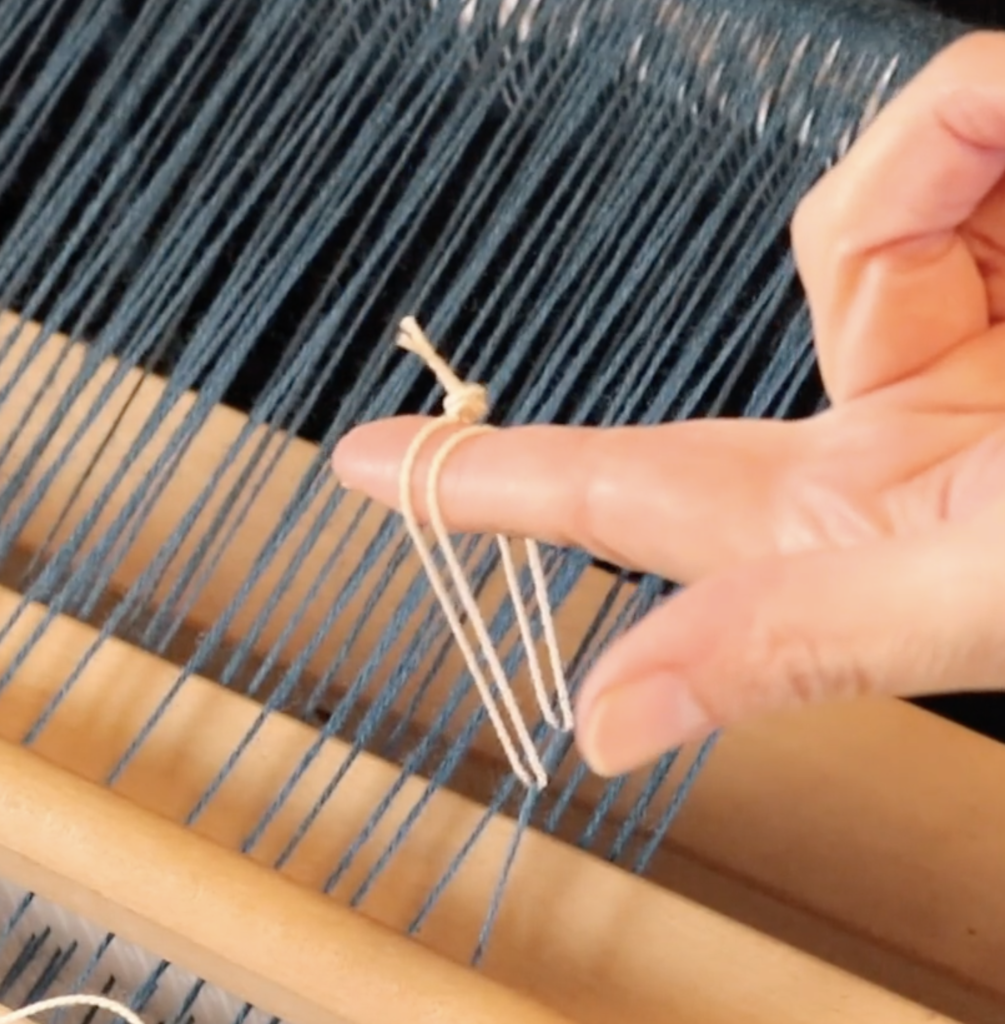
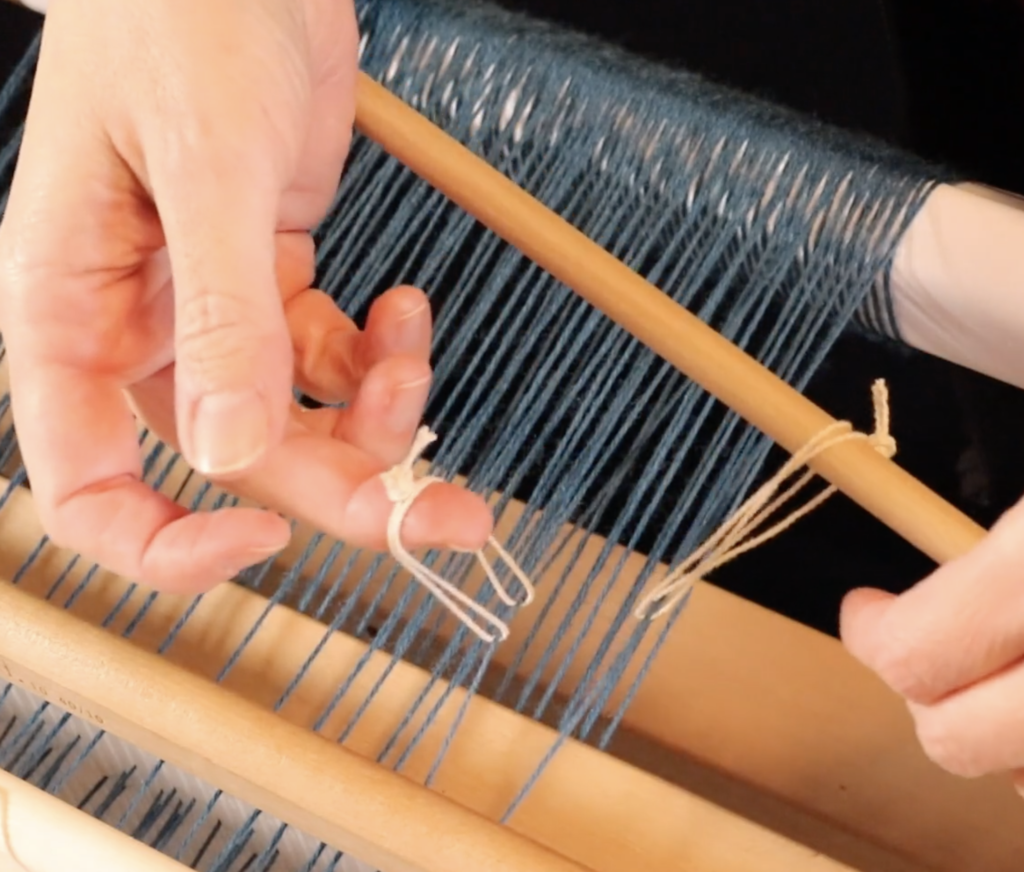
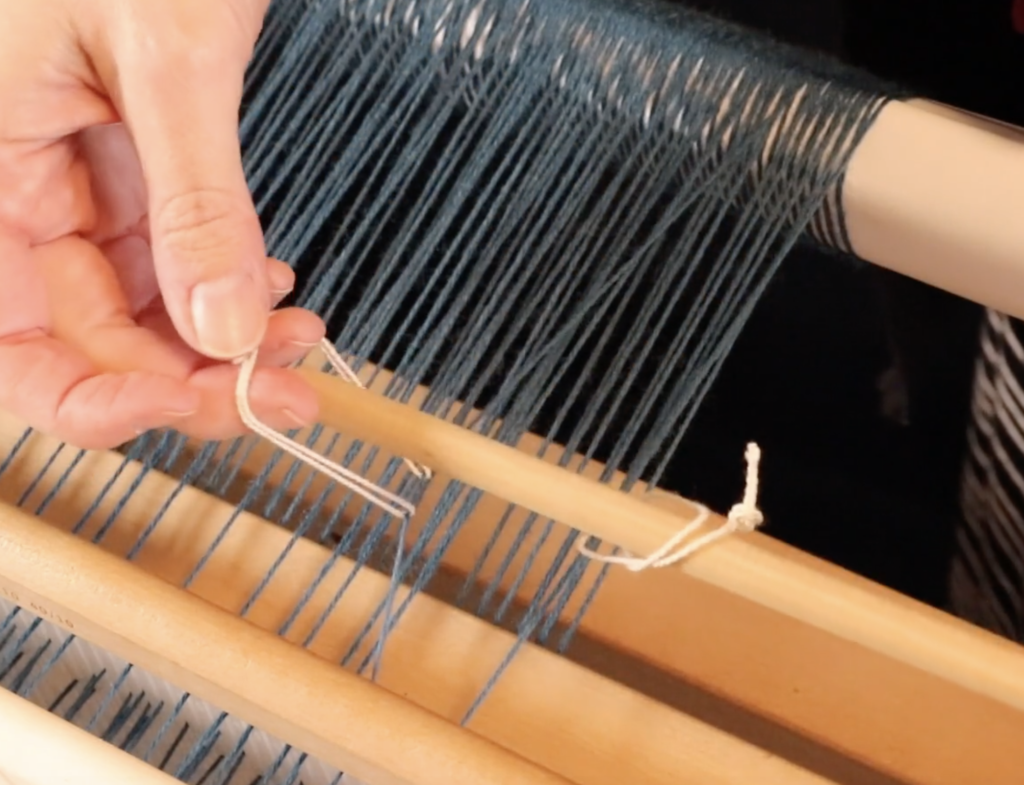
Now you can grab the tail ends of the supplemental fringe and pull them through the loop you’ve made.

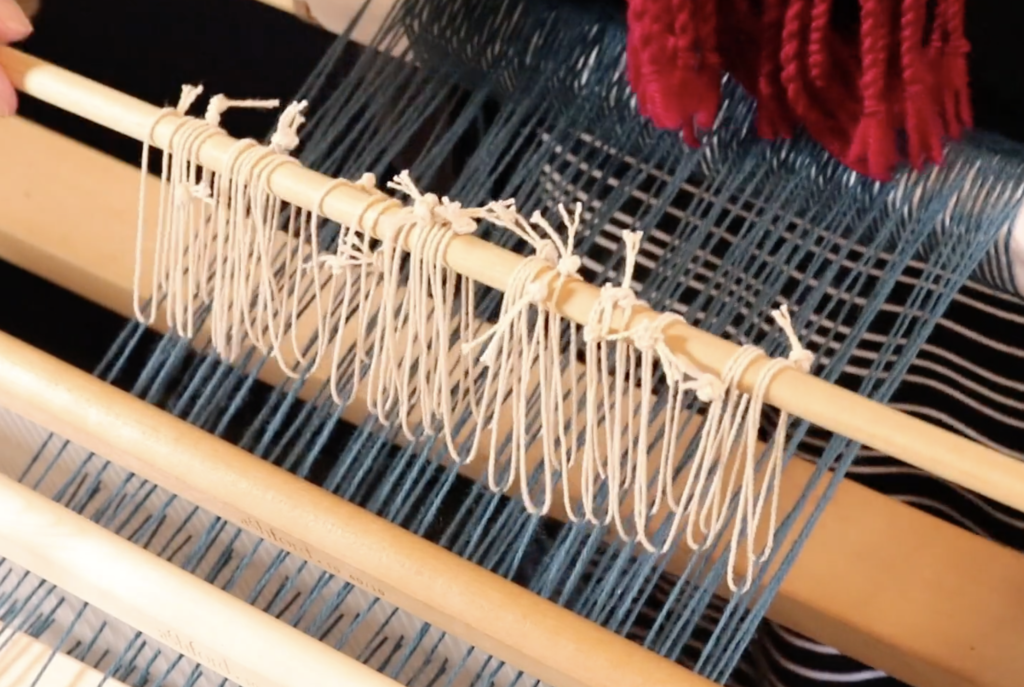
Tighten the knot up close to the woven edge and you’re done! Repeat across the rest of the weaving at your chosen intervals.

All that’s left to do is to trim your supplemental fringe, which can be longer, shorter or just the same length as your existing fringe.

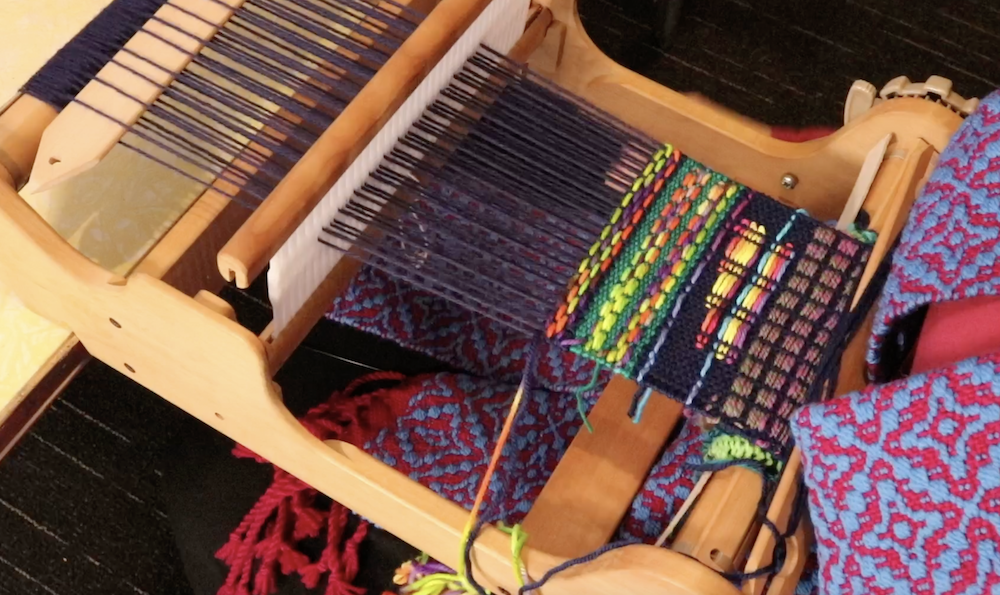
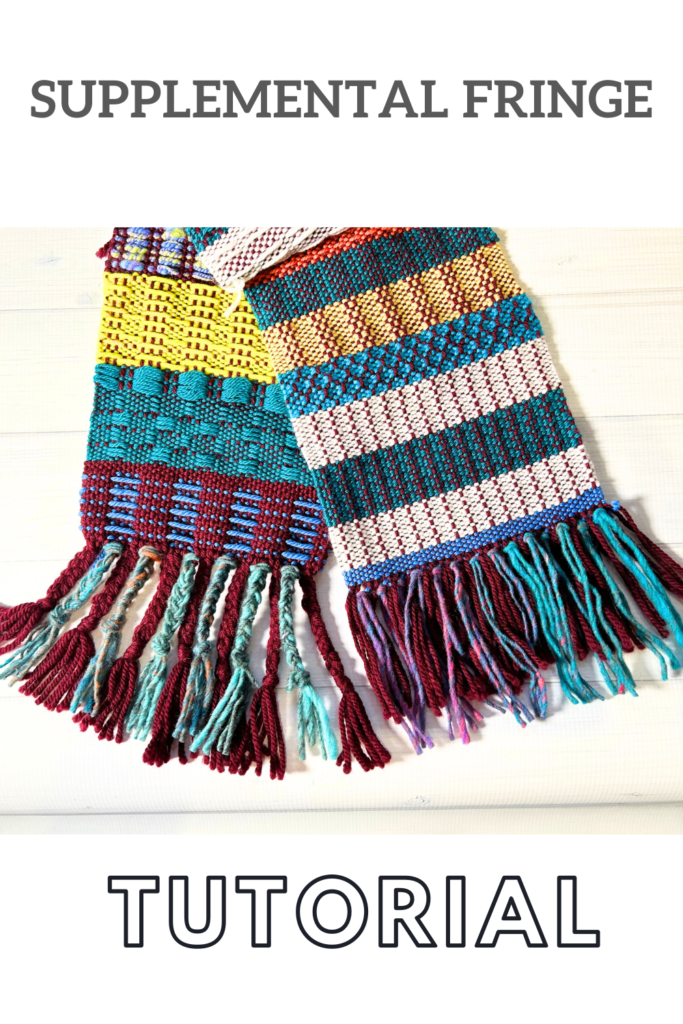
There are lots of variations and possibilities with this idea. See the plaited (braided) fringe in the photo above? Well, if that interests you I suggest you watch my video tutorial for all the details on how to work that:

I hope you enjoyed this tutorial!

Until next time…

Happy Weaving!

This post contains affiliate links. For more information please see my disclosure policy.

Filed Under: Free tutorial, Tutorials, Weaving Tagged With: supplemental fringe, weaving tutorial

Christmas Trees Weaving Tutorial on a Rigid Heddle Loom

by Kelly 2 Comments

With Christmas just around the corner, my head has begun swimming with festive ideas!

Christmas, as the song goes, “is the most wonderful time of the year” – at least I think so, I love to celebrate the birth of Jesus.

I also love the atmosphere, the colours, the change in mood to one of joy and relaxation. The excitement of finding the right Christmas tree and the wonderful scent of pine filling the house is a real highlight for our family.

You may have previously seen my Winter Trees Tutorial but I thought it was high time we do a good and proper Christmas Tree Tutorial.

*This post contains affiliate links. For further information, please view my disclosure policy.

This tutorial is inspired by the Russian Branoe technique and involves picking up threads with a pick up stick in front of the heddle on a closed shed. We then use a “pattern weft” to build up pattern as we weave through the rows. It’s a lot of fun and you can make some super cool characters and pictures.

The threading for the loom set up is just plain weave, and all patterning is done by picking up warp threads. There is no need for specialist knowledge, just a bit of patience!

You can choose to weave plain Christmas trees, or there is an option to “decorate” your tree at the end of the tutorial.

I used my rigid heddle loom to weave this on, but all you really need is a loom that is capable of tensioning a warp and opening 2 sheds. A frame loom would work, it would just be a bit more work for the weaver

If you find this technique interesting, I have plenty of other resources and tutorials for you to delve into:

Baubles and Candles

Little Trees

Exploring Branoe (Online weaving class)

Gift Boxes

Reindeer

Snowmen

You will find all the materials and instructions for the Christmas Trees in this downloadable, printable PDF. I recommend that you use this PDF in conjunction with the instructional Youtube video for best results. Click on “download” at the bottom of the file.

Christmas-trees-PDFDownload

The free video tutorial is available to view here-

I hope that this tutorial and pattern brings some Christmas cheer into your homes and lives!

Until next time…

Happy Weaving!

Filed Under: Free tutorial, Tutorials, Weaving Tagged With: christmas, christmas trees, weaving tutorial

Supplementary Weft Tutorial

by Kelly 16 Comments

What is a supplementary weft?

It is simply a weft that is introduced to your weaving, in addition to your regular weft yarn, usually on a plain weave background.

This supplementary weft is often known as a “pattern weft”, which makes sense because it often creates a pattern (think overshot).

A supplementary weft will usually be thicker yarn than the plain weave or tabby yarn, which is normally the same thickness as the warp yarn.

*This post contains affiliate links. For further information, please see my disclosure policy.

This technique is a great way to use a handspun or novelty yarn to really highlight the beauty of the yarn and is also an excellent way to use up leftovers.

A pick up stick is usually used with a supplementary weft – this helps to make a pattern through the use of weft floats.

Using supplementary wefts is a really versatile way to showcase pretty yarn and weave a truly unique piece. I love to design on the loom, trying out different pick ups and different yarns, it’s so much fun and it suits my creative preferences to not have to plan ahead too much.

To weave a sample like I have in the tutorial, you will need the following materials:

  • A rigid heddle loom (I used my Sampleit loom)
  • A 7.5 dent heddle (of course, you can adapt this by using a different sized heddle with a different yarn weight)
  • Threading/reed hook
  • A stick shuttle or several (use one that is the right size for your loom)
  • A pick up stick (again, use the size that is suitable for your loom or the width of warp you have on)
  • Something to separate your warp (cardboard stick separators, thick craft paper on a roll etc)
  • Scissors

Yarn Requirements:

I’m not giving exact yarn amounts, obviously you need more yarn for your warp and tabby (plain weave) than you do for the supplementary weft, but just experiment with what you have.

For my warp I used Bendigo Woollen Mills Luxury 8ply (this is a dk weight wool) in Navy. I used this same yarn for the majority of my tabby.

For supplementary wefts I used Noro, handspun and some of my hand dyed wool and cotton – most of these were around a dk to aran weight.

Sampler size suggestion:

When I warp for a sampler like this one, I like to warp around 8-10 inches in width and at least 30″ in length (total length of warp). For my 7.5 dent heddle this was 47 ends.

Weaving and Pick Up Sequences:

You will find all the information you need to follow the video sampler in this downloadable, printable PDF.

Supplementary-weft-youtube-tutorialDownload

There are three ways to use this tutorial. You can either:

  1. Warp your loom and then follow my examples exactly according to the video and PDF.
  2. Warp your loom and follow some of my examples to gain confidence, then try some of your own designs.
  3. Use my designs as inspiration but go your own way by using the techniques and ideas to create your own unique fabric.

Whatever you decide to do with this tutorial, don’t forget to relax and have fun – that’s what it’s all about!

The 45 minute video tutorial is available here-

As always, comments and questions are very welcome in the section below.

Until next time…

Happy Weaving!

Filed Under: Free tutorial, Inspiration, Rigid heddle weaving, Rigid Heddle Weaving Patterns, Tutorials, Weaving Tagged With: rigid heddle weaving, supplementary weft, weaving tutorial

How to double your weft thread

by Kelly 14 Comments

There are times that you will want to double your weft thread in order to achieve a balanced sett. Or, you may just be wanting to make the weft stand out and feature more.

If you only have one cone or ball of yarn to work from, you will need to think around how you’re going to load the shuttle to be double, rather than single stranded.

*This post contains affiliate links. For more information, please see my disclosure policy.

Today I’m going to show you how to easily double your weft when using a stick shuttle. I’ll cover a couple of different methods.

In my example piece, my warp is 8/4 cotton. For my weft, I want to use a lovely, bright yellow, I received recently from the brand new Australian cotton range from Thread Collective. This yarn however, is 8/2 cotton – quite a bit lighter than the 8/4 warp.

Considering it’s important to me that my pattern stands out and is nice and bold, the 8/2 as a single weft would not have the impact I’m wanting to achieve. I decided to double the weft.

I start by placing the cone of yarn that I want to use for weft on the floor next to the table I’m sitting at. I use my cone warping stand to hold the cone steady and to feed the yarn off freely. You can also stand your cone in a box or empty cylinder of the right size – whatever stops the cone from rolling all over the floor while you’re trying to feed yarn off it!

I’m going to be using my ball winder for this tutorial, but you do not have to have one in order to successfully load your shuttle with doubled weft.

Another suggestion is to use an empty cone cylinder to wind the yarn off your full cone by hand. This plastic one is handy because it has a grip, so it’s easy to wind fast by hand, but empty toilet paper rolls are also great. You can even wind off an amount of yarn just onto your hands, though that may be a more potentially tangly method.

A ball winder is simple to use and does the job really quickly. I just clamp the winder to my table, thread the yarn in through the side loop, up over the central cylinder and into one of the notches, which holds the yarn in place initially and also creates a centre pull ball once you’re finished.

You then just wind manually, using the handle until you have a quantity of yarn. A couple of tips I have for successfully ball winding:

  • Keep some tension on the yarn as it’s feeding off the original cone, but don’t make it really tight. This is a mistake I made initially, and it caused problems with the yarn rotations slipping off the ball and tangling. Now I keep it a bit looser and never have that issue.
  • Hold the yarn tail for the first few rotations (particularly if you’re using a finer yarn) so that it doesn’t slip out of the notch. After the first few rotations, you can let go and it will be fine.
  • When I’m using the ball winder for doubling my weft, I usually wind off relatively small amounts at a time. I can always come back and wind off a little more if I need to.

Now you have 2 sources of yarn to feed from. I place the yarn cake on the cone stand, next to the original cone and feed it up through it’s own round hook.

Yarn Donation

Now things get super easy! I just slip knot the two yarns together at the ends, ready to start loading onto my stick shuttle.

From this point on, you can treat the two yarns as though they are one, and simply wind them on together.

If you need help with how to wind a stick shuttle in a figure 8 (my favourite method), watch this video:

When you are ready to start weaving, you also just use the two yarns together as though they are one. So, each pick will have two threads instead of one.

This tutorial is available in video format, if you’re interested, click on the video below:

I hope this tutorial was helpful to you, leave your questions or comments down below.

Until next time…

Happy Weaving!

Filed Under: Free tutorial, Rigid heddle weaving, Weaving, Yarn Tagged With: double weft, doubling weft, weaving tutorial

What is a heddle rod? Part 2- how to install the rod

by Kelly 4 Comments

Last week we talked about how invaluable a heddle rod is to the rigid heddle weaver.

I showed you how to make string heddles for the heddle rod. If you missed that post, please click here.

*This post contains affiliate links. For more information, please see my disclosure policy.

Now that we know how to make our own string heddles, we can learn how we use them on a heddle rod.

The actual rod needs to be wider than the width of the piece you’re weaving. It can be either flat or round. It should be fairly lightweight and not so large that it is difficult to pick up. It should be smooth but not slippery.

For this tutorial I’m using a smooth but not lacquered wooden dowel measuring 9mm (3/8 of an inch) around. The dowel was purchased at a local hardware store.

Begin by picking up the threads you want to place on the heddle rod according to the pattern or instructions you’re using. It is easiest to pick up the threads in front of the heddle first using a pick up stick. Make sure your heddle (or if you’re using more than one, heddles) are in the down position. This brings slot threads up, and it’s the slot threads we want to pick up.

Once your threads are picked up, slide the front stick towards the heddle and place it on it’s edge. This props up the heddle rod threads at the back of the heddle and differentiates them from all the other threads.

Now you can insert another pick up stick (or stick shuttle if you don’t have the extra pick up stick) into the shed that has been created by the propped up threads behind the heddle/s.

You will need your piece of dowel or whatever you’re using for the heddle rod plus your string heddles handy.

You may find it easier to sit or stand behind the loom for this next part. Working from either right to left (it makes no difference) pick up the threads in order from one side to the other. Keep your pick up stick in place as your visual guide – you can clearly see which threads need to be picked up. Have a string heddle ready at this point.

Bring a string heddle underneath the first thread so that it has a loop on either side of the thread. One loop will be smooth, the other will contain the knot. It is very much preferable not to have your knot near the thread. You want to arrange it so that it will sit on top of the heddle rod.

Bring the two loops of the string heddle together at the top. Note how my knot is sitting at the top rather than at the bottom or underneath the warp thread.

Bring in the heddle rod and slip the loops of the string heddle over it.

Now repeat this step with each warp thread that is sitting on your pick up stick, sliding them onto the heddle rod as you go.

Some of you may like to put the rod down on top of the warp as you organise each string heddle, I like to keep the rod in my left hand while managing the string heddles with my right. It’s a bit fiddly, but I do find it faster. You might need a bit of practice under your belt before you use my approach this though.

Once you have all your string heddles on the rod, you will want to secure them as it is all too common for that heddle rod to slip and then you lose all your hard work!

Some weavers like to use some masking or painter’s tape and place it across the top of the heddle rod.

I have a different and perhaps peculiar method, but it sure does work! I place a rubber band on each end of the rod, close to the string heddles.

Then I run a piece of waste yarn right through the middle of the string heddles, pulling each end of the waste yarn through a rubber band on each end. Then I pull the cut ends of the waste yarn up and tie a bow.

Using this method, my string heddles don’t move and are completely secure on the rod. And no annoying, sticky tape.

If you want to see a video tutorial of this process, you can watch here-

I have a number of classes that make use of heddle rods:

Converting Drafts to a rigid heddle loom

Overshot on a rigid heddle loom (coming soon)

Pinwheels on a rigid heddle loom

All of my free Krokbragd videos on Youtube are set up with a heddle rod too-

I hope you enjoyed this two part heddle rod series, don’t forget to catch the first post on making string heddles here if you haven’t already.

Be sure to leave any questions or comments below, I love to hear from you.

Until next time…

Happy Weaving!

Filed Under: Free tutorial, Krokbragd, Online Weaving School, Pinwheels, Rigid heddle weaving, Rigid Heddle Weaving Patterns, Tutorials, Weaving Tagged With: heddle rod, rigid heddle weaving, weaving tutorial

Tote Bag Weave Along, Lesson 7

by Kelly 2 Comments

Now we’re ready to sew the bag together! If you missed the last post on taking your fabric off the loom and wet finishing, you can take a look at it here.

*This post contains affiliate links, meaning if you click on the link I will receive a small commission at no extra cost to you.

Lay the fabric out on the ironing board with the WRONG side facing up. You will notice that your fusible interfacing has a shiny side and dull side. It’s the shiny side that will fuse to the fabric, so you want to place the shiny side down so that it meets with the wrong side of your fabric. This is worth doing properly. If you place the shiny side up instead, you may find yourself in the market for a new iron!

It is best to place a presser cloth over the fabric and fusible interfacing before you begin to iron. I just use an old sheet for protection. Set your iron to “cotton” steam setting a press evenly over the fabric. You can peel back the sheet here and there to check whether you have a good bond happening. Bear in mind that the bonding is not complete until the fabric has cooled.

Your piece should look like this when ready. The interfacing is completely bonded to one side of your fabric.

Fold the fabric over on itself so that the sides are all touching. Line up the pieces to fit as best you can.

Press the fold at the bottom of the bag to make a crease. This will become your cutting mark. If you’re a bit worried about cutting your fabric, don’t be! The fusible interfacing keeps it all very secure.

Cut right through the fabric, using the crease mark you just made.

Now you have two separate pieces, or bag panels.

At this point you will also want to cut your lining fabric in half after ironing a crease in it as you did before. There are so many choices you could make for lining fabric but if you’re really not sure, broadcloth is a good option.

If you’re not sure where to find all the measurements, they are in the Essential Info PDF in this post.

The next task is to fuse your interfacing to the bag handles, using the same method that was used for the main bag panels.

Fold the bag straps in half lengthwise and press. Open out and then fold in each long raw edge by about 1/4 inch and press. Fold the whole piece to the middle and press again. The raw edges will now be encased.

At the overlocker (serger) I run over all the raw edges. You can use a zig zag stitch on a sewing machine if you don’t have a serger.

This is what we have now. 2 X serged bag panels, 2 X lining panels and 2 X prepared bag handles.

Place a bag panel on top of the other, with RIGHT sides facing. Pin around all the edges except at the top, where you need to keep and opening. Do the same with the two lining panels, keeping the top open and leaving about a 6 inch gap at the middle of the bottom for turning later.

You can also pin the bag handle pieces together just so that they are held in place when you begin to sew them together.

Now all of our pieces are pinned and prepared for sewing. Stay tuned for the next post where we will sew the bag together!

You can watch the videos for this post:

And if you feel you need to learn more about cutting your hand woven fabric, I have a post for that here as well as videos:

Until next time…

Happy Weaving!

Filed Under: Rigid heddle weaving, Sewing, Tote Bag series, Tutorials, Uncategorized, Weaving Tagged With: tote bag, weaving tutorial

Primary Sidebar

Categories

Archives

Meta

  • Log in
  • Entries feed
  • Comments feed
  • WordPress.org

Copyright © 2025 Kelly Casanova Weaving Lessons on the Foodie Pro Theme