• Skip to main content
  • Skip to primary sidebar

Kelly Casanova Weaving Lessons

  • Hi! I’m Kelly!
    • Disclosure
  • Online Weaving School Class Index
    • Common account issues
    • Common technical issues
    • What do I get with a membership?
  • New to rigid heddle weaving? Start here!
    • Never heard of the rigid heddle loom?
    • How to weave neat edges on the rigid heddle loom
    • Rigid heddle weaving
    • Rigid Heddle Weaving Patterns
  • Patterns
  • Subscribe

Pinwheels

What is a heddle rod? Part 2- how to install the rod

by Kelly 4 Comments

Last week we talked about how invaluable a heddle rod is to the rigid heddle weaver.

I showed you how to make string heddles for the heddle rod. If you missed that post, please click here.

*This post contains affiliate links. For more information, please see my disclosure policy.

Now that we know how to make our own string heddles, we can learn how we use them on a heddle rod.

The actual rod needs to be wider than the width of the piece you’re weaving. It can be either flat or round. It should be fairly lightweight and not so large that it is difficult to pick up. It should be smooth but not slippery.

For this tutorial I’m using a smooth but not lacquered wooden dowel measuring 9mm (3/8 of an inch) around. The dowel was purchased at a local hardware store.
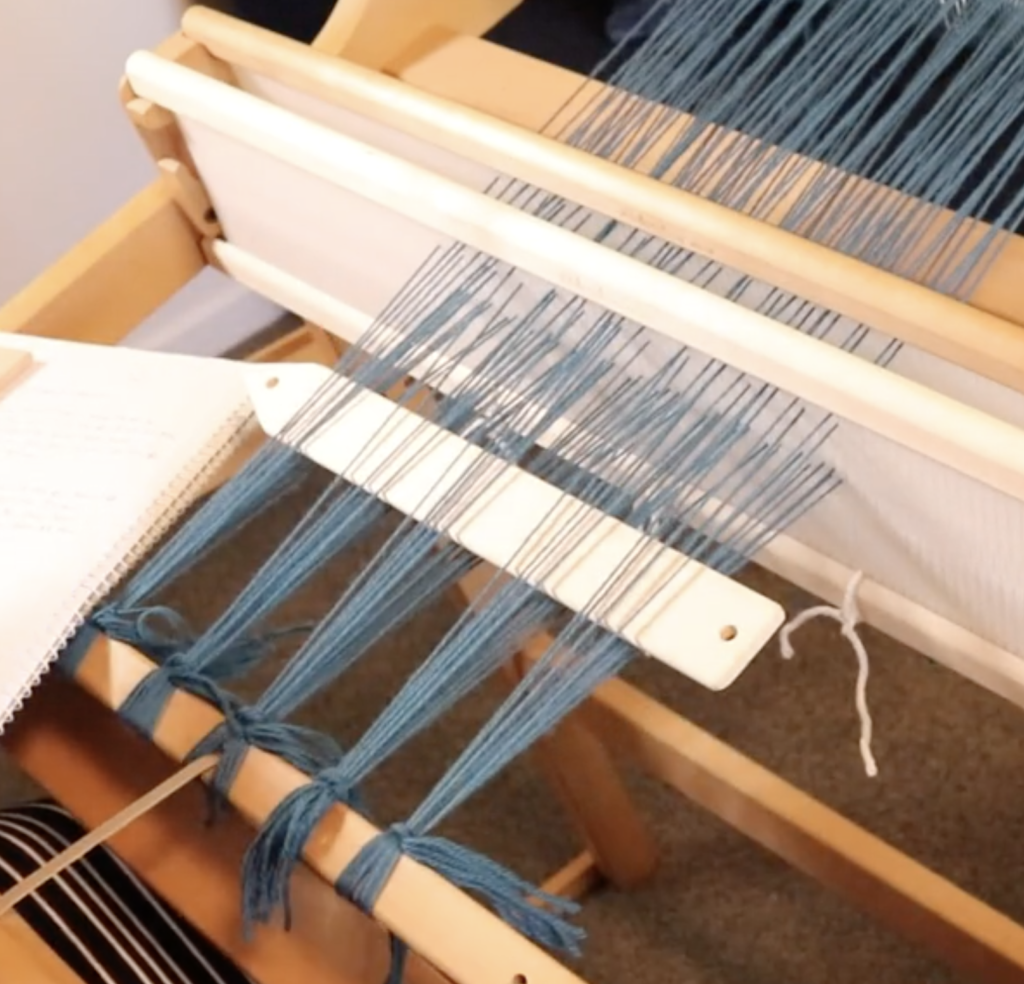
Begin by picking up the threads you want to place on the heddle rod according to the pattern or instructions you’re using. It is easiest to pick up the threads in front of the heddle first using a pick up stick. Make sure your heddle (or if you’re using more than one, heddles) are in the down position. This brings slot threads up, and it’s the slot threads we want to pick up.
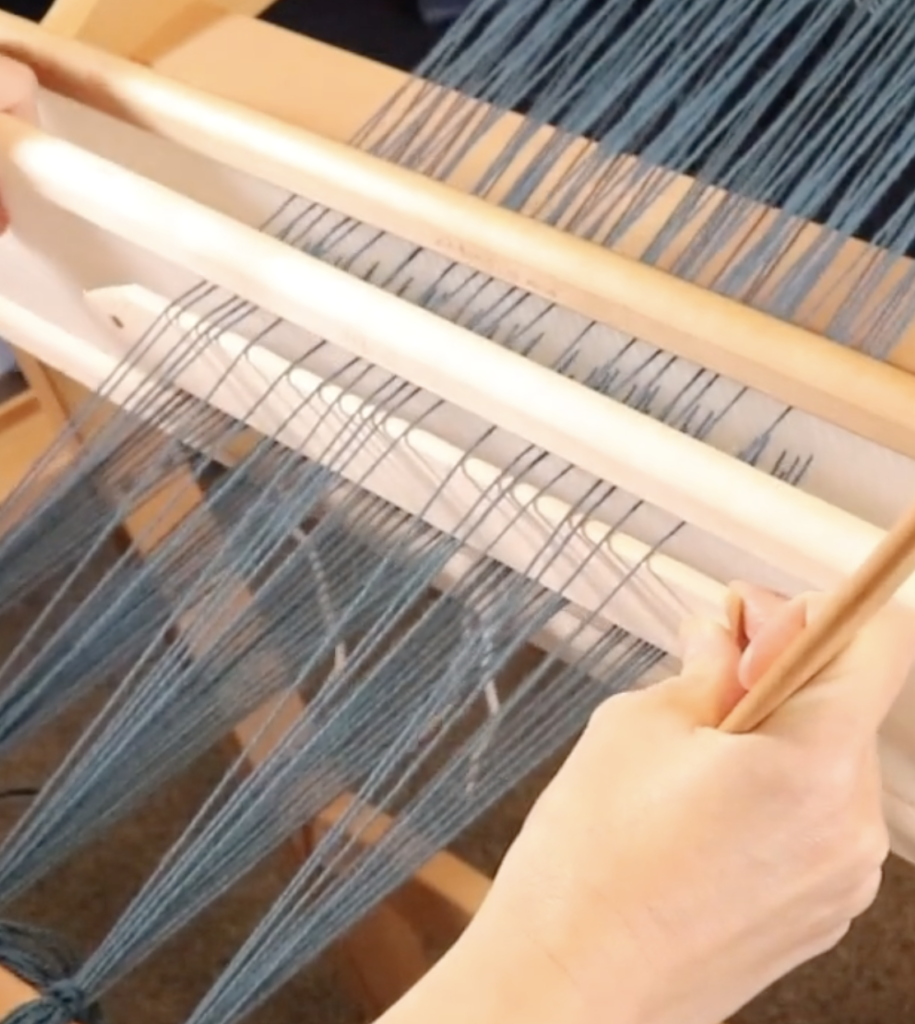
Once your threads are picked up, slide the front stick towards the heddle and place it on it’s edge. This props up the heddle rod threads at the back of the heddle and differentiates them from all the other threads.
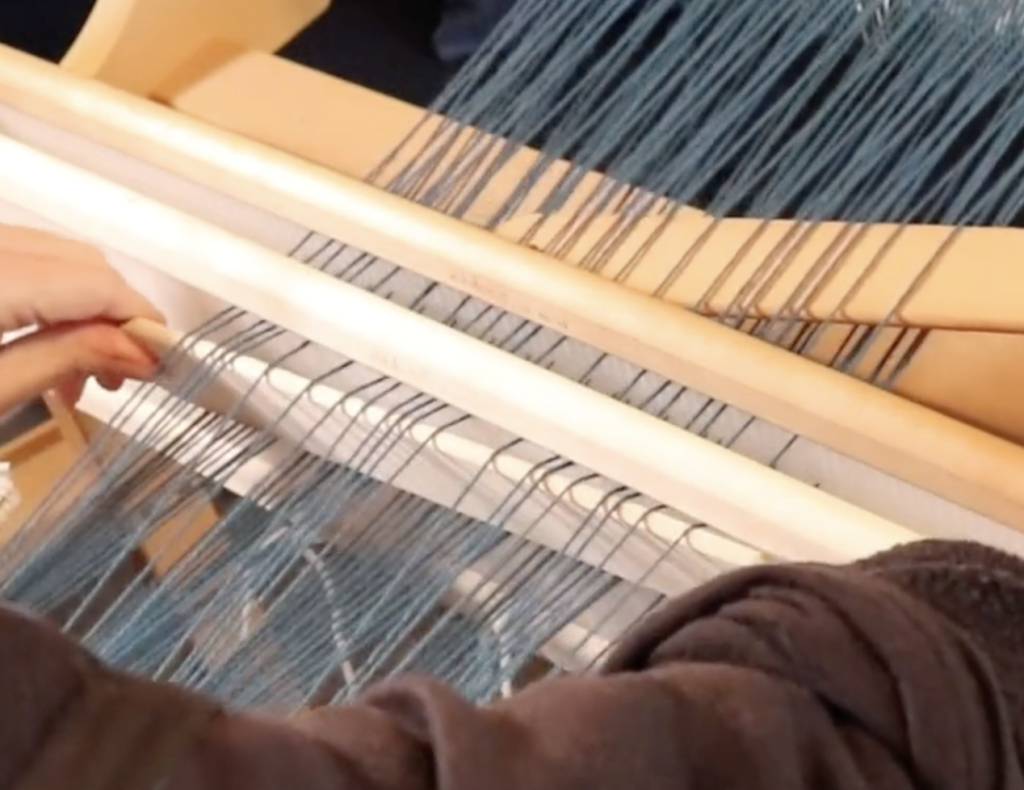
Now you can insert another pick up stick (or stick shuttle if you don’t have the extra pick up stick) into the shed that has been created by the propped up threads behind the heddle/s.
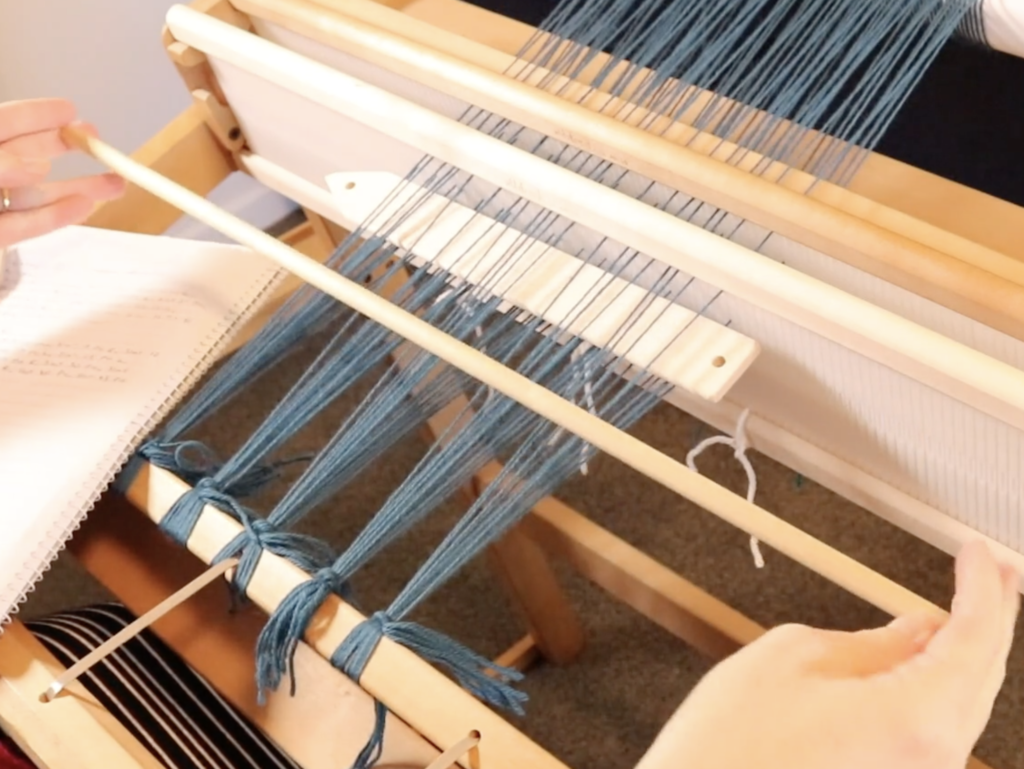
You will need your piece of dowel or whatever you’re using for the heddle rod plus your string heddles handy.
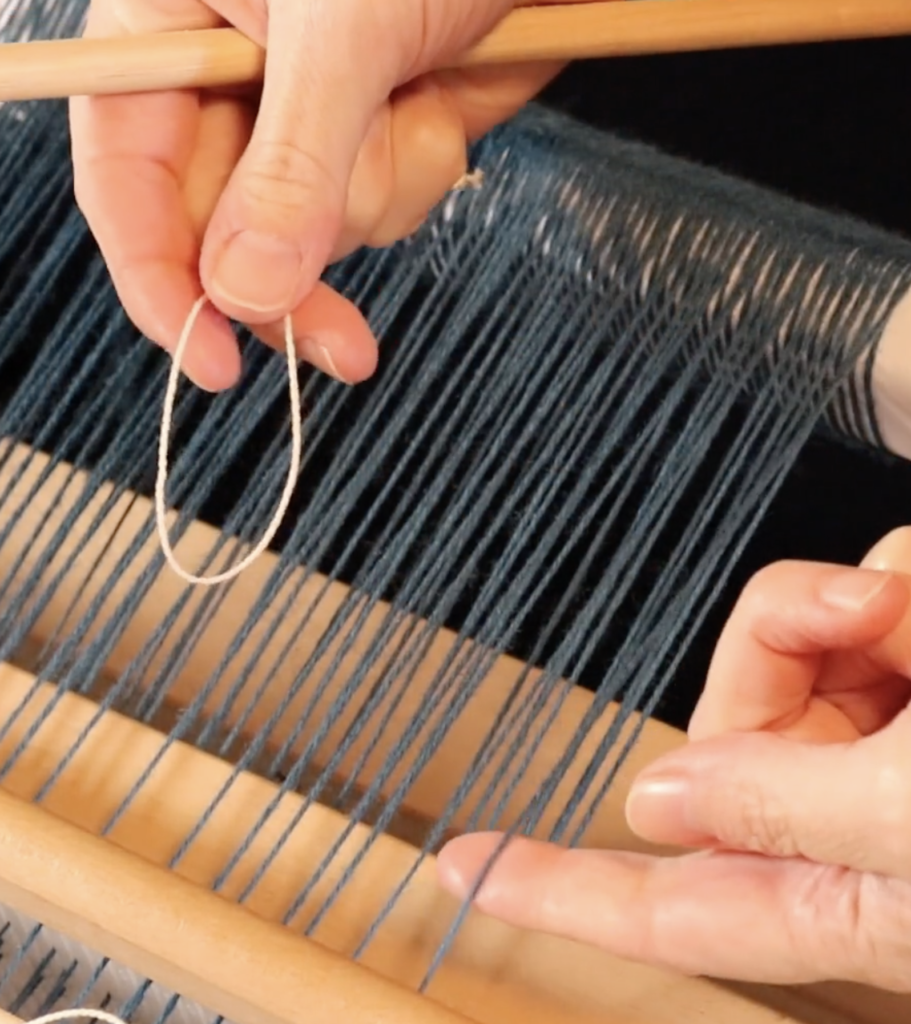
You may find it easier to sit or stand behind the loom for this next part. Working from either right to left (it makes no difference) pick up the threads in order from one side to the other. Keep your pick up stick in place as your visual guide – you can clearly see which threads need to be picked up. Have a string heddle ready at this point.
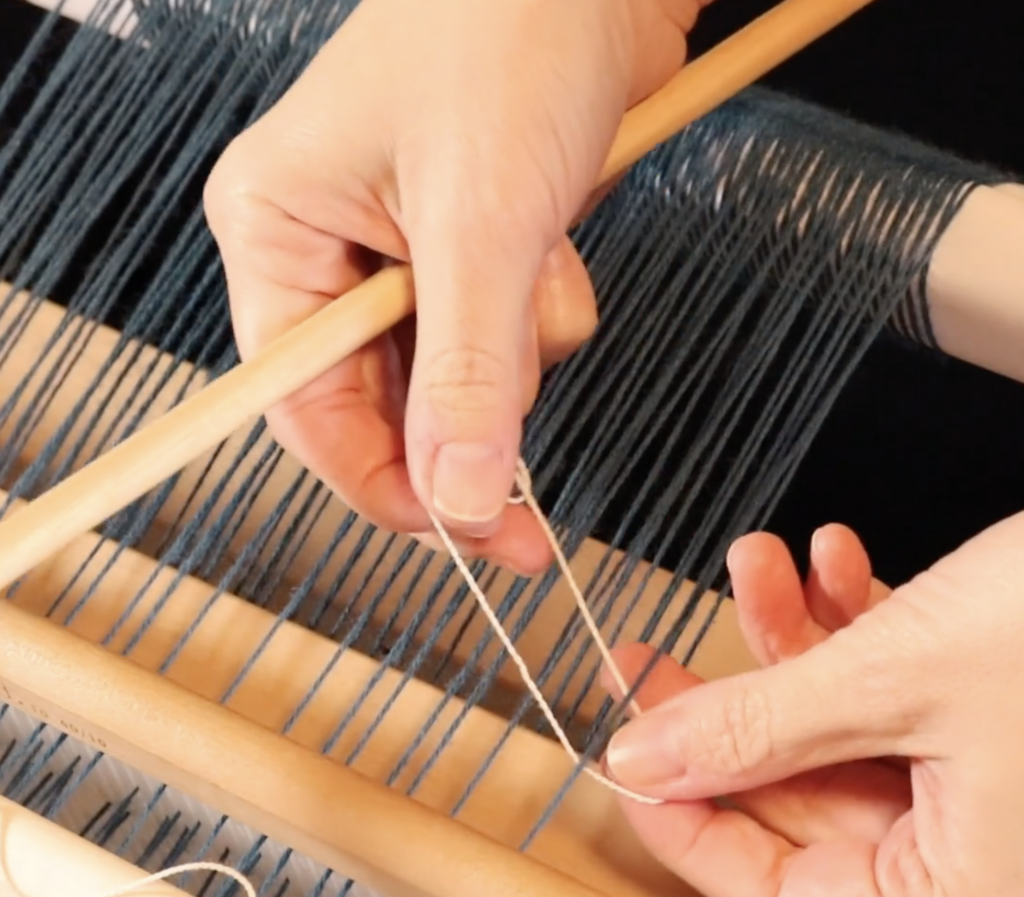
Bring a string heddle underneath the first thread so that it has a loop on either side of the thread. One loop will be smooth, the other will contain the knot. It is very much preferable not to have your knot near the thread. You want to arrange it so that it will sit on top of the heddle rod.
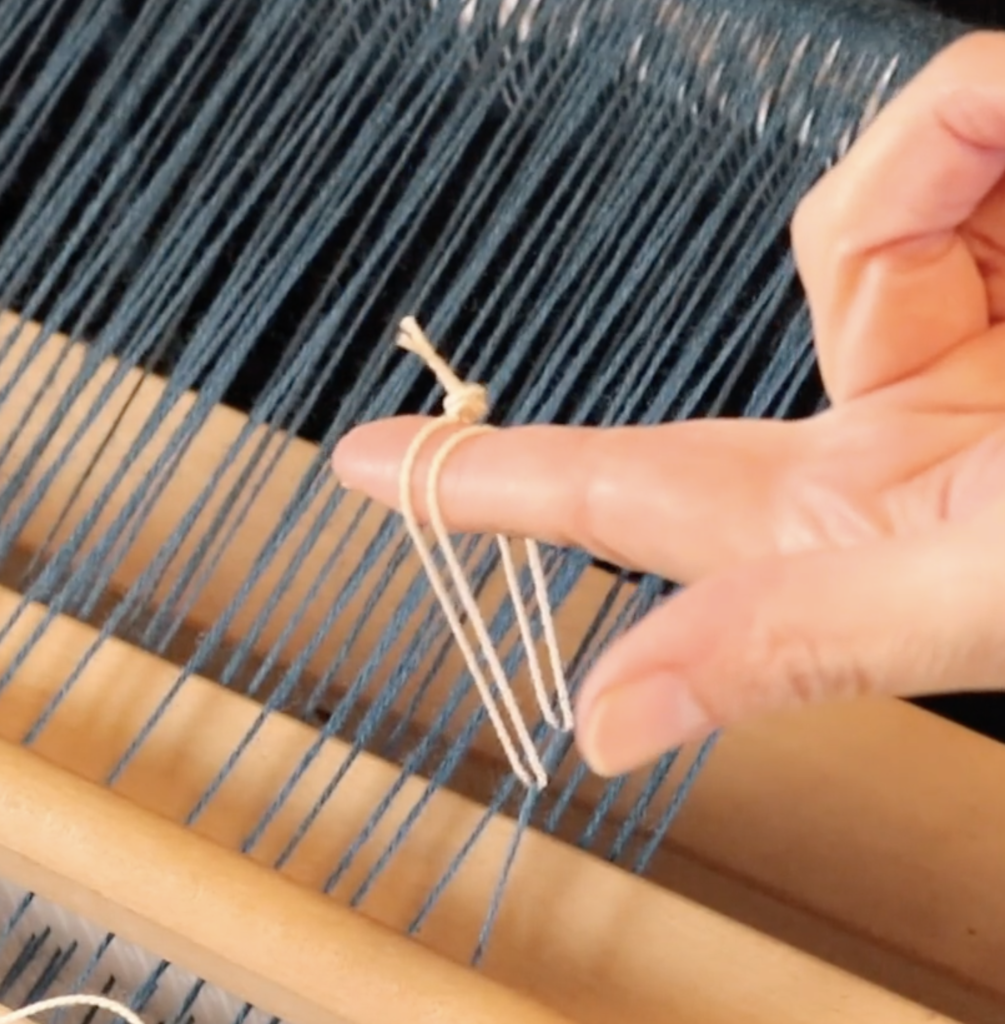
Bring the two loops of the string heddle together at the top. Note how my knot is sitting at the top rather than at the bottom or underneath the warp thread.
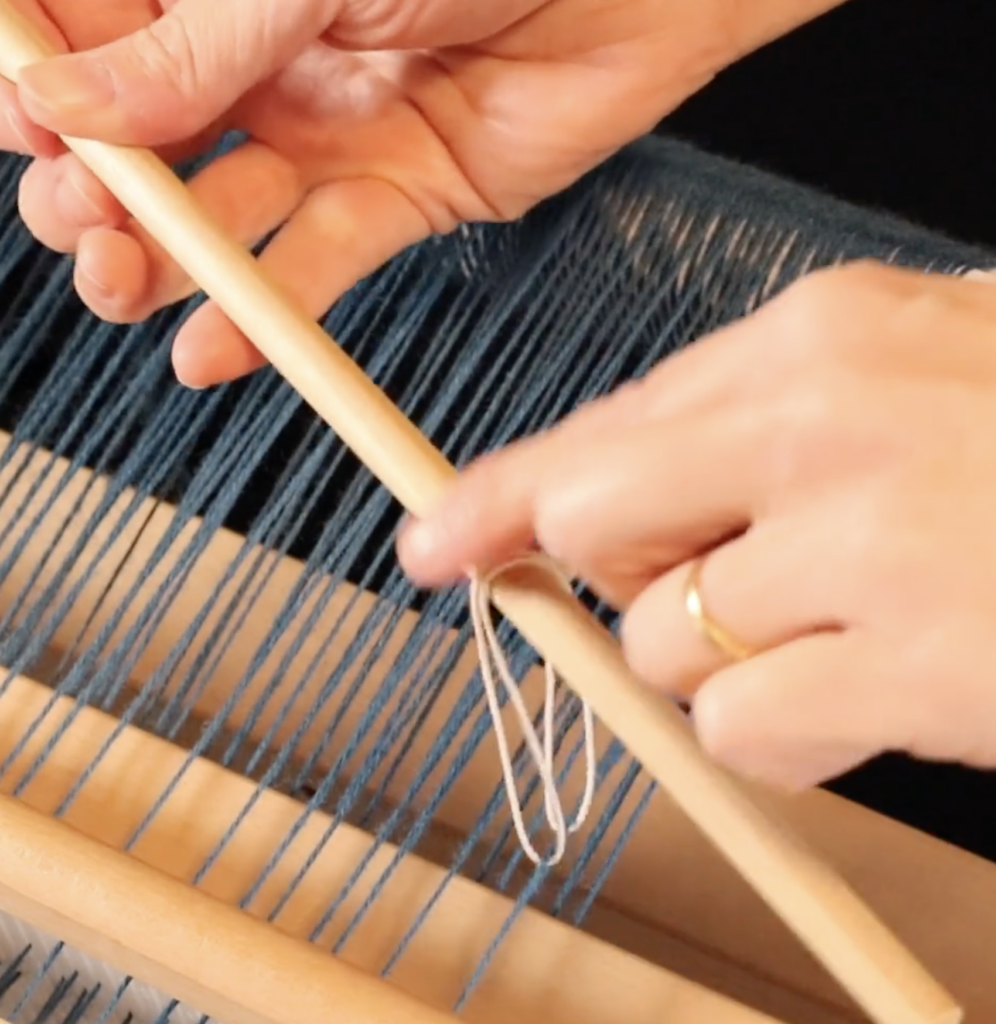
Bring in the heddle rod and slip the loops of the string heddle over it.
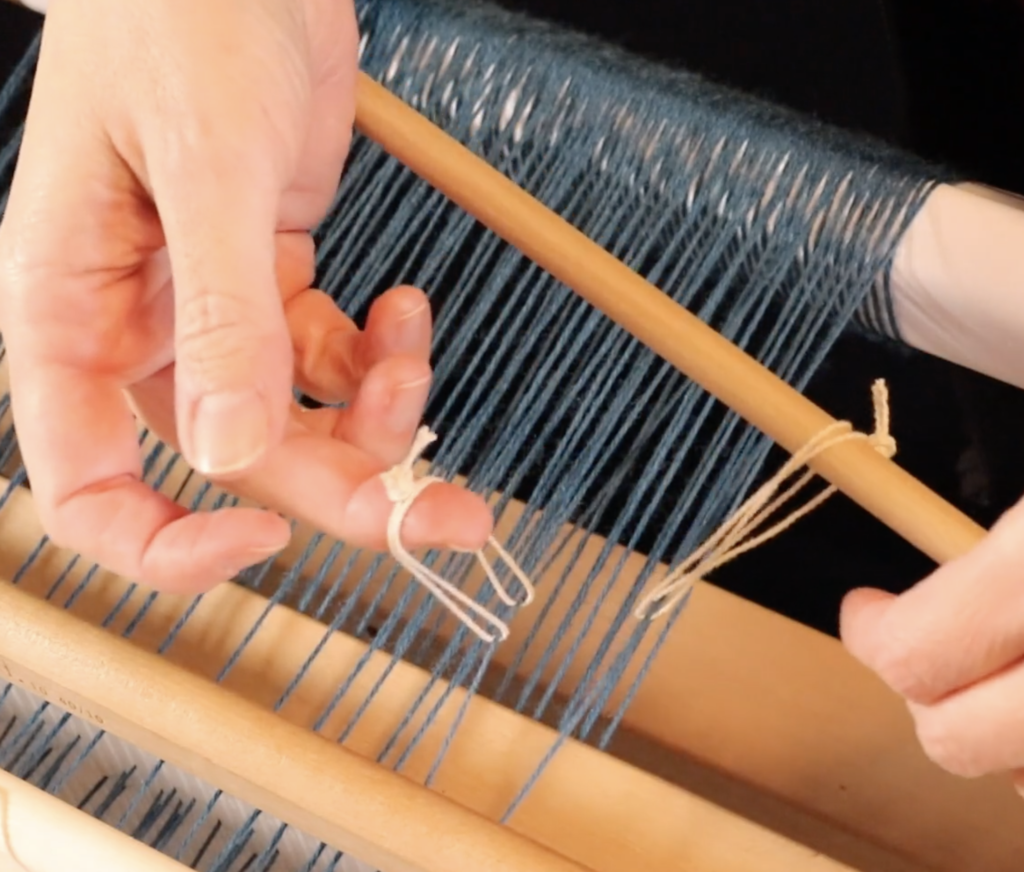
Now repeat this step with each warp thread that is sitting on your pick up stick, sliding them onto the heddle rod as you go.
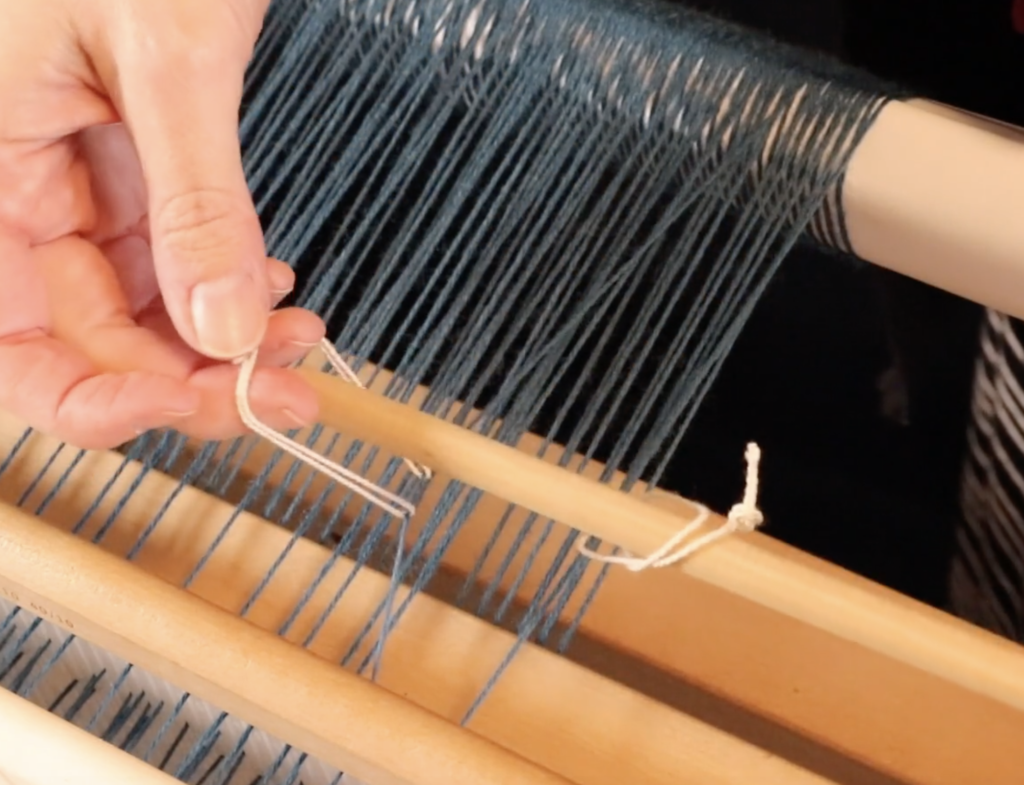
Some of you may like to put the rod down on top of the warp as you organise each string heddle, I like to keep the rod in my left hand while managing the string heddles with my right. It’s a bit fiddly, but I do find it faster. You might need a bit of practice under your belt before you use my approach this though.
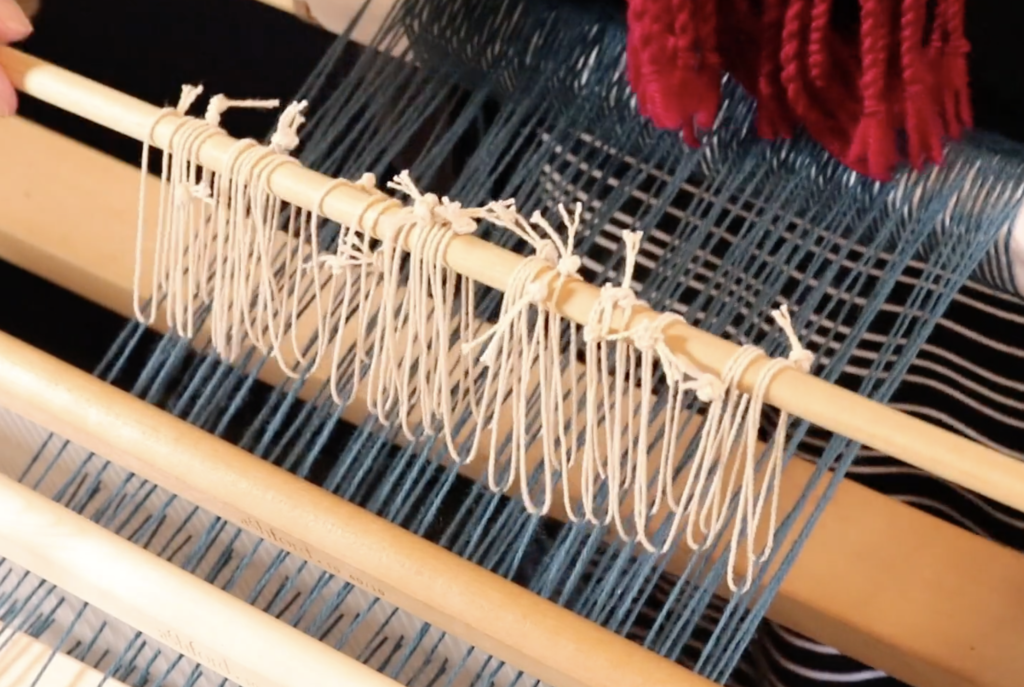
Once you have all your string heddles on the rod, you will want to secure them as it is all too common for that heddle rod to slip and then you lose all your hard work!
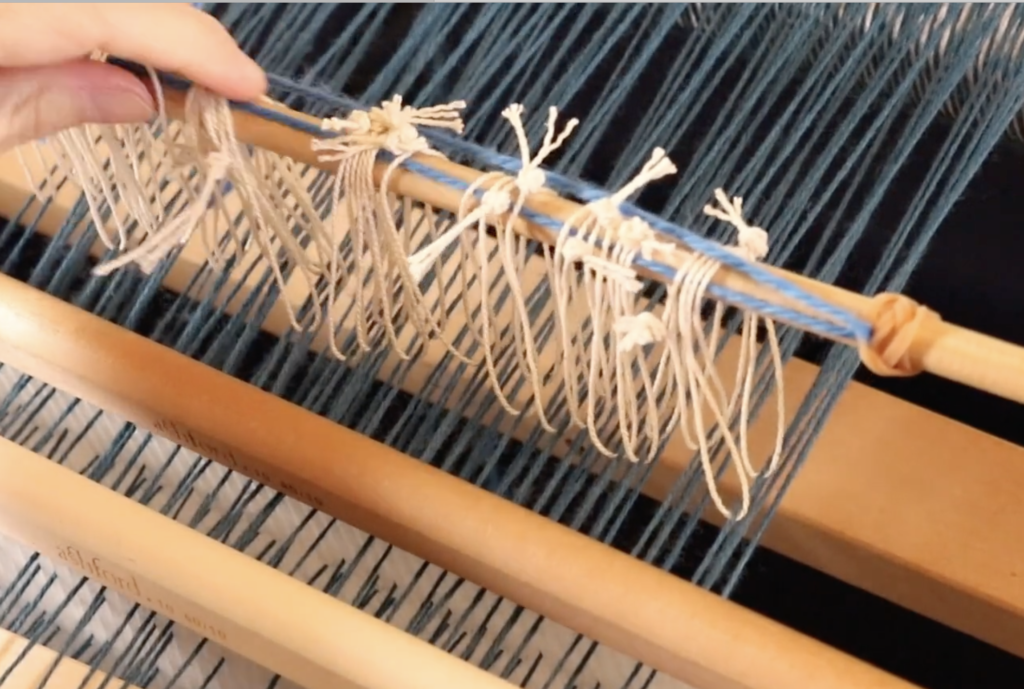
Some weavers like to use some masking or painter’s tape and place it across the top of the heddle rod.

I have a different and perhaps peculiar method, but it sure does work! I place a rubber band on each end of the rod, close to the string heddles.

Then I run a piece of waste yarn right through the middle of the string heddles, pulling each end of the waste yarn through a rubber band on each end. Then I pull the cut ends of the waste yarn up and tie a bow.

Using this method, my string heddles don’t move and are completely secure on the rod. And no annoying, sticky tape.

If you want to see a video tutorial of this process, you can watch here-

I have a number of classes that make use of heddle rods:

Converting Drafts to a rigid heddle loom

Overshot on a rigid heddle loom (coming soon)

Pinwheels on a rigid heddle loom

All of my free Krokbragd videos on Youtube are set up with a heddle rod too-

I hope you enjoyed this two part heddle rod series, don’t forget to catch the first post on making string heddles here if you haven’t already.

Be sure to leave any questions or comments below, I love to hear from you.

Until next time…

Happy Weaving!

Filed Under: Free tutorial, Krokbragd, Online Weaving School, Pinwheels, Rigid heddle weaving, Rigid Heddle Weaving Patterns, Tutorials, Weaving Tagged With: heddle rod, rigid heddle weaving, weaving tutorial

Colour and Weave

by Kelly 12 Comments

Recently I was talking about patterns for the rigid heddle beginner (you can read that post here if you missed it). I briefly mentioned Colour and Weave as an additional technique to jazz up your weaving, but decided that it would need to have it’s own discussion, as it is so versatile and varied.

Firstly, what is colour and weave?

Well, it’s very simple. It’s the introduction of colour, usually in a set sequence, first in the warp and then also in the weft. When you begin weaving, that is when the magic happens!

The prearranged colours cross paths and have a party on your loom 🥳

Plaid, which I discussed recently is a type of colour and weave, as you have set colours in set amounts in the warp and then cross with the same colours and amounts in the weft. Take a look at this post if you want to see some examples of plaids I made on my weaving software.

*This post contains some affiliate links. For further information please see my disclosure policy.

Candy Store Scarf

When the warp and weft colours cross over each other, they can produce some very interesting effects. You can use colour and weave in all kinds of weave structures, but it works great for plain weave and is perfect for the newer weaver. You are still weaving your familiar plain weave, but it can look very different! My Candy Store Scarf is the perfect example of this.

Colour and weave is wonderful for the rigid heddle weaver as it is such a simple “next step” once you have practiced plain weave and are looking for a new and interesting challenge.

Log Cabin

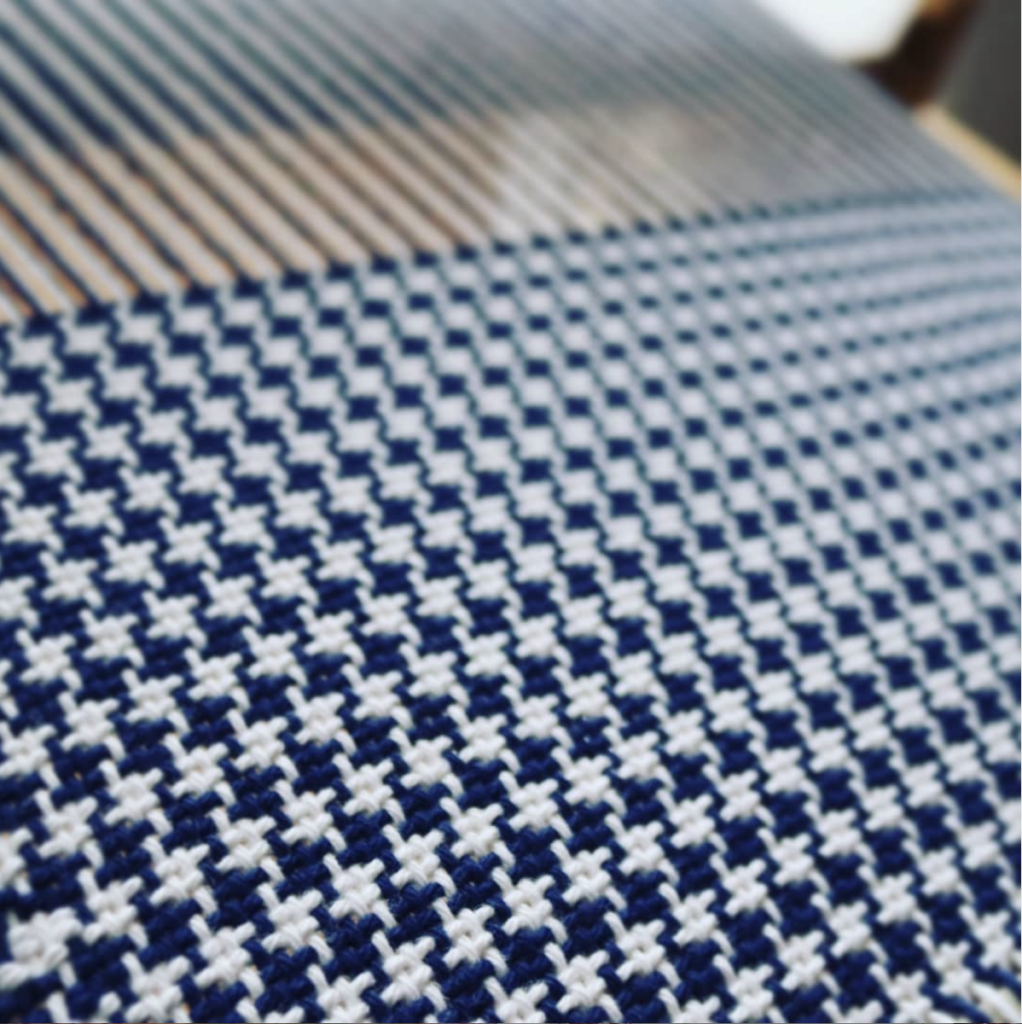
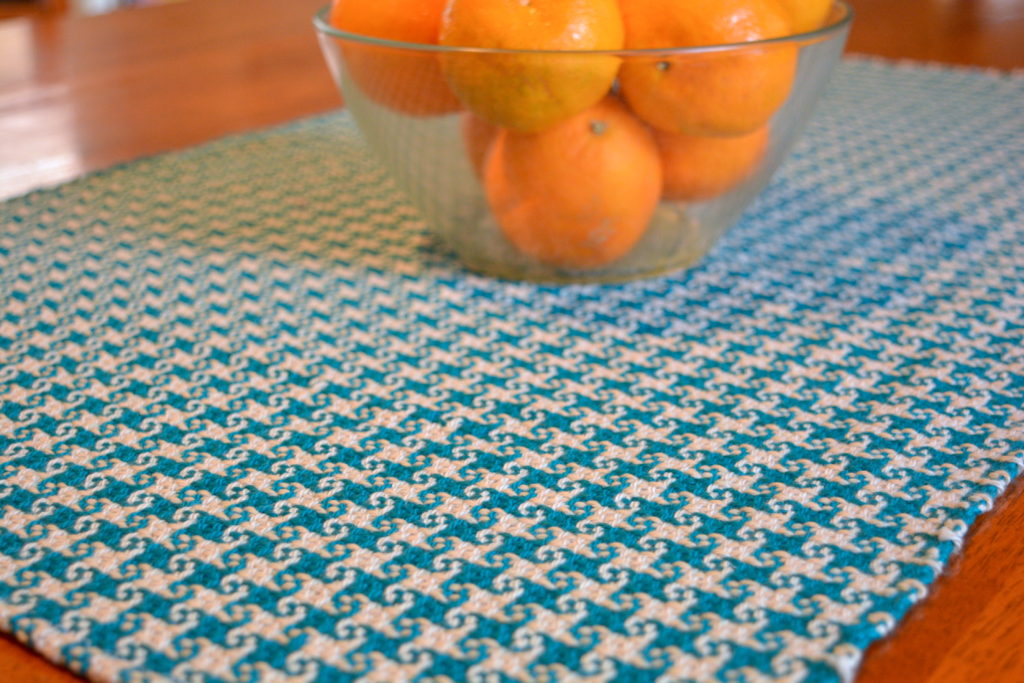
Some of the most famous and popular examples of colour and weave are Log Cabin and Houndstooth. These are often considered a “next step” for weavers venturing out from limited colour plain weave.

Although you can use multiple colours for both of these weaves, it can be a good idea to limit the colours to two that contrast well, otherwise the beauty of the crossing colours can become a bit lost.

Houndstooth colour arrangement is very simple, whereas log cabin is a little more complicated and warping can take quite some time. So, if you are a newer weaver, definitely have a go at houndstooth before attempting log cabin.

Houndstooth

Jane Patrick’s “The Weaver’s Idea Book” is a great resource for getting started with this technique. She has a section on weaving a colour and weave sampler and it includes many examples or suggestions for colour arrangements.

If you’re interested in exploring colour and weave, you have come to the right place! Here is a list of resources I have that can help.

Log Cabin Table Runner Class

Log Cabin Rable Runner PDF

Houndstooth Placemats Class

Candy Store Scarf PDF

The Town Bag PDF

The Weekend Scarf PDF

Pinwheels

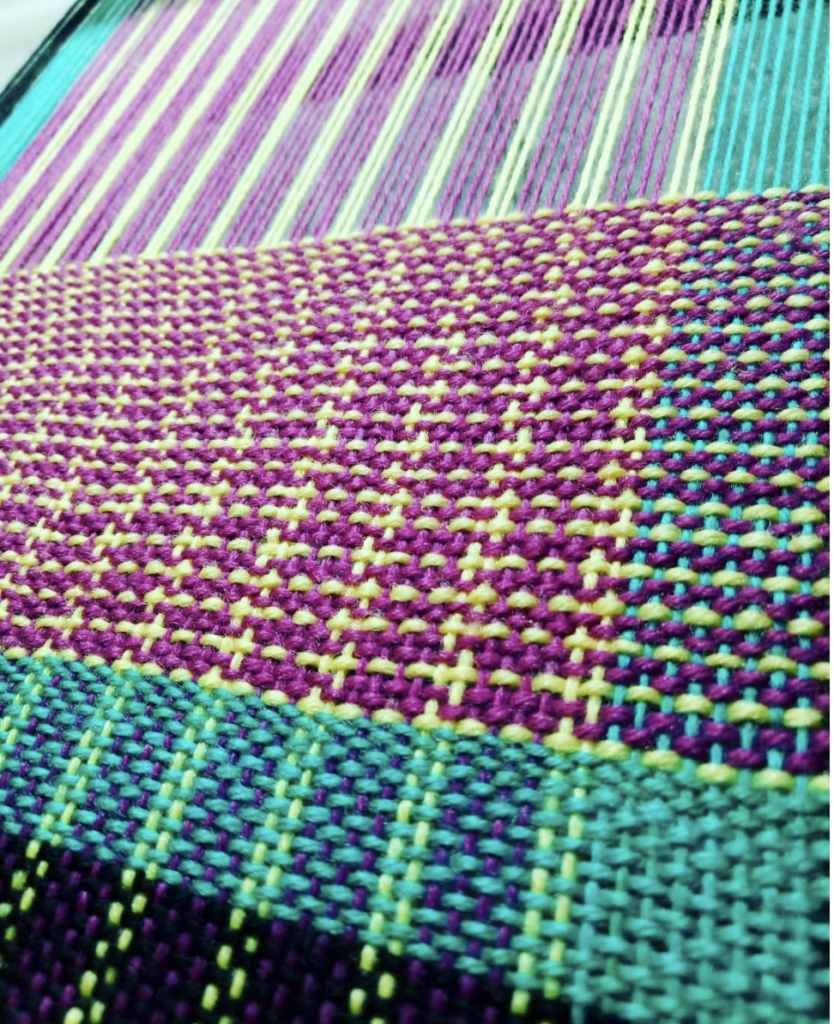
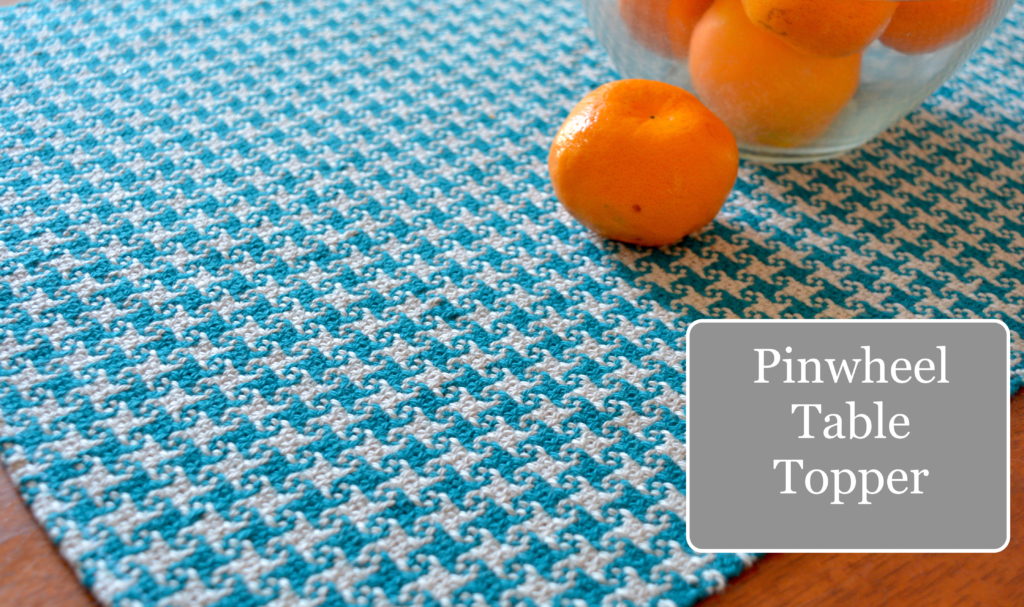
Finally, I want to mention the applications of colour and weave beyond 2 shafts. Pinwheels are an easily recognisable example of this and can be woven on 4 or 8 shafts. Even though there are more shafts, the initial warp colour setup, then weaving colour sequence is still an essential aspect. My Pinwheels Table Topper class shows you how to set up your rigid heddle loom to weave this beautiful 4 shaft pattern.

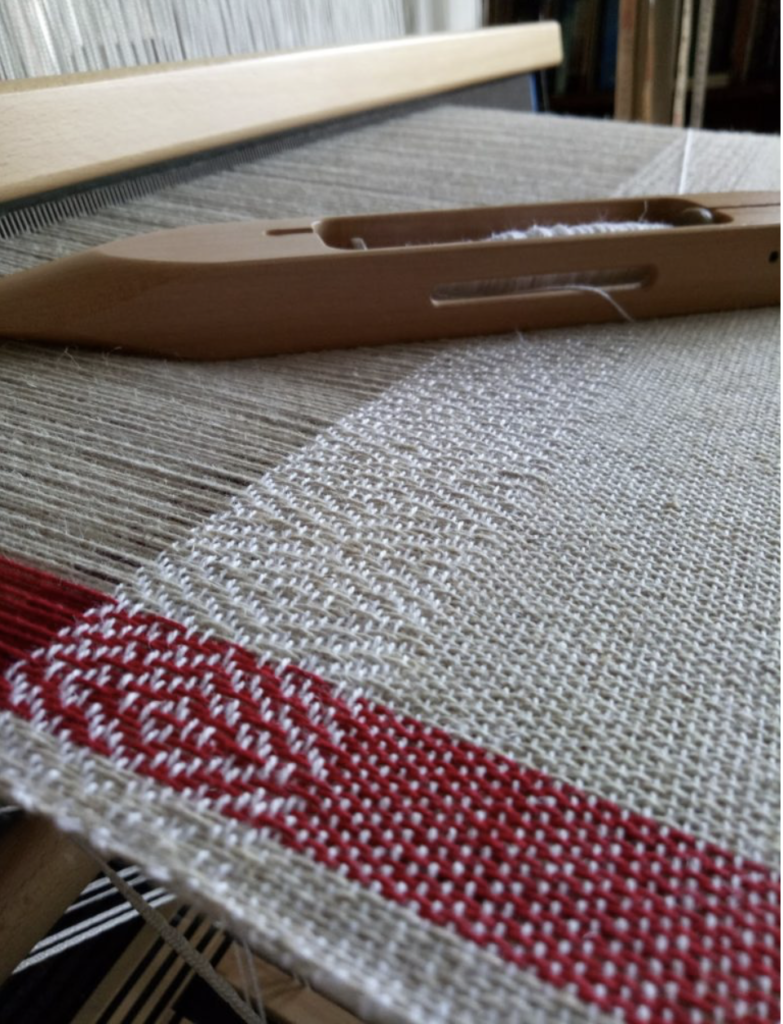
When you get into 4 shafts and beyond, you can play around with your colour placement in the warp and weft in order to highlight certain areas of pattern. When I wove some bread towels for myself, I included a contrasting strip of red in the warp.

This is really not a colour and weave because I had already threaded the loom with the intended pattern – the pattern didn’t appear strictly because of my colour placement.

But I still think it’s worth mentioning to highlight how patterns can appear or at least become more prominent when selective colour arrangement is used. If I had planned this piece better, I would have ensured in the design process that the strip of red was going to be wide enough for one full repeat of the pattern – you can see part of the pattern has been cut off.

Another example from a 4 shaft project for the floor loom or table loom weavers is the Bright and Beautiful Towels.

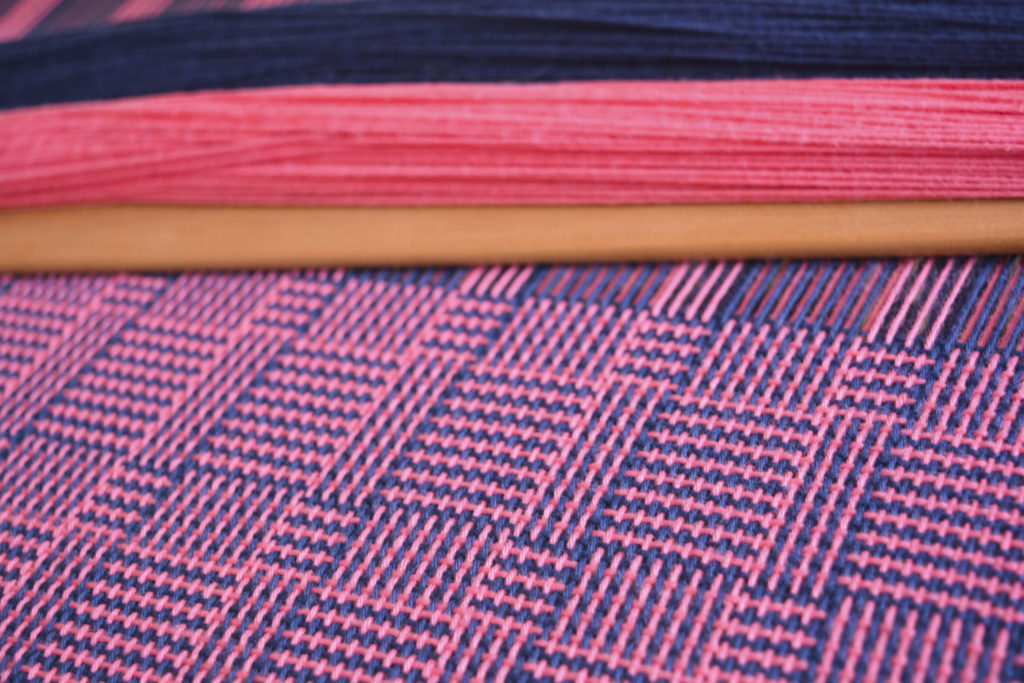
This project uses a twill weave structure but strategically uses colour in the warp and weft so that they meed at specific points of the pattern AND so that they weave squares. This twill pattern is beautiful to begin with, but playing with the colour arrangement makes it truly unique and eye catching.

I think it’s a wonder that so many fascinating patterns can appear just by the meeting of colour!

I hope you enjoyed this post, and please leave any thoughts of questions you may have in the comments below – I would love to hear from you!

Until next time…

Happy Weaving!
Filed Under: Colour and Weave, Pinwheels, Rigid heddle weaving, Rigid Heddle Weaving Patterns, Weaving Tagged With: colour and weave, weaving

Pinwheels on a rigid heddle loom!

by Kelly 15 Comments

Pinwheels are a bit of an ultimate goal for some of us rigid heddle weavers. I’ve often heard it said that it was a picture of another weaver’s pinwheel project that first excited the interest of some to the rigid heddle loom.

I’ve had many requests for a pinwheels class over the past couple of years, so I finally knuckled down, and as a result “Pinwheels for the Rigid Heddle Loom” is now available.

*This post contains an affiliate link. For further information, please view my disclosure policy.

I really enjoyed making this class, as it’s always a thrill to introduce my students to a project that I know just naturally has the “WOW!” factor in abundance.

Pinwheels can be woven on either 8 or 4 shafts, and are essentially a twill draft combined with colour and weave to produce something really impressive, but not all that difficult. You have to love that!

For this class, I chose to weave on 4 shafts (for obvious reasons – 4 shafts is way more achievable on a rigid heddle loom than 8!) using a single heddle/reed and 3 heddle rods. The set up is a little time intensive, but very comparative to the time it would take to set up on a multi shaft loom. And once you start weaving, you are more than rewarded for your efforts.

The class demonstrates a Table Topper project (rather like a table centrepiece) but also provides all the calculations for a table runner, if that is your preference. I chose my colours (Latte and Peacock) to co-ordinate with my dining room curtains, which are a greyish coffee colour.

It is important with pinwheels to choose colours that are harmonious yet have enough contrast – you want those pinwheels to pop out at you!

Before undertaking this class, I highly suggest that you complete the “Converting Pattern Drafts to the Rigid Heddle Loom” to gain a good understanding of setting up your loom according to traditional pattern drafts. The Pinwheels class would then build on that knowledge and demonstrate that there are several ways to achieve the same result.

This class is available as a part of any membership to my Online Weaving School, or can be purchased as a single class.

Until next time….

Happy Pinwheel Weaving!

Filed Under: Online Weaving School, Pinwheels, Rigid heddle weaving, Weaving Tagged With: newclass, onlinelearning, pinwheels, rigidheddleweaving

Primary Sidebar

Categories

Archives

Meta

  • Log in
  • Entries feed
  • Comments feed
  • WordPress.org

Copyright © 2025 Kelly Casanova Weaving Lessons on the Foodie Pro Theme