• Skip to main content
  • Skip to primary sidebar

Kelly Casanova Weaving Lessons

  • Hi! I’m Kelly!
    • Disclosure
  • Online Weaving School Class Index
    • Common account issues
    • Common technical issues
    • What do I get with a membership?
  • New to rigid heddle weaving? Start here!
    • Never heard of the rigid heddle loom?
    • How to weave neat edges on the rigid heddle loom
    • Rigid heddle weaving
    • Rigid Heddle Weaving Patterns
  • Patterns
  • Subscribe

weaving

One Pattern, Many Possibilities: See How Students Made It Their Own

by Kelly Leave a Comment

Discover how weavers have taken one of my patterns or classes and infused it with their own style, color choices, and creative flair.

See how students have transformed one pattern into unique, beautiful weaving projects! Get inspired by their creativity and explore how you can put your own spin on your next project.

Over the past 10 years of sharing weaving content online, I’ve created a huge variety of patterns, tutorials, and classes to help others learn and grow in their weaving journey.

One of the most rewarding parts of this work is seeing how students take what I’ve created and make it entirely their own. Whether it’s through bold color choices, inventive adaptations, or thoughtful personal touches, these weavers have turned a single pattern into something uniquely beautiful.

In this post, I’m thrilled to showcase some of these inspiring student projects—because as Einstein said, “Creativity is intelligence having fun.”

Many of my students are prolific weavers and so I’m presenting multiple projects from some of them 😊 All the photos shown below belong to the mentioned student.

Lace Shawl by Ruth

Ruth was inspired by the Lovely and Lacy Workshop. Rather than a class project, students learn finger controlled lace techniques on a rigid heddle loom by weaving a sampler.

Some of the techniques included in this online workshop are Mexican Lace, Leno, Spanish Lace and Brook’s Bouquet.

Ruth took the idea to the next level by using Mexican Lace and 16/2 cotton to create this beautiful full sized shawl.

Wash Your Hands Towels by Lisa

The Wash Your Hands Towels project is a free rigid heddle loom pattern I created back when we were all kept at home with a series of health guidelines to follow. I thought hand towels an appropriate project for that time period!

Since I released the towels pattern I have seen literally hundreds of them being woven (still to this day!) in a huge variety of colours and styles.

I think that Lisa’s towels are very classic and classy and I love her take on the original pattern.

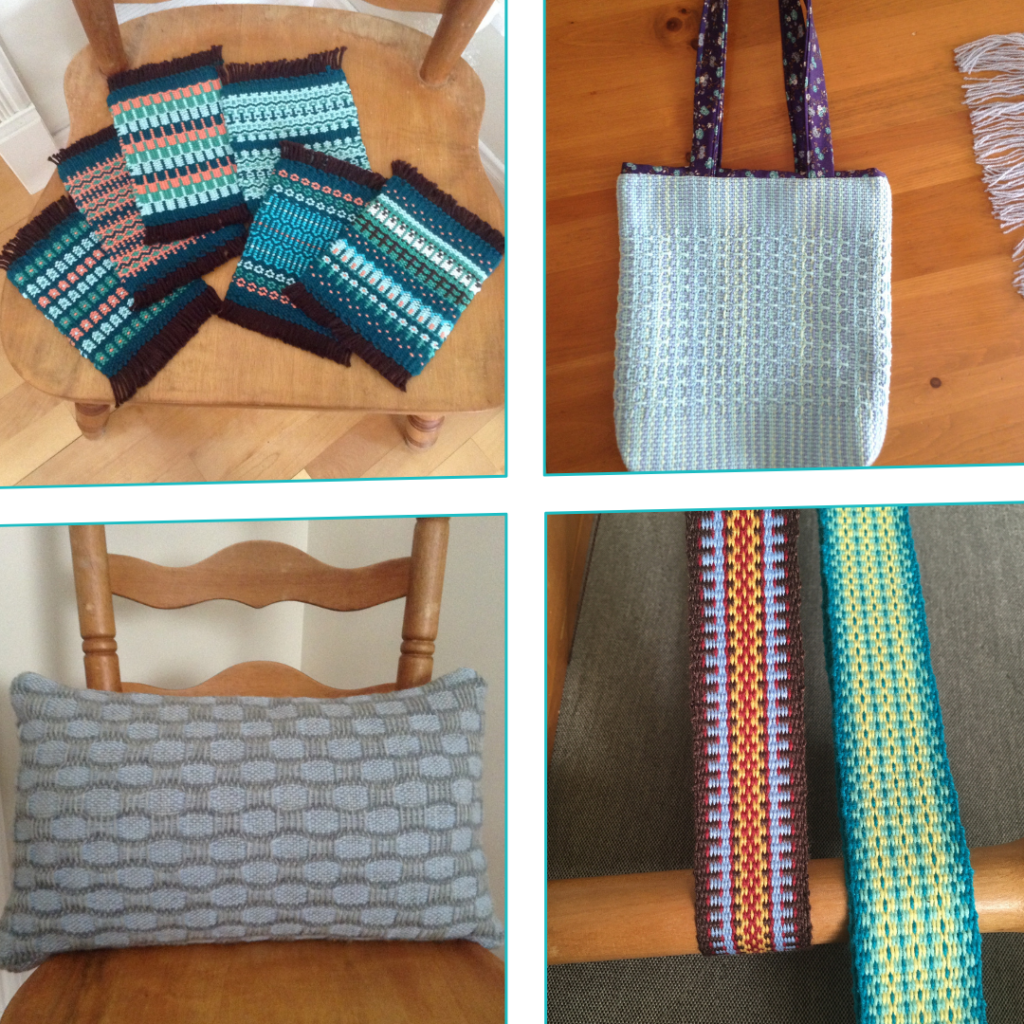
Here are some more stunning pieces from Lisa.

  • Krokbragd Mug Rugs (top left)
  • Tote Bag (top right)
  • Honeybee Cushion (bottom left)
  • Inkle Bands (bottom right)

Leno Scarf by Gai

Gai’s scarf is such a magnificent example of taking a pattern and using it for inspiration to make something totally different.

She used the Farmer’s Market Bag pattern but rather than weave the fabric required for the bag, used the weaving instructions and sequences, combined with some lovely yarn in different shades, to weave this unique scarf.

Gai wove the scarf in the Leno weave structure on her rigid heddle loom using Moda Vera Ombre bamboo/cotton yarn.

Tablet Woven Band by Traci

Having a limited colour palette for a project can actually be a good thing! Traci had some stash yarns when she undertook the Tablet Weaving on an Inkle Loom but not the same colours as the class project. What a happy accident! I think the colours Traci used for this tablet woven band are just stunning!

You may also notice from Traci’s photo that she is weaving on the wonderful Lojan Inkle loom. You can learn more about that here.

Pick Up Scarf by Tanya

Tanya used the Pick Up Perfection class as her inspiration for this lovely scarf. The class project is actually a pillow/cushion but Tanya used the pick up instruction as a launching pad to create a uniquely striking scarf.

Although she is only a beginner weaver, I think Tanya really nailed the colour and design for this one!

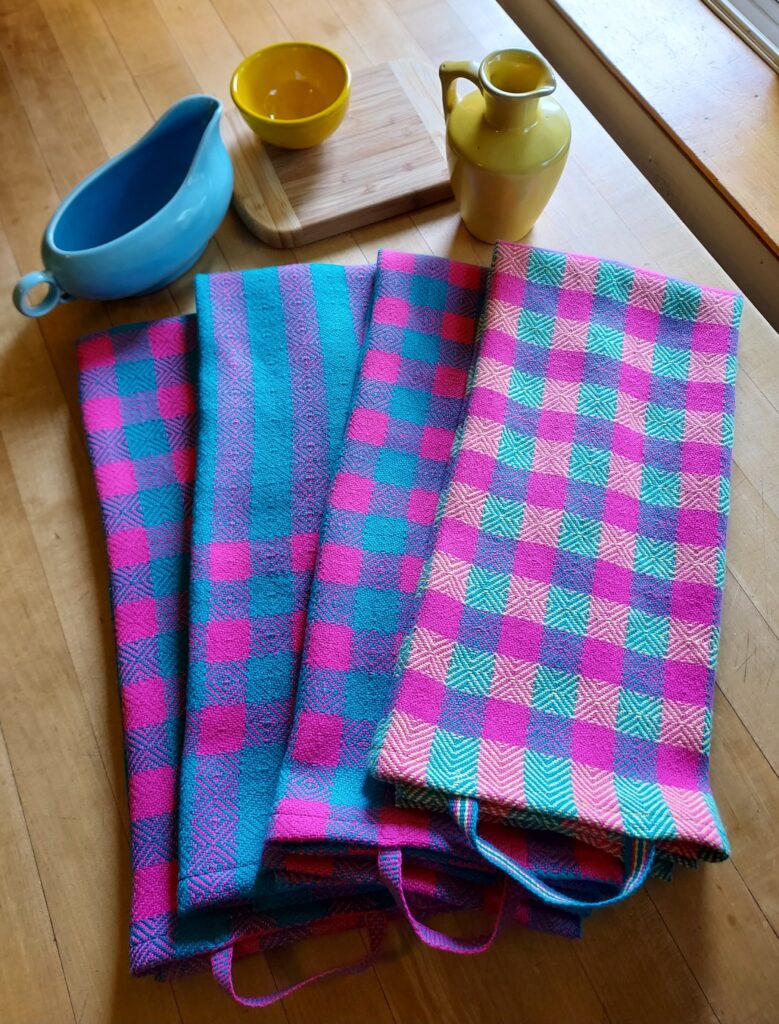
Bright & Beautiful Towels by Liz

Liz wove the Bright & Beautiful towels fairly true to the pattern (I can see some lovely little variations in her towels though) but what I really loved is how she also wove matching inkle bands as tabs! Going the extra mile means that you can customise your projects to be truly unique.

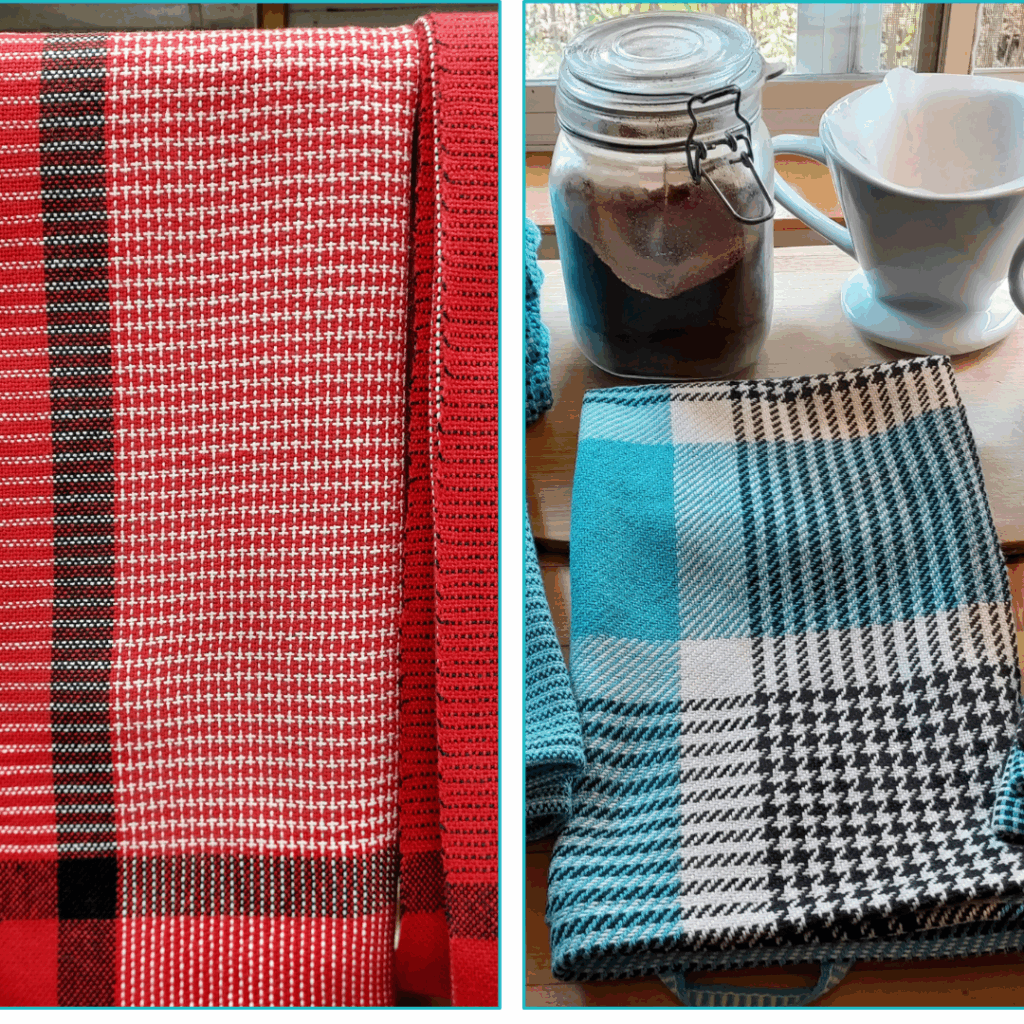
I had to include some more projects from Liz because not only is she a prolific weaver, she always uses such beautiful colours and ideas. On the left above is her version of my Colour and Weave Towels and on the right her own towel design.

*This post contains affiliate links, please see my disclosure policy for further information.

I hope you enjoyed viewing these student projects and I’m sure you will draw much inspiration from the creativity of other weavers!

All of the above mentioned weavers are members of the Online Weaving School. When you purchase a membership you not only have access to the full class library (currently almost 100 classes!) but you also gain access to the private member’s group. In this space we share projects, advice, ideas and troubleshooting!

Until next time…

Happy Weaving!

Filed Under: Inspiration, Student work, Weaving Tagged With: inspiring weaving, pattern possibilities, rigid heddle weaving, student work, weaving

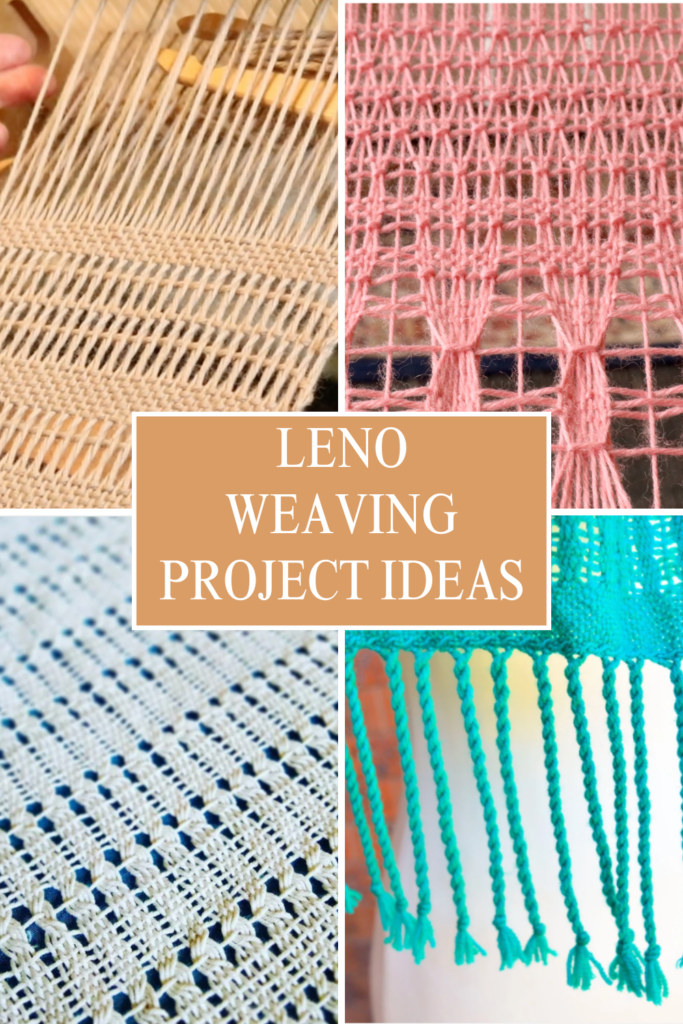
5 Beautiful Leno Weaving Project Ideas for the Rigid Heddle Loom

by Kelly 2 Comments

If you loved learning how to weave Leno lace on your rigid heddle loom in my previous article, you’re going to be excited about today’s post!

Leno is a beautiful, open-weave technique that adds texture and lightness to your projects. It’s a finger controlled technique that can easily be woven on a plain weave threading and with very minimal tools – all you need is your rigid heddle loom and a pick up stick!

In this post, I’ll share five gorgeous Leno weaving project ideas to inspire your Leno journey.

Let’s dive in!

1. Airy Leno Scarf

A lightweight, lacy scarf is a perfect way to showcase Leno weaving. Use a soft cotton, wool or silk for a breezy, elegant accessory. To add interest, you could use contrasting warp and weft colours. The Garden Path Scarf uses the Brook’s Bouquet weave structure, but is a lovely example of how special a lace weave scarf can look.

2. Leno Market Bag

A sturdy yet flexible string bag is a fantastic use of Leno lace! The open weave allows for some stretch, making it ideal for carrying groceries, beach essentials, books or even yarn. Use a strong cotton or linen yarn for durability. A tapestry cotton or seine twine is the kind of hard wearing yarn you need for a project like this 😉

Check out the digital download PDF pattern for The Farmer’s Market Bag for an easy to follow project.

3. Sheer Leno Curtains

Leno is a very popular structure for weaving airy, light-filtering curtains. Because you are already threaded for plain weave, a hem and top section for hanging are easy to include on each end of your Leno panel. Choose natural fibers like cotton or linen.

4. Table Runner with Leno accent

Although Leno is not really appropriate for a table runner due to its need for some sturdiness and the ability to sit flat on a table, it is very lovely when used as an accent. You could choose to weave a plain weave table runner with recurring repeats of Leno, strategically placed.

Or you could place your Leno in particularly places rather than doing a full row to create Leno sections or windows in your runner.

Coupled with an Italian Hemstich, your table runner would be a real show stopper!

5. Lightweight Leno Wrap or Shawl

A Leno-woven wrap or shawl is perfect for layering over outfits in warmer weather or draped with an evening dress on cooler nights. You could try a sheeny and soft yarn like tencel or bamboo for a luxurious drape. Using the same colour for both warp and weft would create a classy and bold statement piece. Introducing Mexican Lace (a type of Leno as demonstrated in this online class) would make a truly beautiful shawl.

There is a lovely shrug project in Jane Patrick’s The Weaver’s Idea Book on page 74.

More About Leno

Want to undertake one of these projects but you’re not sure if Leno is for you? Check out my free tutorial to get started weaving Leno on an open shed.

And if you’re interested in delving into some more finger controlled techniques like Mexican Lace, Brook’s Bouquet and Spanish Lace, you need the Lovely and Lacey Online Workshop. In this workshop we weave a sampler to practice the techniques, so there is no need to commit to a full sized project.

Leno weaving is a fantastic way to add texture, lightness, and a touch of elegance to your rigid heddle loom projects. Whether you’re weaving a breezy scarf, a sturdy market bag, or delicate curtains, this technique opens up so many creative possibilities and variations.

*This post contains some affiliate links. For more information, please see my disclosure policy.

I hope these project ideas inspire you to try Leno in new and exciting ways! Have you woven with Leno before? I’d love to hear about your favourite projects—share your thoughts in the comments below 👇

Until next time…

Happy Weaving!

Filed Under: Rigid heddle weaving, Rigid Heddle Weaving Patterns, Weaving Tagged With: finger contolled, lace weave, leno, rigid heddle weaving, rigid heddle weaving books, rigid heddle weaving patterns, rigid heddle weaving project ideas, weaving

7 Trending Weaving Techniques for 2025

by Kelly Leave a Comment

Weaving continues to evolve as more makers explore creative and innovative approaches to this timeless craft. Whether you’re a seasoned weaver or just starting out, these trends can inspire your next project and introduce you to new techniques. Here’s what’s shaping up to be big in the weaving world in 2025:

1. Layered Textures and Dimensional Weaving

Gone are the days of flat, uniform weaves! Textured and dimensional designs are making a bold statement. Techniques like adding loops, tassels, and fringe create eye-catching depth. Combining materials like wool, cotton, silk, and even unconventional fibers such as raffia or metallic threads adds another layer of interest.

Tips to Try:

  • Use a pick-up stick on your rigid heddle loom to create textured patterns.
  • Add layers of roving or chunky yarn for depth and softness.
  • Try textured weave structures like waffle weave.

2. Sustainable Weaving Practices

Sustainability is a core focus for many weavers in 2025. Crafters are sourcing eco-friendly yarns, upcycling old textiles into weaving materials, and using locally-produced fibers. This movement gives projects a unique, meaningful story and supports local industry.

How to Incorporate Sustainability:

  • Try weaving with fabric strips from thrifted clothing or linens.
  • Seek out small-batch, hand-dyed yarns from ethical producers.
  • Research local manufacturers and see what they have to offer.

3. Bold, Colorful Palettes (but also earthy tones!)

This year is all about color! Vibrant, daring combinations like electric blue with coral or mustard yellow with magenta are taking center stage. Color blocking and ombré effects are especially popular, offering striking visual appeal.

Having said that, there seems to be a definite trend towards early color palettes too.

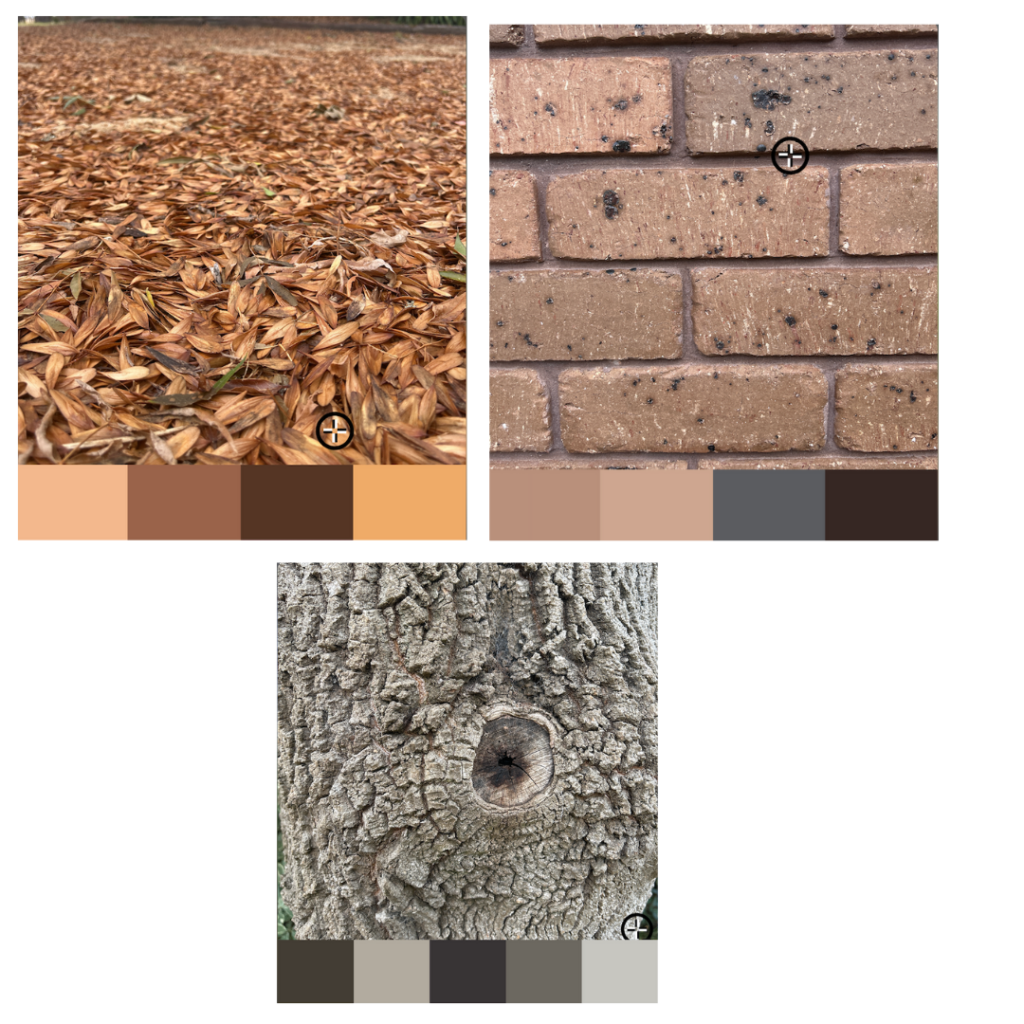
Have you seen the Pantone color of the year? When I first saw the “Mocha Mousse” for 2025 I admit that I was less than enthused. However, when you look at the color palettes on the Pantone website, some of them are quite lovely.

See point 4 below for how I used my own photos and an app to easily generate customised earthy color palettes ⬇️

Color Trends to Explore:

  • Use hand-dyed yarns for gradual color changes.
  • Incorporate color gradients or geometric shapes in your designs.
  • Explore an earthy palette with pops of bolder color.

4. Weaving with Natural Inspiration

Nature-inspired themes are gaining momentum, from earthy tones to patterns that mimic natural forms. Think flowing water, tree bark, or the soft hues of sunrise. Weaving with plant-dyed yarns and botanical fibers enhances this connection to nature.

Ideas for Nature-Inspired Weaving:

  • Use a neutral palette with pops of green or terracotta.
  • Try weaving leaf or wave patterns using pick-up sticks, finger-manipulated techniques or multi shaft weaving patterns.
  • Use a color palette picker that makes random color palettes or an app on your phone that allows you to generate a color palette from your own photos.

I used Palette Cam on my phone to generate some earthy tones from around my property:

5. Mixed-Media Weaving

Weaving isn’t limited to traditional materials anymore! Adding unexpected elements like beads, feathers, or even wire creates pieces that feel like sculptural art. This trend blends well with wall hangings and statement décor.

How to Get Started:

  • Weave sections with yarn and alternate with beads or macramé knots.
  • Experiment with unconventional materials like metallic threads or leather strips.
  • Keep an eye out when you’re in nature for inspiration or found objects.

6. Small-Scale Weaving for Everyday Use

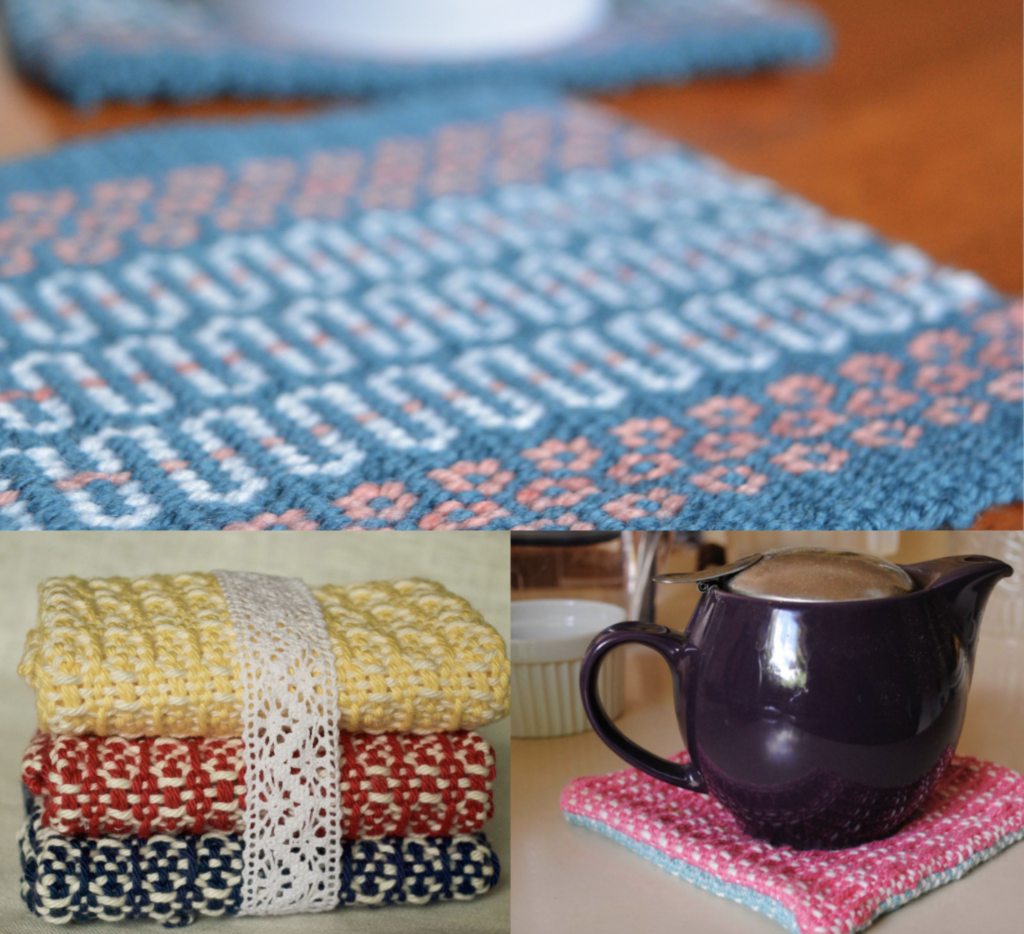
Smaller weaving projects are having a moment. From keychains to coasters and bookmarks, these small pieces are perfect for testing techniques or using up leftover yarn. They’re also quick, satisfying projects that make thoughtful gifts.

Many weavers have a smaller creative space available to weave in, so compact looms and smaller projects are great options.

Quick Project Ideas:

  • Weave a set of colorful coasters for your coffee table.
  • Create small pouches or coin purses with your leftover warp.
  • Weave squares or strips of fabric to sew together to make a larger item.

7. Digital and Virtual Weaving Communities

With technology continuing to connect the weaving world, online weaving challenges, tutorials, and live workshops are booming. Weavers are sharing their work and learning from each other like never before.

Although there was little that was positive about lock downs and isolation, one take away is that we all realised how easy it is to connect with people all over the world through the internet. There are now many online weaving groups and guilds to choose from.

_______________________________________________________________________________

2025 is shaping up to be an exciting year for weaving, with trends that inspire creativity, sustainability, and bold expression. Whether you’re experimenting with textures, exploring local artisans, or trying out mixed media, there’s something new for every weaver to explore.

What trends are you excited to try this year? Let’s celebrate the art of weaving together—share your ideas and join the conversation!

*This post contains affiliate links. For more information please see my disclosure policy.

Filed Under: Weaving Tagged With: 2025, weaving, weaving trends

The Joy of Rigid Heddle Weaving: A Beginner’s Adventure

by Kelly 2 Comments

I still remember the thrill of waiting for my very first rigid heddle loom to arrive. The idea that I could create my own handwoven fabric felt like magic. I’d seen weaving videos online, mostly featuring floor looms, and dreamed of starting my own weaving journey, imagining the joy of weaving.

When the box finally arrived, I was filled with excitement—and a little bit of trepidation. I didn’t know any other weavers, and back then, online resources were scarce. Thankfully, that’s no longer the case! Today, rigid heddle weaving is more accessible than ever, and I’m here to help you get started.

Why Rigid Heddle Weaving?

Rigid heddle weaving is perfect for beginners and experienced crafters alike. Its accessibility and versatility make it a great choice for anyone eager to explore the art of weaving. Whether you’re looking for a creative outlet or a way to relax, the rigid heddle loom is a wonderful companion and excellent starting point.

What Is Rigid Heddle Weaving?

A rigid heddle loom is a simple, portable loom with a rigid heddle (a frame with slots and holes) that serves as both a beater and a shed maker. It allows you to weave fabrics quickly and easily without the complexity of a large multi shaft loom.

Compared to Other Looms:

  • Rigid Heddle Loom: Affordable, compact, and beginner-friendly.
  • Floor Loom: Larger and more complex, designed for advanced weavers and larger projects.
  • Inkle Loom: Ideal for narrow projects like belts and straps.

Why It’s Fun and Accessible

Simple Setup and Use
One of the best things about a rigid heddle loom is its simplicity. The setup is straightforward, making it easy to get started even if you’re completely new to weaving. With a bit of practice most weavers find that they improve very quickly.

Quick Results
Weaving on a rigid heddle loom allows you to see progress quickly, which is incredibly motivating for beginners. Imagine weaving your first scarf or table runner in just a few hours to a day or two!

Creative Freedom
The rigid heddle loom is versatile enough to let your creativity shine. You can experiment with different yarns, textures, and patterns without needing advanced techniques. Even if you just learn plain weave and decide to mostly stick with that, there are other techniques, such as Color and Weave or Clasped Weft to jazz up your plain weave.

Hands-On Satisfaction
There’s something deeply satisfying about working with your hands. Watching your project take shape on the loom is a tangible reminder of your creativity and effort. Weaving is calming and therapeutic.

Creative Possibilities

Rigid heddle weaving opens up a world of possibilities. You can create:

  • Scarves: Perfect for trying out new yarns and color combinations.
  • Table Runners: Add a handmade touch to your home décor.
  • Wall Hangings: Combine textures and patterns for stunning art pieces.
  • Dish Towels: Practical and beautiful gifts for family and friends.
  • Blankets: Cosy up on cold winter evenings with a bespoke handwoven blanket 🖤

You can also experiment with specialty yarns, hand-dyed fibers, and weaving patterns to make each piece uniquely yours.

A Social Craft

Weaving doesn’t have to be a solitary activity—it’s a way to connect. Many online weaving communities and local guilds welcome weavers of all skill levels. Sharing your progress and learning from others can make your weaving journey even more rewarding.

At the Online Weaving School we have a private member’s group where students share and troubleshoot. It’s a wonderfully supportive and safe space for weavers!

A Source of Income

Yes, you really can make money from your weaving if that is something that interests you. Check out these posts to get you started:

Do you want to start selling your weaving?

3 ways to start selling online for free

Etsy vs Shopify – which is best for selling online?

Getting Started

Ready to dive in? Here’s what you’ll need:

  • Rigid Heddle Loom: Start with a size that fits your space and budget
  • Yarn: I recommend starting out with a woollen or cotton knitting yarn for first projects
  • Shuttle: For passing your weft yarn through the shed.
  • Double ended threading hook: Makes warping and threading your loom simple with just one tool.

Check out this article for all the basic essential tools I use frequently.

Budget-Friendly Tip: Many weaving stores offer beginner kits or sometimes secondhand looms. Check online marketplaces or local weaving groups and guilds for deals.

Rigid heddle weaving is more than a craft—it’s a way to express your creativity, make beautifully unique items, and connect with a vibrant community of makers. If you’ve ever dreamed of creating your own fabric, there’s no better time to start.

Until next time…

Happy weaving!

*This post contains affiliate links. For further information, please see my disclosure policy.

Filed Under: Rigid heddle weaving, Weaving Tagged With: rigid heddle loom, rigid heddle weaving, weaving

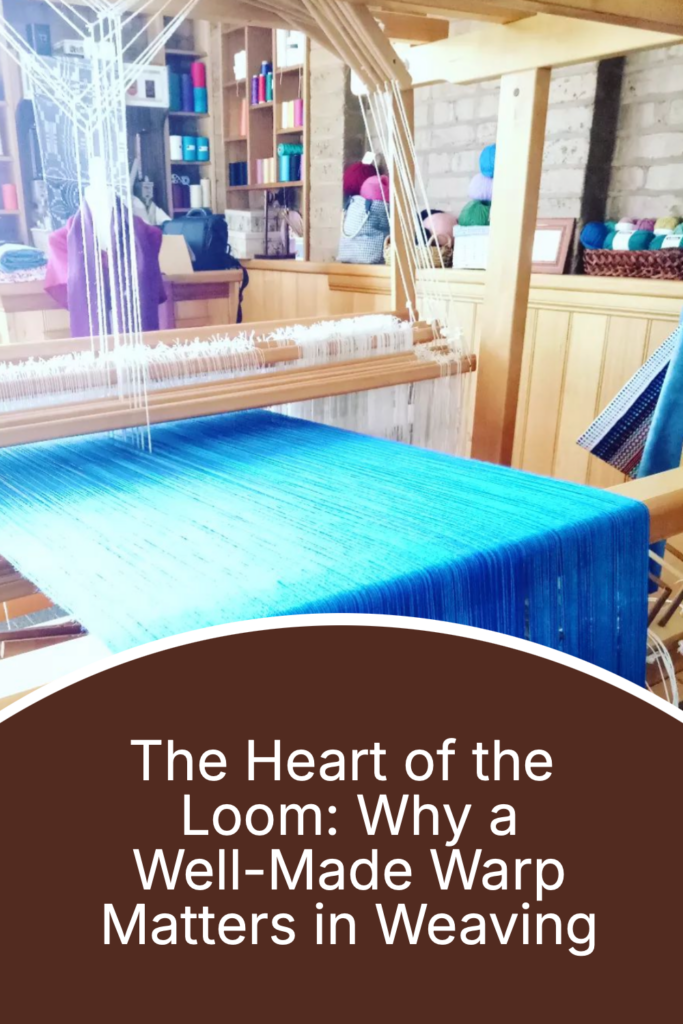
The Heart of the Loom: Why a Well-Made Warp Matters in Weaving

by Kelly Leave a Comment

Ask any weaver about their least favorite part of the process, and many will answer without hesitation: “warping the loom!”

Warping is often seen as tedious, complicated, and fraught with potential for mistakes.

But for me, warping is an essential and satisfying step in the weaving process, the foundation on which every weaving project depends. A well-made warp sets the tone for a successful and joyful weaving experience.

I remember saying to my husband one time, when I had just finished warping my Louet David Floor Loom. “That was my best warp yet. It went on like butter!”

That was a very happy day for me and a milestone reached. I realised that day that all the practice I had put in had been worth it. I felt completely relaxed and at ease during the whole warping process.

Whether you weave on a rigid heddle loom, a table loom, a floor loom or another type of loom, I hope the tips in this article will help you turn your warping experience around.

The Warp: Backbone of the Weave

In weaving, the warp is the series of threads stretched lengthwise on the loom, held under tension to provide the structure for weaving the weft threads. It’s not just a technical necessity; it’s the backbone of every design, ensuring stability and evenness in the final fabric. A poorly prepared warp can lead to uneven tension, broken threads, and frustration at every turn.

When done correctly, however, a good warp creates harmony. Every thread is aligned, tensioned evenly, and ready to support the creative process that follows. It’s like tuning a musical instrument; the preparation determines the quality of the performance. It can make all the difference between a happy and successful project or a frustrating and unfulfilling project.

Why Warping Matters

Warping isn’t just a step in the weaving process—it’s an act of care, discipline and skill. Here’s why I believe warping deserves respect, not dread:

  1. Foundation of Success: Just as a sturdy foundation supports a house, a well-warped loom supports a beautiful and functional fabric.
  2. Opportunity for Design: Warping isn’t just a chore; it’s a chance to engage deeply with your design. The choice of colors, fiber types, and spacing happens here, laying the groundwork for your creative vision.
  3. Mindful Preparation: Warping slows you down. It requires attention, precision, and patience – qualities which are actually character building!
  4. Fewer Problems Later: An hour spent carefully warping your loom can save countless hours of untangling, retying, and troubleshooting during the weaving process.

Finding Joy in Warping

So, how do you shift your mindset and embrace the joy of warping?

  1. Create a routine: Set aside dedicated time for warping in a space that feels peaceful. Play music or light a candle to make it an enjoyable experience.
  2. Invest in Tools: Good tools can make all the difference. A warping board, sturdy loom, and the right yarn are worth the investment to make warping more efficient and less frustrating.
  3. Learn Techniques: Experiment with different warping methods until you find one that works for you. Whether you use a direct warping peg, a warping board, sectional beaming or something else, mastering your preferred method can boost confidence and ease.
  4. Celebrate the Process: Remember, every part of weaving contributes to the whole. Warping isn’t just a means to an end; it’s an integral step that can result in deep satisfaction.

The Heart of Your Weaving

For me, there’s a special satisfaction in finishing a warp and seeing the loom ready for weaving. It’s a moment of anticipation, knowing that all the preparation will pay off in smooth, rhythmic weaving.

So, the next time you’re about to warp your loom, pause for a moment. Consider the care and craftsmanship you’re about to invest in your project. Embrace the process, and you might just find that warping becomes one of your favourite parts of weaving.

Or at the very least, it can become a less dreaded part of the process for you!

Because warping is such an important part of weaving, I have resources to help you to warp better:

Independent warping issues…

Rigid heddle warping tips…

2 tips for rigid heddle warping…

Strategies for better warping…

Plus I have a Youtube playlist specifically for learning more about warping.

Until next time…

Happy Weaving!

Filed Under: Warping, Weaving Tagged With: warping, weaving

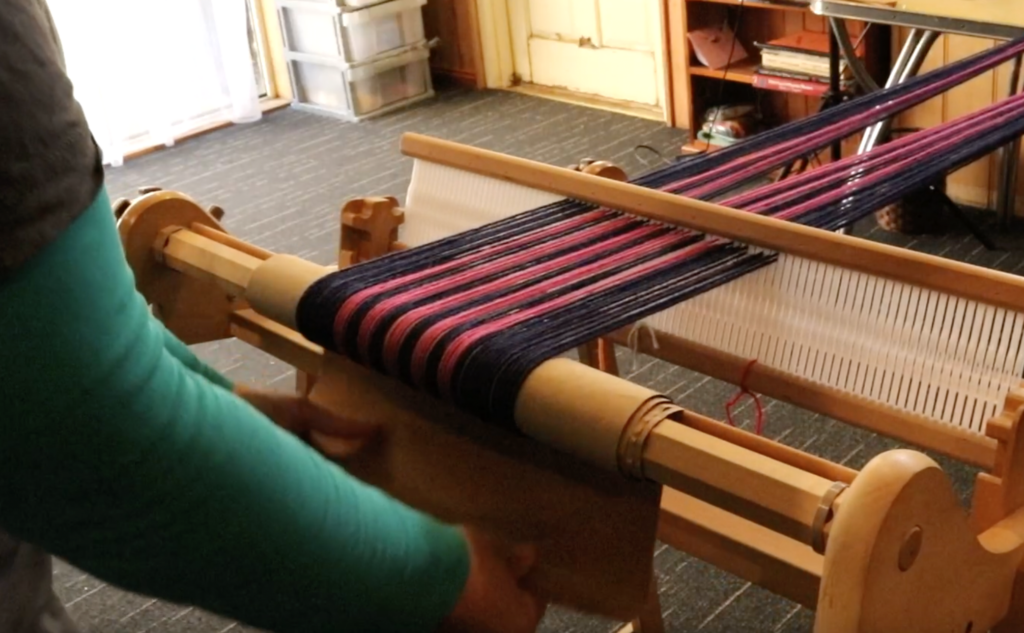
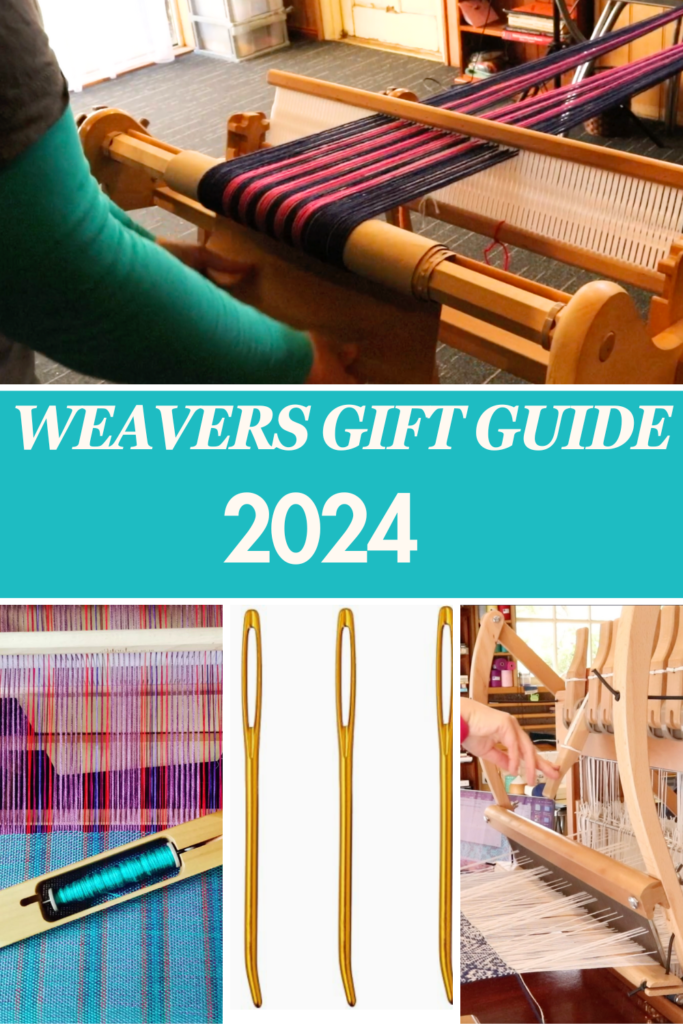
Gift Guide for Weavers 2024

by Kelly Leave a Comment

It’s that wonderful time of year again, which means it’s also time for a new gift guide for weavers!

Welcome to the Gift Guide for Weavers, 2024!

This year I’m ordering the guide from lowest to highest price so you can jump to where your budget is currently at. Gifts most definitely do not have to be expensive but for some of you it may be the right time to purchase that upgrade or tool you’ve been wanting.

I don’t think I can every begin a new gift guide without making this one the first item:

  1. The Clover Jumbo Bent Tip Tapestry Needles are one of my favourite and most used tools in my weaving studio! They are perfect for hemstitching or embellishing a piece on the loom and weaving in ends off the loom. 

I use them for hand sewing pieces of hand woven fabric together too. They are also super affordable, making them the perfect stocking stuffer.

2. That Purple Thang

I never knew these things existed until one of my students (hi Sandy!) very kindly sent me one. Yes, I had to read the label to find out what it was and now it’s an indispensable tool in my studio.

If you enjoy sewing your handwoven fabric with a sewing machine, you will love this low cost tool. It is a multi purpose tool but what I love to use it for most is to help run my fabric through the machine and press down seams as I go over them with the machine.

Sounds simple, but I used to use my finger for the job this tool is now doing for me! I’m happy to have my precious fingers much safer now.

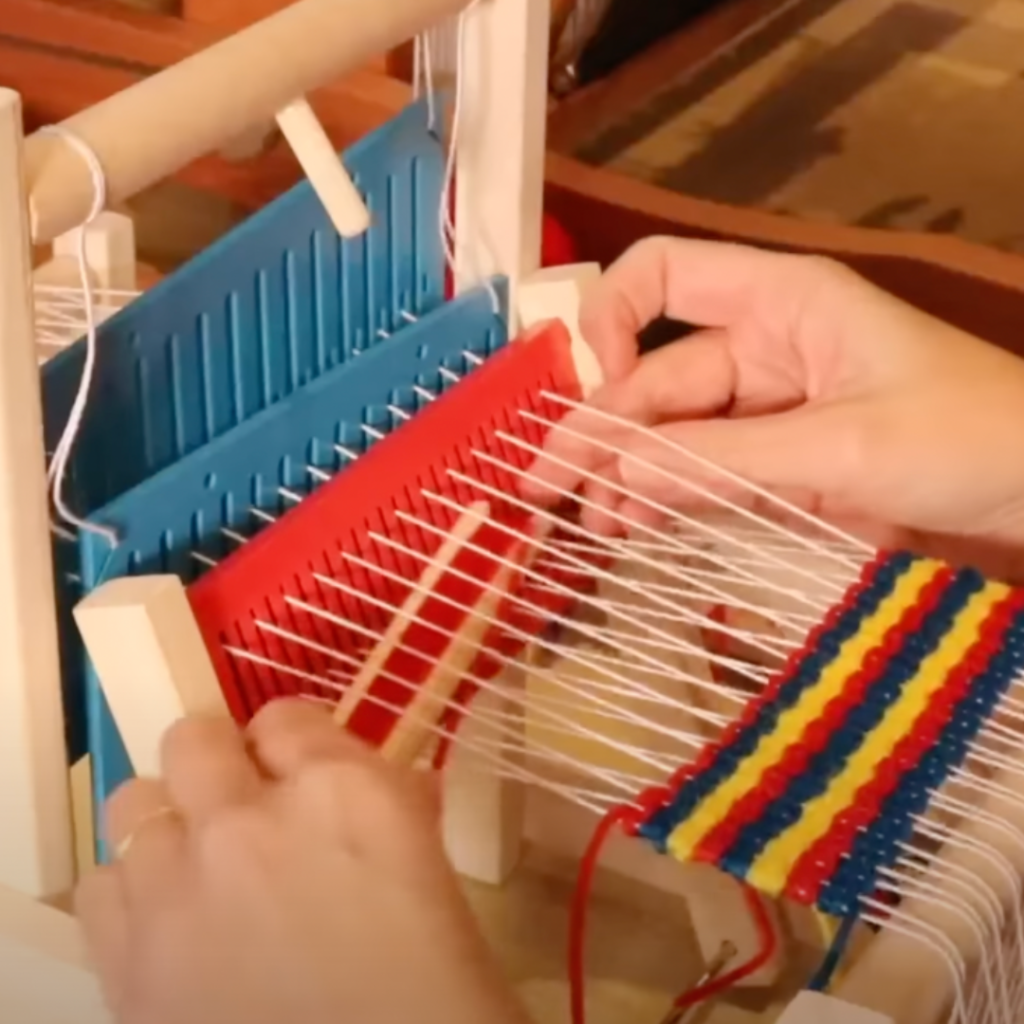
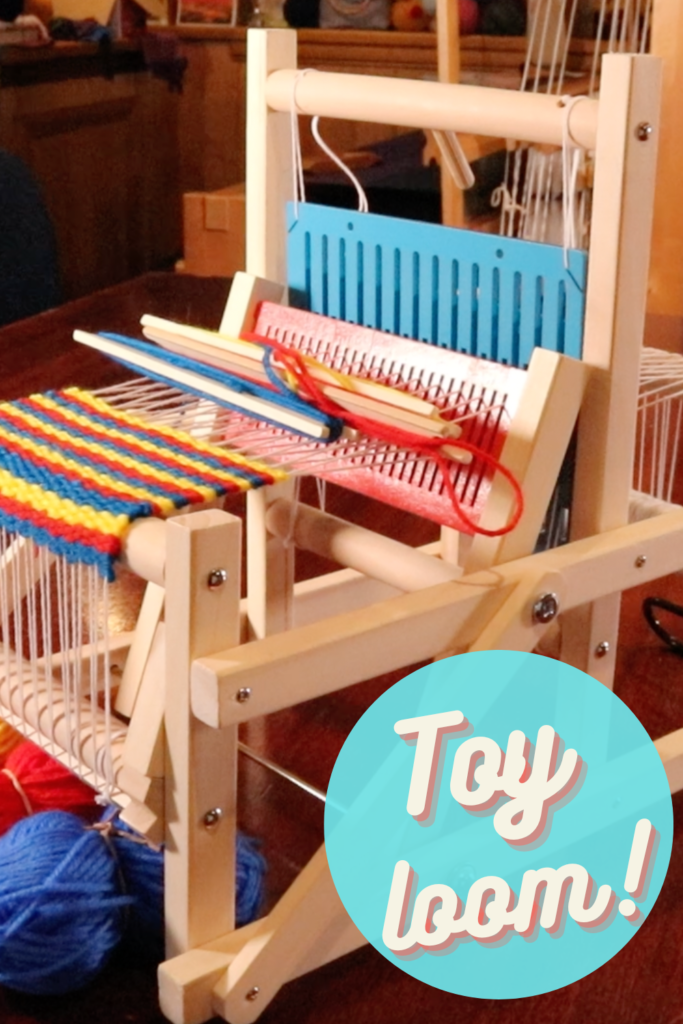
3. Lavievert Toy Loom

I bought my first toy loom as an experiment. I was curious to know, firstly – would it work and secondly, what could I weave on one?

Well, after playing around with my toy loom for some time I have been very pleasantly surprised!

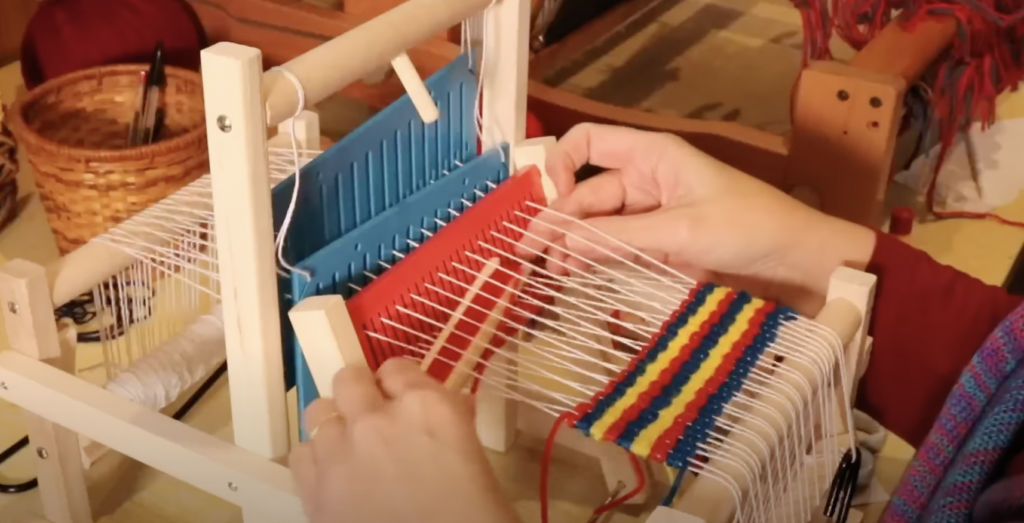
A toy loom like this is a great way to get into weaving for a small financial outlay. It is simple to learn how to use, it tensions a warp very well and pleasant to weave on.

It is a small loom, so it does have it’s limitations but it’s such a fun way to get started.

I have a number of resources available for this loom:

I bought a toy loom! Was it worth it?

I wove a blanket on a toy loom!

4. Weaving Books

I am a huge book lover and my weaving book library is quite extensive (but there is always room for more! 😉) Weaving books are really invaluable to weavers and make a wonderful gift too.

My favourite rigid heddle books can be found in this post. And my favourite multi shaft books can be found in this post. I have many weaving books listed in my Amazon store too.

5. Ashford Table Loom Shuttle Race

This product was just released recently and is very popular with the table loom weavers! The shuttle race prevents the shuttle from diving through the warp, which can be so frustrating! Available for new and older Ashford table looms in a variety of sizes, this will be a game changer for some table loom weavers!

6. Ashford XL Boat Shuttle

Another new and wonderful product from Ashford is this larger sized boat shuttle. I am absolutely loving using this with my larger countermarch loom and will definitely be utilising it with my Louet David loom as well.

7. Ashford Inkle Loom

An inkle loom is a great gift for so many reasons. It’s one of the most affordable and portable looms. It also allows the weaver to have a dedicated band loom without taking up space on another loom. You can be weaving a project on one loom while weaving a band to match on the inkle loom!

For an even cooler gift opportunity, Ashford has an inkle loom available as a kit that includes the loom, some cotton yarn and a wonderful inkle weaving book to get started with.

8. Ashford Rigid Heddle Loom

My very first rigid heddle loom was given to me as a gift from my husband! So of course, I’m a huge advocate for gifting RH looms 😊 This loom is still constantly in use in my studio.

There is a huge variety of sizes available to suit every budget and size requirements. I have a guide for new rigid heddle weavers here.

9. Louet David Floor Loom

It’s no secret that I love my David floor loom! It’s compact, modern and gives you a true floor loom weaving experience. I have a review of this loom here if you want to find out more.

10. Online Weaving School Gift Voucher

The weaving school is the perfect place to get started in your weaving journey. There is a huge variety of classes available as well as memberships. Classes include rigid heddle, inkle loom, table loom and floor loom, so there is something for everyone.

To purchase a class as a gift, you simply choose “send as a gift” at checkout plus fill in the name and email of the recipient – this is how it looks:

The recipient then receives an email with instructions for how to use the gift link.

Well, I hope all of you have a wonderfully happy Christmas and maybe even receive some new weaving goodies!

Until next time…

Happy Weaving!

*This post contains affiliate links. For more information, please see my disclosure policy.
Filed Under: Gift Guide, Weaving Tagged With: gift guide, gifts for weavers, weaving

Ask Kelly – How long should a scarf be?

by Kelly 4 Comments

Asking how long a woven scarf “should” be is kind of like asking how long is a piece of string! However, since I personally have woven a heck of a lot of scarves, I can share the lengths that I typically use.

Today’s Ask Kelly question relates to not just the length of scarf, but how long should the warp be to obtain the desired length?

“If I want to create a pattern using different colors of DK 8 ply Bendigo Wool, what should I put on the loom for the length of a scarf?”

Laura

Now, as for the length of scarf, that does depend quite a bit.

When I’m planning a scarf I usually ask myself, do I want to be a “drape around the neck and go” scarf or do I want it to be a “wrap around the neck at least once” scarf? 

For a shorter scarf I would generally do about 60” weaving length, then allow for fringes. For a twisted fringe, I would generally add 6-7” on each end of the scarf. So that would be 60 + 14 = 74”. That is without adding on shrinkage and waste allowance.

For a longer scarf I would be thinking 70” weaving length plus fringes and allowances.

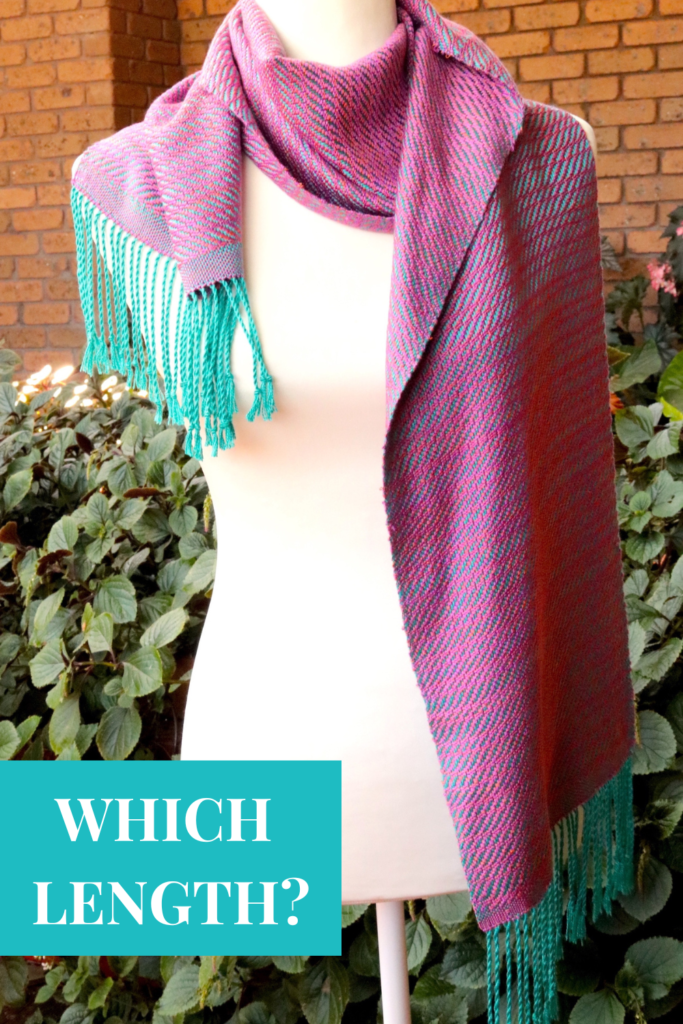
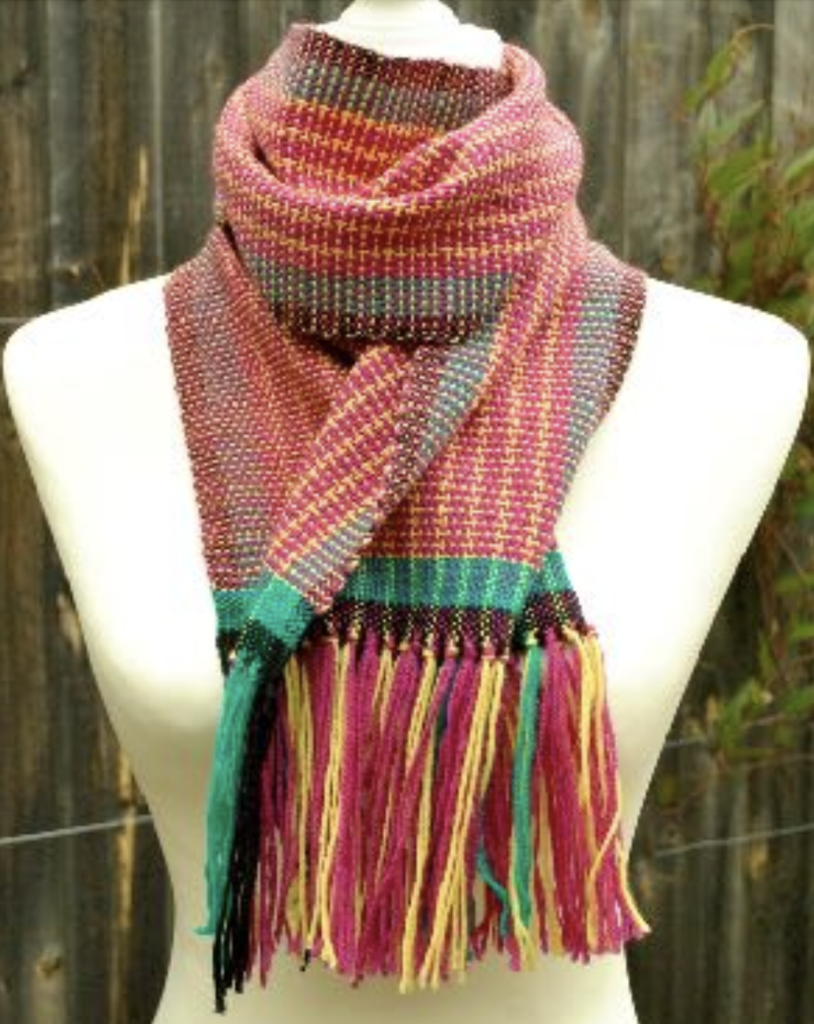
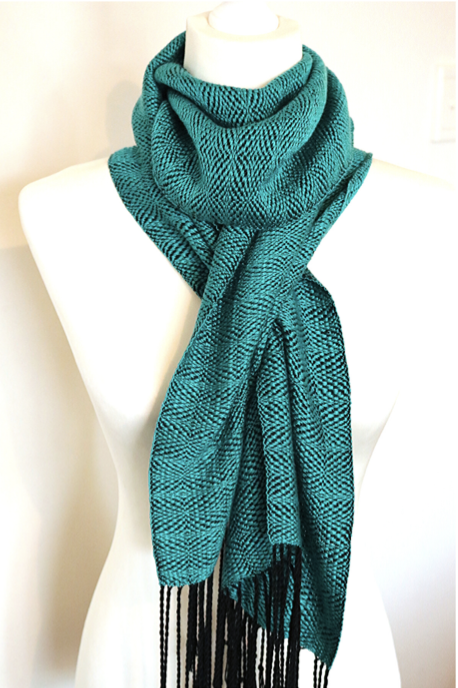
Here are some examples of various scarf lengths I’ve used:

The Ripple Scarf project

This one was a 68.5” weaving length + fringes.

The Candy Store Project
This one was a 60” weaving length. Yes, it is wrapped around but that is on a model that has a skinnier neck than mine. And it’s quite short in length when wrapped.

The Aquamarine Scarf
This scarf was around 70” weaving length with longer fringes, you can see it has that extra bit of length.

The scarf lengths I’ve outlined are fairly standard but if you are feeling adventurous and want to go all “Lenny Kravitz Blanket Scarf” you will definitely need some good pre planning to ensure you have enough length in your warp to achieve the length of scarf you want.

TOTAL WARP LENGTH

In the planning stages of your scarf it is best to use a calculations sheet so that you don’t miss any crucial numbers. It’s also an important focal point for your project – a launching pad or recipe, if you like.

Every project on your loom will have shrinkage, take up and other numbers that need to be accounted for.

I have a FREE project calculations sheet that also comes with an explanatory video. You can access that by registering for an account at the Online Weaving School (it doesn’t cost anything to register).

Check out the free calculations sheet and video here.

I hope this post was helpful to you!

Until next time…

Happy Weaving!

Filed Under: Ask Kelly, Etsy, Weaving Tagged With: scarf, weaving

I bought a toy loom! Was it worth it?

by Kelly 5 Comments

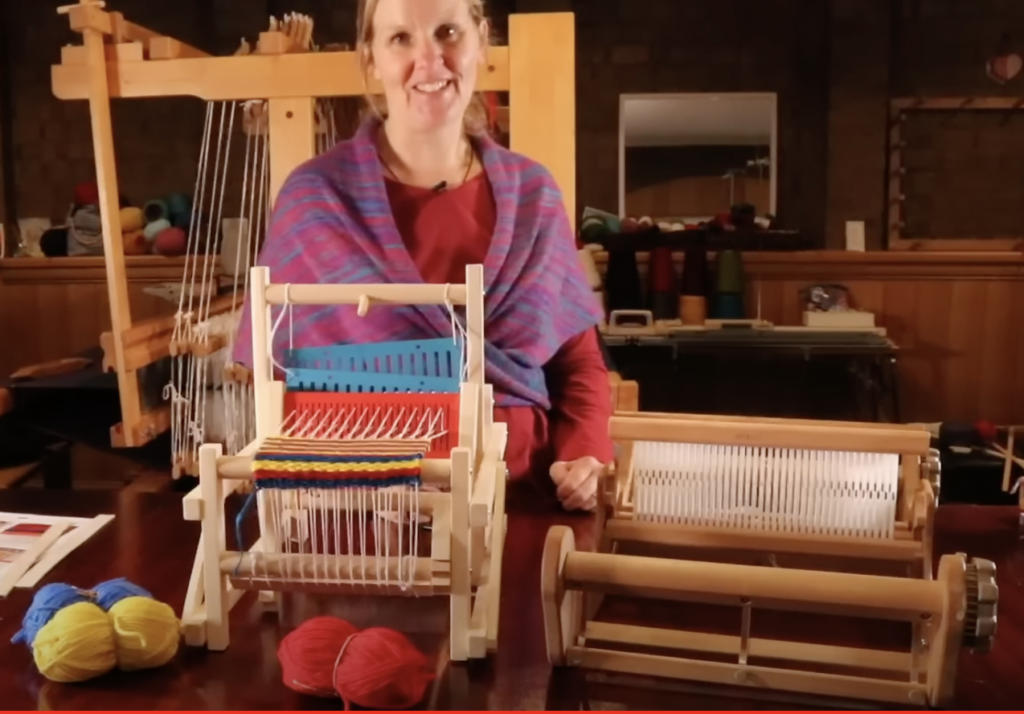
Recently I purchased a Lavievert Toy Weaving Loom.

My motivation for doing so was twofold – firstly, I was curious and thought it might be a fun experience and secondly, I’m always on the lookout for ways of advising newer weavers on ways that they can get into weaving more economically.

*This post contains affiliate links. For further information, please see my disclosure policy.
Naturally, before I recommend any product I need to first use it and review it myself!

The only other toy or children’s loom I’ve used is a very cheap and basic frame loom, so this loom from Lavievert seemed quite a step up and more similar to a rigid heddle loom.

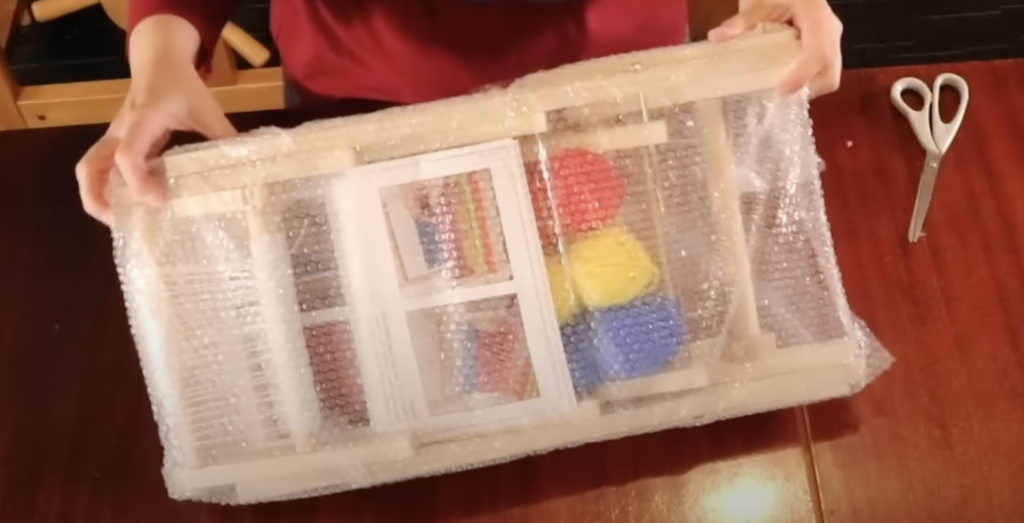
This loom is very small, compact and lightweight. The initial setup couldn’t really be easier – it comes pre-warped and simply unfolds and then is held in place by a couple of screws.

It also comes with 3 balls of acrylic yarn, 3 little stick shuttles (already loaded!) and a very basic instructions booklet. The booklet only really tells you how to unfold the loom, start weaving and advance your warp – there are no instructions for future warping, which could have been a useful addition to new weavers!

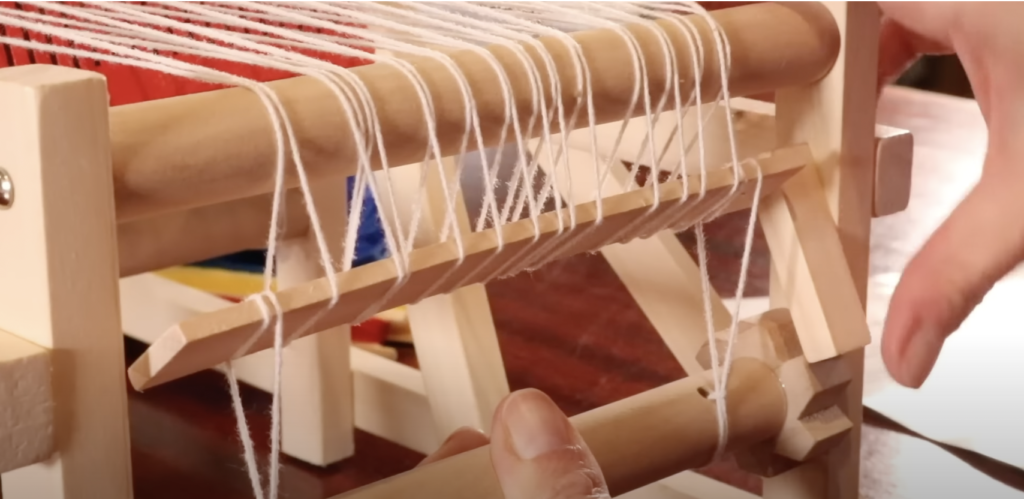
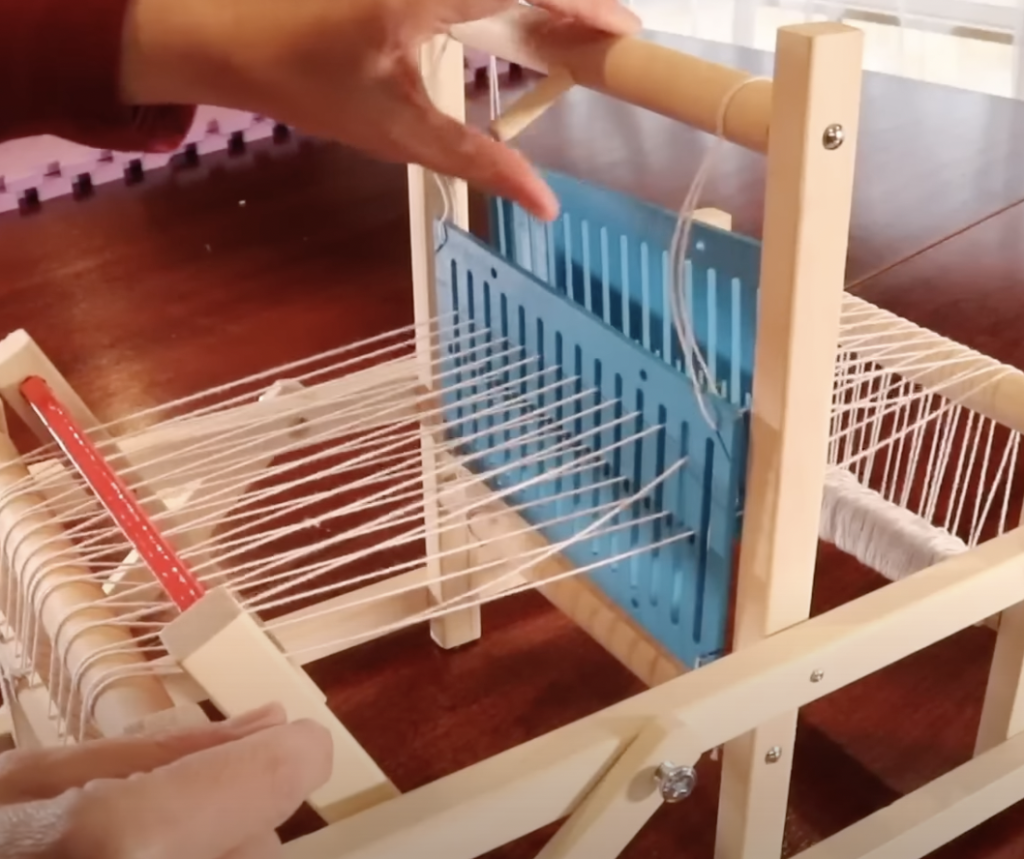
It is made of a lightweight wood, has 2 wooden heddles and wooden beater, and the warp is released and advanced by manually moving the back or front roller. A piece of wood, along with a cog hold the tension. These cogs slip very easily, so it can be difficult to achieve a decent tension, though this does seem to improve as you weave and advance the warp.

The heddles are similar to a rigid heddle, in that they have holes and slots. For the warp that came on the loom, they had it threaded through the holes on both heddles. The heddles are operated by rotating the top beam that both heddles are tied to, which causes the heddles to alternate in rising and lowering, providing two sheds to weave in and producing a plain weave fabric.

Upon measuring these heddles, I found that they are sized at 5 dents per inch – pretty wide apart for such a thin warp. So, when you weave, you get quite a weft faced fabric and it’s better to beat gently to avoid the fabric being too dense (unless of course, you really want a weft faced fabric).

The most frustrating aspect to using this loom was the tension. The warp that came on the loom was very loose in some sections. It seems that the loom is probably not strong enough to hold really good tension but I want to experiment with this further in the future by warping it myself.

The maximum weaving width is around 5.5″, so definitely only a small item loom – again, great for kids who might want to weave doll’s blankets or squares to sew together to make a larger item. Some adult weavers have also told me that they use this loom for sampling for larger projects.

While I found this a fun little loom to weave on, there is definitely a lot of room for improvement! My plan to move forward with it is to re-warp it with a thicker yarn, possibly thread the heddles differently and then to play around with pick up sticks to increase the shaft possibilities.

What I would recommend though, is that if you are serious about getting into weaving, save up the extra money to buy a quality loom. Something like the Ashford Sampleit is a really great place to start, and you won’t have to worry about not achieving good tension or possibly breaking parts.

If you would like to see me unpacking, setting up and weaving on this toy loom, watch this video:

Since writing this article I have used this toy loom more extensively. My experiments lead me to replace some parts of the loom, re-warp the loom and weave some pick up on it. To learn more about that, please see this video:

Until next time…

Happy Weaving!

Filed Under: All about looms, Weaving Tagged With: toy loom, weaving, weaving with children

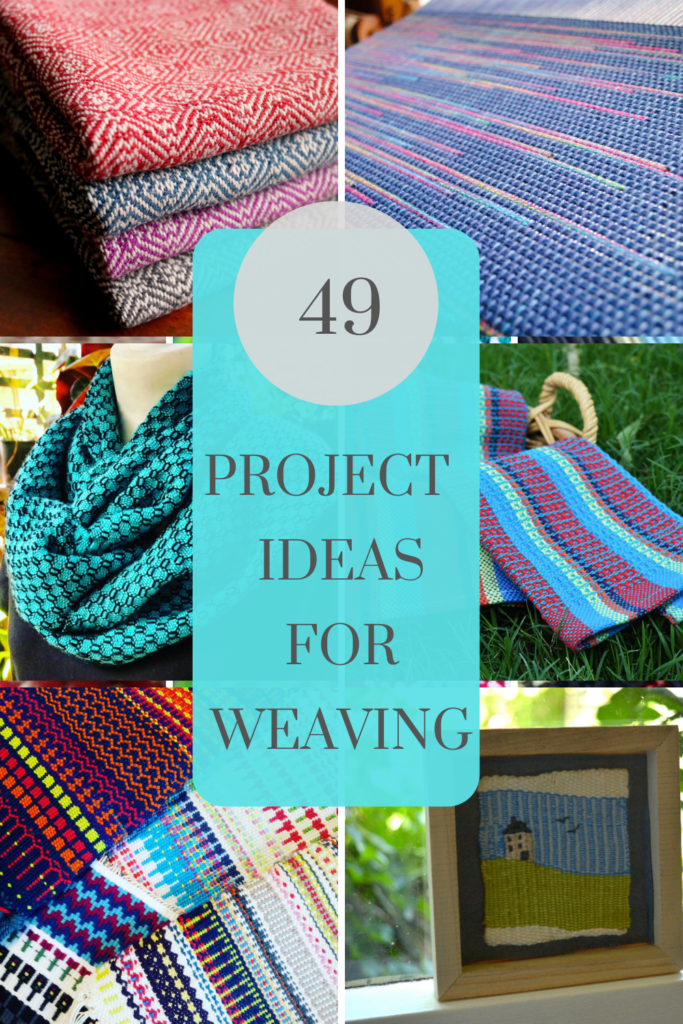
49 Weaving Project Ideas

by Kelly 10 Comments

Feeling a little stuck for ideas for your next weaving project?

The options are almost unlimited, but here are 49 weaving project ideas to get you started!

Whether you’re weaving on a rigid heddle loom, a table loom or a floor loom you are sure to find these weaving project ideas super helpful.

Weaving a scarf is the perfect starting point for the new weaver.

It’s a narrow piece, which makes it easy to tension. It’s a long warp, but not so long as to be likely to cause any real issues. And once you’re done weaving and wet finishing, you have a completed woven piece, ready to wear.

That is so rewarding and empowering to the beginner weaver!

Once you’ve completed your first scarf, you may want to build on that success and hone the skills you learned by weaving another. Great! Another beautiful scarf to wear!

What is next? Another scarf? Well, I guess you could either add to your scarf collection or start giving them as gifts. Some weavers will continue weaving scarves until they have so many they’re not sure what to do with them. That could be a time to start selling for some extra income, if that is something you are interested in.

But not everyone wants to continue just weaving scarves for the rest of their weaving lives.

I often see weavers chatting and asking questions online, wondering if there is anything beyond the humble scarf.

Well, rest assured, there are SO many things you can make as a weaver!

Once you take up weaving, you become a maker of cloth. In quite a magical way, you are able to produce your own fabric.

You can either choose to weave an item that is basically finished when it comes off the loom, or you can use your hand woven cloth as a stepping stone or starting point for something else.

If you have, or can learn basic sewing skills, you are well on your way to creating unlimited projects with your handwoven fabric.

Here is a list of ideas to get you started:

Scarves (obviously! 😉)

Shawls

Bags (totes, handbags, shopping bags, carry bags)

Rugs

Wallhangings and tapestries

Blankets

Pillows/cushions

Purses/ pouches

Kitchen, bath and hand towels

Face washers

Apron

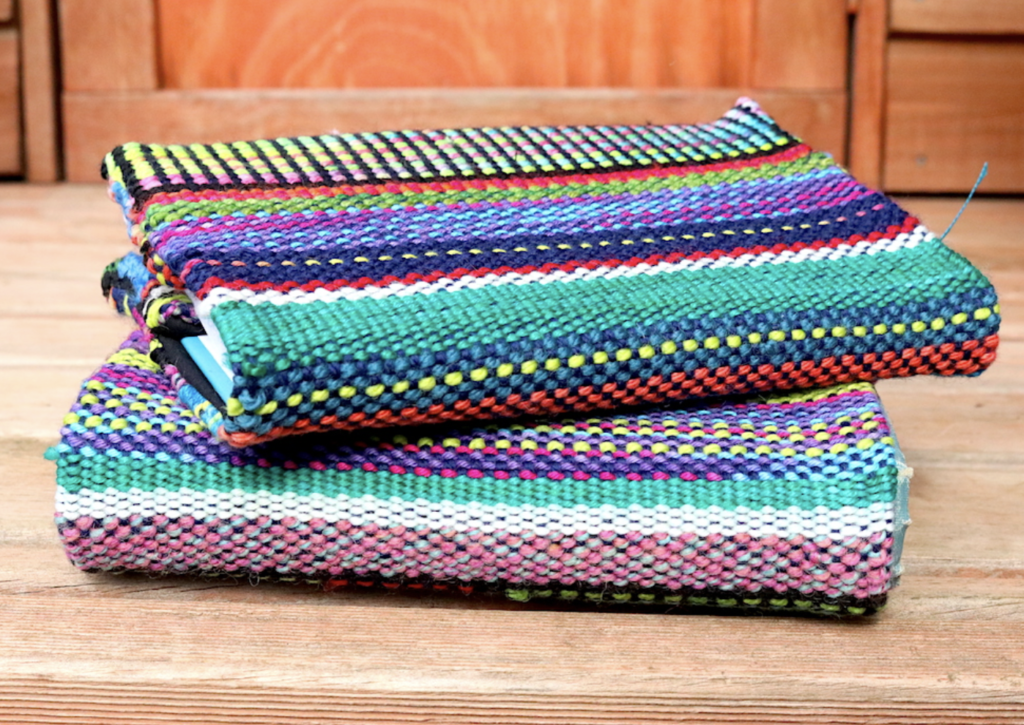
Book covers

The free Stashbuster Notebook Covers class can be found here.

Bookmarks

Kitchen cloths

Soft toys

Ponchos

Jackets

Tops

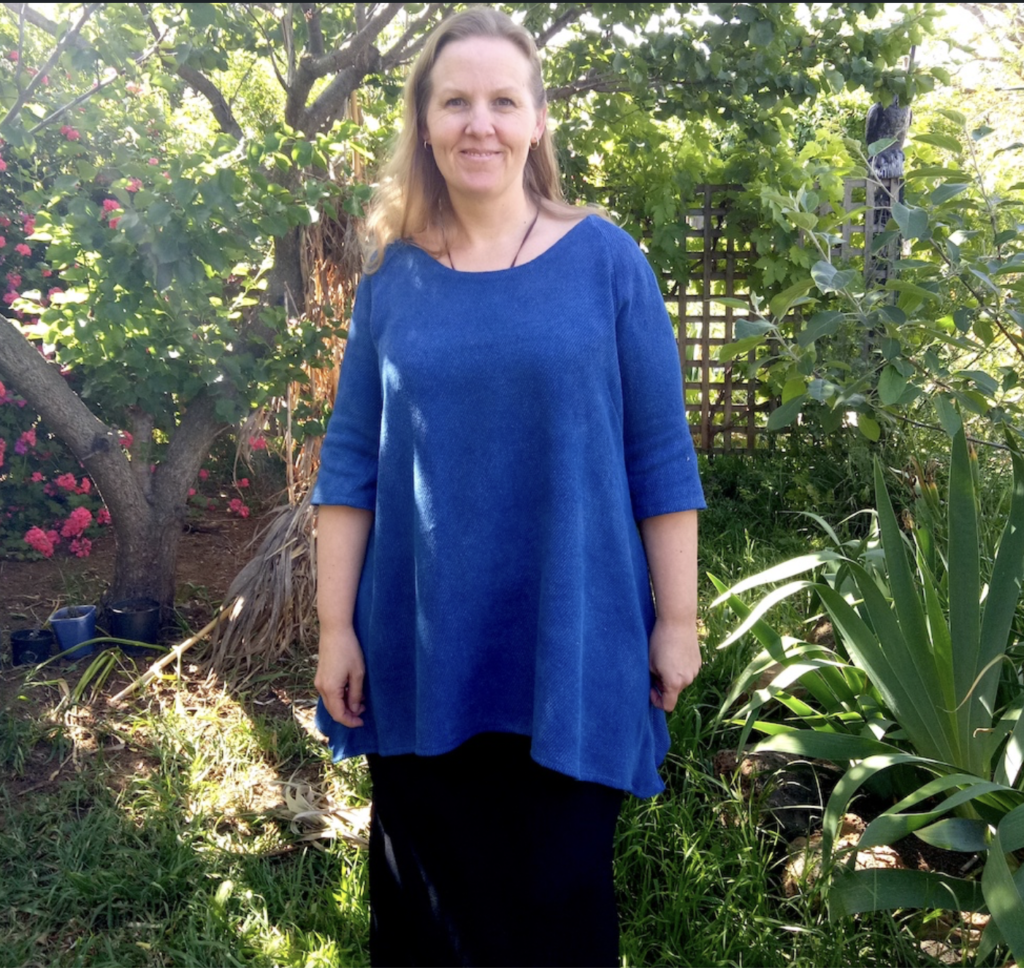
Read about my hand woven tunic project here

Skirts

Dresses

Pants

Coats

Framed art

Lampshade covers

Loom covers/bags

Upholstery fabric for unique furniture pieces

Historical re-enactment costuming

Hats

Jewelery

Wallhanging from the Krokbragd 101 Online Class

Baby wraps, carriers and blankets

Drink coasters or mug rugs

Curtains

Patchwork and quilting projects

Hair accessories/ head wraps

Saddle blankets for horses

Dog beds, coats

Potholders/trivets/oven gloves

Dining table ware – table runners, place mat sets

Bedding – throws, coverlets, pillow covers, blankets, quilts

Well, what do you think, have I convinced you that you can weave more than just scarves with your loom?

If you’re looking for some free projects to get you started, check out my Free Projects list and be sure to check out my Youtube channel for even more ideas and tutorials. My design store contains my original project designs as digital downloads as well as my ebooks.

At the Online Weaving School you will find many classes to choose from, and as most of my lessons are project based, you can often complete a finished woven item.

So, as you can see, the possibilities for woven projects is really unlimited! Please add your own ideas in the comments to share with other readers.

Until next time…

Happy Weaving!

Filed Under: Rigid heddle weaving, Weaving Tagged With: rigid heddle weaving, weaving, weaving projects, whattoweave

How to fix snags in your weaving!

by Kelly Leave a Comment

That awful moment when your lovingly hand woven piece catches on something sharp and pulls, leaving an unsightly loop.

I’m sure we’ve all been there and collectively cringed when this has happened.

Thankfully, the fix is a quick and easy one, once you know how.

*This post contains affiliate links. For further information, please see my disclosure policy.

If you are interested in the fabric I’m working with here, it is a sample from my Plaid Double Width Ebooklet.
All you need is the snagged piece of cloth and a tapestry needle. My favourite tapestry needles are the Bent Tip Needles by Clover.

The first thing to do is to have a look at the loop so that you can determine which row of your weft has been affected. We want to work on this row to redistribute the slack that occurred when the weft was snagged. Have a look at the way the weft row is running. This will tell you the direction in which you need to work.

Here you can clearly see the loop and the way in which it runs through the cloth (horizontally, not vertically).

Using the tapestry needle, go to one of the weft stitches either side of the loop. It doesn’t matter which side at this point, as we’re going to be alternating.

Pull up gently on the weft stitch so that some of the slack goes out of the loop and into this stitch.

Now go to the opposite side of the main loop and repeat with the stitch next to it on this side. The aim here is not to pull up big loops, but just to begin to ease and decrease that main loop. The weft stitches you are working on will become looser as you do this – that is normal and expected.

Once you have redistributed some of the slack among the other stitches (I started by doing 3 stitches either side of the main loop) it is time to get a bit rough on the fabric.

Holding onto the fabric either side of the main loop, pull it outwards, away from the loop. It is very helpful to use a “snapping” action for this. The idea is to shock the fabric and re-tension it in order to settle the weft back into the pattern it belongs in.

After snapping the fabric several times, you may see that the weft loop is now laying flat. If this is the case, your work here is done! However, if any of your wefts are still raised (either the loop itself or the weft threads around the loop) then more attention is required.

Simply go back in with your tapestry needle and gently repeat the process, including the fabric snapping afterwards.

By this time your wefts should all be happily settled back into place and laying flat. Ideally, it is now hard to see that there ever was a weft loop. I am pointing to my original loop in the photo above.

If you want to see this whole process in the form of a video, please enjoy watching this one:

I hope this tutorial was really helpful to you! Thank you for visiting me today and until next time…

Happy Weaving!

Filed Under: Free tutorial, Tutorials, Weaving Tagged With: fix snags, troubleshooting, weaving, weaving fix

  • Page 1
  • Page 2
  • Page 3
  • Interim pages omitted …
  • Page 10
  • Go to Next Page »

Primary Sidebar

Categories

Archives

Meta

  • Log in
  • Entries feed
  • Comments feed
  • WordPress.org

Copyright © 2025 Kelly Casanova Weaving Lessons on the Foodie Pro Theme