
Warping a rigid heddle loom can be quite daunting when you’re just starting out, but with a little bit of practice and some simple tips to follow, it doesn’t need to be a headache!
I actually love direct warping my rigid heddle loom, I find it so quick and easy compared with indirect warping.
*This post contains affiliate links. For more information, please see my disclosure policy.
What is direct warping?
When you purchase a rigid heddle loom, it should come with a warping peg and clamp. This peg will allow you to start making your warp directly on your RH loom, rather than having to make the warp on a warping board or mill first and then transferring to the loom.
You use the peg to measure out and hold your warp, while the other end is tied on or looped to the back apron rod of the loom. The added bonus here is that you save time by doing part, or all (depending on your yarn and project) of your threading at the same time as the warping. Efficiency at it’s best!
While warping a rigid heddle loom is fairly straightforward, like anything new, it will take some getting used to. Today I have 2 tips to share that are easy to learn but will help you to have a more positive warping experience.
Tip 1 : Use more than one peg
Although your loom will only come with one peg and clamp, you can purchase more separately.
Doing this has a couple of benefits.
- Waste efficiency – If all of your warp threads are travelling to just one central point, some threads will travel further than others. You will find that, when you take all your warp threads off the peg, ready to thread, you will need to cut them all to an equal length for ease of threading and tying on, which creates more waste.

- Overloaded peg – If your entire warp is on one peg, the peg can get overloaded. This does depend on the width of your warp (number of warp threads) and the thickness of your yarn.
If you don’t want to purchase an additional peg, there are other options. Coat racks can be a perfect solution, and some weavers prefer to use more than 2 pegs, which also works great. If you opt for a coat rack, just ensure that it has straight, smooth pegs, like this one does – otherwise it could be hard to remove your warp from it.
Tip 2 : Be gentle!
This stage of the warping process is not the time to tensioning your warp, ready for weaving. Yes, you want to maintain a consistent tension whilst warping, so that your threads stay fairly even and everything is nice and neat, but the proper warp tensioning will occur in the winding on of the warp.
Winding your warp around the peg/s too tightly can actually be detrimental to the process. This is because the pegs are holding a lot of tension. If the tension increases too much, that carefully clamped peg can come loose, and if you have any experience with this, you know what happens next! 😆
The peg can come loose with a “ping” and make spaghetti out of your carefully wound warp in a second flat!
Even if your peg manages to stay in place with your warp threads too tightly wound around it, once you are ready to take the warp off to start threading, you may find it difficult to remove from the peg.
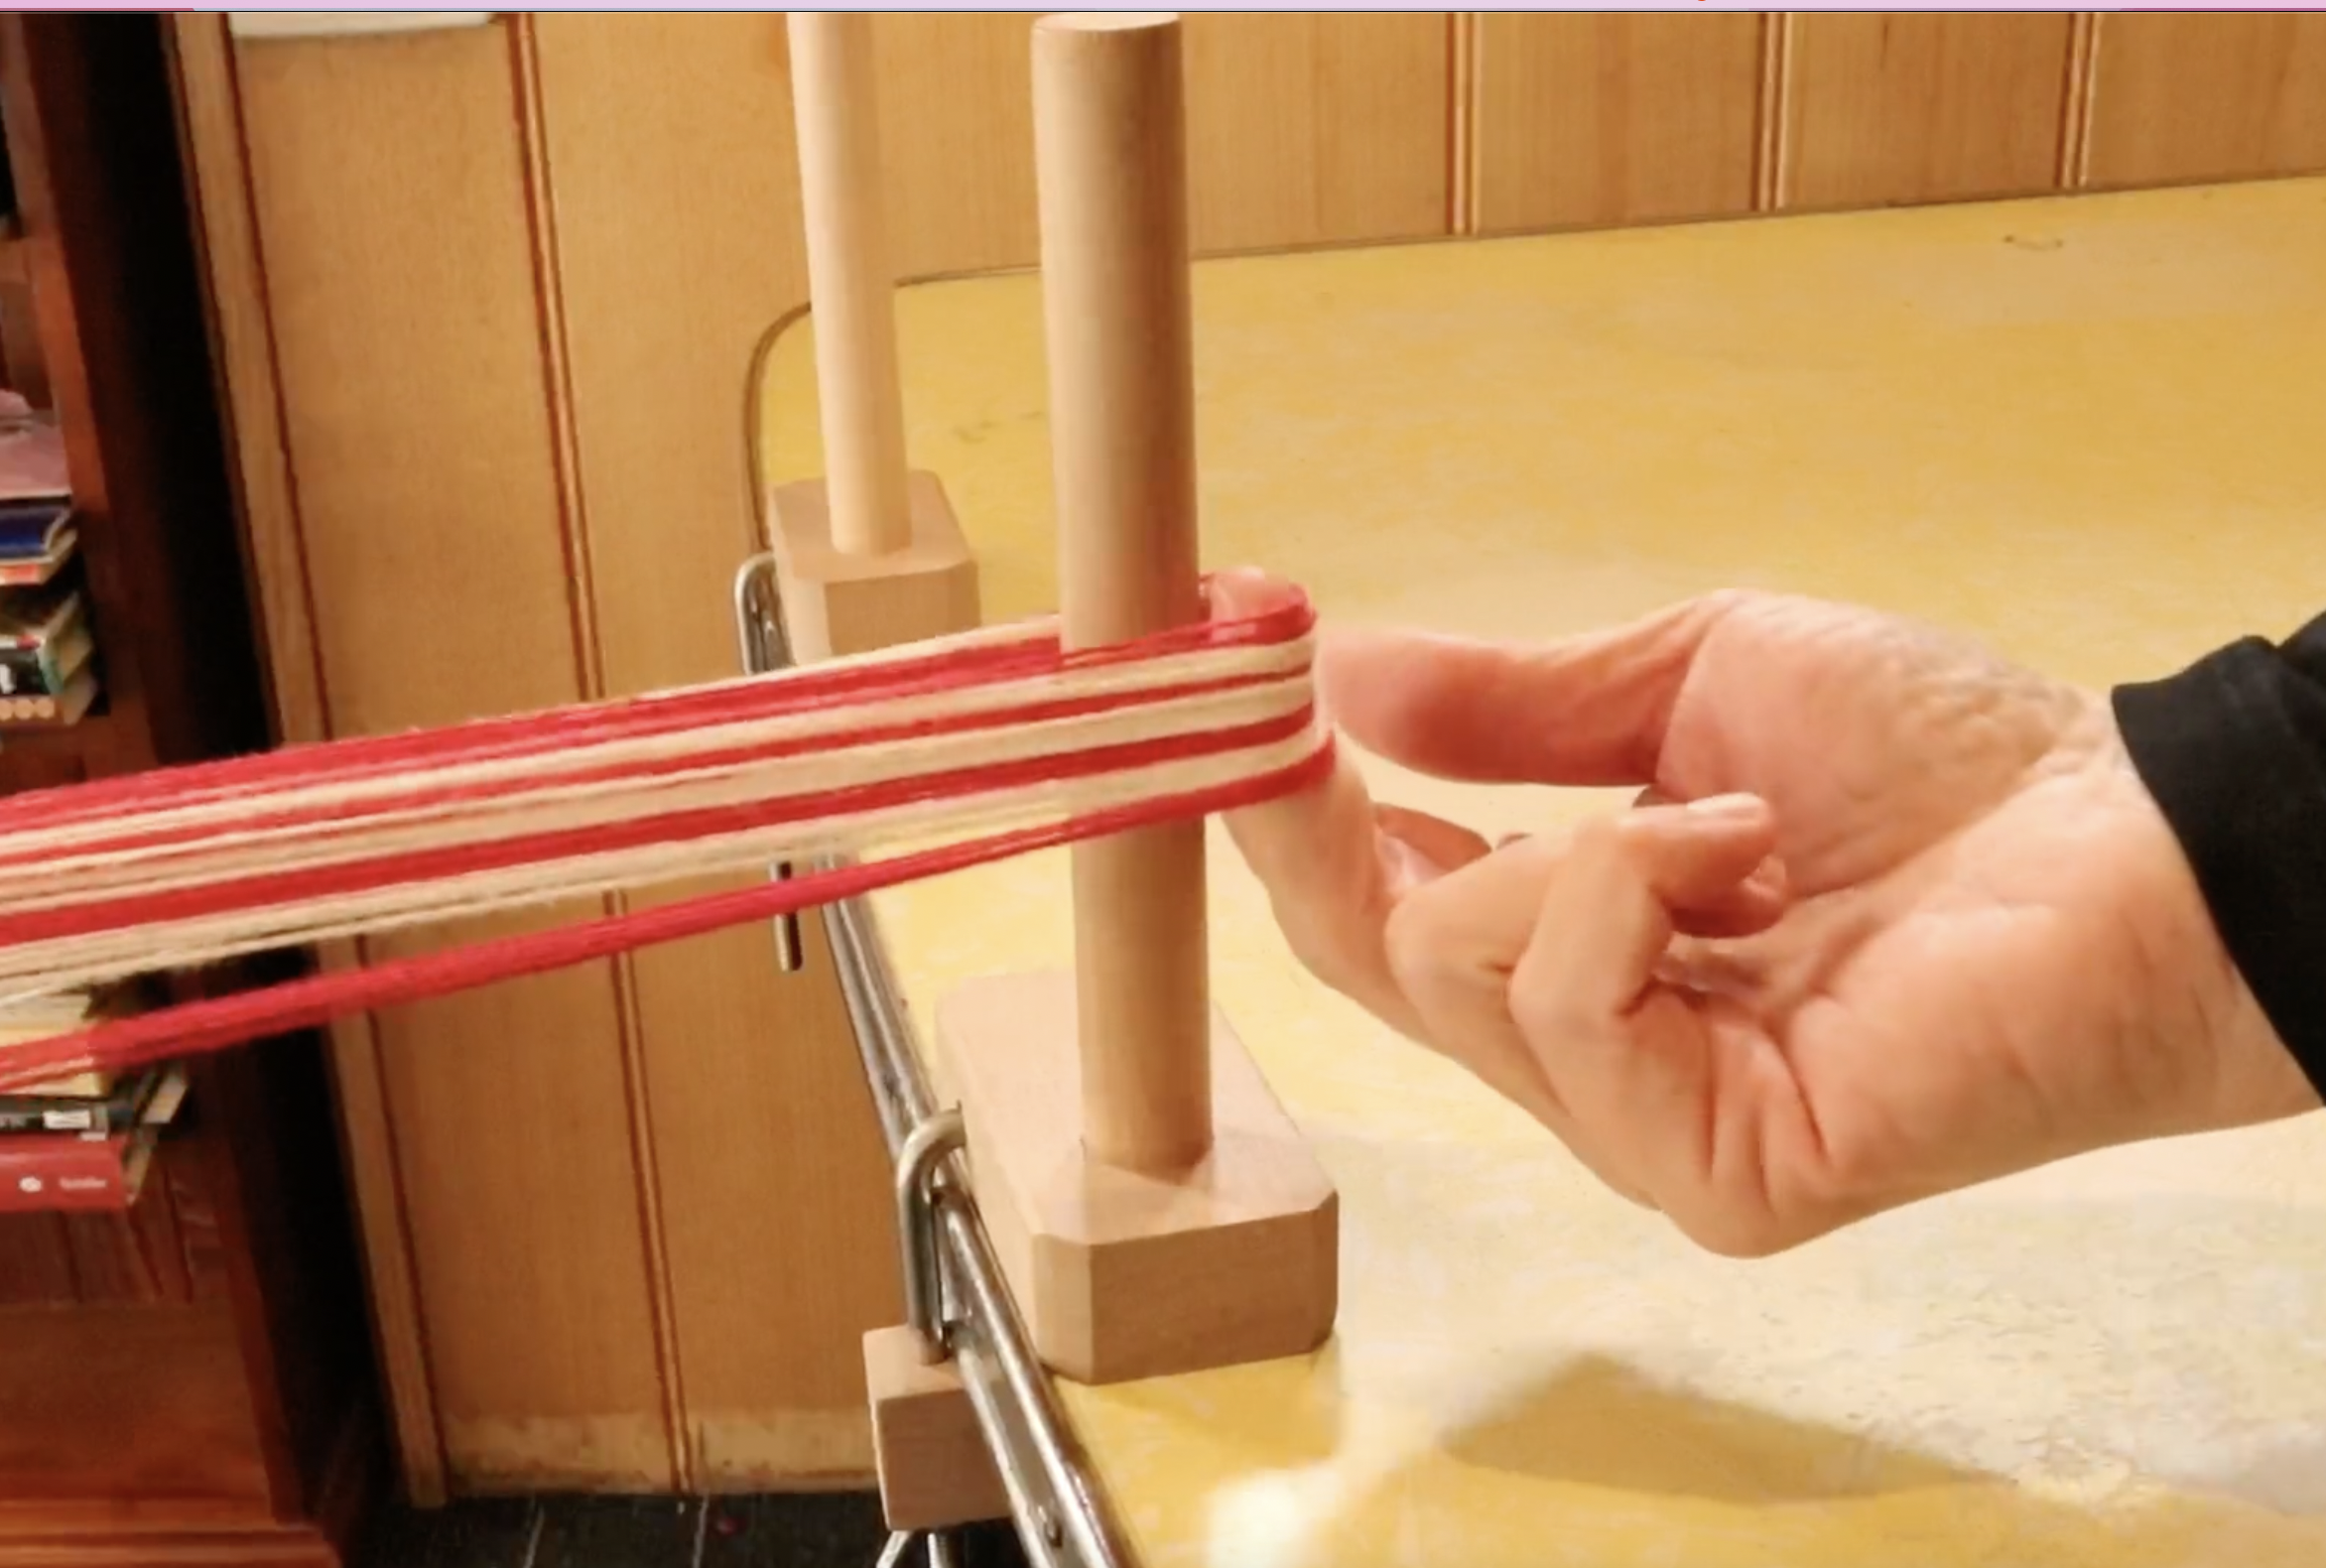
Ideally, you should be able to get a couple of fingers inside the warp at all times, this ensures that you’re not winding too tightly around the peg.

An easy way to ensure that you’re warping around the peg with a loose enough tension is to have your yarn feeding off the cone or ball adequately. A cone/warping stand is ideal for cones of yarn, as it allows the yarn to wind off freely.
I also like to use 2 fingers inserted into the loop after pulling it through the slot with the reed hook. Then I simply walk towards the peg, keeping my fingers in the same place. I don’t pull on the warp, but just walk with it, then drop the loop gently over the peg.

I hope these tips make a difference to your warping experience! If you would like to see this post in video format, please view that here-
Until next time…
Happy Weaving!
Hi Kelly
Have really enjoyed the class I signed up for so first and foremost, thank you for such a great experience!
I am near completion of my second ever project – a scarf for my brother for Christmas! I have a little bit more warp left on my rigid heddle that I’d like to maximise (to eek out the length of the final scarf!) but have found that this last section (about 30cm) now that it has unwrapped from the back beam is really uneven in tension suddenly. This may be because it was warped in 2 different yarns (similar thickness but varied in age/elasticity) or tied on irregularly (it was log cabin so I tied on to the back rod as well as sometimes just looping around it. As the entire wrap width is higgledy piggledy varied in tension, rather than just one or two sections of warp, my question is this: would it be absolutely ridiculous to take the warp off the back beam and retie it (in the same way you tie the warp onto the front rod at the start of a project) back onto the back rod to even out the tension. I wanted to ask before I attempted it, in case this is a red flag, sirens blaring, absolute no no of a thing to do!
Thank you for any words of wisdom in advance. I can’t wait to get the scarf finished and start a new project, you have given me the buzz I needed!
All the best
Just for future reference, for a warp with lots of colour changes like log cabin, I always go to the extra effort of tying each new colour on rather than looping. It’s tedious, but you will end up with great tension.
As for your idea of re-tying , it would be a bit of work. I’m wondering if you would find it better to just try to tension it better for the next section. You can cut off your scarf and re-tie the warp on at the front apron rod – that could really help with your tension.
It’s always good to be reminded of these basic tips. Recently I warped my 32” Kromski but found after I wound it on, but before I tied it to the front beam that I left two warp ends untied at the back. Woe is me!
Oops!
I use 10″ c-clamps for the warping pegs. They are tall enough to not have the yarn slip over the end. I tell people who buy a loom about using the c-clamps and most people have some in their workshops. For those who don’t, they are readily available in any hardware store.
Thanks for sharing that Vicky!