• Skip to main content
  • Skip to primary sidebar

Kelly Casanova Weaving Lessons

  • Hi! I’m Kelly!
    • Disclosure
  • Online Weaving School Class Index
    • Common account issues
    • Common technical issues
    • What do I get with a membership?
  • New to rigid heddle weaving? Start here!
    • Never heard of the rigid heddle loom?
    • How to weave neat edges on the rigid heddle loom
    • Rigid heddle weaving
    • Rigid Heddle Weaving Patterns
  • Patterns
  • Subscribe

Rigid heddle weaving

Boat Shuttle vs Stick Shuttle: Which Should You Use on a Rigid Heddle Loom?

by Kelly 4 Comments

If you’re a rigid heddle weaver and you’ve ever looked at a boat shuttle and wondered, “Can I use that on my loom?” — this post is for you!

When you first purchase a rigid heddle loom, it almost always comes with a stick shuttle to get you started. But then, you might notice other weavers using a boat shuttle instead and wonder why.

Today I’m going to walk you through the key differences between these two types of weaving shuttles, how I decide which one to use, and whether a boat shuttle is worth the investment for your weaving journey.
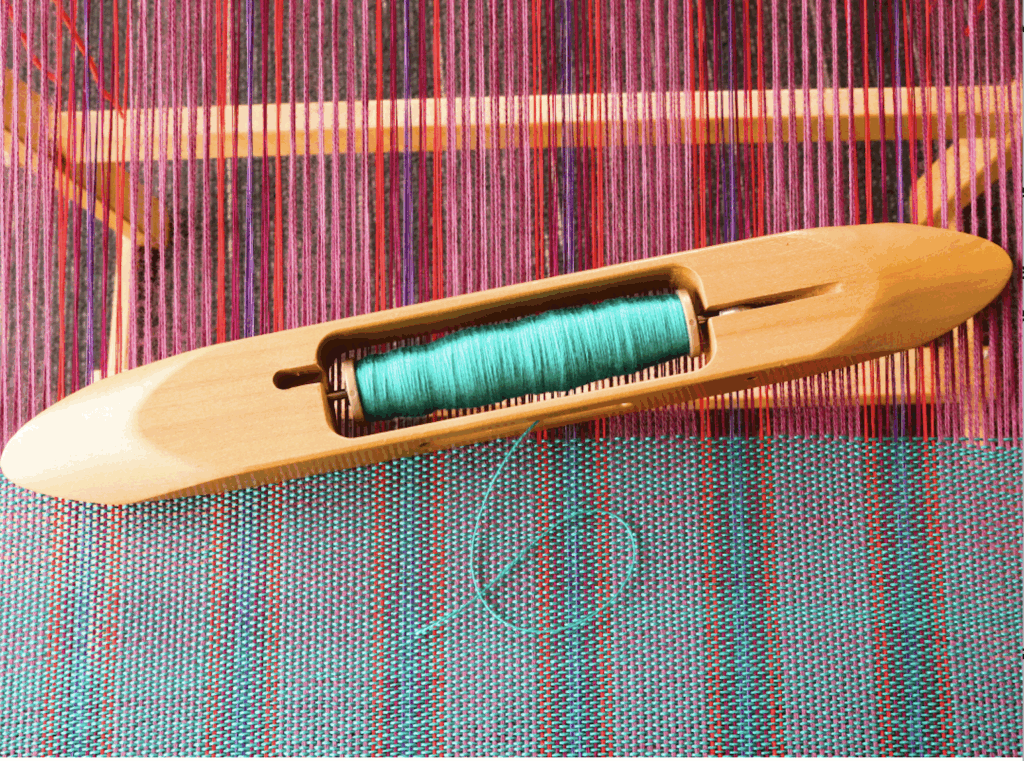
Can You Use a Boat Shuttle on a Rigid Heddle Loom?

Yes, absolutely! While a stick shuttle is what most rigid heddle looms come with, a boat shuttle is a wonderful tool that can be used on these looms — you just need to know when and why it might be helpful.

Let’s look at the differences so you can decide which shuttle is right for your projects.

Boat Shuttle vs Stick Shuttle: What’s the Difference?

Here’s a quick comparison of the two:

1. Cost

  • Stick Shuttle: Usually inexpensive — you can even make your own or improvise with a paint stirring stick or similar.
  • Boat Shuttle: Although prices vary significantly, a boat shuttle is more of an investment — In addition to the shuttle, you’ll likely want extra bobbins, which are an additional cost.

💡 Tip: Some weavers make their own bobbins from cardboard or stiff paper!

2. Ease of Use

  • Stick shuttles are quick and simple for thicker yarns. I like to use mine when I’m weaving with anything thicker than fingering weight.
  • A stick shuttle involves passing the shuttle through the shed.
  • Boat shuttles shine when working with finer yarns (like Tencel, lace weight or 8/2 cotton). They feed yarn more smoothly and save a lot of time.
  • A boat shuttle (depending on the width of the warp) involves throwing the shuttle through the shed.

One of my favorite things? I can pre-wind multiple bobbins and just swap them out quickly mid-project. So satisfying and keeps you in “the zone”!

3. Efficiency

With a boat shuttle:

  • Winding yarn is fast — especially if you use a hand bobbin winder or electric bobbin winder.
  • Weaving is smoother. No need to stop and unwind yarn manually like with a stick shuttle.
  • It glides beautifully through the shed, especially when you’re working with fine, smooth yarns. You do need to ensure that you have good warp tension, especially on a wider warp where you might need to throw your boat shuttle further.

💡 Tip: You can even use a hand drill to wind bobbins!

A stick shuttle:

  • It’s fairly quick to wind a thicker yarn onto a stick shuttle
  • Once you’ve had some practice, you can kind of “shoot” the shuttle from one side of the warp to the other, making the transfer quicker. You will need a good firm tension and straight angle to ensure the “prongs” of the shuttle don’t catch on any warp threads.

Does a Boat Shuttle Fit Through the Shed on a Rigid Heddle Loom?

Great question — and yes, it absolutely does!

I often hear weavers worry that the shed (the opening between raised and lowered threads) won’t be large enough for a boat shuttle. But on my rigid heddle looms, I’ve had no issues at all. The boat shuttle fits through easily, and its smooth design helps it glide through like a dream.

If you were using a boat shuttle with a higher profile, you may run into issues. For that reason, I recommend a low profile boat shuttle (about an inch high is perfect).

💡 Tip: Just make sure you’re advancing your warp often so your shed stays nice and open!

Which Boat Shuttle Should You Buy?

There are so many boat shuttles out there, it can feel a bit like picking your first loom all over again!

A great entry level shuttle is the Ashford 13 or 15 inch open boat shuttle:

  • Lightweight but sturdy
  • Tapered ends for easy gliding
  • Works beautifully for both narrow and slightly wider projects
  • Affordable

It comes with one plastic bobbin, but I definitely recommend grabbing a few extras if you can.

A mid range shuttle would be this 13″ open boat shuttle from Pickers Ridge.

  • Handcrafted in Australia but affordable
  • Quality, sustainable New Guinea Rosewood
  • Light and lovely to hold
  • Magnetic spindle
  • Regular sized Ashford bobbin fits this shuttle

And for a high end, one of a kind shuttle check out the 13″ open boat shuttle from Pickers Ridge.

  • Handcrafted in Australia
  • Stunning appearance
  • Quality, sustainable Figured Silkwood maple
  • Magnetic spindle
  • A special piece for your weaving studio
  • Regular sized Ashford bobbin fits this shuttle
Image from Pickers Ridge Online Store

So… Do You Need a Boat Shuttle?

Nope — but you might really enjoy having one in your weaving toolbox.

If you mostly work with thicker yarns, don’t mind winding by hand and need to be budget conscious, your stick shuttle might be all you ever need. But if you’re venturing into finer yarns, love having pre-wound weft ready to go, or just want to make your weaving more efficient — the boat shuttle is a game-changer.

I love having both shuttle options available — and using them based on the yarn and project I’m working on. Like most weaving tools, it’s all about finding what works best for you.

If you’re interested in learning more about different types of boat shuttles, check out this article I wrote on open boat shuttles v’s closed boat shuttles.

*This post contains affiliate links. For more information, please see my disclosure policy.

Let me know in the comments below:
Do you use a boat shuttle on your rigid heddle loom? Or are you tempted to give one a try?

If you found this post helpful, feel free to share it or subscribe to my YouTube channel for more weaving tips and tutorials.

Check out the video below to see the boat shuttle in action with a rigid heddle loom:

Until next time…

Happy weaving!
— Kelly 💛

Filed Under: Rigid heddle weaving, Weaving Tagged With: boat shuttle, rigid heddle weaving

Open vs Closed Boat Shuttle: What’s the Difference & Which Should You Use?

by Kelly Leave a Comment

If you’re new to weaving or upgrading your toolkit, you might be wondering: What’s the difference between an open and closed boat shuttle—and does it really matter which one I choose? In this post, I’ll walk you through the key differences, the pros and cons of each style, and tips on choosing the best shuttle for your weaving projects.

🧵 What Is a Boat Shuttle?

A boat shuttle is a weaving tool used to pass weft yarn through the shed (the opening created when you raise or lower the warp threads). It typically holds a bobbin or quill on a metal spindle that allows the yarn to feed off smoothly as you weave.

Boat shuttles are most commonly used with floor looms or table looms, but can also be advantageous for rigid heddle weaving.

There are many types of boat shuttle but today we’re going to discuss open and closed boat shuttles with a side feed.

What is warp diving?

I have to explain what I mean by “warp diving” as I’m going to use the term a number of times! It sounds like a whole lot of fun but it’s really not! 😆 So, a warp dive is when your shuttle angles downward at some point during it’s transition from your hand to the opposite side of the loom.

This causes the tip of the shuttle to break through the bottom shed of the weaving and, well, you can probably imagine the outcome.

Warp dives range from minor (phew, the cloth beam fabric caught it in mid dive) to spectacular (picture yourself, or me if you like, crawling around under the loom trying to locate the exact landing position of the shuttle).

OK, that should be crystal clear to everyone now? 😆

What Is an Open Boat Shuttle?

An open boat shuttle is open on the top and the bottom, allowing the bobbin to be visible and easily accessible. You can pop the bobbin in and out quickly, because you can push on it from underneath, which makes unloading and reloading a breeze.

✅ Pros of an Open Boat Shuttle:

  • Easy bobbin changes – slide one out and another in with minimal fuss.
  • Good visibility – see how much weft yarn you have left at a glance.
  • Lightweight shuttle – Without the additional wood to enclose the bottom of the shuttle, an open boat shuttle will usually weigh less and be light to handle.
  • Finger control – Some weavers (I don’t use this technique myself, but many do) like an open shuttle for it’s tactile aspect. They like to have more of a feel for how the thread is feeding off the shuttle.
  • Slimline design – The height of an open shuttle is usually lower, making it great for a small shed.

⚠️ Cons:

  • Slightly more exposed, so the bobbin can jump around a little if the shuttle isn’t smooth-running. It’s important not to overload your bobbin so that it ends up protruding beyond the bottom of the shuttle and rubbing up against your warp threads.
  • May not be as suitable for wider warps – Due to the light weight of the shuttle, some weavers may find it difficult to throw far enough when weaving on a wide warp. This can depend on the length of the shuttle too. A longer shuttle is more appropriate for a wider warp.
  • More likely to warp dive – This can depend on the design of the shuttle, but my experience has been that warp diving is more common with an open shuttle.

What Is a Closed Boat Shuttle?

A closed boat shuttle has a more enclosed body with smaller slots or holes where the yarn exits. The bobbin is housed inside, which can give a smoother glide through the shed in some setups.

✅ Pros of a Closed Boat Shuttle:

  • Smooth and solid – glides easily over the warp, especially on high-tension looms.
  • Protects the bobbin – less chance of yarn catching or bobbin misalignment.
  • Prevents warp diving! – A nicely shaped closed shuttle can glide so straight and smooth that you will never have to experience the pain of a warp dive!
  • Heavier construction – Due to being enclosed, the closed shuttle will be slightly weighted than an open shuttle.

⚠️ Cons:

  • Can be slightly slower to change bobbins – If there is no finger hole, changing a bobbin can be fiddly as you can’t adjust from underneath.
  • Heavier – this is not necessarily a con, just something to point out for consideration!
This closed shuttle by Pickers Ridge has a super handy finger hole for pushing the spindle up to load a new bobbin.

Size and Weight Comparison

Here are a few examples from boat shuttles I personally own:

Ashford 11″ open boat shuttle – 71 grams

Ashford 13″ open boat shuttle – 113 grams

Ashford 15″ open boat shuttle – 181 grams

Pickers Ridge hand crafted 13″ closed boat shuttle – 117 grams

Pickers Ridge hand crafted 13″ open boat shuttle – 105 grams

Leclerc 15″ flying shuttle – 494 grams

Schacht 15″ end feed shuttle – 189 grams

Which Shuttle Should You Choose?

Here are a few quick tips to help you decide. Take these with a grain of salt because at the end of the day, shuttle choice is heavily influenced by personal preference and specific project needs:

SituationBest Shuttle
You are challenged by warp divesClosed boat shuttle
Your loom has a smallish shedOpen boat shuttle (lower profile)
You like to see and feel how much yarn is leftOpen boat shuttle
You use a high-tension floor loom with a wider weaving widthClosed boat shuttle
You want a quick and convenient workflow for narrower warpsOpen boat shuttle

Of course, many weavers like to own both types and switch depending on the project.

Bonus Tip: Choose Quality

Whether you choose open or closed, make sure your shuttle is:

  • Well-balanced and glides easily across the warp.
  • Made of smooth, durable wood to be long-lasting.
  • Compatible with your loom’s shed height.
  • Not just pretty to look at but also comfortable and practical to use.

A good-quality shuttle can make a big difference in your weaving speed and enjoyment.

*This post contains affiliate links. For further information, please see my disclosure policy.

Make the choice that fits you best!

There’s no one-size-fits-all answer—but understanding the pros and cons of open vs closed boat shuttles helps you make an informed decision that suits your weaving style. If you’ve never used a boat shuttle before, see if you can try one out at a weaving supplier, guild or with a friend.

If you are a rigid heddle weaver you might be wondering if boat shuttles are a tool that you could use? Well, head on over to this article next to find out all about using a boat shuttle with a rigid heddle loom!

👉 Have a favorite shuttle? Let me know in the comments! Share the details so other readers can learn and make informed choices 😊

Until next time…

Happy Weaving!

Filed Under: 4 shaft weaving, 8 shaft weaving, Floor Loom Weaving, Rigid heddle weaving, Weaving Tagged With: boat shuttle, boat shuttle comparison, closed boat shuttle, open boat shuttle

What is a weaver? (Hint: It’s About More Than Making Cloth)

by Kelly 7 Comments

When you think of a weaver, what comes to mind? Someone sitting at a loom, throwing the shuttle back and forth, quietly creating cloth from yarn? That’s true—but it’s only the beginning.

After years immersed in the world of weaving—teaching, learning, and connecting with thousands of weavers—I’ve come to realize that being a weaver is as much about who you are as what you make.

I’ve been pondering the question “What is a weaver?” Does weaving shape who we are or do we shape the way we weave?

Here are my thoughts on the heart of a weaver:

A Weaver Is Generous

Weavers are givers. You’ll rarely meet a weaver who hasn’t gifted their handmade creations to friends, family, neighbors, or total strangers. Whether it’s a handwoven tea towel, a scarf, or something as intricate as a baby blanket, their joy is in the giving.

But the generosity doesn’t stop with finished pieces. Many weavers freely share their time, knowledge, and experience with others. It’s a craft rooted in community.

Many weavers are involved in charitable organisations. They may weave tiny blankets for babies born early, or weave prayer shawls as part of their church ministry. Some will weave and sell items so they can then donate to their favourite charities.

A Weaver Is Curious

Weavers love to learn. Whether it’s trying a new technique, exploring color combinations, or diving into historical weave structures, curiosity is a common thread.

Weaving is full of possibilities, and a weaver is always asking, “What if?” “Can I bend that rule?” “What will happen if I change this?”

A Weaver Is Patient

Weaving takes time. A lot of time.

Warping the loom, threading heddles, sleying the reed, fixing mistakes—it all requires focus and patience. Many weavers spend long hours in solitude, and it shows in their calm, centered presence. The process itself often becomes a form of quiet meditation.

If you consider yourself and impatient person, does that mean that weaving won’t suit you? Of course not! Weaving will help you develop patience naturally as you work to achieve your goals.

A Weaver Is a Problem Solver

Tangled warp? Uneven tension? A threading error discovered ten inches into your cloth?

Weavers are skilled at troubleshooting and adapting. The craft naturally develops resilience and creativity. A weaver rarely gives up—they pause, reflect, and try again.

If a weaver cannot figure something out they strive to find out more. Online communities have been a wonderful support for many weavers.

A Weaver Is Willing to Share

The weaving community is one of the most open and supportive I’ve ever known.

Whether online or in person, weavers are always ready to lend a hand, offer advice, or cheer you on. Ask a question in a weaving group, and you’ll get answers, encouragement, and maybe even a photo tutorial or links to further resources!

A Weaver Is Passionate

Once weaving grabs your heart, it doesn’t let go.

Weavers are deeply connected to their craft. Yarn, texture, structure—it’s more than just a hobby. Many weavers describe it as a lifelong journey of discovery, challenge, and joy.

So… What Is a Weaver?

A weaver is someone who turns threads into cloth—but more than that, a weaver is:

  • A generous spirit
  • A curious mind
  • A patient soul
  • A creative problem solver
  • A passionate maker
  • A thoughtful giver
  • And a valuable part of a rich, global community

If you’re just starting your weaving journey, welcome. You’re joining a long line of extraordinary makers who don’t just weave cloth—they weave meaning, kindness, and connection into everything they create.

To put it really simply, weavers make the world a better place ❤️

Want to Join the Weaving Community?

If this post resonates with you, you might already be a weaver at heart. Browse my Youtube channel, sign up for a class, or subscribe to my newsletter for inspiration, patterns, and tips sent straight to your inbox.

Until next time…

Happy Weaving!

Filed Under: Inspiration, Personal development, Rigid heddle weaving, Table loom weaving, Weaving Tagged With: encouragement, gratitude, inspiration, what is a weaver

Feeling Stuck? 5 Quick 10-Minute Fixes to Break Through Your Weaving Plateau

by Kelly Leave a Comment

Have you ever sat down at your loom and just… stared at it?

You want to weave. You love weaving. But nothing’s sparking your creativity, and everything feels like too much effort.

You’re not alone. Every weaver hits a plateau now and then. Sometimes it’s not enough time or decision fatigue. Maybe it’s a busy time in your life and the creative energy is lacking. Or maybe you just feel a little bored with the whole thing!

The good news? You don’t need to overhaul your whole setup, buy new equipment or start a huge new project to get inspired again.

Here are five quick, low-pressure ideas that take just 10 minutes—but can completely shift your mindset and help you fall back in love with weaving.

1. Switch Up Your Yarn or Color Combo

Sometimes all it takes to reignite your excitement is a little color play. Spend 10 minutes digging through your stash and pull out 3–5 yarns you wouldn’t usually use together—bold contrasts, unexpected textures, or that one skein you’ve been “saving.”

Lay them out, snap a photo, or warp up a quick sample. A fresh palette can open up a whole new direction.

Tip: Look for color inspirations – they are everywhere! In nature, manmade objects, you will even see color when you close your eyes 😀 Try taking inspiration from the color wheel and explore some basic color theory.

2. Test a New Weave Structure (On a small scale)

Trying something new doesn’t have to mean committing to a large project. Choose a weave structure or technique you’ve been curious about—like waffle weave, finger controlled techniques, or krokbragd—and do a tiny sample on a new or leftover warp.

Ten minutes of experimentation can be just the spark you need.

Tip-  For small project ideas, check out this list.

3. Weave a Just-for-Fun Project

Give yourself permission to weave just because. A mini coaster, mug rug, or bookmark can be finished quickly and without pressure—and often leads to surprising bursts of creativity.

Don’t overthink it. Choose whatever yarns catch your eye, and just go.

Tip- If you’re time poor, check out the principles of the 10 Minute Rule and see if it’s something that could be beneficial in your life.

4. Refresh Your Creative Space

It may sound simple, but cleaning up your weaving space has a powerful mental effect. In just 10 minutes you can:

  • Clear away old yarn scraps and tools, sweep or vacuum the floor
  • Do a brief declutter or put things away to create a sense of space
  • Add a plant, vase of flowers, photo, or anything that makes you smile

Weaving is as much about mindset as it is about materials—and a tidy, inviting space can make all the difference. A cluttered room makes a cluttered mind!

5. Revisit a Favorite Pattern — But Change One Thing

Remember that pattern or project you loved making? Try it again—but switch up one element. Change the colors, yarn weight, or sett. Add stripes. Try a different finishing technique.

Familiar patterns offer a safe, low-stress way to explore something with a new twist.

Need inspiration? Browse my Pattern Store or check out some student work to see how they made the patterns their own.

The Stepping Up Scarf PDF Pattern for rigid heddle weavers

Feeling stuck doesn’t mean you’re doing anything wrong—it just means your creative brain needs a reset. These 10-minute changes aren’t just about weaving differently; they’re about rediscovering why you love weaving in the first place.

So pick one today. Set aside a little time. And let the joy come back in!

Which fix do you plan to implement in your weaving life? Let me know down in the comments 👇

Until next time…

Happy Weaving!

Filed Under: Floor Loom Weaving, Inspiration, Rigid heddle weaving, Rigid Heddle Weaving Patterns, Table loom weaving, Weaving Tagged With: 10 minute fixes, inspiration, weaving plateau, weaving project ideas

How to Warp a Rigid Heddle Loom: A Step-by-Step Guide for Beginners

by Kelly 2 Comments

Warping a rigid heddle loom might seem a little overwhelming when you’re first starting out — but once you learn the process, it becomes second nature!

In this step-by-step guide, I’ll show you exactly how to warp your rigid heddle loom using the direct warping method, with clear instructions and photos from my beginner rigid heddle weaving course (spoiler alert – there is a discount link at the end of this article 😉)

Whether you’re preparing for your very first rigid heddle project or just need a refresher, this simple method will have you ready to weave in no time. Let’s get started!

Step 1: Calculate Your Warp

Calculating for your next project may not feel like the most fun and glamorous part of weaving, but trust me, it can make or break your success!

I hear a lot of new weavers say “I was never any good at math” or “numbers are confusing to me”. Well, you’re in good company because mathematics was my worst subject at school and oh, how I loathed it!

But the interesting thing is that numbers can become interesting when they have a specific purpose. And it also helps when somebody else lays out a plan for you to follow 🙋‍♀️

I have a completely free printable PDF calculations sheet for rigid heddle weaving for you. As if that wasn’t enough, I’ve also added a mini class to show you how to use the calculations sheet. Still for free!

Now, you technically can weave a project without calculating first, I even have a member’s only class showing how to do that, but I highly recommend making a habit of getting comfortable with calculations for predictable and repeatable outcomes.

  • Tip: Make the math easy by using a calculations sheet or online calculator.

Step 2: Set Up Your Rigid Heddle Loom for Direct Warping

  • Place your loom on a sturdy surface (or loom stand) with the front of the loom facing your warping peg. If using a table, clamp the loom (unless you’re weaving with a Lojan Flex – no need to clamp).
  • Secure your warping peg at the right distance for your total warp length (Use a measuring tape for correct distancing).
  • Get your warp yarn, scissors, and threading hook ready.
  • Tip: Try to set up your loom in a place that you can leave and take a break if needed. Time pressure is reduced if your loom setup is not in the way of other home activities.

Step 3: Prepare to Warp your Rigid Heddle Loom

  • Mark the width of your project on the heddle with waste yarn.
  • Ensure you have everything you need and your project calculation information is nearby to refer to.
  • Tie on your warp yarn to the apron rod in line with one of your heddle markers.
  • The back apron rod should be fully extended and the brake on.
  • Try to have your direct warping peg set up at a fairly similar height to your loom.

Step 4: Warp the Loom

  • Using the “reed hook” end of your threading hook, take a loop of yarn through the slot. Place the loop gently over your direct warping peg.
  • Walk to the back of the loom, take the warp yarn around the apron rod (either under or over, alternating), through a slot and to the warping peg once more.
  • Continue threading through slots and repeating the process until the correct width of warp is complete.
  • Tip: Now is not the time to focus on keeping the warp tight. Keep it light, gentle and consistent. The proper tensioning comes a little later.

Step 5: Roll the Warp Onto the Loom

  • Place a choke tie near the end of the warp (close to the warping peg) to keep the warp threads together.
  • Lift the warp off the peg. It can be helpful to make a warp chain and rest this on the table to keep threads tidy.
  • Head to the back of the loom and begin to roll the warp onto the back beam, keeping it under tension.
  • After one warp rotation begin to use separators at the back beam. In this class I use cardboard warp separators but my main preference nowadays is to use brown craft paper on a roll.

  • After each rotation, come to the front of the loom and pull on the warp. You should feel it give and then tighten up a little.
  • Head back behind the loom and repeat.
  • Tip: Take your time! If you need a break, go ahead. Warping doesn’t need to be completed in one session.
  • When the end of the warp is approximately equal with the front beam, finish rolling on.
  • Cut the warp loops and remove the choke tie.

Step 6: Thread your Rigid Heddle Loom for Plain Weave

  • Take one warp thread (end) from each slot and thread in a hole to the left.
  • Repeat for the rest of the threads.
  • You should have a thread in every hole and every slot for the width of your project.
  • Tip: Sit nice and close to your heddle while threading to avoid any back strain. I have my loom situated on the stand and bring my office chair on wheels in close so that I feel “tucked in”.

Step 7: Tie On and Adjust Tension

  • Tie small groups of warp threads around 1″ wide to the front apron rod, starting in the middle and alternating sides. I use a surgeon’s knot so I can adjust my groups for final tensioning.
  • Adjust until all groups are even and firm. Consistency is important at this step!
  • Tip: Test by pressing across the thread groups with the palm of your hand – this will show you if any groups are looser than others.

Step 8: Insert a Header

  • Weave scrap yarn (or thicker yarn) back and forth a few times then beat down.
  • OR
  • Use cardboard separators in alternating sheds and beat down.
  • This spreads out the warp evenly and helps prevents gaps.

Step 9: You’re Ready to Weave!

  • Celebrate! Your rigid heddle loom is now set up and you’re ready to start your first project.
  • Each time you warp, it gets easier and faster, trust me!

And that’s it — your rigid heddle loom is warped and ready for weaving! Fun times ahead 🥳

The more you practice, the more familiar warping will become. I hope this beginner rigid heddle weaving step-by-step guide helped make the process simple and stress-free for you.

If you’d like even more help, I walk you through the entire process inside my best selling Rigid Heddle Weaving for Beginners course. This course covers everything you need to know to get weaving on your rigid heddle loom, including yarn choices, sett, loom overview and a beautiful placemats project.

Click on the link below to unlock a special course discount, just for you!

Beginner Rigid Heddle Weaving Course Special Offer…

Would you like a free Rigid Heddle Weaving Setup printable checklist to help you move through these steps? You can download, print and then check off the boxes as you go, ensuring that nothing is missed.

Rigid-Heddle-Loom-Setup-ChecklistDownload

Until next time…

Happy Weaving!

*This post contains affiliate links. For further information, please see my disclosure policy.

Filed Under: Rigid heddle weaving, Warping, Weaving Tagged With: rigid heddle weaving, rigid heddle weaving tutorial, warping

Direct Warping a Rigid Heddle Loom the Wrong Way (And How to Fix It!)

by Kelly 4 Comments

My 6 Best Tips for Rigid Heddle Warping Success!

Direct warping a rigid heddle loom is something I love to do! It’s one of the fastest and easiest ways to get started on a new weaving project, and I find the process simple and satisfying. There’s nothing better than going from an idea to a fully warped loom in hardly any time at all.

But let’s be honest—direct warping isn’t foolproof. If you’ve ever ended up with a tangled mess, uneven tension, or felt completely frustrated before you even started weaving, you’re not alone! I’ve made plenty of mistakes over the years, but the good news is that most warping issues have quick and easy fixes.

In this post, I’ll walk you through some of the most common direct warping mistakes and how to solve them so you can begin to enjoy the warping process as much as the weaving!

So, What is So Great About Direct Warping?

When you begin to make the warp for a table loom or floor loom, you traditionally do so with a warping board, or with a sectional beam setup. These methods are terrific as they allow the weaver to be precise about the warp making process, but I’m not kidding when I say they take time!

Direct warping a rigid heddle loom though, allows us to side step other processes, to start and finish our warp at the loom and sometime to even skip the threading afterwards by doing it during the warping!

We use a direct warping peg, clamped at a suitable distance away from the loom (the distance will depend on your warp calculations so be sure to do that first). We tie the yarn onto the back apron rod of the RH loom, take a loop through the heddle/reed and then drop the loop onto the peg. Back to the loom and repeat.

This makes the process really fast and hey, you even get some exercise thrown into the deal as you go from the loom to the peg and back again! 💃

6 Common Warping Mistakes & How to Fix Them

  1. Forgetting to Take the Warp Over the Front & Back Beams

This is a very common rookie weaver error, so don’t worry if you have fallen victim to it, we’ve all been there!

  • Why it’s a problem: Most of the time you will be unable to make a shed. You put your heddle up, you put it down, nothing happens!
  • How to fix: This depends on your particular rigid heddle loom. Some have beams that are removable while you have a warp on – if this is the case with your loom, remove whichever beam you have warped under, slacken your warp tension and place the beam back so that it is underneath the warp.
  • If you can’t remove your beam/s you will need to un-warp and re-warp correctly over both beams.

2. Using the Wrong Yarn (Stretchy Acrylic, etc.)

This can be a bit of a weaving nightmare because you don’t always know just how the yarn will perform under tension if you haven’t used it before. Once stretched, you can’t “unstretch” the yarn.

  • Why it’s a problem: Stretchy yarns make it hard to maintain even tension. They will frequently stretch more and more as you advance your warp and try to weave, no matter what you do.
  • How to fix: You can try using wedging and tension improving techniques. I once wove with an acrylic yarn that began to stretch and by using these techniques I was able to finish the project, but I can tell you, it wasn’t fun! The only other alternative is to (and I don’t say this lightly, it’s not my usual recommendation!) bin the warp and start over with a different yarn. I hate having to tell someone to do that, but it’s a good lesson in what is an inappropriate yarn for warping.

3. Too Many Warp Ends on One Peg

Bunching up too much warp on one peg when direct warping is less than ideal for a couple of reasons.

  • Why it’s a problem:
  • Your warp should be well ordered on the peg, each warp loop being placed above the last one to keep the threads in good order.
  • If you don’t distribute the warp among more than one peg (especially if its a wider warp) you will have more wasted yarn as it has to travel further to go to a central point (the peg).
  • Your warping peg can lose tension. Too much warp on a single peg can cause too much pressure, causing the peg to go pinging across the table and messing up the lovely order of your warp!
  • How to fix: Distribute warp ends across more than one peg. Don’t place too much tension on the warp as you take the loops around the peg. Aim for consistency, not tightness.

4. The Wrong Attitude: Warping Frustration

I don’t know about you, but when I’m frustrated I don’t think clearly! Usually, the way you think about your warping before commencing is how it will be. For example, I think of warping as simple and easy, so when I go through the warping process, guess what? It’s simple and easy!

  • Why it’s a problem: Leads to mistakes and makes the process feel stressful. Clouds judgment and clarity of thought.
  • How to fix: Take breaks, set up in a calm environment, and remember that practice makes perfect! Give yourself plenty of grace, you’re not expected to know everything, it’s a journey! If you have a recurrent frustration, perhaps it’s time to do some more research or take a step by step class to help you get over the hurdle.

5. Warping the loom or heddle backwards

  • Why it’s a problem: You won’t be able to advance your warp forwards if it’s warped on the front beam instead of the back. Warping the heddle backwards is not as big of a deal – you can actually weave that way but it may be less comfortable to use. If you have warped your heddle backwards and want to repair it, this video will show you how.
  • How to fix: You can fix a backwards warped loom by cutting your yarn loops at the peg and securing with a choke tie. Wind this warp onto your front apron rod (if you haven’t done so already). Leave enough length at the other end to tie on the cut ends to the back apron rod securely. You can then release the tension at the front apron rod and begin to roll onto the back beam, using warp separation as you go. Once you have the warp rolled on to where it’s supposed to be, you can progress as normal!

6. Trying to hurry the process

  • Why it’s a problem: Trying to speed through the warping process when you’re not all that familiar with it could be a recipe for disaster. You may skip steps, you may make mistakes, you may get tangles, things may go wrong and you don’t notice. Rolling on a warp with good, consistent tension is not a step to be hurried over, it takes a little time and patience.
  • How to fix: Warp your rigid heddle loom when you actually have time to do so. If you can’t get it done in one session (and it’s absolutely fine not to!) ensure that you have set up in a location where you can leave the warp partly done to come back to. If you’re warping at the dining room table at 5pm and your family needs to sit down to eat at 7pm, you may have a problem.

Final Tips for Direct Warping Success

  • Slow down and check your work as you go. Time is never wasted in weaving, it is only invested 😉
  • Use a checklist to tick off as you go (I have a free printable one here). This helps to ensure you don’t miss any steps in setting up your loom.
  • If you make a mistake, don’t panic—ALL issues can be fixed!

Want to learn more about warping successfully?

Check out this list:

Independent warp issues

5 Tips for Rigid Heddle Warping

2 Tips for Easier Warping

Setting Up for Success Online Workshop

Did you know that I’m a reseller for Lojan Wheels and Looms in Australia? If you are interested in knowing more, please feel free to contact me.

Until next time…

Happy Weaving!

*This post contains affiliate links. For further information, please see my disclosure policy.

Filed Under: Rigid heddle weaving, Warping, Weaving Tagged With: direct warping, rigid heddle loom, rigid heddle weaving, warping tips

Lojan Flex Rigid Heddle Loom Review

by Kelly 6 Comments

Lojan Flex Rigid Heddle Loom Review: My Honest Thoughts

I’m so excited to share my review of the soon to be released Lojan Flex Rigid Heddle Loom! Now that I’ve had some time to weave with it, I have plenty to say about its features, benefits, and what you should know before adding it to your weaving loom collection.

First Impressions & Setup

Right out of the box, I noticed some interesting differences with this loom. One of the first things that caught my attention was the metal warping rod—a great feature held in place by texsolv cords. This keeps the rod steady while warping, making the process easier and more secure. If you haven’t already, I recommend checking out my assembly video before diving into this review, as I explain all the parts in more detail.

The loom also comes with little rubber feet that do a great job of keeping it stable on the table without clamping! I pulled the loom out a little so that the back rubber feet were over the edge of the table, keeping it from moving as I was direct warping. That’s a nice touch for those who prefer to warp without extra setup hassle.

Warping the Flex Loom

For my first project, I used lovely variegated green wool, alternating with a soft pink. I chose to use direct warping, and I have to say, the process was smooth. One of my favorite warping techniques is using two warping pegs to minimize yarn waste—a little trick I always recommend!

As I started winding on, I noticed that the texsolv cords played another helpful role. When rolling the warp onto the back beam, the cords held the apron rod in place, preventing shifting and ensuring an even tension. When it was time to start weaving, I simply slipped the cords off and let them hang out of the way until next time.

The plastic warp separators that come with the loom are similar in size to traditional cardboard sticks, but a bit more durable. Still, my personal favorite remains brown craft paper, which I use repeatedly for superior warp separation.

Why I Recommend a Stand

Now, let’s talk about comfort. I typically weave with a stand when using a larger loom, and after working with the 50 cm Flex Loom, I highly recommend getting one! Without a stand, I found the weaving angle a bit awkward, making my arms work harder than usual.

Lojan does offer foldable, height adjustable stands, which can be packed away easily. If you’re investing in this loom, I’d suggest grabbing the stand along with it to make your weaving sessions more enjoyable!

Tensioning: A Standout Feature

One of the biggest highlights of the Lojan Flex is the tensioning system. Just like their inkle loom, which I also love, the tensioning is simple, seamless, and smooth. The loom has front and back bars in addition to the warp and cloth beams, helping to maintain excellent tension throughout the weaving process.

If you’ve ever struggled with keeping tension even, you’ll appreciate this design. Plus, it’s very user-friendly for those with hand or wrist issues, making adjustments easy without strain.

Innovative Rigid Heddle Design

Another unique aspect of this loom is its modular rigid heddle design. Instead of a single, fixed heddle, this loom features individual plastic sections that fit together. This means you can:

  • Mix and match different heddle sizes for varied setts.
  • Swap out sections instead of buying an entirely new rigid heddle.
  • Customize your setup for thick-and-thin weaving with a variety of yarns (similar to a variable dent reed).

I found this to be a super clever feature that adds more options to the weaving experience!

Weaving Experience & Final Thoughts

Initially, I tried weaving with the loom flat on the table, using the extra dowels at the back to create a slight incline. However, I quickly realized that the breast beam and back beam sit quite high, making it a bit tricky to get the right angle without a stand. This reinforced my recommendation—if you’re using the 50 cm size, a stand will make weaving much more comfortable!

Overall, I’m really impressed with the Lojan Flex Rigid Heddle Loom. The smooth tensioning, modular heddle system, and well-thought-out features make it a fantastic option for weavers looking for a high-quality, innovative loom.

The top back beam helps the weaver to achieve a beautifully well ordered and well tensioned warp.

What’s in the box?

Whether you purchase the 30cm or 50cm Flex, you will receive:

  • Loom parts to assemble, including screwdriver for simple assembly (check out my assembly video here)
  • A 7.5 heddle reed and heddle sections
  • 2 stick shuttles
  • Direct warping peg and clamp
  • Heddle hook for threading
  • Warp separators
  • Apron rod metal rods and texsolv cords

Optional extras

  • Stand
  • Additional rigid heddle frames and heddle segments, available in sizes 2.5 dpi – 15 dpi.
  • Pick up sticks
  • Additional warping pegs and stick shuttles

Even more options!

The Flex can be used purely as a rigid heddle loom but it can also be much more than that! Shortly there will be the option to upgrade the regular Flex to either a 4 or 8 shaft loom through the purchase of conversion kits. Reverting back to the rigid heddle loom is quick and easy so you can weave what you want, when you want!

The Flex is available now for pre-order (March 2025). If you’re in Australia you can re-order through me 😉 or if in the US, check them out at the Woolery. If you are interested in the Lojan Inkle Loom I have a review of that here.

Want to see the loom in action? Check out the review video here –

Have any questions about the Flex Loom? Let me know in the comments below! And don’t forget to check out my assembly video for a closer look at how this loom comes together.

Until next time…

Happy weaving! 🎨✨

Filed Under: Lojan products, Rigid heddle weaving, Weaving Tagged With: lojan flex loom, loom review, rigid heddle loom, rigid heddle weaving

Ask Kelly – Heddle rod or more heddles?

by Kelly 4 Comments

Today’s question springs from the popular online Krokbragd 101 class for rigid heddle weavers. In that class I show you different options for setting up your rigid heddle loom. You can either opt for a single heddle with a heddle rod or pick up sticks OR you can choose to set up with two heddles.

In many of my classes at the Online Weaving School I try to provide more than one option for loom setup because, well, we’re not all the same! What suits one weaver may not suit another.

When I received this question from Milly I realised that no one had asked it of me before. I wanted to share so that all can benefit.

For context, method one refers to setting up the rigid heddle loom with a single heddle, a pick up stick and a heddle rod.

Method two is a two heddle set up.

“Hi Kelly,

Your video is very informative and very easy to comprehend, thanks for making this and I am glad that I have purchased it. Just a quick question. For Method 1 and 2, in terms of preparation of threading and set up and in terms of speed of completing project such as changing shaft 1-3 for each method, which do you feel more smooth to continue the project and which is faster and convenient do you think?

Budgeting wise, rather than purchasing two heddles, if you have a rod and buying a picking stick it is maybe a bit more cheaper right? But I just wondered about in terms of practical convenience, speeding of threading and completing the project which is better I wonder…?? Appreciate if you can give me your opinion on this:)“

Hi Milly!

It might depend a little bit on the weaver. If you prefer one method it’s probably because you can get it set up easily and quickly? For me personally, method two definitely trumps method one in terms of speed of set up and ease of weaving. I have quite a bit of experience with using more than one heddle now and I “get it”.

But many would say the opposite and say they prefer method one. Method one is undeniably more economical as buying additional heddles of the same dent can be expensive. I usually advise students to purchase the extra heddle if:

A) They are already weaving with pick up sticks/heddle rods and find it cumbersome for any reason (eg. some weavers, myself included, will get neck/shoulder strain from repeatedly picking up a heddle rod) then it could be worth investing in another heddle.

B) If they intend to do a lot of weaving that requires more than the regular 2 shafts it would be worth buying a second heddle.

I hope my response to the question is insightful for all of you but perhaps you are at more of a beginner level?

What is a heddle rod?

A heddle rod is a replacement tool for a pick up stick. When you wish to use more than one pick up stick to create texture or patterning on a rigid heddle loom you may find that the two sticks will not slide past each other.

This is a problem because one stick will need to be removed and the threads picked up again each time you need to weave that pick (row). Hello tedium! 😆

A heddle rod completely bypasses this issue because it can pick up the threads you want, sit behind the heddle and still leave a clear path for a pick up stick.

I have a full, free tutorial that shows you how to install a heddle rod, including how to make your own string heddles.

What About More Than One Heddle?

Weaving with a single heddle, lowering and raising it to weave with, can achieve 2 shafts. But we can add an additional heddle (or heddles) to achieve even more.

For weaving a 3 shaft krokbragd like we do in the Krokbragd 101 online class, this means we can set up the rigid heddle loom with two heddles to achieve the three shafts we need for the weave structure.

As I already pointed out to Milly, I love weaving with two heddles but I understand it’s not the best solution for everyone.

The heddles must be the same size, so if you want to weave your krokbragd with a 7.5 dent heddle, you need two of the exact same size. Naturally, this is a more expensive option than using a piece of dowel or similar for a heddle rod.

There are so many options for weaving with two heddles though, beyond just krokbragd. For some weavers, an additional heddle opens up the world of weaving on a rigid heddle loom in a new way, I know it did for me when I discovered it!

*This post contains affiliate links. For further information, please see my disclosure policy.

Let me know if you found this article helpful by commenting below ⬇️ Heddle rods or two heddles? Do you have a preference?

Until next time…

Happy Weaving!

Filed Under: Ask Kelly, Rigid heddle weaving, Weaving Tagged With: heddle rod, rigid heddle weaving, two heddles

5 Beautiful Leno Weaving Project Ideas for the Rigid Heddle Loom

by Kelly 2 Comments

If you loved learning how to weave Leno lace on your rigid heddle loom in my previous article, you’re going to be excited about today’s post!

Leno is a beautiful, open-weave technique that adds texture and lightness to your projects. It’s a finger controlled technique that can easily be woven on a plain weave threading and with very minimal tools – all you need is your rigid heddle loom and a pick up stick!

In this post, I’ll share five gorgeous Leno weaving project ideas to inspire your Leno journey.

Let’s dive in!

1. Airy Leno Scarf

A lightweight, lacy scarf is a perfect way to showcase Leno weaving. Use a soft cotton, wool or silk for a breezy, elegant accessory. To add interest, you could use contrasting warp and weft colours. The Garden Path Scarf uses the Brook’s Bouquet weave structure, but is a lovely example of how special a lace weave scarf can look.

2. Leno Market Bag

A sturdy yet flexible string bag is a fantastic use of Leno lace! The open weave allows for some stretch, making it ideal for carrying groceries, beach essentials, books or even yarn. Use a strong cotton or linen yarn for durability. A tapestry cotton or seine twine is the kind of hard wearing yarn you need for a project like this 😉

Check out the digital download PDF pattern for The Farmer’s Market Bag for an easy to follow project.

3. Sheer Leno Curtains

Leno is a very popular structure for weaving airy, light-filtering curtains. Because you are already threaded for plain weave, a hem and top section for hanging are easy to include on each end of your Leno panel. Choose natural fibers like cotton or linen.

4. Table Runner with Leno accent

Although Leno is not really appropriate for a table runner due to its need for some sturdiness and the ability to sit flat on a table, it is very lovely when used as an accent. You could choose to weave a plain weave table runner with recurring repeats of Leno, strategically placed.

Or you could place your Leno in particularly places rather than doing a full row to create Leno sections or windows in your runner.

Coupled with an Italian Hemstich, your table runner would be a real show stopper!

5. Lightweight Leno Wrap or Shawl

A Leno-woven wrap or shawl is perfect for layering over outfits in warmer weather or draped with an evening dress on cooler nights. You could try a sheeny and soft yarn like tencel or bamboo for a luxurious drape. Using the same colour for both warp and weft would create a classy and bold statement piece. Introducing Mexican Lace (a type of Leno as demonstrated in this online class) would make a truly beautiful shawl.

There is a lovely shrug project in Jane Patrick’s The Weaver’s Idea Book on page 74.

More About Leno

Want to undertake one of these projects but you’re not sure if Leno is for you? Check out my free tutorial to get started weaving Leno on an open shed.

And if you’re interested in delving into some more finger controlled techniques like Mexican Lace, Brook’s Bouquet and Spanish Lace, you need the Lovely and Lacey Online Workshop. In this workshop we weave a sampler to practice the techniques, so there is no need to commit to a full sized project.

Leno weaving is a fantastic way to add texture, lightness, and a touch of elegance to your rigid heddle loom projects. Whether you’re weaving a breezy scarf, a sturdy market bag, or delicate curtains, this technique opens up so many creative possibilities and variations.

*This post contains some affiliate links. For more information, please see my disclosure policy.

I hope these project ideas inspire you to try Leno in new and exciting ways! Have you woven with Leno before? I’d love to hear about your favourite projects—share your thoughts in the comments below 👇

Until next time…

Happy Weaving!

Filed Under: Rigid heddle weaving, Rigid Heddle Weaving Patterns, Weaving Tagged With: finger contolled, lace weave, leno, rigid heddle weaving, rigid heddle weaving books, rigid heddle weaving patterns, rigid heddle weaving project ideas, weaving

Rigid Heddle Loom Warp & Weft Calculator

by Kelly 10 Comments

Planning your weaving projects just got easier! This free Rigid Heddle Loom Warp & Weft Calculator takes the guesswork out of determining how much yarn you need for your rigid heddle loom. Simply enter your project dimensions, sett, and other simple weaving details, and the calculator will automatically determine your warp and weft yardage.

No more running out of yarn mid-project or buying too much—get precise calculations for warp length, weft requirements, and shrinkage allowance all in one place. Try it out below!

If you prefer the old school method of pen and paper, I have you covered for that too! Check out my free printable calculations sheet that also includes a mini class to walk you through filling out the calculations!

Please note, the calculator is not perfect, for example, the weft section at the bottom does overestimate slightly. Hopefully I can fine-tune that!

Warp Calculation Quiz

Calculate Your Warp & Weft Requirements

Width Calculation

Length Calculation

Yarn Requirements

Yarn Required for Warp

Yarn Required for Weft

Need some help to understand and use the calculator? Check out this free tutorial to get you started:

I hope this calculator is super helpful and helps you get started on your weaving project quickly and easily!

Until next time…

Happy Weaving!

Filed Under: Rigid heddle weaving, Weaving Tagged With: rigid heddle weaving, rigid heddle weaving calculator, warp and weft calculator

  • Page 1
  • Page 2
  • Page 3
  • Interim pages omitted …
  • Page 15
  • Go to Next Page »

Primary Sidebar

Hand crafted boat shuttles

Categories

Archives

Meta

  • Log in
  • Entries feed
  • Comments feed
  • WordPress.org

Copyright © 2025 Kelly Casanova Weaving Lessons on the Foodie Pro Theme