• Skip to main content
  • Skip to primary sidebar

Kelly Casanova Weaving Lessons

  • Hi! I’m Kelly!
    • Disclosure
  • Online Weaving School Class Index
    • Common account issues
    • Common technical issues
    • What do I get with a membership?
  • New to rigid heddle weaving? Start here!
    • Never heard of the rigid heddle loom?
    • How to weave neat edges on the rigid heddle loom
    • Rigid heddle weaving
    • Rigid Heddle Weaving Patterns
  • Patterns
  • Subscribe

loom review

Lojan Flex Rigid Heddle Loom Review

by Kelly 4 Comments

Lojan Flex Rigid Heddle Loom Review: My Honest Thoughts

I’m so excited to share my review of the soon to be released Lojan Flex Rigid Heddle Loom! Now that I’ve had some time to weave with it, I have plenty to say about its features, benefits, and what you should know before adding it to your weaving loom collection.

First Impressions & Setup

Right out of the box, I noticed some interesting differences with this loom. One of the first things that caught my attention was the metal warping rod—a great feature held in place by texsolv cords. This keeps the rod steady while warping, making the process easier and more secure. If you haven’t already, I recommend checking out my assembly video before diving into this review, as I explain all the parts in more detail.

The loom also comes with little rubber feet that do a great job of keeping it stable on the table without clamping! I pulled the loom out a little so that the back rubber feet were over the edge of the table, keeping it from moving as I was direct warping. That’s a nice touch for those who prefer to warp without extra setup hassle.

Warping the Flex Loom

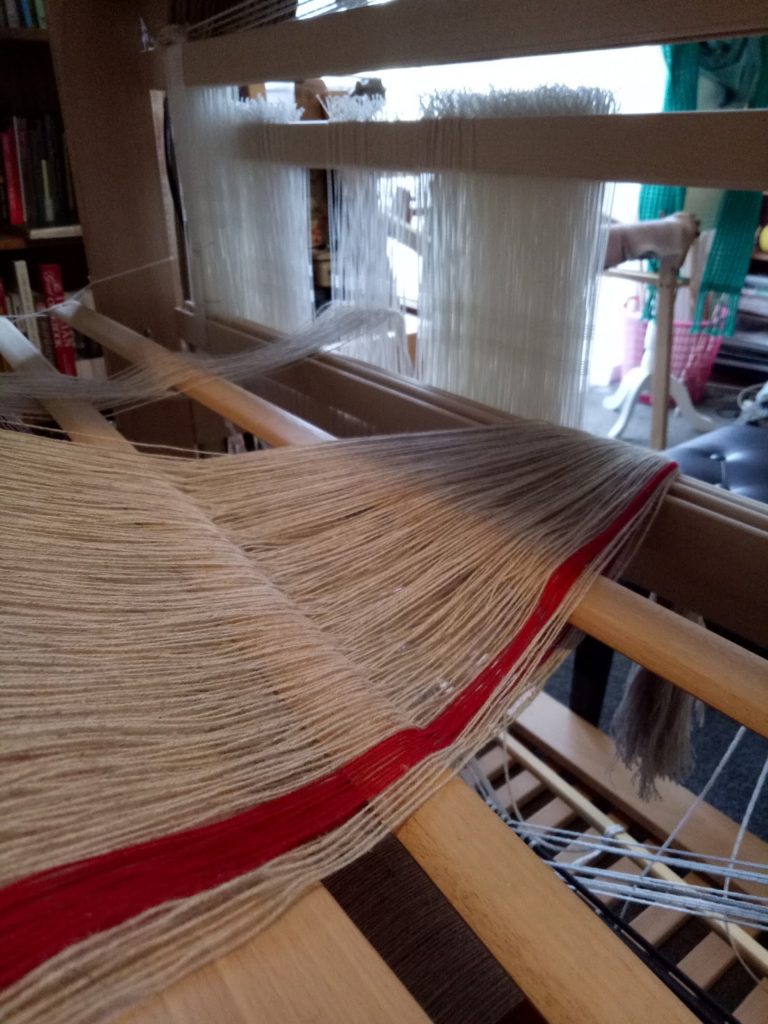
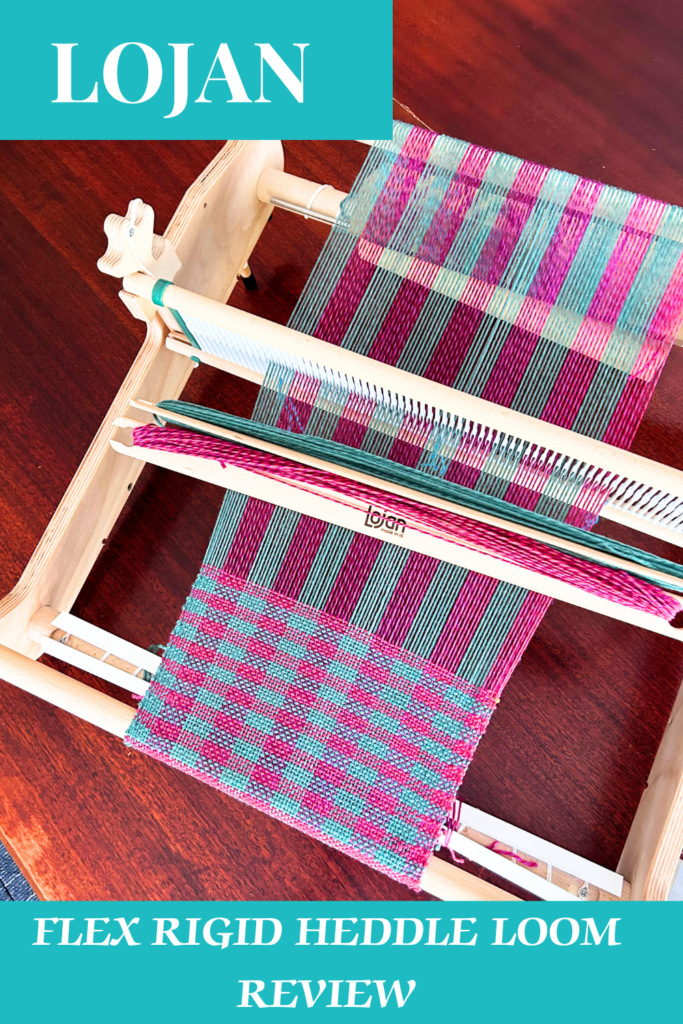
For my first project, I used lovely variegated green wool, alternating with a soft pink. I chose to use direct warping, and I have to say, the process was smooth. One of my favorite warping techniques is using two warping pegs to minimize yarn waste—a little trick I always recommend!

As I started winding on, I noticed that the texsolv cords played another helpful role. When rolling the warp onto the back beam, the cords held the apron rod in place, preventing shifting and ensuring an even tension. When it was time to start weaving, I simply slipped the cords off and let them hang out of the way until next time.

The plastic warp separators that come with the loom are similar in size to traditional cardboard sticks, but a bit more durable. Still, my personal favorite remains brown craft paper, which I use repeatedly for superior warp separation.

Why I Recommend a Stand

Now, let’s talk about comfort. I typically weave with a stand when using a larger loom, and after working with the 50 cm Flex Loom, I highly recommend getting one! Without a stand, I found the weaving angle a bit awkward, making my arms work harder than usual.

Lojan does offer foldable, height adjustable stands, which can be packed away easily. If you’re investing in this loom, I’d suggest grabbing the stand along with it to make your weaving sessions more enjoyable!

Tensioning: A Standout Feature

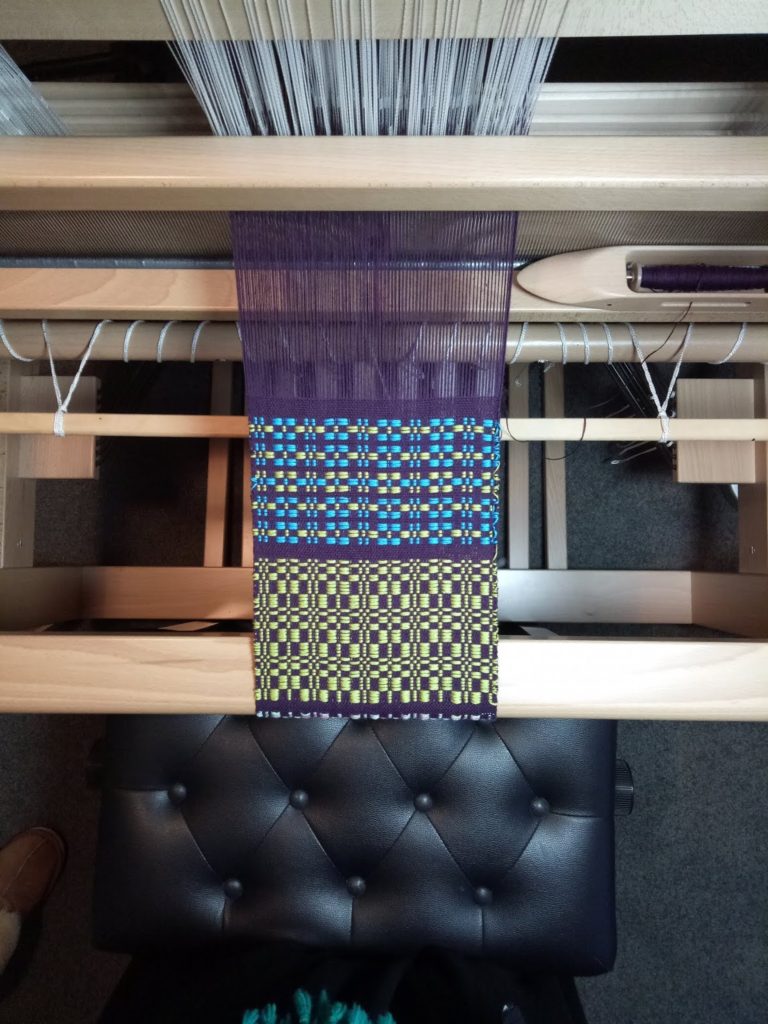
One of the biggest highlights of the Lojan Flex is the tensioning system. Just like their inkle loom, which I also love, the tensioning is simple, seamless, and smooth. The loom has front and back bars in addition to the warp and cloth beams, helping to maintain excellent tension throughout the weaving process.

If you’ve ever struggled with keeping tension even, you’ll appreciate this design. Plus, it’s very user-friendly for those with hand or wrist issues, making adjustments easy without strain.

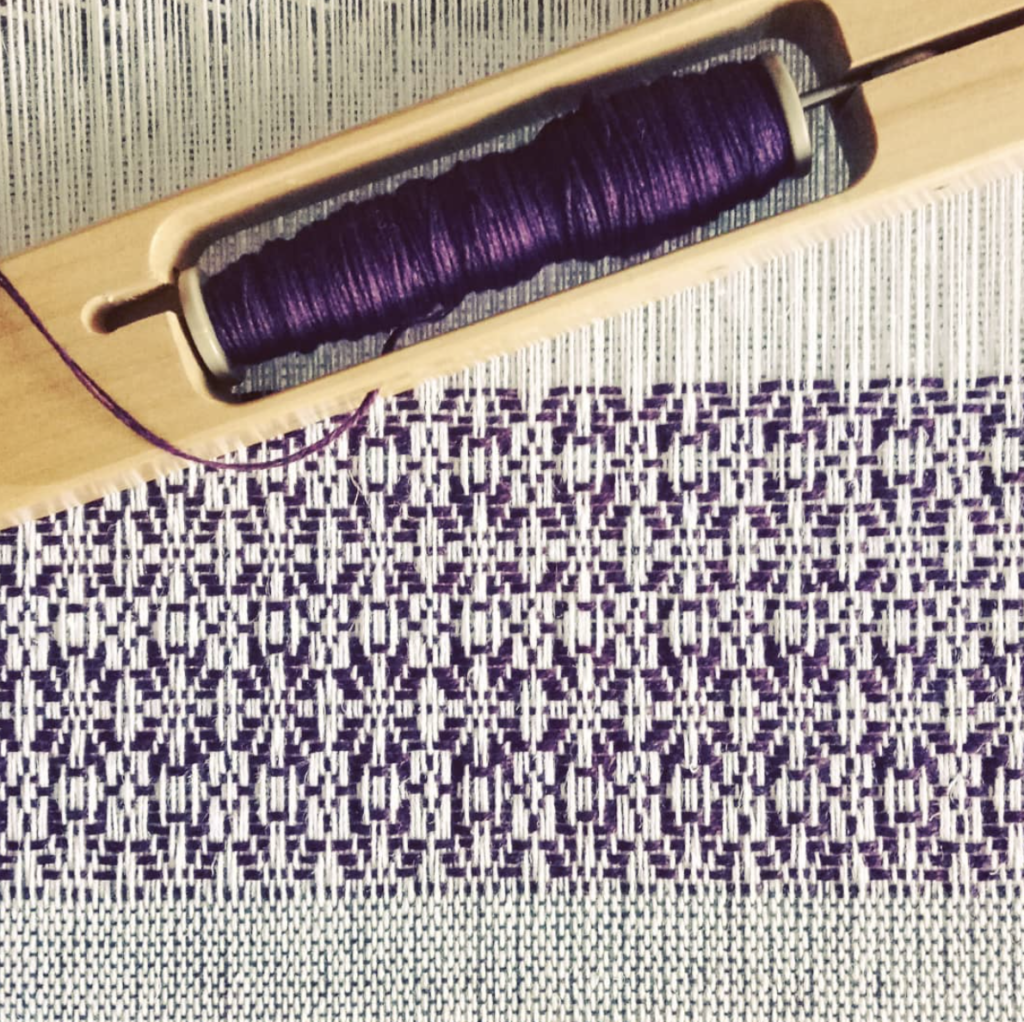
Innovative Rigid Heddle Design

Another unique aspect of this loom is its modular rigid heddle design. Instead of a single, fixed heddle, this loom features individual plastic sections that fit together. This means you can:

  • Mix and match different heddle sizes for varied setts.
  • Swap out sections instead of buying an entirely new rigid heddle.
  • Customize your setup for thick-and-thin weaving with a variety of yarns (similar to a variable dent reed).

I found this to be a super clever feature that adds more options to the weaving experience!

Weaving Experience & Final Thoughts

Initially, I tried weaving with the loom flat on the table, using the extra dowels at the back to create a slight incline. However, I quickly realized that the breast beam and back beam sit quite high, making it a bit tricky to get the right angle without a stand. This reinforced my recommendation—if you’re using the 50 cm size, a stand will make weaving much more comfortable!

Overall, I’m really impressed with the Lojan Flex Rigid Heddle Loom. The smooth tensioning, modular heddle system, and well-thought-out features make it a fantastic option for weavers looking for a high-quality, innovative loom.

The top back beam helps the weaver to achieve a beautifully well ordered and well tensioned warp.

What’s in the box?

Whether you purchase the 30cm or 50cm Flex, you will receive:

  • Loom parts to assemble, including screwdriver for simple assembly (check out my assembly video here)
  • A 7.5 heddle reed and heddle sections
  • 2 stick shuttles
  • Direct warping peg and clamp
  • Heddle hook for threading
  • Warp separators
  • Apron rod metal rods and texsolv cords

Optional extras

  • Stand
  • Additional rigid heddle frames and heddle segments, available in sizes 2.5 dpi – 15 dpi.
  • Pick up sticks
  • Additional warping pegs and stick shuttles

Even more options!

The Flex can be used purely as a rigid heddle loom but it can also be much more than that! Shortly there will be the option to upgrade the regular Flex to either a 4 or 8 shaft loom through the purchase of conversion kits. Reverting back to the rigid heddle loom is quick and easy so you can weave what you want, when you want!

The Flex is available now for pre-order (March 2025). If you’re in Australia you can re-order through me 😉 or if in the US, check them out at the Woolery. If you are interested in the Lojan Inkle Loom I have a review of that here.

Want to see the loom in action? Check out the review video here –

Have any questions about the Flex Loom? Let me know in the comments below! And don’t forget to check out my assembly video for a closer look at how this loom comes together.

Until next time…

Happy weaving! 🎨✨

Filed Under: Lojan products, Rigid heddle weaving, Weaving Tagged With: lojan flex loom, loom review, rigid heddle loom, rigid heddle weaving

Floor Loom Review – David 2 Louet loom

by Kelly 13 Comments

I’ve had a lot of people ask me to do a review of my David 2 by Louet floor loom.

This post is not sponsored or endorsed by Louet, it’s just an honest review for your own information or research.

I have written about this loom and floor looms in general before, and also about what to expect when your loom arrives, but this article gets into the specifics of the Louet David.

If you purchase a new David in 2024 or after, you will be buying the David 3, not the David 2. The David 2 has been retired. But this is still a very useful review as there are only a couple of minor differences between the 2 and 3.

If you are purchasing a used David, it may well be a David 2 and would be exactly like my floor loom.

I must admit that when I was looking for a floor loom to purchase it was kind of hard to get information on this particular loom. All I really had to go on was a little amount of information on the Louet website.

*This post contains affiliate links. Please see my disclosure policy for further information.

I knew that I wanted something compact enough to fit in the smaller space I had available and due to my lack of experience with floor looms at the time, I wasn’t confident that a second hand, possible fixer upper would be a sensible choice.

One of the reasons that I was interested in the David is because I live in Australia and there are somewhat limited choices when it comes to looms and most have to be custom ordered and imported.

The Schacht Baby Wolf was a very strong contender in my decision making because it was more familiar to me and it was easier to find information on it.

To further complicate the issue, I had never woven on a floor loom (true story!)

Through a good deal of googling, I had found an agent in Sydney who could order a David for me. Not only that, she and her husband delivered the loom in person and brought it into my home, even though they are from another state! Amazing customer service!

I will be going over the loom discussing a few different features and then giving you my opinions on the positives and negatives. There are not many negatives, but maybe the things that I’d like you to think about if you’re considering purchasing the same loom.

The first thing that I do love about this loom is the compact size. I’ve had it in a couple of different positions in my studio, and it’s easy to move and fits a variety of spaces. The weaving width is 90cm (35″) which is a good width for many different projects.

You need a certain amount of space at the front and back of the loom for warping – I think a 1 metre clearance at the front and back of the loom is optimal. You can get away with less, but it may be a little cramped.

The next thing I love about this loom is the quality of make. I can’t fault the quality at all, from the wood, the finishing to all of the pieces that go with it, it’s just beautiful quality and design.

My husband actually put it together for me – I’ll admit that because my brain is not very wired for putting things together and following set written instructions, but my husband is very good at that. He didn’t have any trouble following the directions. It did take quite a few hours to put together, but that is to be expected with a loom of this size and type.

The David loom comes with texsolv heddles and cords. I personally really love texsolv as it is so light and quiet. Metal heddles can be heavy and noisy, but this is a personal preference and not to suggest that one is better than the other.

Treadling on the David is very light and easy. It is not the least bit clunky when treadling because of the spring system and it’s easy on your body. Speaking of treadling, I like the texsolv tie up system which is simple to learn to use and quite quick to tie up. There is no real “tying” up, you just pop the texsolv cord holes over the treadle screw heads and away you go. The texsolv cording is strong so you don’t have to worry about breakage while treadling.

The David has a gliding beater, meaning that your beater is positioned on metal rods. It “glides” back and forth on the rods, so it is level and steady. I’ll admit that it took me a bit of getting used to. The Ashford table loom I had been weaving on previously had an overhead beater, which is loose and swinging.

The gliding beater is not as easy to use in some ways, as it is rigid and set on the tracks of the metal rods. Now that I’ve been using it for a number of years, I am used to it and have found ways to weave most effectively with it. I do think that once you’re accustomed to it, it does result overall in a more even beat.

One thing that really helped was using a small amount of lubrication on the rods. I couldn’t find much information on whether or not this was a good idea, but to me the beater was feeling quite stiff and not so enjoyable to weave with.

So, I applied a very small amount of lubricant with a dry, clean rag. The difference was amazing! I now usually lubricate between projects. The beater now really does feel like it’s gliding. Just be sure to use a non silicon lubricant that won’t build up a residue on the metal rods. I use the Australian made Inox lubricant spray.

Always apply the lubricant to the rag, not directly to the metal.

Another way to work successfully with the gliding beater is to find the right warp tension. Too tight and the beater doesn’t glide as well. Just like on any loom, there is a sweet spot for tension that you discover through experience. I am careful when I advance my warp to advance to the spot that feels right for me – not too far towards the front beam or, once again, the beater will struggle and the look of your weaving will suffer.

I advance in small increments and adjust gently towards a firm tension. I hope that makes sense!

This loom came with a 10 dent reed. I haven’t purchased another reed at this point due to the expense and lack of space to be able to store yet another piece of weaving equipment. When I need to use a different sett, I just adjust the number of threads in my reed to accommodate. I very often weave at 20 epi, so I simply double my ends in the reed.

The reed and beater are removable for warping and threading, as is the front breast beam. This is really handy when you get to the threading stage, as you can get in really close to the heddles to thread which saves my back from days of pain afterwards!

One feature that I’ve found particularly great is the ability to put add or remove heddles to the shafts after warping. With my table loom I have to collapse the castle (the upright part of the loom) and tilt it in order to adjust heddle numbers. Not so practical.

On the David, if I have miscalculated the heddles for my project and I need a few extra all I have to do is unhook the texsolv cords on the top and bottom of the shaft, slide the new heddles on and hook the cords back on.

Another feature I particularly like about this loom is the friction brake. I can be weaving away and when I’m ready to advance my warp all I have to do is lean over the side and pull up the friction brake to release the warp tension. Then I use a handle also on the right hand side to advance my warp forwards.

Louet looms have a built in raddle, which is a unique feature. It means that instead of taking your warp off the warping board and then taking it to a table to lay into a raddle, then tying the raddle onto the loom to begin warping, you just take the warp from the warping board directly to the loom. When you wind on the warp, you can then tension the warp over the top of the loom, which can be quite handy if you are using weights to assist with tensioning.

I usually have to break up my time placing threads in the raddle, as standing for a longer amount of time wreaks havoc on my back!

I hope to eventually purchase a sectional warp beam for my David, as I prefer to warp floor looms with my Sawyer Bee Warping Square.

You receive a pair of lease sticks and some wooden separator sticks with the loom. I have devised my own methods for using the lease sticks, as initially I found it way too fiddle trying to deal with the sticks while warping and threading. I didn’t have the extra pair of hands to hold the sticks steady, so I now use stretchy bands (like the Ashford bands that they call “helping hands”) and these make a huge difference. I also like to use metal rings that open and close through the holes in the ends of the sticks to help keep them together and hold them steady.

I use the wooden warp separators mostly at the front of the loom as I advance my warp. At the back I use a roll of brown craft paper which does an excellent job.

I feel that I have a new appreciation for my David loom since purchasing a much larger floor loom. The David is simple to dress and weave on and so light to treadle.

Those are all the basics of the loom, I could definitely talk about other features but this article is already getting long!

Now, you may be wondering what the cost of this loom is?

Bear in mind that I bought this loom a number of years ago now and inflation is crazy.

At the time of purchase, my loom cost around $4000AUD. That included the cost of importing. That price does not include the extras I needed such as boat shuttles, extra heddles, weaving bench etc.

There are also optional extras available like an extra cloth beam (for longer warps), sectional beam and a Louet weaving bench. I don’t have any of these. I use a piano stool as a weaving bench, it’s much more affordable.

Revolution Fibers in the US list a current price from $4,770USD (at the time of writing this article).

In Australia, you can purchase from Thread Collective at a current price of $6,780AUD.

These prices don’t include shipping and can vary according to the rise and fall of the Australian dollar.

If you would like to know even more about this loom, I have a number of videos that will interest you.

This is my first video review of the Louet David which I filmed a few years ago. You get to see the parts of the loom, although some of the information is different to this article as my opinions may have changed over time:

I also have a demonstration to show how quiet this loom is:

And a fun little video that I made not too long after I purchased the loom. It’s nice for me to look back and see how much faster I weave now!

I hope this article has been informative and interesting for you! If you have any questions, please leave a comment below, I love to hear from you 😊

Until next time…

Happy Weaving!

Filed Under: 8 shaft weaving, Floor Loom Weaving, Weaving Tagged With: floor loom weaving, loom review, louetdavid

Primary Sidebar

Categories

Archives

Meta

  • Log in
  • Entries feed
  • Comments feed
  • WordPress.org

Copyright © 2025 Kelly Casanova Weaving Lessons on the Foodie Pro Theme