• Skip to main content
  • Skip to primary sidebar

Kelly Casanova Weaving Lessons

  • Hi! I’m Kelly!
    • Disclosure
  • Online Weaving School Class Index
    • Common account issues
    • Common technical issues
    • What do I get with a membership?
  • New to rigid heddle weaving? Start here!
    • Never heard of the rigid heddle loom?
    • How to weave neat edges on the rigid heddle loom
    • Rigid heddle weaving
    • Rigid Heddle Weaving Patterns
  • Patterns
  • Subscribe

8 shaft weaving

Why Not All Towels Are the Same: Weaving Kitchen, Hand & Bath Towels

by Kelly 8 Comments

I find that towels are one of the most satisfying things to weave. They are practical, gift-worthy, and so customisable. If you’ve ever wondered how to weave towels that are absorbent, durable and enjoyable to use, this guide will walk you through what you need to know.

Not all towels are created equal. A kitchen towel has different demands to a hand towel, and a bath towel is a whole other level again.

In this article, I’ll walk you through the three main types of towels you can weave – kitchen towels, hand towels and bath towels. We will talk about:

  • suitable yarns for each
  • suitable loom types
  • weave structure considerations
  • and links to patterns and resources if you want a proven starting point

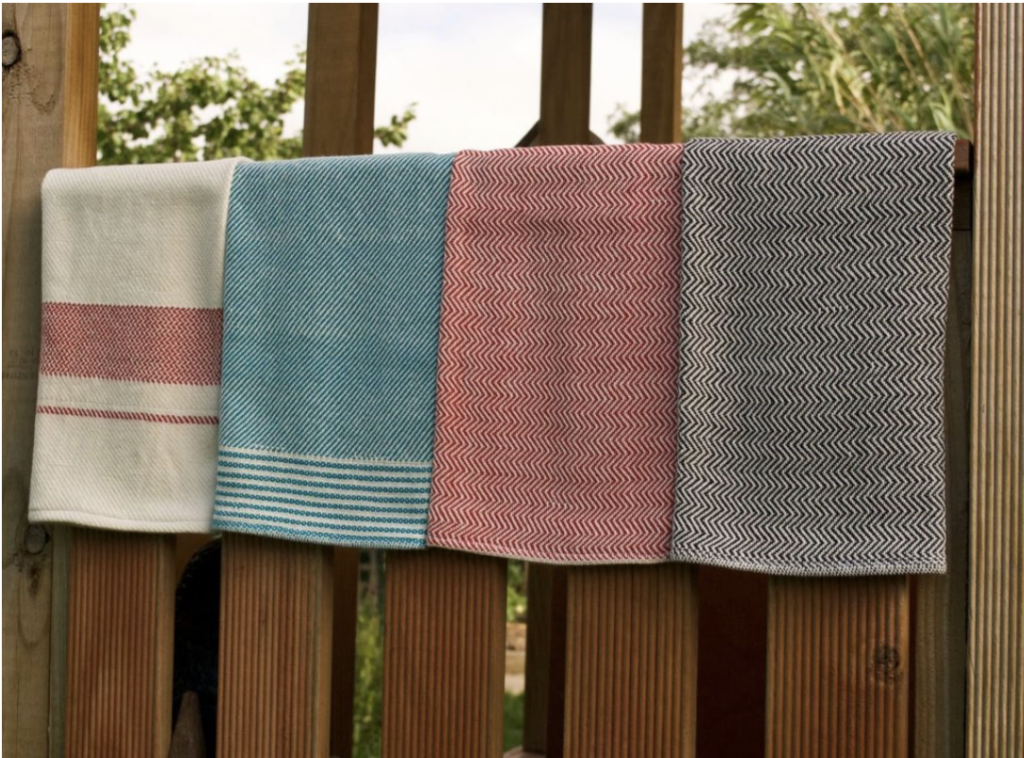
1. Kitchen Towels (Tea Towels)

Kitchen towels (we call them tea towels in Australia!) are usually the first towels handweavers make, and they’re an excellent place to start if you’re learning how to weave towels.

Kitchen towels are such a great place to start. They’re quick to weave, highly practical, and a fantastic way to experiment with colour, structure and yarns.

What a kitchen towel needs to do:

  • Be highly absorbent
  • Dry quickly
  • Stand up to frequent washing
  • Feel pleasant but not fluffy

Best yarns for kitchen towels (absorbent & durable)

  • Cotton (8/2 or 10/2 is ideal)
  • Cotton-linen blends (I love 8/2 cottolin for kitchen towels)
  • Linen (beautiful, but better for experienced weavers)

Avoid wool or acrylic – they simply don’t absorb well enough. They will repel, rather than absorb moisture.

I have a more detailed article about which cotton to use for kitchen towels here.

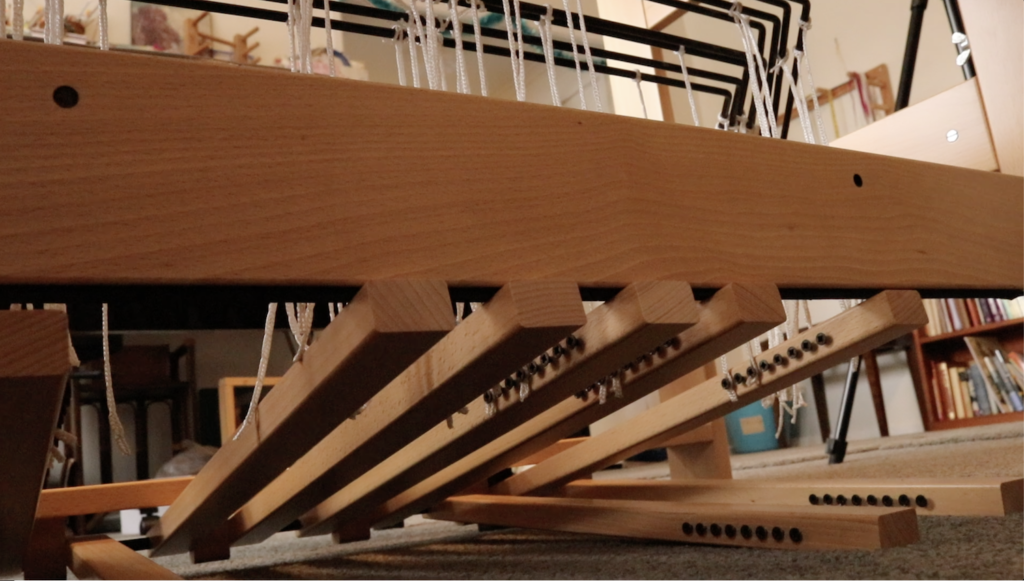
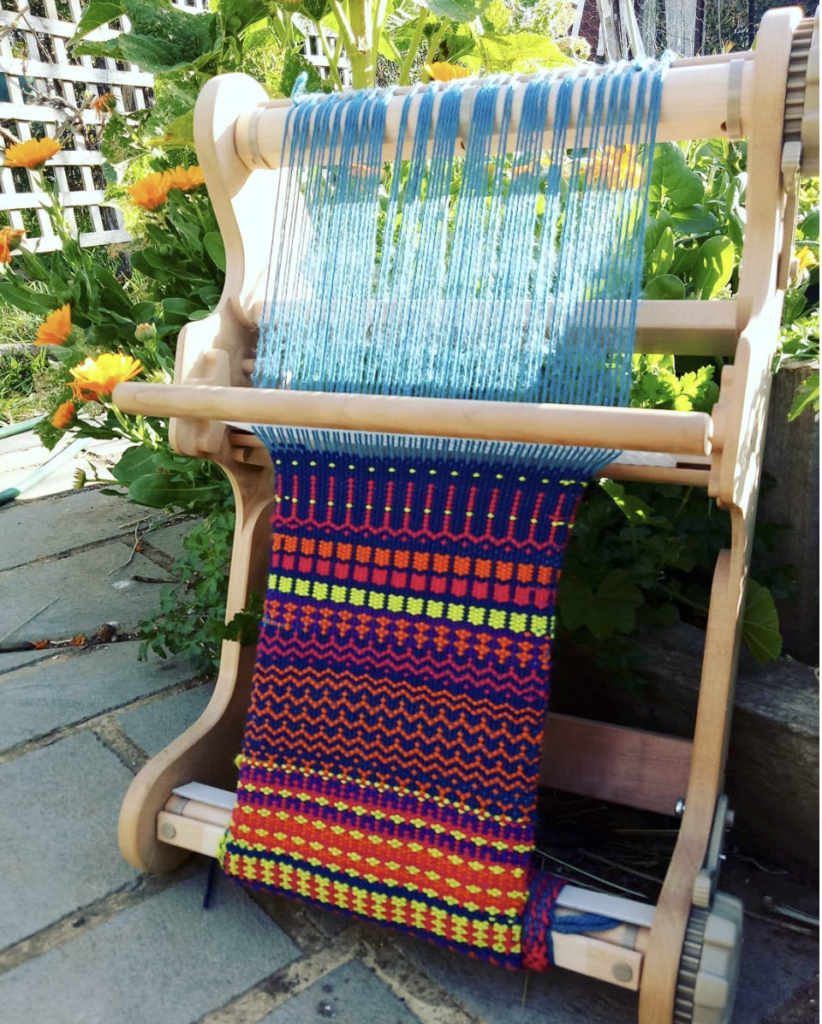
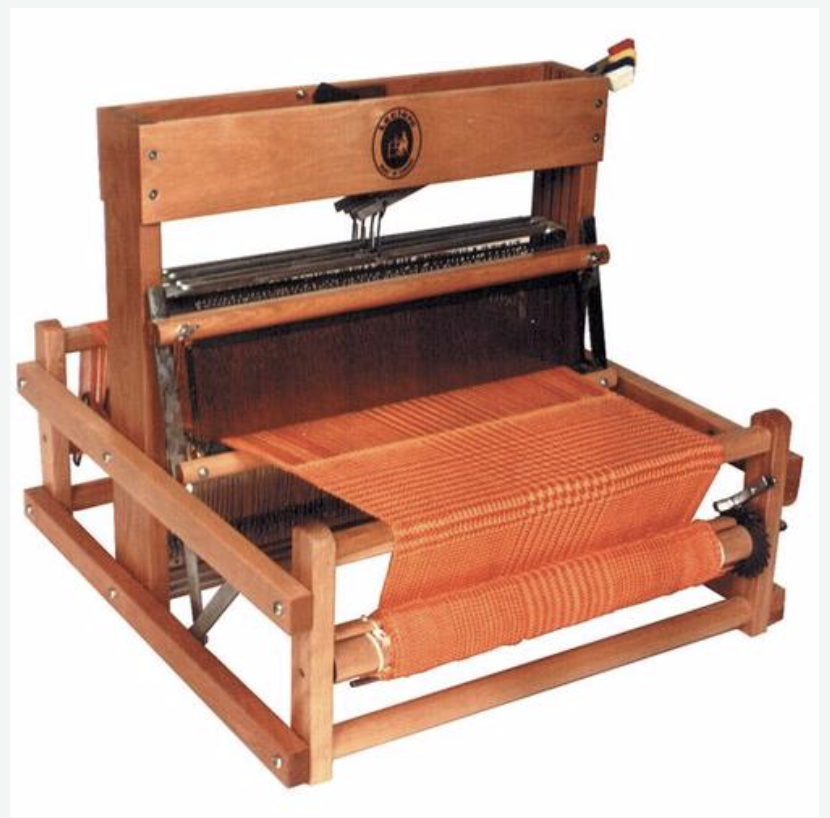
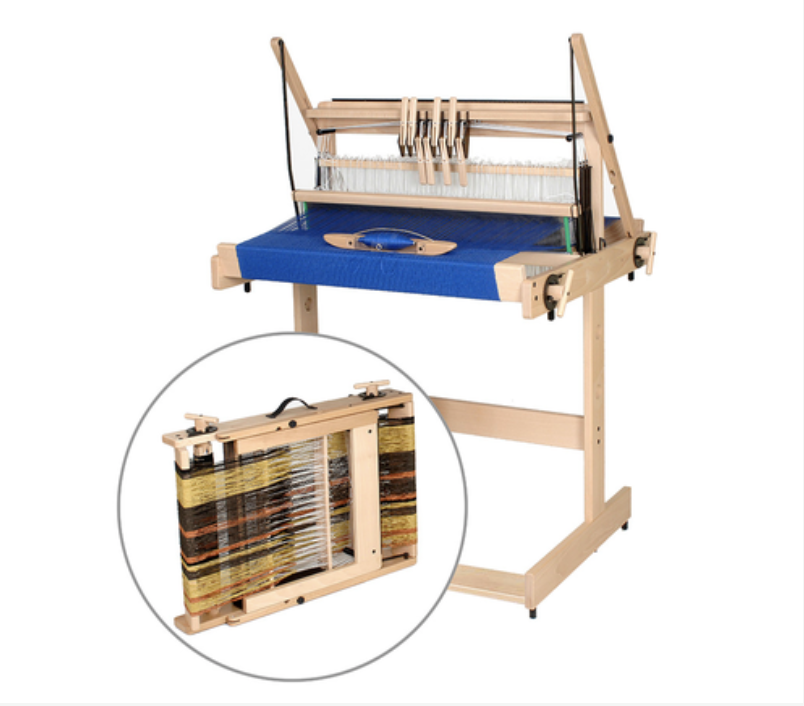
Best looms for weaving kitchen towels

  • Rigid heddle looms (perfect for beginners)
  • Table looms
  • Floor looms

Kitchen towels are very forgiving and work beautifully on a variety of looms.

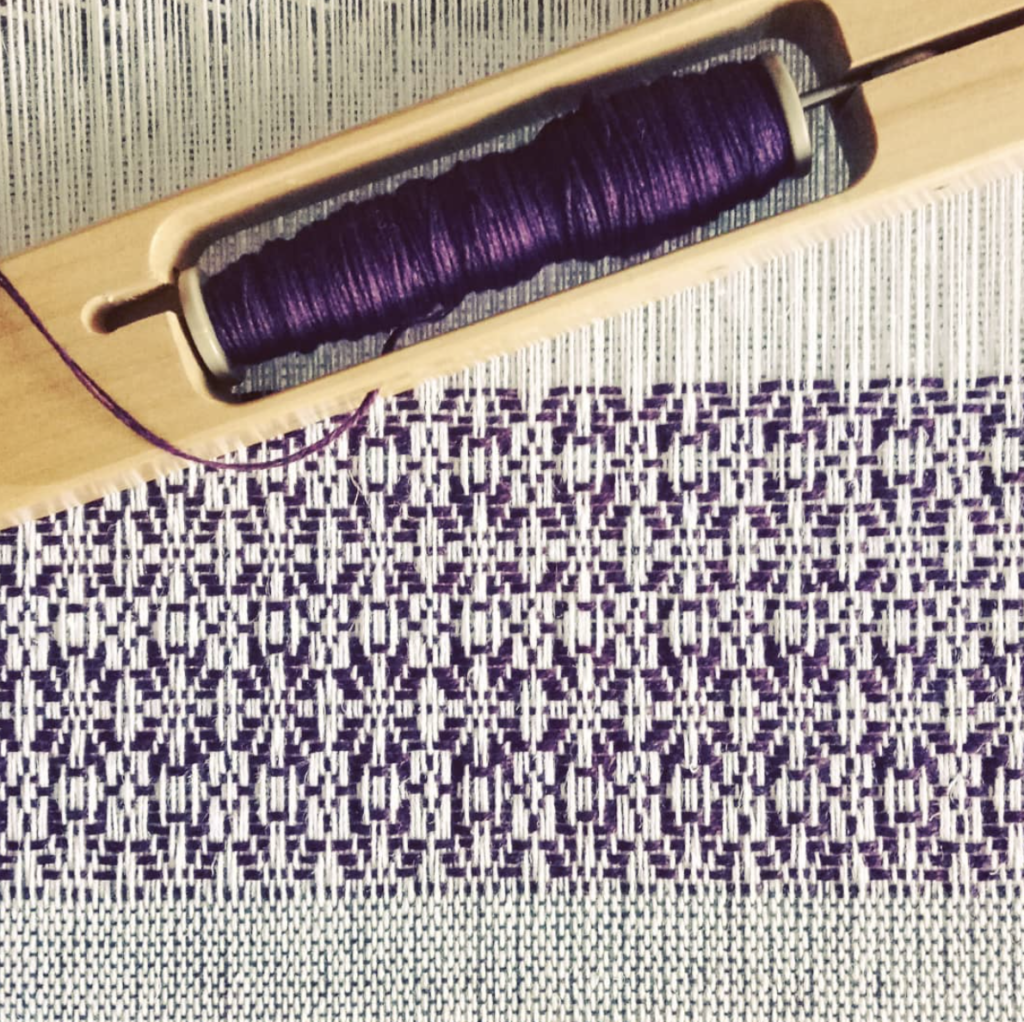
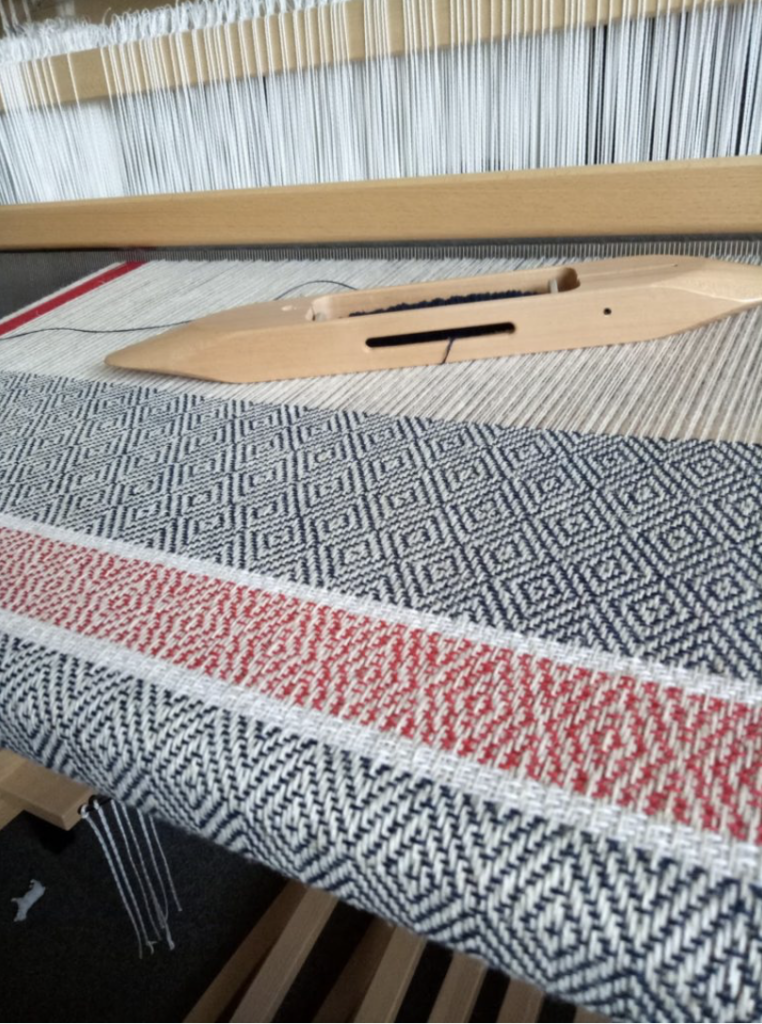
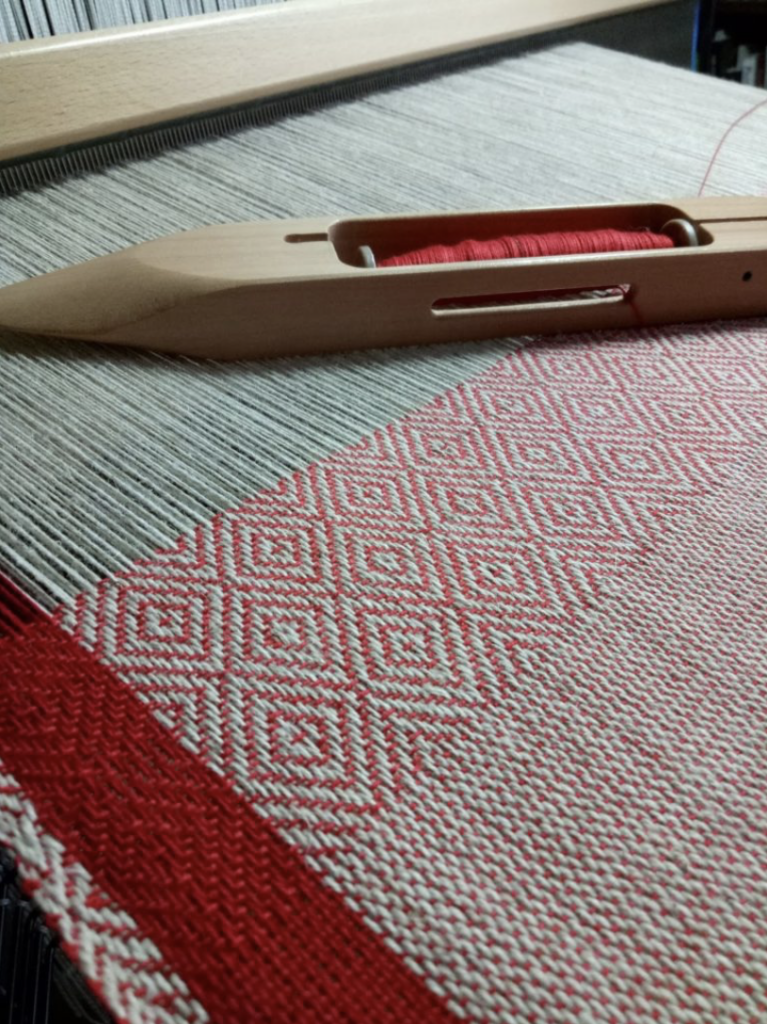
Best weave structures for kitchen towels

  • Plain weave (simple and effective)
  • Waffle weave (especially absorbent)
  • Simple twills
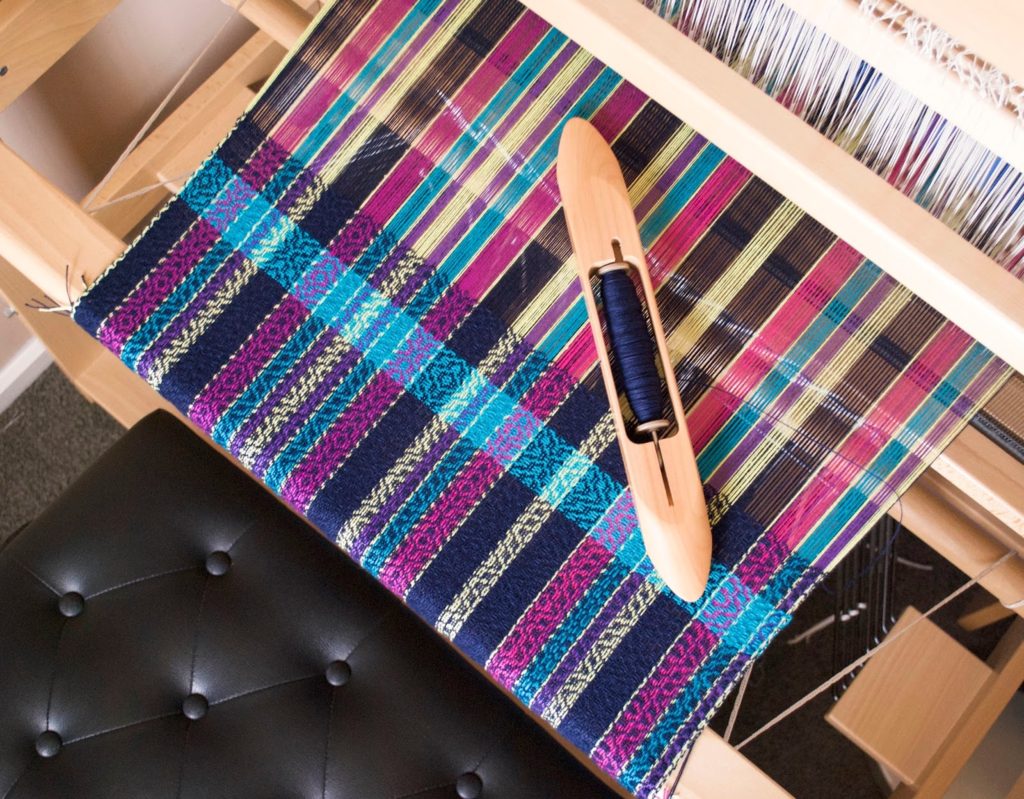
  • A combination of structures for a beautiful, classic look like these
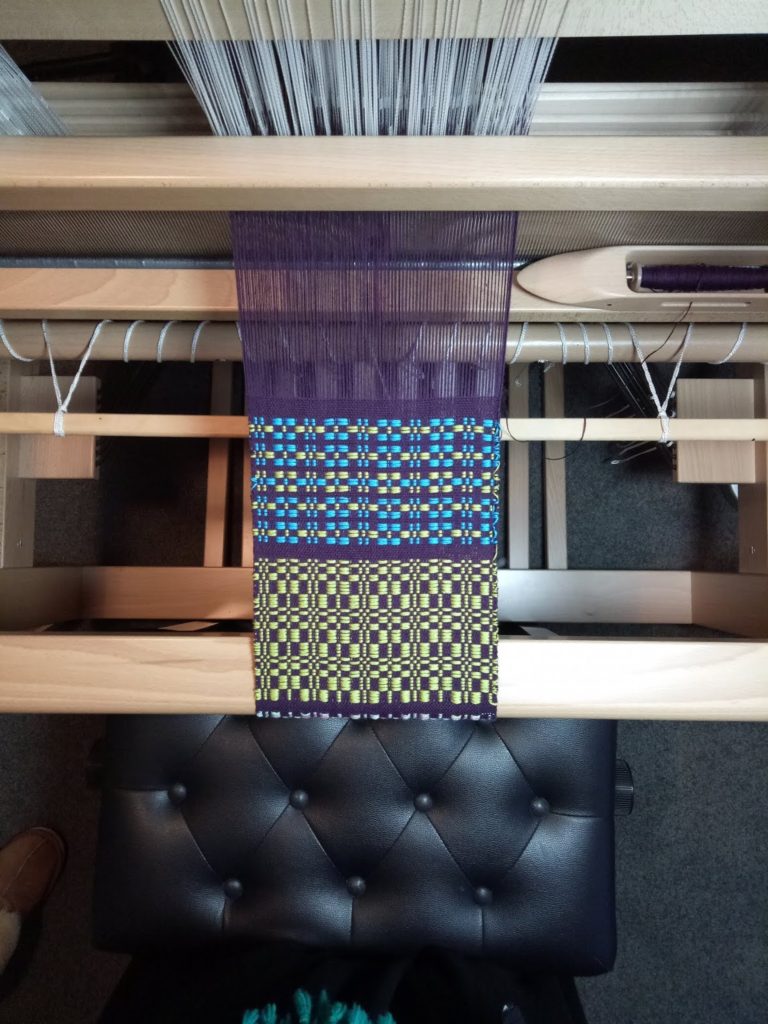
  • Summer and Winter actually makes beautiful towels

2. Hand Towels

Hand towels bridge the gap between kitchen towels and bath towels. They need to be practical, but they’re also something you see and touch every day in the bathroom or kitchen.

Hand towels sit somewhere between kitchen towels and bath towels – they need to be absorbent, but also soft and attractive. They are usually thicker in weight and larger in size than a kitchen towel.

What a hand towel needs to do

  • Absorb water efficiently
  • Feel good against the skin
  • Look nice hanging in a bathroom or kitchen

Best yarns for weaving hand towels

  • 8/4 cotton (will weave a thicker fabric than 8/2 cotton)
  • Cottolin (cotton/linen blend – once again a heavier weight is preferable)
  • Knitting cotton
  • Cotton blends (choose natural fibres)

You can afford to prioritise softness and loftiness here more than with kitchen towels.

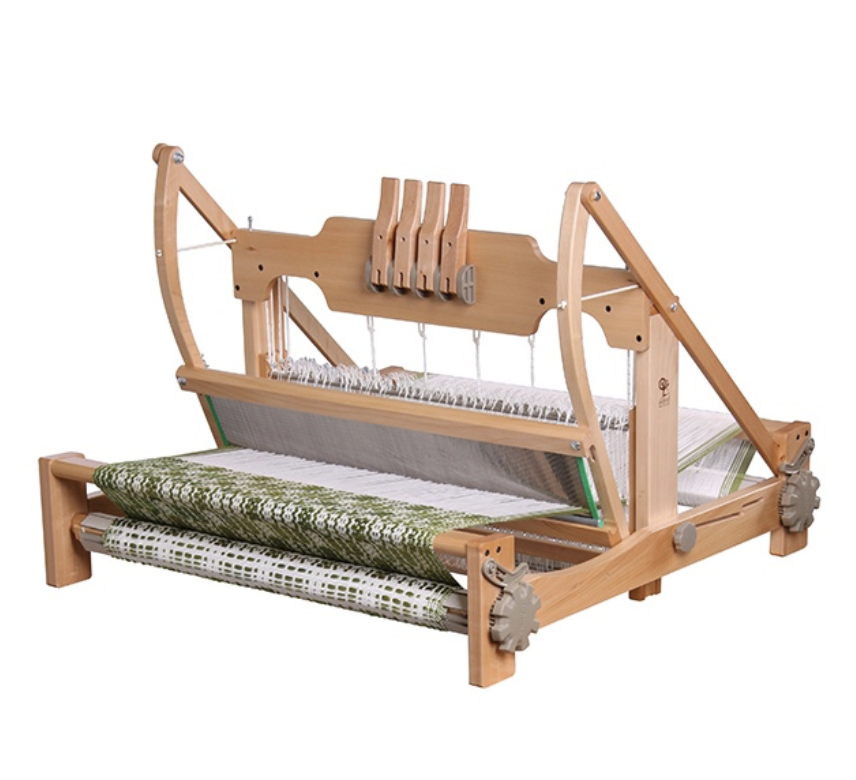
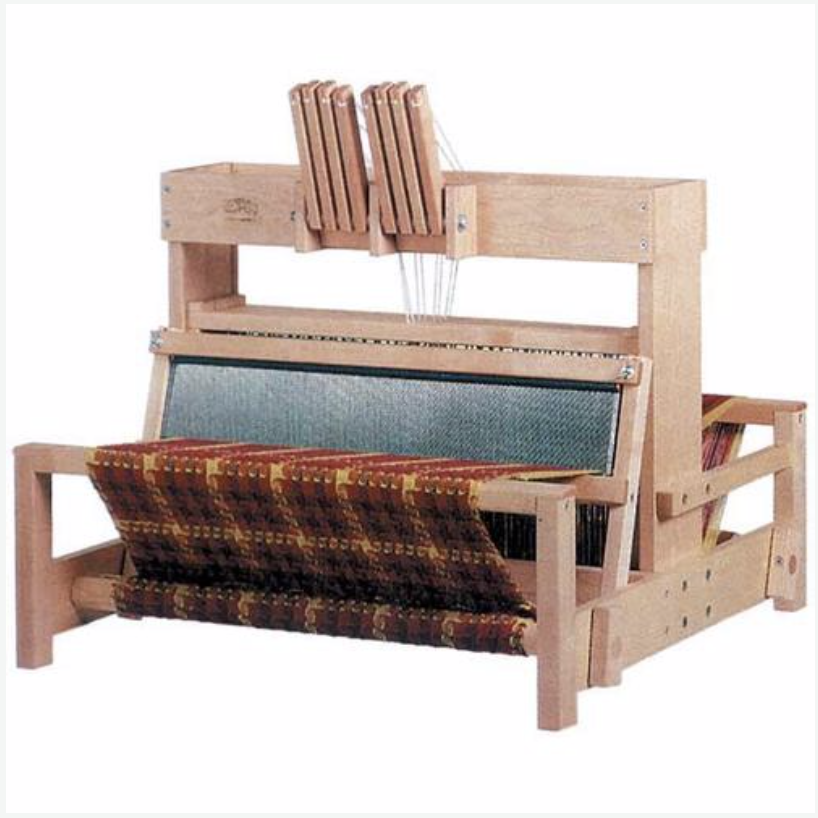
Best looms for weaving hand towels

  • Rigid heddle looms (with slightly wider widths)
  • Table looms
  • Floor looms

If weaving on a rigid heddle loom, consider using pick up sticks or two heddles to allow for more interesting structures.

Best weave structures for hand towels

  • Twills
  • Waffle weave
  • Honeycomb
  • Subtle textured patterns

3. Bath Towels

Bath towels are the most advanced towel project for handweavers because they are a large size and may require a more significant time investment if using a technique like loop pile (keep reading if that piques your interest!)

Bath towels are the most ambitious towel project, but can be very rewarding.

What a bath towel needs to do

  • Be very absorbent
  • Feel soft against the skin
  • Be strong enough for heavy use
  • Have good drape
  • Be regular wash friendly

Best yarns for weaving bath towels

  • Fine cotton (8/2 or finer)
  • Unmercerised cotton for maximum absorbency
  • Cotton/bamboo blends for softness
  • Other plant fibres can also be used successfully, like hemp, for example.

Bath towels usually require more yarn and more weaving time, so quality matters.

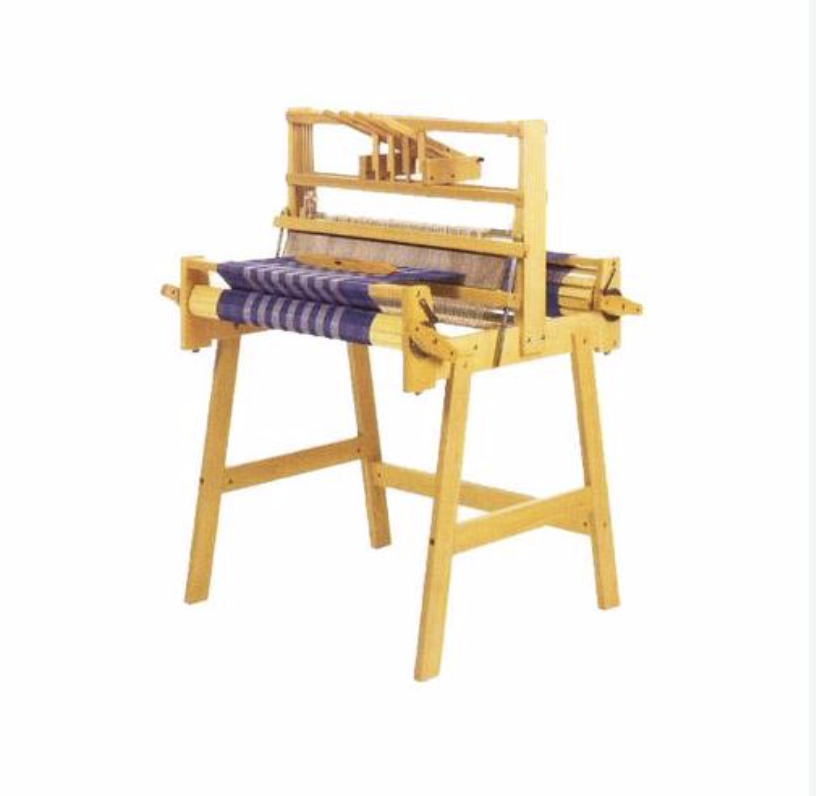
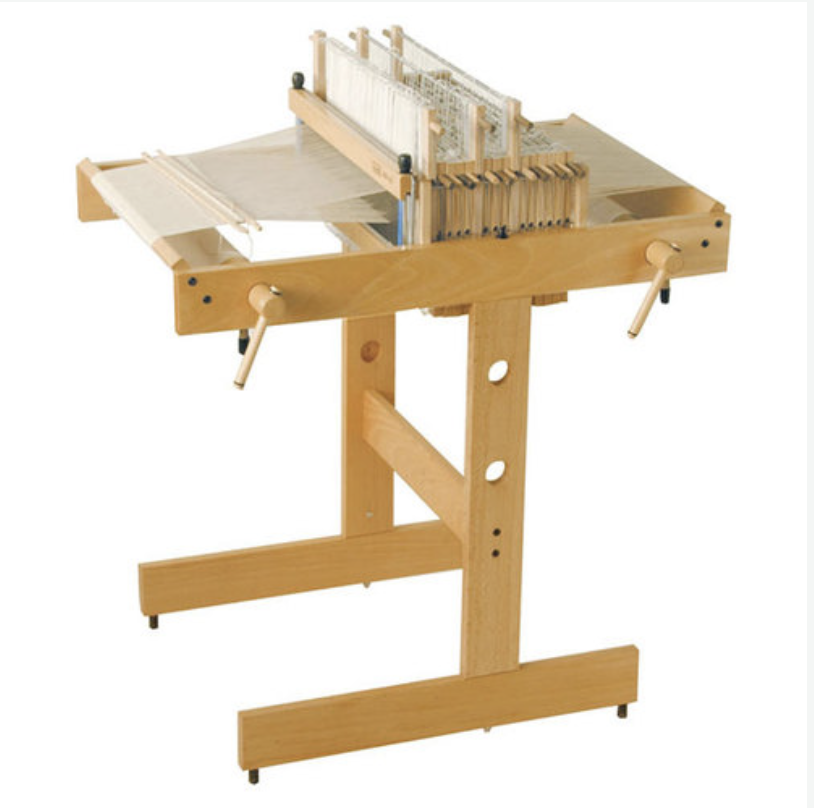
Best looms for weaving bath towels

  • Floor looms (ideal)
  • Large table looms
  • Large rigid heddle looms

While bath towels can be woven on rigid heddle looms, width limitations often mean compromises or seaming. This won’t be an issue if your RH loom is 32″ or larger.

Best weave structures for bath towels

  • Waffle weave (classic bath towel structure)
  • Twill variations
  • Textured blocks
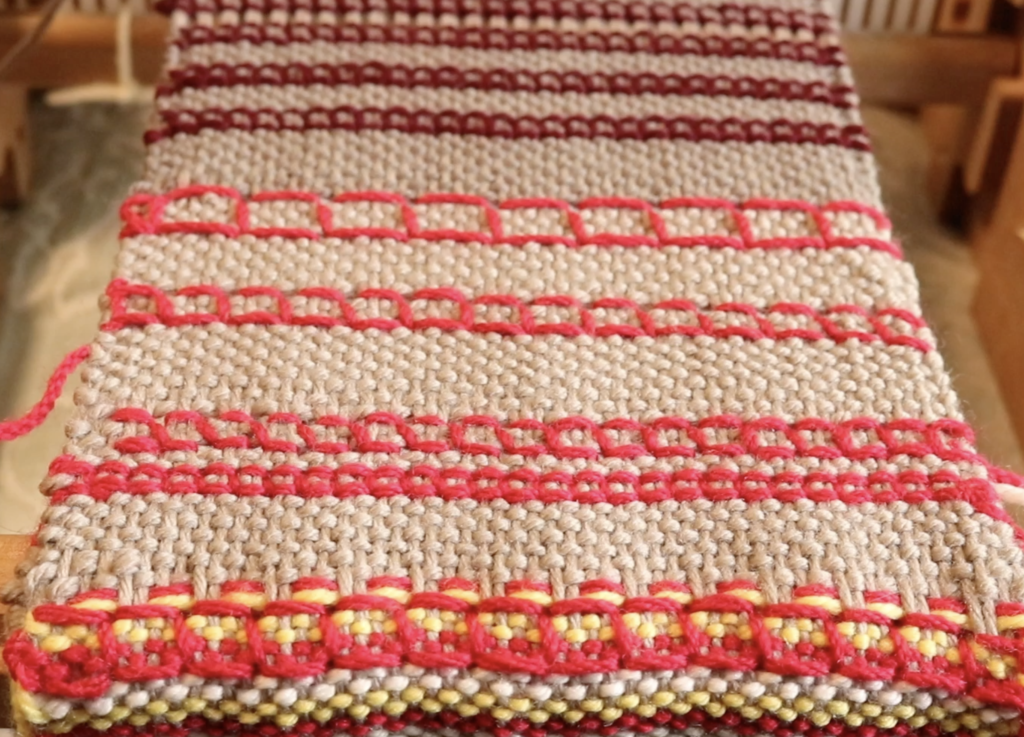
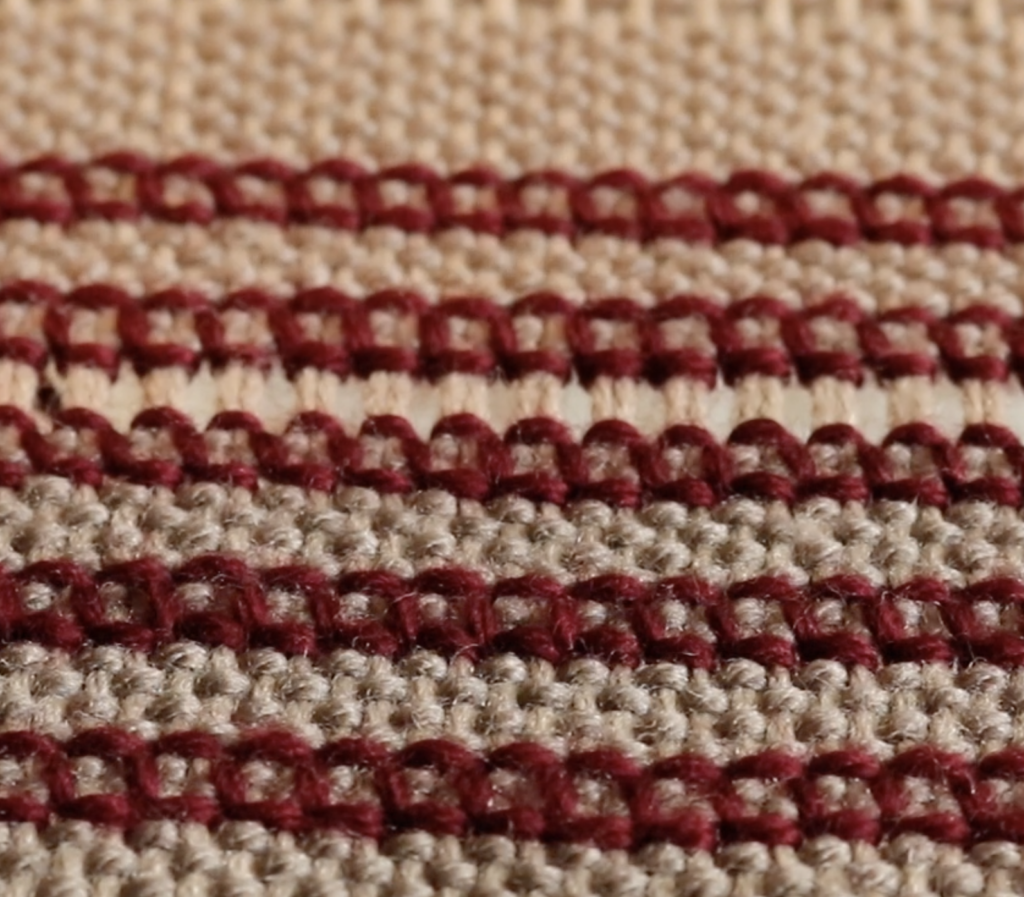
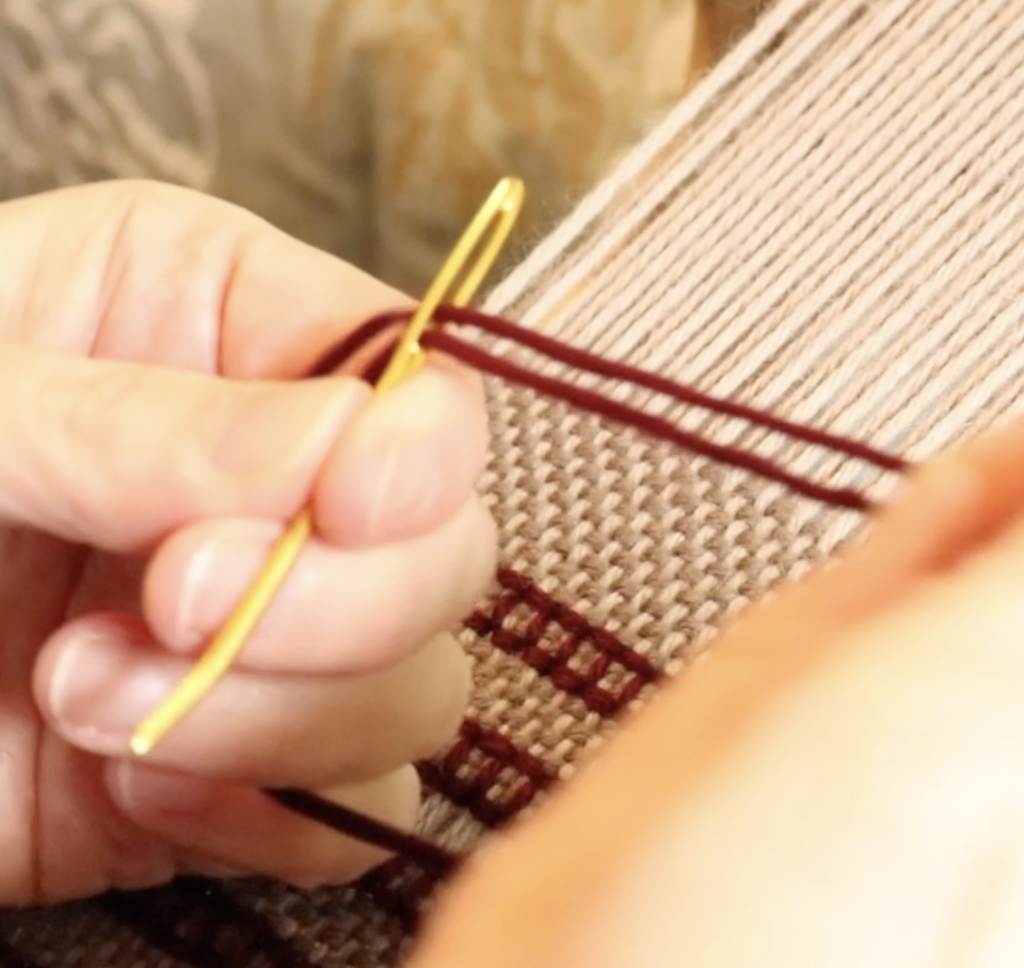
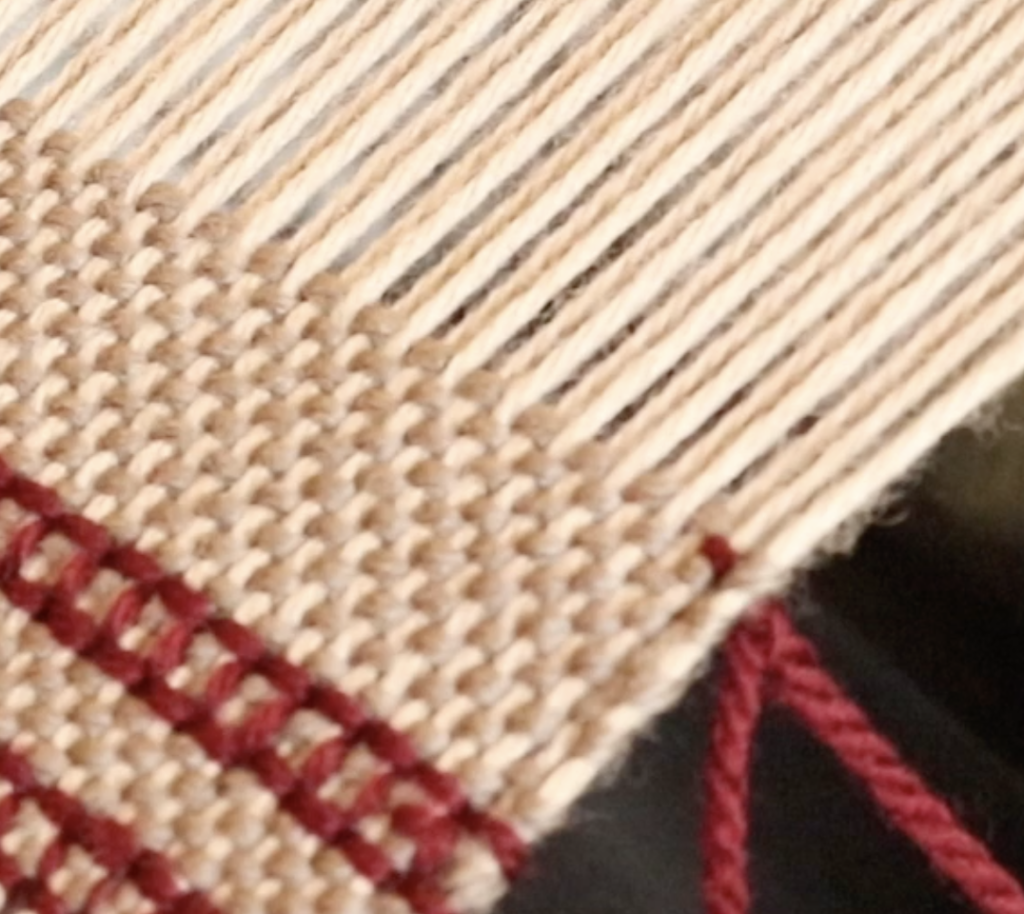
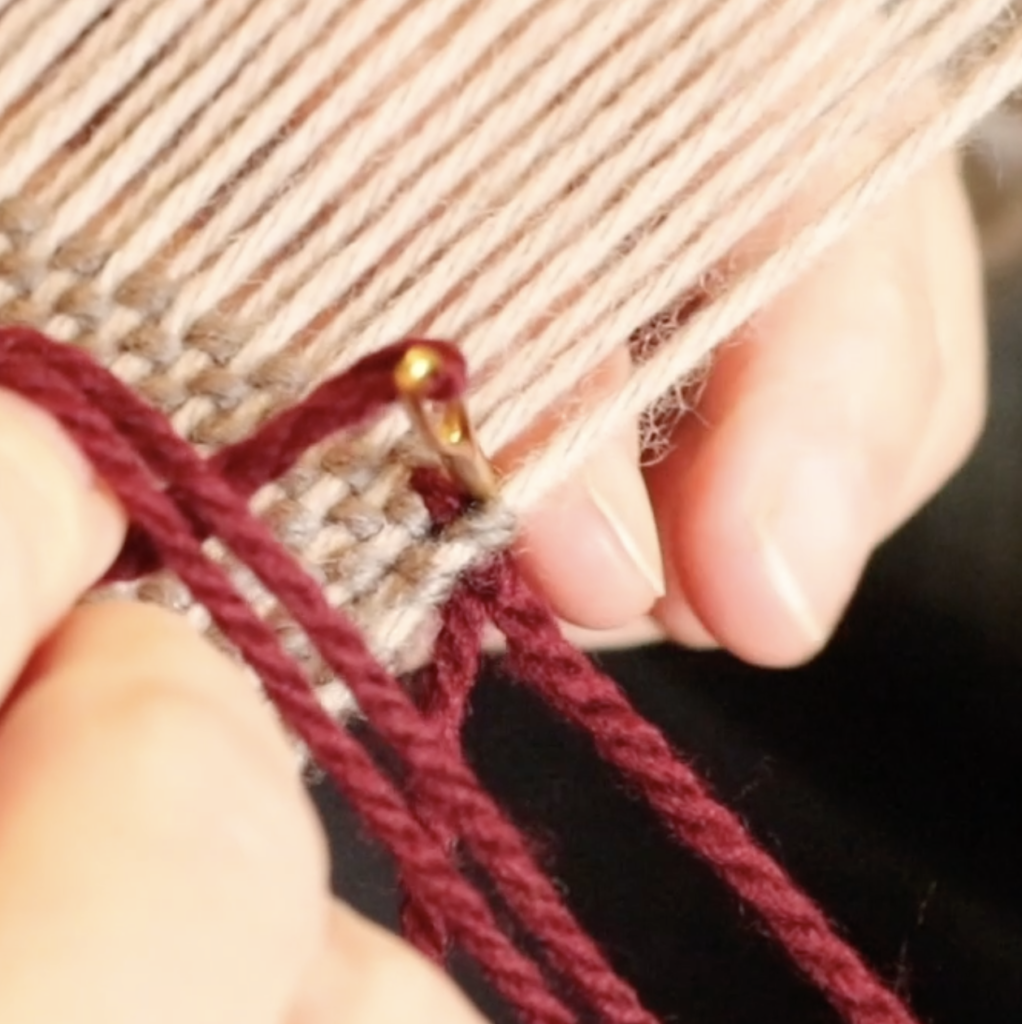
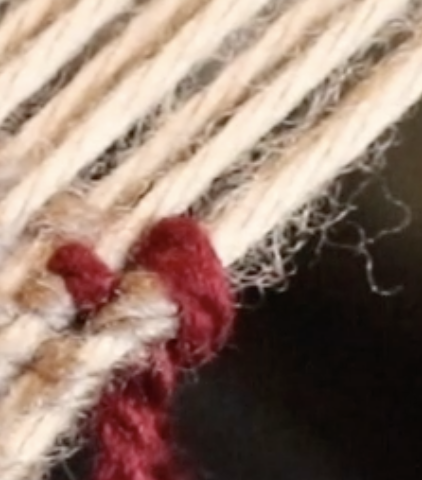
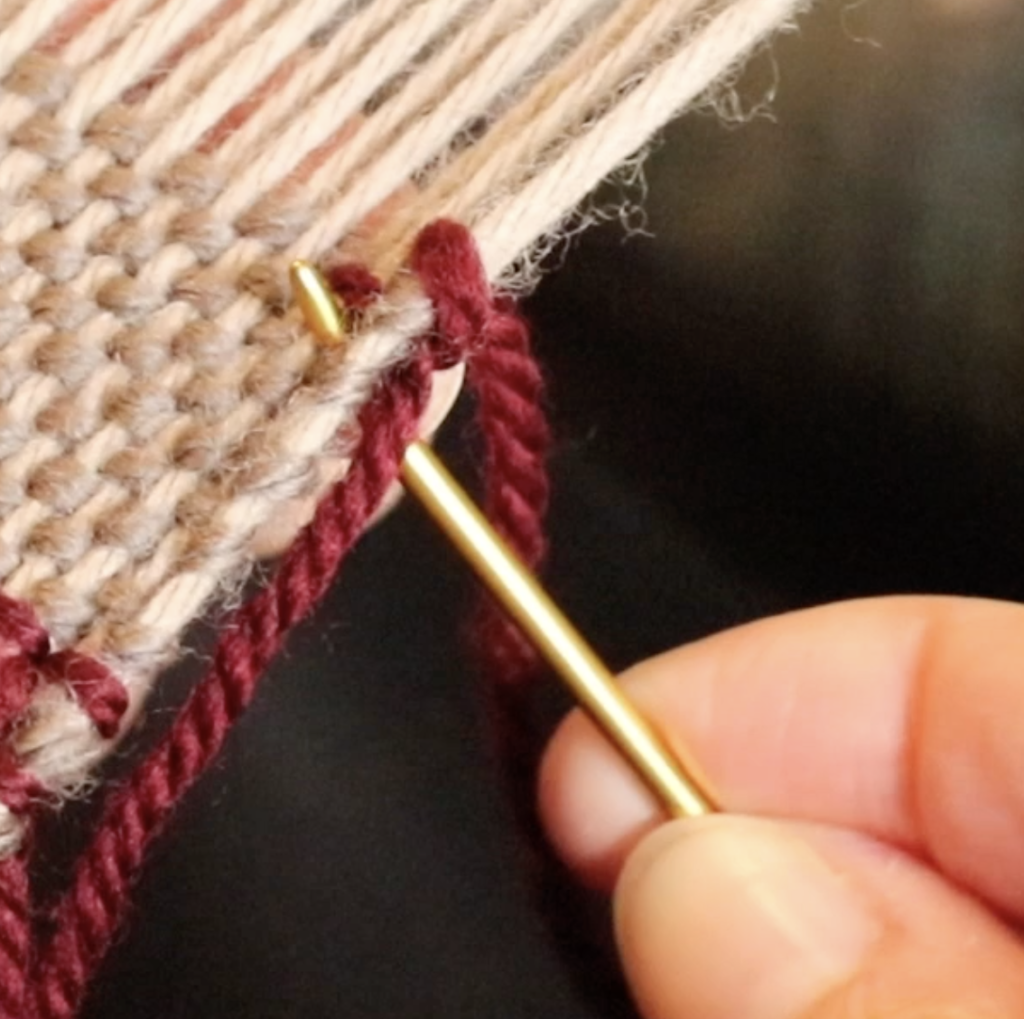
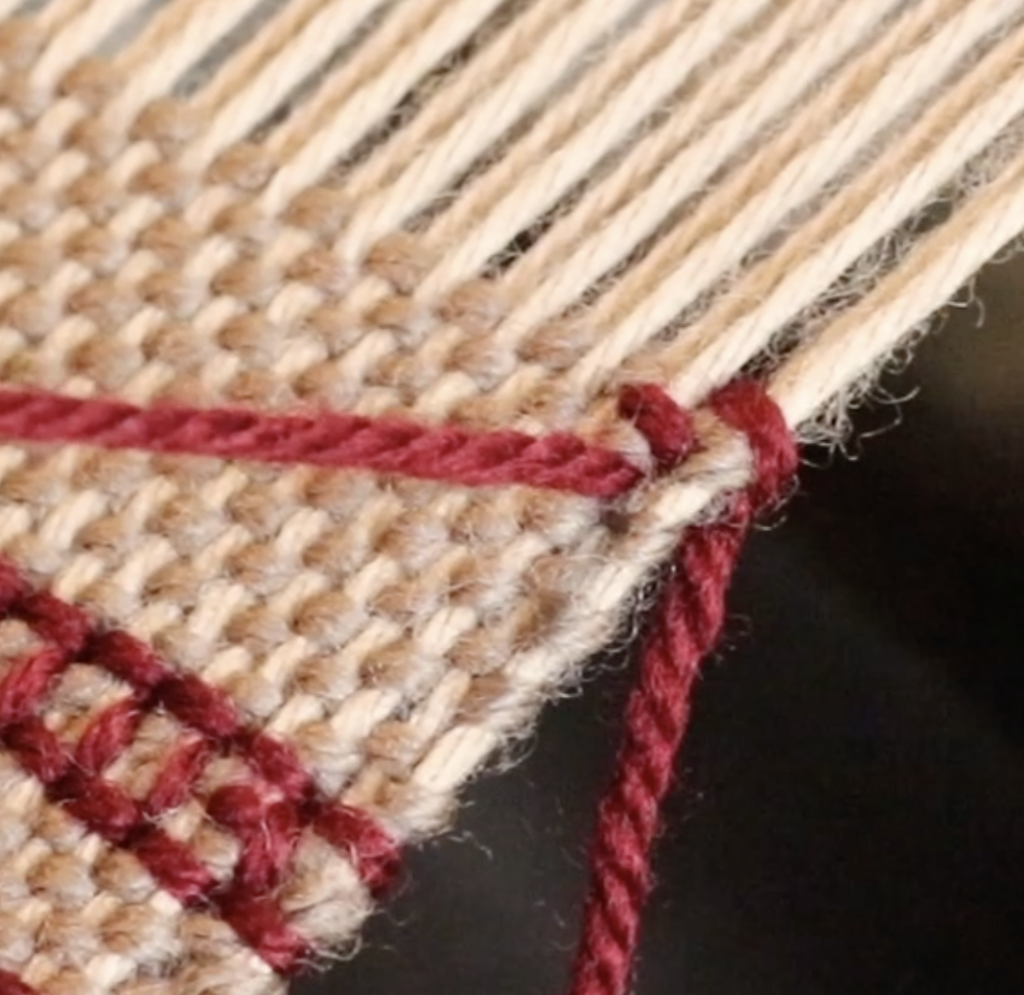
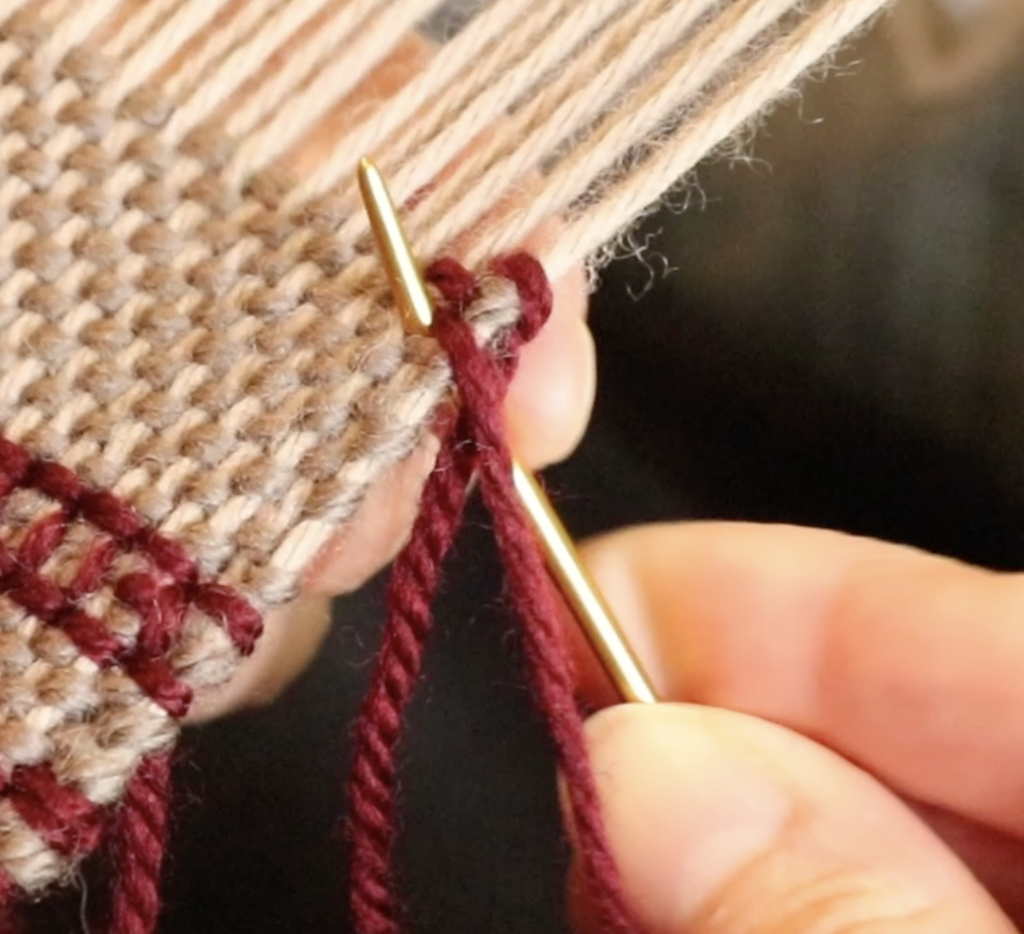
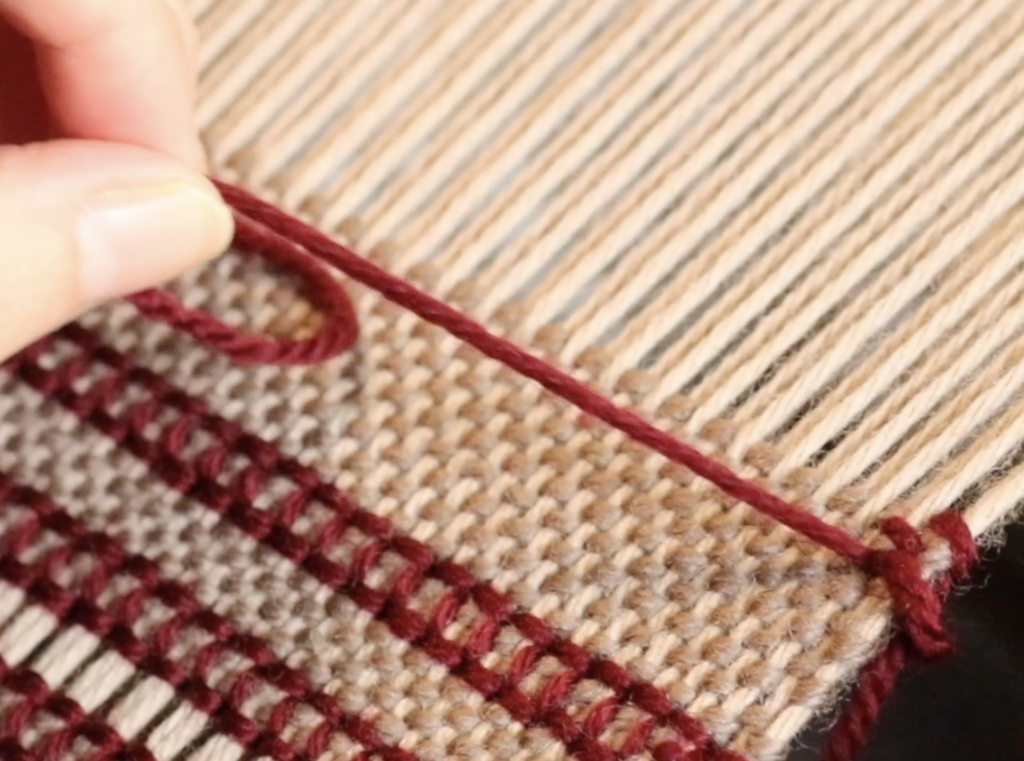
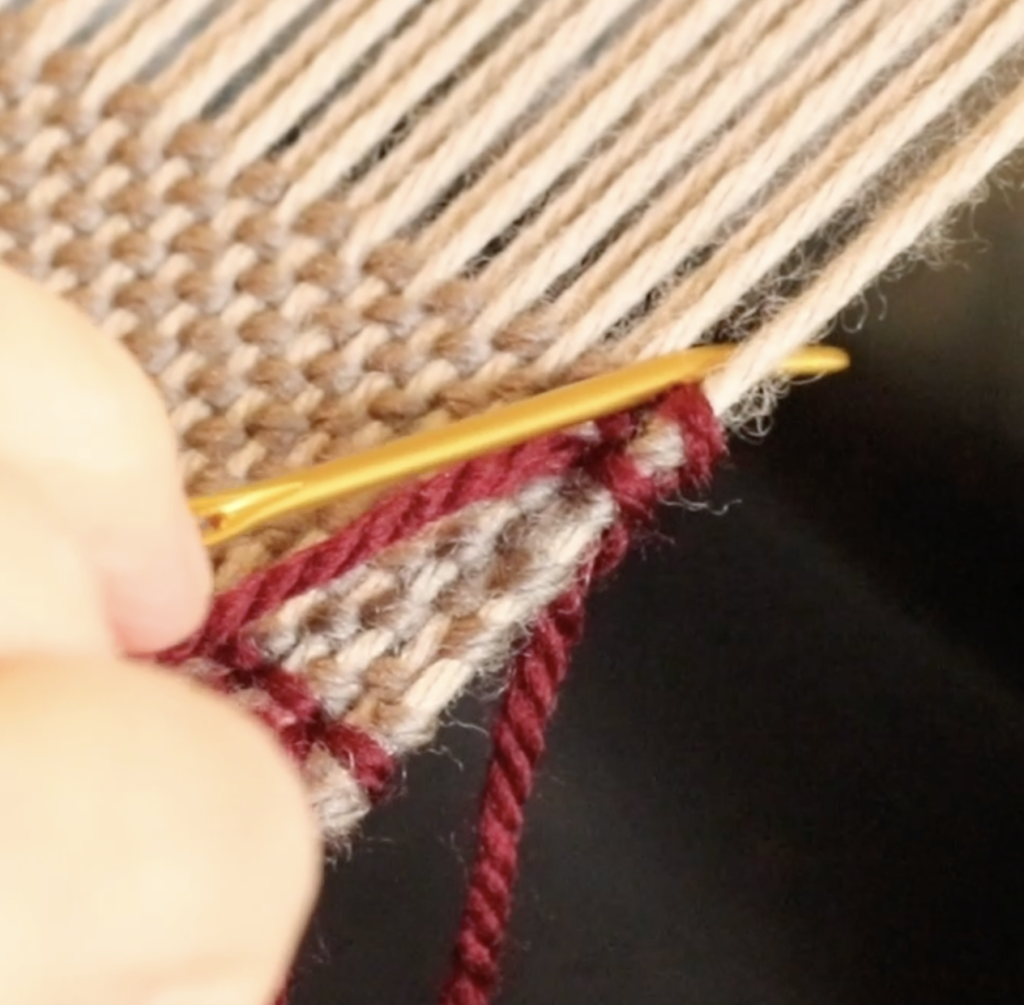
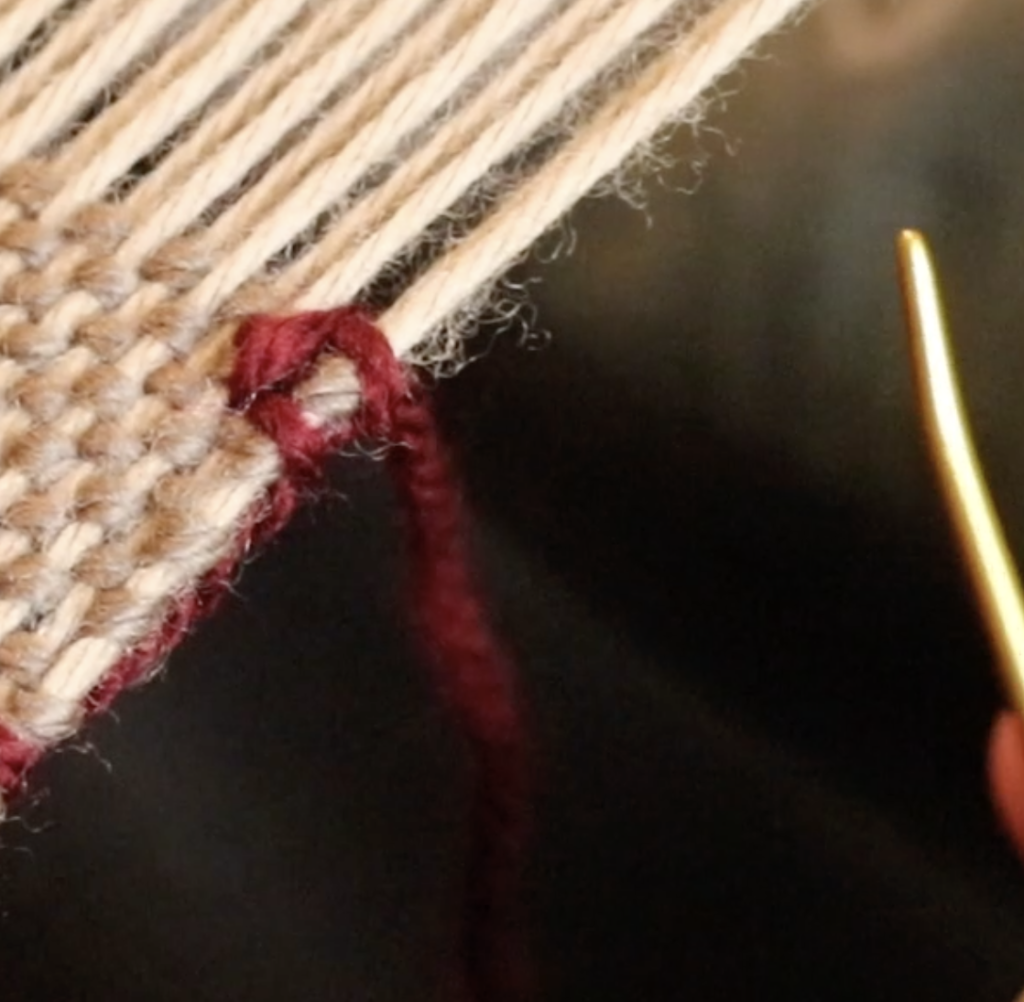
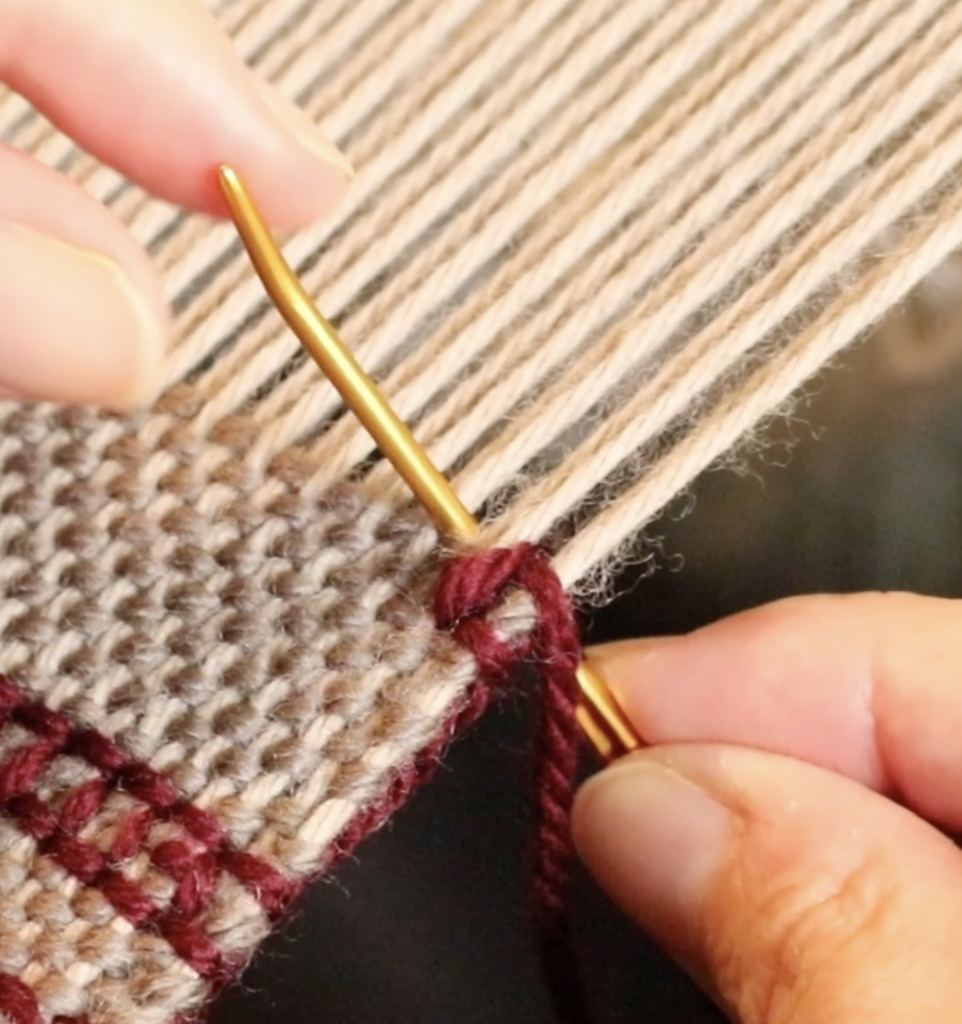
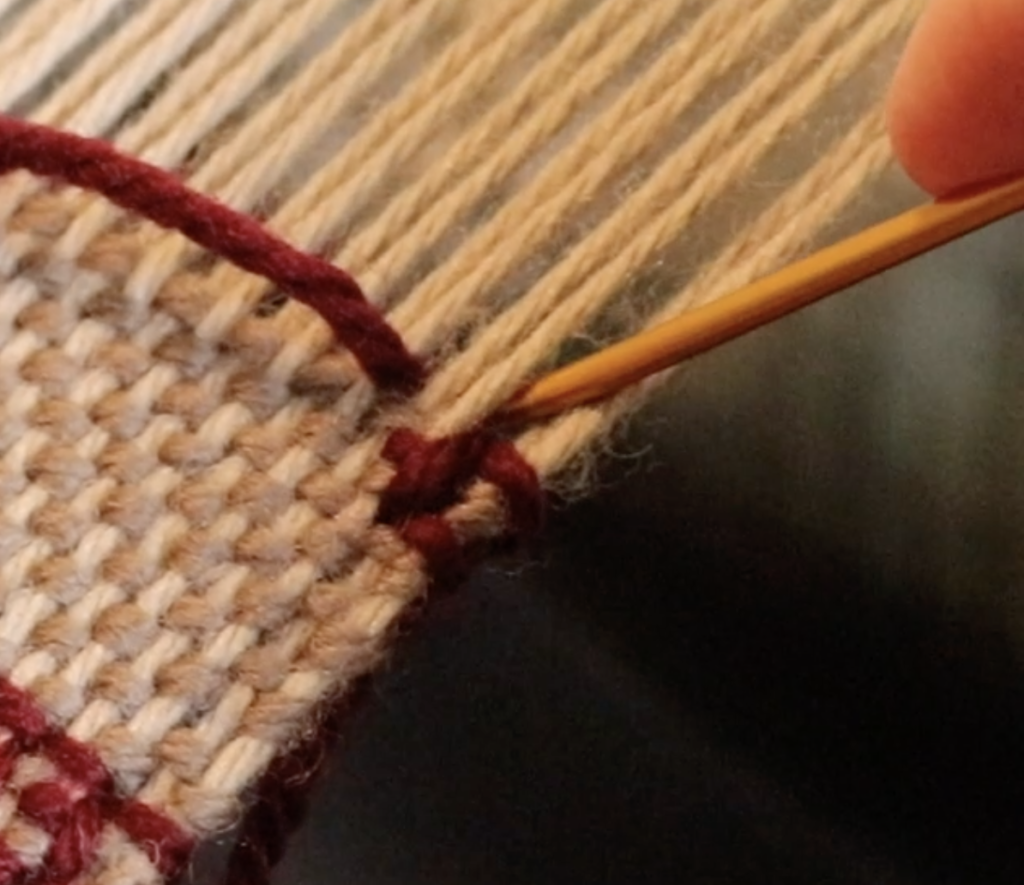
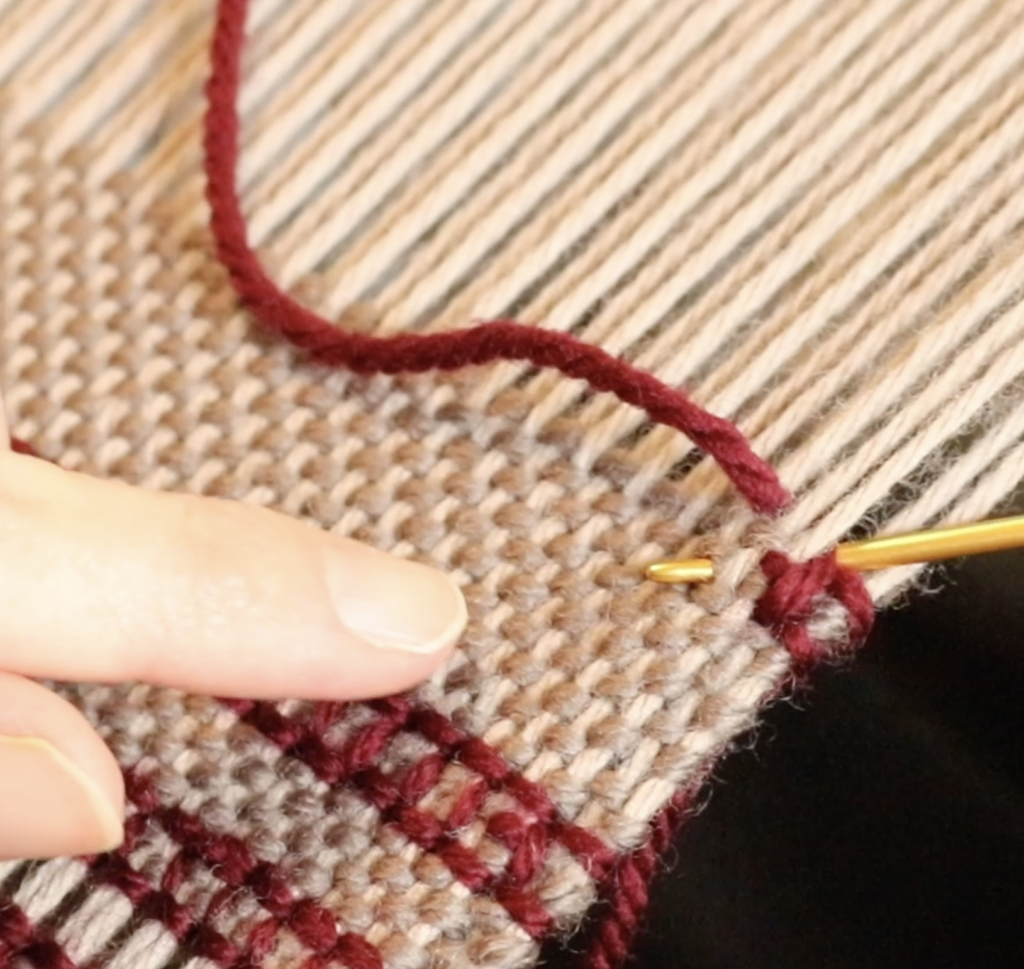
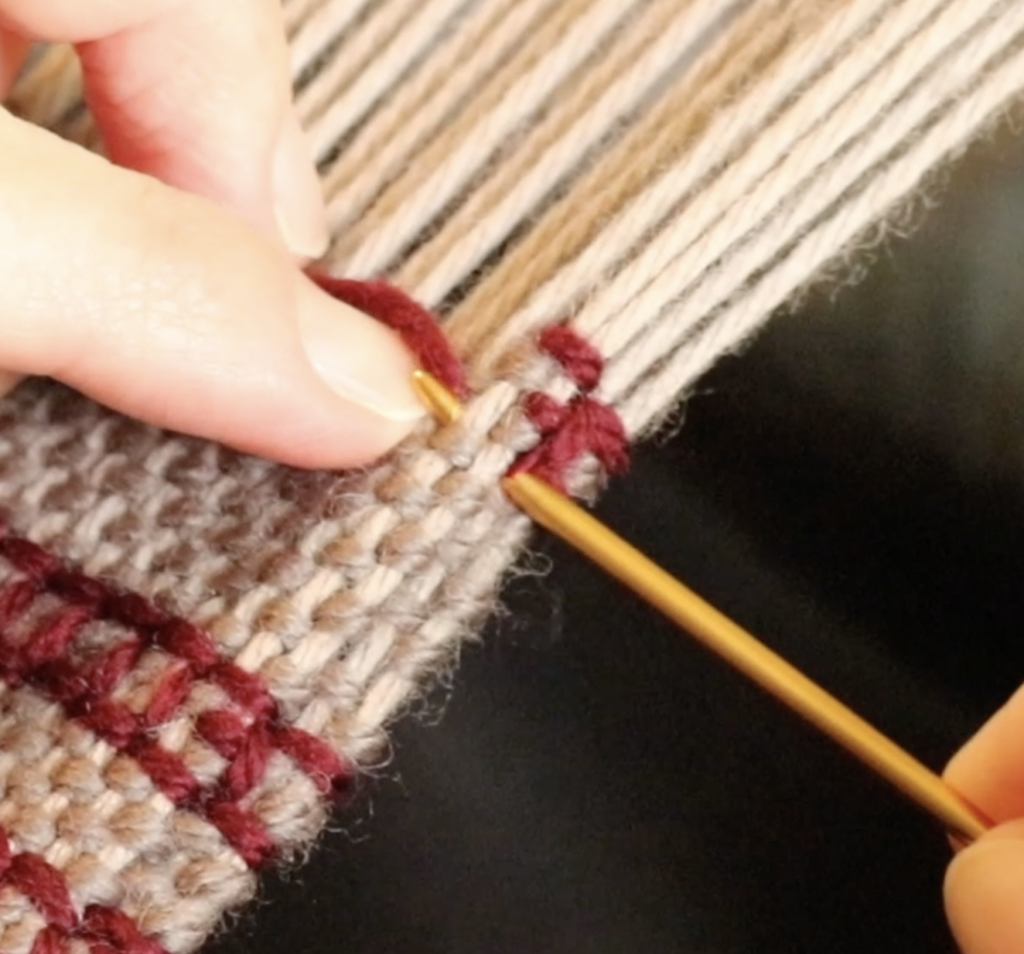
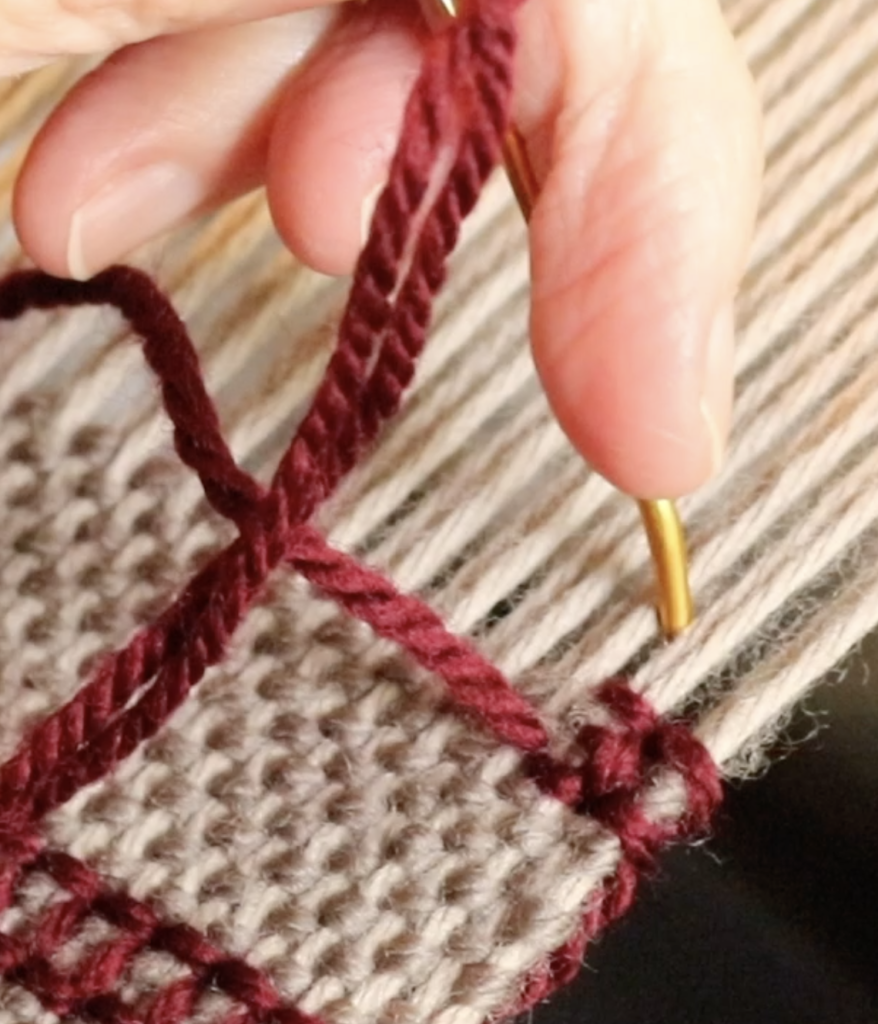
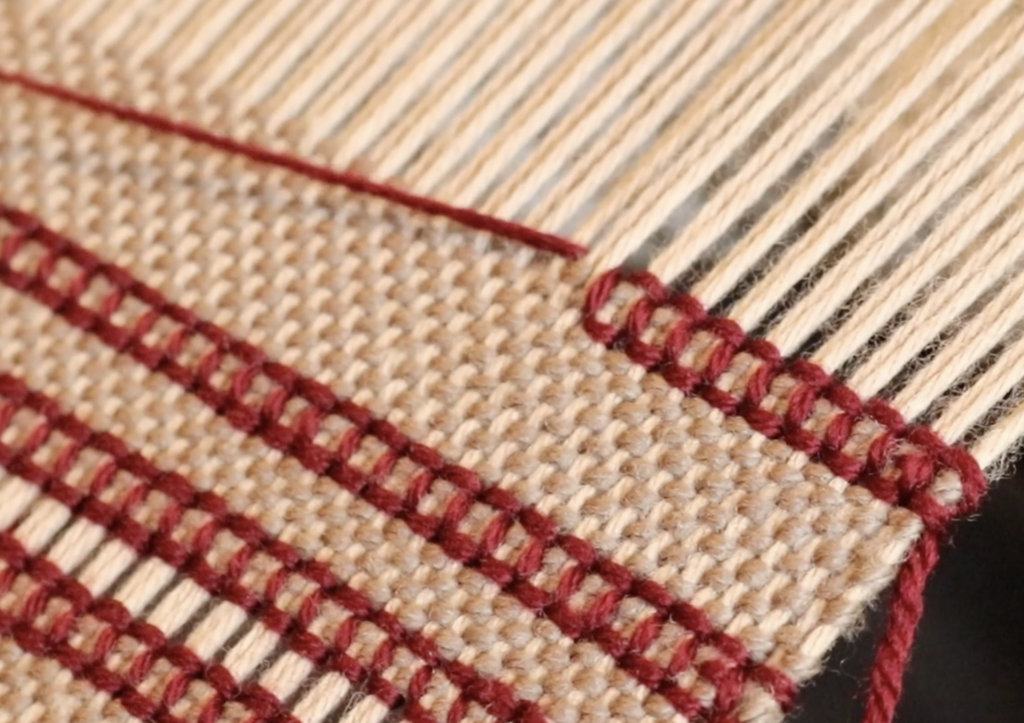
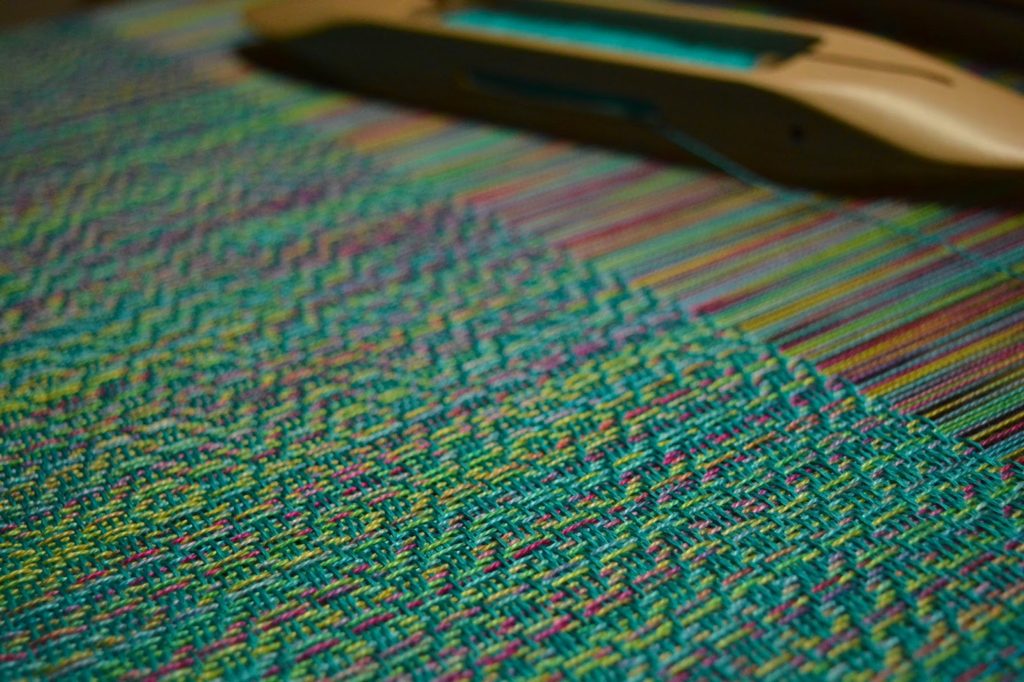
  • Loop pile or cut pile. Loop pile is the technique used for most commercially available towels. Cut loop is a little more luxurious and velvety but can be less absorbent. The loop pile technique is not hard to learn and is worked on a plain weave backing. My Lux Hand Towels pattern used loop pile as a decorative border.

Syne Mitchell has a handy section on loop pile in her book Inventive Weaving on a Little Loom, page 178- 181.

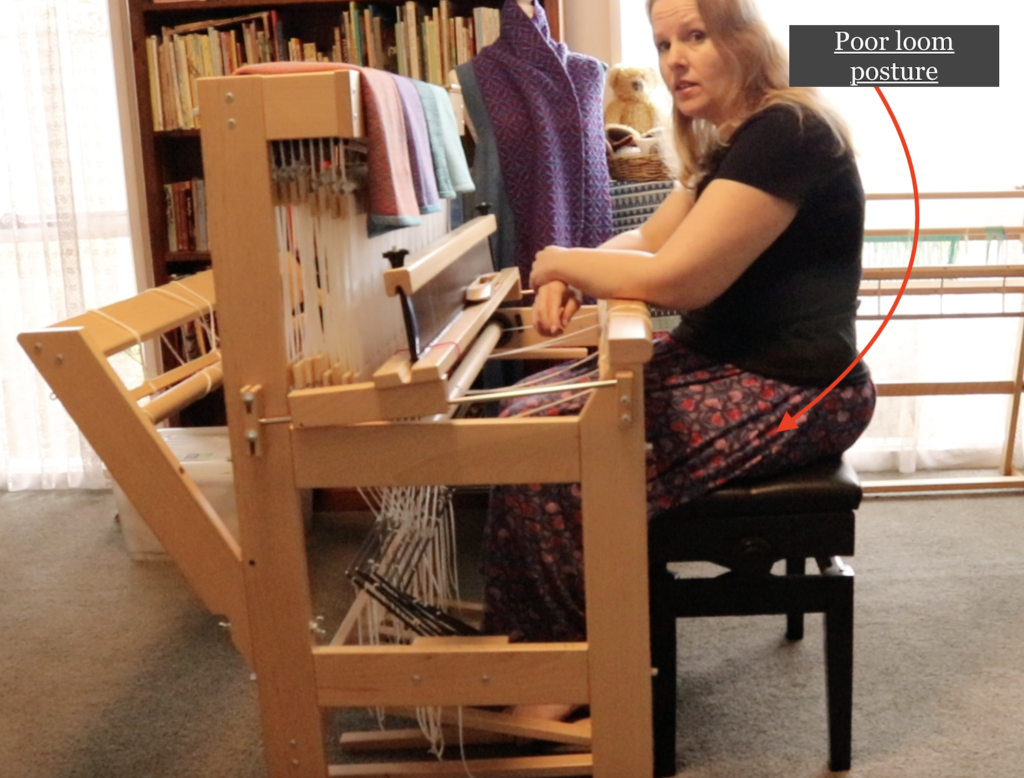
How to Choose the Right Towel Project for Your Loom and Skill Level

If you’re new to weaving towels, start with kitchen towels. Once you’re comfortable with yarn behaviour, finishing and shrinkage, move on to hand towels, and then tackle bath towels when you’re ready for a bigger commitment.

Each type teaches you something different, and all of them result in something genuinely useful.

Towel Weaving Resources (Kitchen, Hand & Bath)

If you’d like to learn more about weaving towels, I have a range of resources to help:

  • Kitchen towel patterns → 

Diamond Stripe Towels

Happy Fibonnaci Towels

Bright & Beautiful Towels

Floor Loom 4 Shaft Class Towels

  • Hand towel patterns → 

Lux Hand Towels

Wash Your Hands Towels (free pattern)

These patterns remove the guesswork so you can focus on enjoying the weaving. Here are some other resources related to weaving towels:

  • How to hem hand woven towels
  • How to hem hand woven by hand (no sewing machine)
  • Which cotton weight for kitchen towels
  • Tips for weaving with cottolin
  • New towels for our new home

Frequently Asked Questions About Weaving Towels

What is the best yarn for weaving towels?

For most towel projects, cotton yarn is the best choice due to its absorbency, durability and ease of care. I like 8/2 unmercerised cotton as it’s so easy to work with. Linen and cotton blends can also be used, particularly for kitchen and hand towels.

Can you weave towels on a rigid heddle loom?

Yes! Kitchen towels and hand towels are very well suited to rigid heddle looms. Bath towels are possible, but width limitations often make table or floor looms a better choice.

What weave structure is best for towels?

Waffle weave is one of the most popular structures for towels because of its excellent absorbency, but plain weave, twill and honeycomb can all work beautifully depending on the towel type.

Final tip: Always sample when in doubt. Towels change dramatically after washing, and sampling will tell you more than any chart ever could. This is especially important for weave structures like waffle weave, which has higher rates of shrinkage than plain weave.

I hope this guide has been super helpful to you 😊

Until next time…

Happy weaving!

*This post contains affiliate links. For more information, please see my disclosure policy here.

Filed Under: 4 shaft weaving, 8 shaft weaving, All about looms, Weaving, Yarn Tagged With: bath towels, hand towels, hand woven towels, kitchen towels, weaving towels

Levers vs Treadles (plus a free weaving draft!)

by Kelly Leave a Comment

Choosing between a table loom and a floor loom is one of the biggest decisions a weaver can make. While both allow you to weave intricate multi-shaft weave structures, the way you achieve that – using hand-operated levers versus foot-operated treadles can completely change the weaving experience.

In my latest video, Levers vs. Treadles (Free Pattern Included!), I break down the physical differences, pros and cons, and the rhythm of each setup. I also use the free weaving draft included in this article (scroll to the bottom for your free copy 😉) and show you how I would approach the tie up for both levers and treadles.

The Table Loom Experience: Weaving with Levers

Table looms are often the entry point for multi-shaft weaving and this was certainly the case for me. Instead of using your feet, you use hand-operated levers (usually located on the side or the top of the castle) to lift your shafts.

The Pros:

  • Portability: These looms are frequently much smaller, lighter and can be moved easily, making them perfect for workshops. Most table looms have a foldable castle.
  • Ease of Setup: There is no “tie-up” process, because basically, the shafts are permanently tied up. If you want shaft 1 and 3 to go up, you just flip levers 1 and 3.
  • Visual Learning: It’s very easy to see exactly which shafts are raised, which is great for beginners learning to read drafts.

The Cons:

  • Slower Speed: Every time you throw the boat shuttle, you have to take your hand off it to flip the levers. This breaks your weaving rhythm. It also means frequently putting the boat shuttle down to free up your extra hand.
  • Physical Strain: Using your arms and shoulders to lift shafts for hours can lead to fatigue more quickly than using your legs. This can depend on the size of your table loom and how you have it set up.

The Floor Loom Experience: Rhythm with Treadles

Floor looms are designed for production and ergonomic flow. By moving the shaft control to your feet, your hands are free to focus entirely on throwing and catching the shuttle.

The Pros:

  • Speed and Rhythm: Once you get into a “dance” with your treadles, the weaving goes significantly faster.
  • Ergonomics: Pushing down with your legs is generally less tiring than lifting levers with your arms, allowing for longer weaving sessions. Using your whole body to weave can feel very balanced.
  • Complexity Made Easy: While the tie-up takes time at the start, once it’s done, a single foot press can lift (or lower, depending on your loom type) multiple shafts at once.

The Cons:

  • Space: They require a dedicated space in your home.
  • The Tie-up: Crawling under the loom to tie treadles to shafts can be a bit of a workout! If you have back issues, the less time you spend hunched on the floor, the better!

Which Should You Choose?

If you are short on space or want a loom you can take to guild meetings, the Table Loom is a fantastic tool. However, if you find yourself wanting to weave long projects (like yardage for clothing or multiple towels) or if you want to find a faster “flow,” the Floor Loom is the way to go.

Tips For Weaving with Levers

I always recommend to purchase a stand with your table loom. Although it’s an extra expense, it is worth the investment long term.

Weaving with your table loom on a stand allows you to get very close to the loom and levers, providing a greater level of comfort and less arm/shoulder/neck fatigue. You can usually adjust the height of the stand too (or use a height adjustable chair) to get the perfect height for you.

You can speed up your weaving process a little by flipping more than one lever at a time. Once you get used to it, you will find yourself doing this naturally.

Using a table loom with levers means you don’t have to be “treadle conservative”. Your levers are not limited to a specific tie up like treadles are, so pattern explorations are much more possible.

Tips for Weaving with Treadles

Opt for “light treadling” when you can. What this means is try not to tie too many shafts up to any one treadle, as this will make the treadling heavy and hard on your back.

If you find the number of treadles on your loom (or lack thereof) a bit limiting, try a skeleton tie up or use a treadle reducer. This can expand the kind of patterning you can achieve.

For some types of looms (like a countermarch) the tie up can be quite cumbersome and difficult. To avoid time spent cramped on the floor inside your loom, look into options like the Top of the Lamms method. Also put a lot of thought into the type of floor loom that will work for you prior to purchasing. You may want to look at the “not time spent on the floor” looms like the Louet Megado Dobby (my dream loom!)

Download Your Free Weaving Draft!

To help you practice on either setup, I’m sharing one of my favourite weaving drafts. This is a versatile 4-shaft M & W Twill that works beautifully whether you are flipping levers or stepping on treadles.

M & W Twill Variation Weaving DraftDownload

If you have weaving software and would like the WIF file, grab that here:

Download the WIF here

Don’t forget to check out the Youtube video for more information on levers and treadles!

Until next time…

Happy Weaving!

  • This post contains affiliate links. For more information, please see my disclosure policy.

Filed Under: 4 shaft weaving, 8 shaft weaving, Floor Loom Weaving, Table loom weaving, Weaving Tagged With: floor loom weaving, levers, table loom weaving, treadles

My Weaving Loom Collection

by Kelly 4 Comments

I am often asked what weaving looms I use in my studio, and admittedly my collection continues to grow! From smaller and portable rigid heddle looms to larger floor looms, each one has its own role in my weaving journey.

Many looms have come into my possession through having a Youtube channel and Online Weaving School. For my students and followers I try to make resources for a wide variety of looms, skill levels and budgets.

In this post, I’ll give you a peek at my weaving loom collection, what I typically use it for, and where you can learn more about them. I’ll also include links to resources and tutorials so you can explore these looms for yourself.

Starting with the Little Guys

Some of these weaving looms are actually toy looms, but I get a real thrill out of showing people what can be done on a small, economical loom.

Generic Brand Frame Loom

Melissa and Doug Frame Loom – You will find a review of this loom here.

Lavievert Toy Loom – find out about my woven blanket project using this loom here.

Tomy Hobby Girl Loom (This loom is no longer manufactured but can be found second hand if you’re lucky! I have a resource page here).

Schacht Zoom Loom (At the time of writing this loom is new to me and I’m still playing around with it 😊)

Lojan Inkle Loom (Read the review and grab a free inkle pattern here).

Ashford Inkle Loom

Ashford Sampleit 10″ Loom

Medium Sized Looms

Ashford 24″ Rigid Heddle Loom and Stand (I have a review of this loom here).

Lojan 50cm Flex Rigid Heddle Loom and Stand (Review is available here).

Lojan 50cm Flex Table Loom Conversion Kit (Find out more about this here).

Mirrix Big Sister 16″ Tapestry Loom (Check out my review here).

Ashford 8 Shaft 16″ Table Loom (I have an assembly tutorial for this loom here).

The Heavyweights

Louet Jane 16 Shaft 90cm Table Loom and Stand (At the time of writing this page, I have just purchased this loom. More resources to come later!)

Louet David 8 Shaft 90cm Floor Loom (I have a detailed resources page for this loom here).

Finlandia Berga Savonia 10 Shaft 150cm Countermarch Floor Loom (This vintage loom is no longer manufactured but you can check out my review here).

Further Resources

As a weaver and online creator for 10 years I have a multitude of resources for anyone interested in getting started in weaving. Or perhaps you’re already weaving but looking to learn more?

This website you’re on right now is the perfect place to start. Use the toolbar in the top right corner to search what you’re looking for and be prepared to go deep down the rabbit hole! 🐰

The Online Weaving School is my best resource for weavers. I’ve put countless hours into classes for inkle, rigid heddle, table loom and floor loom weaving. No matter what skill level you are currently at, there will be a class to suit you!

But today I will list my beginner classes, as that is where most students tend to start:

Inkle Weaving Beginner Class

Rigid Heddle Weaving Beginner Class

Table Loom Weaving Beginner Class

Floor Loom Weaving Beginner Class

I hope this article has given you a solid idea of the looms I own and more importantly, has inspired you in your own weaving journey ❤️

Until next time…

Happy Weaving!

Filed Under: 4 shaft weaving, 8 shaft weaving, Floor Loom Weaving, Inkle Weaving, Online Weaving School, Rigid heddle weaving, Table loom weaving, Tapestry Weaving, Tomy Hobby Girl Weaving Loom, Weaving Tagged With: my weaving loom collection, weaving looms

10 Perfect Christmas Gift Ideas for Weavers 🎄

by Kelly 5 Comments

If you’re shopping for a weaver this Christmas, you may be wondering what to get them. Weaving is such a creative and rewarding hobby, and there are so many tools and goodies that make thoughtful presents!

Whether you’re buying for a beginner who is interested in getting started in weaving or a seasoned weaver who seems to have everything, this guide will help you find the perfect gift.

Here are 10 Perfect Christmas Gift Ideas for Weavers that range from practical tools to fun little luxuries.

1. Beautiful Shuttles

Every weaver needs shuttles – and it’s super handy to have extras.

Stick shuttles are affordable, easy to load with yarn and effective to weave with. I recommend getting stick shuttles that are already lacquered, unless you plan to lacquer them yourself. Lacquered shuttles glide beautifully through the warp without resistance.

Handmade wooden boat shuttles are not only functional but can also be a work of art. Look for shuttles in unique woods, ergonomic design and skilled craftsmanship for a truly special gift.

I love my personal collection of hand crafted boat shuttles from Pickers Ridge. They are carefully crafted in Australia from sustainably sourced wood and are a delight to use.

2. Hand-Dyed Yarn or Dyers Kit

Weavers love yarn (you can’t really go wrong here). Hand dyed yarn is something special, created by artisans with love and care. Perhaps the weaver in your life is interested in learning to dye yarn at home for their own unique weaving projects.

Yarn dye kits are available to enable beginners to dyeing to get started without having to source all the ingredients themselves. For those interested in natural dyeing, a gift voucher for an online class would be a perfect gift.

3. Rigid Heddle Loom or Heddle Upgrades

If your weaver has a rigid heddle loom, an extra heddle/ reed in a different size will expand their possibilities. Or if you know that they are wanting to level up to weaving with more than one heddle of the same size, that is also an excellent option.

Pick up sticks – Pick up sticks are a low cost way for a weaver to up their weaving game. A pick up stick allows the weaver to “pick up” warp threads in order to create additional sheds and varied patterns without the additional cost of new heddles.

4. Handy Weaving Tools

Small tools make perfect stocking stuffers and are great lower cost gifts. Think: weaving combs, beaters, threading hooks, tapestry needles, or a good pair of small scissors. Tools in brass, wood, or other special finishes are extra thoughtful.

Here are some of my favourite handy tools that are in constant use in my studio:

Bent tip tapestry needle – wonderful for weaving in tails off the loom, hemstitching, hand seaming and embroidery on the loom.

Double ended threading hook – I love these hooks so much because they sit flat, they are flexible, easy to store, affordable and they are two tools in one!

Dressmakers shears – Sharp scissors are an essential for weavers. What I love about dressmakers shears is they are nice and long for cutting warps off the loom and also indispensable for weavers who love to cut and sew with their handwoven fabric.

5. Inspiring Books

There are so many wonderful weaving books available! A weaving book can spark fresh ideas, keep creativity flowing and teach brand new techniques.

Books play a huge role in my own creative life – ok, confession time, I’m a little addicted to books! They are such a wonderful way to learn and inspire, and they align perfectly with my learning style.

Here are some of my personal favourites:

Rigid Heddle Weaving

The Weaver’s Idea Book – Jane Patrick

Inventive Weaving on a Little Loom – Syne Mitchell

Multi Shaft Weaving

The Handweaver’s Pattern Directory – Anne Dixon

Next Steps in Weaving – Patty Graver

Inkle Weaving

The Weaver’s Inkle Pattern Directory – Anne Dixon

In Celebration of Plain Weave – Annie Machale

6. Online Classes or Memberships

The gift of learning never goes out of style! An online weaving course or membership (like my Premium Level Membership) makes a thoughtful present for a weaver who loves to expand their skills.

Over at the Online Weaving School you will find a huge array of weaving classes for a variety of weaving disciplines and levels.

Students can learn in their own time and in the comfort of their own home – no commuting long distances for expensive in person classes. They also receive one on one support when needed.

Gift vouchers are available, so consider giving the precious gift of learning to a weaver today!

7. Yarn Storage & Organization

Yarn has a way of multiplying! Help your favourite weaver stay organised with a yarn bowl, project or rigid heddle loom bag, or beautiful storage basket.

If you have noticed that the weaver in your life has a collection of heddles with nowhere to keep them when not in use, a heddle rack could be the perfect solution. Or, if you’re handy with woodworking, you could follow these simple plans to make one.

With trends in home organisation being a very popular topic these days, it is easy to find all kinds of storage solutions for weavers. For more ideas, check out this detailed resource.

8. Finishing and Yarn Tools

Fringe twisters, Strucket for easy wet finishing and draining, or a basic sewing machine are practical gifts that make projects look polished and professional. These are the kinds of things many weavers don’t necessarily buy for themselves but are thrilled to receive.

To help your weaver become really proficient with yarn, here are two super helpful tools that can work together or individually:

  • Yarn Swift – If you have hanks or skeins of yarn rather than a ball or cake you will need to prepare it before weaving with it. Placing the skein on a yarn swift holds it in place for you and turns as you wind your ball. I have a Glimakra swift but they are harder to find these days. This one looks like a good alternative.
  • Ball Winder – You can thread your yarn from the yarn swift directly to the ball winder to make a yarn ball or cake. As you turn the handle of the ball winder, the swift also turns, feeding the yarn off so that the two tools work together seamlessly. I use my ball winder a LOT in my studio!

You can also find a swift and ball winder combo package.

9. Little Loom Fun

Little looms provide a lot of relaxing fun for the weaver and are usually much more affordable than a larger or more complicated loom.

The Zoom Loom is a type of pin loom by the Schacht company that allows you to weave small squares. You can keep it simple with plain weave or get more invested with patterning. The squares can be used for a huge variety of projects when sewn together to create larger pieces of fabric. I actually just purchased a Zoom Loom for myself, I’m having fun weaving squares and exploring patterning possibilities 😌

There are also pin loom weaving books available for extra learning and inspiration.

If you are interested in doing some more research on weaving in small spaces, check out this resource.

10. A New Loom or Gift Card

If you’re looking for a big-ticket present, you can’t go past a new loom! A rigid heddle loom, a table loom, or even a floor loom will make their Christmas unforgettable. For those hard-to-shop-for weavers, a gift card or certificate from their favourite weaving supplier is always a safe bet.

*This article contains affiliate links. For further information, please see my disclosure policy.

🎁 Final Tip: If you’re a weaver yourself, don’t forget to share this list with family and friends so they know exactly what’s on your wish list this year!

I hope you find this list helpful and valuable.

Until next time…

Happy Weaving!

Filed Under: 4 shaft weaving, 8 shaft weaving, All about looms, Books, Floor Loom Weaving, Gift Guide, Rigid heddle weaving, Table loom weaving, Weaving, Yarn Tagged With: gift guide, gift guide for weavers, perfect weaving gifts, rigid heddle weaving

Open vs Closed Boat Shuttle: What’s the Difference & Which Should You Use?

by Kelly Leave a Comment

If you’re new to weaving or upgrading your toolkit, you might be wondering: What’s the difference between an open and closed boat shuttle—and does it really matter which one I choose? In this post, I’ll walk you through the key differences, the pros and cons of each style, and tips on choosing the best shuttle for your weaving projects.

🧵 What Is a Boat Shuttle?

A boat shuttle is a weaving tool used to pass weft yarn through the shed (the opening created when you raise or lower the warp threads). It typically holds a bobbin or quill on a metal spindle that allows the yarn to feed off smoothly as you weave.

Boat shuttles are most commonly used with floor looms or table looms, but can also be advantageous for rigid heddle weaving.

There are many types of boat shuttle but today we’re going to discuss open and closed boat shuttles with a side feed.

What is warp diving?

I have to explain what I mean by “warp diving” as I’m going to use the term a number of times! It sounds like a whole lot of fun but it’s really not! 😆 So, a warp dive is when your shuttle angles downward at some point during it’s transition from your hand to the opposite side of the loom.

This causes the tip of the shuttle to break through the bottom shed of the weaving and, well, you can probably imagine the outcome.

Warp dives range from minor (phew, the cloth beam fabric caught it in mid dive) to spectacular (picture yourself, or me if you like, crawling around under the loom trying to locate the exact landing position of the shuttle).

OK, that should be crystal clear to everyone now? 😆

What Is an Open Boat Shuttle?

An open boat shuttle is open on the top and the bottom, allowing the bobbin to be visible and easily accessible. You can pop the bobbin in and out quickly, because you can push on it from underneath, which makes unloading and reloading a breeze.

✅ Pros of an Open Boat Shuttle:

  • Easy bobbin changes – slide one out and another in with minimal fuss.
  • Good visibility – see how much weft yarn you have left at a glance.
  • Lightweight shuttle – Without the additional wood to enclose the bottom of the shuttle, an open boat shuttle will usually weigh less and be light to handle.
  • Finger control – Some weavers (I don’t use this technique myself, but many do) like an open shuttle for it’s tactile aspect. They like to have more of a feel for how the thread is feeding off the shuttle.
  • Slimline design – The height of an open shuttle is usually lower, making it great for a small shed.

⚠️ Cons:

  • Slightly more exposed, so the bobbin can jump around a little if the shuttle isn’t smooth-running. It’s important not to overload your bobbin so that it ends up protruding beyond the bottom of the shuttle and rubbing up against your warp threads.
  • May not be as suitable for wider warps – Due to the light weight of the shuttle, some weavers may find it difficult to throw far enough when weaving on a wide warp. This can depend on the length of the shuttle too. A longer shuttle is more appropriate for a wider warp.
  • More likely to warp dive – This can depend on the design of the shuttle, but my experience has been that warp diving is more common with an open shuttle.

What Is a Closed Boat Shuttle?

A closed boat shuttle has a more enclosed body with smaller slots or holes where the yarn exits. The bobbin is housed inside, which can give a smoother glide through the shed in some setups.

✅ Pros of a Closed Boat Shuttle:

  • Smooth and solid – glides easily over the warp, especially on high-tension looms.
  • Protects the bobbin – less chance of yarn catching or bobbin misalignment.
  • Prevents warp diving! – A nicely shaped closed shuttle can glide so straight and smooth that you will never have to experience the pain of a warp dive!
  • Heavier construction – Due to being enclosed, the closed shuttle will be slightly weighted than an open shuttle.

⚠️ Cons:

  • Can be slightly slower to change bobbins – If there is no finger hole, changing a bobbin can be fiddly as you can’t adjust from underneath.
  • Heavier – this is not necessarily a con, just something to point out for consideration!
This closed shuttle by Pickers Ridge has a super handy finger hole for pushing the spindle up to load a new bobbin.

Size and Weight Comparison

Here are a few examples from boat shuttles I personally own:

Ashford 11″ open boat shuttle – 71 grams

Ashford 13″ open boat shuttle – 113 grams

Ashford 15″ open boat shuttle – 181 grams

Pickers Ridge hand crafted 13″ closed boat shuttle – 117 grams

Pickers Ridge hand crafted 13″ open boat shuttle – 105 grams

Leclerc 15″ flying shuttle – 494 grams

Schacht 15″ end feed shuttle – 189 grams

Which Shuttle Should You Choose?

Here are a few quick tips to help you decide. Take these with a grain of salt because at the end of the day, shuttle choice is heavily influenced by personal preference and specific project needs:

SituationBest Shuttle
You are challenged by warp divesClosed boat shuttle
Your loom has a smallish shedOpen boat shuttle (lower profile)
You like to see and feel how much yarn is leftOpen boat shuttle
You use a high-tension floor loom with a wider weaving widthClosed boat shuttle
You want a quick and convenient workflow for narrower warpsOpen boat shuttle

Of course, many weavers like to own both types and switch depending on the project.

Bonus Tip: Choose Quality

Whether you choose open or closed, make sure your shuttle is:

  • Well-balanced and glides easily across the warp.
  • Made of smooth, durable wood to be long-lasting.
  • Compatible with your loom’s shed height.
  • Not just pretty to look at but also comfortable and practical to use.

A good-quality shuttle can make a big difference in your weaving speed and enjoyment.

*This post contains affiliate links. For further information, please see my disclosure policy.

Make the choice that fits you best!

There’s no one-size-fits-all answer—but understanding the pros and cons of open vs closed boat shuttles helps you make an informed decision that suits your weaving style. If you’ve never used a boat shuttle before, see if you can try one out at a weaving supplier, guild or with a friend.

If you are a rigid heddle weaver you might be wondering if boat shuttles are a tool that you could use? Well, head on over to this article next to find out all about using a boat shuttle with a rigid heddle loom!

👉 Have a favorite shuttle? Let me know in the comments! Share the details so other readers can learn and make informed choices 😊

Until next time…

Happy Weaving!

Filed Under: 4 shaft weaving, 8 shaft weaving, Floor Loom Weaving, Rigid heddle weaving, Weaving Tagged With: boat shuttle, boat shuttle comparison, closed boat shuttle, open boat shuttle

Avoiding back pain at the floor loom

by Kelly 24 Comments

This is an issue close to my heart, as I have a lower back injury. Over my years of weaving, I’ve had to find the best ways to avoid pain while being able to indulge in as much weaving as possible.

The more time you spend thinking about and implementing comfortable weaving, the more time you will be able to spend actually doing it into the future.

Firstly I’m going to talk about seating.

There are a few important factors here. Generally, a regular chair cannot be used for weaving on a floor loom, so we have to look at the best suitable alternatives.

So, what are these alternatives?

Most floor loom manufacturers also make weaving benches that can be purchased separately but are made specifically for your loom. Benches can be very pricey.

I’ve seen some weavers seated on exercise balls for threading the loom, which allows you to get very close to the shafts – I don’t intend to try this myself, but it’s another option.

I have been fortunate to find the perfect seating option for me. I use an adjustable, padded piano bench. Let me tell you why I love this option:

  1. It’s height adjustable.

    An adjustable bench is important because it allows you to adjust your seated height to suit the loom. Your posture at the loom is crucial to your long term back health. Your elbows should be able to rest on the front cloth beam without you having to raise them up. Your hips should be higher up than your legs (like they are when you’re driving a car) because otherwise you’re going to have to exert more pressure when treadling and then – hello back pain!

2. It has ample seating space.

When I was looking at buying a weaving bench, all I could think when I saw commercial weaving benches is “they obviously weren’t built for weavers with generous lower proportions!” The piano bench accommodates my… ahem… ample behind (🙈) very well because it is wide enough, but not so wide as to be a difficulty.

3. It’s padded.

I can’t imagine sitting on a non padded bench, ouch. If you can get something with padding built in, that is better because you don’t have to contend with it slipping around. 

4. It has 4 legs.

This is really useful for the threading stage, as I can angle the bench so that two legs sit inside the front of the loom, allowing me to be closer to the shafts and therefore putting less strain on my back.

If you purchase an adjustable piano bench, try to spend a bit more to get good quality. I did not do this, and am constantly having to tighten bolts because the bench is not as stable as I would like. Eventually I’ll invest in a good one!

Also, don’t get the cheap, fold out piano bench. I do have one of these for my kids to use at the piano, and it’s surprising strong, but you want a bench with four legs, as I already mentioned.

Now let’s discuss some other tips and strategies for keeping your back pain free at the loom.

If you already have pain:

  • Firstly, if your lower back is on fire REST IT! I can’t stress this enough. Do not sit at that loom again until your back has settled down, you will only make it worse. I know it’s hard to take a break but it really is necessary.
  • Take anti inflammatories if needed, use ice or heat – whatever works for you to get your back moving towards normal again. If you’re using medications due to a flair up, do it sensibly and in consultation with a medical professional.
  • If your flare up does not settle down, you may need to see someone who can help you. This may be a chriopractor, a physical therapist, a masseuse – there are options to try and you don’t have to suffer alone!

    As you weave:
  • Try to move a little or shift your weight from side to side as you weave rather than keeping your body really rigid – follow the shuttle with your body, especially if it’s a wide warp.
  • Throw and catch your shuttle in a way that is not causing you to raise your arms unnecessarily or at weird angles.
  • Get in close to the loom. The closer you are, the nearer your reach. You can also naturally brace yourself against the breast beam to beat.

Treadle positioning:

A couple of years ago we bought a new (secondhand) van following an accident where our existing van was written off. The new van was the same company and make as the last one, but was a slightly updated model.

As soon as I began driving the new van, I noticed a difference in the height of the accelerator. The new accelerator was so much higher than the old one! I had to lift my foot higher to depress the pedal. And, guess what? Yep, the hip pain started up and is still a problem. I try to limit my driving, but when I do drive I use cruise control as much as possible so that I’m not having to lift my right foot so much.

My point? The higher you have to lift your feet to operate your treadles, the more stress you will place on your legs and ultimately, your back. If your treadles are very low to the floor (as they are for my floor loom) you will not have that stress on your body.

You may find that older looms not only have treadles sitting high, you also have to depress them quite firmly. If you do have an older loom, I recommend looking at any modifications you can do to get those treadles lower to the floor.


Take regular breaks.

It’s tempting to stay in the weaving groove and forget about time, but breaks are necessary. Get up, walk, stretch. Don’t sit at the loom for so long at one time that you feel sore and stiff when you get up. Anticipate the stiffness (even set a timer if you need it) and be kind to your body by resting it.

Batching tasks:

This goes hand in hand with the last point on taking breaks. Plan out your project so that you can batch tasks.

For example, if you’re threading for a full width project, unless you are Speedy Gonzales, you have to expect that the threading will take several hours. Plan to do a certain amount at one time or on one day. Make an agreement with yourself like: “Today I will aim to thread half of this project, taking regular breaks. If I start to experience pain, I will stop or only do a quarter of the threading”. You’re still making progress, but you’re not overdoing it.

Another example: “I will aim to make my warp today, dress my loom tomorrow, do half of the threading the next day and the second half the following day etc”. Break the tasks down to keep them achievable. You may end up doing more than you planned because you are pain free, but the point is to have a plan in place.

Accept bodily limitations:

This is a hard one! I’m sure we all wish that we were completely fit, healthy and pain free. But we need to be realistic and accept that we are not perfect. Accept the physical limitations you may have and don’t push yourself beyond them. Work with what you can do and make that your focus.

Sit up straight!

Did you ever here those words from your mother at the dining table? Well, she was right! 😆 You want to sit naturally, not rigidly at the loom, but you also want to keep your back nice and straight. If you find yourself slumping often, go back and check the seating points I discussed. It may be that your bench is not at a correct height.

Overall loom posture is really important. Remember – elbows on the breast beam, hips higher than knees, back straight!

I hope this post has been helpful to you. I have made a companion video so you can see just how I sit at my loom. You can view that here:

If you want to get started in floor loom weaving, my Introduction to Floor Loom Weaving course is perfect. It takes you through step by step processes to give you the confidence to get weaving!

Want to know more about my floor loom? Check out my review by clicking here.

Let’s keep the conversation going! Do you have any helpful tips to add? Any questions? I would love to hear from you in the comments.

Until next time…

Happy Weaving!

Filed Under: 4 shaft weaving, 8 shaft weaving, All about looms, Floor Loom Weaving, Health and home, Online Weaving School, Reviews, Weaving Tagged With: avoid back pain, back pain, floor loom weaving, posture

Italian Hemstitch Step by Step Tutorial

by Kelly 4 Comments

You all know that I love hemstitching, right?

I have quite a lot of resources available on the topic, including articles and videos, some of which you can find in this post.

In addition to the basic hemstitch we all know and love, there are variations for an even more visually decorative, but still functional hemstitch. Italian hemstitch is a beautiful example.

*This post contains affiliate links. For more information, please see my disclosure policy.

The hemstitch doesn’t have to just be a way to secure your warp threads so that the weft doesn’t unravel when you remove your weaving from the loom. It can also be used within the weaving as a feature.

In the member’s only “How to Hemstitch” series, I have a separate class just to highlight and demonstrate how you can use hemstitch as a feature in your woven piece.

That brings me to today’s topic – the Italian Hemstitch. This is a gorgeous, decorative and functional stitch. It secures your warp ends just like an ordinary hemstitch does, but it stands out as a real feature. Embroidery lovers, this one is right up your alley!

Italian hemstitch looks great either as a single row at each end of your weaving or as rows within the weaving. It can be stitched in a variety of sizes, depending on how large you want it to look. It looks wonderful both from the front and from the back.

I love the way Italian hemstitch looks on a plain weave background, using a contrasting yarn so that it stands out and takes centre stage. You could choose to use a weight of yarn that matches the weight of your warp and weft, or something thicker, or something thinner. Experiment and see what your own preferences are!

For this tutorial I’ve used a light worsted wool for warp, weft and hemstitch, just in different colours. I’m going to be working a 2 x 2 Italian hemstitch.

Start by threading up a tapestry needle with the yarn you want to stitch with. Make the length around 5 times the width of your warp (I like to have a little more rather than run the risk of running out part way through).

I have to take a moment to extoll the virtues of this Clover Jumbo Bent Tip Needle. I used a regular tapestry needle for a long time before I purchased a pair of these needles, and wow, what a world of difference it’s made to my hemstitching! The large size, the coating that slips through your weaving just beautifully, and the bent tip all come together to make it a perfect tool to hemstitch with.

Secure the hemstitch yarn in your weaving, bringing the needle through to the front from the back. You can see one way that I work lock stitch in this free video. I work this about 2 – 3 warp threads in from the edge on the right hand side.

Count 2 warp threads in from the edge (above your last woven pick) and take the needle down through the gap to the back of your weaving.

When you pull the yarn through, there will be a loop around those first two warp threads, right at the top of the fell (where you last wove your weft).

Count across 2 warp threads again, but this time count down 2 weft threads. Bring the needle up from the back through that space.

Here is how this step looks once the needle and thread have been pulled through.

Take the needle and yarn back to the right edge. Now bring the needle up from behind, through the exact same hole that your last stitch came out of. This will make a new loop as you pull the needle through once more.

Pull on this loop to tighten it up a little. That gives us 2 horizontal lines – 2 sides of our box shape. Now we need to make the 3rd line as a vertical to close the box shape.

To get the vertical stroke of thread, we take the needle straight up to the left of those first 2 warp threads and pull through.

Now you can see your first block/box shape. Each box at the very edges of your weaving will be open ended on one side, the rest will be closed.

To continue working the boxes, count off the next 2 warp threads, bring the needle up and pull the needle and yarn through.

Take the needle back to the start of the second set of 2 warp threads and underneath.

Bring the tip of the needle (this is where that bent tip makes your life a whole lot easier!) up 2 weft threads down, in line with the 2 warp threads you have counted off.

Pull yarn through and tighten the loop. Take the needle back to the start of the pair of warp threads and down into the previous stitch’s hole.

Now bring the needle back up (thank you again bent tip needle!) through the hole that the working thread is in and pull through.

Finish off the box shape with a vertical thread again, by taking the needle down to the left of the warp threads just worked. Continue on across the warp and before long you will have something that looks like this:

It may seem a little complicated at first, but it’s really only a couple of steps more to complete than the regular hemstitch, and once you’ve “got it” your needle will fly!

If you would like a detailed, step by step video on how to work the Italian hemstitch, you may want to consider signing up for a membership at my Online Weaving School to access this and other great tutorials and classes.

The Italian Hemstitch class is available to all members of the Online Weaving School. It is a bite sized, technique focused class to further your learning in the wonderful world of weaving!

Thanks for stopping in for a visit today, if you have any questions or comments, please leave them below, I always love to hear from you!

Until next time…

Happy Weaving!

Filed Under: 4 shaft weaving, 8 shaft weaving, Floor Loom Weaving, Free tutorial, Hemstitching, Inspiration, Online Weaving School, Rigid heddle weaving, Tutorials, Weaving Tagged With: hemstitch tutorial, how to hemstitc, Italian hemstitch

Floor Loom Review – David 2 Louet loom

by Kelly 13 Comments

I’ve had a lot of people ask me to do a review of my David 2 by Louet floor loom.

This post is not sponsored or endorsed by Louet, it’s just an honest review for your own information or research.

I have written about this loom and floor looms in general before, and also about what to expect when your loom arrives, but this article gets into the specifics of the Louet David.

If you purchase a new David in 2024 or after, you will be buying the David 3, not the David 2. The David 2 has been retired. But this is still a very useful review as there are only a couple of minor differences between the 2 and 3.

If you are purchasing a used David, it may well be a David 2 and would be exactly like my floor loom.

I must admit that when I was looking for a floor loom to purchase it was kind of hard to get information on this particular loom. All I really had to go on was a little amount of information on the Louet website.

*This post contains affiliate links. Please see my disclosure policy for further information.

I knew that I wanted something compact enough to fit in the smaller space I had available and due to my lack of experience with floor looms at the time, I wasn’t confident that a second hand, possible fixer upper would be a sensible choice.

One of the reasons that I was interested in the David is because I live in Australia and there are somewhat limited choices when it comes to looms and most have to be custom ordered and imported.

The Schacht Baby Wolf was a very strong contender in my decision making because it was more familiar to me and it was easier to find information on it.

To further complicate the issue, I had never woven on a floor loom (true story!)

Through a good deal of googling, I had found an agent in Sydney who could order a David for me. Not only that, she and her husband delivered the loom in person and brought it into my home, even though they are from another state! Amazing customer service!

I will be going over the loom discussing a few different features and then giving you my opinions on the positives and negatives. There are not many negatives, but maybe the things that I’d like you to think about if you’re considering purchasing the same loom.

The first thing that I do love about this loom is the compact size. I’ve had it in a couple of different positions in my studio, and it’s easy to move and fits a variety of spaces. The weaving width is 90cm (35″) which is a good width for many different projects.

You need a certain amount of space at the front and back of the loom for warping – I think a 1 metre clearance at the front and back of the loom is optimal. You can get away with less, but it may be a little cramped.

The next thing I love about this loom is the quality of make. I can’t fault the quality at all, from the wood, the finishing to all of the pieces that go with it, it’s just beautiful quality and design.

My husband actually put it together for me – I’ll admit that because my brain is not very wired for putting things together and following set written instructions, but my husband is very good at that. He didn’t have any trouble following the directions. It did take quite a few hours to put together, but that is to be expected with a loom of this size and type.

The David loom comes with texsolv heddles and cords. I personally really love texsolv as it is so light and quiet. Metal heddles can be heavy and noisy, but this is a personal preference and not to suggest that one is better than the other.

Treadling on the David is very light and easy. It is not the least bit clunky when treadling because of the spring system and it’s easy on your body. Speaking of treadling, I like the texsolv tie up system which is simple to learn to use and quite quick to tie up. There is no real “tying” up, you just pop the texsolv cord holes over the treadle screw heads and away you go. The texsolv cording is strong so you don’t have to worry about breakage while treadling.

The David has a gliding beater, meaning that your beater is positioned on metal rods. It “glides” back and forth on the rods, so it is level and steady. I’ll admit that it took me a bit of getting used to. The Ashford table loom I had been weaving on previously had an overhead beater, which is loose and swinging.

The gliding beater is not as easy to use in some ways, as it is rigid and set on the tracks of the metal rods. Now that I’ve been using it for a number of years, I am used to it and have found ways to weave most effectively with it. I do think that once you’re accustomed to it, it does result overall in a more even beat.

One thing that really helped was using a small amount of lubrication on the rods. I couldn’t find much information on whether or not this was a good idea, but to me the beater was feeling quite stiff and not so enjoyable to weave with.

So, I applied a very small amount of lubricant with a dry, clean rag. The difference was amazing! I now usually lubricate between projects. The beater now really does feel like it’s gliding. Just be sure to use a non silicon lubricant that won’t build up a residue on the metal rods. I use the Australian made Inox lubricant spray.

Always apply the lubricant to the rag, not directly to the metal.

Another way to work successfully with the gliding beater is to find the right warp tension. Too tight and the beater doesn’t glide as well. Just like on any loom, there is a sweet spot for tension that you discover through experience. I am careful when I advance my warp to advance to the spot that feels right for me – not too far towards the front beam or, once again, the beater will struggle and the look of your weaving will suffer.

I advance in small increments and adjust gently towards a firm tension. I hope that makes sense!

This loom came with a 10 dent reed. I haven’t purchased another reed at this point due to the expense and lack of space to be able to store yet another piece of weaving equipment. When I need to use a different sett, I just adjust the number of threads in my reed to accommodate. I very often weave at 20 epi, so I simply double my ends in the reed.

The reed and beater are removable for warping and threading, as is the front breast beam. This is really handy when you get to the threading stage, as you can get in really close to the heddles to thread which saves my back from days of pain afterwards!

One feature that I’ve found particularly great is the ability to put add or remove heddles to the shafts after warping. With my table loom I have to collapse the castle (the upright part of the loom) and tilt it in order to adjust heddle numbers. Not so practical.

On the David, if I have miscalculated the heddles for my project and I need a few extra all I have to do is unhook the texsolv cords on the top and bottom of the shaft, slide the new heddles on and hook the cords back on.

Another feature I particularly like about this loom is the friction brake. I can be weaving away and when I’m ready to advance my warp all I have to do is lean over the side and pull up the friction brake to release the warp tension. Then I use a handle also on the right hand side to advance my warp forwards.

Louet looms have a built in raddle, which is a unique feature. It means that instead of taking your warp off the warping board and then taking it to a table to lay into a raddle, then tying the raddle onto the loom to begin warping, you just take the warp from the warping board directly to the loom. When you wind on the warp, you can then tension the warp over the top of the loom, which can be quite handy if you are using weights to assist with tensioning.

I usually have to break up my time placing threads in the raddle, as standing for a longer amount of time wreaks havoc on my back!

I hope to eventually purchase a sectional warp beam for my David, as I prefer to warp floor looms with my Sawyer Bee Warping Square.

You receive a pair of lease sticks and some wooden separator sticks with the loom. I have devised my own methods for using the lease sticks, as initially I found it way too fiddle trying to deal with the sticks while warping and threading. I didn’t have the extra pair of hands to hold the sticks steady, so I now use stretchy bands (like the Ashford bands that they call “helping hands”) and these make a huge difference. I also like to use metal rings that open and close through the holes in the ends of the sticks to help keep them together and hold them steady.

I use the wooden warp separators mostly at the front of the loom as I advance my warp. At the back I use a roll of brown craft paper which does an excellent job.

I feel that I have a new appreciation for my David loom since purchasing a much larger floor loom. The David is simple to dress and weave on and so light to treadle.

Those are all the basics of the loom, I could definitely talk about other features but this article is already getting long!

Now, you may be wondering what the cost of this loom is?

Bear in mind that I bought this loom a number of years ago now and inflation is crazy.

At the time of purchase, my loom cost around $4000AUD. That included the cost of importing. That price does not include the extras I needed such as boat shuttles, extra heddles, weaving bench etc.

There are also optional extras available like an extra cloth beam (for longer warps), sectional beam and a Louet weaving bench. I don’t have any of these. I use a piano stool as a weaving bench, it’s much more affordable.

Revolution Fibers in the US list a current price from $4,770USD (at the time of writing this article).

In Australia, you can purchase from Thread Collective at a current price of $6,780AUD.

These prices don’t include shipping and can vary according to the rise and fall of the Australian dollar.

If you would like to know even more about this loom, I have a number of videos that will interest you.

This is my first video review of the Louet David which I filmed a few years ago. You get to see the parts of the loom, although some of the information is different to this article as my opinions may have changed over time:

I also have a demonstration to show how quiet this loom is:

And a fun little video that I made not too long after I purchased the loom. It’s nice for me to look back and see how much faster I weave now!

I hope this article has been informative and interesting for you! If you have any questions, please leave a comment below, I love to hear from you 😊

Until next time…

Happy Weaving!

Filed Under: 8 shaft weaving, Floor Loom Weaving, Weaving Tagged With: floor loom weaving, loom review, louetdavid

Making pictures with your loom

by Kelly 10 Comments

Something that really captivated me before I even started weaving, was the idea of using artistic creativity in weaving.

When I was younger I loved to draw and paint. In my adult life, I have not made a lot of time to devote to making art, but I have been happy to discover that there is a huge crossover with art and weaving.

This post contains affiliate links.

One of the most obvious forms of weaving that this crossover takes place in is tapestry weaving. In tapestry, the weaver can have total artistic licence through the use of colours and shapes. The shapes can be basic or complex. Colours can be blended on the loom. And, tapestry can be woven on many different types of looms.

I purchased a Mirrix Big Sister last year, as I wanted to develop my tapestry techniques and also have a dedicated tapestry loom. It is an excellent loom for tapestry, as even though it’s small, I find the available weaving room quite spacious and the tension is awesome.

Before I bought the Mirrix, I wove tapestries on my rigid heddle loom.

I had a lot of fun using different yarns and styles. My most popular Youtube series details how to weave in a free and unplanned style with a variety of yarns and colours.

I’ve also explored more tradition tapestry techniques on the rigid heddle loom. I particularly enjoyed taking my Sampleit on vacation, which enabled me to sit on the beach, watch the kids enjoy the waves and weave. What bliss!

My adventures with tapestry on the rigid heddle loom gained so much interest on social media, that I developed a course to show others how to do it! The course includes all the basic tapestry techniques you need to know, plus how to use all of these techniques to weave a finished project. If that sounds interesting to you, the course is available here.

Another way to get started in tapestry without breaking the budget, is with a more affordable tapestry loom. Depending on your budget, you could opt for something like the Schacht Tapestry Loom, or even just an el cheapo like a Melissa and Doug simple frame loom. Some people choose to make their own by building a simple frame or repurposing a wooden picture frame or similar. Just be aware that the more tension the loom holds, the better it is for tapestry and if you go down the cheap route, well, you tend to get what you pay for.

A resource that I found to be great when starting out with tapestry, and still use for inspiration, is Kirsten Glasbrook’s book, The Art of Tapestry Weaving.

Aside from tapestry, are there other ways to make pictures with your loom. Oh, yes indeed!

If I haven’t already gushed about krokbragd on this blog enough times, here I go again! If you’re interested in going down my blog rabbit hole on this topic, start with this post. Krokbragd is a weft based, most of the time but not always 3 shaft, weft faced weave. You repeat the same order of treadling over and over, but can vary your yarn colour combinations to produce simple and complex shapes and images. It is seriously cool, and that is why I’m always gushing about it.

Many of the shapes are open to interpretation, as they can be slightly non specific, but there is really so much to explore. One of my goals for this year is to weave a striking krokbragd wall hanging using my floor loom. Can’t wait for that one! Debby Greenlaw has written a terrific book, Krokbragd: How to Design and Weave.

I have a number of Youtube lessons on krokbragd using my rigid heddle loom, but if it’s new to you, start with the above video.

Boundweave is another weft faced weave that is very adaptable and versatile. It can be woven on 4 or more shafts (so it’s possible on a rigid heddle loom). The picture possibilities are endless. I have been playing around with bound weave on rose path threading and 6 shafts recently on my floor loom.

I’m using Nancy Arthur Hoskins’ Weft Faced Pattern Weaves book for guidance. My goodness, what an extensive book – so much to learn! This was my first attempt and I’ve now branched out with some more random designs, which is all very interesting. Slow, but interesting.

There is a lot more to be said about making pictures on your loom, but I hope this post has inspired you with some of the possibilities. Have you tried any of these techniques? Which is your favourite? Let me know in the comments!

Until next time…

Happy Weaving!

Filed Under: 4 shaft weaving, 8 shaft weaving, Floor Loom Weaving, Krokbragd, Rigid heddle weaving, Tapestry Weaving, Weaving Tagged With: boundweave, pictures, tapestry

Table loom options

by Kelly 27 Comments

When it comes to selecting a table loom to purchase, we are not as spoiled for choice as we may be for rigid heddle looms.

This can actually be a positive rather than negative thing, as it can be easier to choose when the selection is more narrow.

In this post I’m going to provide details for table looms currently available commercially (if I miss any brands it would be because they are obscure and not easy to obtain.) I will also give the retail prices of each so that you can compare.

*This post contains affiliate links

As a little disclaimer, the only brand of table loom I have actually used and am really familiar with is Ashford. So, I’m not giving an opinion or appraisal on the other brands, but rather providing available information and pricing.

Most of the looms I mention here do not come with extras like stands, benches or raddles. These things are available as separate purchases.

Let’s dive in!

I’m going to start with Ashford table looms, for the reasons already given above. There are quite a few options with Ashford and pricing is quite reasonable by comparison. Please note that the photographs are all courtesy of the manufacturers and all prices do not include stands.

All prices are in US dollars.

The entry level table loom from Ashford is a 4 shaft and is available in weaving widths of 16, 24 (pictured) and 32 inches. Prices start at around $840USD for the 16″.

The cool thing about a 4 shaft is that there is room on the castle front to upgrade to 8 shafts later if you choose to, so if you’re not sure you can always start out on 4 and see how you go.

There are also stands available separately, and these come with the option of also purchasing a treadle kit for more of a floor loom experience.

Then we have the 8 shaft range, also available in 16 (pictured), 24 and 32“. 8 shaft prices start at $890USD.

There is even a 16 shaft table loom for those who love the idea of having lots of shafts to play around with.

All the Ashford table looms have a folding castle for compatibility, meaning they are a good travel or teaching loom. The beater is overhead and easy to use. Each loom comes standard with a stick shuttle, threading and reed hook, 10 dent beater and 640 texsolv heddles to get you started. All Silver Beech wooden pieces come lacquered and ready to assemble.

If you need help to assemble your new Ashford table loom, I have instructional videos:

Le Clerc has several table loom options. Their looms look to me to be made in a more traditional style with dark wood, straight lines and metal heddles plus a boat shuttle included.

The Dorothy table loom comes in 15.75 or 24″ weaving width and may have 4, 8 or 12 shafts. Starting price is $750USD. Le Clerc also make the Voyageur, which goes right up to 16 shafts. You have the option of buying a stand with these looms and I must say that I really like the way their stands are basically a sturdy little table with side shelves – shelves are a great thing to have with any loom in my opinion! There is also the option here to purchase a treadle stand.

Your options for table looms with Schacht are a little narrower, to be the best of my knowledge they just make one model of table loom, but in a variety of weaving widths and a choice of 4 or 8 shafts. These looms are constructed with maple wood and you actually get a choice of reed size, which is a nice bonus! Prices start at $742USD. A stand is available for separate purchase, as is a double back beam kit.

Glimakra makes the Victoria Table Loom. Once again, there is not a lot of variation as this is their only table loom and it is only available in 4 shafts with a 27″ weaving width. Something I find interesting about this loom is that it doesn’t fold and isn’t very portable, but just looking at it you can see that it’s a solid, sturdy loom. The starting price for this loom is $1,100USD and once again you have the option of purchasing a stand and treadle kit.

Toika makes a table loom in only one size (23.6″) but with a choice of 4 or 8 shafts. It comes with an 8 dent reed and 200 texsolv heddles. The levers for this loom look a little different as the ends that you grip on to for shaft manipulation are rounded pegs. At first glance, I wonder whether the shape of these pegs cause hand fatigue for the weaver, I do think that would be a possible problem for me. Prices start at $825USD. This loom can apparently be mounted on a stand, however I don’t think Toika actually make a stand specifically for this loom.

Lastly, Louet make a few different table looms. I have to mention the Klik Table Loom first, as it’s such a different concept to your regular table loom. The shafts are actually operated (raised) from the side based on a spring and click system. Then you beat with a swinging beater. The loom comes with 4 shafts, but up to 16 shafts can be added to the space. This loom looks very lightweight and portable, which would make it an ideal “take with you” loom. A couple of thoughts that spring to mind though. 1. You have to lean around to the side to operate the shafts, possibly not good for back or shoulder injuries? 2. The loom looks like it would sit flat on a table, but at the same time the shafts look lower than the bottom edge of the loom? And what about those handles, could you not do a full rotation if the loom was on a table? Therefore, would it possibly be necessary to purchase the stand to use this loom effectively? So, while the concept is very interesting, I would definitely want to try this loom before buying. Price for the Klik is $750USD.

Louet also make the Jane (pictured) and the Erica table looms. I have heard very good things about these two looms and they are definitely gaining popularity. The Erica starts at $555USD for the 4 shaft or you can start with the 2 shaft at $370USD and upgrade to 4 later. The Jane comes standard with 8 shafts in 2 different weaving widths, and a built in raddle (no separate purchase for that) starting at $1,195USD. These looms fold down and are light weight to transport.

The links I’ve provided in this post are from Amazon and The Woolery.

If you are in Australia and interested in purchasing an Ashford loom, I recommend Tracy from Knit Spin Weave.

If you are in Australia and it’s a Louet you’re after, I recommend Nicky from The Thread Collective.

Have I missed any table looms that should have been mentioned? If so, please tell me in the comments below.

If you are interested in table loom weaving or already own one but need help to get going, my Table Loom Weaving course would be perfect for you!

I hope this has been useful to you!

Until next time…

Happy Weaving!

Filed Under: 4 shaft weaving, 8 shaft weaving, Table loom weaving, Weaving Tagged With: table loom weaving

  • Page 1
  • Page 2
  • Go to Next Page »

Primary Sidebar

About Kelly Casanova

Hand crafted boat shuttles

Categories

Archives

Meta

  • Log in
  • Entries feed
  • Comments feed
  • WordPress.org

Copyright © 2026 Kelly Casanova Weaving Lessons on the Foodie Pro Theme