
If you’ve ever found yourself rummaging through a tangled mess of yarn or searching for that one shuttle that always seems to disappear, you’re not alone. A cluttered workspace can slow down your creativity, but with a few must – have storage solutions, you can transform your weaving area into an organized haven.
Whether you have a dedicated studio or just a cozy corner, these storage tips will help you maximize your space and keep everything within easy reach.
When you look at your weaving space, try not to think of it as “too small or limited” but rather look at the availability of space and how it can be arranged to be more productive and less frustrating.
Let’s dive in!

Smart Yarn Storage Solutions
Yarn has a way of multiplying when you’re not looking (seriously, where does it all come from? 😆) We all have smaller lengths of yarn leftover from larger projects, and if you’re like me and hate to waste anything, you also have thrums (warp ends left on your loom after finishing your project) here, there and everywhere! Keep your stash tidy with these ideas:
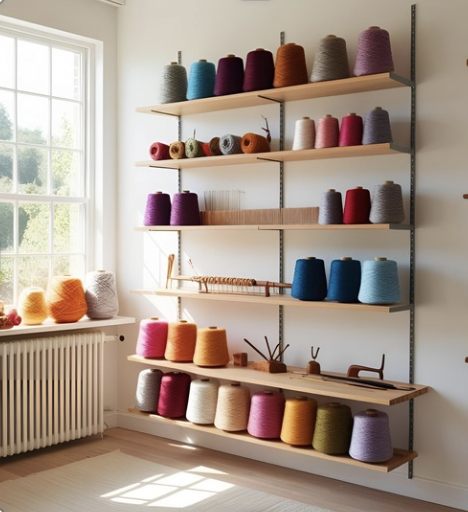
- Wall-Mounted Shelves & Pegboards – Not only do they free up space, but they can also make your yarn collection look like a work of art!
- Clear Storage Bins & Baskets – Sort your yarn by color, fiber, or project to make grabbing what you need a breeze.
- Over-the-Door Organizers – Perfect for small skeins, yarn scraps, and those odd little balls you just can’t part with.
- Stackable Drawers or Cubbies – Keeps your yarn dust-free while still letting you see what you have at a glance.
Organizing Weaving Tools & Accessories
Small tools are the easiest to lose (hello, missing threading hook!) Here’s how to keep them all in check:
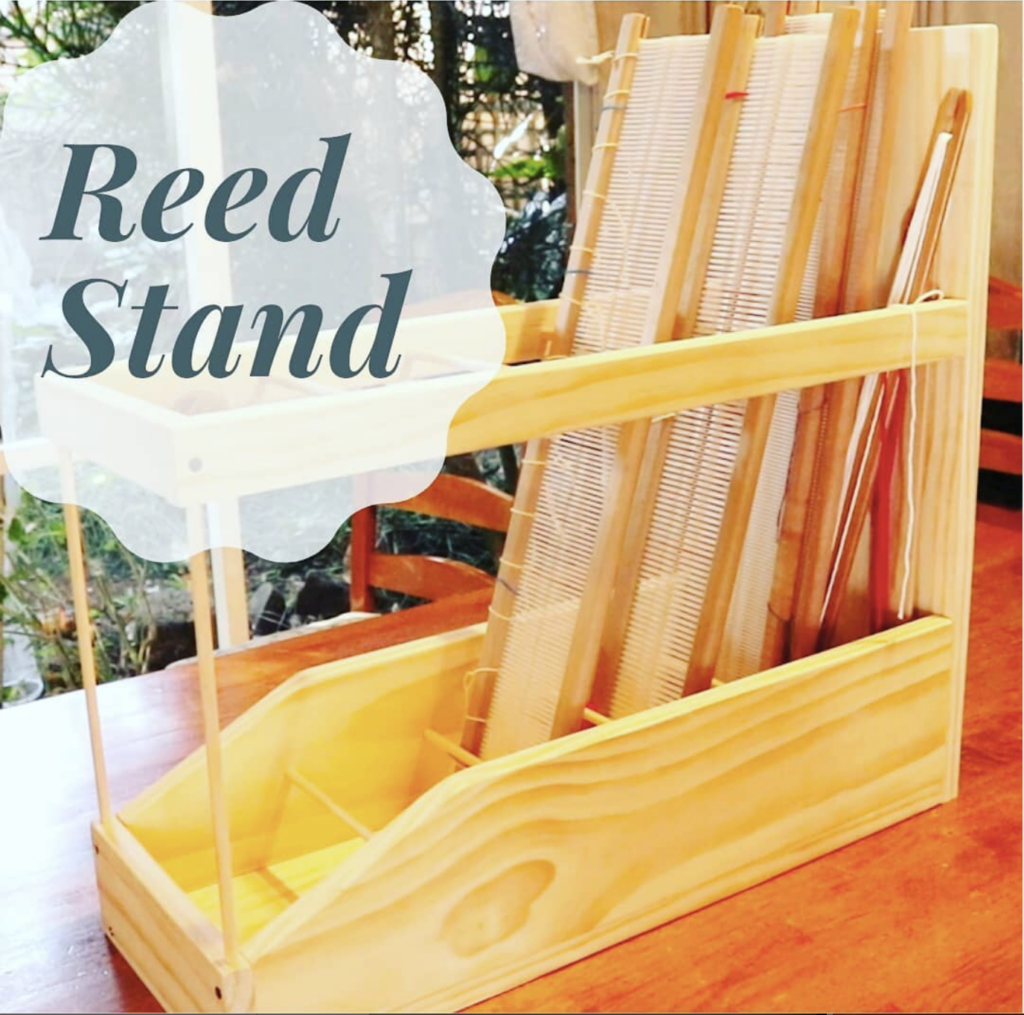
- DIY Heddle/Reed Stand – This is a great way to store rigid heddles and pick up sticks and doesn’t take up a lot of space. I have some free instructions available here for a DIY reed stand.
- Magnetic Strips or Pegboards – A great way to keep scissors, heddle hooks and tapestry needles handy.
- Drawer Dividers – Keep small tools and accessories from turning into a jumbled mess.
- Portable Tool Caddies – If you like to weave in different spots, having a grab-and-go caddy can be a lifesaver.
- DIY or Repurposed Storage Ideas – Use mason or other decorative jars for bobbins, utensil holders for shuttle storage, or tackle or craft boxes for beads, embellishments and smaller tools.
Loom Storage & Space-Saving Ideas
Looms take up space, so it’s important to choose an appropriate sized loom for your situation, but with a little creativity, you can store them more efficiently:
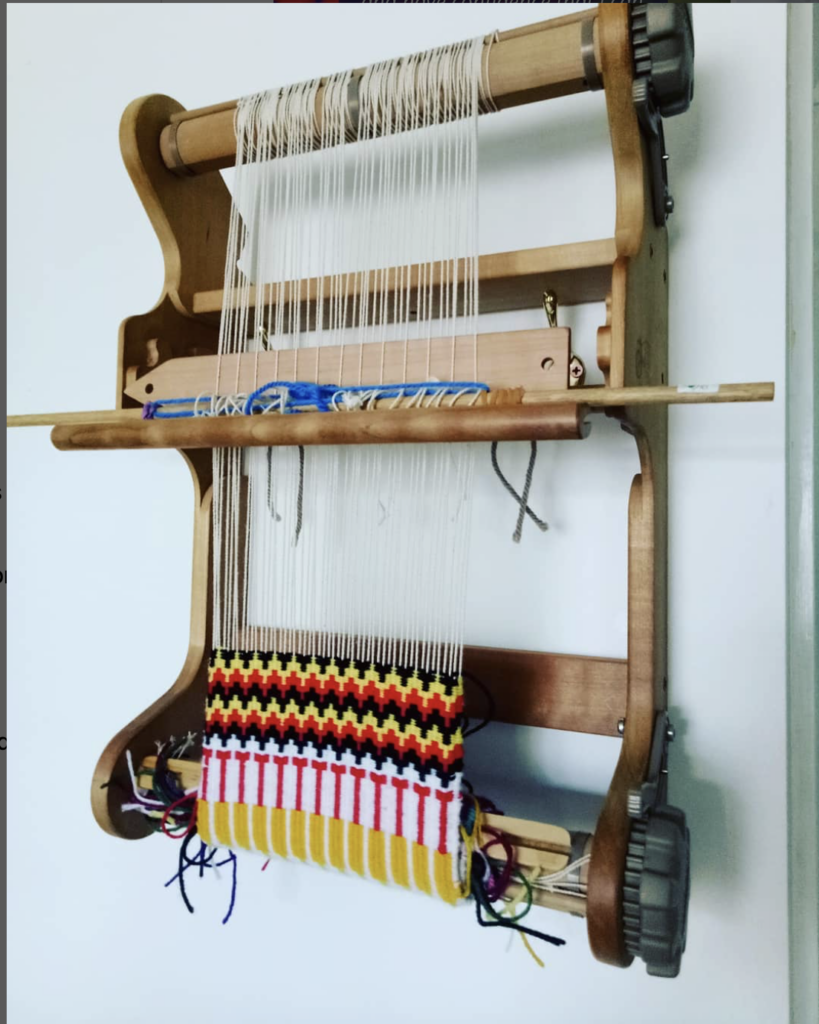
- Foldable & Compact Looms – If you’re tight on space, a folding loom can be a game-changer. Some floor looms, like the Louet David have a folding back beam for storage. Others, like the Ashford Table Loom have a collapsible castle.
- Wall Hooks or Coat Racks – Store frame looms and rigid heddle looms vertically to free up floor space.
- Rolling Carts or Trolleys – Keep smaller looms and weaving supplies mobile and organized. These are just so handy to wheel around and tuck away when not in use. You can choose how many tiers your trolley has, depending on how much space you need. I love to keep all my “close at hand” tools on the top tier to move between looms or workspaces.
- Closet and Built in Storage – If you need to tuck a loom away between projects, a closet can be ideal.

Keeping Your Weaving Space Neat & Functional
A tidy workspace means more time for actual weaving! It’s also way more inspiring to walk into a clean and tidy space than it is to try to weave amongst chaos. Here are some extra tips:
- Labels – Trust me, future-you will be grateful when you’re looking for that specific skein or tool. At the least, keeping the labels from your yarn will be so helpful, you think you will remember the exact fiber content, weight and color lot of each yarn but you really don’t!
- Create Work Zones – Having designated areas for warping, weaving, and finishing can streamline your process. This helps to keep designated areas clear so that they are useable when you want to use them.
- Declutter Regularly – We all hold onto scraps and extras, but doing a periodic clean-out keeps your space feeling fresh and inspiring. Vacuuming, sweeping and wiping down surfaces is not the fun part of being creative, but there is something about shiny surfaces that makes my heart sing! 🫶
Storage Hacks for Small Weaving Studios
Although I am now blessed with an actual studio space it wasn’t always that way! My first “studio” was a corner of a shared living room in our home. Even though I dreamed of having a studio of my own one day, I was grateful for that corner! It gave me a place to be creative and taught me the value of tidiness and organisation.

- Multi-Use Furniture – Foldable tables, storage ottomans, and wall-mounted desks can double your workspace without taking up extra room.
- Hanging Baskets or Floating Shelves – Perfect for keeping supplies off the floor while still within reach.
- Maximize Vertical Space – Use the walls for shelves, pegboards, or hanging storage solutions.
- Lightweight Yarn Caddies – These are so good for storing the yarn and tools for your current project.
To learn more about specific looms that are suitable for smaller spaces and additional organizational tips, check out this article.
*This post contains affiliate links. For more information please see my disclosure policy.
How would you like a free printable checklist to help you get your weaving space organized?
A well-organized weaving space isn’t just about aesthetics—it makes weaving more enjoyable and stress-free. With these storage solutions, you can spend less time searching for supplies and more time doing what you love.
What’s your favorite storage hack for keeping your weaving space tidy? Share your tips in the comments! And don’t forget to pin this post on Pinterest so you can come back to it later!
Until next time…
Happy Weaving!
I just bought a few items you linked here so hopefully you get some commissions. It’s just what I was needing
Thanks so much for using my links, I hope the products make a difference to you!
Hi Kelly, I. Just began weaving with a rigid heddle loom and took your Beginner Class and have watched multiple videos. Thank you! They’ve been so helpful.
One question: I only have a few stick shuttles and when finished with a project, I unwind any yarn left on a shuttle onto a cardboard paper towel roll to re-use. Is there another way?
Hi Diane,
That is a good way to keep your leftover yarn, but can get a bit bulky if there are lots of rolls.
Depending on the type of yarn you’re using (weaving yarn on a cone or knitting yarn on a ball etc) you can wind it back it’s original way.
For example, if I have a ball of knitting yarn I will usually knot the leftovers onto the original and wind it back on the ball. Same thing if I’ve used yarn on a cone, just wind it back on to the original cone.
If you don’t have any yarn left on the ball or cone and you have leftovers there are a couple of options.
I always keep the cardboard tube from inside my yarn cones and use them for small amounts of leftover yarn. They are compact and very strong.
Another thing I do with thicker leftover yarn is just wind a little ball using two fingers to start with and then making it more of a ball as I go. If there isn’t too much of it this is relatively easy and quick and then I chuck it in a basket of other little balls to use up here and there in smaller projects, tapestries etc.
Hi Kelly….my space is where you started. In my living area. I constantly am tidying it up because I need order.
These ideas are so helpful…maybe one day I will have the space for weaving.
Debbie
Any space is good space, I was happy to be able to have that amount of space and fit so much into it.
Thank you…it’s great to have your suggestions!
You’re most welcome! ❤️
Excellent ideas. Thank you for this.
My please Terri, we could all do with a little more organisation in our lives!
Another useful and practical reference article Kelly. Great collection 🙂 Thank you!!
Thanks Liz!