• Skip to main content
  • Skip to primary sidebar

Kelly Casanova Weaving Lessons

  • Hi! I’m Kelly!
    • Disclosure
  • Online Weaving School Class Index
    • Common account issues
    • Common technical issues
    • What do I get with a membership?
  • New to rigid heddle weaving? Start here!
    • Never heard of the rigid heddle loom?
    • How to weave neat edges on the rigid heddle loom
    • Rigid heddle weaving
    • Rigid Heddle Weaving Patterns
  • Patterns
  • Subscribe

8 shaft weaving

What is a table loom?

by Kelly 39 Comments

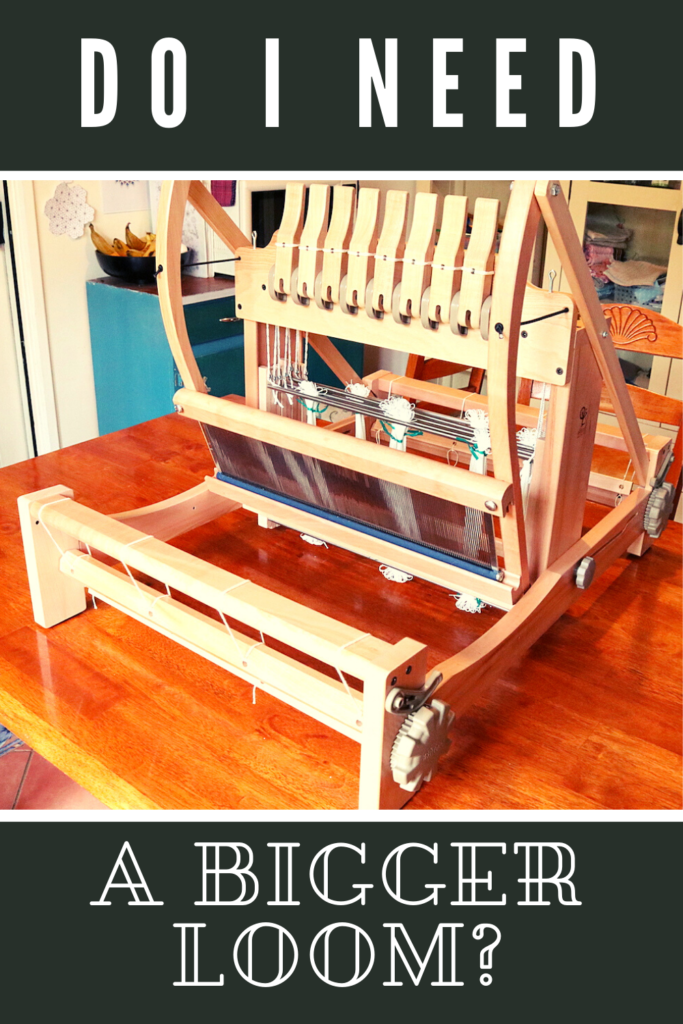
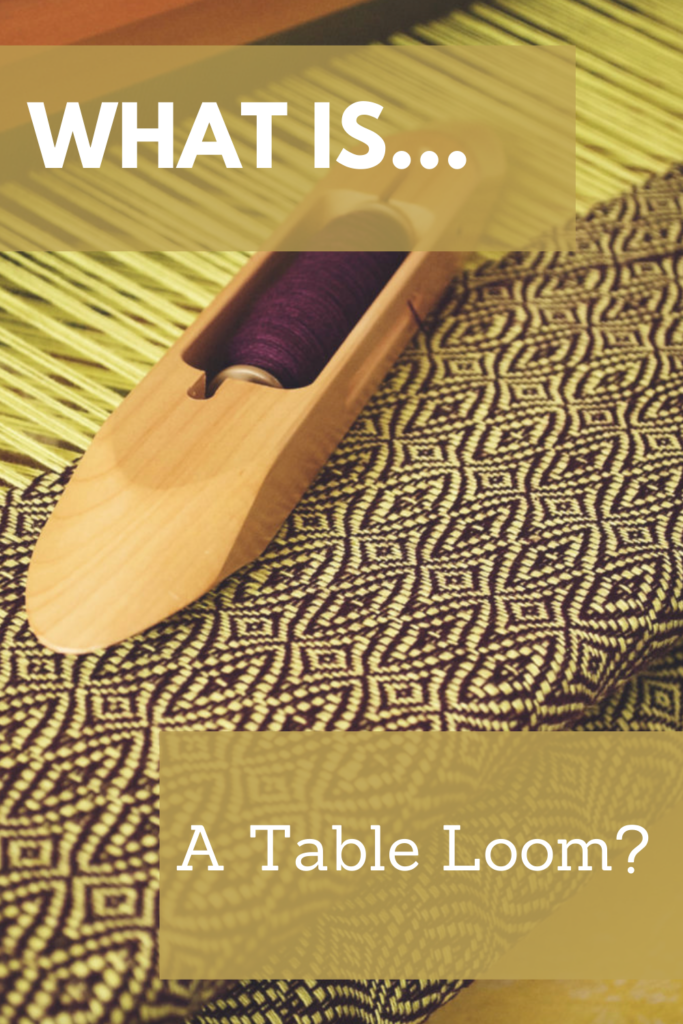
A table loom enables multi shaft weaving without the space or financial investment that a floor loom requires.

*This post contains affiliate links.

A table loom usually comes with four or more shafts. Four and eight shaft looms are the most common, but they can have more. Ashford, for example, manufacture a 16 shaft table loom!

Ashford 16 shaft table loom. Image from Ashford website.

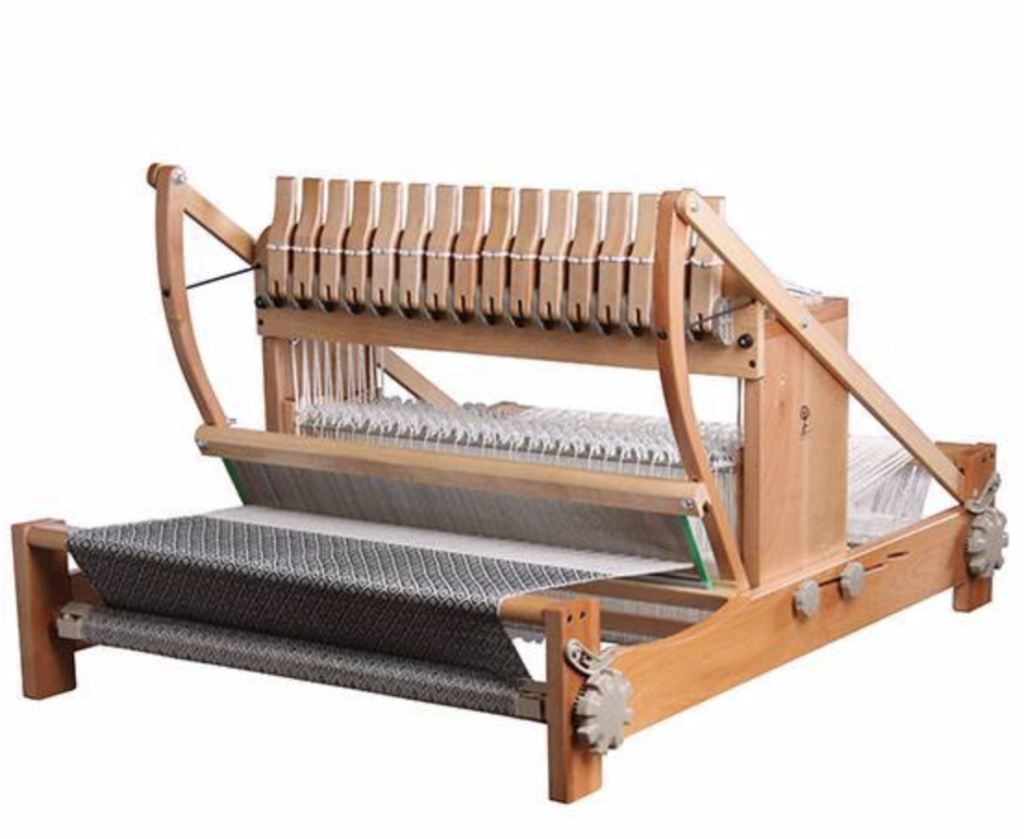
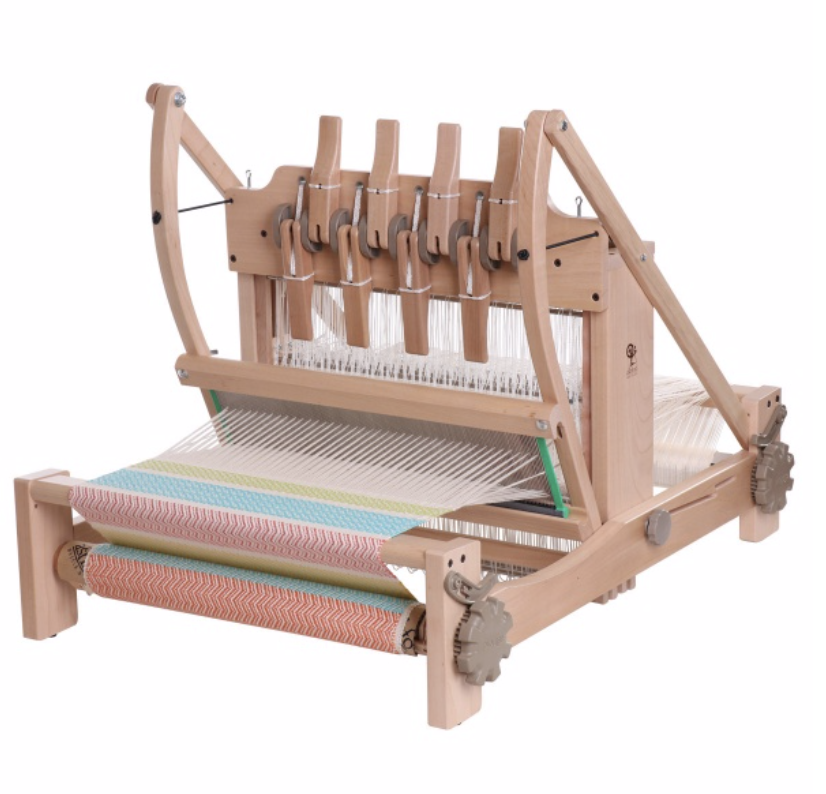
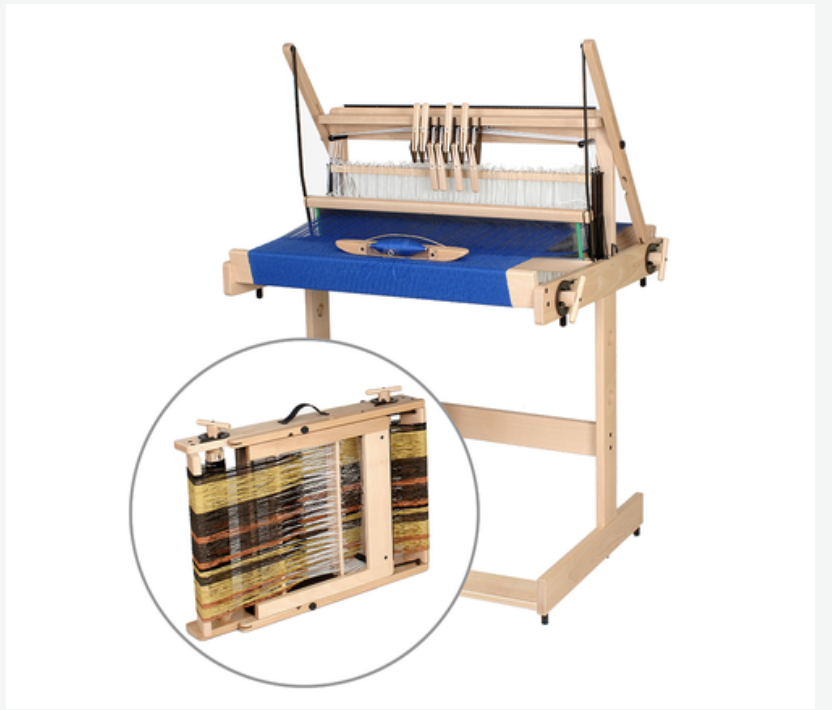
Table looms are often favoured for their portability and affordability. They make a great loom to take along to workshops, or anywhere you want to take a multi shaft loom. Some will come with a handy carry bag and many will fold down to be even more space efficient. They are also often used for sampling, as you can test out your yarns or pattern before committing it to the floor loom.

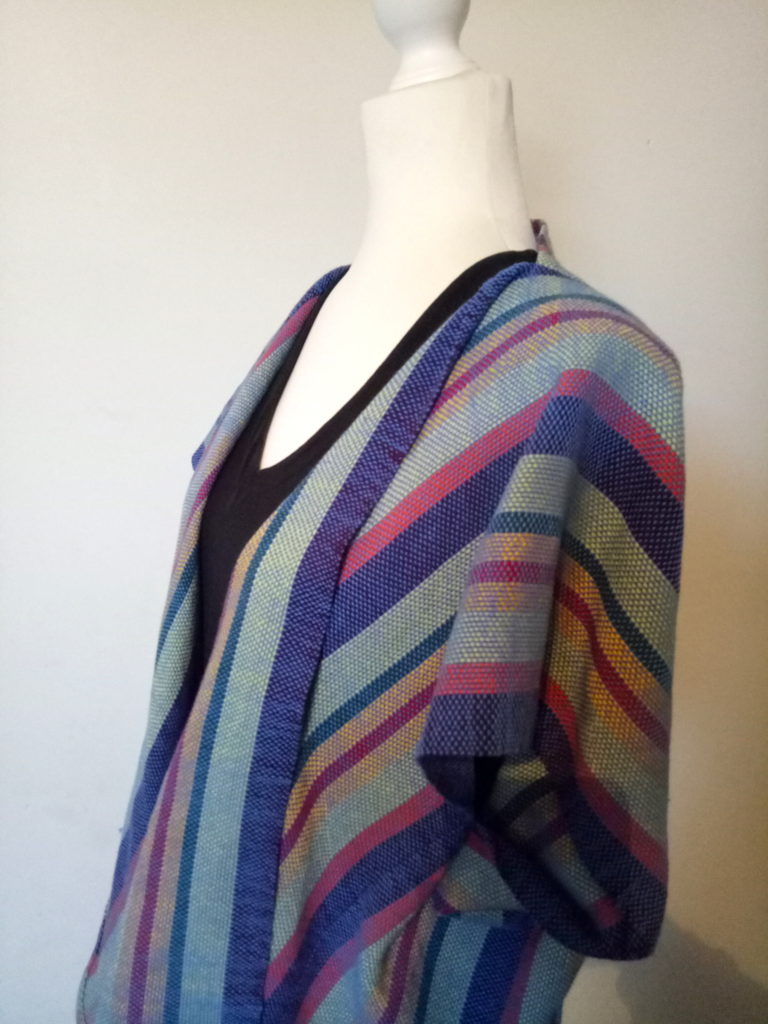
Table looms come in a variety of sizes, meaning that if you only require one for sampling or you have a very small space to fit the loom, you could choose a 16 inch or lower weaving width. This size would also be suitable if you only wanted to weave narrower pieces like scarves.

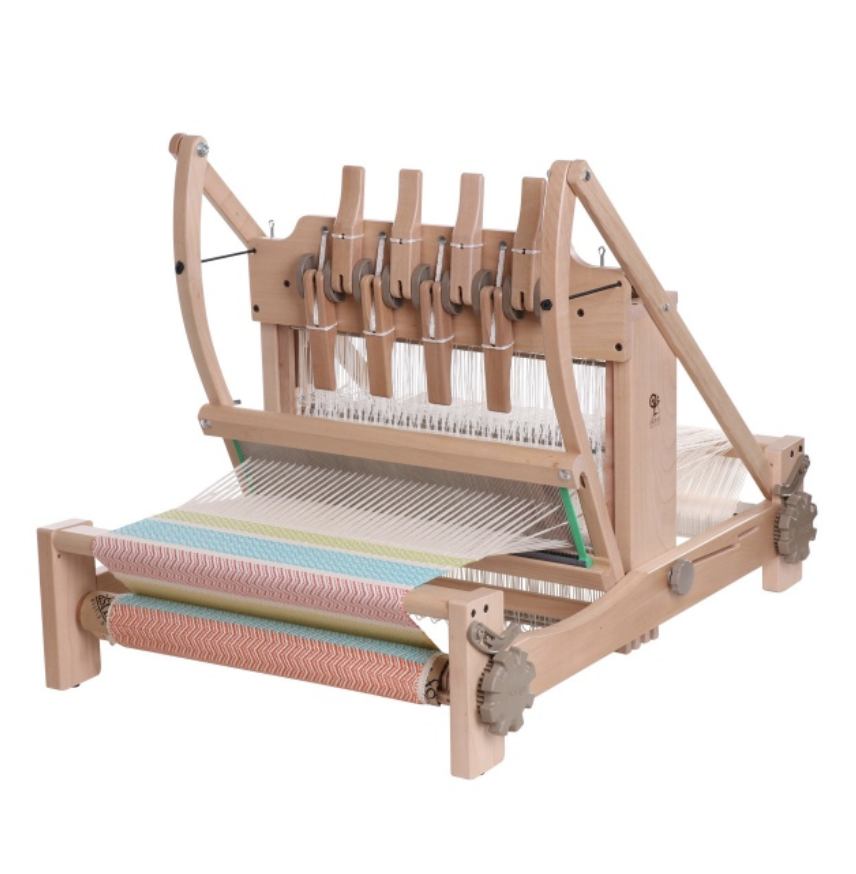
The mode of operation for weaving on a table loom differs to other looms and makes it instantly recognisable. The shafts, rather than being operated by raising or lowering a heddle/reed (as in rigid heddle weaving) or being foot controlled (such as treadling on a floor loom) are raised by the manoeuvring of levers that sit at the front of the castle (the upright part of the loom) and are tied to the shafts underneath. These levers are very simple to operate and as lever 1 corresponds with shaft 1 and so on, it is visually simple – you are actually looking at the levers right in front of you, making it difficult to mix up and get the pattern wrong.

Table looms are also adaptable. In the last paragraph I explained that the levers are hand operated, however if you want more of a floor loom experience, you can purchase a stand along with treadles. The treadles are tied to the shafts in place of the levers, allowing you to lift the shafts by depressing treadles with your feet.

Some looms can be purchased as a four shaft and upgraded to an eight shaft later on. This is a terrific option for those who:

  1. Wish to start out on four shafts only OR
  2. Don’t wish to make the financial commitment of an eight shaft loom right away.

To weave on a table loom, you will need a few things apart from the tools that come standard with the loom:

*A table space to keep the loom on whilst weaving (unless you also purchase a stand, which is available separately). If weaving at a table, some weavers choose to stand. My back is no good for standing so I like to use an adjustable height office chair that I find comfortable.

*A warping board. A table loom is warped indirectly, so you make your warp on the board and transfer it to the loom.

*A raddle kit. This is necessary for spacing your warp before taking it to the loom. You can buy the raddle kit that fits your size of loom. Some weavers choose to make their own.

You can see a short overview of the Ashford 8 shaft, 32″ table loom here-

And you can see a demonstration of me using the loom here-

I have some exciting news regarding table looms too! I recently purchased the Ashford 16″ 8 shaft table loom to use for teaching. My husband and I made a two part video that shows you how to assemble it.

But that is not all! My primary purpose for buying this new loom is because I have had so many requests for a table loom class and I am happy to say that I’ve put together a very comprehensive class, Weaving on a Table Loom.

I hope this post has been useful to you, let me know in the comments if you have any questions or simply want to leave me a comment.

Until next time…

Happy Weaving!

Filed Under: 4 shaft weaving, 8 shaft weaving, Table loom weaving, Weaving Tagged With: table loom

Should I buy a larger loom?

by Kelly 19 Comments

One of the number one questions I’m asked by either brand new or seasoned weavers is “Should I buy a larger loom?”

In this post I will take you through the main points to consider when you’re wondering whether a size upgrade is the right choice for you.

*This post contains affiliate links.

The first consideration is what type of loom we’re talking about. Most people who ask me are rigid heddle weavers. So I’ll cover rigid heddle looms first, specifically Ashford looms, as they have the largest sizes available.I often recommend my 24″ loom as a great starting point for a beginner who wants a decent, but not huge width. It is wide enough to weave smaller width items like scarves but just large enough to weave kitchen towels and bags.

You can, of course weave yardage to sew with (to make your own clothes and larger items) but that involves sewing panels together to make wider widths. Depending on the item you plan to sew, this may or may not work well.

Beyond the 24″, the next size up is the 32″ rigid heddle loom. The largest currently available is the 48″ rigid heddle loom.

When considering a larger loom, consider the following points:

  • Do you have the physical space for a larger loom?

If you buy a rigid heddle loom 24″ (that is the size I have) or above, I would definitely recommend to also purchase a stand with it.

I personally would not enjoy using a larger loom trying to lean it on the edge of a table or similar, and I don’t think that this would allow you to maintain a beneficial weaving posture. A good posture is really important – even if you have no physical injuries or problems, know that you could develop problems long term through repetitive poor setup and practices. So a stand is well worth the investment.

But, this means that your loom will be free standing rather than packed away. Do you have a space where you can set up a loom of that size and leave it on the stand when finished? Or does your living space/s dictate that your loom would need to be packed away in between uses?

  • What is your budget?

This is a pretty important consideration for most of us! Naturally, the larger your loom, the more it will cost. And not just the initial outlay for the loom, but addition tools or pieces that you wish to add along the way. Every time you buy a different sized heddle/reed, a pick up stick, a stick shuttle – these are all going to be larger to compliment and fit your loom and that will cost more.

Here are a couple of examples as a comparison. I’ll list the 24″ loom specifics as compared to the 48″. All prices are in US dollars.

24″ RHL and stand – $394 USD (you can sometimes find a combo deal of the loom and stand together for a slightly cheaper price).

24″ 10 dent reed/ heddle – $37.50

22″ stick shuttle – $7.50

48″ RHL and stand – $695

48″ 10 dent reed/heddle – $89

48″ stick shuttle $40

Uh huh, big price differences!

  • What do you intend to weave?

Some new weavers don’t really consider this when purchasing. Not being familiar with the possibilities or not having used a loom before, it can be very difficult to know what items you will end up enjoying weaving. If you only intend to weave scarves and smaller items, why go to the expense of the largest loom?

On the other hand, you may find that your absolute favourite thing to weave is baby blankets or afghans, therefore making the larger loom well worth your consideration. What if you make the decision to buy a smaller loom but after a little experience find that you want something larger?

Well, the good news is that rigid heddle looms are easy to resell. If you have kept it in good condition, it should be easy to find an eager new weaver willing to take it off your hands for a fair price. You can then use this money to invest towards the larger one.

  • How is your back?

Back or shoulder problems? Neck trouble? Then you need to consider carefully whether a larger loom is the right choice for you. A larger loom means a much wider reach with a shuttle.

As an example, I can sit very comfortably at my 24″ on it’s stand, extend each arm out to insert the stick shuttle and not have to move forward in my seat.

As someone who has a back injury and regular flare ups, if I had to lean forward or to the side every time I wanted to throw a pick, that would be a real problem for me. It would be a much greater strain on my body. I prefer to accept my limitations and be grateful that I am able to weave on the 24″ and plan my projects accordingly.

That brings me to the next related topic, the table or floor loom.

I’ve written a large number of articles on this topic, here is a list of those posts if you’re interested in researching more.

When I had my 8 shaft, 32″ table loom it was a little more difficult to weave on when I had it fully warped, but with the correct height adjustable chair, it was more than manageable. I still miss that loom, I sold it to make space and provide extra funds for my floor loom. I’ve since replaced it with a smaller 16″ table loom that I can use for teaching purposes – perfect!

Now that I have my Louet David 2, 35″ floor loom, even though it is the widest loom I have owned, it is a good fit for me width wise. It is wide enough to weave baby blankets and wide shawls.

Recently I wove yardage on it for my Clothtober project, which was a tunic for me and it worked out well. So, why is this loom not a problem for my back? Well, I always use a boat shuttle with this loom.

Because the tension is excellent, I can shoot my boat shuttle back and forth with ease. I am also seated on an adjustable piano bench and find that I develop a slight rocking motion as I get into the weaving rhythm. Although my shoulders do get a little sore if I put in a long weaving session, it is not excessive and generally my back is fine as long as I’m not in a dreaded flare up phase.

The action of throwing a boat shuttle is quite different to passing a stick shuttle. Yes, you an use a boat shuttle with a rigid heddle loom too, but I generally don’t because it can’t hold the same tension so I end up mostly passing the boat shuttle through anyway.

I should also add, if you do have a rigid heddle loom that is a little smaller than you would like, you always have the option of double width weaving. Although somewhat limited, it is a really terrific way to double the width of your fabric. I have two classes that teach you how to do this – Doubleweave Baby Blanket and Weaving with Two Heddles. I also have the Rainbow Lap Blanket, which is woven entirely on a Sampleit loom.

I certainly didn’t intend to write such an epic post when I sat down to address this topic today, but there is a lot more to be said about it than I realised! I hope my ramblings have been of use to you.

As always, leave me a comment with any questions or additional points you may have to add. I appreciate your input!

Until next time…

Happy Weaving!

Filed Under: 4 shaft weaving, 8 shaft weaving, Floor Loom Weaving, Rigid heddle weaving, Weaving Tagged With: buying a loom, floor loom weaving, rigid heddle weaving, table loom weaving

Is a table loom the answer?

by Kelly 34 Comments

One of my most commonly asked questions relates to physical conditions.

No, I’m not a physician, but I am a weaver and I do have physical restrictions. I’ve also found ways around the restrictions and I’d love to share some of them with you.

This post contains affiliate links. This means that if you click and purchase, I will receive a small commission at no extra cost to you.

My first multi shaft loom was an 8 shaft, 32″ Ashford Table Loom.

Image from Ashford website.

My decision to buy this particular loom was based on a few things.

  1. My physical capabilities
  2. What the loom could do
  3. Price
  4. Size

Addressing number 1 first. I have a back injury that causes daily pain and discomfort and limits what I can do physically. I desperately wanted a multi shaft loom but thought it probably wasn’t going to be possible for me to physically use one. So I started researching (a lot!) and found that a table loom could be a very good option. And it was! Here is why:

  • My table loom was operated by levers rather than treadles. This meant no getting down on the floor to tie up treadles.
  • The raddle was separate to the loom. This meant that if I was doing a narrower warp, I could sit at the table, away from the loom to place my warp chain in the raddle ie. less time standing.
  • I had my loom on a table rather than a stand. I also had a height adjustable chair on wheels. So I could adjust my chair to the right height, then roll right in under the table and get close to the loom. Many table loom weavers weave standing up, I couldn’t do that, so the adjustable chair was very important.
  • The loom had a slung beater. Effortless to use.
  • Because the table was at a good height for me, I found warping easy, not having to bend to the height of the loom.

On to number 2 – what the loom could do.

Well, it could do anything that an 8 shaft floor loom could, but there were some differences. I could never achieve as good tension on the table loom as I can on my floor loom. It wasn’t a really huge deal, but could be frustrating at times when my boat shuttle would dive through the weaving. The other thing that bothered me was not being able to remove or add heddles from the shafts once I had a warp on. Once again, not a huge deal, but annoying at times.

The all important number 3 – the price!

Table looms are really affordable considering the abilities they have. If you can find a used one with all the pieces and in good condition, even better! For those who really can’t afford the outlay (which can be massive!) for a floor loom, a table loom can be 1/4 to 1/2 the price. You also have the option of starting out on 4 shafts to reduce the initial outlay. You can either stay with your 4 shafts or upgrade to 8 later on.

Finally, number 4

If you simply don’t have space for a floor loom, a table loom can be the solution. Whether you have it sitting on a table or on a stand, it is more compact than most floor looms.

As I mentioned, I do now have a floor loom. Testing myself on a table loom taught me many things. One thing was that my body could handle it if I was careful and that greatly influenced my final decision to buy a floor loom. It was also the perfect learning ground for weaving with multiple shafts, so that moving up to a floor loom was a short, rather than steep learning curve. I had to sell my table loom in order to finance and make space for my floor loom, but many times I still wish I had the table loom as well.

If you are interested in learning more about table looms, I have some Youtube videos that will help.

I have also written about table looms in a previous post where I discuss Which loom to buy?

I hope you found this post informative and helpful. Please let me know by leaving a comment, and be sure to ask any questions you may have.

Until next time…

Happy Weaving!

Filed Under: 4 shaft weaving, 8 shaft weaving, Weaving Tagged With: 8 shaft, disability, table loom

8 shaft Strickler sampler

by Kelly 2 Comments

If you follow me on Instagram you will have been viewing the progress I’ve made on my 8 shaft sampler.

*This post contains affiliate links, meaning that if you click and purchase, I will receive a small commission at no extra cost to you.

I didn’t have any specific plan for this sampler other than to explore some 8 shaft drafts on a rose path threading from Carol Strickler’s 8 Shaft Pattern Book.

If you’re not familiar with rose path threading, it is a point twill variation and can be used for both 8 and 4 shaft patterns. An example of rose path threading for 4 shafts would be 1,2,3,4,1,4,3,2,1 and for 8 shafts 1,2,3,4,5,6,7,8,1,8,7,6,5,4,3,2,1.

Something I really love about having an 8 shaft loom is the range of patterns or motifs that can be woven. I wanted to explore:

  1. Which combinations of yarns would be most effective for the designs I wanted to weave.
  2. How many different patterns I could weave on 8 shafts by changing my tie up often.

Once you have threaded a multi shaft loom, there is no going back, no changing the order of threading (unless you want to go back and start again and no one wants to do that!) By changing the tie up though, you can vary the combinations of shafts as you’re weaving, therefore changing the pattern without having to change the threading.

By “tie up” I’m talking about attaching my treadles to various shafts with texsolv cording. Different types of looms have different ways to tie up the treadles and one thing I love about my Louet David is how simple it is to tie up. This means that if I want to change the tie up to alter the pattern, it doesn’t take long and isn’t hard to do.

My loom is a sinking shed loom, so I was aware that the actual pattern would be woven on the underside. I didn’t mind that (in other words, I couldn’t be bothered messing around with the treadling to make sure the pattern would weave the right way up). Interestingly, I discovered that I often preferred the weaving on the underside to the right side anyway.

I started with 8/2 unmercerised cotton for the warp in white and warped at 20 ends per inch. I made my warp around 10 inches wide on the loom, as I like to have plenty of space to see my pattern. A narrow warp doesn’t always give enough pattern repetitions to give a good representation.

Beginning on page 30 of the book, I randomly picked motifs to weave according to the number of treadles required. My loom has 10 treadles, so 8 were tied up for the pattern weft and 2 were tied up for tabby.

Right side
Under side

I initially started weaving with some dk weight cotton (pink) and Bambu 7 (blue) and changed to 8/2 Cottolin (grey). For these designs I used tabby throughout (which means that following every pattern weft row is a row of plain weave) in an 8/2 mercerised cotton in a very light blue which looks mostly like white in these photos.

I wasn’t too thrilled with the initial results but it showed me something valuable. For the designs to have more impact I needed to use a heavier weight of yarn for the pattern weft and to choose my colours with intention. I wanted bold, not “meh” designs!

Right side
Under side

I switched the tie up and the yarn, and presto! Much better result this time. I alternated between a variegated orange/pink and teal fingering weight hand dyed wool, keeping my pale blue 8/2 cotton tabby. The top design is a burgundy dk/light worsted wool. I find both sides of this design equally pleasing. Between the hand dyed and burgundy you can see that the design looks slightly different – this is as a result of changing the treadling around but keeping the same tie up. So many variations are possible! If you’re looking for this design in the book, it is number 132 on page 32.

Right side
Under side (Space Invaders?!)

For this design I once again changed the tie up and swapped to a black fingering weight wool. This design is number 133 on page 32. The red design is number 128 and was worked in a dk/light worsted weight cotton. You can see how different this one looks on each side! I also tried it in a lighter weight and colour of cotton, which sort of just shrunk into the background.

Right side
Under side

This design is one of my favourites – number 139 on page 33. I changed treadling and yarn again for this one, using dk/light worsted weight wool (I had figured out by now that a heavier weight wool gave the kind of effect I liked).

Right side
Under side

I finished up with design 120 on page 31. The Strickler design looks like little trees, but mine are upside down and look more like balloons, which I find quite cute. I experimented with my tabby yarn by using a hand dyed, variegated tencel against the blue wool. I quite liked the effect (you can see the rainbow-ish colours in the middle of the panel.

This was a really fun project. I loved having something on the loom that had no particular commitment and didn’t need finishing quickly – it was purely for my own enjoyment and learning. That’s the kind of weaving I like!

I may just keep this as a sample or I may cut it up and use it for a small project. For now, I like the way it looks just hanging off my studio shelf.

If you are intrigued by multi shaft or floor loom weaving, I have a very popular class for beginners, the Introduction to Floor Loom Weaving. It takes you through all the step by step basics of getting started on your loom and weaving a beautiful cowl project. There is also a follow up class to go onto afterwards. You can even purchase the two classes together for a special price.

If you take out a Yearly Membership or Monthly Membership to my Online Weaving School, the floor loom classes are included.

I hope you found this post interesting and inspiring!

If you have any questions about this post or my Online Weaving School, please leave me a comment below.

Until next time…

Happy Weaving!

Filed Under: 8 shaft weaving, Inspiration, Weaving Tagged With: 8 shaft weaving, floor loom weaving, rose path, weaving

My Favourite Books for Multi Shaft Weaving

by Kelly 9 Comments

I love books, so it makes sense that I am a huge lover of good weaving books. It can be hard to know which books are worth buying, especially if you’re buying online and can’t view the book before purchase.


I have already made a video on my favourite rigid heddle weaving books, but haven’t talked about my floor loom or multi shaft books.


This is certainly not an exhaustive list, and I definitely plan on increasing my collection over the years, but these are a few that I have found particularly good.

*This post contains affiliate links


I will start with my absolute favourite. If, in some terrible circumstance, I had to choose just one of the following books to keep, this one would be it!

The Handweaver’s Pattern Directory by Anne Dixon only covers 4 shaft weaves, and yet, with the number of pattern drafts you could feasibly use this book for years before even considering buying an 8 shaft book. There is nothing I do not love about this book! Yes, it is a little expensive, but I consider  it my “go to” for any 4 shaft weaving. It’s a hardcover book with spiral binding. This is awesome because you can lay the book flat to follow a threading or treadling pattern, and the hard cover prevents any damage to the pages. I’ve had mine for many years and it still looks as good as new. The layout shows you exactly what you can expect from each draft by providing colour pictures and yarns used to achieve each one – great for those just starting out.

Once again, not a cheap book, but this one is an absolute classic!  Carol Strickler’s A Weaver’s Book of 8 Shaft Patterns has plenty of information on 8 shaft weaves, explanations of tie ups and treadlings, and black and white pictoral representations of each weave (there are almost 900 photos). Individual yarn suggestions are not given, but in each new chapter, suggestions are made for particular weave structures. Many of the drafts have historical information – where the draft came from (if known) or where it is adapted from, which provides the keen weaver the opportunity for further research if desired. 
Next Steps in Weaving by Patty Graver has been a great one to add to my library. Published in 2015, it has a more modern and fresh feel. The layout is uncluttered but still contains a lot of information. I admit that I read this book when it first came out and I was in the infancy of my multi shaft journey. I felt like some of it was a bit beyond me at the time. However, when I cam back to it later (after a lot of research and practice) I found that the language now made sense and it was in fact a very helpful book! 
The beginning of the book goes over understanding terminology and drafts (something that many new weavers struggle with!) She explains twills and twill orders and then launches straight into the projects. This is my style of learning and teaching – project based! To get stuck in and actually learn something as you do it, rather than be stuck at the starting line with a lot of theory and fear of how to put it into practice. Patty starts with some basic twill projects, then shows more advanced versions to expose the reader to what is possible with variations and colour. The threading charts for the projects are all colour coded, which I think is a really great visual learning cue for newer weavers, and even for more seasoned weavers who just want to follow a threading chart in a simple format.
There is a lot more I could say about this book, but then this post may turn into a book itself! So, I’ll finish up with this. It’s a great book, the projects and samples are beautiful and inspiring, and even if, like me, you find it a little overwhelming to begin with, it is a book you can keep going back to over and over.
A Handweaver’s Pattern Book by Marguerite P Davison is another well know weaver’s classic. It was first published in 1944 as a green book, the orange one being a more recent and publication. Thanks to the generosity of a student, I now own the green book as well. This book has 200 pattern drafts and has 4, 6 and 8 shaft weaves. The layout is a little more old fashioned (though there are black and white photo representations of most drafts) and some may find it difficult to decipher the way in which the drafts are drawn. That should not put off the adventurous weaver though, as it is very beneficial to be able to read all styles of drafts so that you can decipher them, no matter what country or time period they are from. 
This is one of those books that you read and just think, “that is a lovely little book”. Simple, lovely big photos, nice colour. Tom Knisely’s Handwoven Baby Blankets starts out with a useful section on the basics of baby blanket weaving, such as sizes, colours and materials. 
There are over 30 projects and it includes both 4 and 8 shaft. Every project has specific yarn and colour descriptions. If you’re interested in weaving baby blankets, I highly recommend this delightful book!
Probably my most asked question from multi shaft weavers is “how do I read a draft?” The next step on from understanding how to read and use a weaving draft is to begin drafting them yourself. This is something that is of huge interest to me, but something I have not devoted enough time to as yet and still have much to learn. If you are interested in drafting for yourself, Madelyn van der Hoogt’s The Complete Book of Drafting for Handweavers is going to help a lot! While I confess that I have not made my way through the entirety of the book yet (it is in a workbook style with drafting exercises for you to follow), I intend to do so as it contains such valuable information. This book is available from The Woolery.
If you’re as interested in coverlets as I am, these are my most loved coverlet books I own:
Carol Strickler’s American Woven Coverlets
Keep me Warm one Night, Burham and Burnham 
(This one is also in my possession thanks to the generosity of a student and it is now one of my most treasured books!)
A Book of Patterns for Hand-Weaving, Mary Meigs Atwater
Weaving a Traditional Coverlet, Helen Jarvis
My last recommendation is for those who are keen to branch out into double weave on your floor loom or table loom.
Doubleweave by Jennifer Moore. Whether you are wanting to explore weaving double cloth or double (even triple) width, this popular book will be a very valuable addition to your collection.
I do have more weaving books in my collection, but these books I’ve listed and described are the ones that I am most happy to recommend and really feel that they would benefit your weaving library too.
I hope you have found this post helpful, please let me know if you have any questions. Do you own any of these books? Which is your most used?
Until next time…
Happy Weaving!


Filed Under: 4 shaft weaving, 8 shaft weaving, Books, Floor Loom Weaving, Weaving Tagged With: books, recommended books, weaving, weaving books

8 shaft towels and lessons learned

by Kelly 8 Comments


I was really happy to pull this fabric off the loom – only 4 towels in all, but quite a time investment!

I love that such variety can be achieved on one warp, and I approached this project rather like a study in variation. 
Armed with Carol Strickler’s 8 Shaft Patterns, I warped a plain white cottolin and hemp warp. My loom has 8 shafts and 10 treadles, so I chose a draft that would fit those requirements but with maximum versatility. I can’t show you a copy of the draft, as that would be a copyright infringement. If you have the book, or are interested in purchasing, the page number for this draft is 29. For the threading, I chose the rose path variation.

This was by far my favourite, I love the bold yet intricate pattern. I used a dark purple 8/2 cotton as the weft, but doubled it to make the pattern weft stand out.  This is pattern #102 in the book, and uses 8 shafts with no tabby. I was worried about draw in, because I was feeling lazy and not wanting to use a temple, but the draw in was less than expected anyway. The treadling was really easy for this pattern, compared to the others which were more complex.


#101, a change of tie up and treadling, this is actually 4 shafts and 6 treadles to allow for the tabby. If I had my time over, I would have doubled the grey 8/2 cottolin weft to accentuate the pattern. At the same time, it’s nice to weave something that looks delicate an intricate. Now that it’s off the loom and washed, the pattern is a little too subtle for my taste. 

#100, another change of tie up and treadling – once again, not as bold as expected and next time I would use a 5/2 cotton for weft instead of the red 8/2. I do like the effect though, the diamonds are really lovely. This one is 8 shafts and 10 treadles to include the tabby.

Exact same treadling as the red diamonds, I just changed the weft to turquoise.

What I learned about the project:
*I used a sett of 20epi – next time I would increase this as the towels are a little airier than I would like. I don’t think I would increase all the way to 30, but I’d give 24-26 a go.
* I am so glad I purchased Carol Strickler’s book, it could definitely keep you busy for a very long time with the variety of drafts.

The most important thing I learned:
Once the towels were washed and hanging on the line, I realised that 3 out of 4 towels had treadling errors (!) Rather than being devastated that the towels I spent so much time on are imperfect, I used it as an opportunity for reflection. Why did I make the mistakes? What could I do differently next time? I found the answer to both of these questions quickly.

I made the errors due to tiredness, lack of concentration and interruption. Using 10 treadles in a non sequential fashion requires concentration! My studio is in a shared space which is actually a family room. The children have access to me whenever they want, and the room is a walk through room with no door. Hence, the lack of concentration.

What I will do differently next time is to simplify. I do like a challenge, but in this season of my life I have realised it is better for me to weave things that are perhaps more familiar and don’t require as much focus. Forcing myself to take on greater projects may just lead to frustration, and I want to enjoy both the weaving and my family. So, for now, I will choose my projects more carefully and not go overboard. As I said to my husband “If I have to wait until we are old and retired to weave just the way I want to, I’m OK with that”. I consider it a great blessing that I get as much weaving time as I do. It’s a great reminder to be grateful and count my blessings! 


Filed Under: 8 shaft weaving

  • « Go to Previous Page
  • Page 1
  • Page 2

Primary Sidebar

About Kelly Casanova

Hand crafted boat shuttles

Categories

Archives

Meta

  • Log in
  • Entries feed
  • Comments feed
  • WordPress.org

Copyright © 2026 Kelly Casanova Weaving Lessons on the Foodie Pro Theme