• Skip to main content
  • Skip to primary sidebar

Kelly Casanova Weaving Lessons

  • Hi! I’m Kelly!
    • Disclosure
  • Online Weaving School Class Index
    • Common account issues
    • Common technical issues
    • What do I get with a membership?
  • New to rigid heddle weaving? Start here!
    • Never heard of the rigid heddle loom?
    • How to weave neat edges on the rigid heddle loom
    • Rigid heddle weaving
    • Rigid Heddle Weaving Patterns
  • Patterns
  • Subscribe

Floor Loom Weaving

Feeling Stuck? 5 Quick 10-Minute Fixes to Break Through Your Weaving Plateau

by Kelly Leave a Comment

Have you ever sat down at your loom and just… stared at it?

You want to weave. You love weaving. But nothing’s sparking your creativity, and everything feels like too much effort.

You’re not alone. Every weaver hits a plateau now and then. Sometimes it’s not enough time or decision fatigue. Maybe it’s a busy time in your life and the creative energy is lacking. Or maybe you just feel a little bored with the whole thing!

The good news? You don’t need to overhaul your whole setup, buy new equipment or start a huge new project to get inspired again.

Here are five quick, low-pressure ideas that take just 10 minutes—but can completely shift your mindset and help you fall back in love with weaving.

1. Switch Up Your Yarn or Color Combo

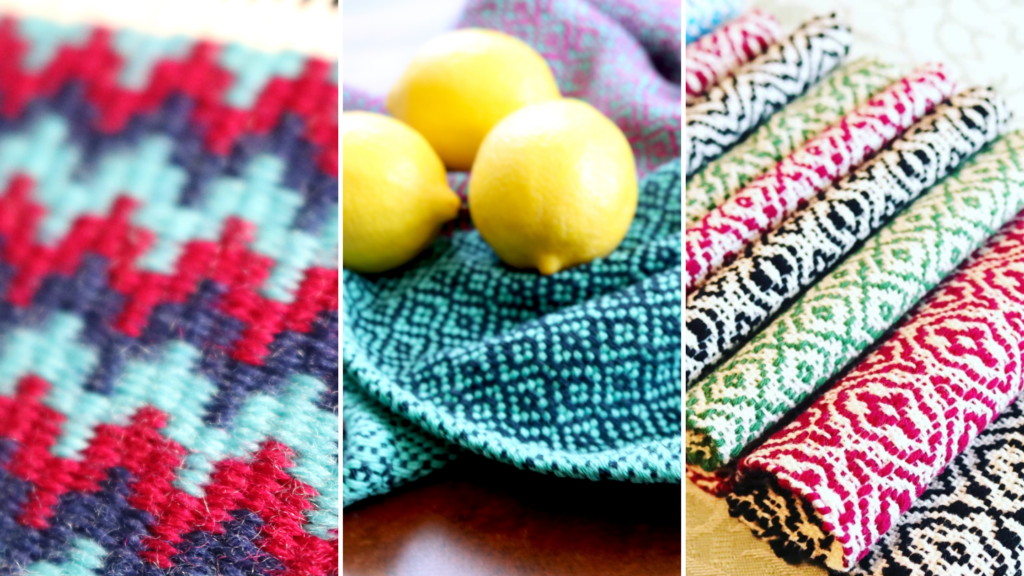
Sometimes all it takes to reignite your excitement is a little color play. Spend 10 minutes digging through your stash and pull out 3–5 yarns you wouldn’t usually use together—bold contrasts, unexpected textures, or that one skein you’ve been “saving.”

Lay them out, snap a photo, or warp up a quick sample. A fresh palette can open up a whole new direction.

Tip: Look for color inspirations – they are everywhere! In nature, manmade objects, you will even see color when you close your eyes 😀 Try taking inspiration from the color wheel and explore some basic color theory.

2. Test a New Weave Structure (On a small scale)

Trying something new doesn’t have to mean committing to a large project. Choose a weave structure or technique you’ve been curious about—like waffle weave, finger controlled techniques, or krokbragd—and do a tiny sample on a new or leftover warp.

Ten minutes of experimentation can be just the spark you need.

Tip-  For small project ideas, check out this list.

3. Weave a Just-for-Fun Project

Give yourself permission to weave just because. A mini coaster, mug rug, or bookmark can be finished quickly and without pressure—and often leads to surprising bursts of creativity.

Don’t overthink it. Choose whatever yarns catch your eye, and just go.

Tip- If you’re time poor, check out the principles of the 10 Minute Rule and see if it’s something that could be beneficial in your life.

4. Refresh Your Creative Space

It may sound simple, but cleaning up your weaving space has a powerful mental effect. In just 10 minutes you can:

  • Clear away old yarn scraps and tools, sweep or vacuum the floor
  • Do a brief declutter or put things away to create a sense of space
  • Add a plant, vase of flowers, photo, or anything that makes you smile

Weaving is as much about mindset as it is about materials—and a tidy, inviting space can make all the difference. A cluttered room makes a cluttered mind!

5. Revisit a Favorite Pattern — But Change One Thing

Remember that pattern or project you loved making? Try it again—but switch up one element. Change the colors, yarn weight, or sett. Add stripes. Try a different finishing technique.

Familiar patterns offer a safe, low-stress way to explore something with a new twist.

Need inspiration? Browse my Pattern Store or check out some student work to see how they made the patterns their own.

The Stepping Up Scarf PDF Pattern for rigid heddle weavers

Feeling stuck doesn’t mean you’re doing anything wrong—it just means your creative brain needs a reset. These 10-minute changes aren’t just about weaving differently; they’re about rediscovering why you love weaving in the first place.

So pick one today. Set aside a little time. And let the joy come back in!

Which fix do you plan to implement in your weaving life? Let me know down in the comments 👇

Until next time…

Happy Weaving!

Filed Under: Floor Loom Weaving, Inspiration, Rigid heddle weaving, Rigid Heddle Weaving Patterns, Table loom weaving, Weaving Tagged With: 10 minute fixes, inspiration, weaving plateau, weaving project ideas

5 Fun Floor Loom Weaving Projects for Beginners

by Kelly Leave a Comment

Welcome to the colourful and exciting world of floor loom weaving!

If you’re looking for a creative and relaxing hobby, weaving might just be your new favourite pastime. Don’t worry if you’re a complete beginner— with a good dose of patience, enthusiasm and just a bit of guidance, you can create beautiful projects in no time. Let’s dive into five fun weaving projects that will spark your creativity and boost your skills!

1. Simple Placemats

Kick off your weaving journey with some simple placemats! They’re quick to make and add a personal touch to your dining table.

  • Materials Needed: Cotton yarn in various colors.
  • Steps:
    1. Set up your loom with plain weave threading.
    2. Weave by alternating shafts 1 and 2 for plain weave.
    3. Finish the edges by tying simple knots or using a hem stitch.
  • Tip: Don’t hesitate to mix and match colors—this is a great opportunity to experiment!

2. Basic Scarf or Cowl

Next up is a lovely scarf! It’s perfect for keeping warm or levelling up your wardrobe and makes a wonderful gift for friends or family.

  • Materials Needed: You have so many choices here! Some options (click to see examples) would be:
  • Wool
  • Tencel
  • Bamboo
  • Acrylic
  • Cotton
  • Steps:
    1. Warp the loom according to the desired scarf width and length (don’t forget to pre-calculate. The Introduction to Floor Loom Weaving course includes printable calculation sheets).
    2. Explore basic patterns like plain weave or twill.
    3. Hemstitching on the loom is a great way to secure your ends, then a twisted fringe adds a really stylish and professional looking finish.
  • Encouragement: This project is not only practical but also a great way to showcase your personality through color and patterning choices!

The project for my Introduction to Floor Loom Weaving online course is a beautiful cowl which is perfect for beginner floor loom weavers and beyond.

3. Woven Wall Hanging

Transform your space with a beautiful woven wall hanging. This project allows for creativity and self-expression. Pretty much anything goes – if you like it then it’s good!

  • Materials Needed: A mix of fibres is possible here, and a dowel for hanging. This can be a terrific project for using up stash yarn.
  • Steps:
    1. Set up your loom for free-form weaving. Plain weave threading is perfect.
    2. Experiment with different techniques like looped or knotting. You could weave a balanced plain weave or a weft faced weave (more like tapestry).
    3. Finish by attaching it to a dowel.
  • Tip: Choose colors that resonate with you and your decor for a piece that feels uniquely yours!

4. Tote Bag

A practical project, a woven tote bag is perfect for carrying your essentials in style.

  • Materials Needed: Sturdy yarn. You can use pre made handles or make your own.
  • Steps:
    1. Weave a large rectangle in plain weave.
    2. Sew the sides together and attach the handles.
    3. If you want to get a little fancier, you can line the bag with commercial fabric like I do in the Tote Bag Series.
  • Encouragement: It’s not just useful; it’s a great way to show off your weaving skills wherever you go! I love projects that are both practical and useful 😉

5. Baby Blanket

For a larger project that’s oh-so-rewarding, consider weaving a baby blanket. I recommend completing a baby blanket before trying a larger sized throw or blanket because it gives you all the practice you will need. Seeing a fresh little human being wrapped up in a handwoven blanket made with love just warms my heart.

  • Materials Needed: Cottons are safest for babies.
  • Steps:
    1. Warp your loom to accommodate the blanket size.
    2. Explore with your weave structure if you’re ready, but be careful there are no long floats where little fingers and toes could catch. Plain weave is lovely for blankets too. Check out Tom Kinsley’s Handwoven Baby Blankets book for heaps of inspiration and blankets to try!
    3. Finish by securing the edges. Neatly finished double fold hems are best for babes.
  • Tip: This blanket can become a treasured item for years to come — babies who grow into children who grow into adults can get quite attached to their blankies!
  • BONUS TIP

There are so many great weaving books available but I recommend that you start out with a draft and pattern directory like Anne Dixon’s Handweaver’s Pattern Directory (4 shaft patterns) or Carol Strickler’s A Weavers Book of 8 Shaft Patterns.

These are the kind of books that I refer back to again and again or frequently flip through for inspiration.

Weaving on a floor loom is not only a fun craft but also a fulfilling creative outlet. It can even become a way to make an income doing something you love. Remember, every project you complete builds your skills and confidence, so don’t be afraid to experiment and make mistakes. Choose any project that excites you, (but be realistic – walk first, then run!) and let your creativity flow.

Until next time…

Happy weaving!

*This post may contain affiliate links. For more information, please see my disclosure policy.

Filed Under: Floor Loom Weaving, Weaving Tagged With: 5 fun floor loom weaving projects for beginners, floorloomweaving, weaving projects, weaving projects for beginners

How to use a metric weaving raddle

by Kelly 2 Comments

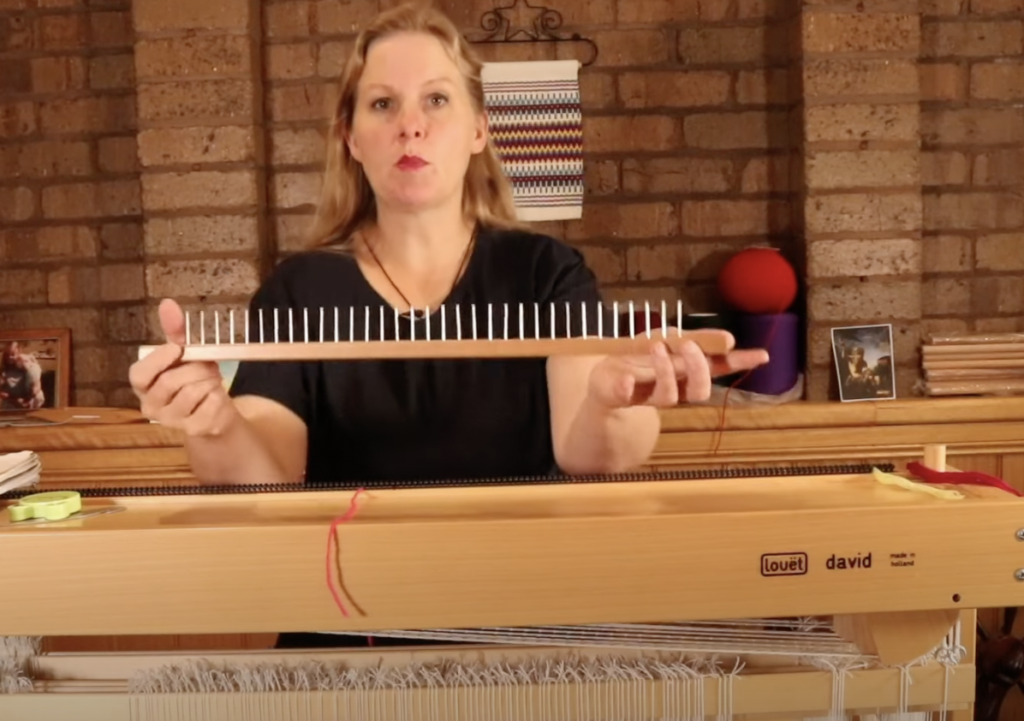
A raddle is a simple device that allows the weaver to space out warp threads in order to dress the loom at the desired warp width.

Most available raddles are based on imperial methods, so it can be a surprise when you find yourself the proud owner of a metric one!

*This post contains affiliate links. Please see my disclosure policy for further information.

Louet looms, like my Louet David come with a metric raddle built into the top of the loom. The Ashford raddle kit, which I use with my Ashford table loom, has an imperial raddle.

Personally, I find the imperial measurements easier to use in weaving (even though I was brought up using the metric system) just because most weaving information is formulated for the imperial system.

The Louet David raddle and the Ashford raddle

Today I’m going to show you my process for easily spacing my warp threads in my metric raddle.

I have two yarns to use as an example –

  • 8/2 cotton
  • Fingering weight wool

The first step to starting a new project is to do the calculations. If you’re a rigid heddle weaver, I have a free printable calculations sheet, plus a short class on how to use it.

Included in your calculations are the width of the item on the loom and the ends per inch (sett) you intend to weave at – these calculations are particularly relevant to the raddle.

You can determine your ends per inch by doing a wrap test with your desired yarn. Then, if you are weaving plain weave, you simply divided the wraps per inch in half to get your ends per inch. This determines how close together your warp yarn will be on the loom.

The 8/2 cotton wrapped 28 times around the inch ruler. My equation then looks like this –

28 ÷ 2 = 14

Now, as a little disclaimer, and because I’ve used 8/2 cotton extensively in my own weaving, I want to point out that I would not normally weave at 14 ends per inch, it would be more like 20-24.

But let us use that figure of 14 for our example.

What it means is that, when my warp is spaced out in the raddle, ready to be wound onto the loom, I want to have approximately 14 ends of yarn in every 1 inch increment.

If I was using an imperial raddle with half inch dents, all I would need to do to space my warp is place 7 threads in every raddle space. Over 1 inch, that would give me 14.

But the metric raddle has many more, smaller spaces, so here is how we deal with that:

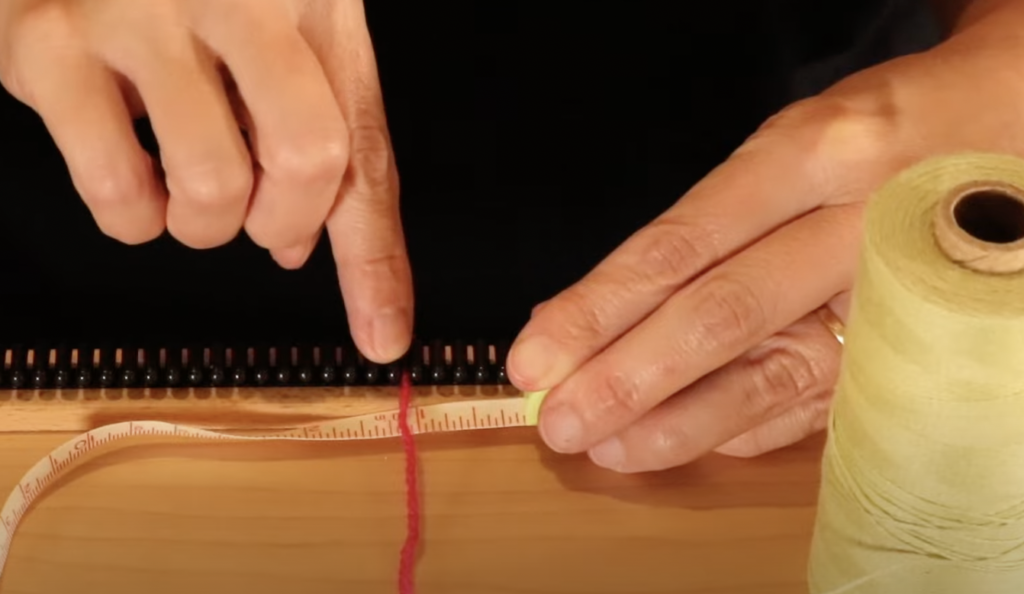
From the middle of the raddle, use a tape measure to measure out 1 inch along the raddle. Place a marker, like a piece of waste yarn to keep the spot for you.

Now you can count the number of raddle spaces that are within that one inch of measurement. I counted 5 spaces on my raddle. The next step is to be able to place my 14 ends into those 5 spaces.

You have probably figured already that it’s not going to be exact, but that is just fine. The raddle is to space our threads to the width we want our item to be on the loom, but that doesn’t mean that every raddle dent has to contain the exact same amount of threads. We have some wiggle room here 😉

You can either calculate the number of threads first, or you can “wing it”. I’ll explain both ways.

To calculate, I would divide 14 by 5, which gives me 2.8.

I cut some short lengths of my yarn to simulate an actual warp. I began by laying in 2 threads in each raddle dent (as the “2” in the 2.8 figure lets me know that at least 2 threads are needed in each dent initially).

After all my spaces were full, I had 4 threads left over. So, I started laying them in, one at a time, until I ran out. This meant that I had 3 threads in all the spaces except for the last one, which just had 2.

Doing this showed me an established pattern I could follow for accurately spacing my threads across the desired width. 4 spaces with 3 threads, 1 space with 2 threads. That becomes the spacing pattern to repeat over and over until all the threads are in the raddle.

Now we will look at the fingering weight wool. The wrap test showed me that I could wrap this yarn 18 times, so that is 18 wpi (wraps per inch).

Using a plain weave example again, I divide the 18 in half to get my ends per inch, which is 9. I need to do the same as before, make those 9 ends fit as evenly as I can into the raddle spaces.

9 ÷ 5 = 1.8

That tells me that I need at least one thread in every raddle space, and I’m going to have some left over to figure out afterwards.

Using the exact same method as before, I lay in those ends one at a time, then go back and lay in the leftovers. For this yarn, that meant that I had two in every space, except for the last space which only had one. So once again, I’ve established my pattern for spreading the yarn in the raddle.

Now, a couple of things I need to mention:

I did say earlier that you can use a “wing it” method, but this is best done in practice, with short pieces of your yarn as I have done here. That way you can visualise how the yarn will be laid out prior to actually doing it with a real warp. For a real warp, you really should have all of your calculations done first so there are no surprises.

To “wing it” you would simple cut your little lengths of yarn, as many as you need for the inch space (you get this figure from your “ends per inch”). Then you can measure out your inch on the raddle and just start laying your yarn pieces in, one at a time, continuing back and forth across the inch until they are all laid in, then count them up and see how many you end up with in each space.

The next thing I want to mention is odd numbers. I’m not a fan of using odd numbers in weaving, I always find it easier to round things up or down to simplify. An example is that for the fingering weight I used in this example, instead of 9 ends per inch I could have chosen to round up to 10.

This would simplify the raddle process, as I would be able to place 2 threads in every heddle space (given that there are 5 raddle spaces in and inch and 2 multiplied by 5 is 10 😊)

These are the kind of decisions I make in the planning and calculating process before I actually begin the warp.

If you would prefer to view this article in video format, please watch here-

I hope that this article was useful in showing you how you can use a metric raddle in a simple way. Feel free to leave your questions or comments down below!

Until next time…

Happy Weaving!

Filed Under: All about looms, Floor Loom Weaving, Free tutorial, Warping, Weaving Tagged With: David louet, floor loom weaving, imperial raddle, metric raddle, raddle

How to organise string heddle bundles

by Kelly 2 Comments

String heddles are commonly made of texsolv nowadays, making them very strong and simple to use.

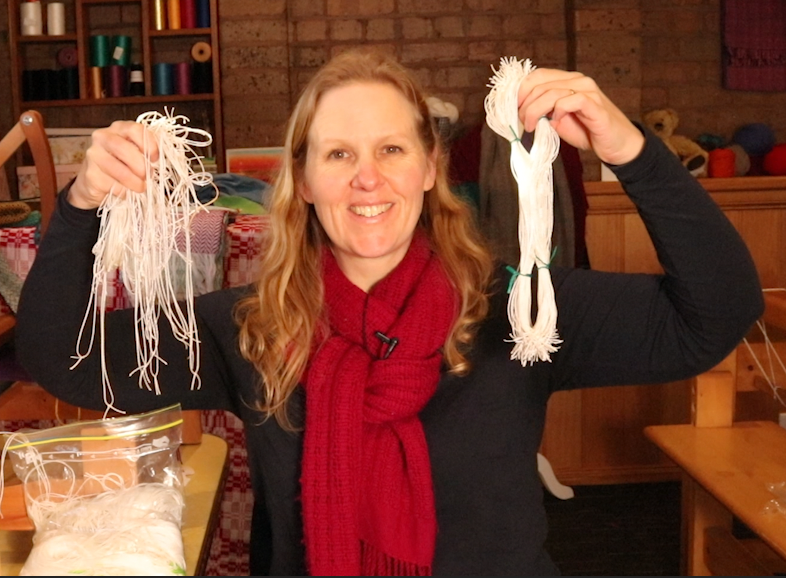
String heddles will generally arrive tied in neat bundles when you purchase them brand new. These bundles are very orderly and can just be slipped right on to your shafts. They can then be cut apart and ready for use

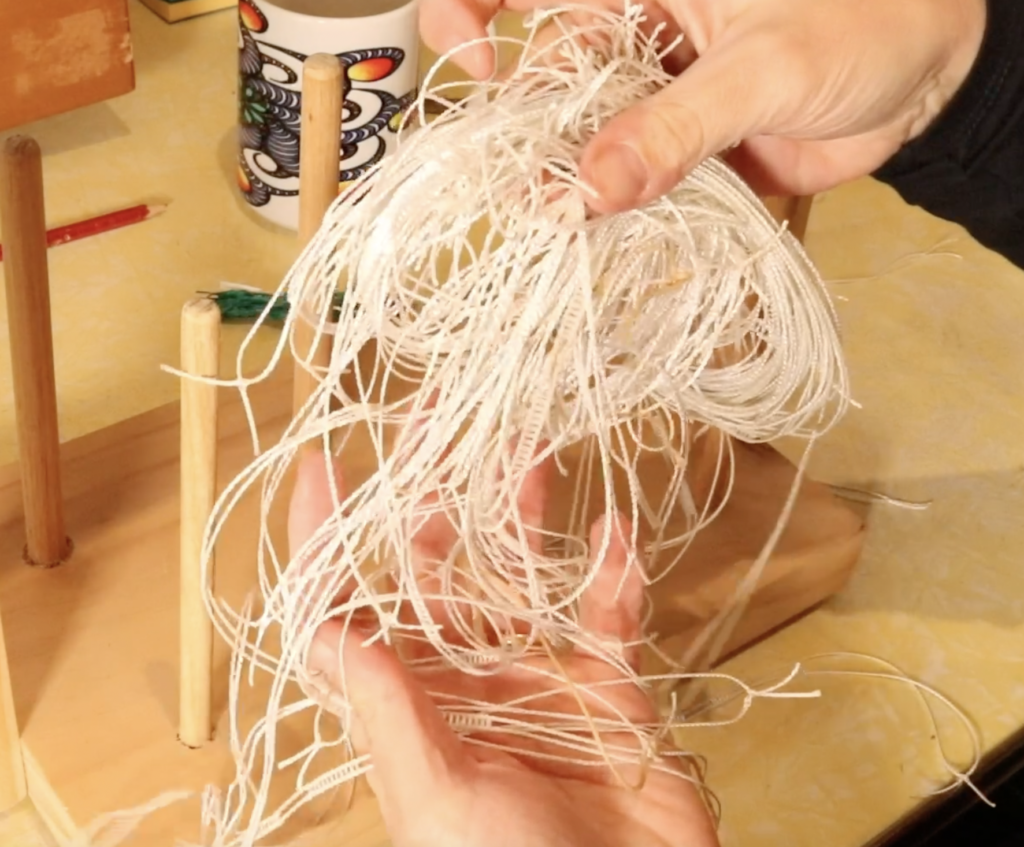
But there are times when your string heddles may be less than organised. I call this “string heddle spaghetti!” Having your string heddles in a pile and out of order is not ideal (not to mention a bit of a time waster) but there is a simple way to get them organised into lovely neat bundles once more.

*This post contains affiliate links. For more information, please see my disclosure policy.

Once you know how to make these bundles, you can continue to use the technique to ensure that your string heddles are always in order and ready to use.

I recently purchased some used string heddles, and many of them arrived packed into a bag singly and without order. Time to make some bundles!

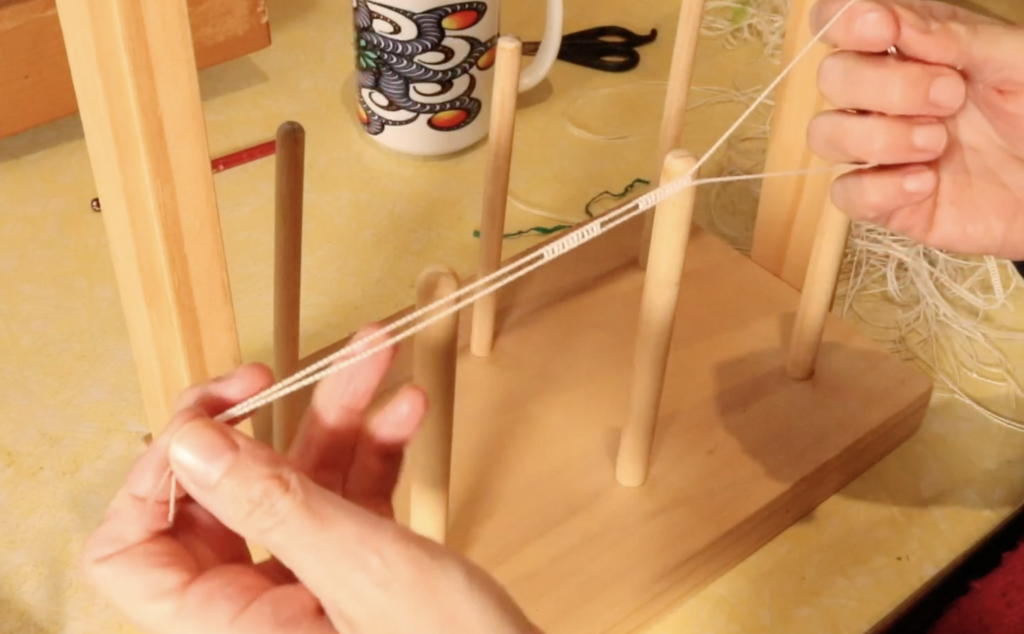
I use my warping stand (if you’re interested in making your own, check out this tutorial). A raddle also works really well if you have one. Two warping pegs, clamped to a table would also work. Even a box with 2 chopsticks is a suitable alternative!

You also need some twisty ties. If they are a different colour to your string heddles, that improves visibility, but if they are the same colour, don’t worry, you can still use them.

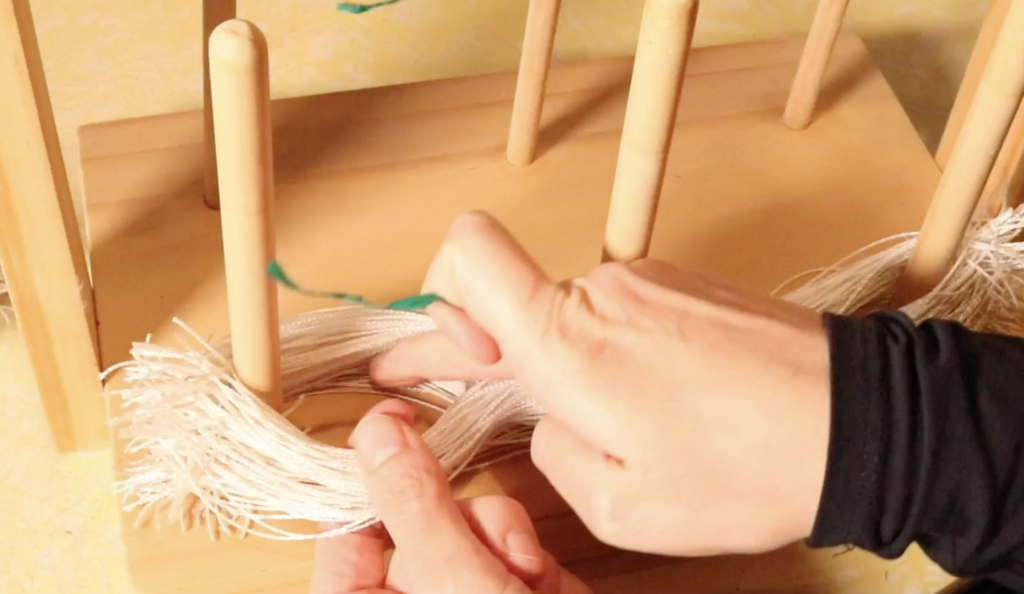
If your string heddles are already separated, grab one and have a look at it. There should be 2 large loops on either side that you can hold on to. There should be the eye of the heddle in the middle of these loops. When you hold the loops, you want the whole string heddle to lay flat – no twists!

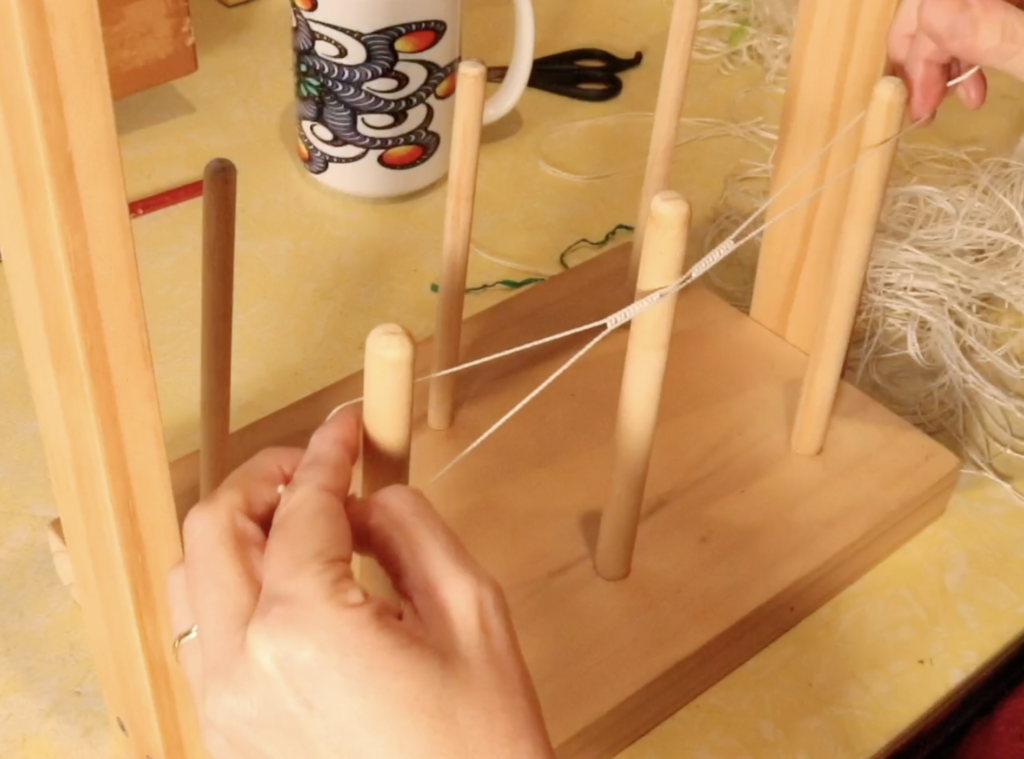
Keeping the string heddle flat, place one of the looped ends over the left peg (or raddle nail or chopstick).

Place the loop at the other end over the right hand peg. If you have a central peg like I do, it doesn’t matter which side of it the eye of the heddle rests against. It is best however, to have it rest on the same side of the central peg for each heddle, to keep the laid out order the same.

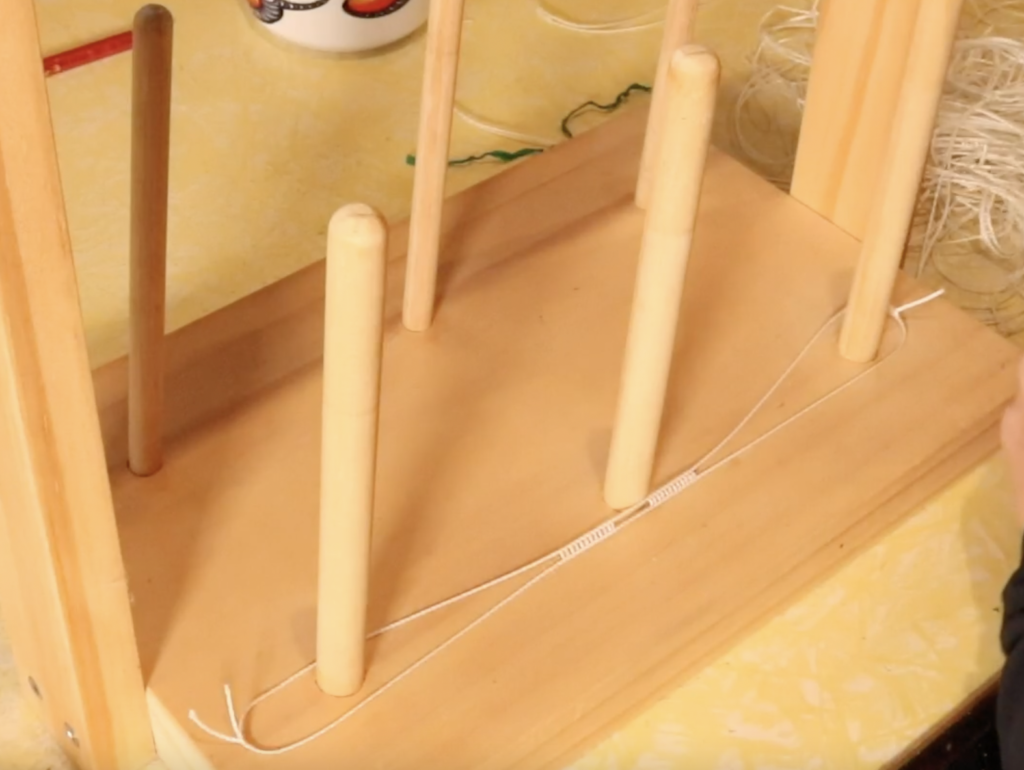
Drop the loops so that the string heddle rests on the base of your pegs.

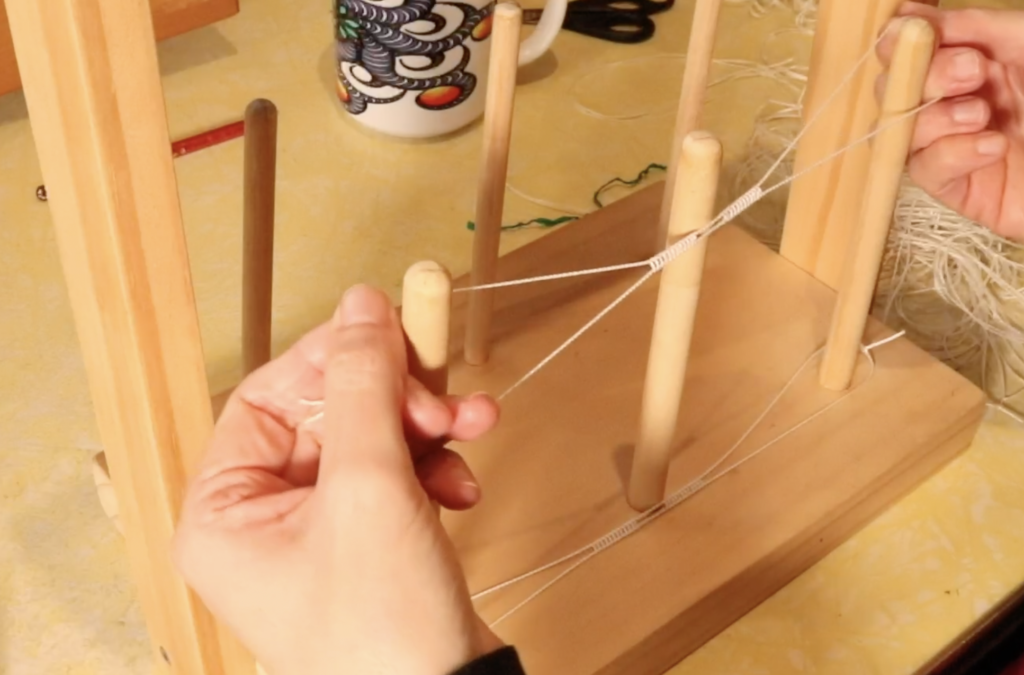
Grab your next string heddle and repeat the same action of holding the loops and placing them on the pegs. Pretty simple? 👍 I like to keep going until I’ve laid out around 100 heddles.

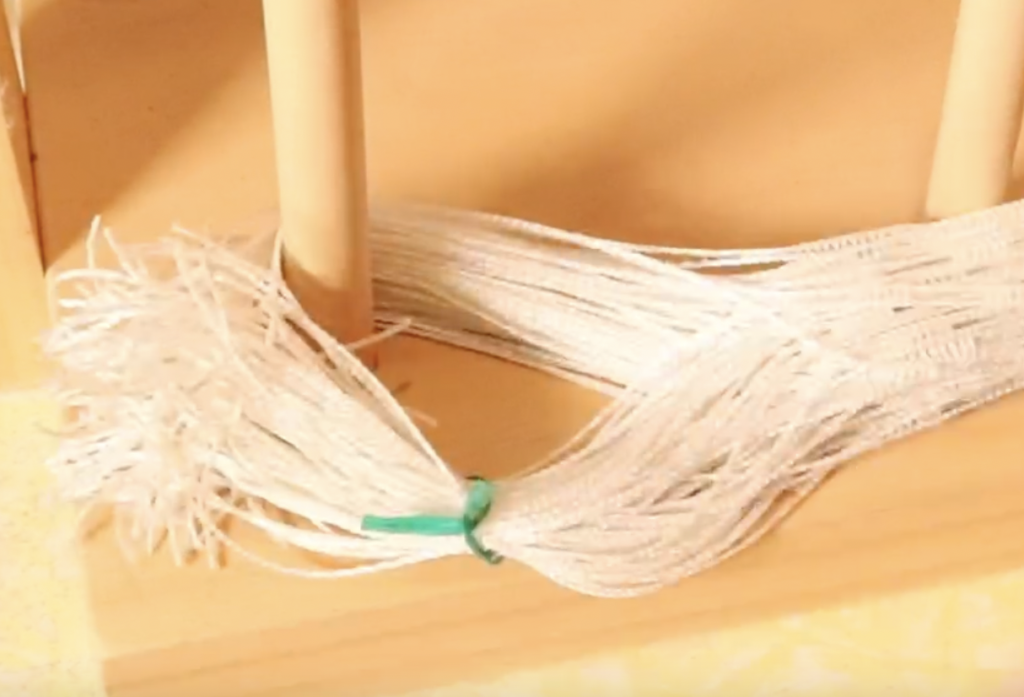
When you have enough to make a bundle, take a twisty tie and take one side of the larger loops on one end of the bundle. Because of the way the heddles are laid out, you will easily be able to see the separated sections.

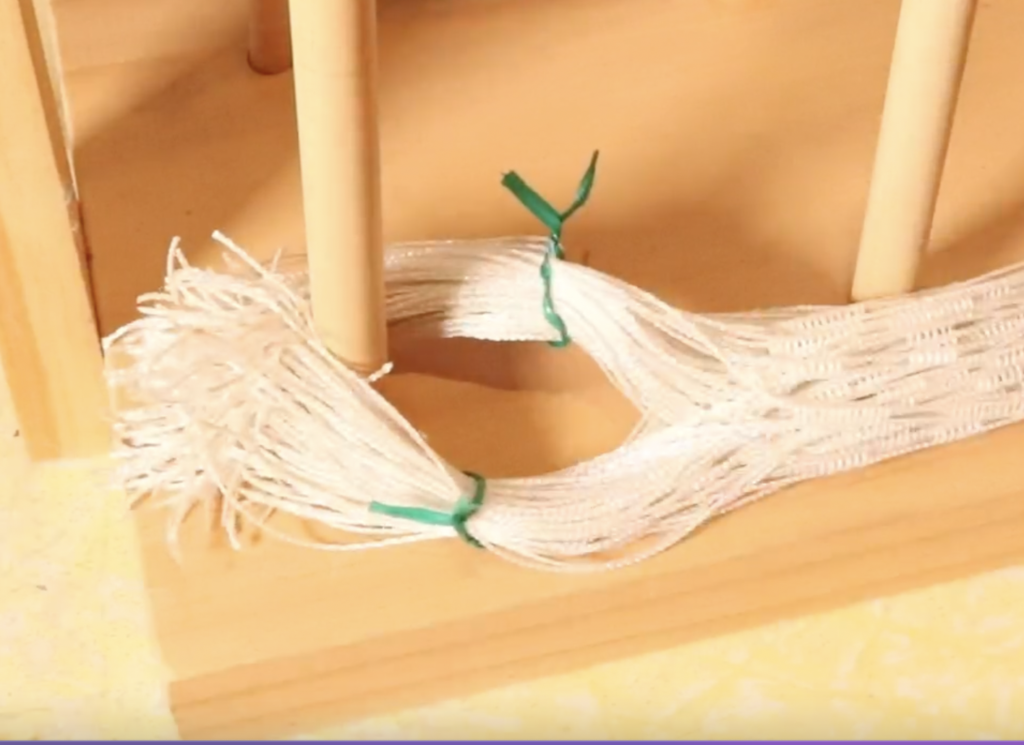
Take the tie and twist it around this section, twisting the ends of the tie together to secure it.

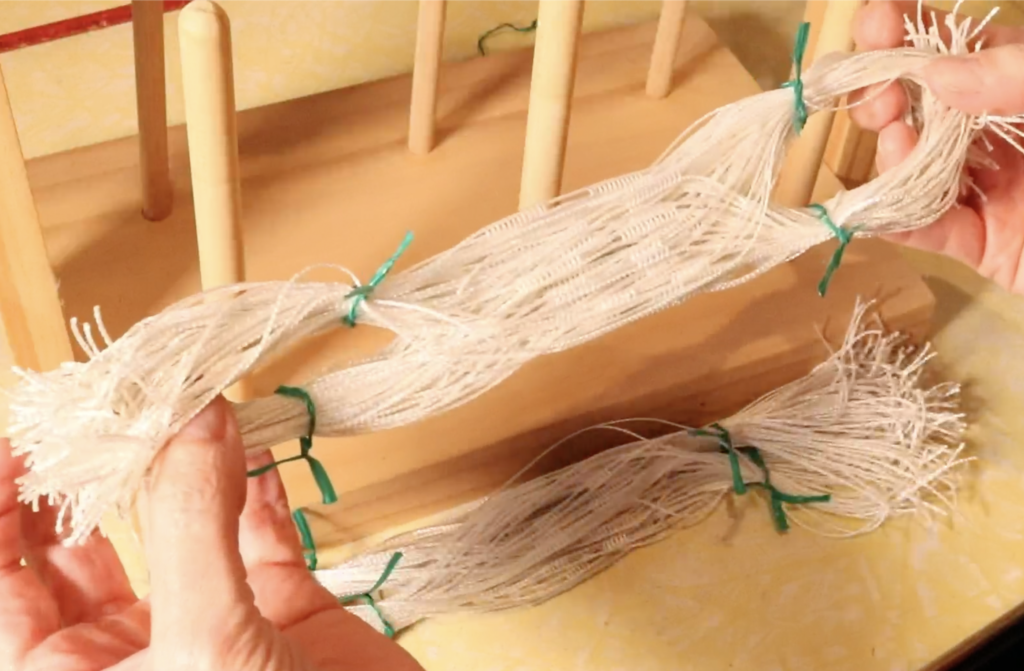
Take another tie and do the opposite side of the same loop, securing it in the exact same way. Do the same for the loop at the other end of the bundle so that you have 4 ties total.

Slip your bundle off the pegs and it’s ready to use!

If you would like a video tutorial on how to make bundles, check out the one below:

I hope this tutorial was useful to you, please leave your questions or comments down below.

Until next time…

Happy Weaving!

Filed Under: Floor Loom Weaving, Free tutorial, Table loom weaving, Tutorials, Weaving Tagged With: floor loom weaving, string heddles, tutorial

What are floating selvedges?

by Kelly 17 Comments

If you’ve been weaving for a little while now it’s very likely that you’ve come across the term “floating selvedge”.

What is a floating selvedge?

Floating selvedges (FS) are used on either side of a warp and are replacement threads for the original edge warp threads. This may lead you to wonder why you would want or need to replace your edge threads?

When weaving a simple plain weave, the interlacement of weft and warp doesn’t change. You alternate between the two plain weave sheds and the weft thread always naturally wraps around the outer most warp threads.

*This post contains affiliate links. Please see my disclosure policy for more information.

But when you are weaving something other than plain weave, you will often find that the weft skips the outer warp thread – either in every shed or, more likely just in certain sheds. If you don’t do anything to combat this problem, the result will be messy edges and a cloth that lacks integrity at the selvedges.

Now, there is a manual method you can use to prevent this from happening, but I find it easy to install floating selvedges and I also love the neat edge finish this gives me.

How does the floating selvedge work?

A floating selvedge will provide you with an unchanging edge thread, unlike your natural edge thread that may change according to the pattern, or the way you have threaded your loom. The path of the weft thread is determined by your action with the shuttle when you begin weaving, ensuring that every edge warp thread (now your floating selvedge) is wrapped with weft yarn.

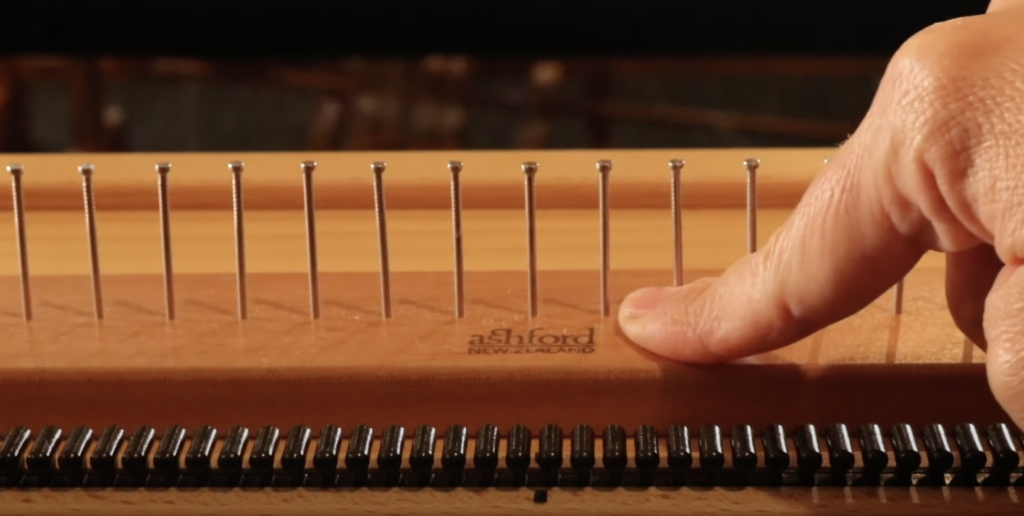
When we install floating selvedges, they are usually not a part of the original warp. They are always threaded into an empty slot next to the last naturally occurring warp thread. This makes them independent of your warp and pattern, and means that we can adapt them to our own purposes.

Although floating selvedges are not necessarily a part of the original warp, they do become a part of the finished woven piece – they are not removed afterwards.

For this reason, it’s important to choose a colour that will blend well with the project. If I am weaving my piece with just one, solid coloured weft, I will choose that same yarn and colour for my floating selvedges.

If I am going to be changing the weft colour multiple times within that one piece, I will choose the same yarn and colour as my warp.

The idea is that, once your piece is off the loom and finished, you won’t be able to tell that there was a floating selvedge introduced (other than the fact that your edges will look really nice!)

Can you use a floating selvedge on any loom?

Pretty much. I use them mostly on my floor loom and table loom, and on my rigid heddle loom if I’m weaving something other than plain weave.

Today’s tutorial is specifically for the rigid heddle loom. Scroll to the end of this post to find a video tutorial specifically for table loom floating selvedges.

I like to install my floating selvedges when the warp is all tied on and I’m almost ready to weave.

The photos from this tutorial are taken from my member’s only Floating Selvedges on a Rigid Heddle Loom class.

I most often use the same yarn for my floating selvedges as I use for my weft. So, in the example above, I will be using a white weft.

I don’t do this every time though. If I am weaving a project where I intend to have multiple and frequent weft colour changes, I will use the same yarn that I used for warp for my floating selvedges.

Step 1. is to measure out a length of yarn that is similar to the length of your warp. A little more is fine, a little less is not so great, as then you may have to install the floating selvedges again in the same project. It’s doable, but preferable to have a little more than you need so you don’t run out.

Cut your length of yarn and tie one end in a secure, double knot to the front apron rod on one side of the warp. It makes no difference whether you do the right or left side first.

Drape the tied yarn over the top of the heddle. It doesn’t really matter what position the heddle is in at this point, but it make sense to have it in the neutral or resting position.

Find the next slot, next to your outer most edge warp thread that is empty. This is the slot you will thread your yarn through. Having the floating selvedges in a slot makes them a “free agent” that we can then manipulate in the weaving process to ensure that our edges are always wrapped with a weft thread.

Pull the thread right through the slot and over the back beam and leave it hanging.

Now repeat the exact same steps on the opposite side of the warp.

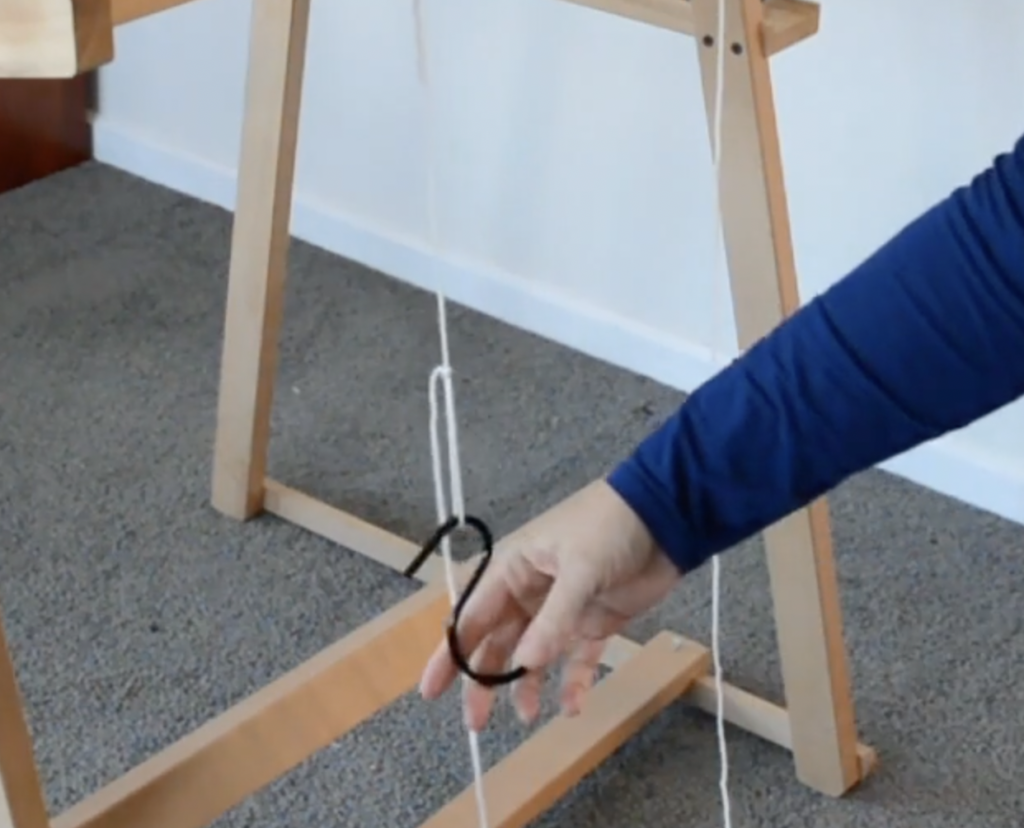
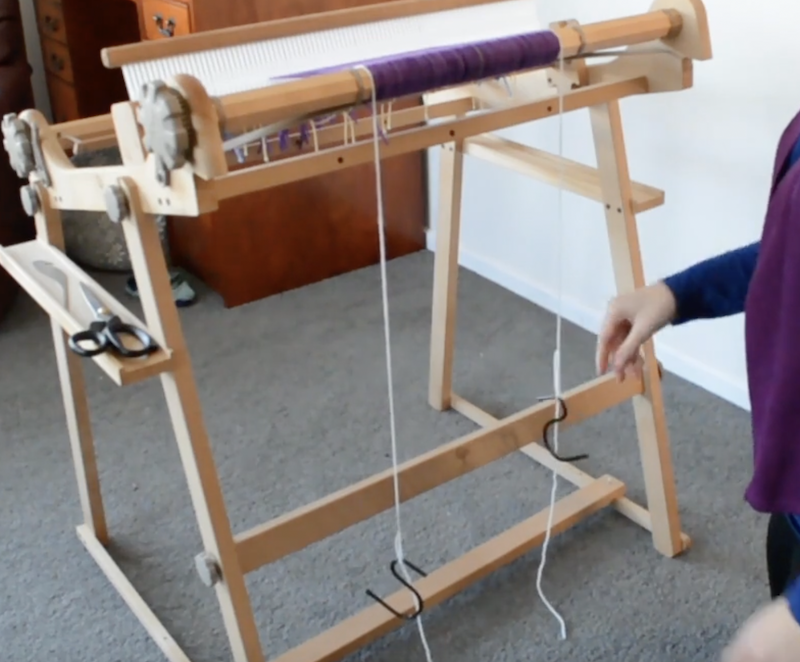
Now you have two threads in slots on either side of your warp and they are ready to be weighted. If you don’t weight them, they won’t work, they need to be under tension!

Make a slip knot in the hanging thread. You can do this half way down, or further towards the floor, the main thing is that the weights are not resting on the floor, you want them to dangle and place tension on the thread.

Place an “S” hook or something similar through the loop of the slip knot and allow it to hang. You can tighten up the slip knot to prevent your hook from jumping out of the loop. I have a bunch of S hooks, they are so handy for tensioning broken or loose threads and I always use them on my floating selvedges.

Do the same for the other floating selvedge thread, and you’re ready to start weaving!

As a side note – this method is not the only way to install floating selvedges. Some weavers prefer to allow for the additional two threads when calculating the warp, and then roll the FS on with the rest of the warp. They would then thread the FS threads through an empty slot rather than threading as part of the pattern.

If you’re interested in knowing more about floating selvedges and viewing a tutorial for installing them on a table loom, please view this video:

In the next post I will have a tutorial for how to actually use the floating selvedges when weaving, so look out for that one.

Until next time…

Happy Weaving!
Filed Under: Floating selvedges, Floor Loom Weaving, Free tutorial, Neat edges, Rigid heddle weaving, Table loom weaving, Tutorials, Weaving Tagged With: floating selvedges, rigid heddle loom

5 Life Lessons from a Difficult Warp

by Kelly 24 Comments

I started my latest project full of enthusiasm and confidence.

I often feel at the beginning that whatever I’m working on is going to be my best piece yet. This is an important motivating tool for me and I’m sure that many of the projects I’ve undertaken would not have come to life without this initial confidence.

You could say that I felt super confident going into this new project. Experience with the weave structure? Check! Experience with the yarns? Check! Experience with the loom? Check, check, check!!

  • This post contains affiliate links. For further information, please see my disclosure policy.

I thought I was cool with the long and wide warp. First mistake!

I should have asked someone to hold the warp for me so I could focus on winding it on. But no, being the “independent to my own detriment” kind of person that I am, I forged ahead alone.

Let me share some more details about this project. Those of you who have been around here for a while will be familiar with my bordering on obsessive desire to weave a full sized overshot coverlet, heavily influenced by the early American Woven Coverlets.

My main stumbling point to weaving my own coverlet is the seaming. Traditional coverlets were woven in panels, usually 2 or 3, then joined. Most looms were not wide enough for the full piece, and my 90cm width Louet David is no different.

The threading for the panels has to be arranged to be able to match up when the seams are joined. This usually consists of a centre panel and 2 panels either side (if weaving 3 panels). Then the seaming method has to be chosen with the view of minimising visibility – a really good coverlet weaver will have almost invisible seams.

Another essential aspect of successfully seaming the panels is to ensure a very consistent beat so that the pattern woven is continuous once the panels are joined. That means measuring picks per inch, something I’m not particularly fond of doing.

So, my idea was to weave just one panel and to practice rearranging threading and weaving a pleasing pattern. I even had the thought initially that I could use the panel to cut into pieces and make a patchwork quilt. I’m not sure the pattern lends itself well to a quilt, but I’m not too fussed about that. I will decide what to do with the piece once it’s off the loom.

For my warp I chose 8/2 cotton in white. I have a lot of experience with this yarn and have used it extensively in other overshot projects. Normally I pair it with a fingering weight wool for the pattern weft, but this time I decided to try Australian 3ply, which is in between a lace weight and fingering weight. In retrospect, I would have been better to sett a little closer than the 20 ends per inch I chose. There is more space between pattern wefts than I would like.

I found the weaving draft in Carol Strickler’s book “American Woven Coverlets”. I made some adjustments to the draft with plenty of calculations. Yet, when it came to the threading, I found that my warp was 16 threads short! I measured out the extra threads and weighted them over the back of the loom.

After threading and sleying the 650 ends I was looking forward to weaving! But my less than ideally tensioned warp came back to bite me at this point. I had to take the initial weaving very slowly to avoid floats and boat shuttle warp dives.

Initially I felt quite angry about all this. The project was meant to be a happy and relaxing experience. It was supposed to help me progress in my coverlet ambitions.

As I sat there weaving today, I started to think. The anger had subsided to disappointment, and that put me in a reflective mood.

There are so many life lessons in weaving. Challenges, frustrations are all part of the process.

I wanted to share some of my reflections from working on this piece.

Lesson 1 – Things don’t always go according to plan and that’s OK

I once heard someone say “you expected ABC and you got XYZ”. I expected this to be a fun, rewarding project, but it was harder than I thought. It’s my reaction to the unfulfilled expectations that matters. The problem is not the problem, the problem is how I deal with the problem!

You’ve probably heard me say before that there is no perfection in this world. That doesn’t mean that we shouldn’t strive for high standards and excellence, it just means that we should have more hope than we do expectation.

Lesson 2 – Accepting responsibility

My first reaction was to lay blame elsewhere or make excuses. I was tired, I was rushed, I didn’t want to bother one of my family members to help me, I thought I’d be fine to do it myself. While there may be some truth to some of these elements, ultimately it is my project and my decision making lead to a warp that wasn’t adequately tensioned and is now causing me more difficulties in the weaving process.

I have to accept that responsibility and work to overcome and undo the problems that I made.

Lesson 3 – Patience and persistence pay off

I could have given up on this warp. But aside from not wanting to waste all that beautiful cotton that I had paid for, I also didn’t want to let the project defeat me. I know from past experience that if I give up on a project I will feel far worse than if I decide to battle through it.

I guess I have a bit of a stubborn streak, but in weaving that works for, rather than against me. Because it forces me to do uncomfortable things. Things that make me angry and frustrated. If I stop at the angry stage, then I’m suspended in that anger and negativity. If I keep going, I’m forced to work through the frustration and come out the other side, much happier and with a sense of satisfaction that even though it was hard, I did it.

Beautiful things are such a treasure that they should take time and shouldn’t necessarily be easy to achieve. They are worth the time and the effort.

Lesson 4 – Learning is a journey

Learning to weave is a journey of stepping stones, walking, then running, but never stopping and sitting down. The journey is every changing and building. Just as life is a constant striving to be better that doesn’t finish. You don’t just wake up one day and say “now I’m the person I should be”. You wake up and prepare to work and practice all the good things you know will make you better. And you repeat that each and every day, building, changing and adapting.

There may be a tendency in weaving to feel like you should know more by now, you should be producing perfect pieces by now. Instead, try to recognise and enjoy the journey and keep building everyday. I’ve talked about Slow Learning before, you can check out this video to learn more-

Lesson 5 – Adversity is good for us

This is one of those hard life lessons and not one that everyone will agree with me on. But if we spend our whole lives being pampered, having it easy and getting what we want, when we want it, we become soft and spoiled.

Difficulties help us to build character. They allow us to develop empathy. They make us strong. We don’t like hardship, because it doesn’t feel good – but that doesn’t mean it isn’t good for us.

This challenging project has certainly been good for me. Right now, I’m at a better place with it, slowly weaving (slower than I would like, but that’s just how it is) and making adjustments as I go. I feel at peace with my progress. I’ve gained confidence that I can deal with pretty much anything my loom throws at me.

I would still rather that this was the easy and enjoyable project that I originally envisioned, but I’ve shifted to a place of gratitude.

I am grateful that:

  • I have a loom and can use it
  • I have supplies to weave with
  • I can figure out how to fix things when I need to
  • I have the time to devote to this wonderful craft
  • Most of the time, I end up with a beautiful piece of weaving

And lastly, that I learn so much more from weaving than just how to weave.

If you would like to see this post in video format (and see me weaving the project itself!) please click on the video below.

Now it’s over to you. What life lessons have you learned from weaving?

Please share your thoughts or comments down below, I love to hear from you!

Until next time…

Happy Weaving!
Filed Under: Floor Loom Weaving, Inspiration, Overshot, Weaving Tagged With: encouragement, life lessons, overshot

Welcome to The Online Weaving School

by Kelly 59 Comments

Are you new to the Online Weaving School – Kelly Casanova Weaving Lessons? This is a guide to help you get started and find the right class for you.

Already a member? Log in here!

Hi, I’m Kelly!

I am very blessed to be able to pass my passion for weaving on to thousands of students all over the world.

At Kelly Casanova Weaving Lessons I teach in a way that is relaxed and unrushed. I share everything that I can think of to help you grasp a concept, and most classes are step by step, project based learning.

I don’t feel like a teacher, more a weaving friend who is eager to show you some really cool things!

So, grab a cuppa, pull up your weaving chair, and let’s get learning!

New to rigid heddle weaving? Start here!

Quick course guide finder

Memberships

Premium Membership
6 Month Membership
Monthly Membership

Would you like to know more about memberships and how they work? Please click here.

Free classes

All free classes

All classes

Full class library

Classes by loom type

Rigid Heddle Loom
Table Loom
Floor Loom
Inkle Loom

Classes by weaving level

Beginner
Experienced
Advanced

Frequently Asked Questions

FAQ’s

Teachable Tutorial

How to use the site

Technical issues

Fixing common technical issues

Account issues

Common account issues

Popular Classes

Filed Under: 4 shaft weaving, Floor Loom Weaving, Online Weaving School, Weaving Tagged With: learntoweave, onlineclasses, onlineweavingschool

Avoiding back pain at the floor loom

by Kelly 24 Comments

This is an issue close to my heart, as I have a lower back injury. Over my years of weaving, I’ve had to find the best ways to avoid pain while being able to indulge in as much weaving as possible.

The more time you spend thinking about and implementing comfortable weaving, the more time you will be able to spend actually doing it into the future.

Firstly I’m going to talk about seating.

There are a few important factors here. Generally, a regular chair cannot be used for weaving on a floor loom, so we have to look at the best suitable alternatives.

So, what are these alternatives?

Most floor loom manufacturers also make weaving benches that can be purchased separately but are made specifically for your loom. Benches can be very pricey.

I’ve seen some weavers seated on exercise balls for threading the loom, which allows you to get very close to the shafts – I don’t intend to try this myself, but it’s another option.

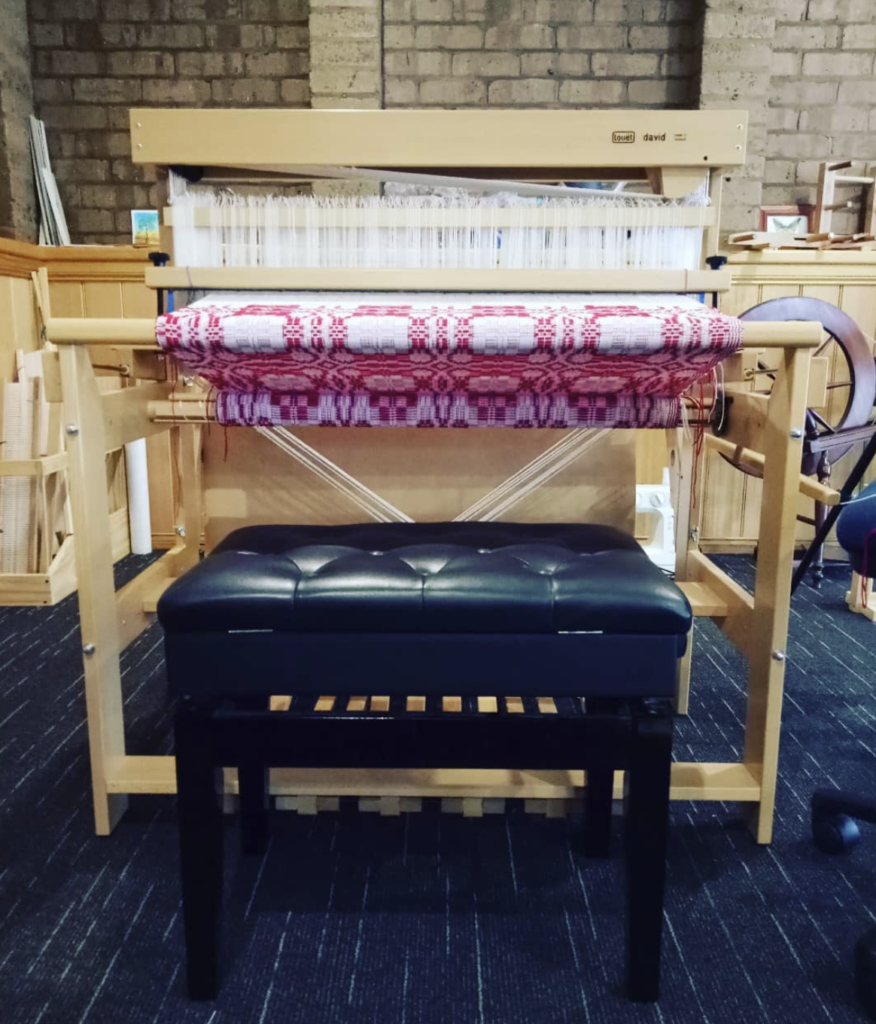
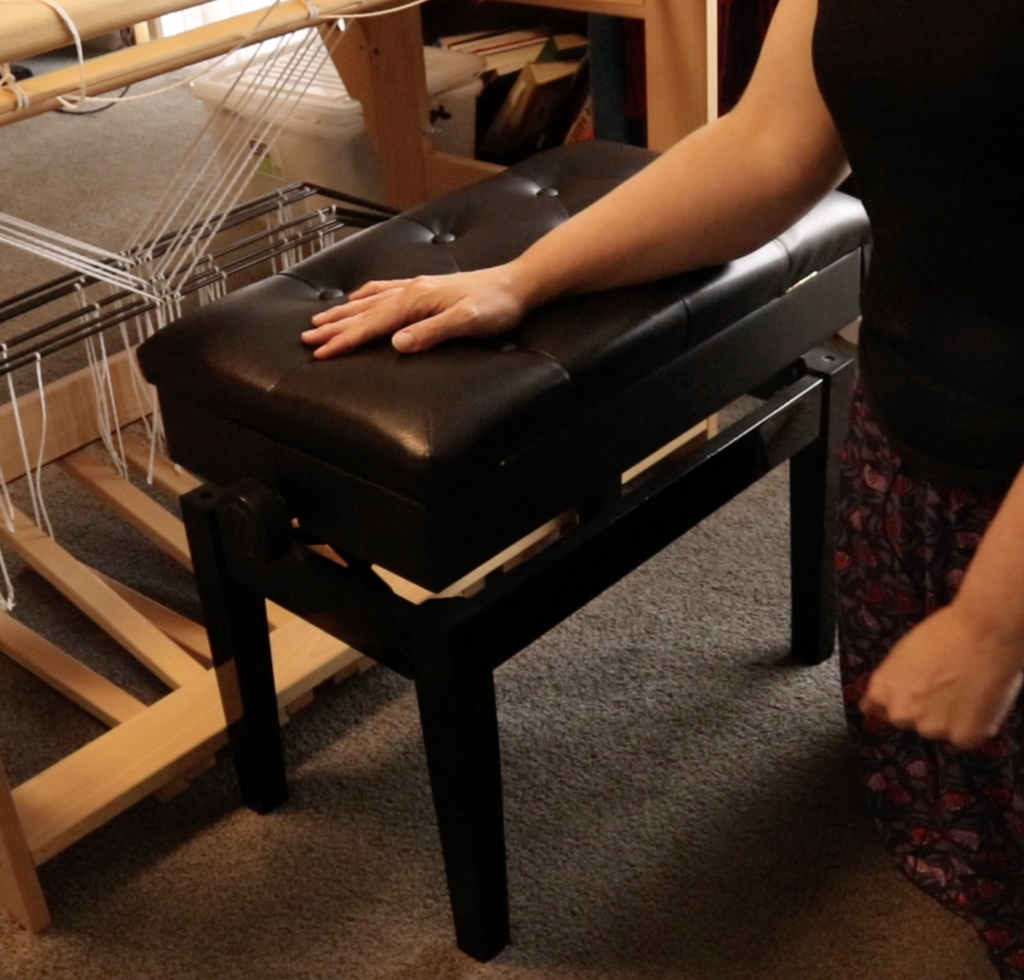
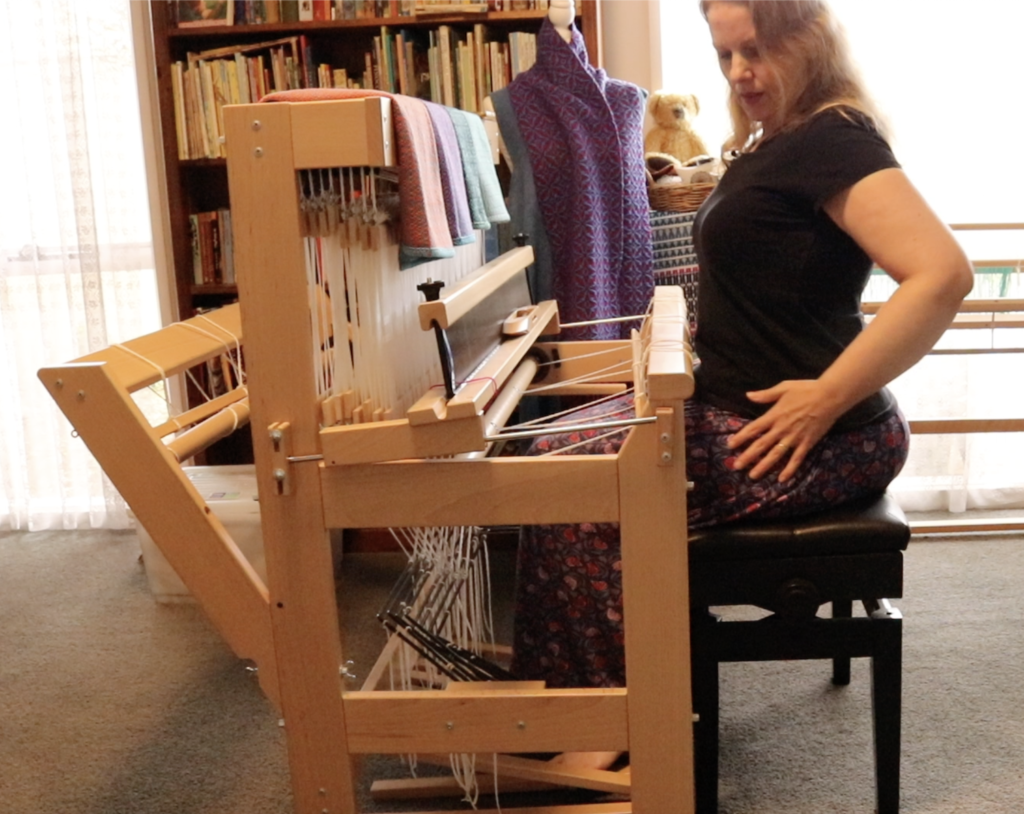
I have been fortunate to find the perfect seating option for me. I use an adjustable, padded piano bench. Let me tell you why I love this option:

  1. It’s height adjustable.

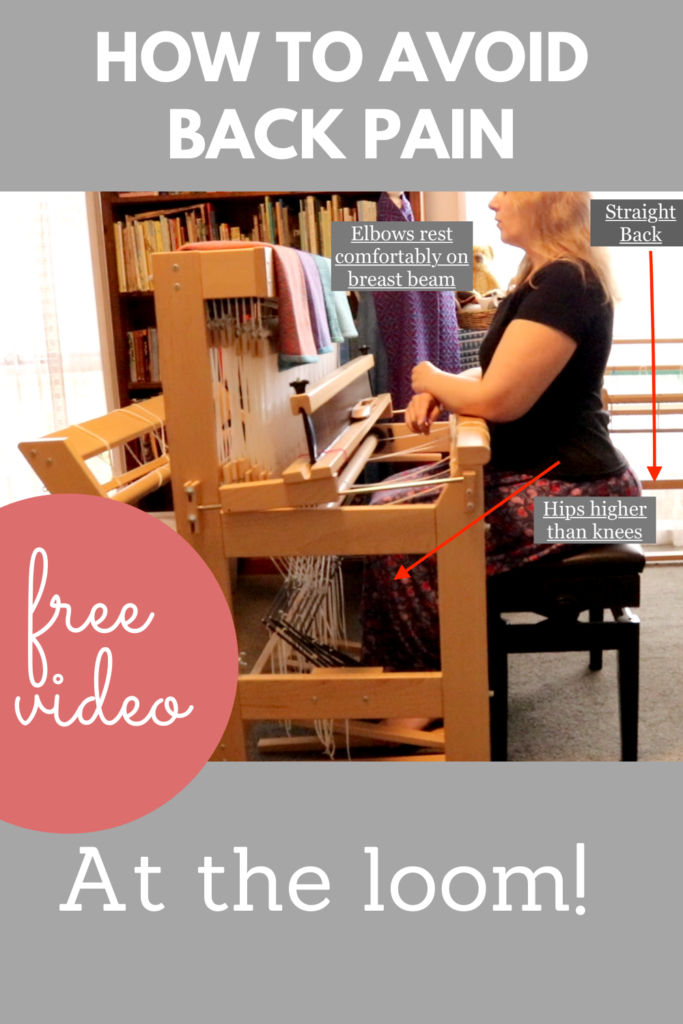
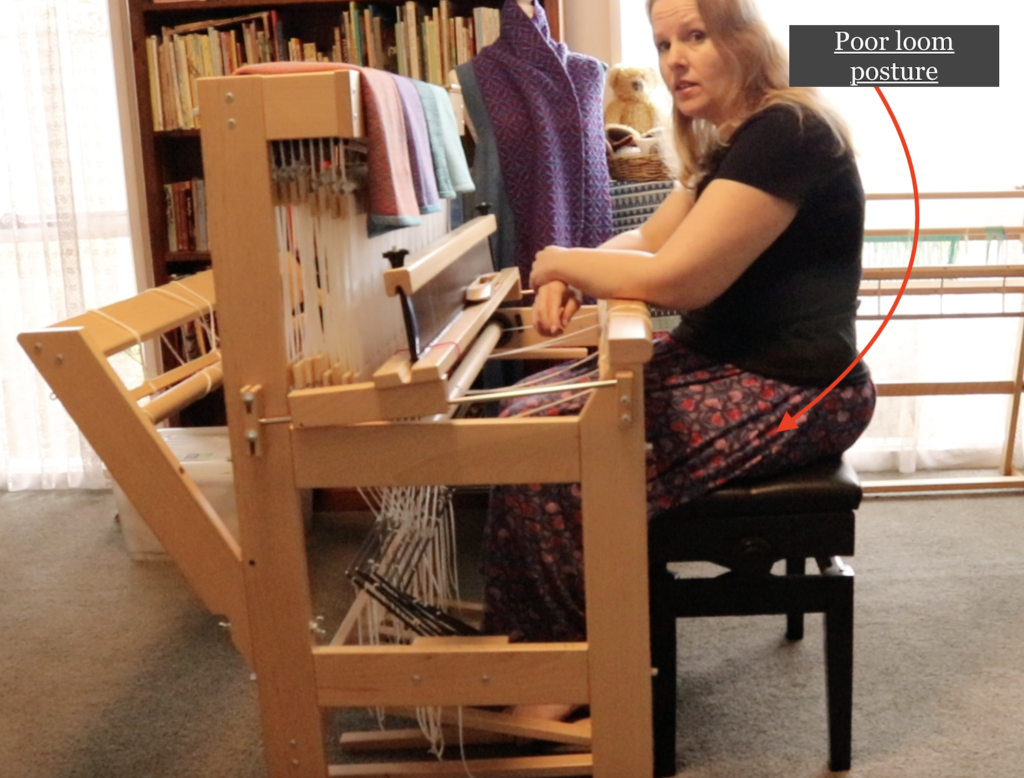
    An adjustable bench is important because it allows you to adjust your seated height to suit the loom. Your posture at the loom is crucial to your long term back health. Your elbows should be able to rest on the front cloth beam without you having to raise them up. Your hips should be higher up than your legs (like they are when you’re driving a car) because otherwise you’re going to have to exert more pressure when treadling and then – hello back pain!

2. It has ample seating space.

When I was looking at buying a weaving bench, all I could think when I saw commercial weaving benches is “they obviously weren’t built for weavers with generous lower proportions!” The piano bench accommodates my… ahem… ample behind (🙈) very well because it is wide enough, but not so wide as to be a difficulty.

3. It’s padded.

I can’t imagine sitting on a non padded bench, ouch. If you can get something with padding built in, that is better because you don’t have to contend with it slipping around. 

4. It has 4 legs.

This is really useful for the threading stage, as I can angle the bench so that two legs sit inside the front of the loom, allowing me to be closer to the shafts and therefore putting less strain on my back.

If you purchase an adjustable piano bench, try to spend a bit more to get good quality. I did not do this, and am constantly having to tighten bolts because the bench is not as stable as I would like. Eventually I’ll invest in a good one!

Also, don’t get the cheap, fold out piano bench. I do have one of these for my kids to use at the piano, and it’s surprising strong, but you want a bench with four legs, as I already mentioned.

Now let’s discuss some other tips and strategies for keeping your back pain free at the loom.

If you already have pain:

  • Firstly, if your lower back is on fire REST IT! I can’t stress this enough. Do not sit at that loom again until your back has settled down, you will only make it worse. I know it’s hard to take a break but it really is necessary.
  • Take anti inflammatories if needed, use ice or heat – whatever works for you to get your back moving towards normal again. If you’re using medications due to a flair up, do it sensibly and in consultation with a medical professional.
  • If your flare up does not settle down, you may need to see someone who can help you. This may be a chriopractor, a physical therapist, a masseuse – there are options to try and you don’t have to suffer alone!

    As you weave:
  • Try to move a little or shift your weight from side to side as you weave rather than keeping your body really rigid – follow the shuttle with your body, especially if it’s a wide warp.
  • Throw and catch your shuttle in a way that is not causing you to raise your arms unnecessarily or at weird angles.
  • Get in close to the loom. The closer you are, the nearer your reach. You can also naturally brace yourself against the breast beam to beat.

Treadle positioning:

A couple of years ago we bought a new (secondhand) van following an accident where our existing van was written off. The new van was the same company and make as the last one, but was a slightly updated model.

As soon as I began driving the new van, I noticed a difference in the height of the accelerator. The new accelerator was so much higher than the old one! I had to lift my foot higher to depress the pedal. And, guess what? Yep, the hip pain started up and is still a problem. I try to limit my driving, but when I do drive I use cruise control as much as possible so that I’m not having to lift my right foot so much.

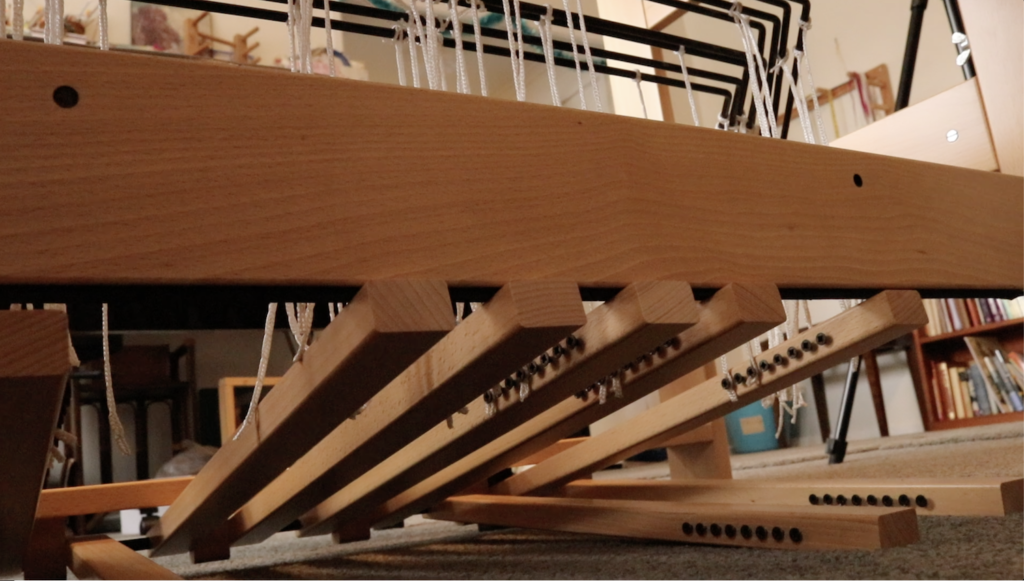
My point? The higher you have to lift your feet to operate your treadles, the more stress you will place on your legs and ultimately, your back. If your treadles are very low to the floor (as they are for my floor loom) you will not have that stress on your body.

You may find that older looms not only have treadles sitting high, you also have to depress them quite firmly. If you do have an older loom, I recommend looking at any modifications you can do to get those treadles lower to the floor.


Take regular breaks.

It’s tempting to stay in the weaving groove and forget about time, but breaks are necessary. Get up, walk, stretch. Don’t sit at the loom for so long at one time that you feel sore and stiff when you get up. Anticipate the stiffness (even set a timer if you need it) and be kind to your body by resting it.

Batching tasks:

This goes hand in hand with the last point on taking breaks. Plan out your project so that you can batch tasks.

For example, if you’re threading for a full width project, unless you are Speedy Gonzales, you have to expect that the threading will take several hours. Plan to do a certain amount at one time or on one day. Make an agreement with yourself like: “Today I will aim to thread half of this project, taking regular breaks. If I start to experience pain, I will stop or only do a quarter of the threading”. You’re still making progress, but you’re not overdoing it.

Another example: “I will aim to make my warp today, dress my loom tomorrow, do half of the threading the next day and the second half the following day etc”. Break the tasks down to keep them achievable. You may end up doing more than you planned because you are pain free, but the point is to have a plan in place.

Accept bodily limitations:

This is a hard one! I’m sure we all wish that we were completely fit, healthy and pain free. But we need to be realistic and accept that we are not perfect. Accept the physical limitations you may have and don’t push yourself beyond them. Work with what you can do and make that your focus.

Sit up straight!

Did you ever here those words from your mother at the dining table? Well, she was right! 😆 You want to sit naturally, not rigidly at the loom, but you also want to keep your back nice and straight. If you find yourself slumping often, go back and check the seating points I discussed. It may be that your bench is not at a correct height.

Overall loom posture is really important. Remember – elbows on the breast beam, hips higher than knees, back straight!

I hope this post has been helpful to you. I have made a companion video so you can see just how I sit at my loom. You can view that here:

If you want to get started in floor loom weaving, my Introduction to Floor Loom Weaving course is perfect. It takes you through step by step processes to give you the confidence to get weaving!

Want to know more about my floor loom? Check out my review by clicking here.

Let’s keep the conversation going! Do you have any helpful tips to add? Any questions? I would love to hear from you in the comments.

Until next time…

Happy Weaving!
Filed Under: 4 shaft weaving, 8 shaft weaving, All about looms, Floor Loom Weaving, Health and home, Online Weaving School, Reviews, Weaving Tagged With: avoid back pain, back pain, floor loom weaving, posture

Tips for weaving overshot

by Kelly 9 Comments

One of the great things about having been a blogger for 12 years (did I actually just admit that?!) is that you occasionally get to look back and see how very far you’ve come.

Over three years ago, when my David Louet floor loom was still somewhat new to me, I wrote this post on overshot. If you read it, you will discover that my initial relationship with overshot was not a very positive one.

This post contains affiliate links. For more information please see my disclosure policy.

Back then, I was a little harder on myself as a learning weaver. By now, I’ve realised that weaving, just like life, is a journey that has a beginning but no end. Back then, I thought that my ultimate goal was to be a “master weaver”.

Honestly, I don’t even really know what that means but it no longer matters to me. I just want to be the best weaver I can be, but even more importantly, to continue to be fulfilled, challenged and rewarded by doing it.

Hang on, am I here to talk about overshot or not? Yes, I am!

The happy ending to the initial overshot sob story is that I can weave overshot now. Quite well, in fact! And I also teach it. And I happen to love it, very, very much. Don’t you love a happy ending?

I don’t think there was any particular moment where I thought to myself “I can weave overshot now!” I didn’t even weave any overshot for quite some time after that initial attempt. But slowly it tempted me back, and we started over. It was just a matter of sticking with it, employing some specific techniques and practice, practice, practice until it feels like an old friend.

My love of overshot has only increased with my more recent discovery of American Coverlets. I loved the look of the coverlets and the history behind them before I realised that so many of them were woven in the wonderfully humble 4 shaft overshot.

I’ve put a lot of research time into coverlets this year and have made it a big weaving goal of mine to weave my first coverlet, which is quite an undertaking, but I relish the thought.

I’ve also spent a lot of time actually weaving overshot this year. I released the very successful Overshot on a Rigid Heddle Loom class not long ago.

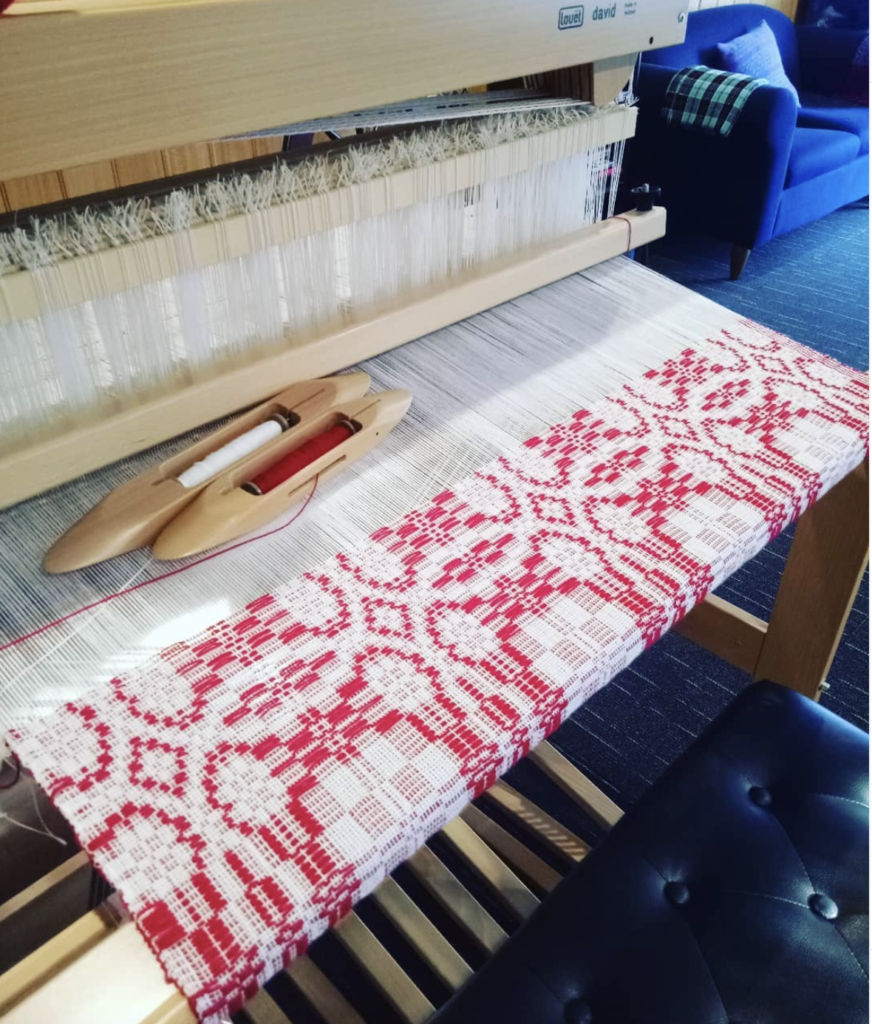
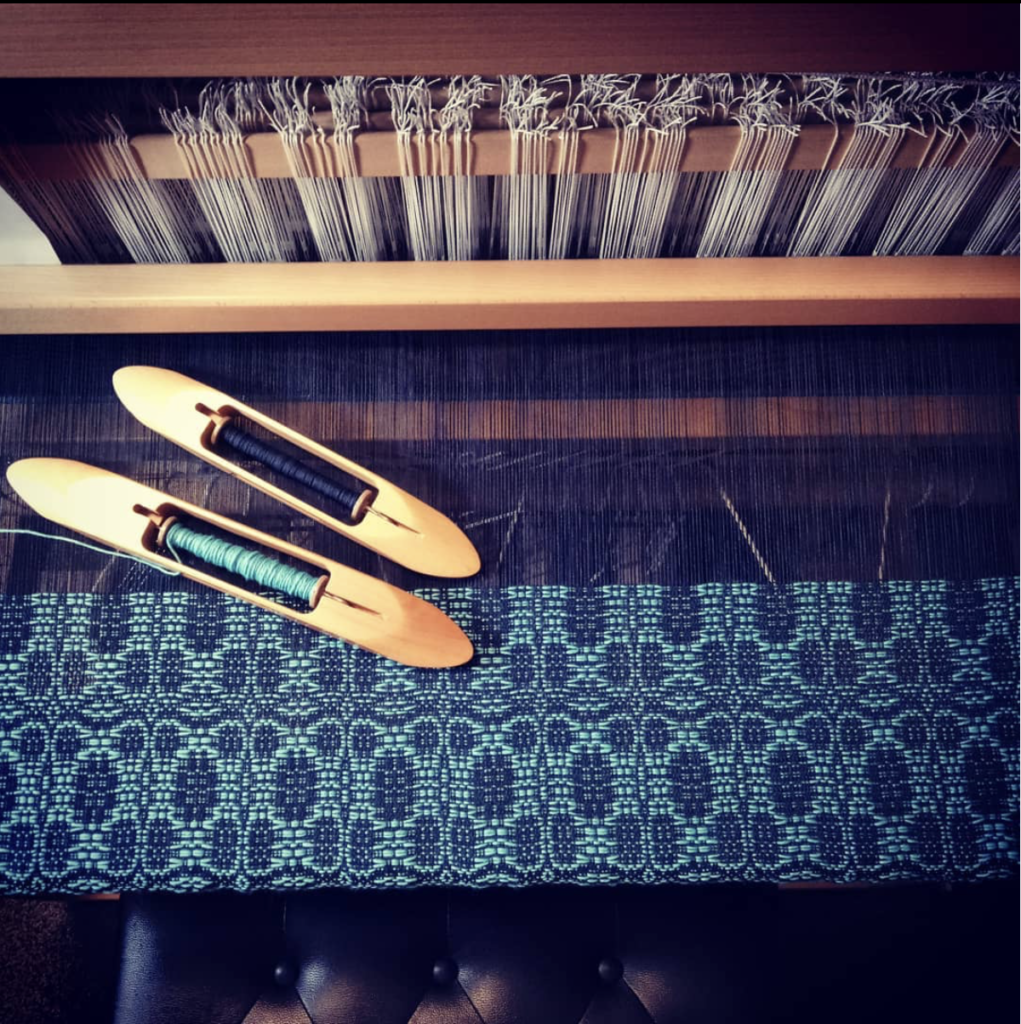
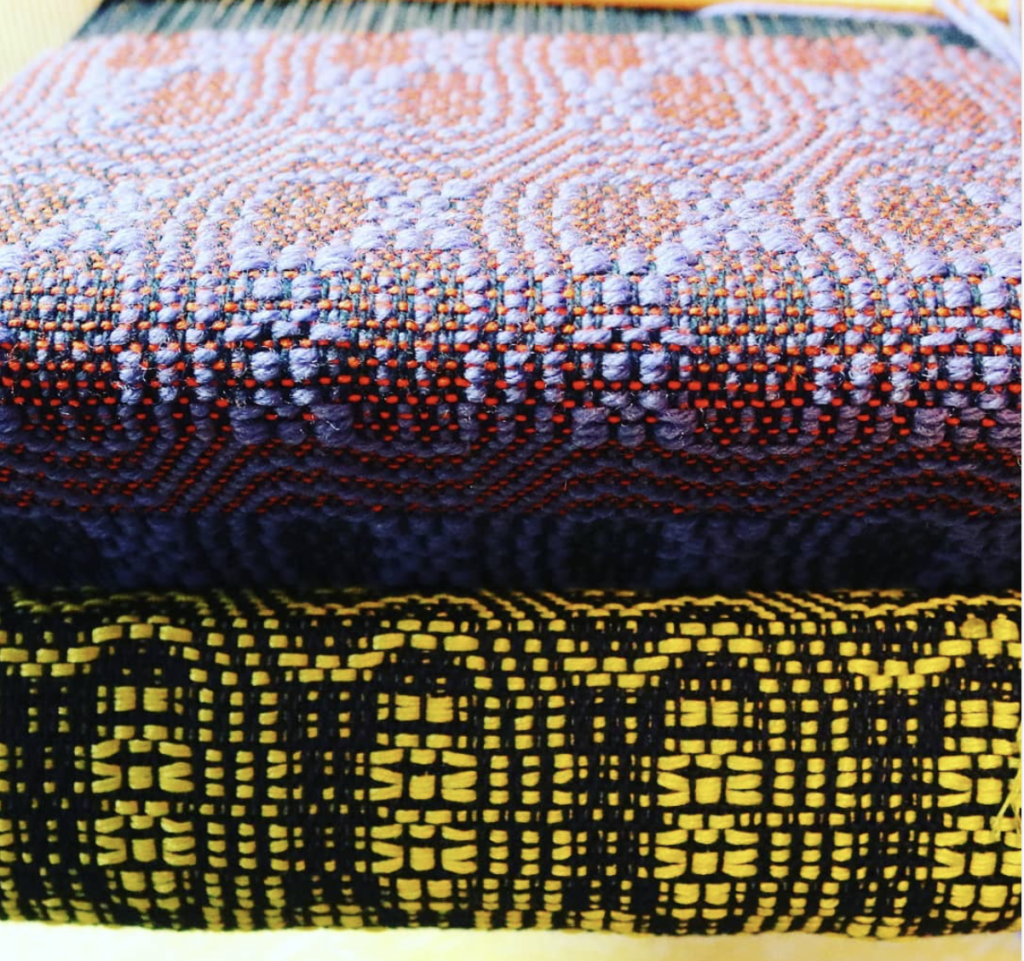
I’ve just completed this magnificent piece on my floor loom for my brand new Overshot on a Floor Loom class.

Incidentally, this photo is now one of my most popular posts on Instagram! I guess other people love it as much as I do.

Now that I have quite a lot of experience weaving overshot, I want to share my best overshot tips with you in hope that you too will fall in love with this wonderful weave structure.

Tip 1 – Take the time to sample

I know, I know, sampling takes time and yarn, it’s true. But it teaches you so, so much. It can also be more economical, as you can test your yarns out for suitability before committing to a larger project. Trust me, sampling is so well worth the time!

Tip 2 – Use appropriately sized yarns

To weave overshot you need a warp yarn, a tabby yarn and a pattern weft yarn. Using the same yarn for warp and tabby works perfectly. For the pattern weft, I like to use a yarn that is twice the size of the tabby/warp yarn. I have experimented with using doubled strands of tabby/warp yarn in a contrasting colour, but it just doesn’t look as good. A thicker pattern yarn is the way to go.

As an example, my current favourite yarn combinations for weaving overshot are:

Warp – 8/2 cotton

Tabby – 8/2 cotton

Pattern weft- fingering weight wool

There are certainly other combinations you can use, and once again, I recommend sampling to find what you love.

Tip 3 – Consider the scale of the pattern

What will the size of your item be? A miniature overshot pattern may get lost in a blanket, but may be perfect for a scarf. As a general rule, a good way to estimate the size of one repeat of your pattern just by looking at the draft is to see how many repeats are in one threading repeat. Also consider the thickness of your yarns and the sett you intend to weave.

Just to give you an idea, my current project is woven at 20 ends per inch with 8/2 cotton for warp and tabby and fingering weight wool for the pattern weft. The weaving draft has 50 threads in one threading repeat. My design repeats on the loom are around 2.5″ wide and just under 5″ long, which is a great size for the 30″ x 99″ throw I’m weaving.

Tip 4 – Give your weft picks plenty of room

I throw my picks gently to avoid drag on the selvedges and therefore preventing excessive draw in. I give a generous angle to the weft pick and keep it soft at the edges. I do adjust the picks at the edges before beating when necessary, but mostly I prefer to leave them alone and let them settle into place on their own.

Tip 5 – Floating selvedges are a must!

This is a non negotiable for overshot if you want neat edges and less headaches! You get used to using floating selvedges very quickly, so don’t stress if you have no experience with them.

Tip 6 – Don’t twist weft threads

This is another selvedges tip. I’ve experimented with crossing the two weft yarns at the selvedge to see whether it gives a neater edge, but it doesn’t, at least for me. So, instead of twisting the two wefts at each selvedge when throwing a new pick, I just let them follow one another sequentially and my edges are much neater that way.

Tip 7 – Will the pattern weft bloom?

Besides the thickness of the pattern weft yarn, you will also want to consider what kind of bloom it may have after wet finishing. For example, I know that my fingering weight wool blooms beautifully, whereas a cotton of the same size would not bloom in the same way. I very much like the contrast of the 8/2 cotton background with the plump wool pattern weft.

I’m going to sound like a broken record, but once again, a sample will show you everything you need to know about how your yarn will behave as a finished piece.

Tip 8 – Beware running colours

I’m often surprised by the potential of yarns to leach dye in the wet finish process. I’ve had certain yarns that I’ve used frequently that will leach dye sometimes and not others.

This is a particular problem if your colours and white on red or navy on white – you want to preserve that white and not have it come out of the wash as a pink or light blue!

The best way to avoid this is through vigilance, especially in the first 10-15 minutes of your woven piece making contact with water. If you see dye beginning to run, take it out of the warm wash and rinse in cold water until the water runs clear. Place back in the warm water and maintain your watch on it. Repeat the rinsing process if needed.

Tip 9 – Set up the treadles ergonomically

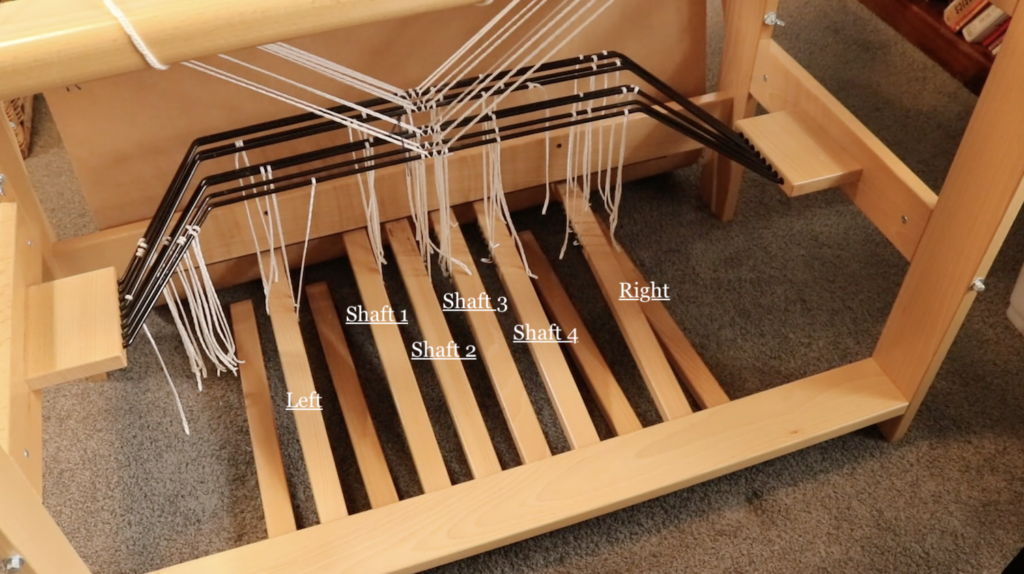
There are 6 treadles needed for overshot, even though you weave on 4 shafts. The two extra treadles are for the tabby weave. I always set up my pattern treadles in the centre of the loom – two on the left and two on the right. Then I set up a “left” tabby and a “right” tabby treadle. To do this on my 8 shaft loom I leave a gap between the pattern treadles and the tabby treadles so that my feet can “see” and differentiate between a pattern and tabby treadle.

Tip 10 – Advance the warp often

I like to advance little and often. You will find your own preference or “sweet spot” for weaving, but I find that with overshot I advance a lot more frequently at a much smaller amount than I do usually.

Tip 11 – Experiment with the beat

The firmness of beat will depend on a few things. Your chosen yarns, the weave structure, the width of the project and the tension your warp is under are all important considerations. I let the project dictate.

An example of this is that I wove an overshot sampler right before Is started my main project (the throw). It was a narrow warp (around 8″) and a different overshot threading and treadling than I’m using for the project.

I found that the sampler required a light beat, where I was pushing or placing the weft into position.

But for my throw project, I am beating harder and sometimes having to beat twice. Because of the width of the project, I need to be careful that I’m beating evenly, and that is easier to do if I’m beating more firmly.

Tip 12 – To temple or not to temple?

I personally do not use a temple. Some weavers will say they won’t weave without one. I’ve tried using a temple on many of my projects, particularly if I’m getting broken edge warp threads (signs of tension problems and too much draw in). But I will avoid using one wherever I can get away with it, and I don’t use one for weaving overshot.

I find that if I’m careful with weft tension and warping evenly, I do not get excessive draw in. It is something I’m constantly aware of while weaving and remind myself of tip 4 so that my weft picks are not pulling in at the edges.

I hope these tips have been helpful to you! If you are interested in overshot, here are some additional resources for you to check out:

Overshot on a rigid heddle loom class

Overshot on a floor loom class

Talking overshot (free video)

The Handweaver’s Pattern Directory, Ann Dixon

A Handweaver’s Pattern Book, Marguerite Davison

Next Steps in Weaving, Pattie Graver

Miniature Overshot Designs, Bertha Graysons Hayes (as a disclaimer, I do not own this book yet, but have heard very good things about it).

Until next time…

Happy Weaving!
Filed Under: 4 shaft weaving, Books, Floor Loom Weaving, Inspiration, Online Weaving School, Overshot, Weaving Tagged With: weaving tips

Italian Hemstitch

by Kelly 4 Comments

You all know that I love hemstitching, right?

I have quite a lot of resources available on the topic, including articles and videos, some of which you can find in this post.

In addition to the basic hemstitch we all know and love, there are variations for an even more visually decorative, but still functional hemstitch.

*This post contains affiliate links. For more information, please see my disclosure policy.

The hemstitch doesn’t have to just be a way to secure your warp threads so that the weft doesn’t unravel when you remove your weaving from the loom. It can also be used within the weaving as a feature.

In the member’s only “How to Hemstitch” series, I have a separate class just to highlight and demonstrate how you can use hemstitch as a feature in your woven piece.

That brings me to today’s topic – the Italian Hemstitch. This is a gorgeous, decorative and functional stitch. It secures your warp ends just like an ordinary hemstitch does, but it stands out as a real feature. Embroidery lovers, this one is right up your alley!

Italian hemstitch looks great either as a single row at each end of your weaving or as rows within the weaving. It can be stitched in a variety of sizes, depending on how large you want it to look. It looks wonderful both from the front and from the back.

I love the way Italian hemstitch looks on a plain weave background, using a contrasting yarn so that it stands out and takes centre stage. You could choose to use a weight of yarn that matches the weight of your warp and weft, or something thicker, or something thinner. Experiment and see what your own preferences are!

For this tutorial I’ve used a light worsted wool for warp, weft and hemstitch, just in different colours. I’m going to be working a 2 x 2 Italian hemstitch.

Start by threading up a tapestry needle with the yarn you want to stitch with. Make the length around 5 times the width of your warp (I like to have a little more rather than run the risk of running out part way through).

I have to take a moment to extoll the virtues of this Clover Jumbo Bent Tip Needle. I used a regular tapestry needle for a long time before I purchased a pair of these needles, and wow, what a world of difference it’s made to my hemstitching! The large size, the coating that slips through your weaving just beautifully, and the bent tip all come together to make it a perfect tool to hemstitch with.

Secure the hemstitch yarn in your weaving, bringing the needle through to the front from the back. You can see one way that I work lock stitch in this free video. I work this about 2 – 3 warp threads in from the edge on the right hand side.

Count 2 warp threads in from the edge (above your last woven pick) and take the needle down through the gap to the back of your weaving.

When you pull the yarn through, there will be a loop around those first two warp threads, right at the top of the fell (where you last wove your weft).

Count across 2 warp threads again, but this time count down 2 weft threads. Bring the needle up from the back through that space.

Here is how this step looks once the needle and thread have been pulled through.

Take the needle and yarn back to the right edge. Now bring the needle up from behind, through the exact same hole that your last stitch came out of. This will make a new loop as you pull the needle through once more.

Pull on this loop to tighten it up a little. That gives us 2 horizontal lines – 2 sides of our box shape. Now we need to make the 3rd line as a vertical to close the box shape.

To get the vertical stroke of thread, we take the needle straight up to the left of those first 2 warp threads and pull through.

Now you can see your first block/box shape. Each box at the very edges of your weaving will be open ended on one side, the rest will be closed.

To continue working the boxes, count off the next 2 warp threads, bring the needle up and pull the needle and yarn through.

Take the needle back to the start of the second set of 2 warp threads and underneath.

Bring the tip of the needle (this is where that bent tip makes your life a whole lot easier!) up 2 weft threads down, in line with the 2 warp threads you have counted off.

Pull yarn through and tighten the loop. Take the needle back to the start of the pair of warp threads and down into the previous stitch’s hole.

Now bring the needle back up (thank you again bent tip needle!) through the hole that the working thread is in and pull through.

Finish off the box shape with a vertical thread again, by taking the needle down to the left of the warp threads just worked. Continue on across the warp and before long you will have something that looks like this:

It may seem a little complicated at first, but it’s really only a couple of steps more to complete than the regular hemstitch, and once you’ve “got it” your needle will fly!

If you would like a detailed, step by step video on how to work the Italian hemstitch, you may want to consider signing up for a membership at my Online Weaving School to access this and other great tutorials and classes.

The Italian Hemstitch class is available to all members of the Online Weaving School. It is a bite sized, technique focused class to further your learning in the wonderful world of weaving!

Thanks for stopping in for a visit today, if you have any questions or comments, please leave them below, I always love to hear from you!

Until next time…

Happy Weaving!
Filed Under: 4 shaft weaving, 8 shaft weaving, Floor Loom Weaving, Free tutorial, Hemstitching, Inspiration, Online Weaving School, Rigid heddle weaving, Tutorials, Weaving Tagged With: hemstitch tutorial, how to hemstitc, Italian hemstitch

  • Page 1
  • Page 2
  • Page 3
  • Go to Next Page »

Primary Sidebar

Categories

Archives

Meta

  • Log in
  • Entries feed
  • Comments feed
  • WordPress.org

Copyright © 2025 Kelly Casanova Weaving Lessons on the Foodie Pro Theme