• Skip to main content
  • Skip to primary sidebar

Kelly Casanova Weaving Lessons

  • Hi! I’m Kelly!
    • Disclosure
  • Online Weaving School Class Index
    • Common account issues
    • Common technical issues
    • What do I get with a membership?
  • New to rigid heddle weaving? Start here!
    • Never heard of the rigid heddle loom?
    • How to weave neat edges on the rigid heddle loom
    • Rigid heddle weaving
    • Rigid Heddle Weaving Patterns
  • Patterns
  • Subscribe

Floor Loom Weaving

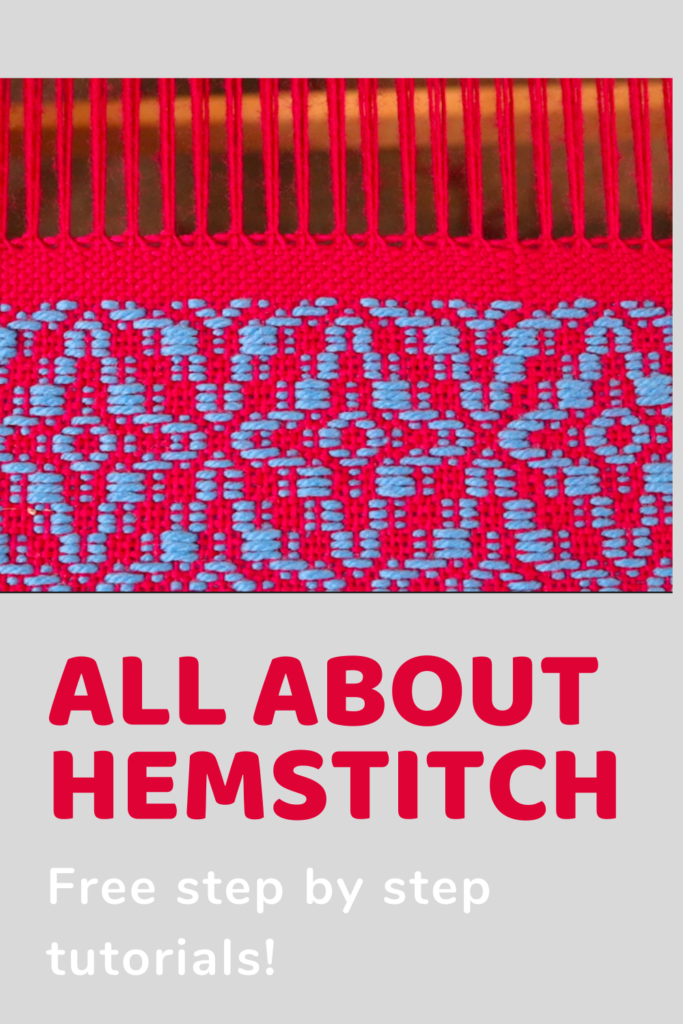
All about hemstitching

by Kelly 10 Comments

I learned how to hemstitch early on in my weaving journey and use it now in most of my hand woven pieces.

I love that it is so decorative but entirely practical as well – that suits my tastes perfectly!

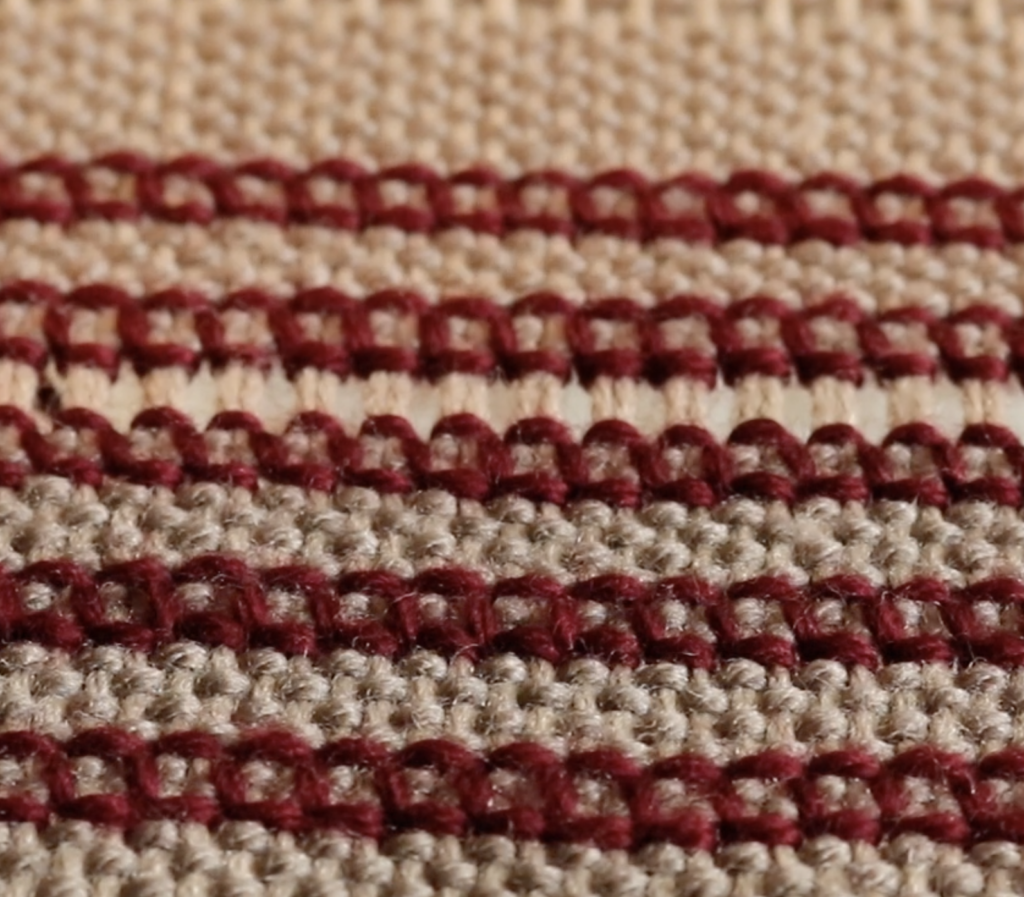
There are many things to love about the humble hemstitch, it is easy to learn, it looks lovely, it allows your woven piece to sit really flat once off the loom (great for table linens), it is very strong and secure and it can be used as a feature within your weaving, not exclusively at the start and end of your piece.

This post contains affiliate links. Please see my disclosure policy for further details.

So, what is hemstitching?

It is a way to secure your warp ends in order to remove your weaving from the loom. It is worked by hand, with a tapestry needle and while your piece is still on the loom (not absolutely necessary, but boy, does it make life easier!)

When you remove your piece from the loom, the weaving will naturally begin to unravel (at different rates, according to the yarn and the project). You need to either secure those warp ends on the loom or promptly after removing from the loom.

Do I have to leave a fringe if I hemstitch?

Not necessarily. It is most common to leave some sort of a fringe when you have hemstitched your ends. A twisted fringe looks stunning with hemstitch but a medium to short fringe is also lovely.

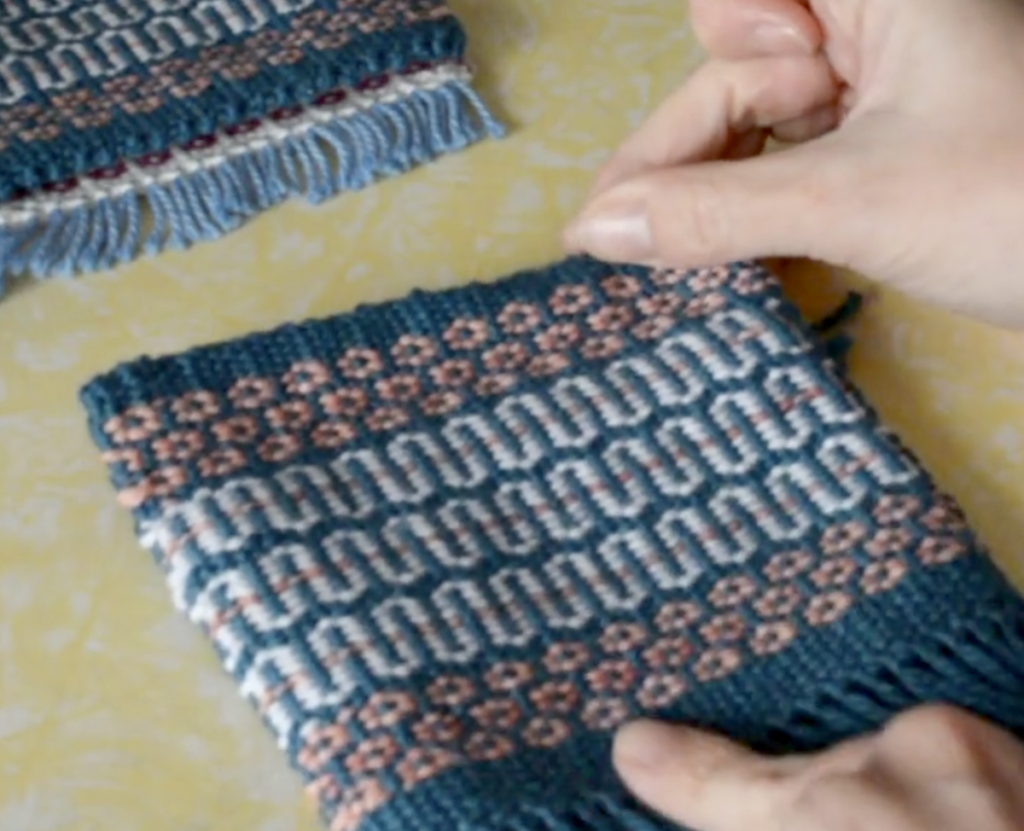
But if you don’t want a fringe at all, don’t have a sewing machine and want those ends secure you can hemstitch on the loom, then needle weave the warp ends (or fringe) back up and into the work. I have used this approach for some of my tapestry projects and on these mug rugs. It gives a very neat and attractive finish – it takes a while to weave all those ends in with a needle though!

Let’s get down to the nitty gritty and have a look at how hemstitch works.

You begin by choosing the number of warp ends you want in each bunch and how far into your weaving (how many weft picks) you want each stitch to go.

My go to is a 4/1 hemstitch, which means that there are 4 warp threads in each bunch and I stitch in 1 weft thread deep. There are all different number configurations you can do depending on the effect you want, the project and the thickness of yarn you have used.

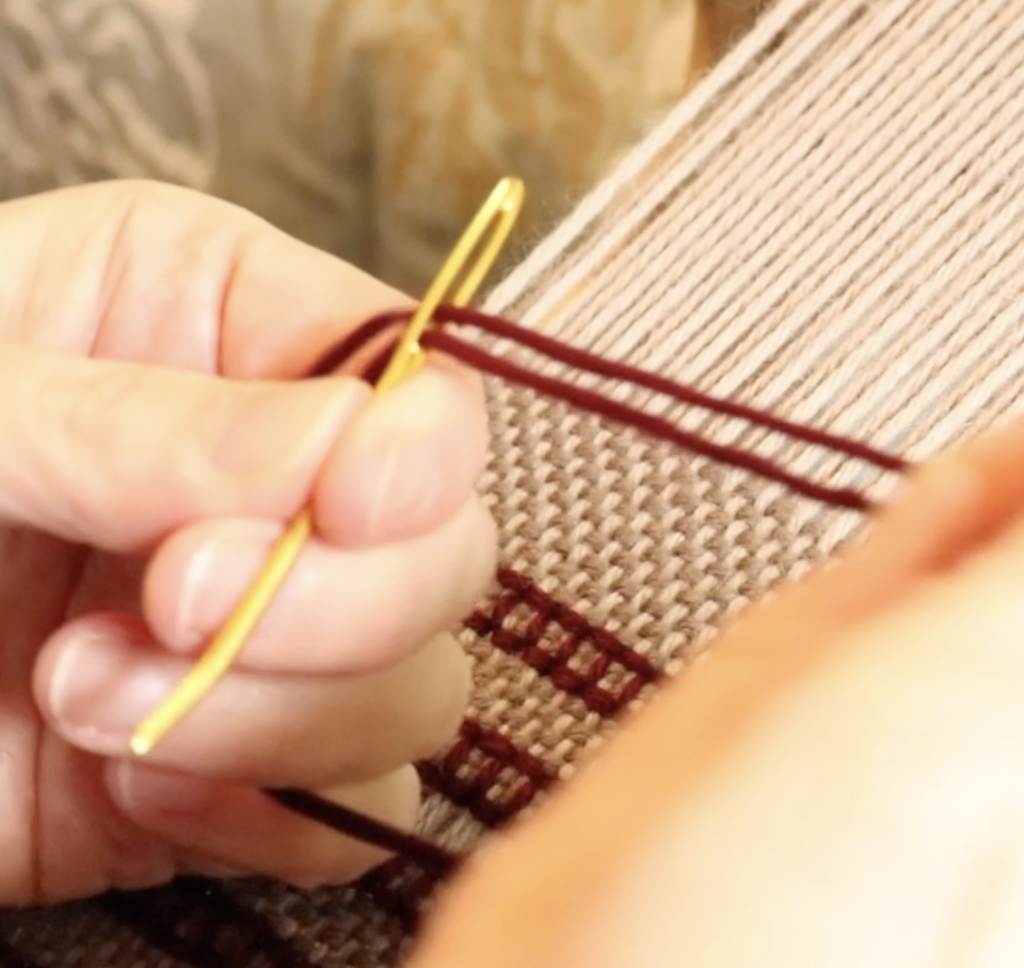
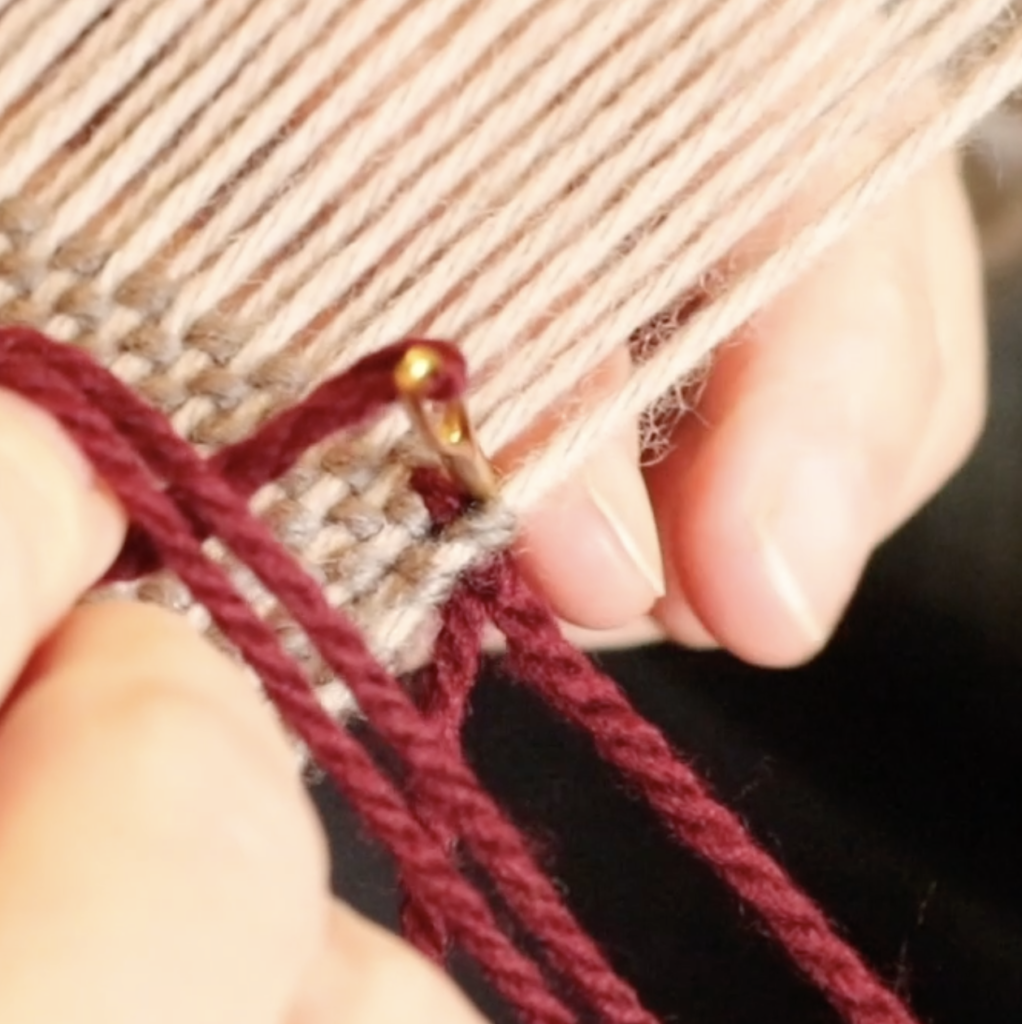
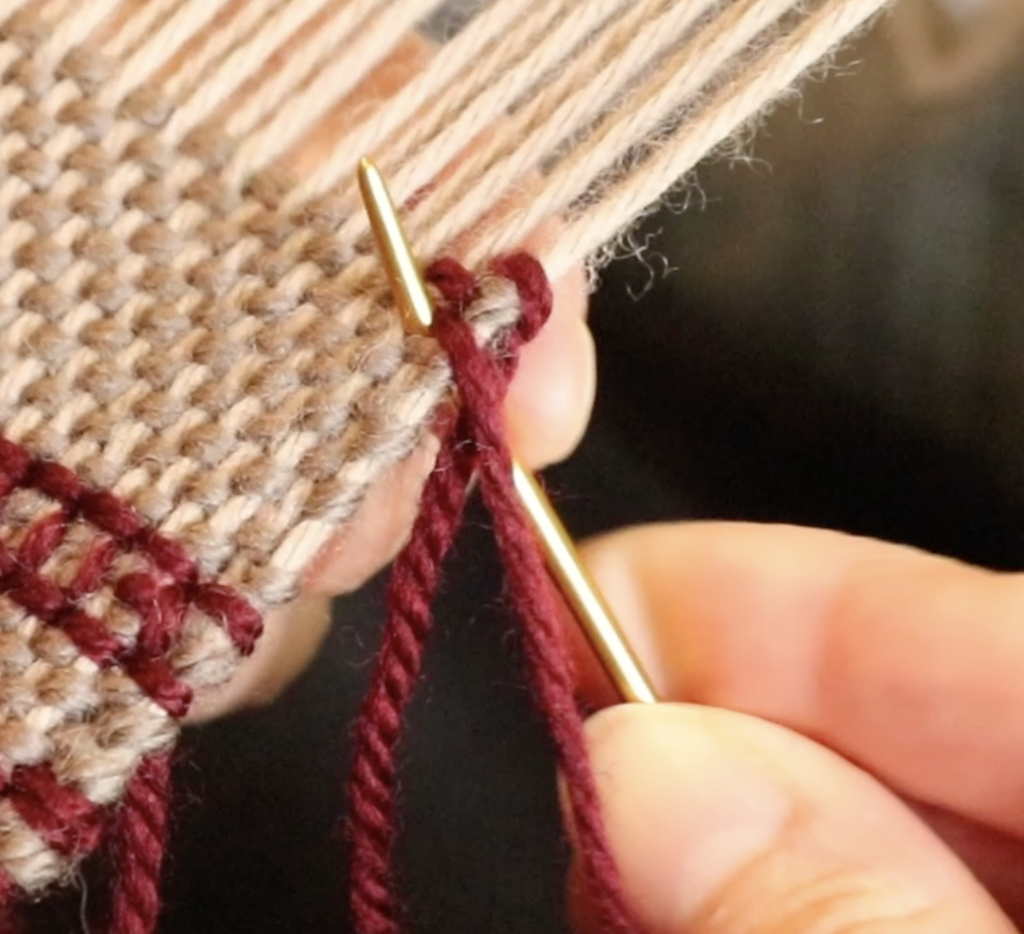
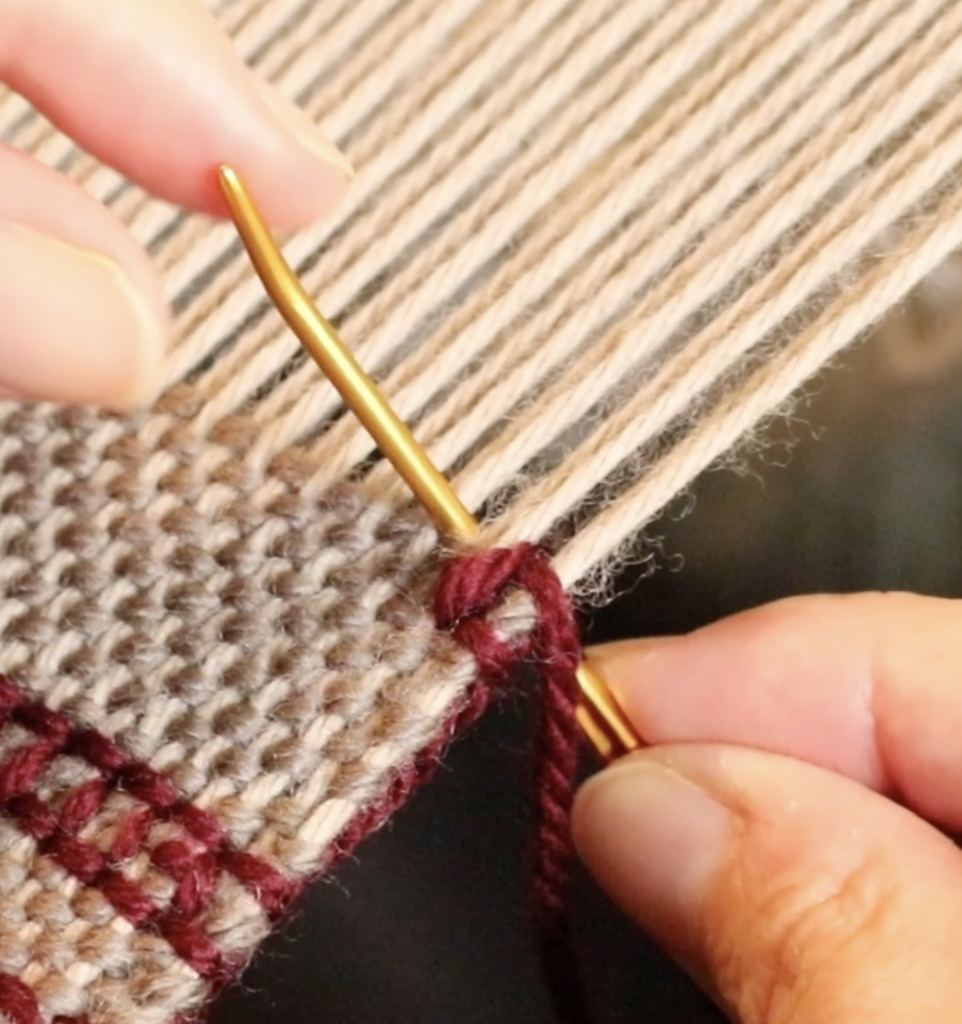
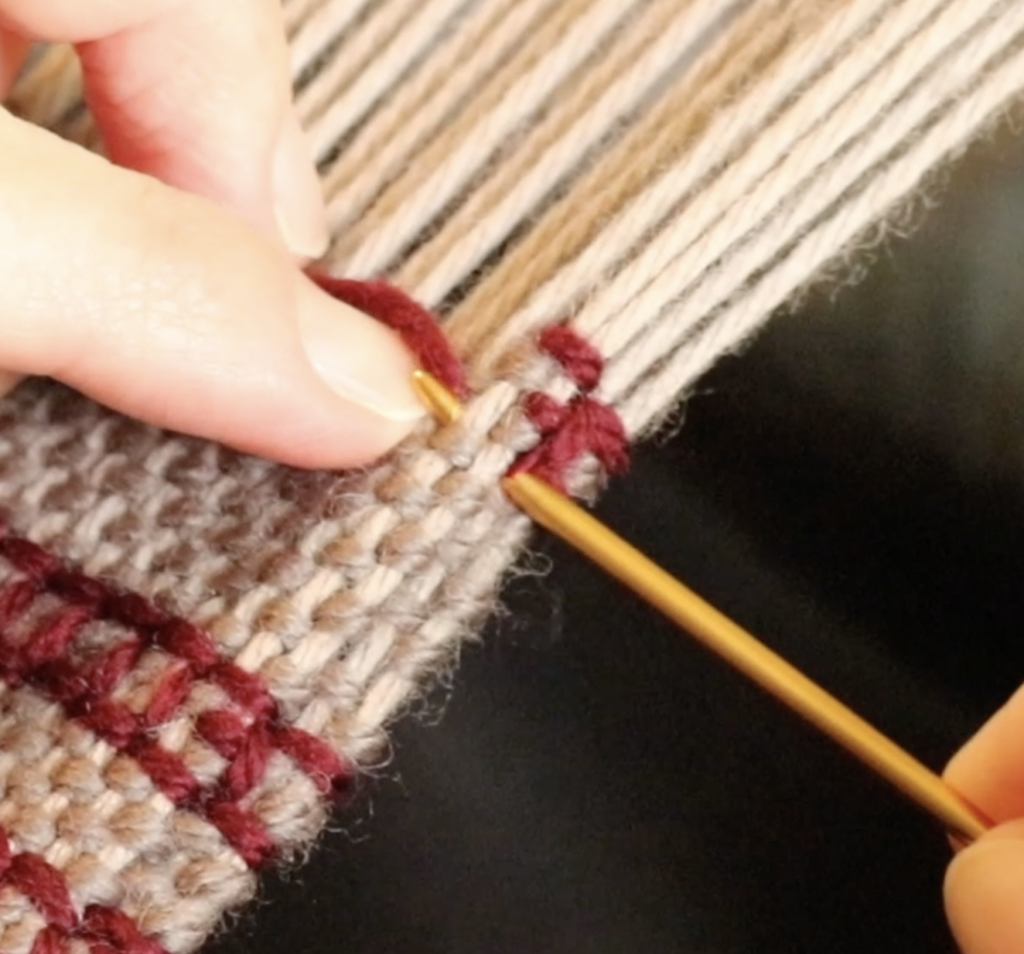
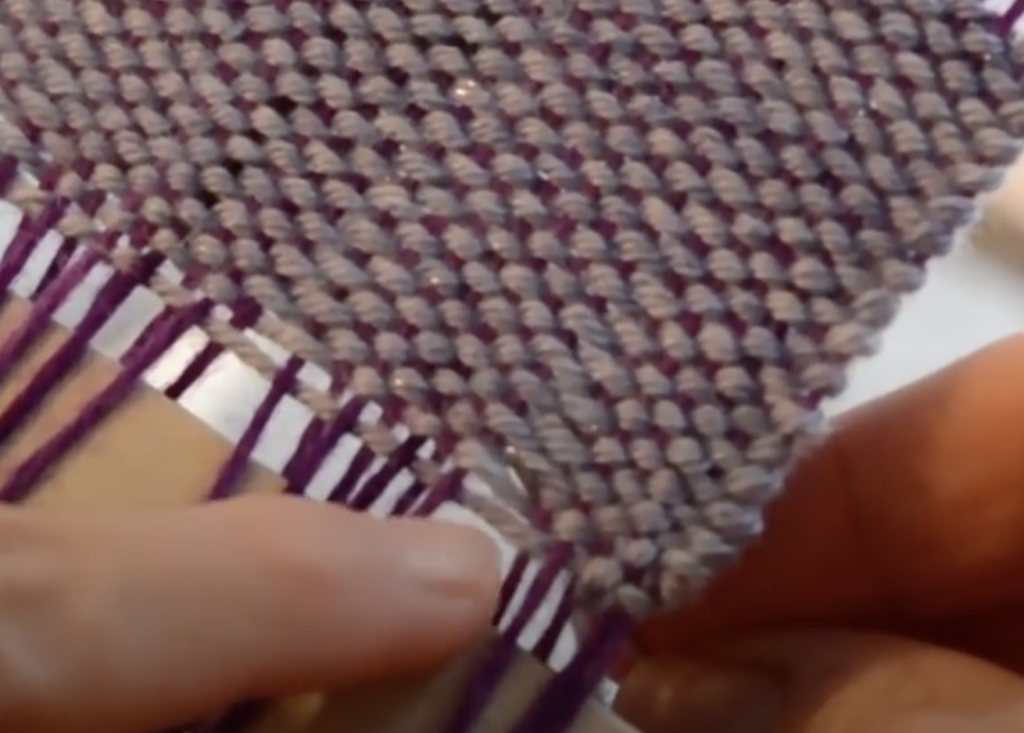
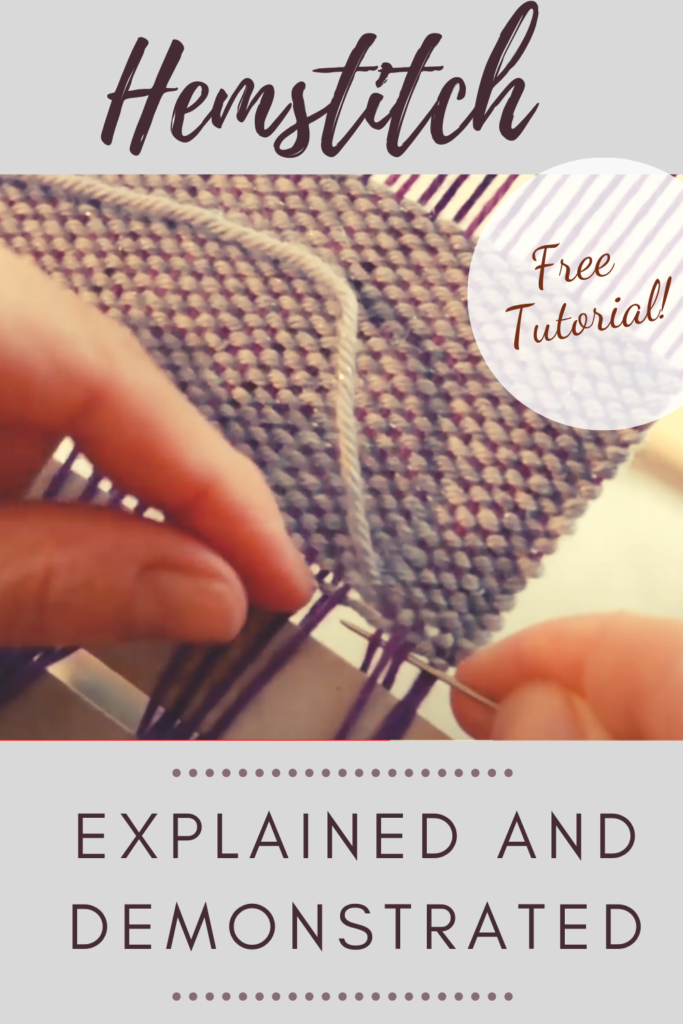
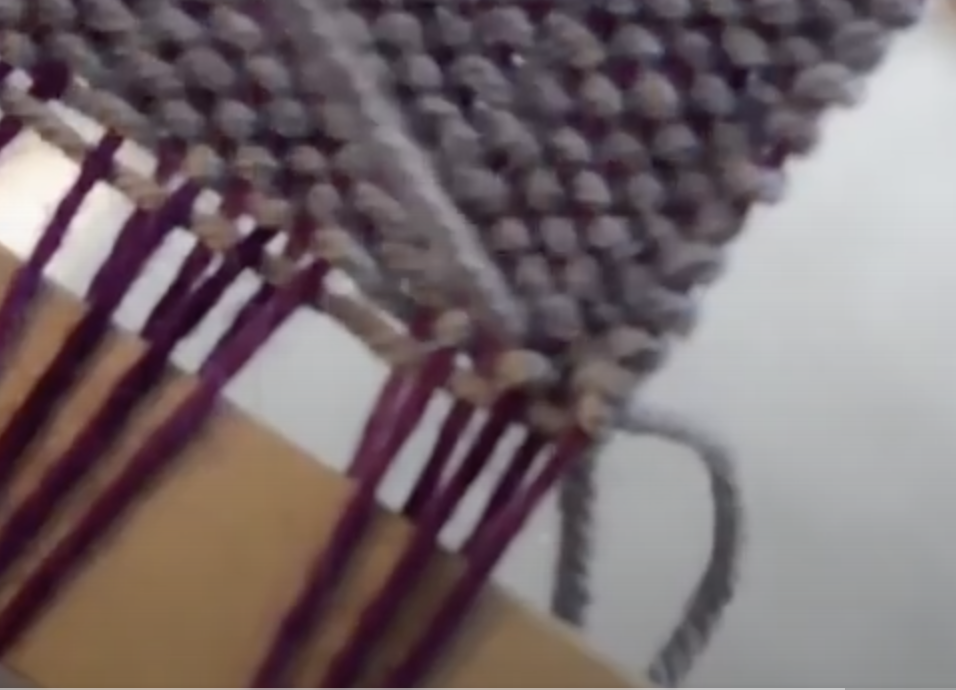
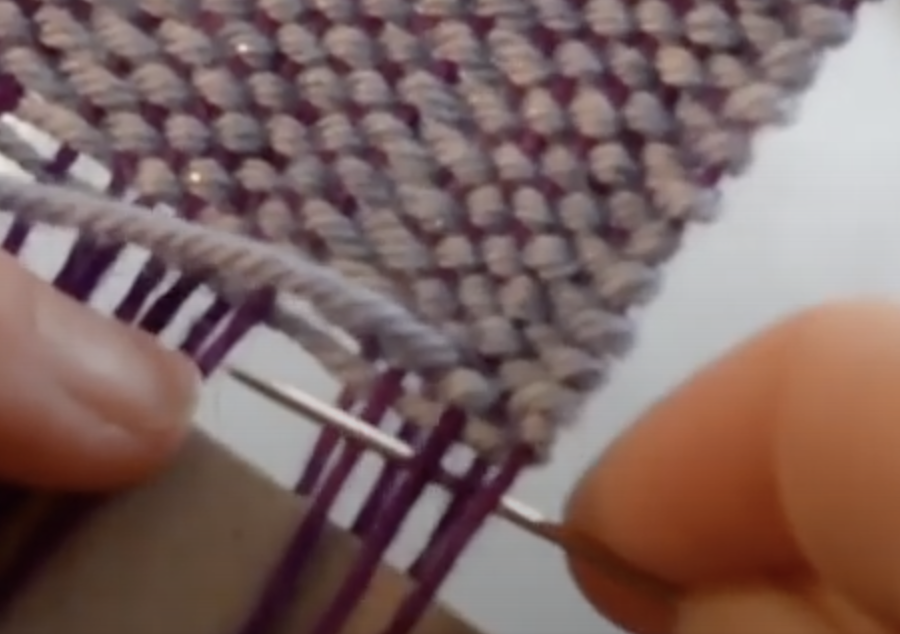
In this picture I am working a 3/2 hemstitch. I count off 3 warp threads at a time, and bring the needle up 2 weft picks deep.

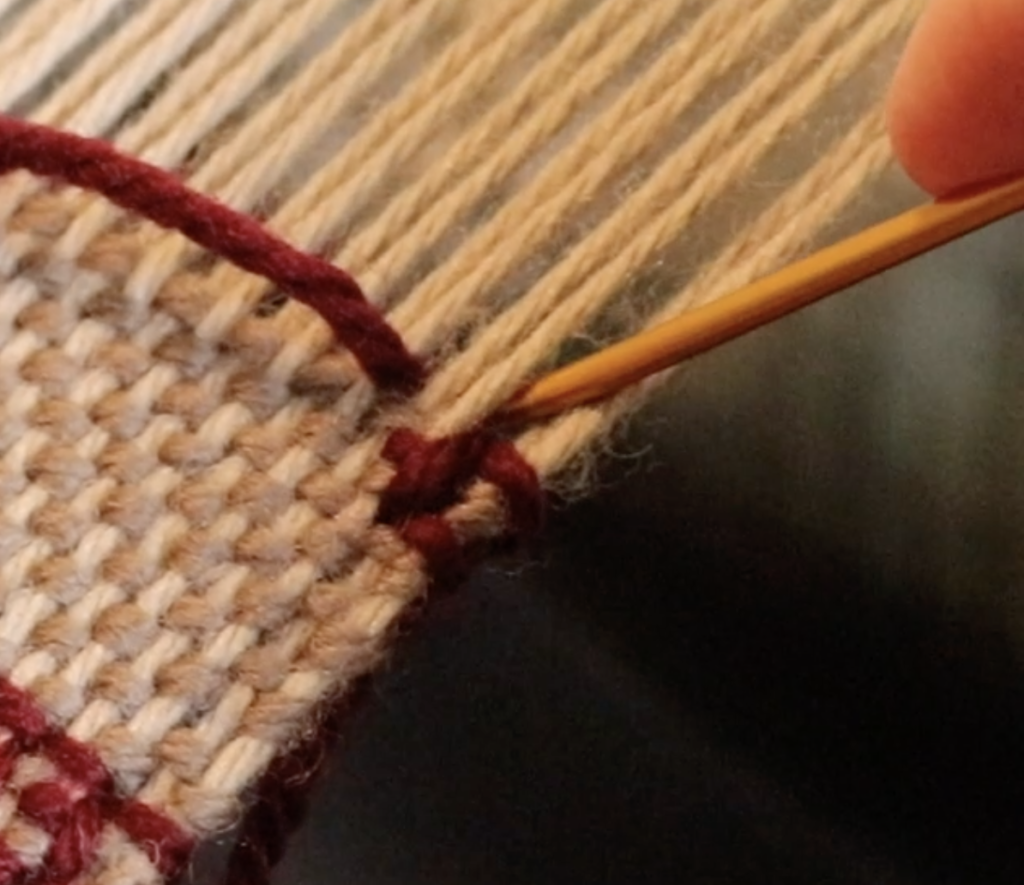
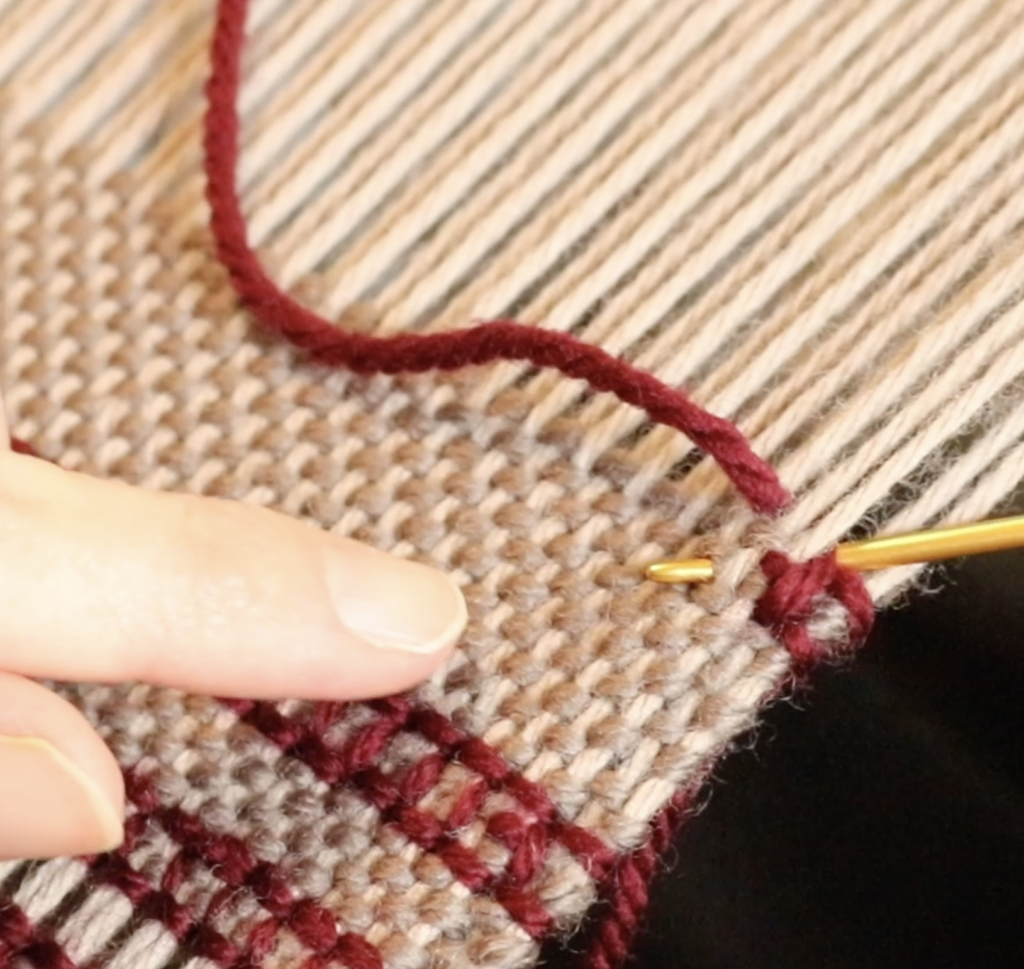
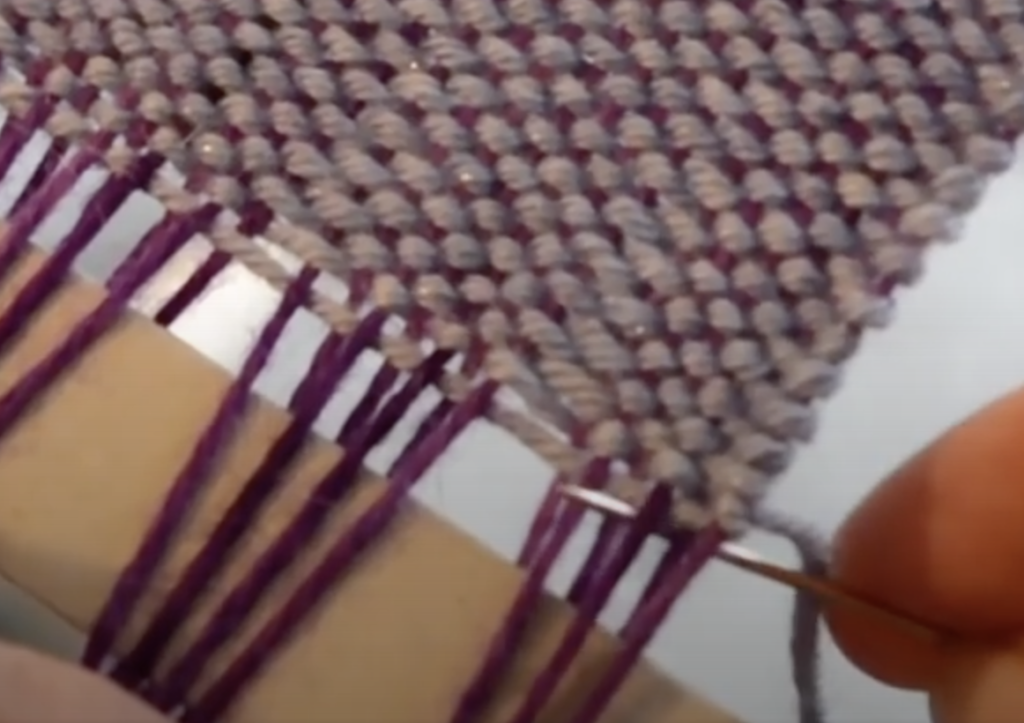
Here is a breakdown for how to work hemstitch, step by step. Heddle is in neutral. Ideally, you have left a long tail of weft yarn (around 4 x the width of the project) on the right hand side (left side if you are left handed). Thread this yarn in a tapestry needle.

Remember, in this demonstration I’m doing a 3/2 hemstitch.

  1. Take the tapestry needle underneath the first 3 warp threads.

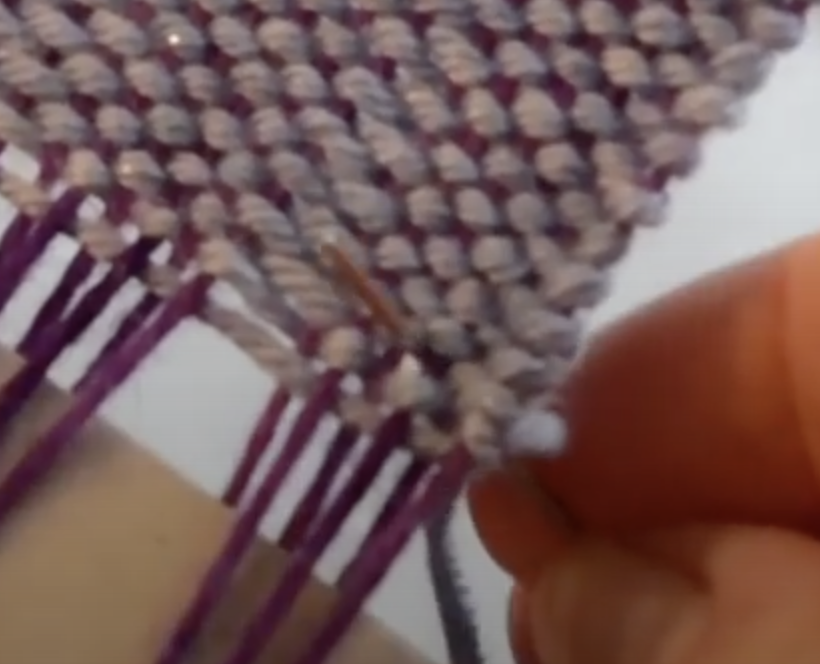
2. Count up 2 weft threads and bring your needle through the space that aligns with the 3 warp threads you counted in.

3. Pull the full length of the yarn through.

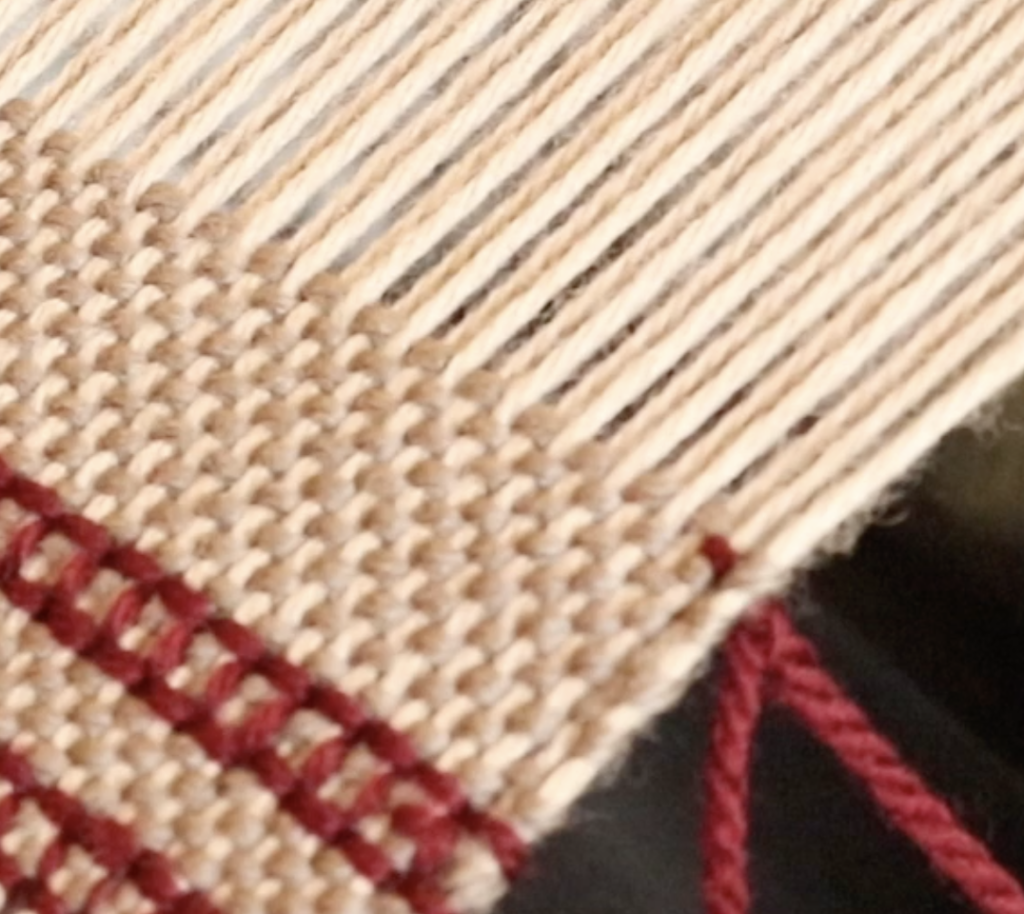
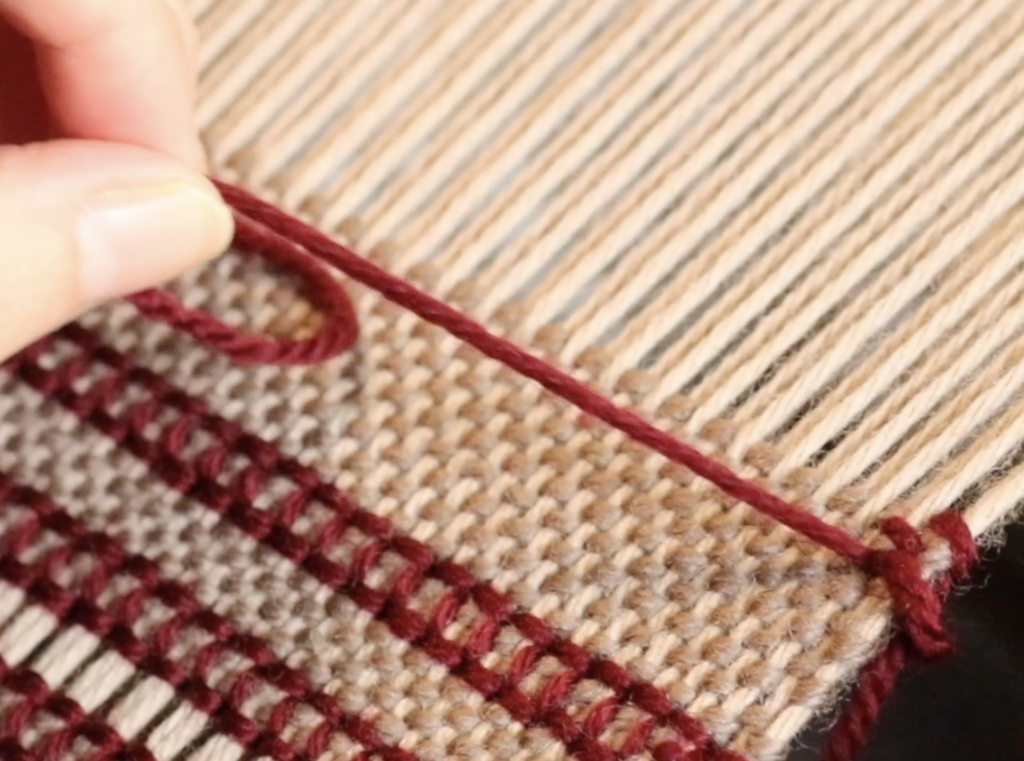
4. Take the needle back to the start of the initial 3 warp threads and underneath, coming up on the left hand side of the 3rd thread.

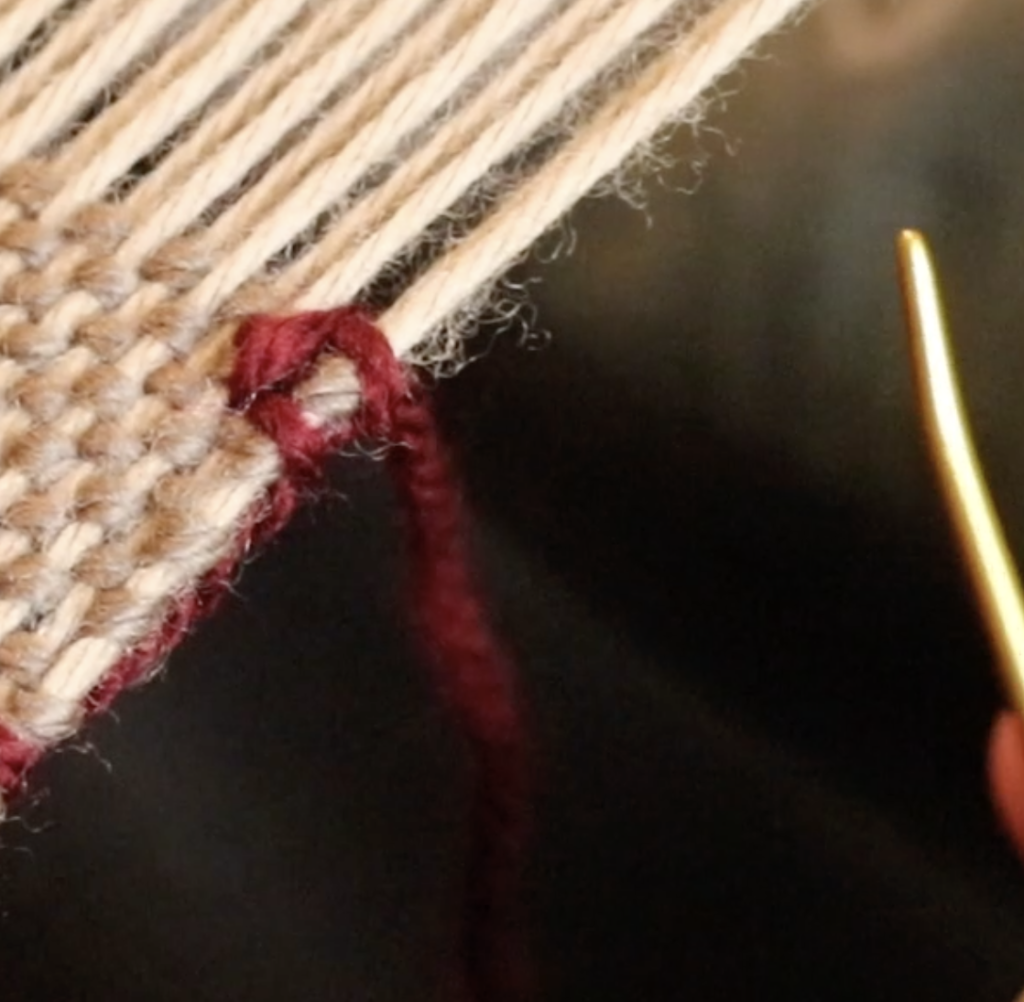
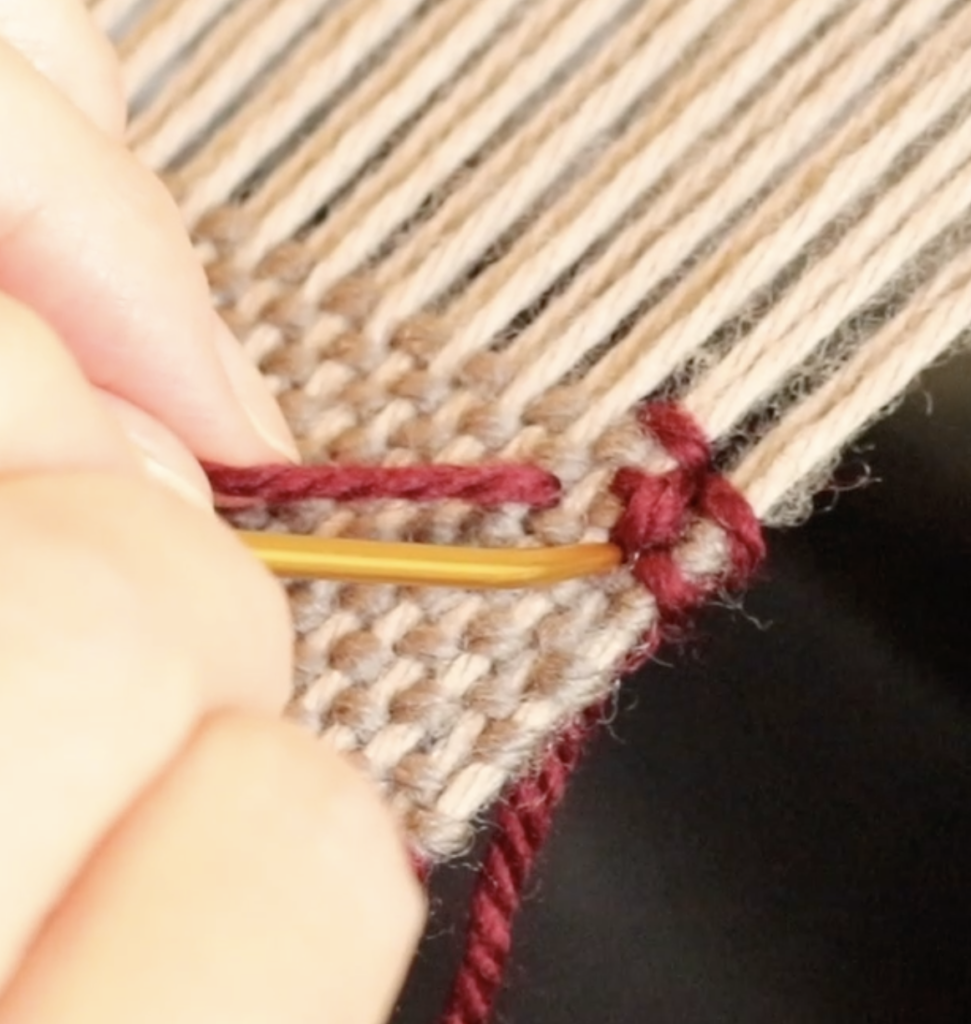
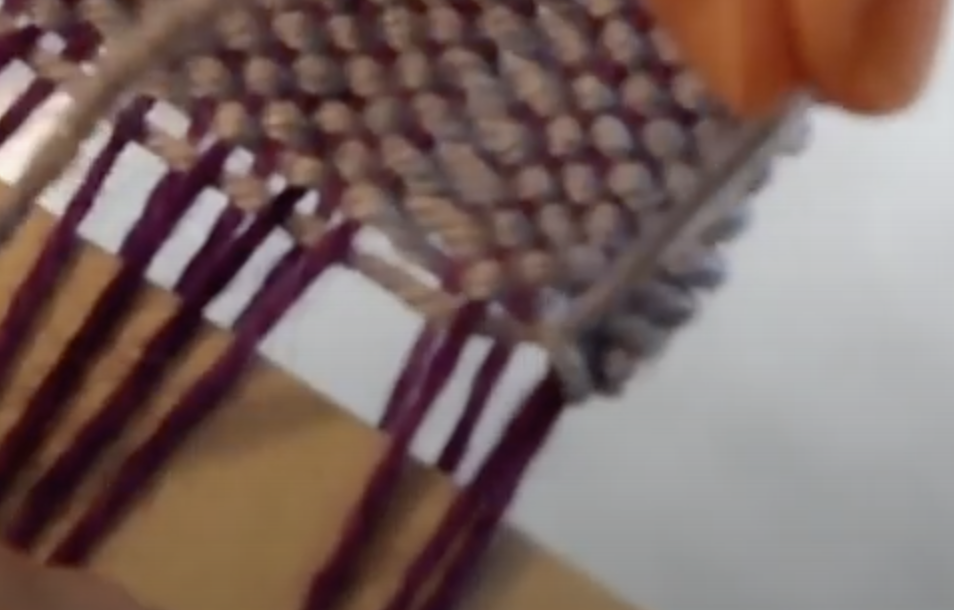
5. Pull the yarn through, making sure that the needle goes under the tail yarn on the left so that a loop is created. Pull the loop firmly to make your first bunch.

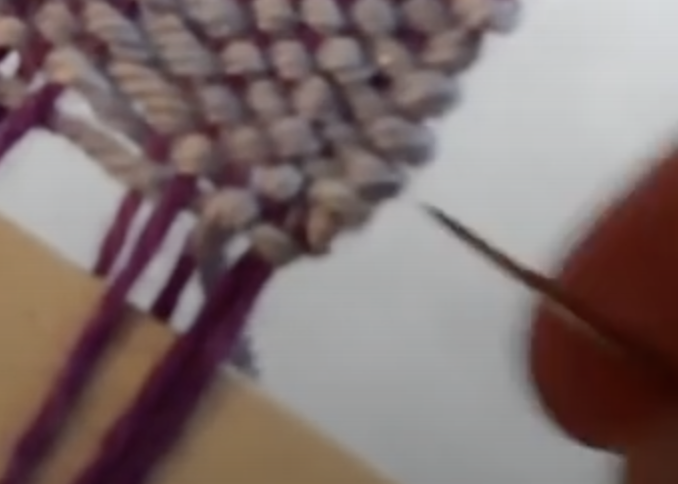
6. Take the needle down in between the first bunch and the next group of 3 warp threads and repeat the steps.

You can see a video of this tutorial here-

I mentioned that hemstitch can also be used decoratively within your weaving, not just as a hem securer.

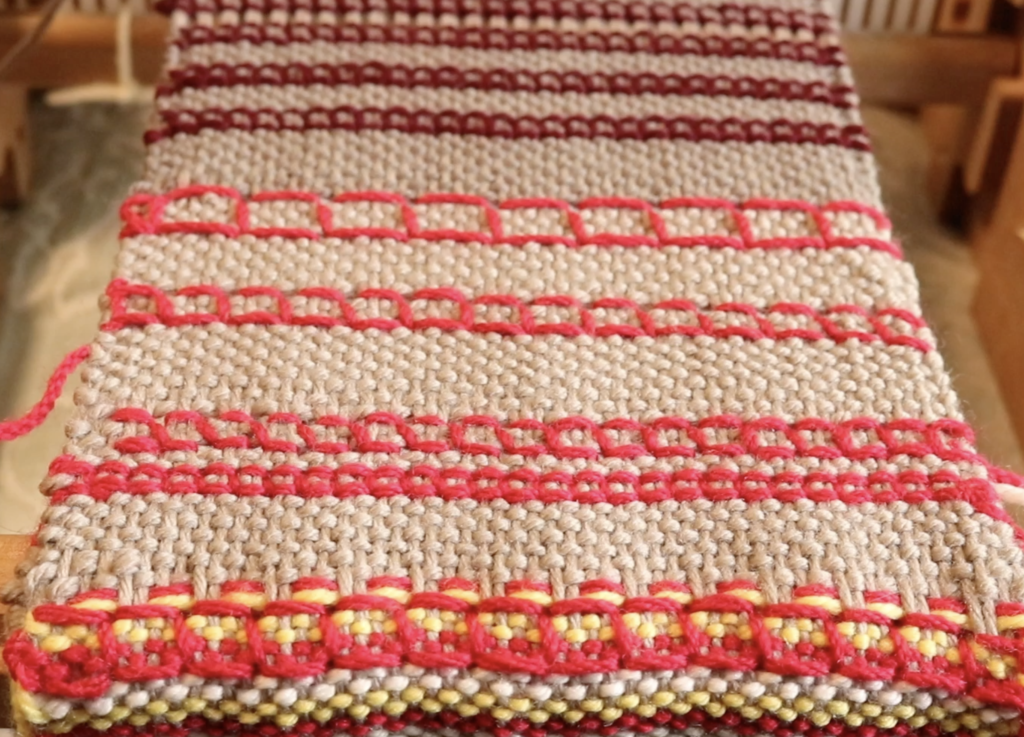
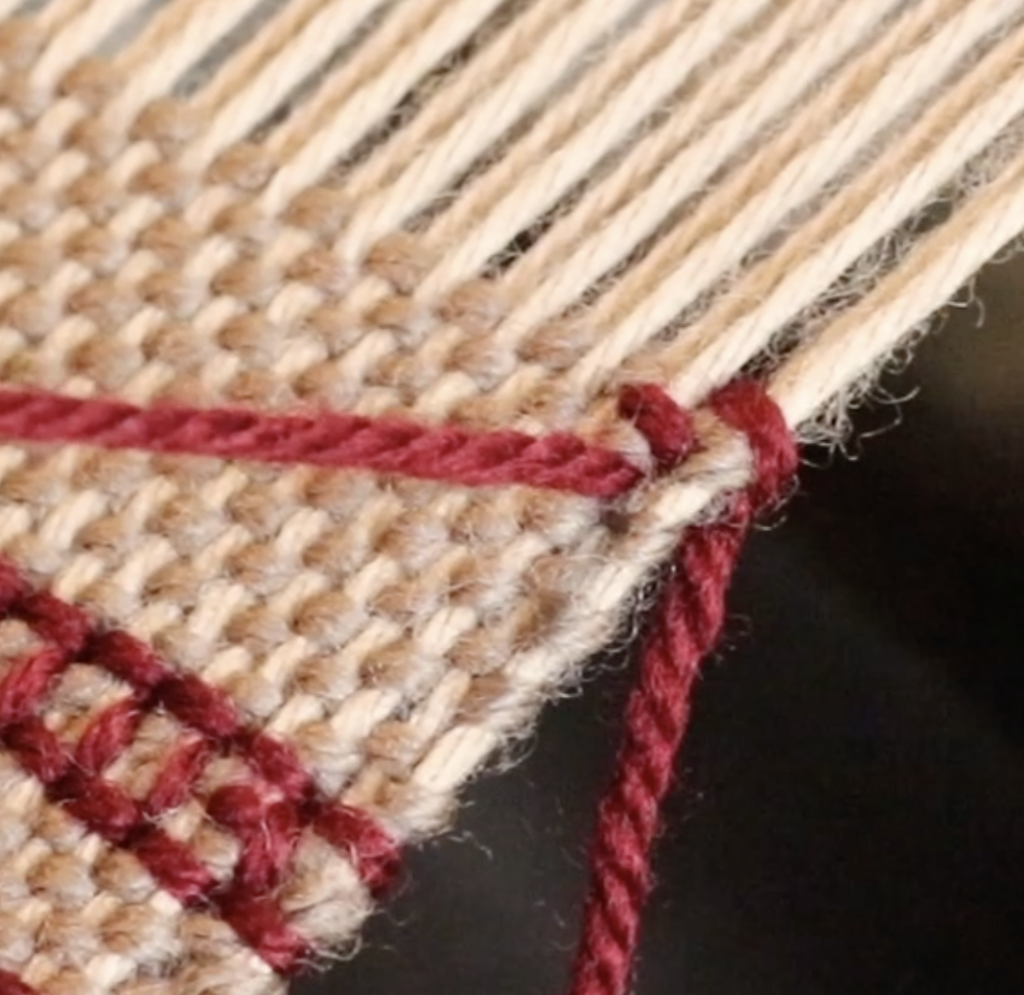
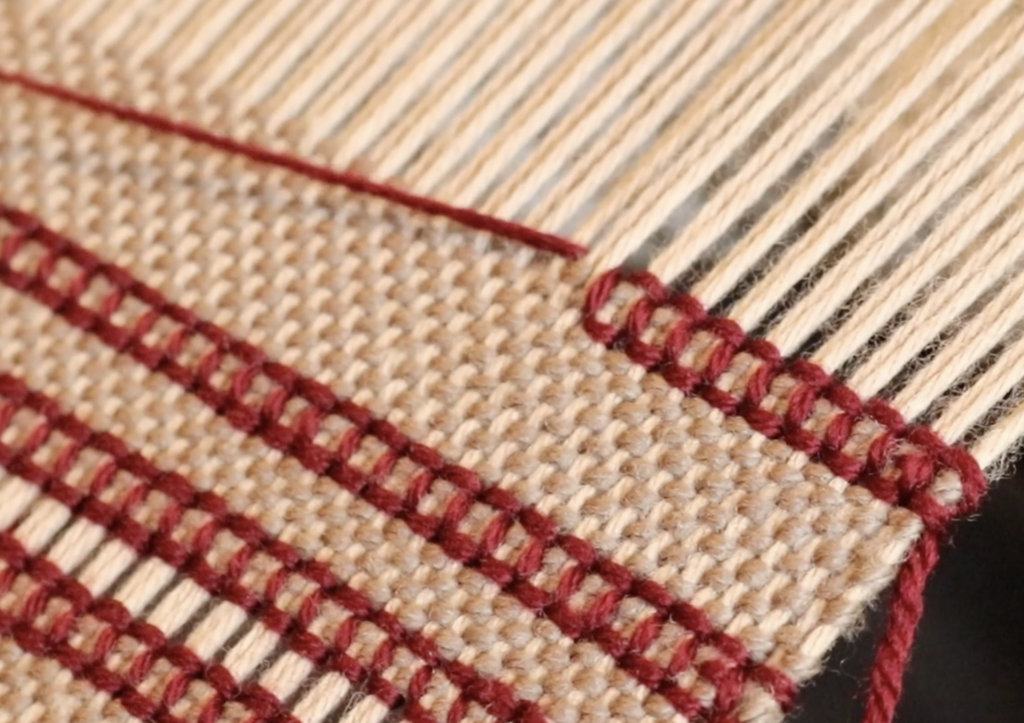
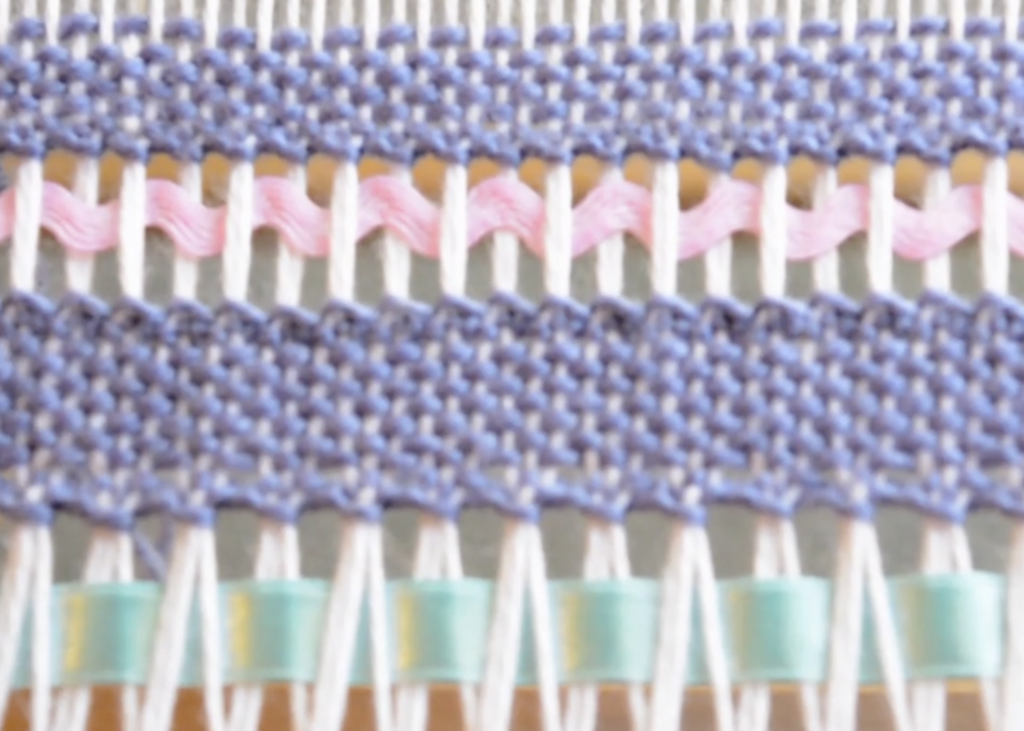
In this image I have worked adjacent rows of hemstitch on bands on plain weave, leaving a gap between the bands. I’ve then woven in some ric rac and ribbon as a feature. This can give a very pretty and unique look to your woven piece. This demonstration is available in a member’s only class – Hemstitching as a Feature.

Do I hemstitch both ends of the piece in the same way?

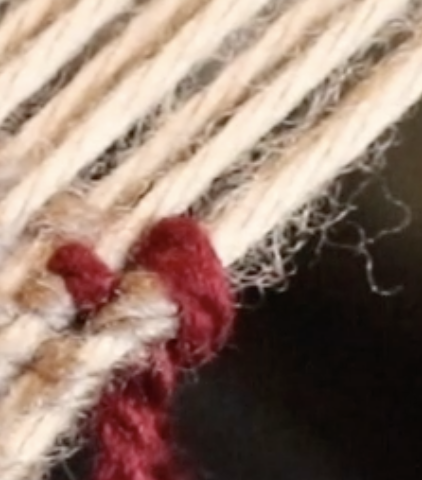
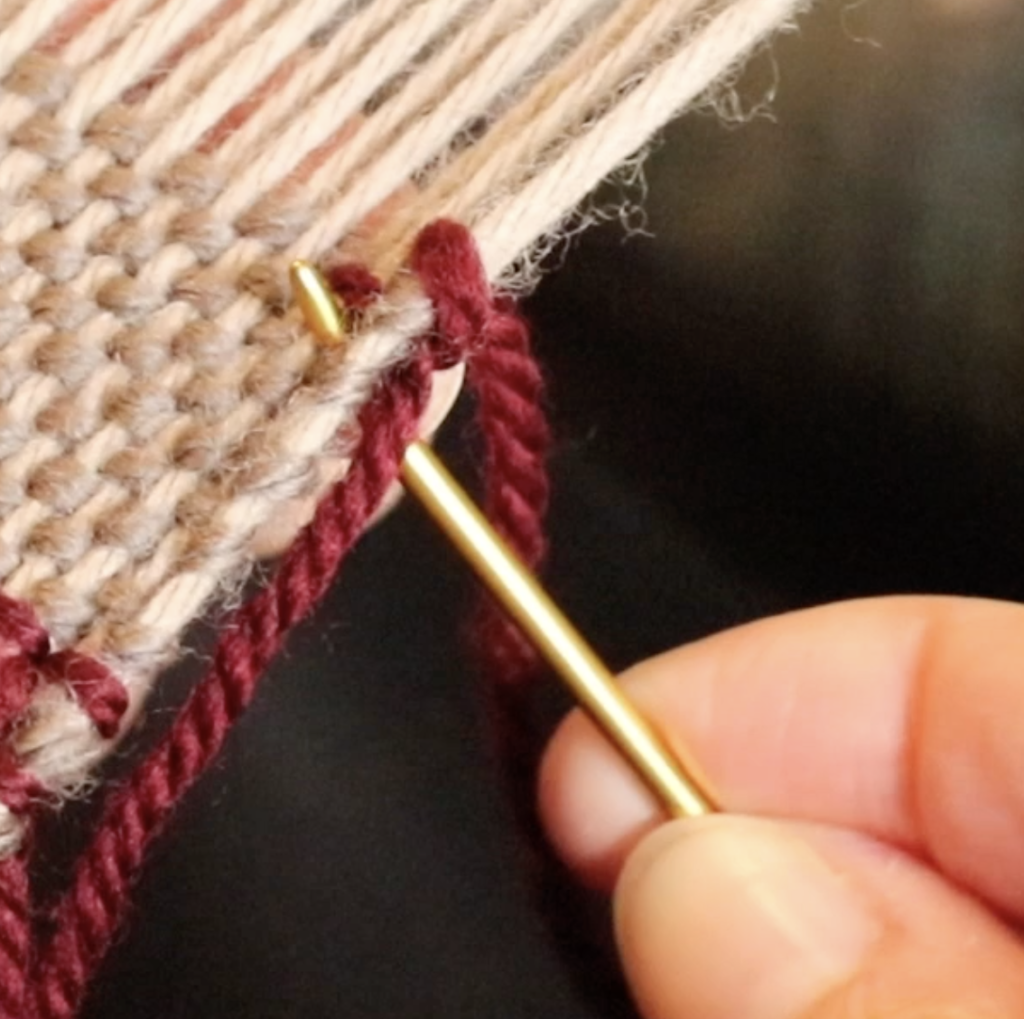
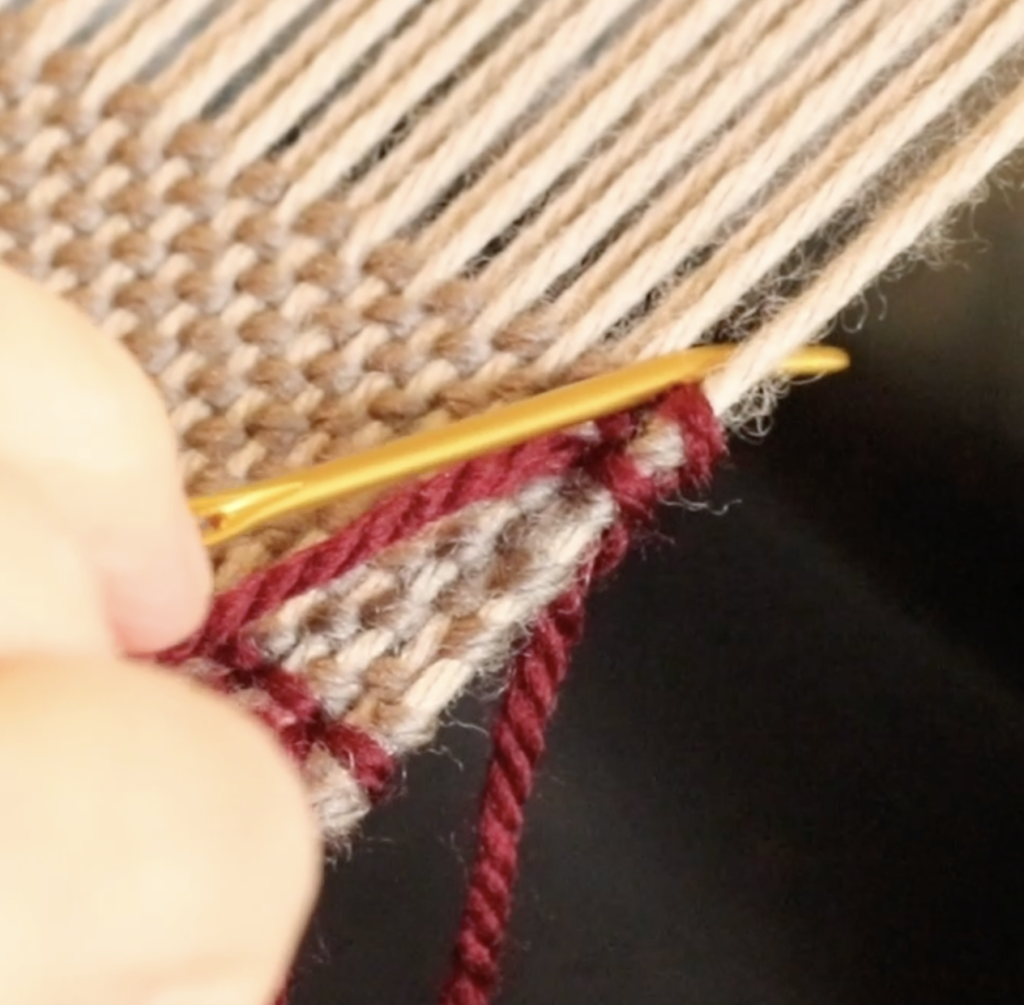
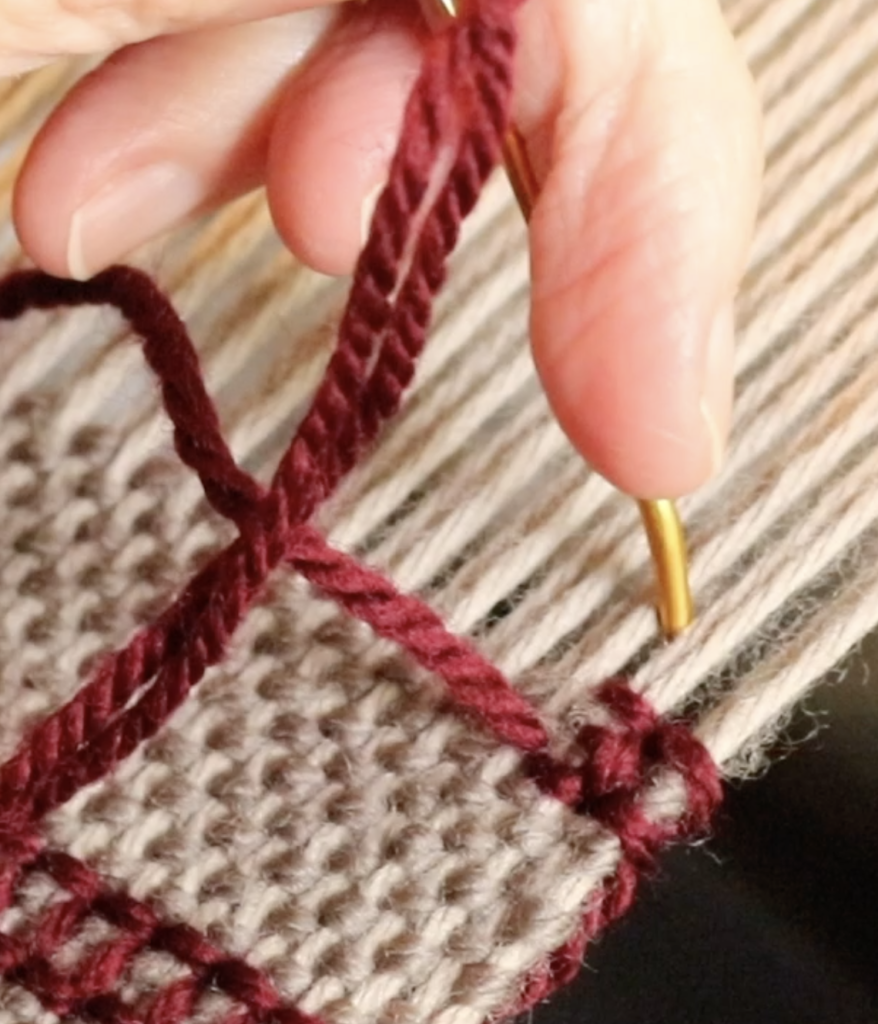
Yes and no. You are still using the same hemstitching technique, but when you hemstitch the first end you are stitching underneath the weaving and when you stitch the final end, you stitch on top of the weaving.

In my earlier days of weaving, I would take my loom off the stand, turn it around to face the other direction and then replace it on the stand. That way, I had the weaving facing me in the same way that it does at the start of the piece and I didn’t have to change the way I stitched at all.

These days, I have a different technique for hemstitching the other end that means I don’t have to rotate the loom and is just as fast and easy as the beginning of the piece hemstitch.

I’ve made a video to share with you how I do this. You will see that its not difficult and just as effective:

Does hemstitching only work on certain types of weaving?

I have used hemstitching on all different types of weaving, even tapestry. I’ve used it on my rigid heddle loom, table loom, floor loom and tapestry loom. I haven’t used it with my inkle loom but inkle bands don’t unravel in the same way and the warp threads are so close together that hemstitching would be quite difficult!

Does the type of tapestry needle matter?

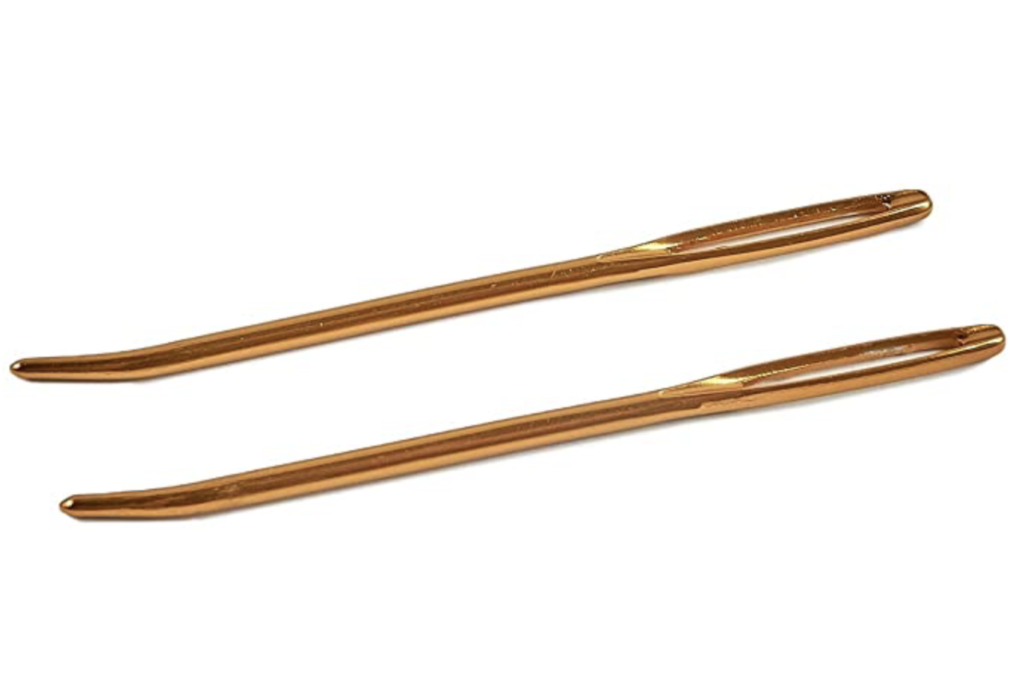
You can use any ordinary tapestry needle. A larger one is easier to thread and use. I recently bought some of these Clover bent tip jumbo tapestry needles, and they have been a game changer! They are large and smooth plus the bent tip is just perfect for hemstitching. Plus they are gold, so hopefully I’m less likely to lose them!

I think a lot of new weavers and a bit overwhelmed by the thought of hemstitching, I mean, it does look quite intricate and complicated on the piece.

Hopefully, by breaking the steps down and making these videos, I will convince you to have a go at hemstitching. Maybe you will find that you love it just as much as I do!

Oh, and by the way, I’ve talked today about basic hemstitch but there are variations that are even more decorative. A great resource for this is The Weaver’s Idea Book, which has a whole section dedicated to hemstitch and it’s variations and possible applications.

All this information plus an extra page of tips and links to 3 hemstitching videos is now available in one convenient e-booklet. The Hemstitch Basics Guide can be purchased in my Etsy shop.

Be sure to leave any questions or comments below, I love to hear from you!

Until next time…

Happy Weaving!

Filed Under: Books, Floor Loom Weaving, Free tutorial, Inkle Weaving, Online Weaving School, Rigid heddle weaving, Table loom weaving, Tapestry Weaving, Tutorials, Weaving Tagged With: hemstitch, how to hemstitch

How to make the most of your membership

by Kelly 2 Comments

Have you ever purchased a gym membership?

Let me guess, when you signed up you imagined yourself on the treadmill or pumping iron regularly. A few days a week, if not every day! You took out a 12 month membership because everybody knows that this will be the clincher – once you’ve paid you have to get your money’s worth!

A gym membership (you thought) was just the motivation you needed to get going and finally get fit and stay fit.

Young woman exercising at the gym with weight

What happened next? One of two things:

  1. The first day you went was great, you felt awesome and on top of the world. Day 2, rolling out of bed early to fit in a session, you didn’t feel so crash hot about the whole thing. Day 3, you decided you really needed that sleep in, but you would definitely get back to the gym tomorrow. That was 6 months ago.

2. You made a plan and started slowly. You decided that 3 sessions a week was realistic for you and that you needed some guidance to start with. You wanted to build gradually towards a good level of fitness, free of injury or exhaustion. 6 months later, you maintain this plan and feel really great about your health and the steps you took to achieve your goals.

All of this is hypothetical of course, especially considering that I myself have never so much as stepped inside a gym – the very notion makes the hairs on the back of my neck stand up. Give me a healthy walk in the fresh air any day!

But I wanted to use the gym analogy today because it coincides pretty well with what I want to say about my Online Weaving School.

What does working out have to do with learning to weave? Quite a bit, actually.

  • Both require a commitment. And not short term, just as you don’t achieve fitness overnight, you don’t become a great weaver overnight.
  • Both take effort and patience.
  • Both involve goals setting and time investment.
  • Both are extremely rewarding and produce wonderful results if all of the above are adhered to.

I will be the first to admit that I absolutely love the fact that memberships in my Weaving School are thriving at currently over 800 students. I’m amazed and so grateful that so many new and seasoned weavers want to learn with me.

But, I have to tell you that the figure of over 800 students is only a vanity metric if most of those students are not actually engaged, making the most of their memberships and learning exciting new techniques.

Because this is not all about how much money I can make from the volume of students I have. That is not why I started all of this (you can read more about my story here and a more recent version here) and it’s not why I work so hard to make my school the best it can be.

The thrill and enjoyment that I get seeing a student have a lightbulb moment, weaving something beautiful or falling hopelessly in love with this craft, is why I do what I do. You really can’t put a price on that.

If you are already a member, please, use the tools that I’ve provided to make your membership the very best learning experience I can provide. Join the membership community, interact with the other students, plan your class list and start working though them.

Know that if you are having trouble, there is support available. Members receive personal support from me when needed, and also from the community of other members.

So, what will you get with a membership?

You will get a HUGE variety of weaving classes to choose from that you can work through in your own time, in your own way. You can stop the videos any time you need to and rewatch again and again. There are countless printable PDF information sheets.

You will get to join a friendly and helpful community of weavers at all different levels. Some are absolute beginners, others have been weaving for years. And they will all cheer you on!

What won’t you get with a membership?

You will not get a babysitter. I don’t mean that to sound harsh, but just like a gym membership, the results are up to you. You will see improvement and success if you put in the time and effort it takes. But you have to show up, have a positive attitude and be ready to learn.

If you are interested in taking out a membership or perhaps checking out one of the free classes available at my weaving school, here are so links for you to have a look at:

Gold Membership

Yearly Membership

Monthly Membership

6 Monthly Membership

Free classes:

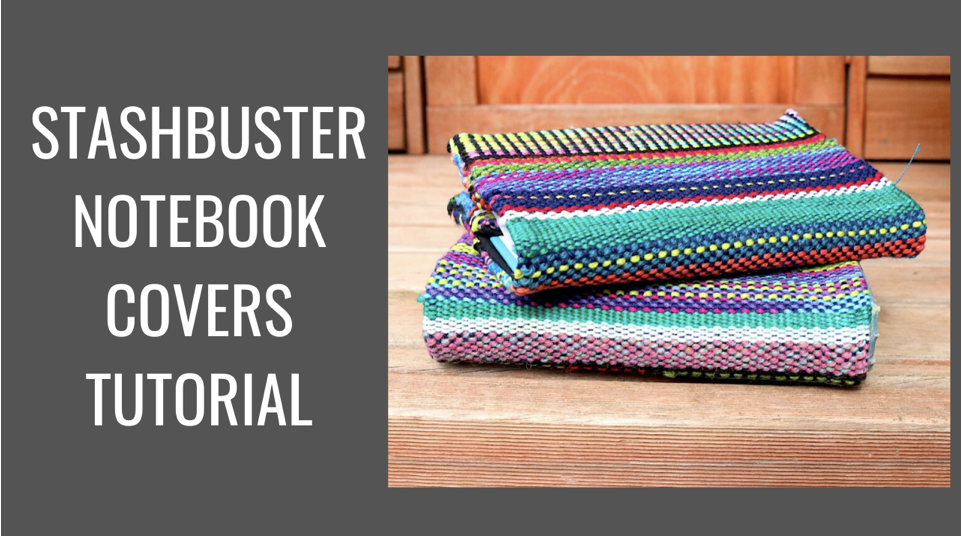
Stashbuster Notebook Covers

Kitty Cats on a rigid heddle loom

Waffle Weave for rigid heddle loom

Wave and Zigzag shuttle weaving

Heart wallhanging

Calculating Warp for the rigid heddle loom

Honeycomb on a rigid heddle loom

Cardboard Loom tutorial

Honeybee Cushion

Do you have a membership already? What are your strategies for ensuring you make the most of it? Share in the comments below, I would love to hear from you!

Until next time…

Happy Weaving!
Filed Under: 4 shaft weaving, Floor Loom Weaving, Inspiration, Online Weaving School, Rigid heddle weaving, Tutorials, Weaving Tagged With: learn to weave, membership, online learning, online weaving school

Floor Loom Review – David 2 Louet loom

by Kelly 13 Comments

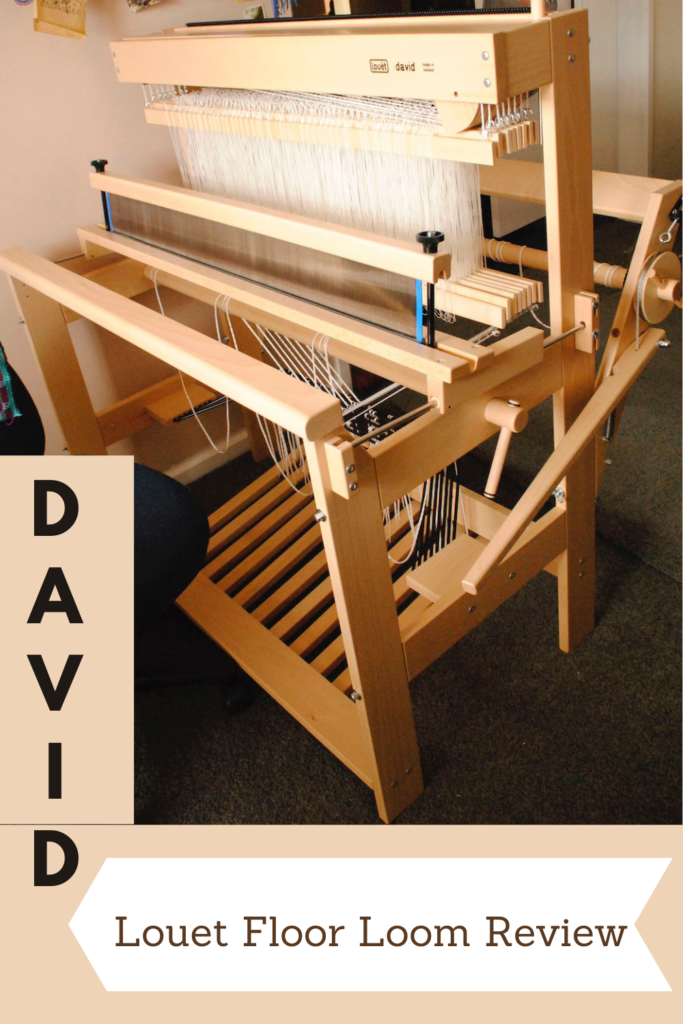
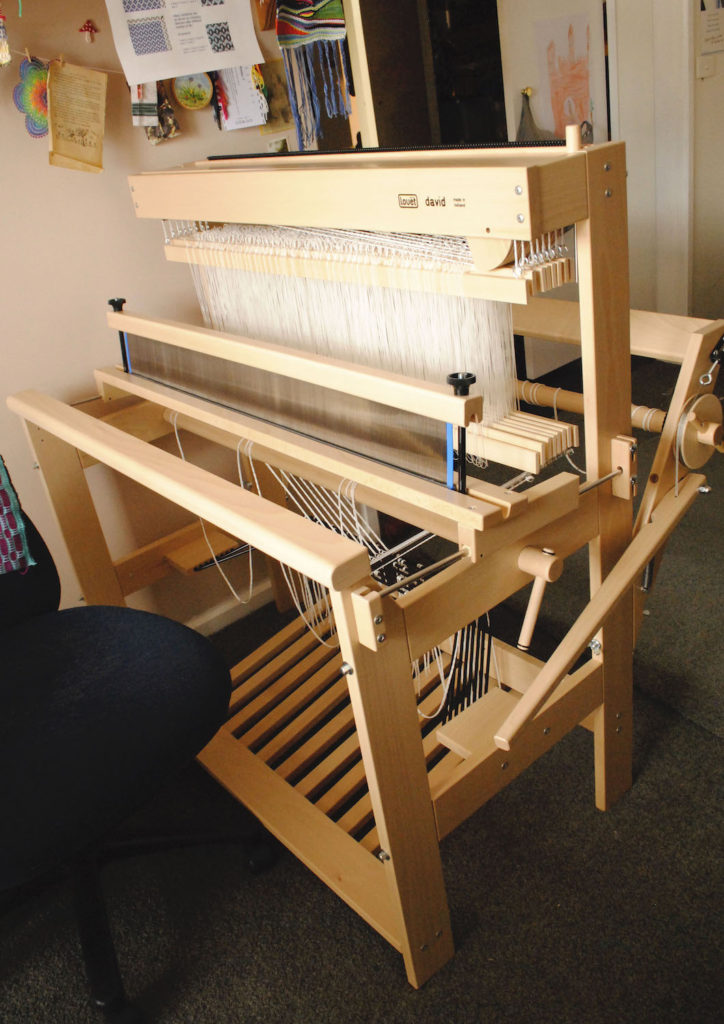
I’ve had a lot of people ask me to do a review of my David 2 by Louet floor loom.

This post is not sponsored or endorsed by Louet, it’s just an honest review for your own information or research.

I have written about this loom and floor looms in general before, and also about what to expect when your loom arrives, but this article gets into the specifics of the Louet David.

If you purchase a new David in 2024 or after, you will be buying the David 3, not the David 2. The David 2 has been retired. But this is still a very useful review as there are only a couple of minor differences between the 2 and 3.

If you are purchasing a used David, it may well be a David 2 and would be exactly like my floor loom.

I must admit that when I was looking for a floor loom to purchase it was kind of hard to get information on this particular loom. All I really had to go on was a little amount of information on the Louet website.

*This post contains affiliate links. Please see my disclosure policy for further information.

I knew that I wanted something compact enough to fit in the smaller space I had available and due to my lack of experience with floor looms at the time, I wasn’t confident that a second hand, possible fixer upper would be a sensible choice.

One of the reasons that I was interested in the David is because I live in Australia and there are somewhat limited choices when it comes to looms and most have to be custom ordered and imported.

The Schacht Baby Wolf was a very strong contender in my decision making because it was more familiar to me and it was easier to find information on it.

To further complicate the issue, I had never woven on a floor loom (true story!)

Through a good deal of googling, I had found an agent in Sydney who could order a David for me. Not only that, she and her husband delivered the loom in person and brought it into my home, even though they are from another state! Amazing customer service!

I will be going over the loom discussing a few different features and then giving you my opinions on the positives and negatives. There are not many negatives, but maybe the things that I’d like you to think about if you’re considering purchasing the same loom.

The first thing that I do love about this loom is the compact size. I’ve had it in a couple of different positions in my studio, and it’s easy to move and fits a variety of spaces. The weaving width is 90cm (35″) which is a good width for many different projects.

You need a certain amount of space at the front and back of the loom for warping – I think a 1 metre clearance at the front and back of the loom is optimal. You can get away with less, but it may be a little cramped.

The next thing I love about this loom is the quality of make. I can’t fault the quality at all, from the wood, the finishing to all of the pieces that go with it, it’s just beautiful quality and design.

My husband actually put it together for me – I’ll admit that because my brain is not very wired for putting things together and following set written instructions, but my husband is very good at that. He didn’t have any trouble following the directions. It did take quite a few hours to put together, but that is to be expected with a loom of this size and type.

The David loom comes with texsolv heddles and cords. I personally really love texsolv as it is so light and quiet. Metal heddles can be heavy and noisy, but this is a personal preference and not to suggest that one is better than the other.

Treadling on the David is very light and easy. It is not the least bit clunky when treadling because of the spring system and it’s easy on your body. Speaking of treadling, I like the texsolv tie up system which is simple to learn to use and quite quick to tie up. There is no real “tying” up, you just pop the texsolv cord holes over the treadle screw heads and away you go. The texsolv cording is strong so you don’t have to worry about breakage while treadling.

The David has a gliding beater, meaning that your beater is positioned on metal rods. It “glides” back and forth on the rods, so it is level and steady. I’ll admit that it took me a bit of getting used to. The Ashford table loom I had been weaving on previously had an overhead beater, which is loose and swinging.

The gliding beater is not as easy to use in some ways, as it is rigid and set on the tracks of the metal rods. Now that I’ve been using it for a number of years, I am used to it and have found ways to weave most effectively with it. I do think that once you’re accustomed to it, it does result overall in a more even beat.

One thing that really helped was using a small amount of lubrication on the rods. I couldn’t find much information on whether or not this was a good idea, but to me the beater was feeling quite stiff and not so enjoyable to weave with.

So, I applied a very small amount of lubricant with a dry, clean rag. The difference was amazing! I now usually lubricate between projects. The beater now really does feel like it’s gliding. Just be sure to use a non silicon lubricant that won’t build up a residue on the metal rods. I use the Australian made Inox lubricant spray.

Always apply the lubricant to the rag, not directly to the metal.

Another way to work successfully with the gliding beater is to find the right warp tension. Too tight and the beater doesn’t glide as well. Just like on any loom, there is a sweet spot for tension that you discover through experience. I am careful when I advance my warp to advance to the spot that feels right for me – not too far towards the front beam or, once again, the beater will struggle and the look of your weaving will suffer.

I advance in small increments and adjust gently towards a firm tension. I hope that makes sense!

This loom came with a 10 dent reed. I haven’t purchased another reed at this point due to the expense and lack of space to be able to store yet another piece of weaving equipment. When I need to use a different sett, I just adjust the number of threads in my reed to accommodate. I very often weave at 20 epi, so I simply double my ends in the reed.

The reed and beater are removable for warping and threading, as is the front breast beam. This is really handy when you get to the threading stage, as you can get in really close to the heddles to thread which saves my back from days of pain afterwards!

One feature that I’ve found particularly great is the ability to put add or remove heddles to the shafts after warping. With my table loom I have to collapse the castle (the upright part of the loom) and tilt it in order to adjust heddle numbers. Not so practical.

On the David, if I have miscalculated the heddles for my project and I need a few extra all I have to do is unhook the texsolv cords on the top and bottom of the shaft, slide the new heddles on and hook the cords back on.

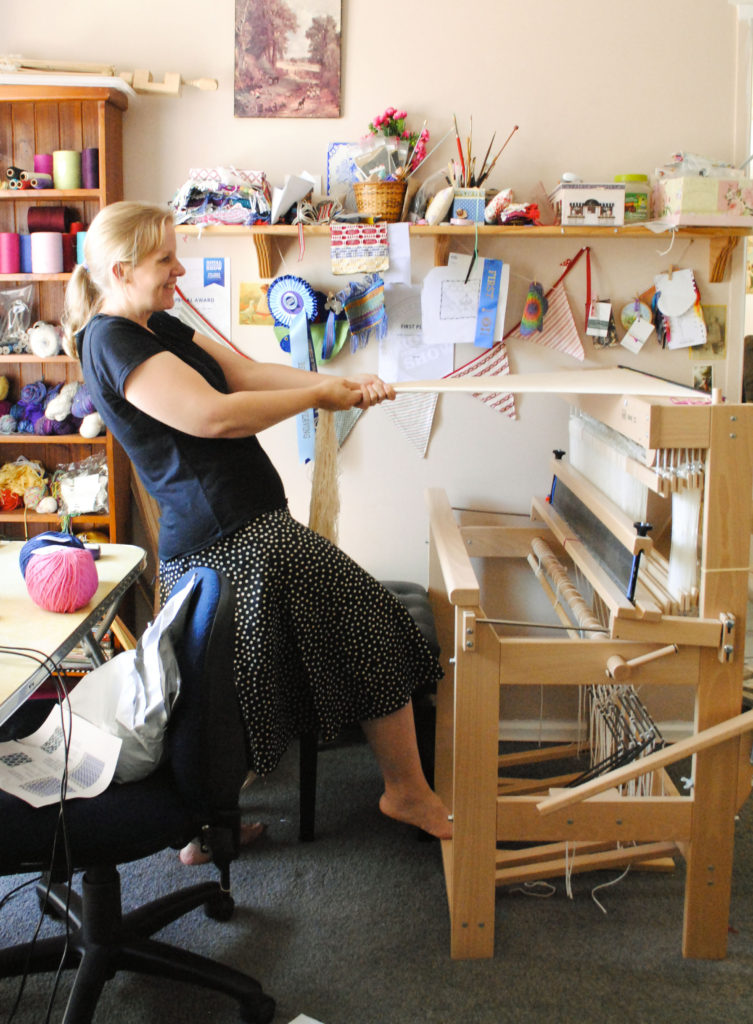
Another feature I particularly like about this loom is the friction brake. I can be weaving away and when I’m ready to advance my warp all I have to do is lean over the side and pull up the friction brake to release the warp tension. Then I use a handle also on the right hand side to advance my warp forwards.

Louet looms have a built in raddle, which is a unique feature. It means that instead of taking your warp off the warping board and then taking it to a table to lay into a raddle, then tying the raddle onto the loom to begin warping, you just take the warp from the warping board directly to the loom. When you wind on the warp, you can then tension the warp over the top of the loom, which can be quite handy if you are using weights to assist with tensioning.

I usually have to break up my time placing threads in the raddle, as standing for a longer amount of time wreaks havoc on my back!

I hope to eventually purchase a sectional warp beam for my David, as I prefer to warp floor looms with my Sawyer Bee Warping Square.

You receive a pair of lease sticks and some wooden separator sticks with the loom. I have devised my own methods for using the lease sticks, as initially I found it way too fiddle trying to deal with the sticks while warping and threading. I didn’t have the extra pair of hands to hold the sticks steady, so I now use stretchy bands (like the Ashford bands that they call “helping hands”) and these make a huge difference. I also like to use metal rings that open and close through the holes in the ends of the sticks to help keep them together and hold them steady.

I use the wooden warp separators mostly at the front of the loom as I advance my warp. At the back I use a roll of brown craft paper which does an excellent job.

I feel that I have a new appreciation for my David loom since purchasing a much larger floor loom. The David is simple to dress and weave on and so light to treadle.

Those are all the basics of the loom, I could definitely talk about other features but this article is already getting long!

Now, you may be wondering what the cost of this loom is?

Bear in mind that I bought this loom a number of years ago now and inflation is crazy.

At the time of purchase, my loom cost around $4000AUD. That included the cost of importing. That price does not include the extras I needed such as boat shuttles, extra heddles, weaving bench etc.

There are also optional extras available like an extra cloth beam (for longer warps), sectional beam and a Louet weaving bench. I don’t have any of these. I use a piano stool as a weaving bench, it’s much more affordable.

Revolution Fibers in the US list a current price from $4,770USD (at the time of writing this article).

In Australia, you can purchase from Thread Collective at a current price of $6,780AUD.

These prices don’t include shipping and can vary according to the rise and fall of the Australian dollar.

If you would like to know even more about this loom, I have a number of videos that will interest you.

This is my first video review of the Louet David which I filmed a few years ago. You get to see the parts of the loom, although some of the information is different to this article as my opinions may have changed over time:

I also have a demonstration to show how quiet this loom is:

And a fun little video that I made not too long after I purchased the loom. It’s nice for me to look back and see how much faster I weave now!

I hope this article has been informative and interesting for you! If you have any questions, please leave a comment below, I love to hear from you 😊

Until next time…

Happy Weaving!

Filed Under: 8 shaft weaving, Floor Loom Weaving, Weaving Tagged With: floor loom weaving, loom review, louetdavid

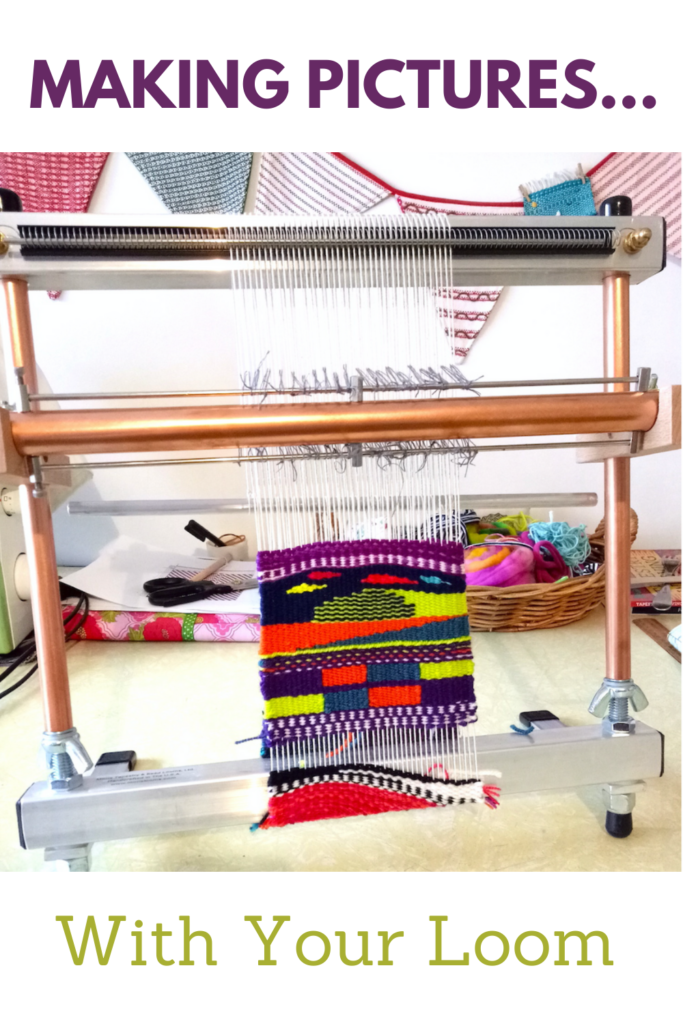
Making pictures with your loom

by Kelly 10 Comments

Something that really captivated me before I even started weaving, was the idea of using artistic creativity in weaving.

When I was younger I loved to draw and paint. In my adult life, I have not made a lot of time to devote to making art, but I have been happy to discover that there is a huge crossover with art and weaving.

This post contains affiliate links.

One of the most obvious forms of weaving that this crossover takes place in is tapestry weaving. In tapestry, the weaver can have total artistic licence through the use of colours and shapes. The shapes can be basic or complex. Colours can be blended on the loom. And, tapestry can be woven on many different types of looms.

I purchased a Mirrix Big Sister last year, as I wanted to develop my tapestry techniques and also have a dedicated tapestry loom. It is an excellent loom for tapestry, as even though it’s small, I find the available weaving room quite spacious and the tension is awesome.

Before I bought the Mirrix, I wove tapestries on my rigid heddle loom.

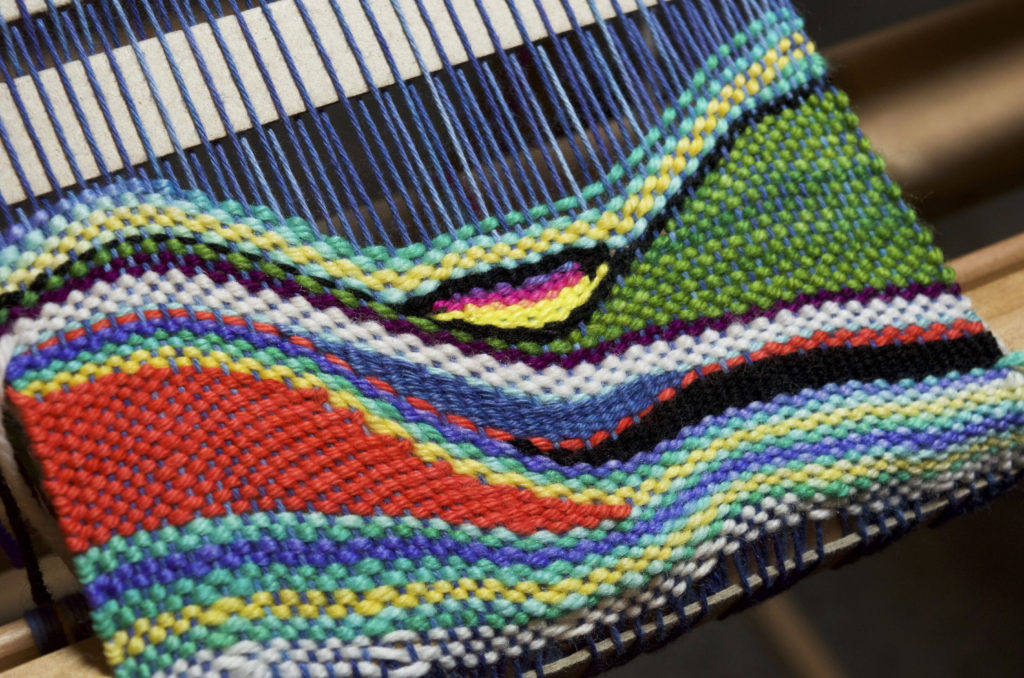
I had a lot of fun using different yarns and styles. My most popular Youtube series details how to weave in a free and unplanned style with a variety of yarns and colours.

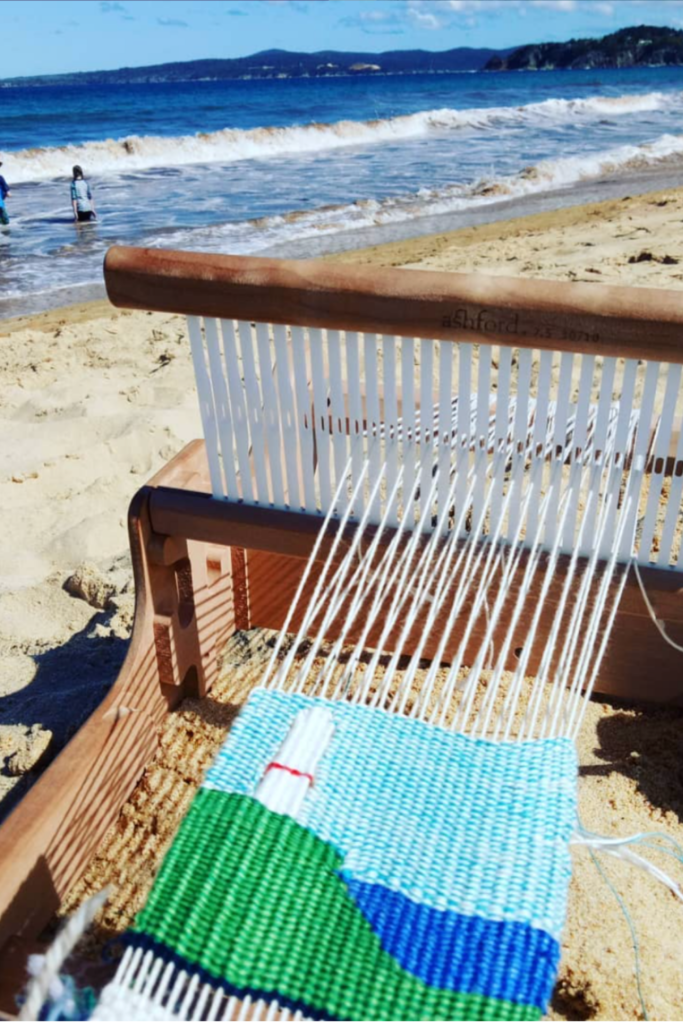
I’ve also explored more tradition tapestry techniques on the rigid heddle loom. I particularly enjoyed taking my Sampleit on vacation, which enabled me to sit on the beach, watch the kids enjoy the waves and weave. What bliss!

My adventures with tapestry on the rigid heddle loom gained so much interest on social media, that I developed a course to show others how to do it! The course includes all the basic tapestry techniques you need to know, plus how to use all of these techniques to weave a finished project. If that sounds interesting to you, the course is available here.

Another way to get started in tapestry without breaking the budget, is with a more affordable tapestry loom. Depending on your budget, you could opt for something like the Schacht Tapestry Loom, or even just an el cheapo like a Melissa and Doug simple frame loom. Some people choose to make their own by building a simple frame or repurposing a wooden picture frame or similar. Just be aware that the more tension the loom holds, the better it is for tapestry and if you go down the cheap route, well, you tend to get what you pay for.

A resource that I found to be great when starting out with tapestry, and still use for inspiration, is Kirsten Glasbrook’s book, The Art of Tapestry Weaving.

Aside from tapestry, are there other ways to make pictures with your loom. Oh, yes indeed!

If I haven’t already gushed about krokbragd on this blog enough times, here I go again! If you’re interested in going down my blog rabbit hole on this topic, start with this post. Krokbragd is a weft based, most of the time but not always 3 shaft, weft faced weave. You repeat the same order of treadling over and over, but can vary your yarn colour combinations to produce simple and complex shapes and images. It is seriously cool, and that is why I’m always gushing about it.

Many of the shapes are open to interpretation, as they can be slightly non specific, but there is really so much to explore. One of my goals for this year is to weave a striking krokbragd wall hanging using my floor loom. Can’t wait for that one! Debby Greenlaw has written a terrific book, Krokbragd: How to Design and Weave.

I have a number of Youtube lessons on krokbragd using my rigid heddle loom, but if it’s new to you, start with the above video.

Boundweave is another weft faced weave that is very adaptable and versatile. It can be woven on 4 or more shafts (so it’s possible on a rigid heddle loom). The picture possibilities are endless. I have been playing around with bound weave on rose path threading and 6 shafts recently on my floor loom.

I’m using Nancy Arthur Hoskins’ Weft Faced Pattern Weaves book for guidance. My goodness, what an extensive book – so much to learn! This was my first attempt and I’ve now branched out with some more random designs, which is all very interesting. Slow, but interesting.

There is a lot more to be said about making pictures on your loom, but I hope this post has inspired you with some of the possibilities. Have you tried any of these techniques? Which is your favourite? Let me know in the comments!

Until next time…

Happy Weaving!
Filed Under: 4 shaft weaving, 8 shaft weaving, Floor Loom Weaving, Krokbragd, Rigid heddle weaving, Tapestry Weaving, Weaving Tagged With: boundweave, pictures, tapestry

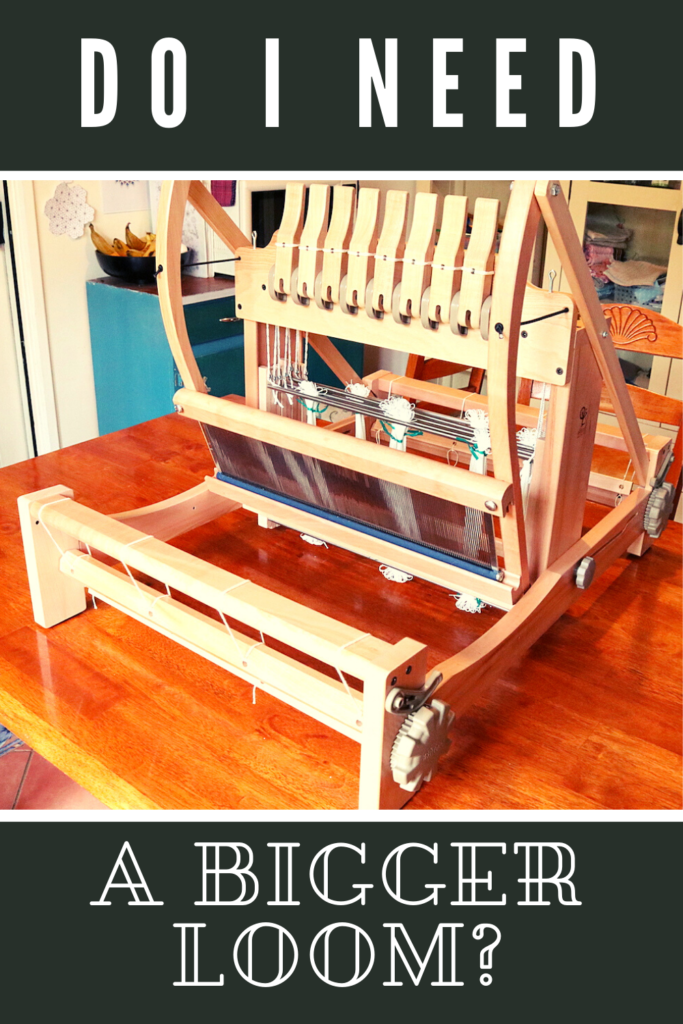
Should I buy a larger loom?

by Kelly 19 Comments

One of the number one questions I’m asked by either brand new or seasoned weavers is “Should I buy a larger loom?”

In this post I will take you through the main points to consider when you’re wondering whether a size upgrade is the right choice for you.

*This post contains affiliate links.

The first consideration is what type of loom we’re talking about. Most people who ask me are rigid heddle weavers. So I’ll cover rigid heddle looms first, specifically Ashford looms, as they have the largest sizes available.I often recommend my 24″ loom as a great starting point for a beginner who wants a decent, but not huge width. It is wide enough to weave smaller width items like scarves but just large enough to weave kitchen towels and bags.

You can, of course weave yardage to sew with (to make your own clothes and larger items) but that involves sewing panels together to make wider widths. Depending on the item you plan to sew, this may or may not work well.

Beyond the 24″, the next size up is the 32″ rigid heddle loom. The largest currently available is the 48″ rigid heddle loom.

When considering a larger loom, consider the following points:

  • Do you have the physical space for a larger loom?

If you buy a rigid heddle loom 24″ (that is the size I have) or above, I would definitely recommend to also purchase a stand with it.

I personally would not enjoy using a larger loom trying to lean it on the edge of a table or similar, and I don’t think that this would allow you to maintain a beneficial weaving posture. A good posture is really important – even if you have no physical injuries or problems, know that you could develop problems long term through repetitive poor setup and practices. So a stand is well worth the investment.

But, this means that your loom will be free standing rather than packed away. Do you have a space where you can set up a loom of that size and leave it on the stand when finished? Or does your living space/s dictate that your loom would need to be packed away in between uses?

  • What is your budget?

This is a pretty important consideration for most of us! Naturally, the larger your loom, the more it will cost. And not just the initial outlay for the loom, but addition tools or pieces that you wish to add along the way. Every time you buy a different sized heddle/reed, a pick up stick, a stick shuttle – these are all going to be larger to compliment and fit your loom and that will cost more.

Here are a couple of examples as a comparison. I’ll list the 24″ loom specifics as compared to the 48″. All prices are in US dollars.

24″ RHL and stand – $394 USD (you can sometimes find a combo deal of the loom and stand together for a slightly cheaper price).

24″ 10 dent reed/ heddle – $37.50

22″ stick shuttle – $7.50

48″ RHL and stand – $695

48″ 10 dent reed/heddle – $89

48″ stick shuttle $40

Uh huh, big price differences!

  • What do you intend to weave?

Some new weavers don’t really consider this when purchasing. Not being familiar with the possibilities or not having used a loom before, it can be very difficult to know what items you will end up enjoying weaving. If you only intend to weave scarves and smaller items, why go to the expense of the largest loom?

On the other hand, you may find that your absolute favourite thing to weave is baby blankets or afghans, therefore making the larger loom well worth your consideration. What if you make the decision to buy a smaller loom but after a little experience find that you want something larger?

Well, the good news is that rigid heddle looms are easy to resell. If you have kept it in good condition, it should be easy to find an eager new weaver willing to take it off your hands for a fair price. You can then use this money to invest towards the larger one.

  • How is your back?

Back or shoulder problems? Neck trouble? Then you need to consider carefully whether a larger loom is the right choice for you. A larger loom means a much wider reach with a shuttle.

As an example, I can sit very comfortably at my 24″ on it’s stand, extend each arm out to insert the stick shuttle and not have to move forward in my seat.

As someone who has a back injury and regular flare ups, if I had to lean forward or to the side every time I wanted to throw a pick, that would be a real problem for me. It would be a much greater strain on my body. I prefer to accept my limitations and be grateful that I am able to weave on the 24″ and plan my projects accordingly.

That brings me to the next related topic, the table or floor loom.

I’ve written a large number of articles on this topic, here is a list of those posts if you’re interested in researching more.

When I had my 8 shaft, 32″ table loom it was a little more difficult to weave on when I had it fully warped, but with the correct height adjustable chair, it was more than manageable. I still miss that loom, I sold it to make space and provide extra funds for my floor loom. I’ve since replaced it with a smaller 16″ table loom that I can use for teaching purposes – perfect!

Now that I have my Louet David 2, 35″ floor loom, even though it is the widest loom I have owned, it is a good fit for me width wise. It is wide enough to weave baby blankets and wide shawls.

Recently I wove yardage on it for my Clothtober project, which was a tunic for me and it worked out well. So, why is this loom not a problem for my back? Well, I always use a boat shuttle with this loom.

Because the tension is excellent, I can shoot my boat shuttle back and forth with ease. I am also seated on an adjustable piano bench and find that I develop a slight rocking motion as I get into the weaving rhythm. Although my shoulders do get a little sore if I put in a long weaving session, it is not excessive and generally my back is fine as long as I’m not in a dreaded flare up phase.

The action of throwing a boat shuttle is quite different to passing a stick shuttle. Yes, you an use a boat shuttle with a rigid heddle loom too, but I generally don’t because it can’t hold the same tension so I end up mostly passing the boat shuttle through anyway.

I should also add, if you do have a rigid heddle loom that is a little smaller than you would like, you always have the option of double width weaving. Although somewhat limited, it is a really terrific way to double the width of your fabric. I have two classes that teach you how to do this – Doubleweave Baby Blanket and Weaving with Two Heddles. I also have the Rainbow Lap Blanket, which is woven entirely on a Sampleit loom.

I certainly didn’t intend to write such an epic post when I sat down to address this topic today, but there is a lot more to be said about it than I realised! I hope my ramblings have been of use to you.

As always, leave me a comment with any questions or additional points you may have to add. I appreciate your input!

Until next time…

Happy Weaving!
Filed Under: 4 shaft weaving, 8 shaft weaving, Floor Loom Weaving, Rigid heddle weaving, Weaving Tagged With: buying a loom, floor loom weaving, rigid heddle weaving, table loom weaving

My completed Clothtober project!

by Kelly 20 Comments

I’m so excited to be finished! A little overdue perhaps, but isn’t the nature of slow cloth?

I went through quite a few of the weaving details like yarns and weave structure in last week’s post, so please check that out if you’re interested (and read of my nightmare-ish warp!)

*This post contains an affiliate link

I’m happy to say that the actual weaving was fairly plain sailing and enjoyable with the simple 1&2, 2&3, 3&4, 4&1 order of treadling.

So, once removed from the loom I had a lovely long length of delightful cloth without serious errors (I’m happy to say that the double threading error referred to in the last post does not even show in the finished garment!)

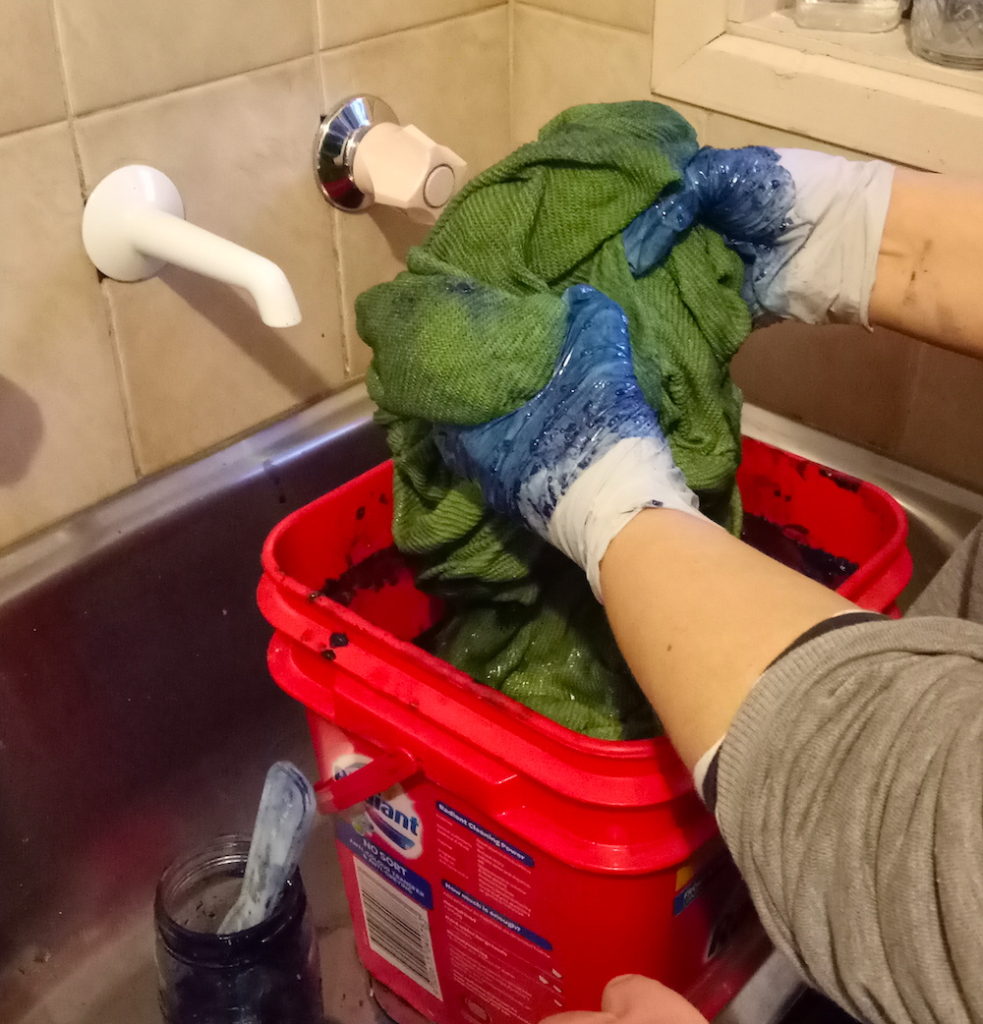
I made a lovely big vat of indigo and tested it with the neck facing pieces I had cut out of a light commercial cotton. The colour was even better than expected, so I felt very good about submitting my long piece of cloth to the vat.

Have you ever dyed with indigo? It is a wonderful, peaceful and relaxing process. While I was standing at my laundry sink, I had the door next to me wide open and a blackbird hopped right up beside me. He didn’t even notice I was there! I thought to myself “perhaps this is the very best way to live. Quietly, slowly, making beautiful things”. It certainly struck me as a beautiful moment in time.

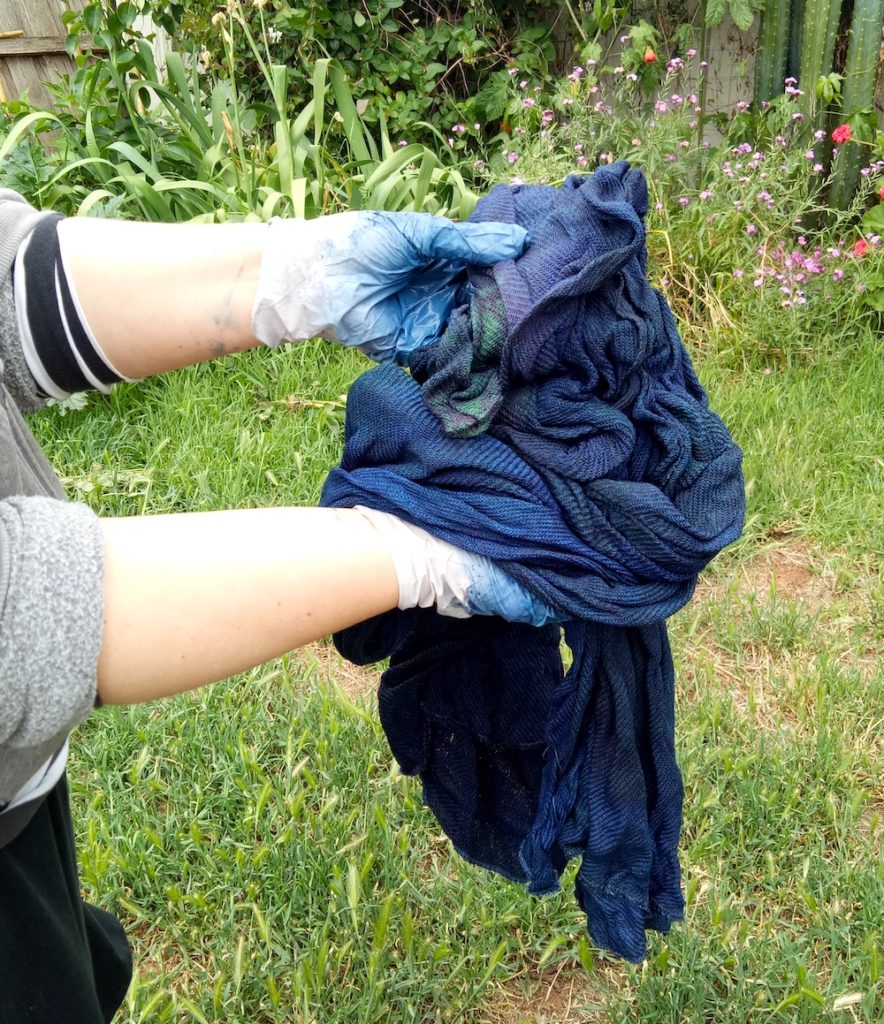
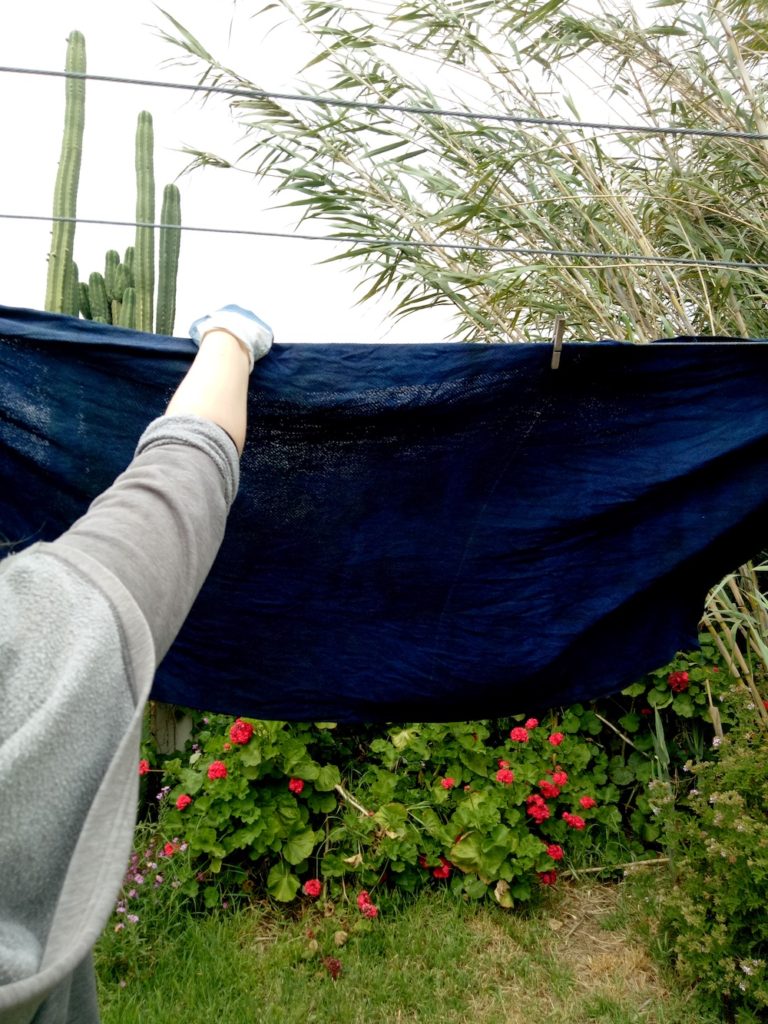
I took my cloth outside (indigo is very messy!) to let the magic happen. As oxygen hits the cloth, it turns from a glorious green to a wonderful blue. The blue is much darker when wet, so I took that into account. I wanted a dark blue. So, I went back to the vat for a total of 3 dippings. On the last dip, I left the cloth sitting in the vat for at least half an hour.

I absolutely love the colour in this shot. I would have preferred that it stay this dark and rich as it dried, but alas that was not the case. I still think it came out a beautiful colour anyway. That is another of the charms of indigo, even if you obtain a very light colour it is bound to be a really beautiful blue – I don’t think an indigo vat can produce anything ugly!

As an aside, I have just begun work on my Journey to Japan course. One of the focuses of the course will be learning to dye with indigo, so if that interests you, be on the lookout for that.

The next step once my fabric was dry was to cut out the pattern. I’m not scared of cutting my handwoven fabric as it all turns out well as long as you take the right precautions. For this project I cut the pieces as I would for commercial fabric but got them quickly to the serger without disturbing the fabric too much, and it was fine. If you’re worried about cutting your handwovens, you may want to check out this video:

There was a hitch with cutting out the pattern though. The fabric had shrunk more than I calculated for. My front and back pattern pieces didn’t fit the folded fabric! Aaaaagh!!

These are the things that feel horrible at the time, but later I am really grateful for. Why? Because I learn! Not only do I learn what to do by thinking about all the possibilities, I also learn that I might be more capable than I thought, which is a great confidence booster! So, I ended up with some odd little shapes and pieces that I tacked on here and there to make up for the lack of width. And it worked!

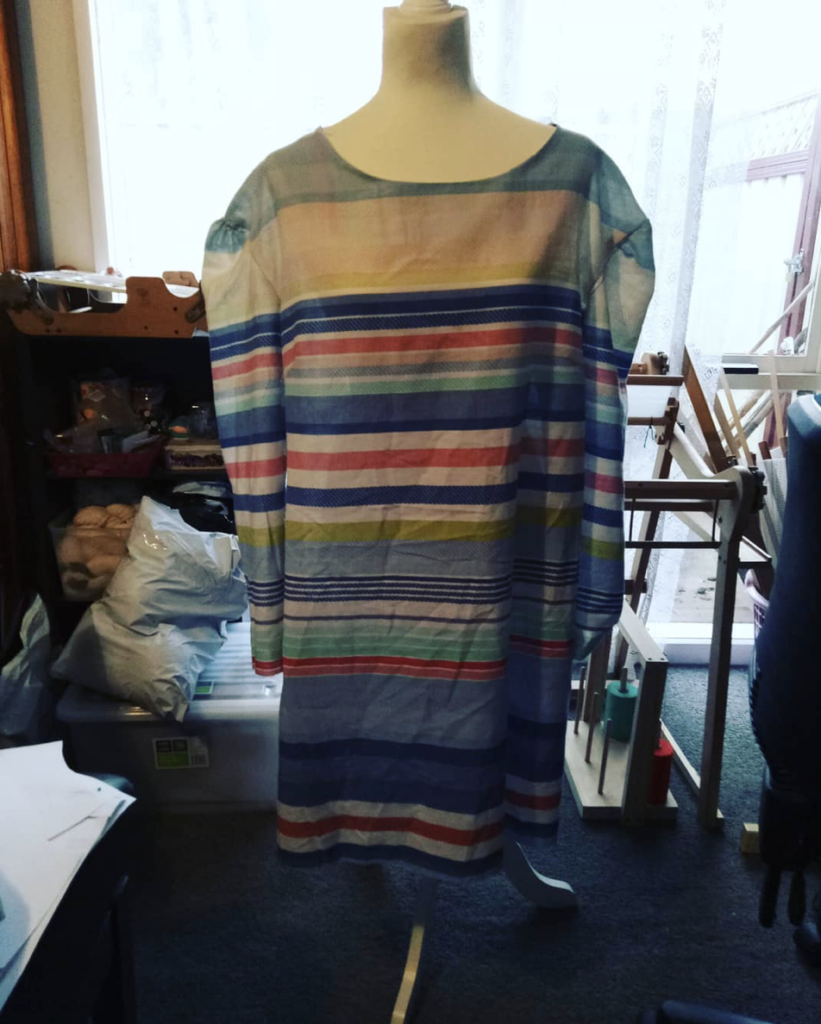
I now have a comfortable, special garment that fits really well. Unfortunately we are coming into warmer weather here in Australia, so I won’t get much wear out of it this year, but I expect it to last many, many years. If the indigo fades at all, I’ll do as the Japanese do and re-dip it. Only I know the work that went into making this, but that makes it all the more rewarding.

The little voice in me says that the neckline is too wide and so are my hips. But I told the little voice to shut up please, I want to bask in the joy of having woven, dyed and sewn a garment from scratch just for me.

I don’t know if any of you decided to make your own garment for Clothtober, but I’m thinking I need to make this an annual thing, even if it’s just to push myself to do something just for me again.

Until next time…

Happy Weaving!
Filed Under: 4 shaft weaving, Clothtober, Floor Loom Weaving, Inspiration, Sewing, Weaving Tagged With: 4shaftweaving, clothtober, hand woven, handmade, indigo

Clothtober progress

by Kelly 3 Comments

I would rather be here to tell you that my Clothtober project is completely finished, but alas, life is not like that. Life is busy, distracting and full.

So, instead of showing you my finished project I am here to update you on my progress. Because I have made progress, and sometimes that is more important than the finish line.

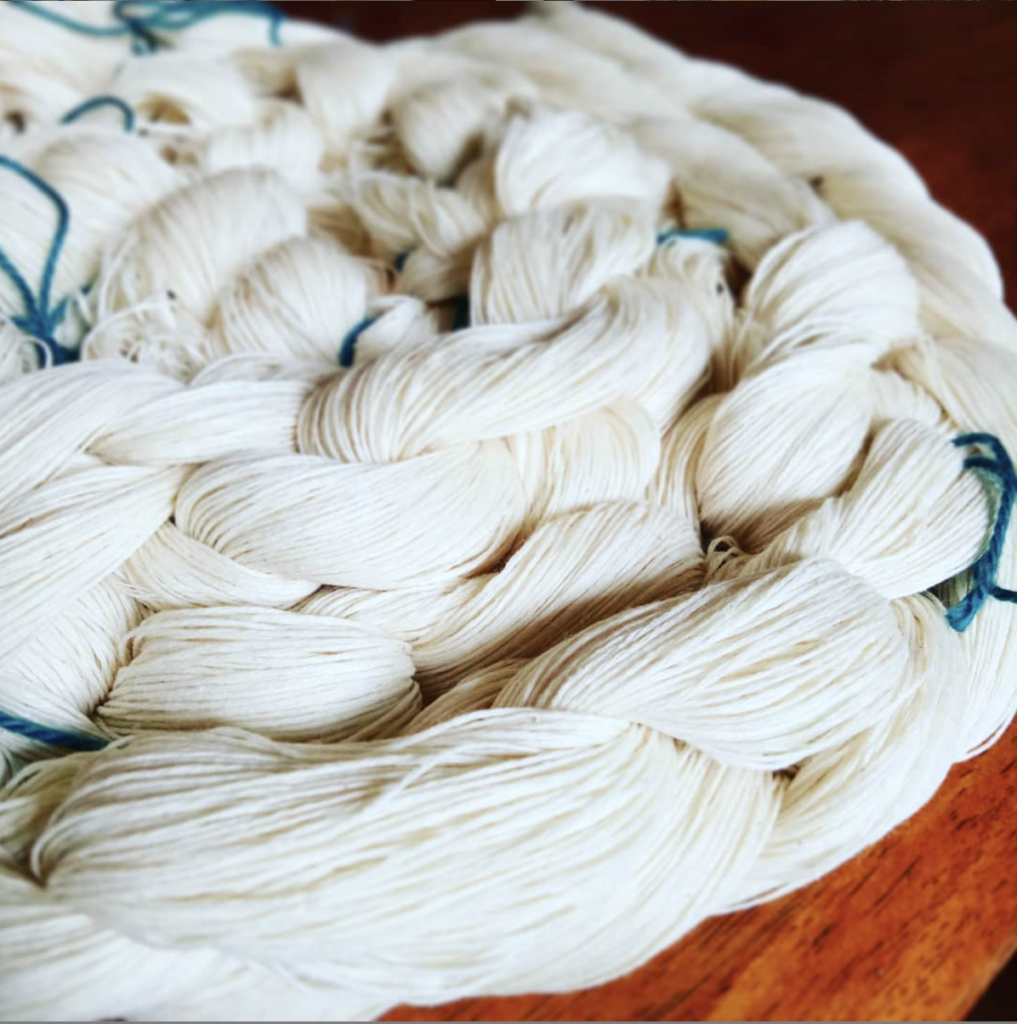
I started with a 10/2 weight cotton. I wanted a light weight and soft fabric for my finished garment. I had woven samples with Full Circle Australian Cotton previously and felt that it was the perfect fit for this project.

I decided on a 4 shaft, straight draw twill for a couple of reasons.

  1. It’s an easy and familiar threading pattern that doesn’t take as long to thread as 8 shaft straight draw.
  2. As I’m using all one colour, I didn’t want to weave a pattern that would not be seen all that well after dyeing.
  3. I wanted a really good drape for my garment, and felt that twill would be more suitable than plain weave.

I chose a sett of 25 ends per inch, meaning that for my 10 dent reed I sleyed 2,3. If that is gobbledygook to you, it means that I placed 2 warp threads in the first reed space, then 3 in the next, then back to 2 and so on. I did this because I only have a size 10 reed for my floor loom.

As soon as I had my warp chains on the loom (800+ ends!) I started having trouble. Was it the yarn or was it me? Hmm, probably a mixture of both. As mentioned, I have used this yarn before, but only as a short, narrow warp for a sampler. This one is full width on my 90cm loom. I had so many snags and tangles, and by the time I was finally ready to weave I had quite a few broken threads. Certainly, this 10/2 cotton is very fine and perhaps not as strong as the regular 8/2 cottons I’m accustomed to.

So, the warping took a really long time and I got to exercise a lot of patience. I also learned (yep, still learning with every single project!) that this yarn may be more suitable next time as a weft if I intend on a wide warp again.

If you have ever struggled with a difficult warp, you know that special moment of being threaded, sleyed, tied on and ready to weave. Oh, the joy!

I noticed after a couple of inches of warping that I had doubled up on ends in one of the reed dents. This means there is one small section of fabric that has a thicker section and stands out as a stripe.

I could have unwoven, re-sleyed and then re-woven. But I didn’t. I decided I could live with the fault and hence forth consider it a design element.

I’m more than half way done weaving and can’t wait to finish up and take this long length of cloth (4 yards or so) off the loom.

I’m now considering which dye process I want to use. I want a dark blue, so I’m considering indigo or a fibre reactive blue. We shall see. As I weave, I have plenty of time to ponder these things.

To read more about the dyeing and sewing of the cloth, click here.

Until next time…

Happy Weaving!
Filed Under: 4 shaft weaving, Clothtober, Floor Loom Weaving, Weaving Tagged With: 4shaftweaving, clothtober, floorloomweaving, weaving

Clothtober!

by Kelly 48 Comments

I’ve been thinking a lot about clothes lately. How dissatisfied I am with my current wardrobe and why. What I might be able to do about it.

I don’t have all that many clothes, and I tend to wear the same things over and over. Once I’m comfortable with something I don’t want to give it up and I really do wear things until they’re completely worn out. This means I don’t have to go shopping too often.

I’m one of those strange women who actually hate clothes shopping. It’s like a vicious cycle on repeat. I head out to the local shopping centre, sometimes the op shop. I have a list of what I need (I never randomly buy clothes, that is just not my personality type!) And the search begins.

I go through a series of predictable steps. I can’t find what I actually want or need, so I compromise, because I need it, because I’ve worn my other clothes to death. I start to try things on. I start to feel hot. Physically hot. Is it the act of trying on one thing after another, or the building anger that nothing fits or looks right that causes this overheating? Probably an even mixture of the two.

I leave the shop. Sometimes I leave with a purchase, which is never really something that I love, it’s just something to get me by until the next thing wears out and I’m forced to come back.

My body type just doesn’t seem to exist on a clothing rack. I need 3 different sizes, 1 for my chest and waist, a larger one for my upper arms, and an even larger one for my hips. So nothing ever fits.

There is something good about all this, I’m coming to that!

It has forced me into a place of action. I’m tired of not wearing clothes I like. I’m tired of being uncomfortable. I’m tired of feeling like I have not style because I can’t buy what I really like. I want to change this.

So, here is my line of thinking. I’m a weaver. I can sew. Pattern drafting is my weakness, but perhaps I can use existing patterns as a template and change them to fit my body? Perhaps, through putting in the extra work and time and effort, I will be able to produce something I enjoy wearing? And perhaps I will even enjoy wearing it more because I know how much time went into it! Instead of junky, off the rack, ill fitting clothes, I can build my own wardrobe of special pieces! Bingo!

I have already begun. I sketched ideas first, then started looking for a sewing pattern that might fit the bill.

I started with the “Esme tunic dress pattern” from Lotta Jansdotter’s book, Everyday Style. (Affiliate link) This book has so many wonderful, classic designs that I would love to build a wardrobe from. I cut the tunic out from the largest size and sewed up a quick muslin from an old bedsheet. The problem was when I set the sleeves in. They looked terrible! No amount of tweaking and re-sewing could make it look better.

After plenty attempts to change my muslin and plenty of sage advice from Instagram and Facebook friends, I decided to look for a different pattern with a raglan sleeve instead of a set in.

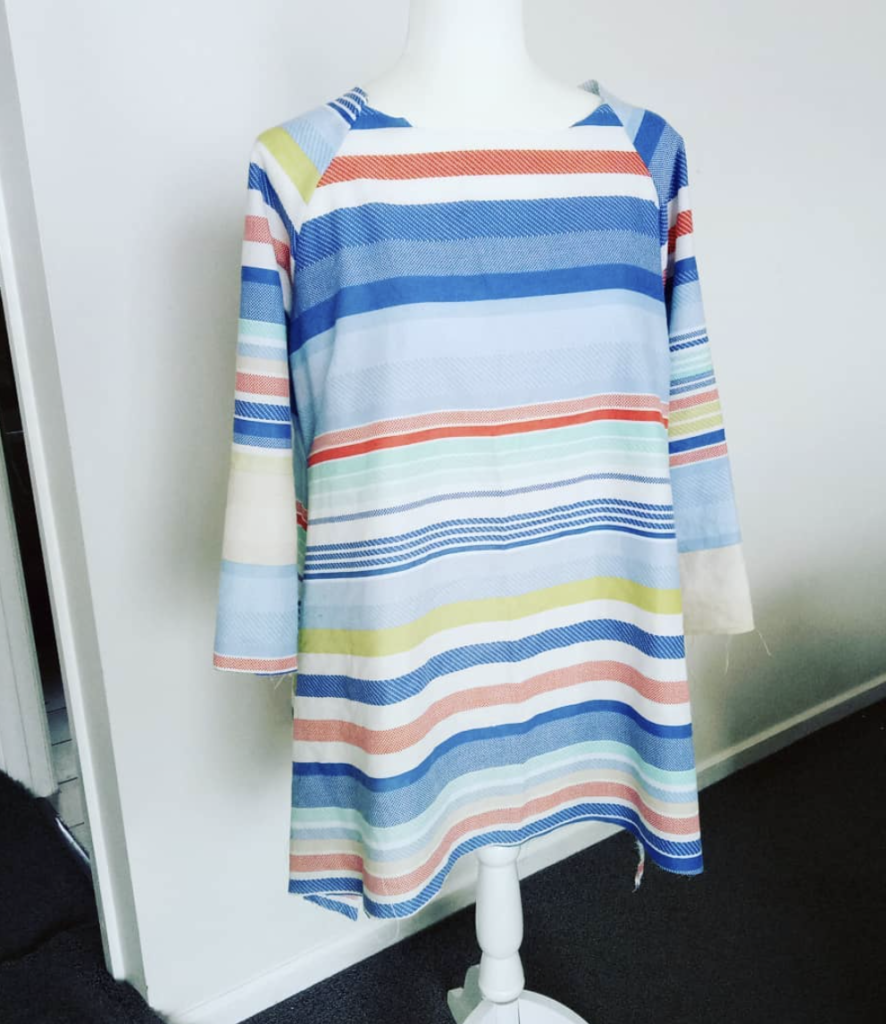
I stumbled upon the It’s Always Autumn blog and found a free Raglan tee pattern. She has a lot of really good free patterns, so be sure to check them out if you head over there. Using that tee pattern I started tweaking and changing to get the dress tunic I had in mind. It took hours of cutting, placing darts, sewing, ripping apart, sewing again and then doing it all over and over, to finally get a tunic pattern that fits me properly and in a style I like! Here is the muslin.

Semi fitted, yet not clingy – perfect! And did I mention that it fits?!

OK, so now onto the fabric. I’ll give more of my warp details next time, but the basic idea is to weave the fabric from an undyed cotton and then dye it to a colour I like. Yes, I want this garment to be as customised as possible!

A lot of my social media followers seem to be right into this idea, so I thought “why not make a thing of it? I can encourage other weavers to make an item of clothing with the same aims in mind. And, if we do it through October, then I can name it Clothtober!” Win, win!

So, I’m going to be sharing more details of this project as I go along (and lets face it, with over 800 ends to warp and thread, this is not going to be over in a flash!) And I hope that I may inspire some of you to choose an item of clothing you want to weave for yourself. According to your skills and what you need in your wardrobe. I will be weaving on my floor loom, but you can do what you like.

Ideas?

A skirt, a fitted blouse, a poncho, a jacket, a top, pants, a hat?

If you feel you need some extra help, here are some classes that may interest you:

Clasped Warp Quechquemitl Wrap

Garment making on a rigid heddle loom

Wrist warmers

I’ve also been eyeing the Bias Top sewing pattern from Sarah Howard, which looks terrific.

What do you think, is this something you can do? Are you fed up with crappy clothes that don’t fit?

Let me know in the comments if you want to join in. What will you make? Or perhaps you just want to follow along with my project for future inspiration, that is fine too.

Next time I’ll be talking about finding your own individual style, so be sure to check that out.

Until then…

Happy Weaving!

Filed Under: 4 shaft weaving, Clothtober, Floor Loom Weaving, Sewing, Weaving Tagged With: clothtober, tunicdress, weaving

My Favourite Books for Multi Shaft Weaving

by Kelly 9 Comments

I love books, so it makes sense that I am a huge lover of good weaving books. It can be hard to know which books are worth buying, especially if you’re buying online and can’t view the book before purchase.


I have already made a video on my favourite rigid heddle weaving books, but haven’t talked about my floor loom or multi shaft books.


This is certainly not an exhaustive list, and I definitely plan on increasing my collection over the years, but these are a few that I have found particularly good.

*This post contains affiliate links


I will start with my absolute favourite. If, in some terrible circumstance, I had to choose just one of the following books to keep, this one would be it!

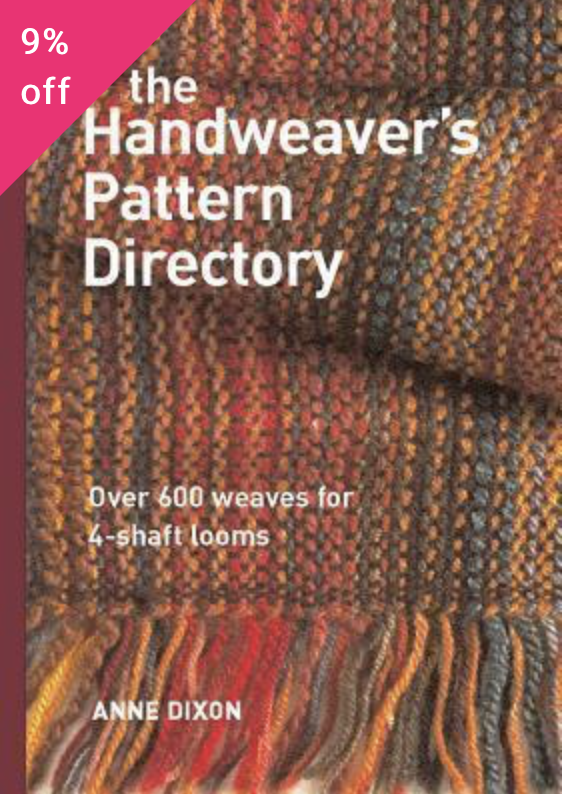
The Handweaver’s Pattern Directory by Anne Dixon only covers 4 shaft weaves, and yet, with the number of pattern drafts you could feasibly use this book for years before even considering buying an 8 shaft book. There is nothing I do not love about this book! Yes, it is a little expensive, but I consider  it my “go to” for any 4 shaft weaving. It’s a hardcover book with spiral binding. This is awesome because you can lay the book flat to follow a threading or treadling pattern, and the hard cover prevents any damage to the pages. I’ve had mine for many years and it still looks as good as new. The layout shows you exactly what you can expect from each draft by providing colour pictures and yarns used to achieve each one – great for those just starting out.

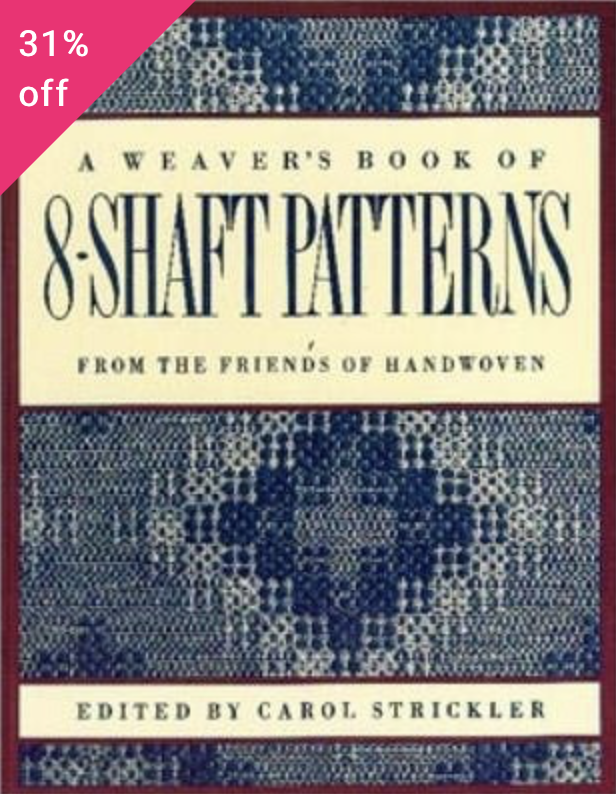
Once again, not a cheap book, but this one is an absolute classic!  Carol Strickler’s A Weaver’s Book of 8 Shaft Patterns has plenty of information on 8 shaft weaves, explanations of tie ups and treadlings, and black and white pictoral representations of each weave (there are almost 900 photos). Individual yarn suggestions are not given, but in each new chapter, suggestions are made for particular weave structures. Many of the drafts have historical information – where the draft came from (if known) or where it is adapted from, which provides the keen weaver the opportunity for further research if desired. 
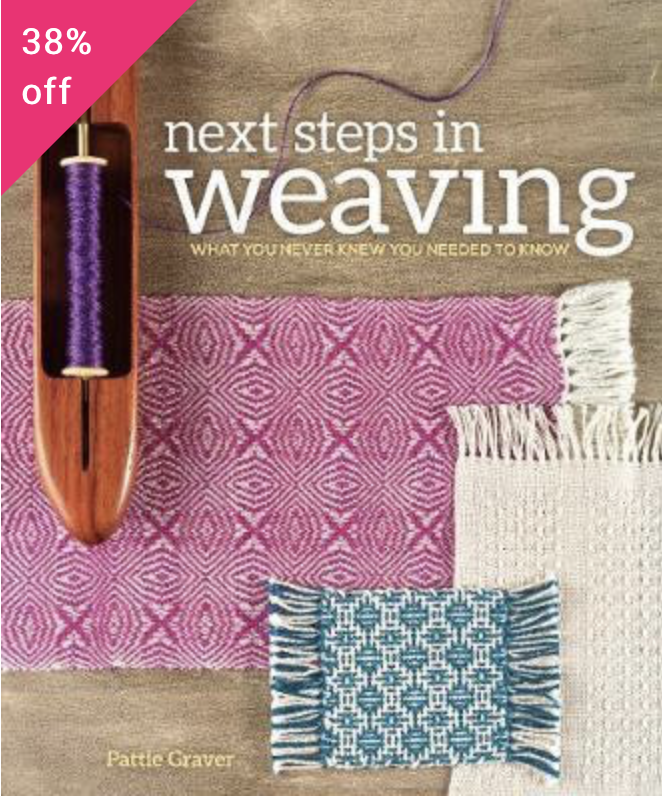
Next Steps in Weaving by Patty Graver has been a great one to add to my library. Published in 2015, it has a more modern and fresh feel. The layout is uncluttered but still contains a lot of information. I admit that I read this book when it first came out and I was in the infancy of my multi shaft journey. I felt like some of it was a bit beyond me at the time. However, when I cam back to it later (after a lot of research and practice) I found that the language now made sense and it was in fact a very helpful book! 
The beginning of the book goes over understanding terminology and drafts (something that many new weavers struggle with!) She explains twills and twill orders and then launches straight into the projects. This is my style of learning and teaching – project based! To get stuck in and actually learn something as you do it, rather than be stuck at the starting line with a lot of theory and fear of how to put it into practice. Patty starts with some basic twill projects, then shows more advanced versions to expose the reader to what is possible with variations and colour. The threading charts for the projects are all colour coded, which I think is a really great visual learning cue for newer weavers, and even for more seasoned weavers who just want to follow a threading chart in a simple format.
There is a lot more I could say about this book, but then this post may turn into a book itself! So, I’ll finish up with this. It’s a great book, the projects and samples are beautiful and inspiring, and even if, like me, you find it a little overwhelming to begin with, it is a book you can keep going back to over and over.
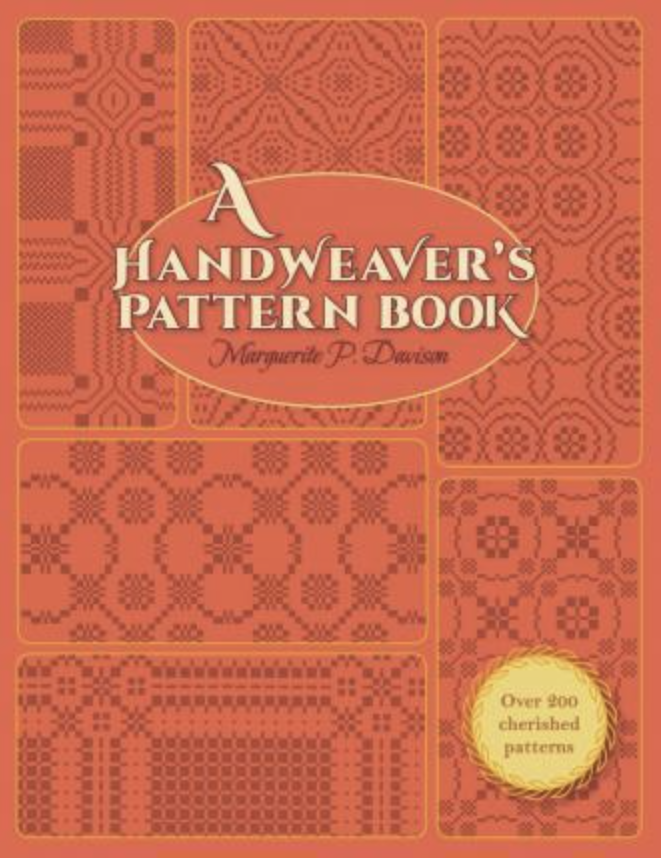
A Handweaver’s Pattern Book by Marguerite P Davison is another well know weaver’s classic. It was first published in 1944 as a green book, the orange one being a more recent and publication. Thanks to the generosity of a student, I now own the green book as well. This book has 200 pattern drafts and has 4, 6 and 8 shaft weaves. The layout is a little more old fashioned (though there are black and white photo representations of most drafts) and some may find it difficult to decipher the way in which the drafts are drawn. That should not put off the adventurous weaver though, as it is very beneficial to be able to read all styles of drafts so that you can decipher them, no matter what country or time period they are from. 
This is one of those books that you read and just think, “that is a lovely little book”. Simple, lovely big photos, nice colour. Tom Knisely’s Handwoven Baby Blankets starts out with a useful section on the basics of baby blanket weaving, such as sizes, colours and materials. 
There are over 30 projects and it includes both 4 and 8 shaft. Every project has specific yarn and colour descriptions. If you’re interested in weaving baby blankets, I highly recommend this delightful book!
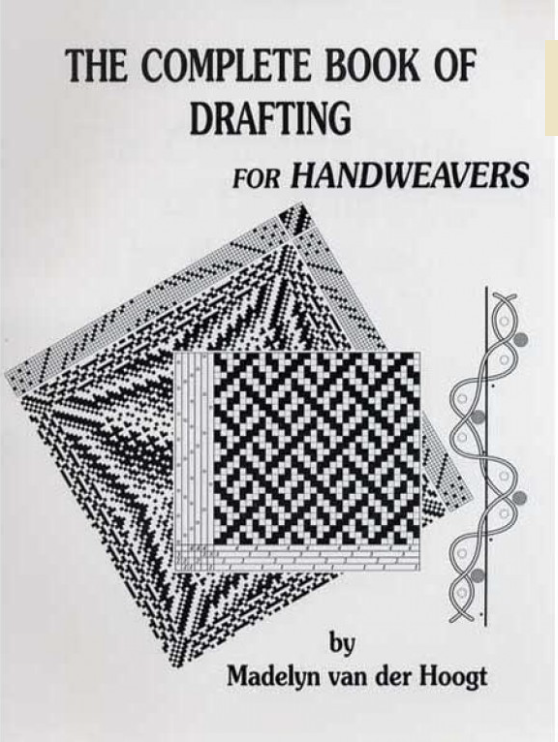
Probably my most asked question from multi shaft weavers is “how do I read a draft?” The next step on from understanding how to read and use a weaving draft is to begin drafting them yourself. This is something that is of huge interest to me, but something I have not devoted enough time to as yet and still have much to learn. If you are interested in drafting for yourself, Madelyn van der Hoogt’s The Complete Book of Drafting for Handweavers is going to help a lot! While I confess that I have not made my way through the entirety of the book yet (it is in a workbook style with drafting exercises for you to follow), I intend to do so as it contains such valuable information. This book is available from The Woolery.
If you’re as interested in coverlets as I am, these are my most loved coverlet books I own:
Carol Strickler’s American Woven Coverlets
Keep me Warm one Night, Burham and Burnham 
(This one is also in my possession thanks to the generosity of a student and it is now one of my most treasured books!)
A Book of Patterns for Hand-Weaving, Mary Meigs Atwater
Weaving a Traditional Coverlet, Helen Jarvis
My last recommendation is for those who are keen to branch out into double weave on your floor loom or table loom.
Doubleweave by Jennifer Moore. Whether you are wanting to explore weaving double cloth or double (even triple) width, this popular book will be a very valuable addition to your collection.
I do have more weaving books in my collection, but these books I’ve listed and described are the ones that I am most happy to recommend and really feel that they would benefit your weaving library too.
I hope you have found this post helpful, please let me know if you have any questions. Do you own any of these books? Which is your most used?
Until next time…
Happy Weaving!


Filed Under: 4 shaft weaving, 8 shaft weaving, Books, Floor Loom Weaving, Weaving Tagged With: books, recommended books, weaving, weaving books

I have a rigid heddle loom, why would I consider buying a floor loom?

by Kelly 2 Comments

I was asked this question in one of my Facebook groups. I started to type a response, then decided it would be better answered in a blog post as it’s not a simple question!


It is true that the Rigid Heddle Loom is capable of a lot (even an 8 shaft pattern if you really want to) but there are many reasons why I love to have both a RHL and a floor loom. 


I wrote a series recently that compared different types of looms that you may wish to review:


The Rigid Heddle Loom


The Table Loom


The Floor Loom


Now, I said the rigid heddle loom is capable of weaving 8 shafts, but does that mean that I would actually want to? To achieve that would mean multiple heddles, multiple pick up sticks and a pretty painstaking process that would have me leaping on to my floor loom in no time. Because the floor loom is made for this, it’s set up for more complex weaves, that is it’s job. So, while the RHL can be utilised for more complex weaves, that doesn’t mean that it’s the ideal choice.


Next, the RHL has yarn size limitations. The smallest dent heddle currently available is a 15 dent by Ashford. Yes, you can still double threads or use extra heddles to increase the available sett, but that is another difference to a floor loom and a consideration if you like to weave with fine threads.


Finally, the floor loom is a full body experience. That sounds a bit weird and new age doesn’t it?! But what I mean is that you are using your head (eyes to read the pattern as you weave, if you need to), your hands to throw and catch the shuttle (your body naturally sways slightly from side to side as you get into the rhythm) and your legs (as your feet move or “walk” the treadles to operate the shafts). It’s actually a bit of a workout!


Because of this “full body” approach on a floor loom, you are able to operate many actions at once. And that is the real beauty of floor loom weaving, the harmony of actions that allow you to work fast to achieve sometimes quite amazing results.


Don’t forget that there are pros and cons to all types of weaving and I try not to promote one over the other because I believe each weaver needs to find the right fit for their particular needs. If it seems that I am promoting the floor loom in this article, it is only within context of answering a question.


To recap, why would I buy a floor loom? 
1. Intricacy of pattern
2. Finer threads
3. Speed and efficiency


I hope this article helps you, thank you for reading!

Filed Under: Floor Loom Weaving, Rigid heddle weaving, Weaving Tagged With: floor loom, floor loom weaving, rigid heddle loom, rigid heddle weaving

  • « Go to Previous Page
  • Page 1
  • Page 2
  • Page 3
  • Go to Next Page »

Primary Sidebar

Categories

Archives

Meta

  • Log in
  • Entries feed
  • Comments feed
  • WordPress.org

Copyright © 2025 Kelly Casanova Weaving Lessons on the Foodie Pro Theme