• Skip to main content
  • Skip to primary sidebar

Kelly Casanova Weaving Lessons

  • Hi! I’m Kelly!
    • Disclosure
  • Online Weaving School Class Index
    • Common account issues
    • Common technical issues
    • What do I get with a membership?
  • New to rigid heddle weaving? Start here!
    • Never heard of the rigid heddle loom?
    • How to weave neat edges on the rigid heddle loom
    • Rigid heddle weaving
    • Rigid Heddle Weaving Patterns
  • Patterns
  • Subscribe

hemstitch

Twisting Fringe on a Handwoven Scarf – What to Do First

by Kelly 1 Comment

Following a question from a student about the steps for twisting fringe on a handwoven scarf, I wanted to make sure everyone could benefit from the answer.

The steps to twisting a fringe on your handwoven piece are fairly simple with the aid of a fringe twister and yet there are important steps that you don’t want to skip!

Step 1 Starts Before You Start!

You need to plan for a fringe when you’re doing the calculations for your project, prior to beginning. This is to ensure you have enough additional warp to accommodate the fringe length you require, but also from a hemstitch perspective. Which brings me to the a crucial point…
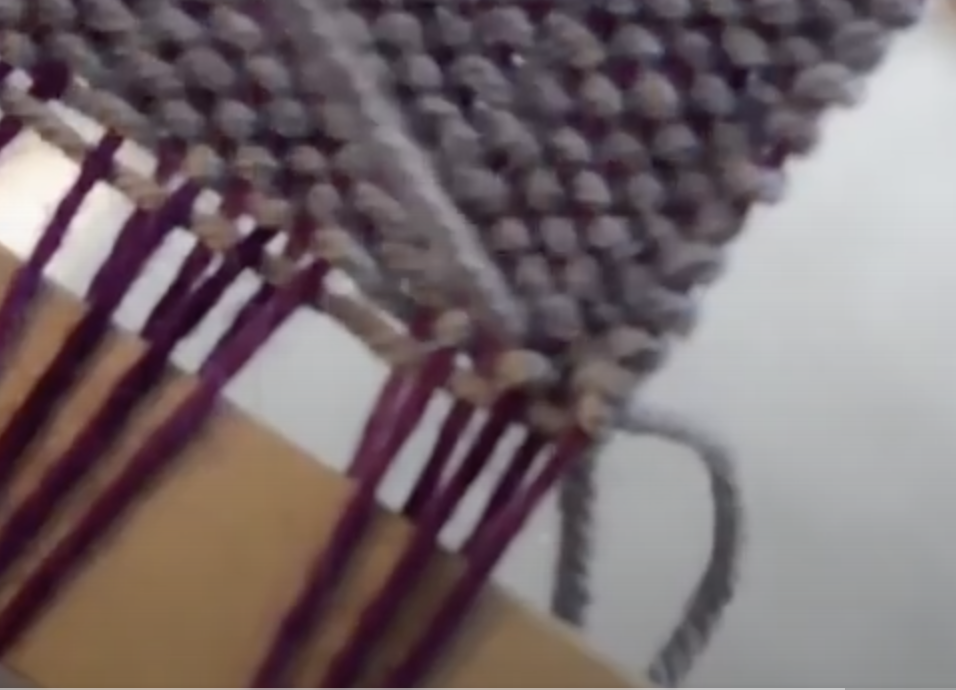
Secure your Edges!

You should secure the edge before twisting the fringe — either by hemstitching or by tying overhand knots in small bundles.

Here’s why:

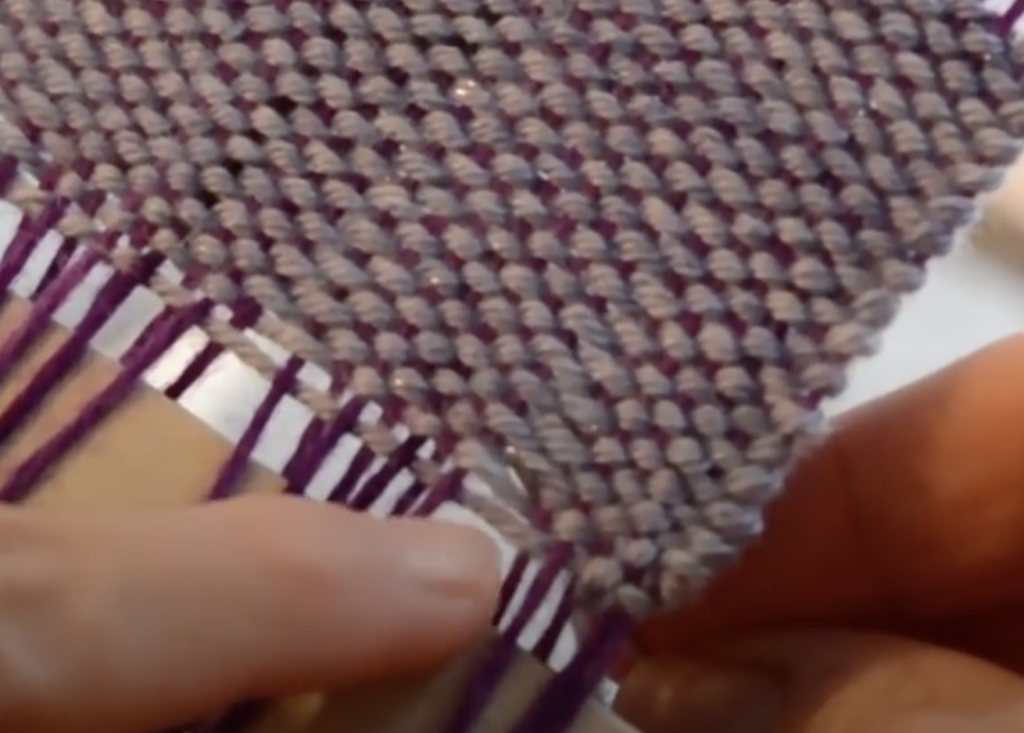
  • When you cut your weaving off the loom, the weft threads are loose at the edge (or the fell of the fabric – where you wove your last pick).
  • If you start twisting right away without securing them, the twist itself doesn’t actually prevent the weft from moving and becoming loose it just holds the warp threads together below that loose edge.
  • Over time (and especially with washing or wearing), those unsecured weft threads can start to loosen or even unravel slightly up into the fabric.

Hemstitch needs to be planned because you stitch at the very start and very end of the project. If you decide to tie knots, that can be done off the loom.

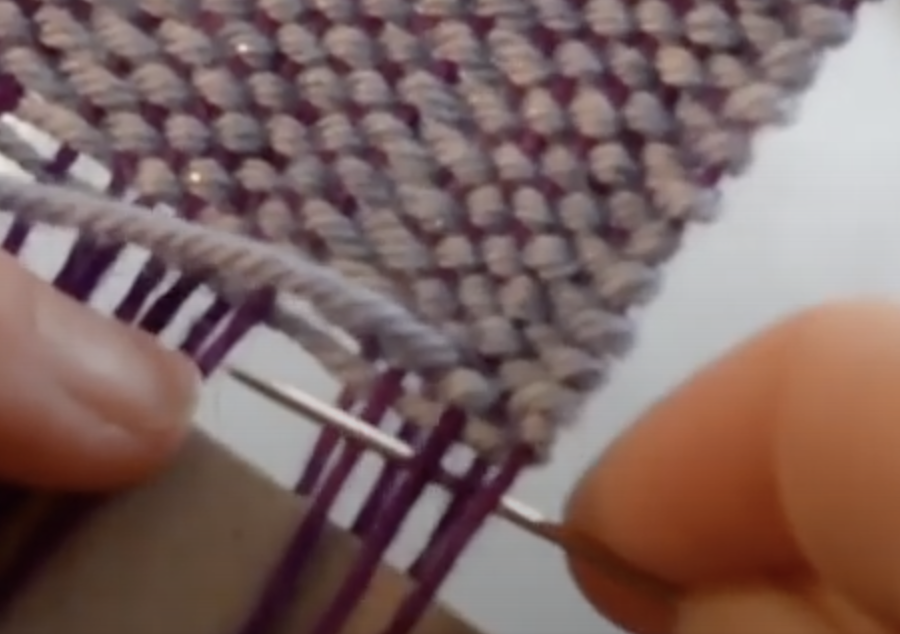
Choosing How To Secure

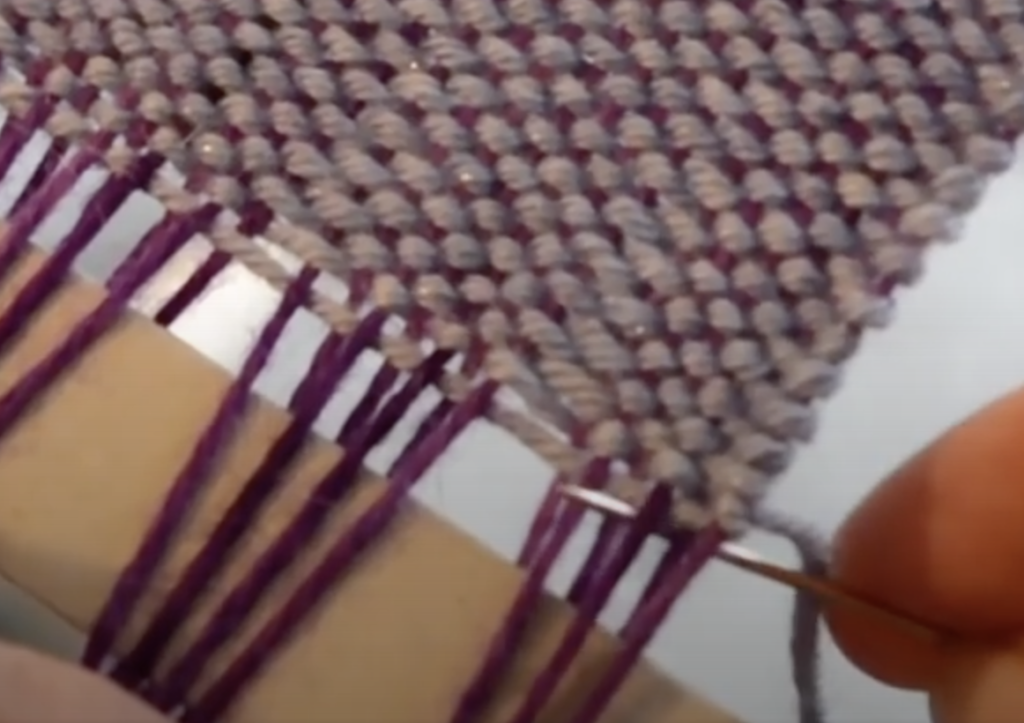
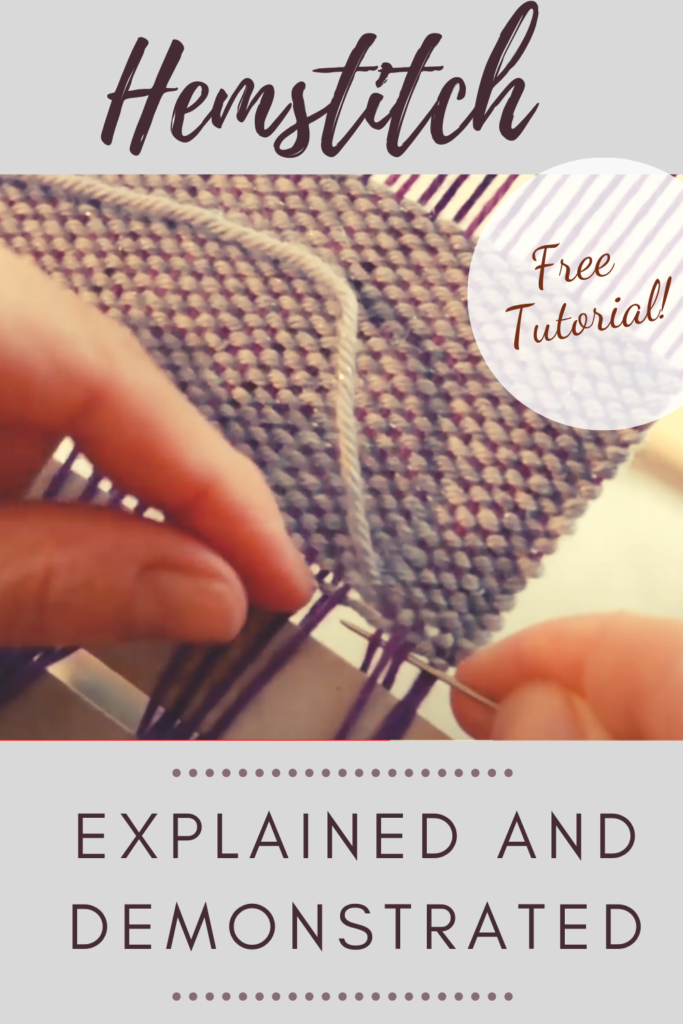
Hemstitch on the loom:

  • This is the cleanest and most secure method. It also looks beautiful and decorative.
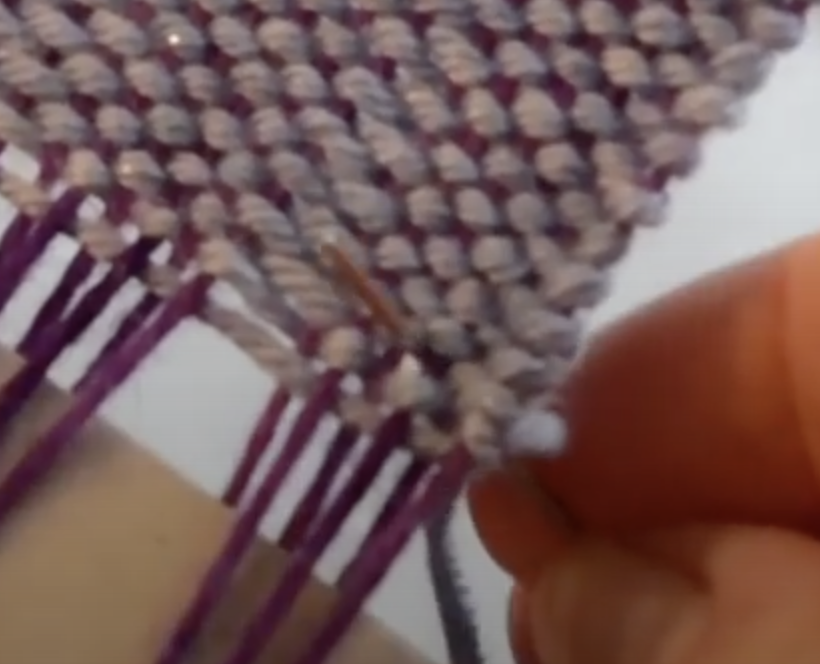
  • You can hemstitch at the beginning and end while the project is still under tension, then cut it off and twist. The piece will have completely secure ends until you’re ready to twist.
  • Once you’ve twisted and tied the ends, it’s fully finished and secure.
  • Learning to hemstitch can be a bit of a learning curve initially, so make sure you have a resource that you can come back to as often as needed.

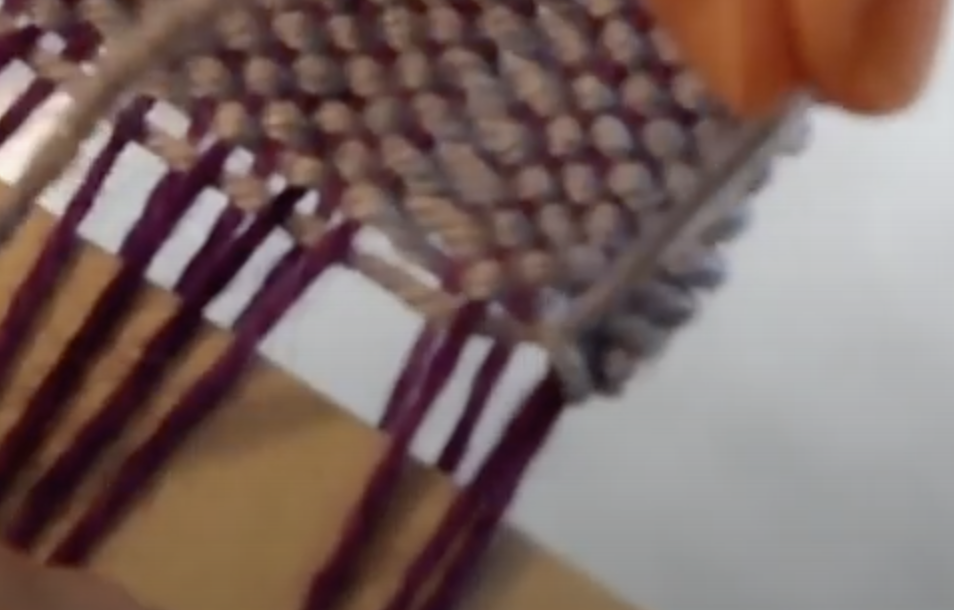
Tie overhand knots before twisting:

  • If you didn’t hemstitch on the loom, tie small groups of warp ends into knots close to the fabric edge before twisting.
  • Then twist each group as desired, and tie off the twisted fringe.

If you skip both:

  • The scarf may look fine at first, but the edge will always be a bit vulnerable — especially if it’s a soft yarn or an open weave.

The Final Essential

Before I go, I need to make sure you know this:

Wet finish your scarf AFTER the fringe treatment is done! Whether you’re hemstitching then twisting or knotting before twisting the same rule applies 😉

I hope today’s article was super helpful to you. Go forth and twist fringe with confidence!

Until next time…

Happy Weaving!

Help Support My Free Content

Filed Under: Weaving Tagged With: hemstitch, how to hemstitch, how to twist a fringe, twisted fringe

All about hemstitching

by Kelly 12 Comments

I learned how to hemstitch early on in my weaving journey and use it now in most of my hand woven pieces.

I love that it is so decorative but entirely practical as well – that suits my tastes perfectly!

There are many things to love about the humble hemstitch, it is easy to learn, it looks lovely, it allows your woven piece to sit really flat once off the loom (great for table linens), it is very strong and secure and it can be used as a feature within your weaving, not exclusively at the start and end of your piece.

This post contains affiliate links. Please see my disclosure policy for further details.

So, what is hemstitching?

It is a way to secure your warp ends in order to remove your weaving from the loom. It is worked by hand, with a tapestry needle and while your piece is still on the loom (not absolutely necessary, but boy, does it make life easier!)

When you remove your piece from the loom, the weaving will naturally begin to unravel (at different rates, according to the yarn and the project). You need to either secure those warp ends on the loom or promptly after removing from the loom.

Do I have to leave a fringe if I hemstitch?

Not necessarily. It is most common to leave some sort of a fringe when you have hemstitched your ends. A twisted fringe looks stunning with hemstitch but a medium to short fringe is also lovely.

But if you don’t want a fringe at all, don’t have a sewing machine and want those ends secure you can hemstitch on the loom, then needle weave the warp ends (or fringe) back up and into the work. I have used this approach for some of my tapestry projects and on these mug rugs. It gives a very neat and attractive finish – it takes a while to weave all those ends in with a needle though!

Let’s get down to the nitty gritty and have a look at how hemstitch works.

You begin by choosing the number of warp ends you want in each bunch and how far into your weaving (how many weft picks) you want each stitch to go.

My go to is a 4/1 hemstitch, which means that there are 4 warp threads in each bunch and I stitch in 1 weft thread deep. There are all different number configurations you can do depending on the effect you want, the project and the thickness of yarn you have used.

In this picture I am working a 3/2 hemstitch. I count off 3 warp threads at a time, and bring the needle up 2 weft picks deep.

Here is a breakdown for how to work hemstitch, step by step. Heddle is in neutral. Ideally, you have left a long tail of weft yarn (around 4 x the width of the project) on the right hand side (left side if you are left handed). Thread this yarn in a tapestry needle.

Remember, in this demonstration I’m doing a 3/2 hemstitch.

  1. Take the tapestry needle underneath the first 3 warp threads.

2. Count up 2 weft threads and bring your needle through the space that aligns with the 3 warp threads you counted in.

3. Pull the full length of the yarn through.

4. Take the needle back to the start of the initial 3 warp threads and underneath, coming up on the left hand side of the 3rd thread.

5. Pull the yarn through, making sure that the needle goes under the tail yarn on the left so that a loop is created. Pull the loop firmly to make your first bunch.

6. Take the needle down in between the first bunch and the next group of 3 warp threads and repeat the steps.

You can see a video of this tutorial here-

I mentioned that hemstitch can also be used decoratively within your weaving, not just as a hem securer.

In this image I have worked adjacent rows of hemstitch on bands on plain weave, leaving a gap between the bands. I’ve then woven in some ric rac and ribbon as a feature. This can give a very pretty and unique look to your woven piece. This demonstration is available in a member’s only class – Hemstitching as a Feature.

Do I hemstitch both ends of the piece in the same way?

Yes and no. You are still using the same hemstitching technique, but when you hemstitch the first end you are stitching underneath the weaving and when you stitch the final end, you stitch on top of the weaving.

In my earlier days of weaving, I would take my loom off the stand, turn it around to face the other direction and then replace it on the stand. That way, I had the weaving facing me in the same way that it does at the start of the piece and I didn’t have to change the way I stitched at all.

These days, I have a different technique for hemstitching the other end that means I don’t have to rotate the loom and is just as fast and easy as the beginning of the piece hemstitch.

I’ve made a video to share with you how I do this. You will see that its not difficult and just as effective:

Does hemstitching only work on certain types of weaving?

I have used hemstitching on all different types of weaving, even tapestry. I’ve used it on my rigid heddle loom, table loom, floor loom and tapestry loom. I haven’t used it with my inkle loom but inkle bands don’t unravel in the same way and the warp threads are so close together that hemstitching would be quite difficult!

Does the type of tapestry needle matter?

You can use any ordinary tapestry needle. A larger one is easier to thread and use. I recently bought some of these Clover bent tip jumbo tapestry needles, and they have been a game changer! They are large and smooth plus the bent tip is just perfect for hemstitching. Plus they are gold, so hopefully I’m less likely to lose them!

I think a lot of new weavers and a bit overwhelmed by the thought of hemstitching, I mean, it does look quite intricate and complicated on the piece.

Hopefully, by breaking the steps down and making these videos, I will convince you to have a go at hemstitching. Maybe you will find that you love it just as much as I do!

Oh, and by the way, I’ve talked today about basic hemstitch but there are variations that are even more decorative. A great resource for this is The Weaver’s Idea Book, which has a whole section dedicated to hemstitch and it’s variations and possible applications.

All this information plus an extra page of tips and links to 3 hemstitching videos is now available in one convenient e-booklet. The Hemstitch Basics Guide can be purchased in my Etsy shop.

Be sure to leave any questions or comments below, I love to hear from you!

Until next time…

Happy Weaving!

Filed Under: Books, Floor Loom Weaving, Free tutorial, Inkle Weaving, Online Weaving School, Rigid heddle weaving, Table loom weaving, Tapestry Weaving, Tutorials, Weaving Tagged With: hemstitch, how to hemstitch

Primary Sidebar

About Kelly Casanova

Hand crafted boat shuttles

Categories

Archives

Meta

  • Log in
  • Entries feed
  • Comments feed
  • WordPress.org

Copyright © 2026 Kelly Casanova Weaving Lessons on the Foodie Pro Theme