• Skip to main content
  • Skip to primary sidebar

Kelly Casanova Weaving Lessons

  • Hi! I’m Kelly!
    • Disclosure
  • Online Weaving School Class Index
    • Common account issues
    • Common technical issues
    • What do I get with a membership?
  • New to rigid heddle weaving? Start here!
    • Never heard of the rigid heddle loom?
    • How to weave neat edges on the rigid heddle loom
    • Rigid heddle weaving
    • Rigid Heddle Weaving Patterns
  • Patterns
  • Subscribe

Free tutorial

Troubleshooting Common Rigid Heddle Weaving Issues

by Kelly Leave a Comment

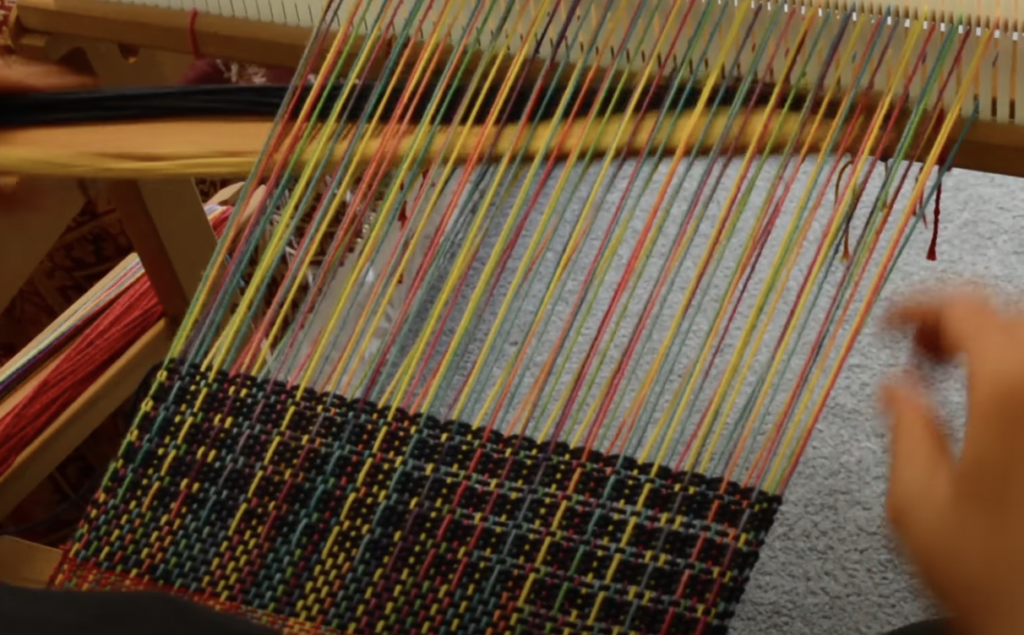
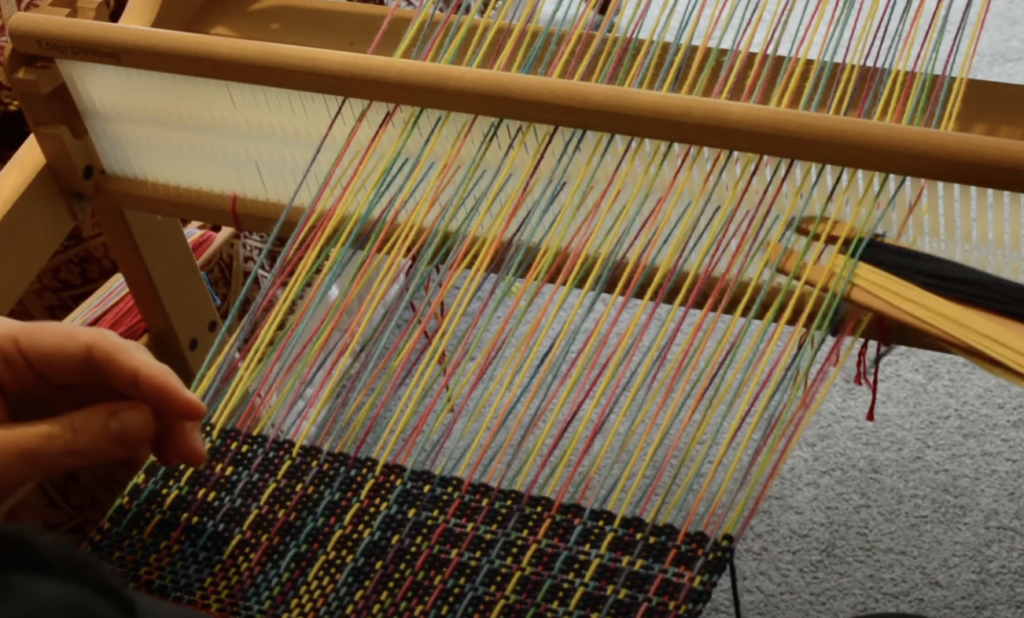
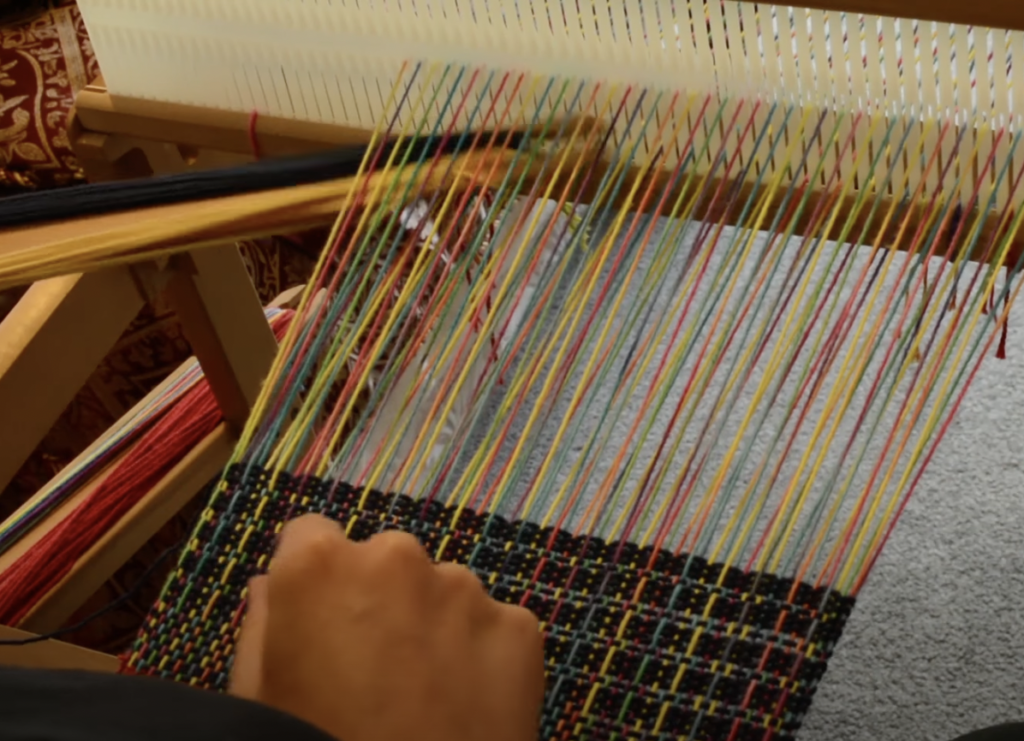
Weaving on a rigid heddle loom is an incredibly rewarding craft, but it’s not without its challenges.

Like learning anything new, time and patience are necessary to achieve your goals.

Something I have observed in my years as a weaving teacher is that most new weavers will experience the same issues that require troubleshooting. This is actually a good thing!

From a teaching perspective, I can identify problems that weavers are having very quickly by just looking at their work. And from a learning perspective, many weavers have gone before you with the same mistakes cropping up and there are many resources available to learn from to figure out where you went wrong.

Weaving should be relaxing, but common issues can unravel your peace.

Whether it’s uneven edges or frustrating warp tension issues, these common hurdles can leave weavers scratching their heads and feeling a bit disillusioned with the whole thing! The good news is that many of these problems are preventable with a little extra care, preparation and experience.

In this guide, we’ll explore why starting with a well-tensioned warp is essential, how patience in the setup process can save you from headaches later, and why taking the time to learn and reflect will make you a more confident and skilled weaver. Let’s turn those troubleshooting moments into learning opportunities!
1. Why a Well-Tensioned Warp is Non-Negotiable

I have no data to qualify this statement, but I feel confident is saying that at least 90% of negative issues encountered in the weaving process are due to something being off with the warp.

Consistency is more important than firmness of tension.

By this I mean that in the warping process you should aim to have all of your warp threads under approximately the same amount of tension, or as near as you can get it.

It’s no good achieving great tension on your edge threads and poor tension in the middle. Or vice versa. The idea being that if your tension is consistent while warping you can then focus on the tightness of the tension afterwards and all the warp threads will be under the same amount of tension.

Uneven tension causes a huge range of headaches to the weaver. Skipped threads, inconsistent edges, uneven or wavy weft picks, snagged or diving shuttles, heddle positions not holding correctly… I could go on!

  • How to achieve great warp tension: 

There are so many methods for warping your rigid heddle loom and it’s definitely not a “one size fits all” process. In my last article I discussed the importance of great warp tension in more detail, so be sure to check that out.

I also recommend that you check out this playlist on Youtube for a variety of methods to consider:

  • Quick tips for achieving good tension:
    • Adjust tension gradually and evenly.
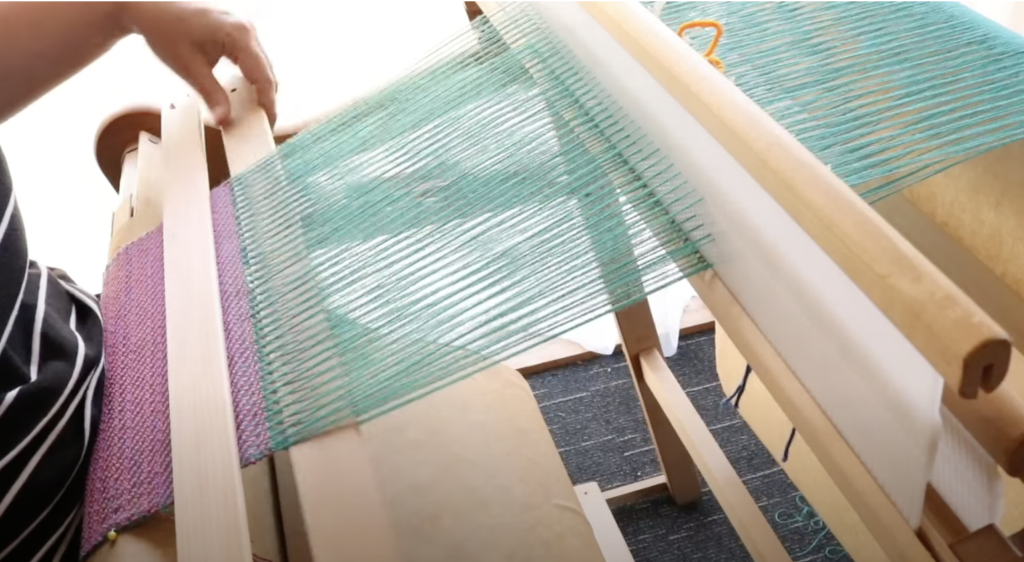
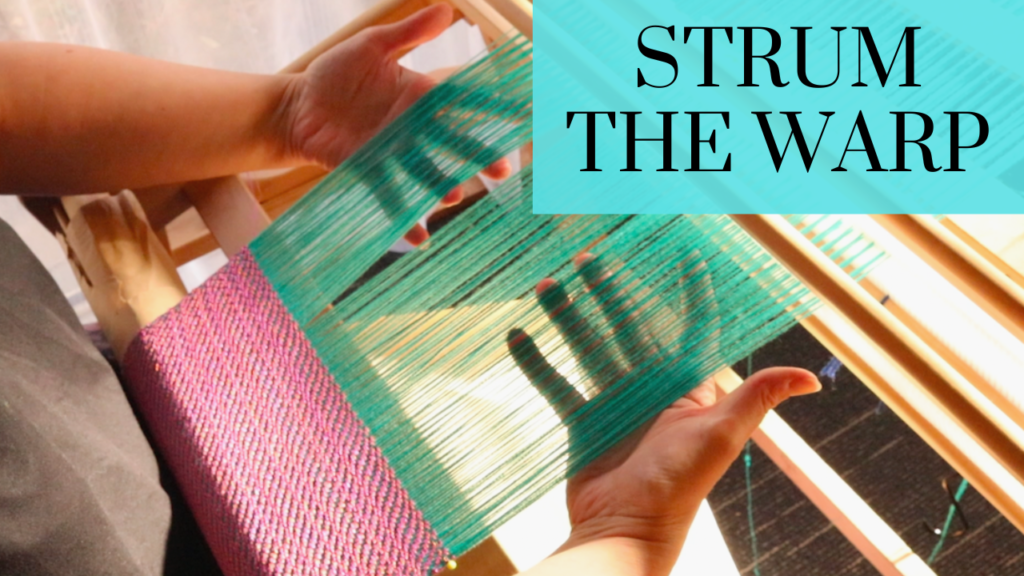
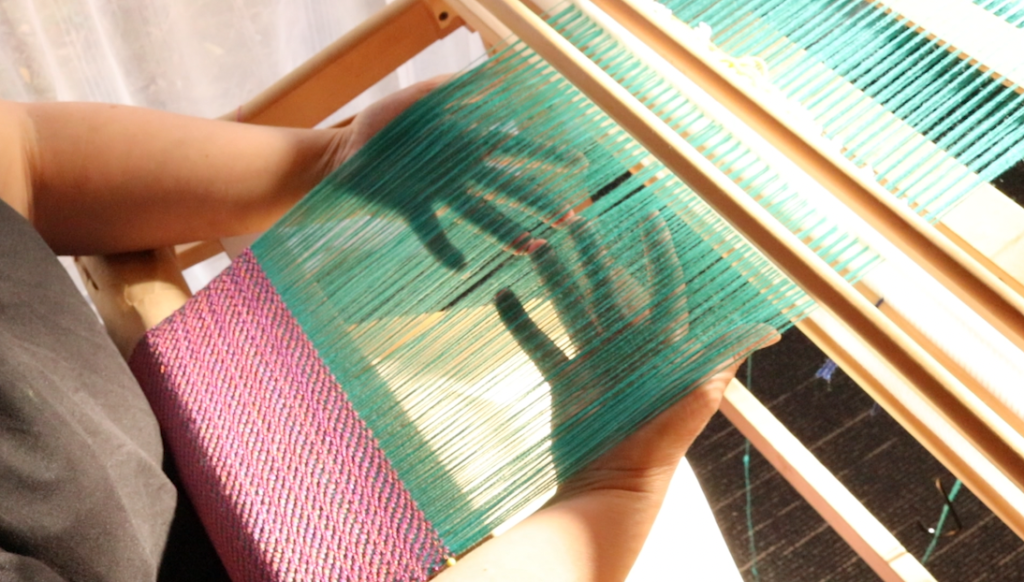
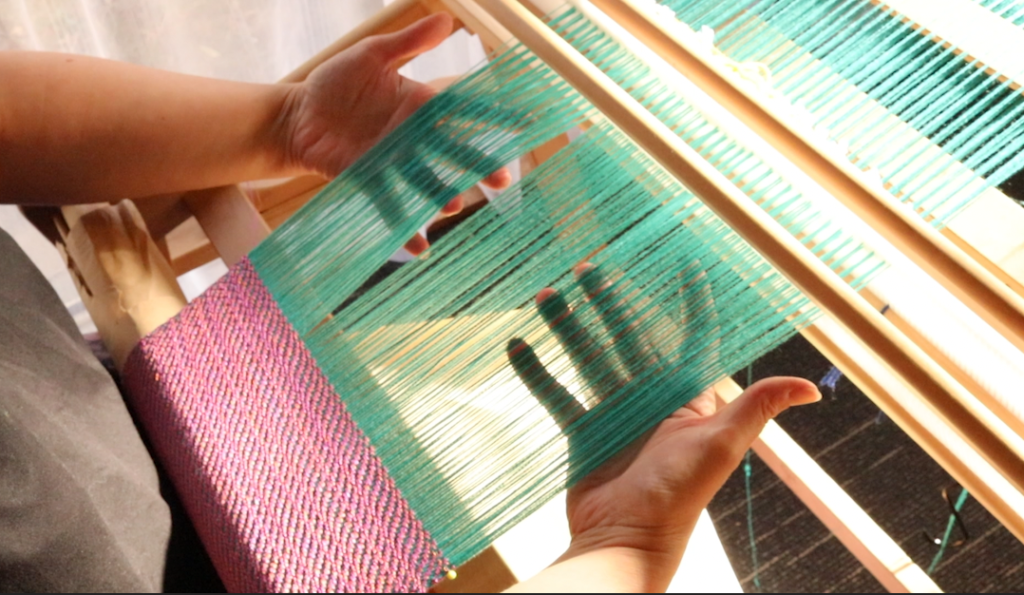
    • Test warp tension by bouncing your hand across the warp once it’s tied on.
    • Separate your warp prior to weaving
    • Take your time and explore different methods to find one that works well for you.

2. The Virtue of Patience in Setting Up Your Loom – Don’t Rush!

There are many things in life that can be rushed and completed quickly. Weaving is not one of them 😆 Rushing will inevitably cause mistakes due to overlooking an important step or process, trust me on this one!

There is so much more to weaving than simply throwing a shuttle back and forth.

There is the planning of the project, sampling if necessary to ensure appropriate yarns and setts. There is the careful warping, threading and readying of the loom prior to weaving. There is the double checking to ensure correctness of threading and steps (especially important for newer weavers!) And that is all before we actually get to the weaving!

Embrace the process:

  • If you feel impatient initially, try to let the process envelop you and teach you to go slowly.
  • Setting up the loom is an integral part of the craft, enjoy it!
  • Take breaks if you feel frustrated—it helps avoid costly errors and gives you a breather.
  • Try to do your warping in a space where you can leave the loom if needed.

  • Tips for setup success:
  • Create a checklist for each setup stage so you don’t miss any steps.
  • It can be great to have a helper for your first project at least. They can hold the warp for you so you don’t have to focus on more than one thing at once. Another set of eyes can also help to pick up errors you may overlook.

3. Giving Yourself Time to Learn and Reflect

This ties in very closely with the last point on patience, but is less about the physical weaving and more about your learning journey.

We all learn in different ways and to be effective we need to give ourselves a lot of grace when learning something new. Perhaps you are the type of learner who just “get’s it” right away or perhaps you are more like me and need more time.

One thing that I do frequently, and have since I started weaving, is to grab one of my weaving books off the shelf and quietly flick through to see what strikes me that day.

Repetition is so good and necessary for learning. There have been many concepts that I had convinced myself I was not smart enough to learn, but it just takes persistence and not giving up on yourself.

Weaving is a journey, not a race:

  • Learning takes practice; each project builds skills. Start small and grow as you go.
  • Mistakes are opportunities to learn and grow.

Tips for cultivating a learning mindset:

  • Keep a weaving journal to note challenges and solutions.
  • Reflect on what worked and what didn’t after each project, and why.
  • Seek out advice and resources from weaving communities.
  • Have good quality books in your weaving library to refer to over and over.
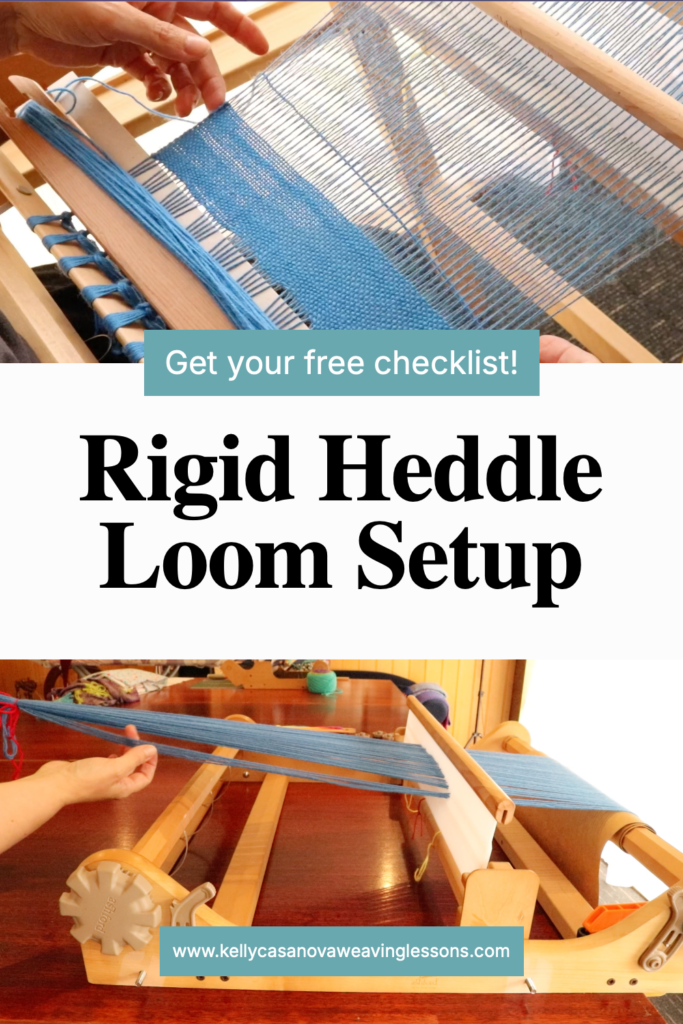
4. Troubleshooting Common Issues (and How to Avoid Them)

These are what I see to be the most common issues that new rigid heddle weavers will encounter:

  • Uneven edges (selvedges):
    • Causes: inconsistent tension, improper beating, fraying edge threads, inappropriate warp threads used.
    • Solutions: Ensure proper warp tension to begin with, try to beat evenly, be sure to use a yarn that is suitable for warping. If edge threads are too loose, try using weights on those threads over the back of the loom. If they are too tight and middle threads are looser, try some wedging techniques as demonstrated in this video.
  • Broken warp threads:
    • Causes: tension too tight or uneven (so some threads end up super tight while others are loose), friction from the heddle (some yarns are more susceptible to this than others).
    • Warp yarn is not strong enough to be suitable for warping.
    • Solutions: choose a suitable warping yarn, ensure warp tension is not exceedingly tight, angle your weft before beating so it has room to settle rather than drawing in too much at the edges.
  • Skipped threads:
    • Causes: threading errors, uneven tension, incorrect angling of a stick shuttle as it travels through the thread. These problems will create floats and imperfections in your work.
    • Solutions: check threading, rethread problem areas if needed. Be vigilant with how you use your shuttle so it’s not inadvertently picking up warp threads it shouldn’t.
  • Gaps, uneven and slightly scrapping weaving:
    • Causes: uneven beat, inappropriate sett, slippery yarns.
    • Solutions: Getting a feel for a correct beat takes time and practice. For a balanced weave, you want a balanced beat. Try to think of pressing your weft into place, we are not whacking here! Hop up and view your work from a few different angles every now and then. Take photos of your progress and review. (Why? For some reason, mistakes stick out like a sore thumb when viewed as a photo! 🤷‍♀️) Again, an uneven warp will impact how your weaving appears. An incorrect sett will have a big effect on your finished weaving, so make sure you figure out the ideal sett before commencing.

It’s good to remember that challenges are part of the weaving journey. I have never personally made a weaving mistake that I couldn’t fix, which is very encouraging!

Having a community to turn to when your weaving is not going so well is invaluable. If you can’t meet with other weavers in person, online groups like my free Facebook group are wonderful for networking and inspiration.

Perhaps you’re ready to level up your weaving in a really supportive atmosphere with a library of online classes at your fingertips? Check out the Online Weaving School!

I hope these tips have been helpful to you, feel free to share your favourites in the comments below.

I have also put together a downloadable Rigid Heddle Loom Setup Checklist as a free resource just for you, enjoy!

Rigid Heddle Loom Setup ChecklistDownload

Until next time…

Happy Weaving!

Filed Under: Free tutorial, Online Weaving School, Rigid heddle weaving, Weaving Tagged With: rigid heddle loom setup checklist, rigid heddle troubleshooting, rigid heddle weaving

Supplemental Fringe Tutorial

by Kelly 7 Comments

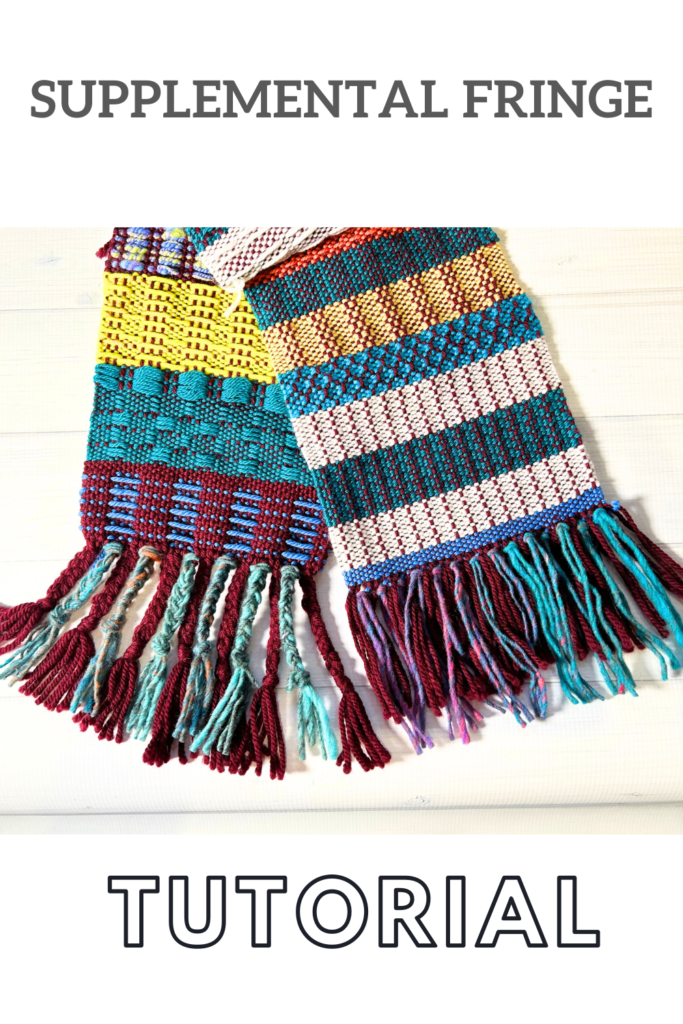
A supplemental fringe is simply some additional fringing that you as the weaver may decide to add in to a finished piece.

The supplemental fringe (that’s what I call it – I just mean that it’s extra fringe in addition to the original) can be brought in after the woven piece is off the loom. It’s fast and easy to secure to your weaving.

But you may be wondering – in what kind of situations would a supplemental fringe be used? And why would I want to add extra fringe when there is one already existing?

Well, sometimes when you finish a project, you might just feel like it needs a little something extra. You might feel that your existing fringe is a little sparse or even just a little bit dull.

If you’re stuck for how to pick colours for the supplementary fringe one idea would be to have a look at the colours that are in the actual piece. Are there any that stand out to you? And really pop? You could coordinate the colours from your piece with your supplemental fringe?

Or you could pick up a yarn that you just really like and you think would look great alongside existing fringe. No rules here!

It can be helpful to be able to practice the technique first on a sample piece (I used a sampler from the Pick Up Perfection online class) if you happen to have one just so that you can ensure you get the most pleasing results, it helps because it will show you things like what different yarn thicknesses and colours look like, how many repeats you want to do and also allows you to practice the knotting.

What you will need to incorporate a supplementary fringe:

  • Yarn (I used Noro Ito, there is such a fantastic colour range)
  • Woven piece to add the fringe to
  • Crochet hook (size is not too important, it just needs to be able to go through your weaving and pick up the supplementary yarn
  • A book or similar to use as a fringe template
  • Scissors

Once you decided how long your want your supplemental fringe pieces to be, you can use a book as a template to quickly and easily wind off your pieces. Make them twice as long as the actual fringe length you need because we’re going to be doubling them over when attaching.

I chose to place my supplemental fringe every 4 warp threads of the existing fringe. Your choice may be completely different, it just depends on what you want to do.

I also chose to go in with the crochet hook 2 weft threads deep – again this is optional but I feel that having 2 weft threads makes for a sturdier edge for my extra fringe.

Grab your first fringe loop and hold it with the hook.

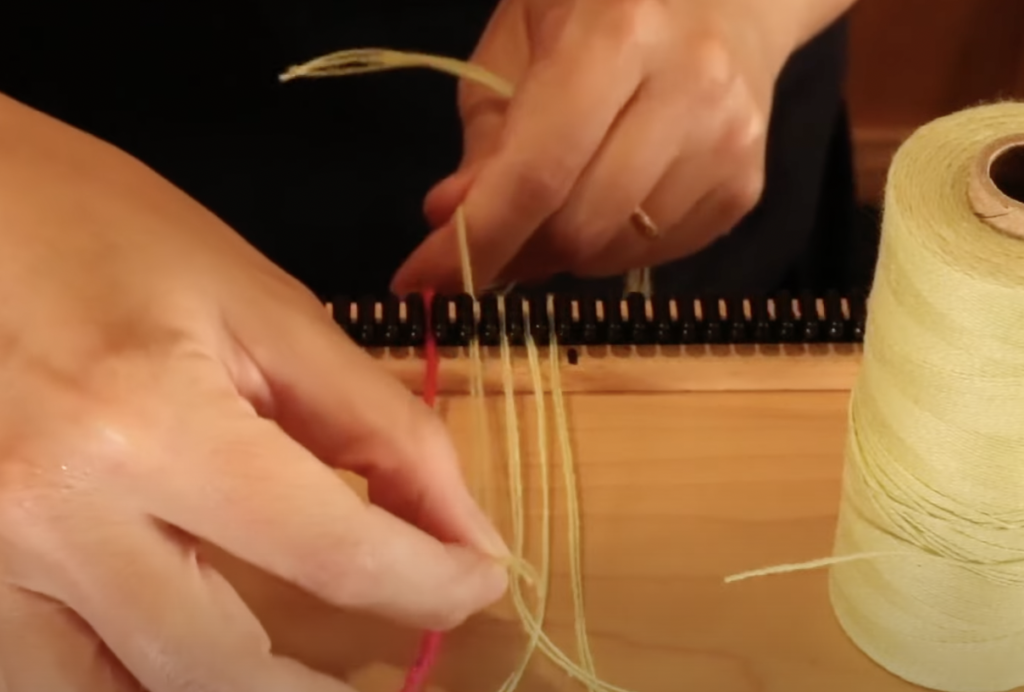
Pull the fringe loop through the 2 weft rows. Continue to pull through until you have a loop large enough to fit your fingers into, but not so large that the tail ends are pulled though.

About this sized loop is good.

Now you can grab the tail ends of the supplemental fringe and pull them through the loop you’ve made.

Tighten the knot up close to the woven edge and you’re done! Repeat across the rest of the weaving at your chosen intervals.

All that’s left to do is to trim your supplemental fringe, which can be longer, shorter or just the same length as your existing fringe.

There are lots of variations and possibilities with this idea. See the plaited (braided) fringe in the photo above? Well, if that interests you I suggest you watch my video tutorial for all the details on how to work that:

I hope you enjoyed this tutorial!

Until next time…

Happy Weaving!

This post contains affiliate links. For more information please see my disclosure policy.

Filed Under: Free tutorial, Tutorials, Weaving Tagged With: supplemental fringe, weaving tutorial

Make a potholder loom

by Kelly 12 Comments

Remember the potholder looms from back in the 70’s?

Well, I actually think the humble potholder loom is a little under rated! I mean, it’s simple to use and it must be one of the cheapest looms out there if you make it yourself.

That’s what today’s post is all about. Recently, my husband and I teamed up to make a cheap and easy potholder loom and now we want to share it with all of you!

We’ve put all the information you need to make one of these simple looms into a simple to download file (you can access that below).

Not only that, but I’ve also made a series that you can find on Youtube that will show you two different ways you can weave on your own potholder loom.

You only need some simple materials to get started. Wood, nails, a hammer, some yarn, some wire (or a Tunisian crochet hook) and a regular crochet hook, I find the 5.75mm size is good. A tapestry needle can also be handy for sewing in any loose ends.

So, go ahead and grab your instructions file below and then check out the video tutorial for weaving further down.

Constructing-a-potholder-loom-2023Download

I hope you have fun with this project and until next time…

Happy Weaving!

*This post contains affiliate links. For further information, please see my disclosure policy.

Filed Under: Free Pattern, Free tutorial, Potholder loom, Weaving Tagged With: free tutorial, potholder loom

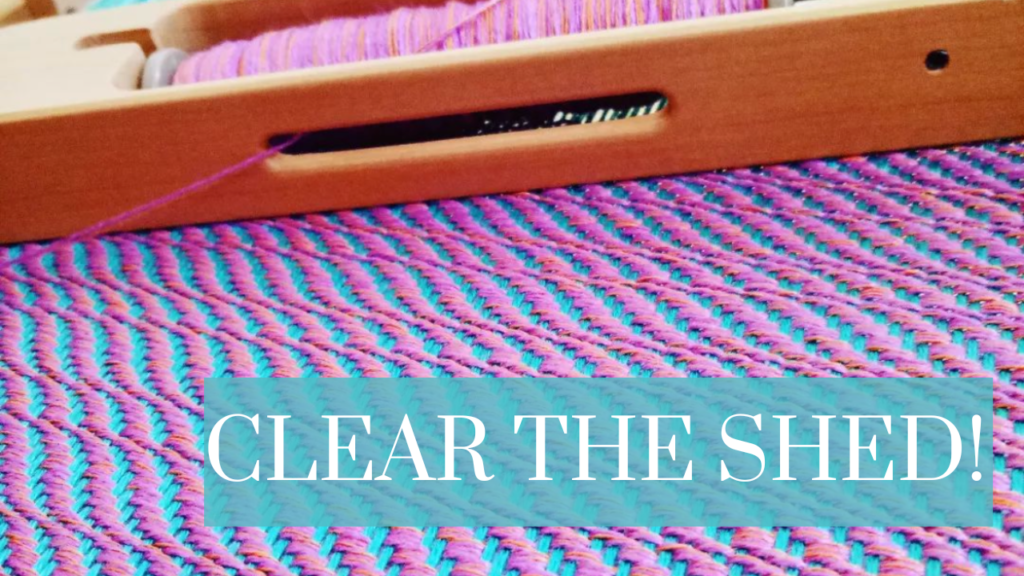
2 Hacks for Clear Sheds on a rigid heddle loom

by Kelly 10 Comments

Threads that tend to stick to one another when you change sheds can be so frustrating!

Some yarns are prone to doing this more than others, and it also commonly occurs when you’re weaving with more than one heddle or are using additional aids (like pick up sticks and heddle rods) to create extra shafts on your rigid heddle loom.

For more information on threads that are notoriously sticky, visit this post.

*This post contains affiliate links. For further information, please see my disclosure policy.

Why is it a big deal if not every thread is exactly where it should be?

Well, it’s going to mess up your pattern. Your weaving pattern is created by the interlacement of threads – the weft going over some warp threads and under others. Now, if the weft ends up going over one or more threads that it should be travelling under, and vice versa, then you have a problem.

Floats will be created where they are not meant to be and this will show as a mistake in your pattern. If you have already checked that your threading and weaving sequences are correct, you don’t have crossed threads or anything else weird going on, the problem is very likely to be caused by unclear sheds and sticking threads.

Before looking at using clearing methods, ensure you have adequate warp tension. If your tension is too loose, threads may sag and interfere with your sheds. If your threads are loose on just some sections, you may need to try some wedging techniques to help your warp tension to be more consistent.

There are 2 main methods I use to ensure a clear shed when sticky threads are proving to be an issue.

The first method involves the use of a pick up stick, extra stick shuttle or even a paint stirring stick will do the trick! Basically, a flat, smooth stick.

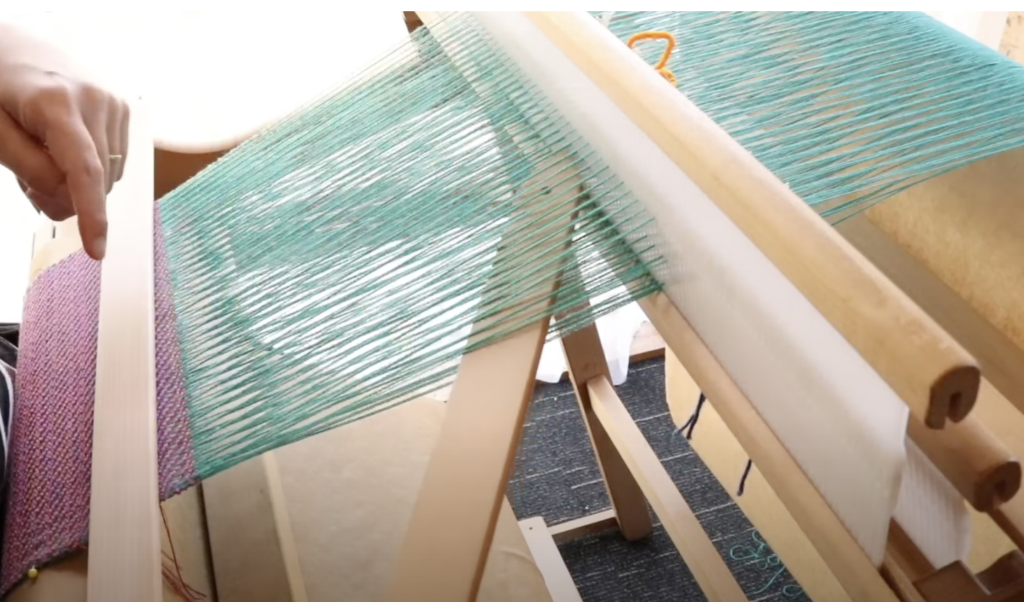
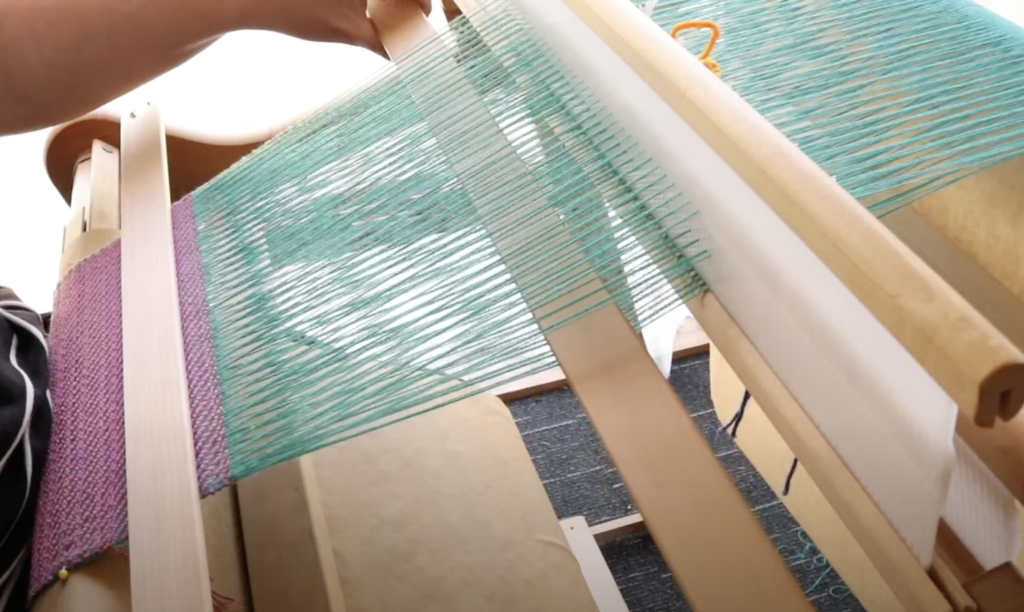
Before inserting the stick into the shed, ensure that all of your threads are in their correct places. The easiest way to do this is to understand where all threads should be at all times according to your threading and heddle/weaving sequence. For example, in this picture my first heddle is up and my pick up stick is forward. For the way that I threaded, this means that all the hole threads on heddle one should be up, and all the threads on top of the pick up stick will also be up. The rest of the threads will be down, forming the bottom layer of the shed.

Once you understand where all the threads should be and you are sure they are correct, you can insert your pick up stick into the shed. Be sure to insert close to your heddle, where the shed space is at it’s widest.

Once the stick is in the shed, hold it on either side.

Pull the stick towards you, and towards the fell (edge) of your weaving and bounce it off the woven edge.

This action is firm and decisive, but doesn’t have to be a super hard whack. If there were any threads that were sagging or tending to want to stick together, this will shock them back into place.

If you prefer to see a video of this technique in action, you can view that here-

Now let’s have a look at the second shed clearing technique I mentioned.

This technique is so simple and easy. No extra tools are needed, just your trusty hands and fingers. I call this “strumming the warp”, but it doesn’t have anything to do with playing the guitar!

Again, the first step is to ascertain whether the problem lies with your threading, sequence or tension.

Next up, place your heddles/rods/sticks in the correct position for the shed you want to weave. Once again, I’m using the front heddle up, pick up stick forward combination as this combination frequently has sticking threads.

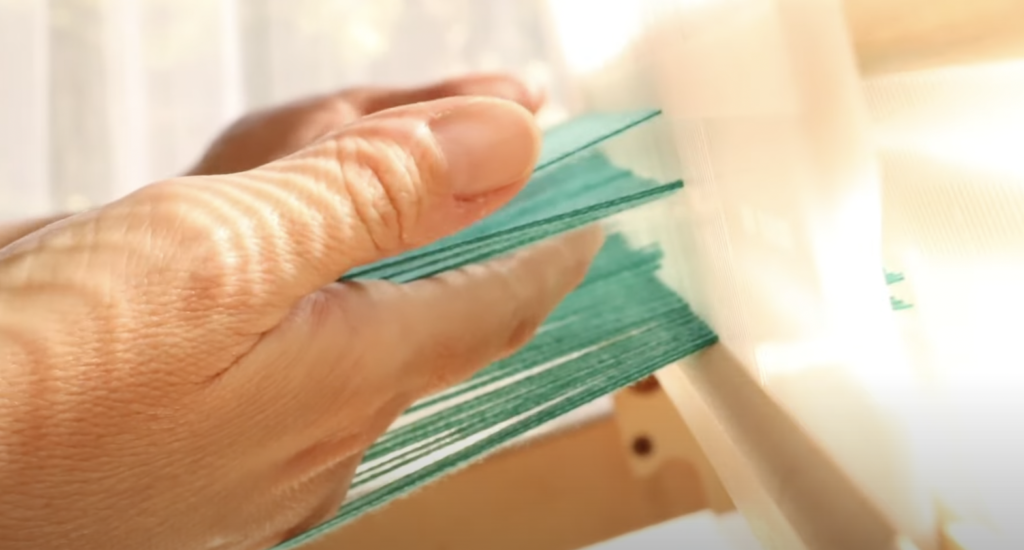
Place both hands, from either side of the warp, into the shed so that your fingers roughly meet around the middle of the warp.

Tilt your fingers slightly upwards as you pull your hands apart and out of the shed. You want your fingertips to “strum” the threads on the way out.

This is such a great technique for snapping threads into place with no ill effects on your warp. Give it a try!

If you would like to see this technique in action, check out this video:

You may have noticed the beautiful piece of weaving I have on the loom in these examples. You can find the PDF pattern for The Ripple Scarf in my Etsy shop. It’s a wonderfully luxurious scarf for rigid heddle weavers, you will love it!

I hope this article has been helpful to you, be sure to leave comments or questions down below, I love to hear from you.

Until next time…

Happy Weaving!

Filed Under: Free tutorial, Rigid heddle weaving, Tutorials, Weaving Tagged With: clear sheds, rigid heddle weaving, weaving hacks, weaving tips

How to use a metric weaving raddle

by Kelly 2 Comments

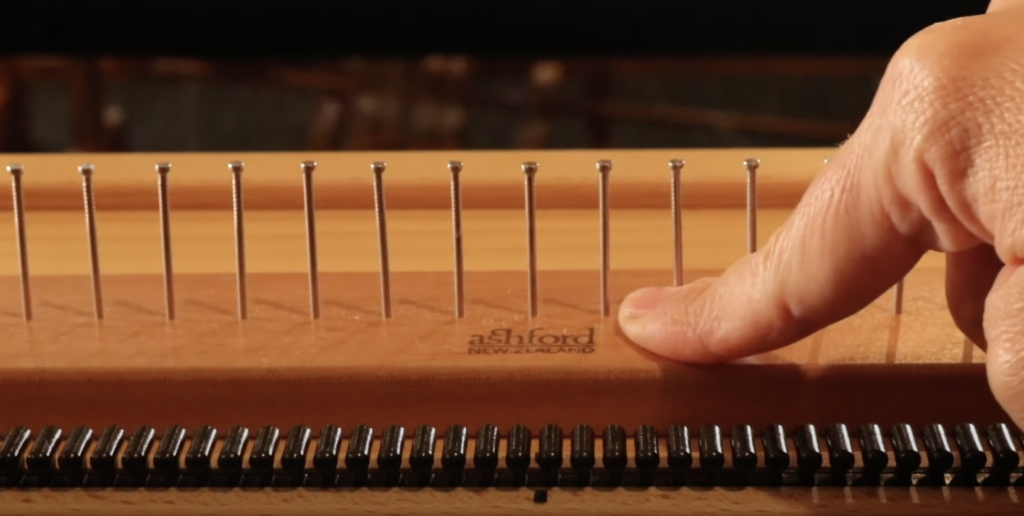
A raddle is a simple device that allows the weaver to space out warp threads in order to dress the loom at the desired warp width.

Most available raddles are based on imperial methods, so it can be a surprise when you find yourself the proud owner of a metric one!

*This post contains affiliate links. Please see my disclosure policy for further information.

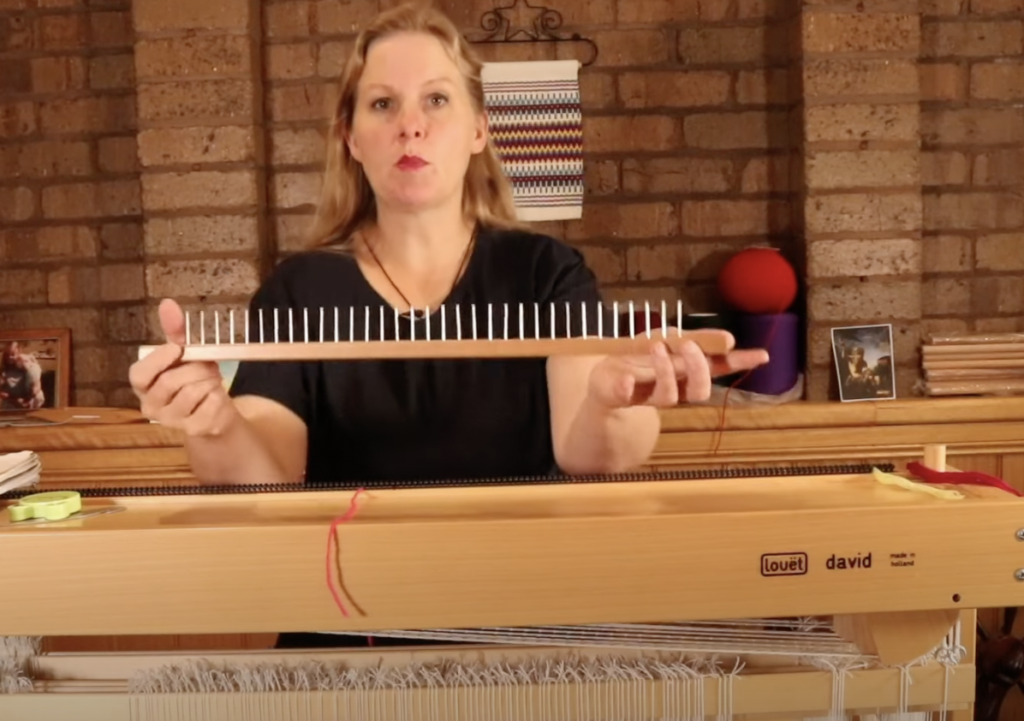
Louet looms, like my Louet David come with a metric raddle built into the top of the loom. The Ashford raddle kit, which I use with my Ashford table loom, has an imperial raddle.

Personally, I find the imperial measurements easier to use in weaving (even though I was brought up using the metric system) just because most weaving information is formulated for the imperial system.

The Louet David raddle and the Ashford raddle

Today I’m going to show you my process for easily spacing my warp threads in my metric raddle.

I have two yarns to use as an example –

  • 8/2 cotton
  • Fingering weight wool

The first step to starting a new project is to do the calculations. If you’re a rigid heddle weaver, I have a free printable calculations sheet, plus a short class on how to use it.

Included in your calculations are the width of the item on the loom and the ends per inch (sett) you intend to weave at – these calculations are particularly relevant to the raddle.

You can determine your ends per inch by doing a wrap test with your desired yarn. Then, if you are weaving plain weave, you simply divided the wraps per inch in half to get your ends per inch. This determines how close together your warp yarn will be on the loom.

The 8/2 cotton wrapped 28 times around the inch ruler. My equation then looks like this –

28 ÷ 2 = 14

Now, as a little disclaimer, and because I’ve used 8/2 cotton extensively in my own weaving, I want to point out that I would not normally weave at 14 ends per inch, it would be more like 20-24.

But let us use that figure of 14 for our example.

What it means is that, when my warp is spaced out in the raddle, ready to be wound onto the loom, I want to have approximately 14 ends of yarn in every 1 inch increment.

If I was using an imperial raddle with half inch dents, all I would need to do to space my warp is place 7 threads in every raddle space. Over 1 inch, that would give me 14.

But the metric raddle has many more, smaller spaces, so here is how we deal with that:

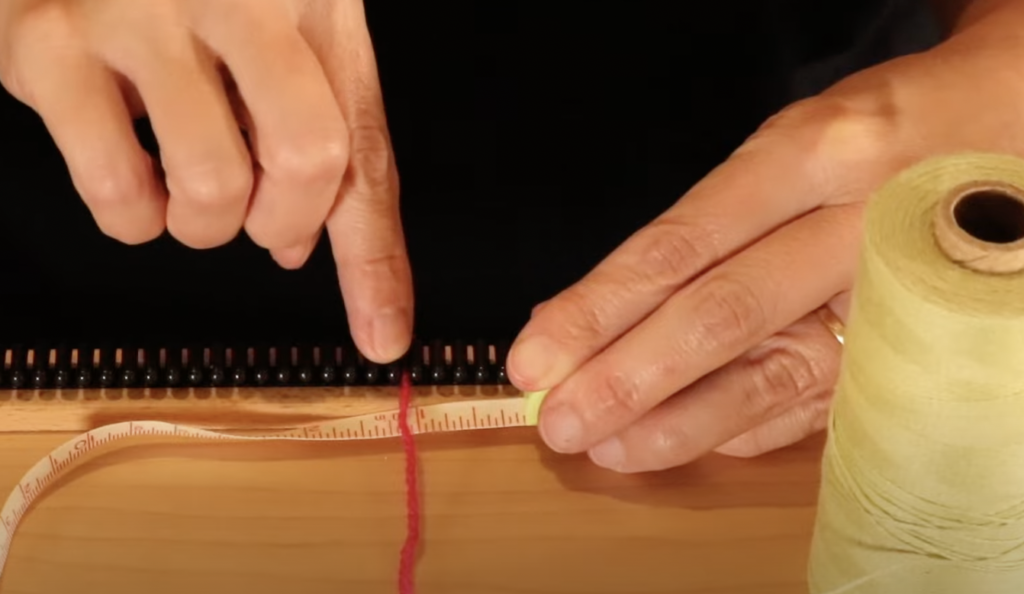
From the middle of the raddle, use a tape measure to measure out 1 inch along the raddle. Place a marker, like a piece of waste yarn to keep the spot for you.

Now you can count the number of raddle spaces that are within that one inch of measurement. I counted 5 spaces on my raddle. The next step is to be able to place my 14 ends into those 5 spaces.

You have probably figured already that it’s not going to be exact, but that is just fine. The raddle is to space our threads to the width we want our item to be on the loom, but that doesn’t mean that every raddle dent has to contain the exact same amount of threads. We have some wiggle room here 😉

You can either calculate the number of threads first, or you can “wing it”. I’ll explain both ways.

To calculate, I would divide 14 by 5, which gives me 2.8.

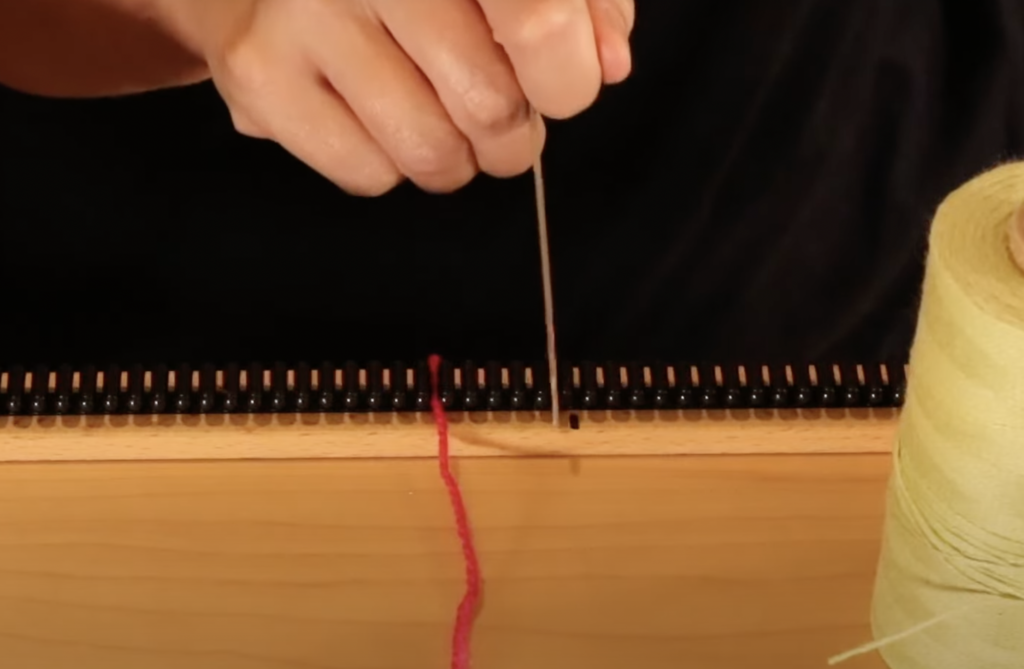
I cut some short lengths of my yarn to simulate an actual warp. I began by laying in 2 threads in each raddle dent (as the “2” in the 2.8 figure lets me know that at least 2 threads are needed in each dent initially).

After all my spaces were full, I had 4 threads left over. So, I started laying them in, one at a time, until I ran out. This meant that I had 3 threads in all the spaces except for the last one, which just had 2.

Doing this showed me an established pattern I could follow for accurately spacing my threads across the desired width. 4 spaces with 3 threads, 1 space with 2 threads. That becomes the spacing pattern to repeat over and over until all the threads are in the raddle.

Now we will look at the fingering weight wool. The wrap test showed me that I could wrap this yarn 18 times, so that is 18 wpi (wraps per inch).

Using a plain weave example again, I divide the 18 in half to get my ends per inch, which is 9. I need to do the same as before, make those 9 ends fit as evenly as I can into the raddle spaces.

9 ÷ 5 = 1.8

That tells me that I need at least one thread in every raddle space, and I’m going to have some left over to figure out afterwards.

Using the exact same method as before, I lay in those ends one at a time, then go back and lay in the leftovers. For this yarn, that meant that I had two in every space, except for the last space which only had one. So once again, I’ve established my pattern for spreading the yarn in the raddle.

Now, a couple of things I need to mention:

I did say earlier that you can use a “wing it” method, but this is best done in practice, with short pieces of your yarn as I have done here. That way you can visualise how the yarn will be laid out prior to actually doing it with a real warp. For a real warp, you really should have all of your calculations done first so there are no surprises.

To “wing it” you would simple cut your little lengths of yarn, as many as you need for the inch space (you get this figure from your “ends per inch”). Then you can measure out your inch on the raddle and just start laying your yarn pieces in, one at a time, continuing back and forth across the inch until they are all laid in, then count them up and see how many you end up with in each space.

The next thing I want to mention is odd numbers. I’m not a fan of using odd numbers in weaving, I always find it easier to round things up or down to simplify. An example is that for the fingering weight I used in this example, instead of 9 ends per inch I could have chosen to round up to 10.

This would simplify the raddle process, as I would be able to place 2 threads in every heddle space (given that there are 5 raddle spaces in and inch and 2 multiplied by 5 is 10 😊)

These are the kind of decisions I make in the planning and calculating process before I actually begin the warp.

If you would prefer to view this article in video format, please watch here-

I hope that this article was useful in showing you how you can use a metric raddle in a simple way. Feel free to leave your questions or comments down below!

Until next time…

Happy Weaving!

Filed Under: All about looms, Floor Loom Weaving, Free tutorial, Warping, Weaving Tagged With: David louet, floor loom weaving, imperial raddle, metric raddle, raddle

How to fix snags in your weaving!

by Kelly Leave a Comment

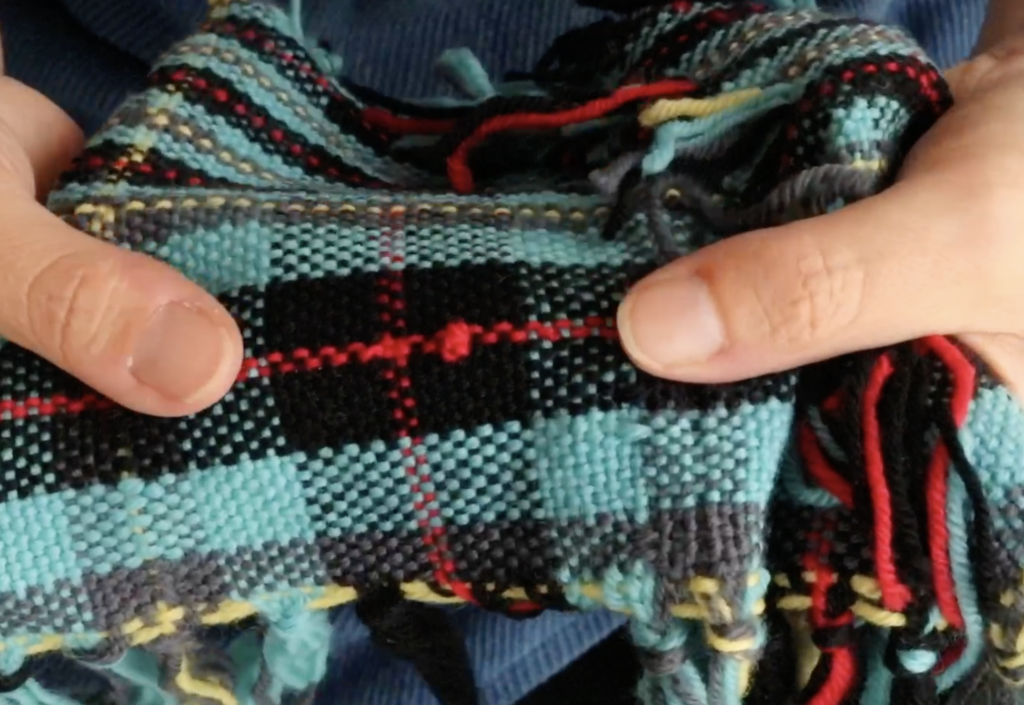
That awful moment when your lovingly hand woven piece catches on something sharp and pulls, leaving an unsightly loop.

I’m sure we’ve all been there and collectively cringed when this has happened.

Thankfully, the fix is a quick and easy one, once you know how.

*This post contains affiliate links. For further information, please see my disclosure policy.

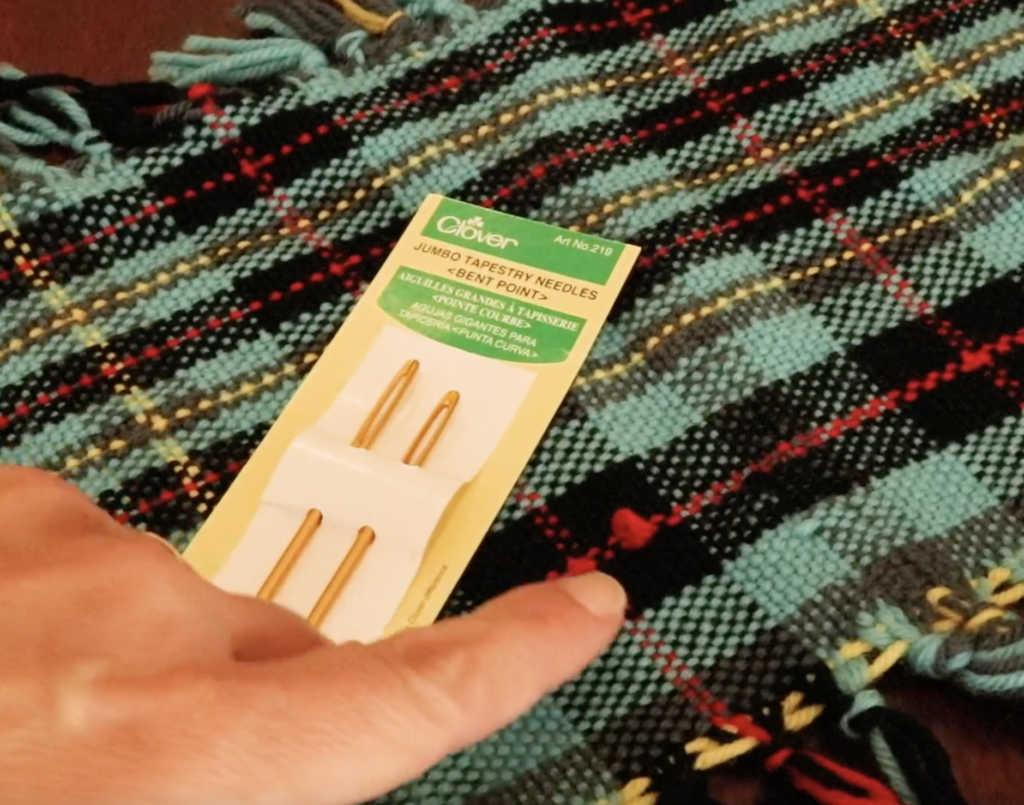
If you are interested in the fabric I’m working with here, it is a sample from my Plaid Double Width Ebooklet.

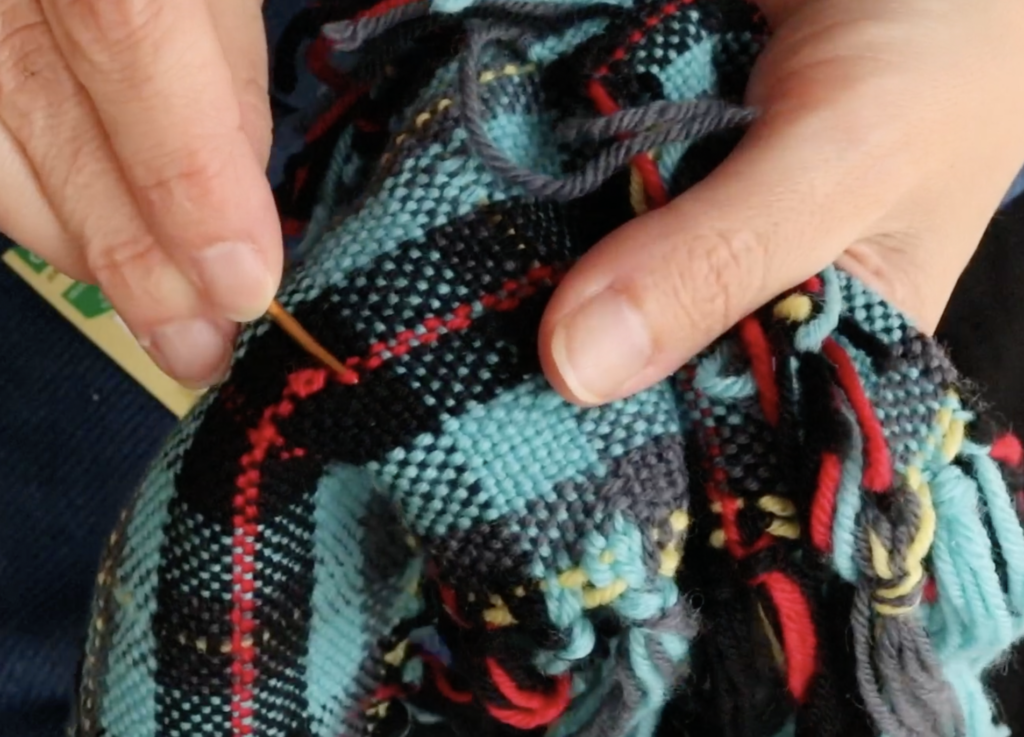
All you need is the snagged piece of cloth and a tapestry needle. My favourite tapestry needles are the Bent Tip Needles by Clover.

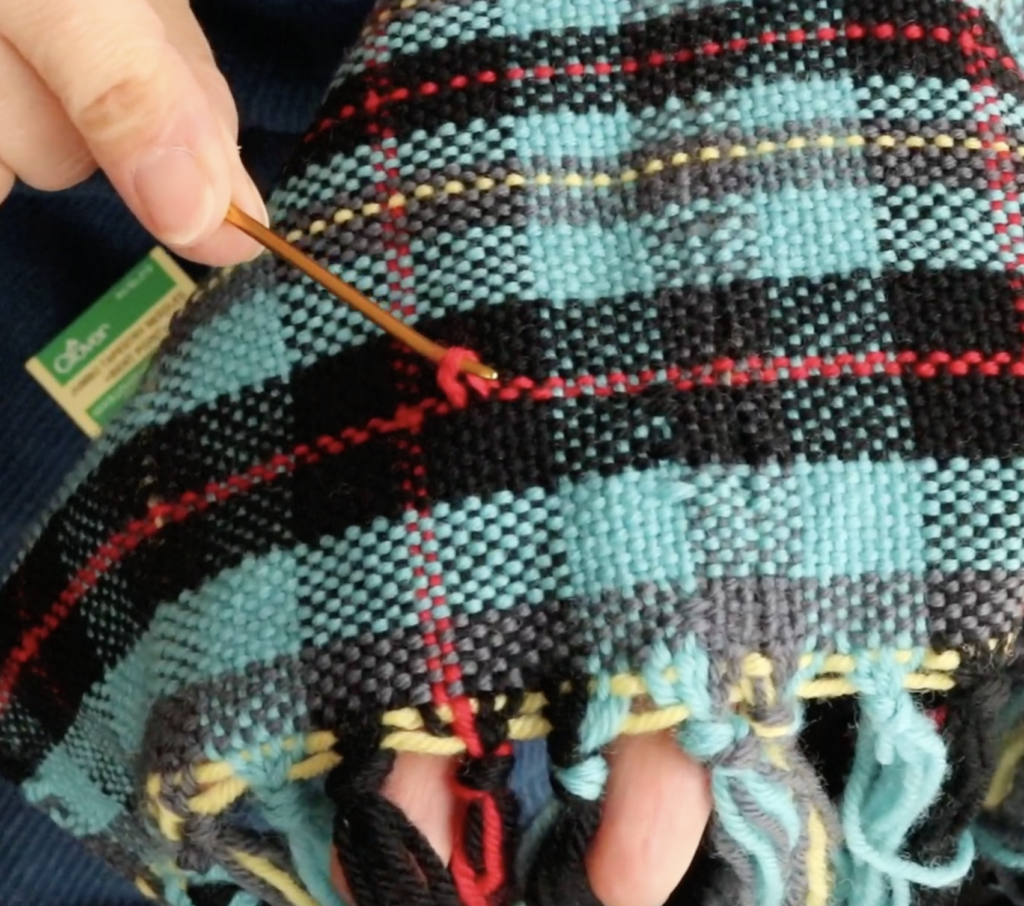
The first thing to do is to have a look at the loop so that you can determine which row of your weft has been affected. We want to work on this row to redistribute the slack that occurred when the weft was snagged. Have a look at the way the weft row is running. This will tell you the direction in which you need to work.

Here you can clearly see the loop and the way in which it runs through the cloth (horizontally, not vertically).

Using the tapestry needle, go to one of the weft stitches either side of the loop. It doesn’t matter which side at this point, as we’re going to be alternating.

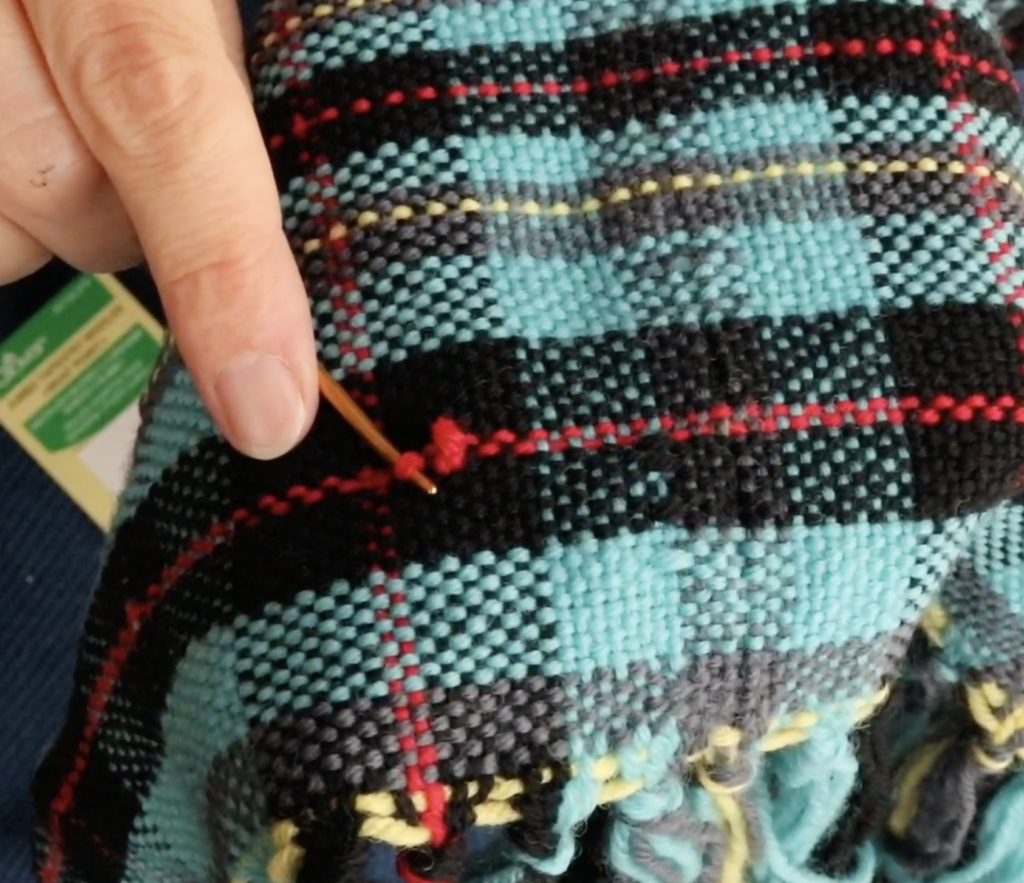
Pull up gently on the weft stitch so that some of the slack goes out of the loop and into this stitch.

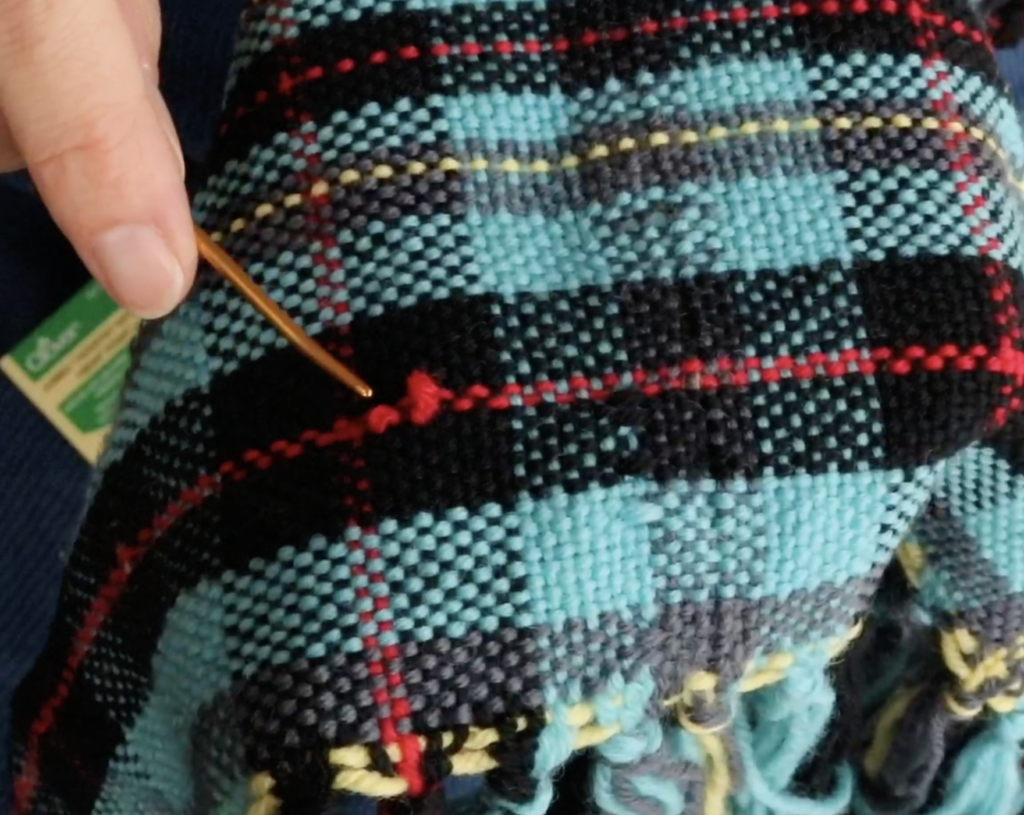
Now go to the opposite side of the main loop and repeat with the stitch next to it on this side. The aim here is not to pull up big loops, but just to begin to ease and decrease that main loop. The weft stitches you are working on will become looser as you do this – that is normal and expected.

Once you have redistributed some of the slack among the other stitches (I started by doing 3 stitches either side of the main loop) it is time to get a bit rough on the fabric.

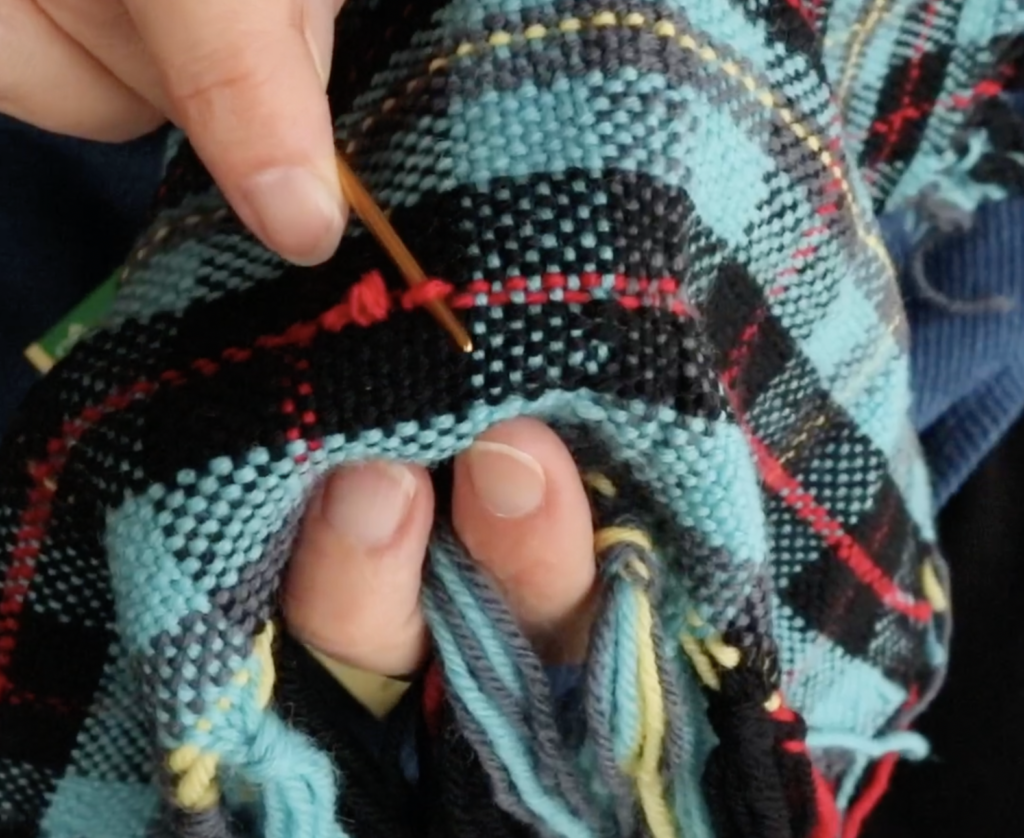
Holding onto the fabric either side of the main loop, pull it outwards, away from the loop. It is very helpful to use a “snapping” action for this. The idea is to shock the fabric and re-tension it in order to settle the weft back into the pattern it belongs in.

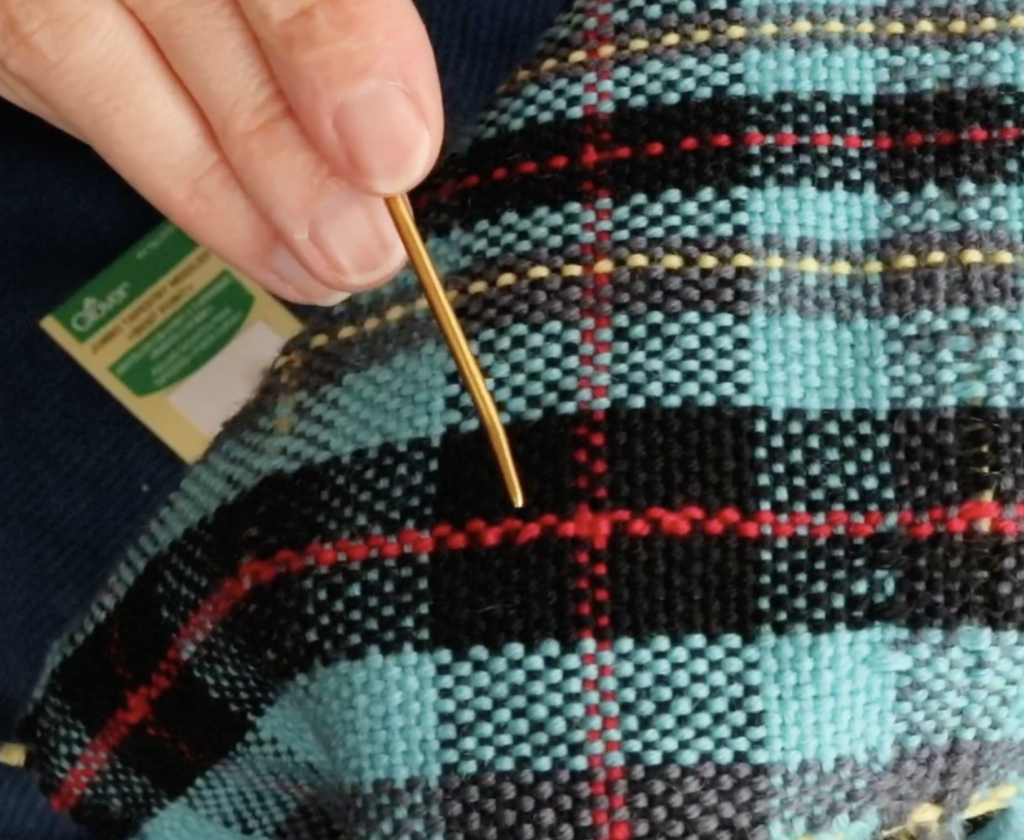
After snapping the fabric several times, you may see that the weft loop is now laying flat. If this is the case, your work here is done! However, if any of your wefts are still raised (either the loop itself or the weft threads around the loop) then more attention is required.

Simply go back in with your tapestry needle and gently repeat the process, including the fabric snapping afterwards.

By this time your wefts should all be happily settled back into place and laying flat. Ideally, it is now hard to see that there ever was a weft loop. I am pointing to my original loop in the photo above.

If you want to see this whole process in the form of a video, please enjoy watching this one:

I hope this tutorial was really helpful to you! Thank you for visiting me today and until next time…

Happy Weaving!

Filed Under: Free tutorial, Tutorials, Weaving Tagged With: fix snags, troubleshooting, weaving, weaving fix

Christmas Trees Weaving Tutorial on a Rigid Heddle Loom

by Kelly 2 Comments

With Christmas just around the corner, my head has begun swimming with festive ideas!

Christmas, as the song goes, “is the most wonderful time of the year” – at least I think so, I love to celebrate the birth of Jesus.

I also love the atmosphere, the colours, the change in mood to one of joy and relaxation. The excitement of finding the right Christmas tree and the wonderful scent of pine filling the house is a real highlight for our family.

You may have previously seen my Winter Trees Tutorial but I thought it was high time we do a good and proper Christmas Tree Tutorial.

*This post contains affiliate links. For further information, please view my disclosure policy.

This tutorial is inspired by the Russian Branoe technique and involves picking up threads with a pick up stick in front of the heddle on a closed shed. We then use a “pattern weft” to build up pattern as we weave through the rows. It’s a lot of fun and you can make some super cool characters and pictures.

The threading for the loom set up is just plain weave, and all patterning is done by picking up warp threads. There is no need for specialist knowledge, just a bit of patience!

You can choose to weave plain Christmas trees, or there is an option to “decorate” your tree at the end of the tutorial.

I used my rigid heddle loom to weave this on, but all you really need is a loom that is capable of tensioning a warp and opening 2 sheds. A frame loom would work, it would just be a bit more work for the weaver

If you find this technique interesting, I have plenty of other resources and tutorials for you to delve into:

Baubles and Candles

Little Trees

Exploring Branoe (Online weaving class)

Gift Boxes

Reindeer

Snowmen

You will find all the materials and instructions for the Christmas Trees in this downloadable, printable PDF. I recommend that you use this PDF in conjunction with the instructional Youtube video for best results. Click on “download” at the bottom of the file.

Christmas-trees-PDFDownload

The free video tutorial is available to view here-

I hope that this tutorial and pattern brings some Christmas cheer into your homes and lives!

Until next time…

Happy Weaving!

Filed Under: Free tutorial, Tutorials, Weaving Tagged With: christmas, christmas trees, weaving tutorial

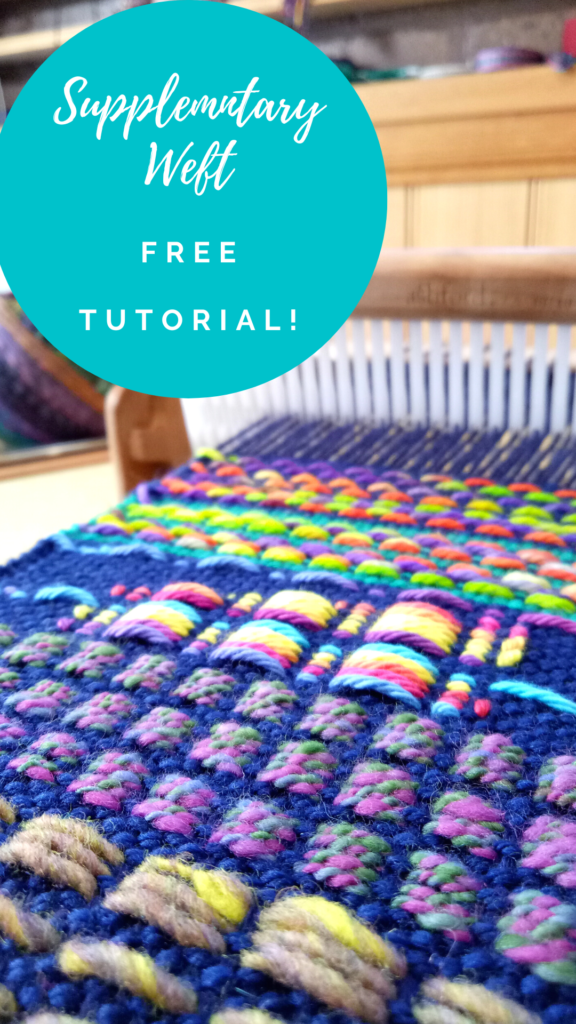
Supplementary Weft Tutorial

by Kelly 16 Comments

What is a supplementary weft?

It is simply a weft that is introduced to your weaving, in addition to your regular weft yarn, usually on a plain weave background.

This supplementary weft is often known as a “pattern weft”, which makes sense because it often creates a pattern (think overshot).

A supplementary weft will usually be thicker yarn than the plain weave or tabby yarn, which is normally the same thickness as the warp yarn.

*This post contains affiliate links. For further information, please see my disclosure policy.

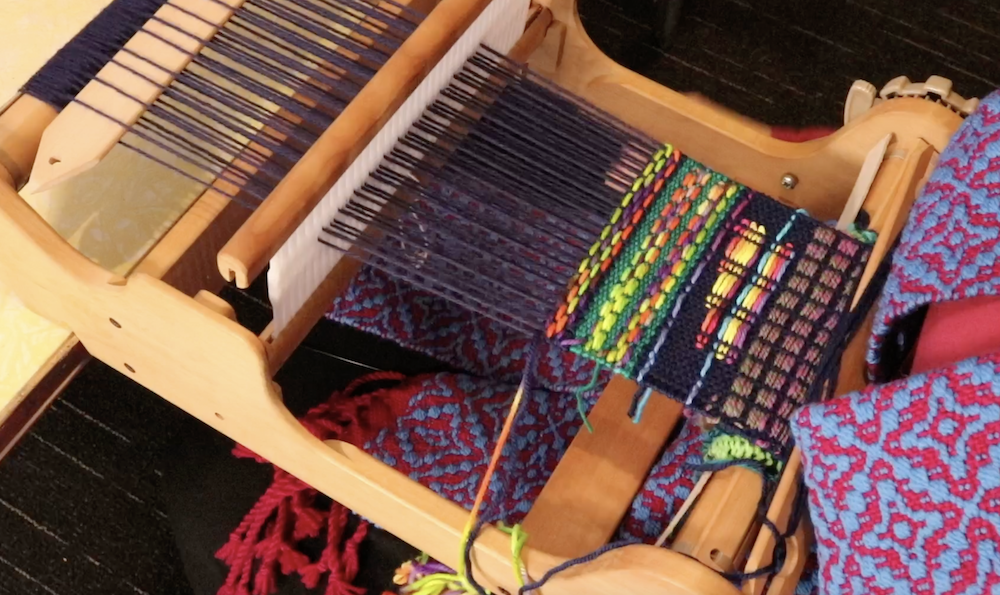
This technique is a great way to use a handspun or novelty yarn to really highlight the beauty of the yarn and is also an excellent way to use up leftovers.

A pick up stick is usually used with a supplementary weft – this helps to make a pattern through the use of weft floats.

Using supplementary wefts is a really versatile way to showcase pretty yarn and weave a truly unique piece. I love to design on the loom, trying out different pick ups and different yarns, it’s so much fun and it suits my creative preferences to not have to plan ahead too much.

To weave a sample like I have in the tutorial, you will need the following materials:

  • A rigid heddle loom (I used my Sampleit loom)
  • A 7.5 dent heddle (of course, you can adapt this by using a different sized heddle with a different yarn weight)
  • Threading/reed hook
  • A stick shuttle or several (use one that is the right size for your loom)
  • A pick up stick (again, use the size that is suitable for your loom or the width of warp you have on)
  • Something to separate your warp (cardboard stick separators, thick craft paper on a roll etc)
  • Scissors

Yarn Requirements:

I’m not giving exact yarn amounts, obviously you need more yarn for your warp and tabby (plain weave) than you do for the supplementary weft, but just experiment with what you have.

For my warp I used Bendigo Woollen Mills Luxury 8ply (this is a dk weight wool) in Navy. I used this same yarn for the majority of my tabby.

For supplementary wefts I used Noro, handspun and some of my hand dyed wool and cotton – most of these were around a dk to aran weight.

Sampler size suggestion:

When I warp for a sampler like this one, I like to warp around 8-10 inches in width and at least 30″ in length (total length of warp). For my 7.5 dent heddle this was 47 ends.

Weaving and Pick Up Sequences:

You will find all the information you need to follow the video sampler in this downloadable, printable PDF.

Supplementary-weft-youtube-tutorialDownload

There are three ways to use this tutorial. You can either:

  1. Warp your loom and then follow my examples exactly according to the video and PDF.
  2. Warp your loom and follow some of my examples to gain confidence, then try some of your own designs.
  3. Use my designs as inspiration but go your own way by using the techniques and ideas to create your own unique fabric.

Whatever you decide to do with this tutorial, don’t forget to relax and have fun – that’s what it’s all about!

The 45 minute video tutorial is available here-

As always, comments and questions are very welcome in the section below.

Until next time…

Happy Weaving!

Filed Under: Free tutorial, Inspiration, Rigid heddle weaving, Rigid Heddle Weaving Patterns, Tutorials, Weaving Tagged With: rigid heddle weaving, supplementary weft, weaving tutorial

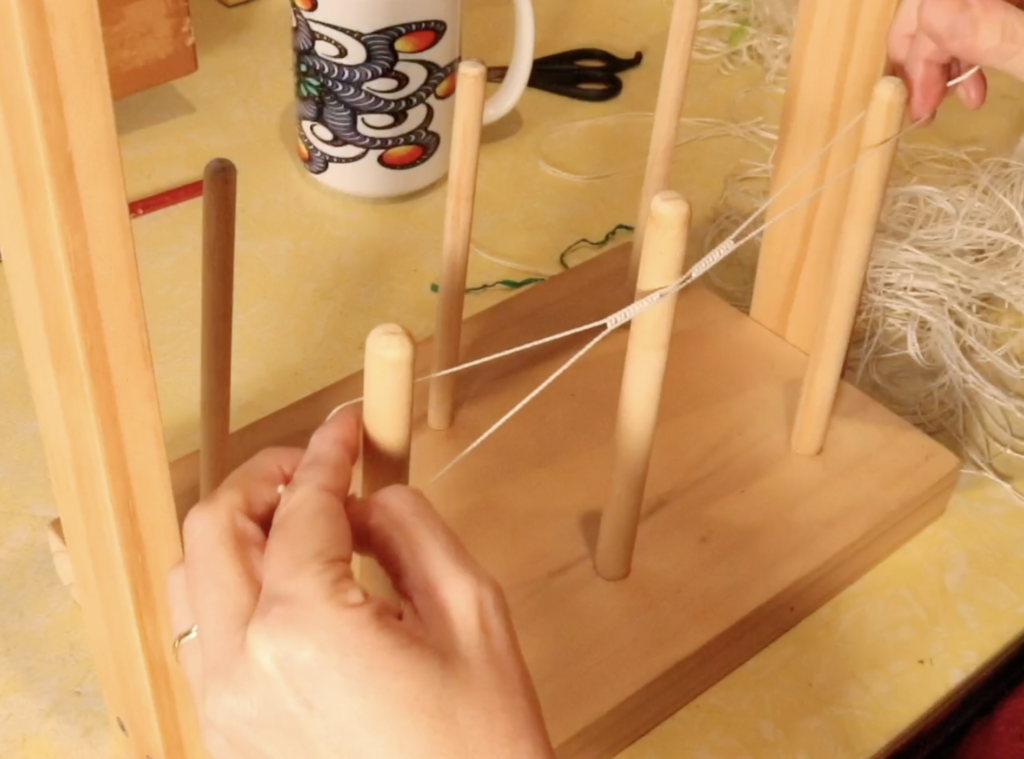
How to organise string heddle bundles

by Kelly 2 Comments

String heddles are commonly made of texsolv nowadays, making them very strong and simple to use.

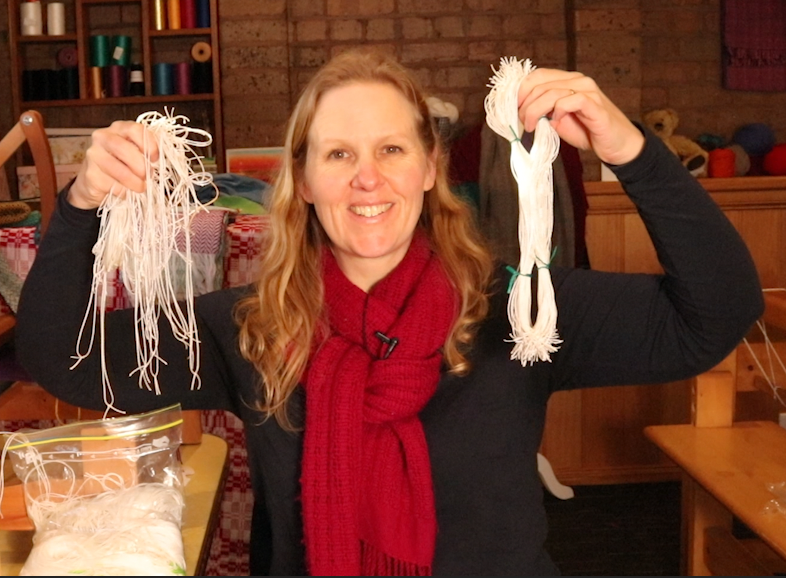
String heddles will generally arrive tied in neat bundles when you purchase them brand new. These bundles are very orderly and can just be slipped right on to your shafts. They can then be cut apart and ready for use

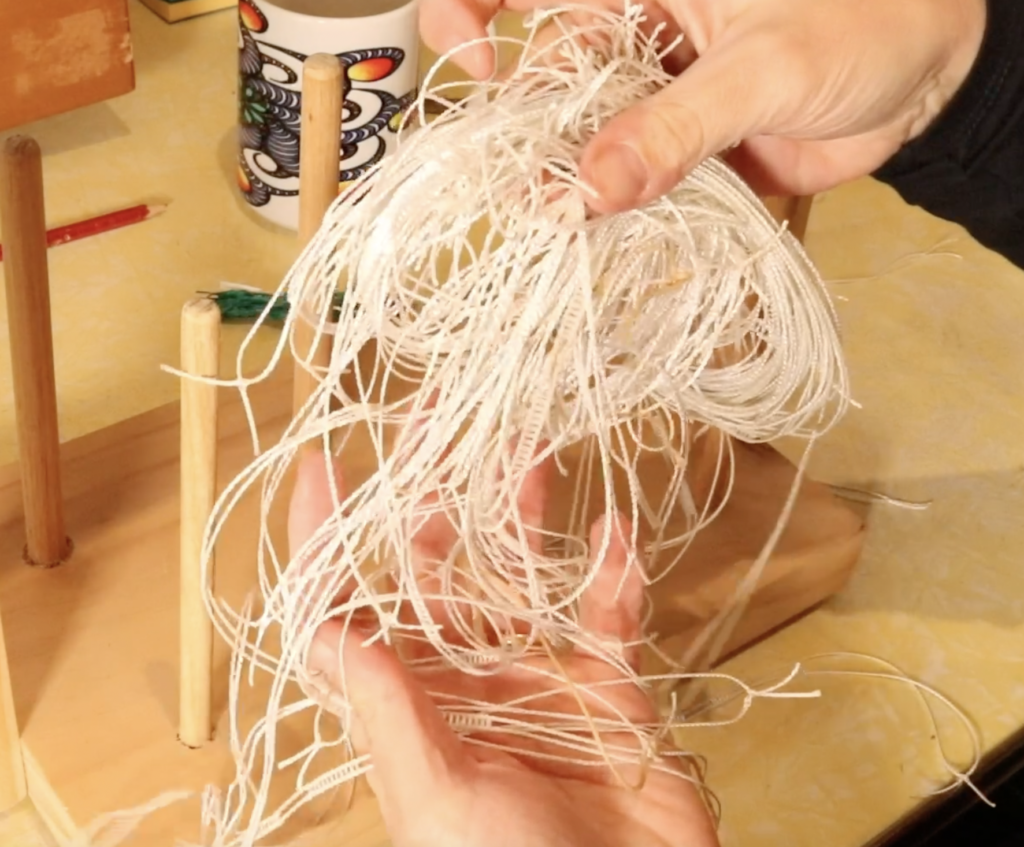
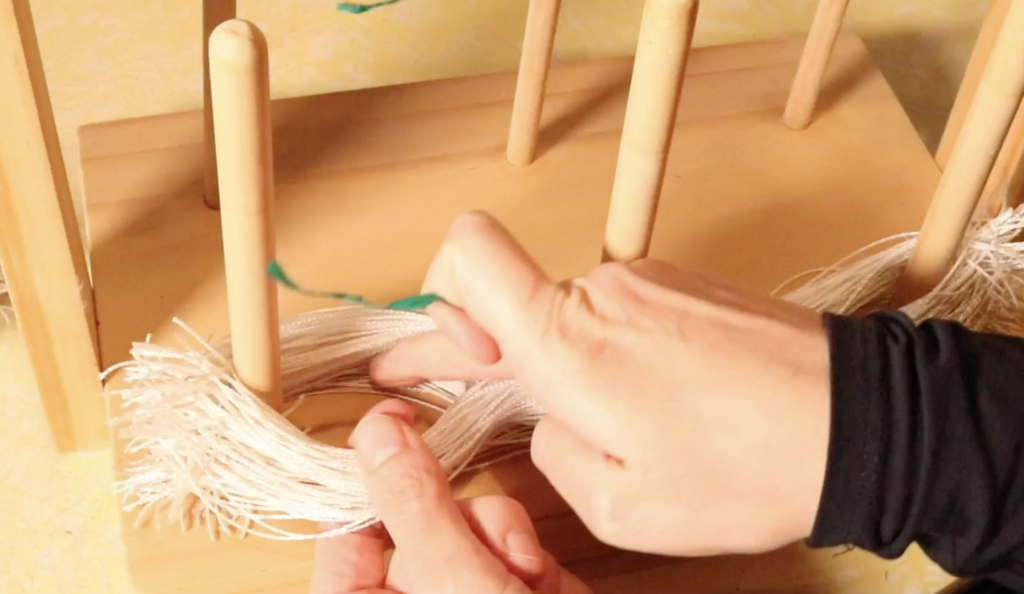
But there are times when your string heddles may be less than organised. I call this “string heddle spaghetti!” Having your string heddles in a pile and out of order is not ideal (not to mention a bit of a time waster) but there is a simple way to get them organised into lovely neat bundles once more.

*This post contains affiliate links. For more information, please see my disclosure policy.

Once you know how to make these bundles, you can continue to use the technique to ensure that your string heddles are always in order and ready to use.

I recently purchased some used string heddles, and many of them arrived packed into a bag singly and without order. Time to make some bundles!

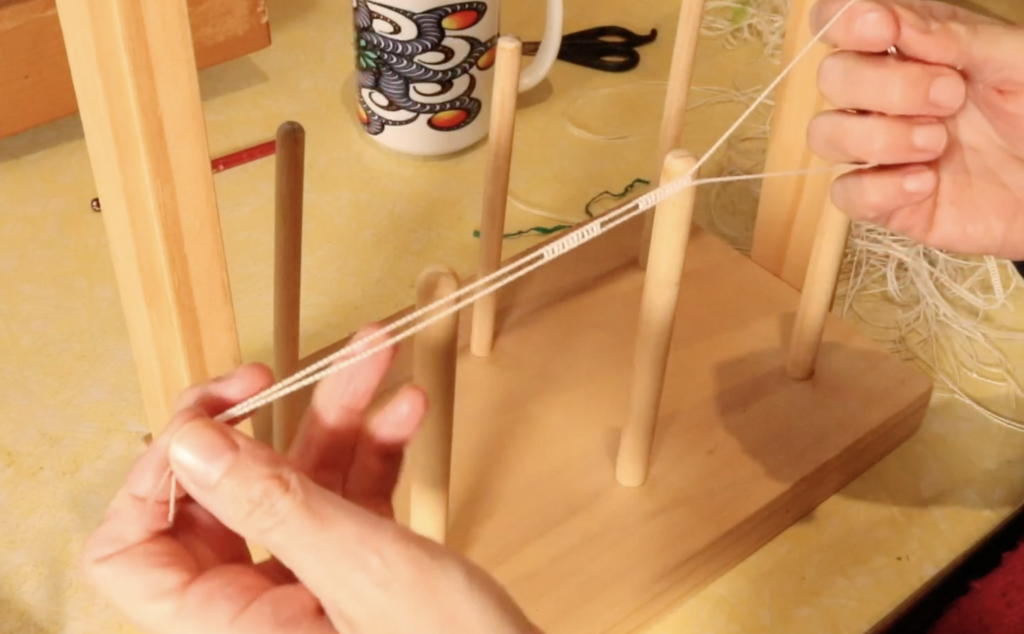
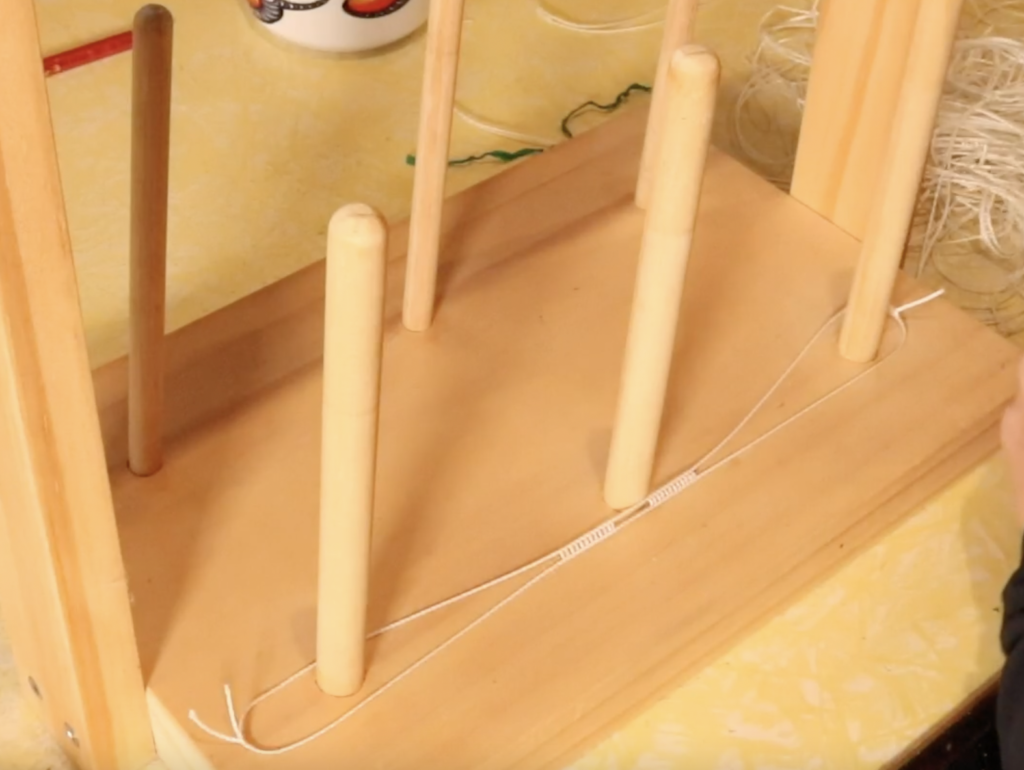
I use my warping stand (if you’re interested in making your own, check out this tutorial). A raddle also works really well if you have one. Two warping pegs, clamped to a table would also work. Even a box with 2 chopsticks is a suitable alternative!

You also need some twisty ties. If they are a different colour to your string heddles, that improves visibility, but if they are the same colour, don’t worry, you can still use them.

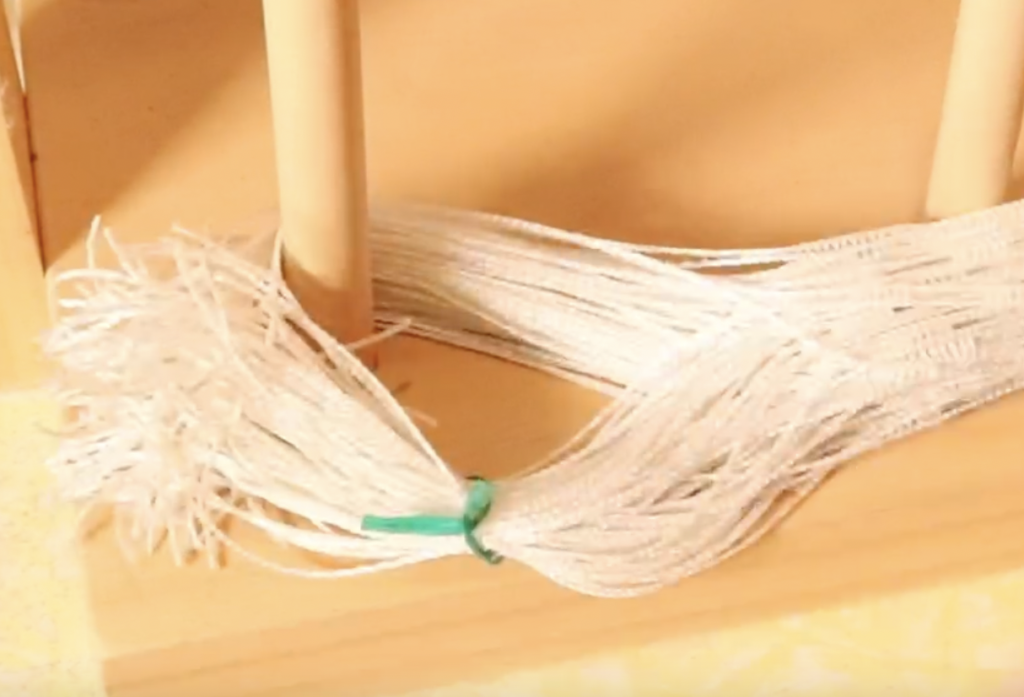
If your string heddles are already separated, grab one and have a look at it. There should be 2 large loops on either side that you can hold on to. There should be the eye of the heddle in the middle of these loops. When you hold the loops, you want the whole string heddle to lay flat – no twists!

Keeping the string heddle flat, place one of the looped ends over the left peg (or raddle nail or chopstick).

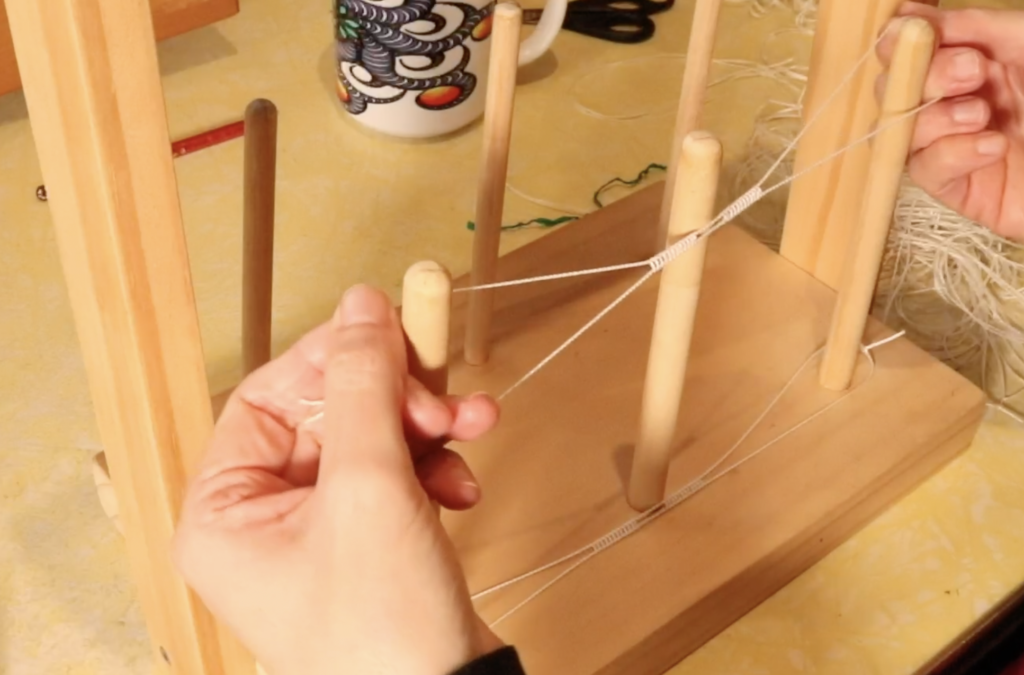
Place the loop at the other end over the right hand peg. If you have a central peg like I do, it doesn’t matter which side of it the eye of the heddle rests against. It is best however, to have it rest on the same side of the central peg for each heddle, to keep the laid out order the same.

Drop the loops so that the string heddle rests on the base of your pegs.

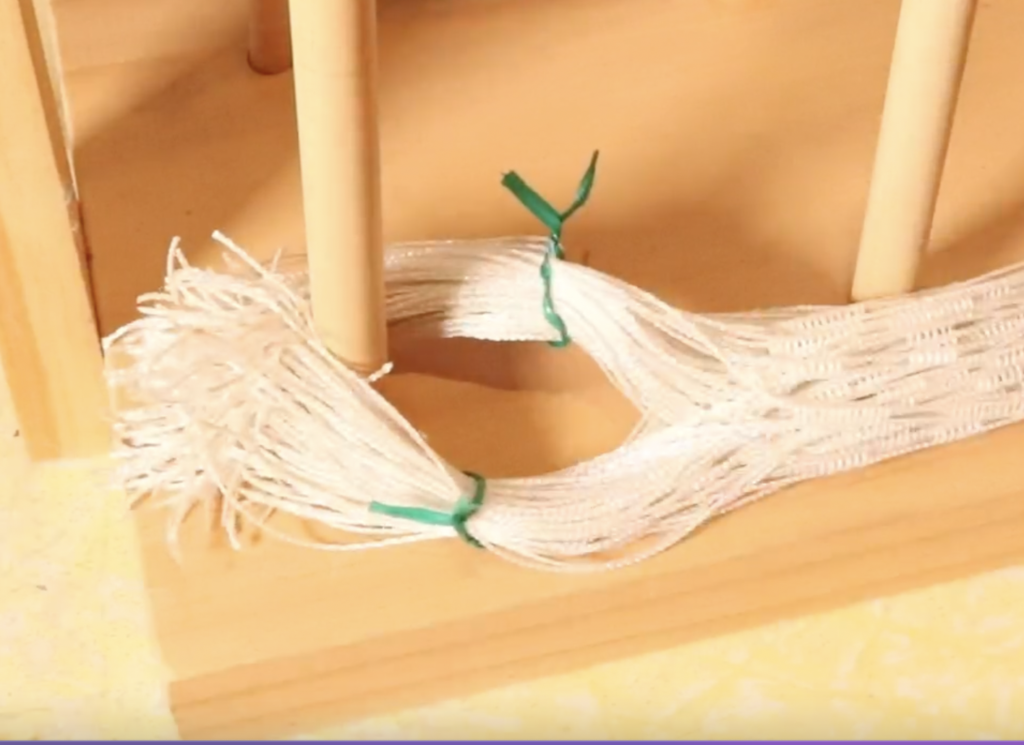
Grab your next string heddle and repeat the same action of holding the loops and placing them on the pegs. Pretty simple? 👍 I like to keep going until I’ve laid out around 100 heddles.

When you have enough to make a bundle, take a twisty tie and take one side of the larger loops on one end of the bundle. Because of the way the heddles are laid out, you will easily be able to see the separated sections.

Take the tie and twist it around this section, twisting the ends of the tie together to secure it.

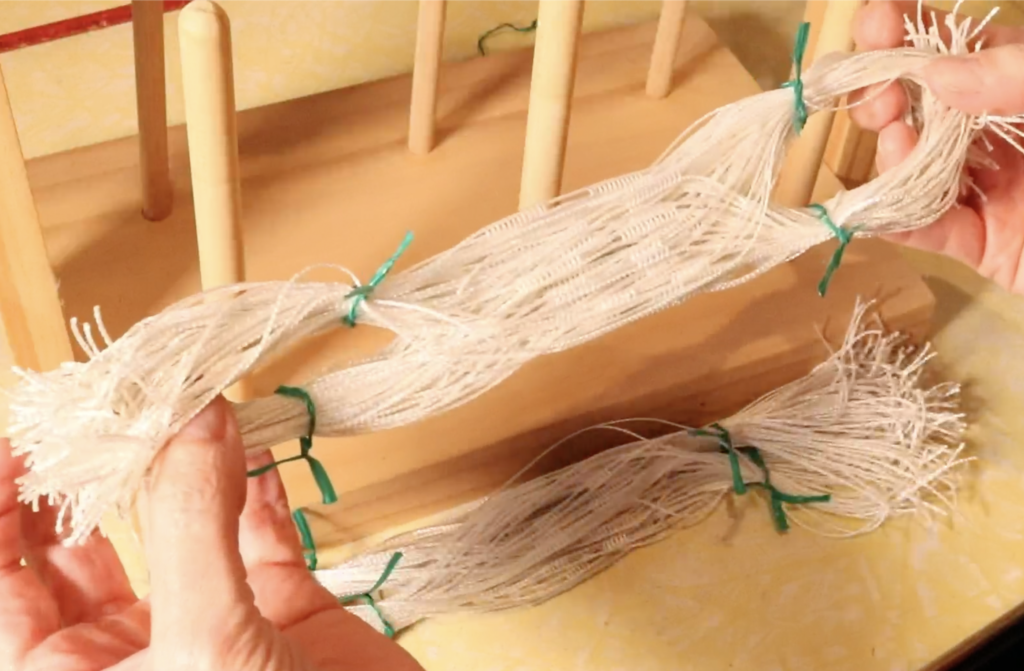
Take another tie and do the opposite side of the same loop, securing it in the exact same way. Do the same for the loop at the other end of the bundle so that you have 4 ties total.

Slip your bundle off the pegs and it’s ready to use!

If you would like a video tutorial on how to make bundles, check out the one below:

I hope this tutorial was useful to you, please leave your questions or comments down below.

Until next time…

Happy Weaving!

Filed Under: Floor Loom Weaving, Free tutorial, Table loom weaving, Tutorials, Weaving Tagged With: floor loom weaving, string heddles, tutorial

1/5 Warp Floats on a Rigid Heddle Loom

by Kelly 6 Comments

A weaving float is not always viewed as something desirable. But that is usually when it’s unintended or unplanned. Floats can actually be utilised in many ways, particularly for texture and pattern weaving.

So, what is a float? Well, if you think about it, weaving is made up of floats. The plain weave structure or interlacement occurs when the threads go over/under/over/under each other. We wouldn’t generally think of this interlacement as being comprised of floats, but that’s what it is, just really short floats.

*This post contains affiliate links. For further information, please see my disclosure policy.

A float can be described as any thread travelling over another. Most of the time when we refer to floats, we are talking about a thread travelling over more than one other, often a group.

A float can occur either horizontally or vertically. A horizontal float is known as a weft float. A vertical float is known as a warp floats. Today’s tutorial is specifically for warp floats.

In case you need a visual reference on the difference between a warp and a weft float, The Heart Scarf Project uses weft floats (note that the grey weft floats are horizontal).

Weft floats

Today’s tutorial is specifically for rigid heddle weavers.

What you will need:

  • A rigid heddle loom (I used my Ashford 24″ rigid heddle loom. )
  • A pick up stick that is wider than the width of your warp
  • Yarn that is appropriate for the project you’re weaving and the heddle size you’re using. In this tutorial, I am playing around with a sampler and used a dk weight rainbow dyed cotton in the warp and a dk weight navy wool weft. My heddle size was 7.5dpi.

We begin by placing the heddle in the DOWN position so that all slot threads are raised. It is the slot threads that we want to pick up, not the hole threads. You can consider the hole threads as already picked up, by being held in the holes.

If you have not used a pick up stick before, don’t worry, they are very easy to get started with by following some very basic rules. If you want to gain some familiarity with how you might use a pick up stick, check out this video before going through the rest of the tutorial:

If you specifically would like to see what a 1/1 pick up looks like (which is what I use for this tutorial), I demonstrate it in this video at around the 10 minute mark 😉

Once your pick up stick is in place you are ready to start weaving the sequence. Your shuttle should be filled with your weft yarn. In my case, I’m using a solid, dark weft to contrast with the colourful warp.

Place the heddle in the DOWN position, throw your shuttle, then beat.

Change to the UP shed and slide your pick up stick forward to sit behind the heddle. There is no need to turn your pick up stick on edge, and in any case it would be very difficult to do so with the up shed being so firm. You can see the pick up stick right against the back of the heddle in the above picture.

Throw your shuttle and beat. Slide the pick up stick to the back of the loom.

Change to the DOWN shed. When you enter the shed with stick shuttle this time, you will need to manually go around the warp edge thread – it won’t catch on it’s own. This is really common when you move away from plain weave. If you need more information on the concept of manually going around the edges, I have a detailed article here.

Throw your shuttle and beat.

Change to the UP shed. Bring the pick up stick forward and lay it flat at the back of the heddle once more. Throw the shuttle and beat. Slide the pick up stick back.

Change to the DOWN shed. Again, you will need to catch the edge warp as you enter the shed. Throw shuttle and beat.

By now you will notice the vertical floats forming and getting longer. Really long floats are not practical, as they will catch on things, so it’s time to halt the float in it’s tracks with a tie down thread.

Change to the UP position. No pick up stick this time! Throw the shuttle and beat.
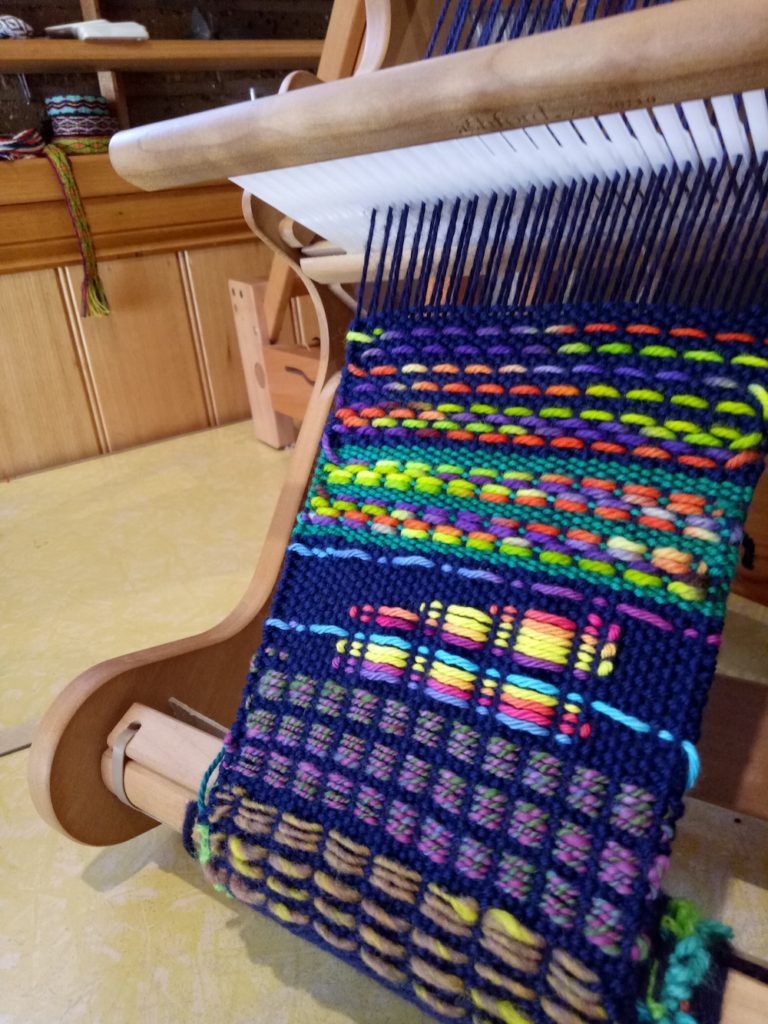
That is one complete weaving sequence. If you want to continue weaving the pattern, you go back to the beginning and work through the steps again.

If you would like the pick up and weaving sequence in a printable format, please click on the download button.

15-warp-floats-Download

If you would like to see this tutorial in video format, I have you covered!

If you want to explore floats further, I have a lot resources to help (too many to list here!) that you can find here on my blog or Youtube channel.

I also want to recommend Jane Patrick’s The Weaver’s Idea Book. It has a HUGE section on weaving warp and weft floats that you will find very instructive and inspiring.

I hope this was helpful to you, be sure to leave any questions or comments down below!

Until next time…

Happy Weaving

If you enjoy my free content and would like to leave a donation in appreciation, please click here. Thank you for your generosity!

Filed Under: Free tutorial, Rigid heddle weaving, Tutorials, Weaving Tagged With: floats, pick up sticks, tutorial

  • Page 1
  • Page 2
  • Page 3
  • Interim pages omitted …
  • Page 6
  • Go to Next Page »

Primary Sidebar

Categories

Archives

Meta

  • Log in
  • Entries feed
  • Comments feed
  • WordPress.org

Copyright © 2025 Kelly Casanova Weaving Lessons on the Foodie Pro Theme