• Skip to main content
  • Skip to primary sidebar

Kelly Casanova Weaving Lessons

  • Hi! I’m Kelly!
    • Disclosure
  • Online Weaving School Class Index
    • Common account issues
    • Common technical issues
    • What do I get with a membership?
  • New to rigid heddle weaving? Start here!
    • Never heard of the rigid heddle loom?
    • How to weave neat edges on the rigid heddle loom
    • Rigid heddle weaving
    • Rigid Heddle Weaving Patterns
  • Patterns
  • Subscribe

tutorial

Krokbragd Reindeer Tutorial

by Kelly 2 Comments

It’s that wonderful time of year again, when thoughts start turning to festive project and gift ideas.

A number of years ago I released a How to weave Reindeer on a rigid heddle loom on Youtube and it has proved to be very popular! In that video we use pick up sticks in front of the heddle to achieve the shapes we need to build some little reindeer.

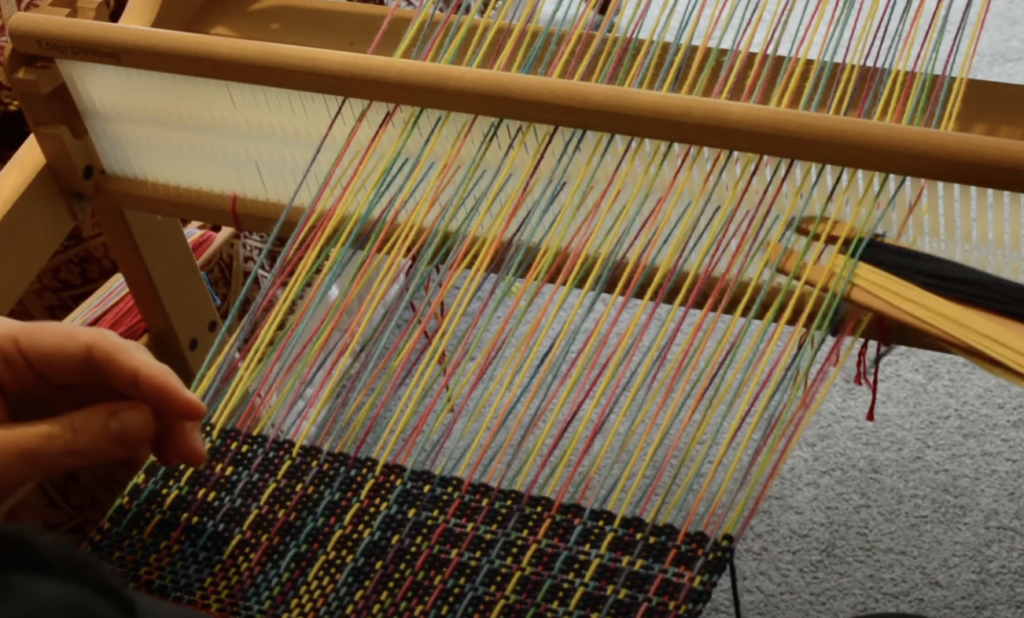
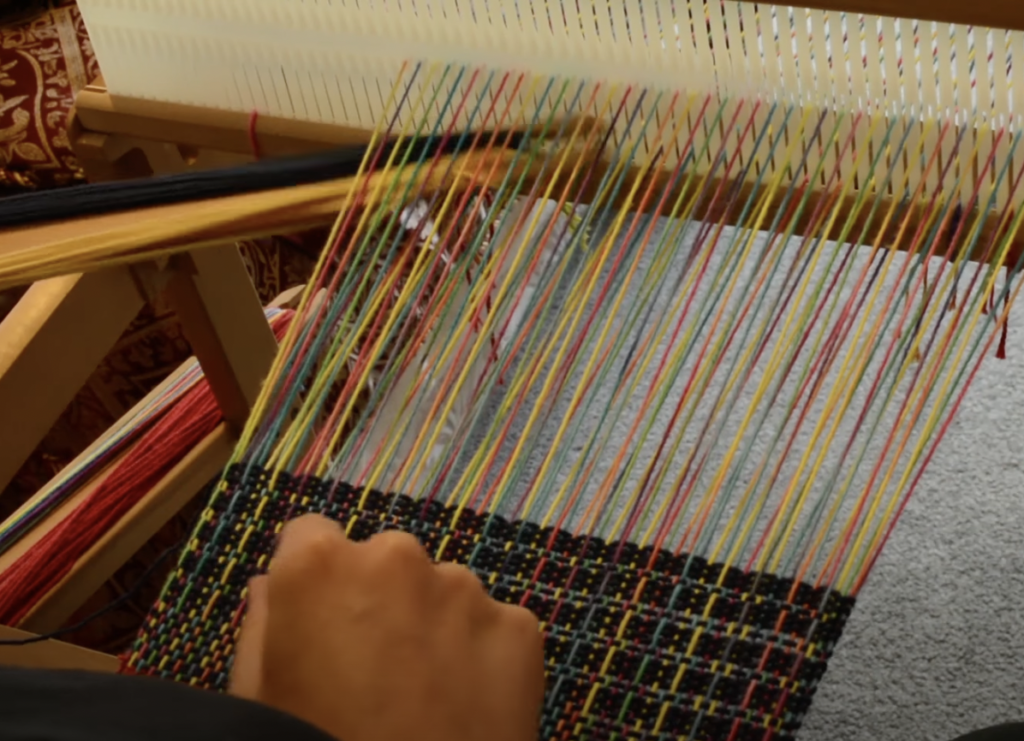
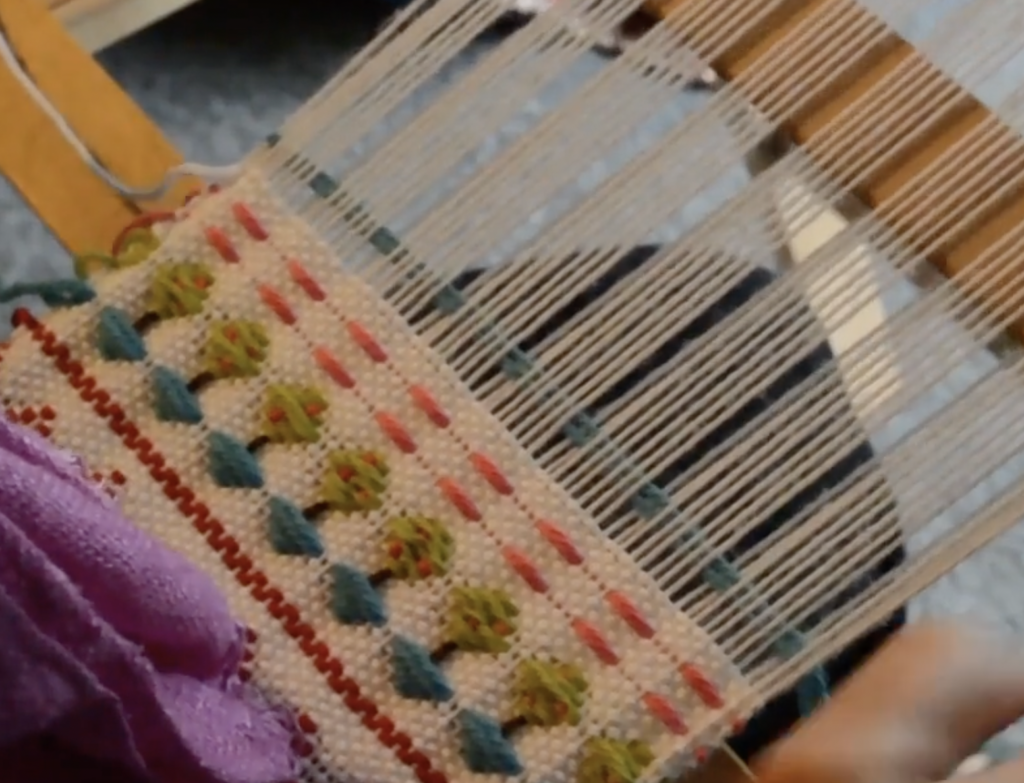
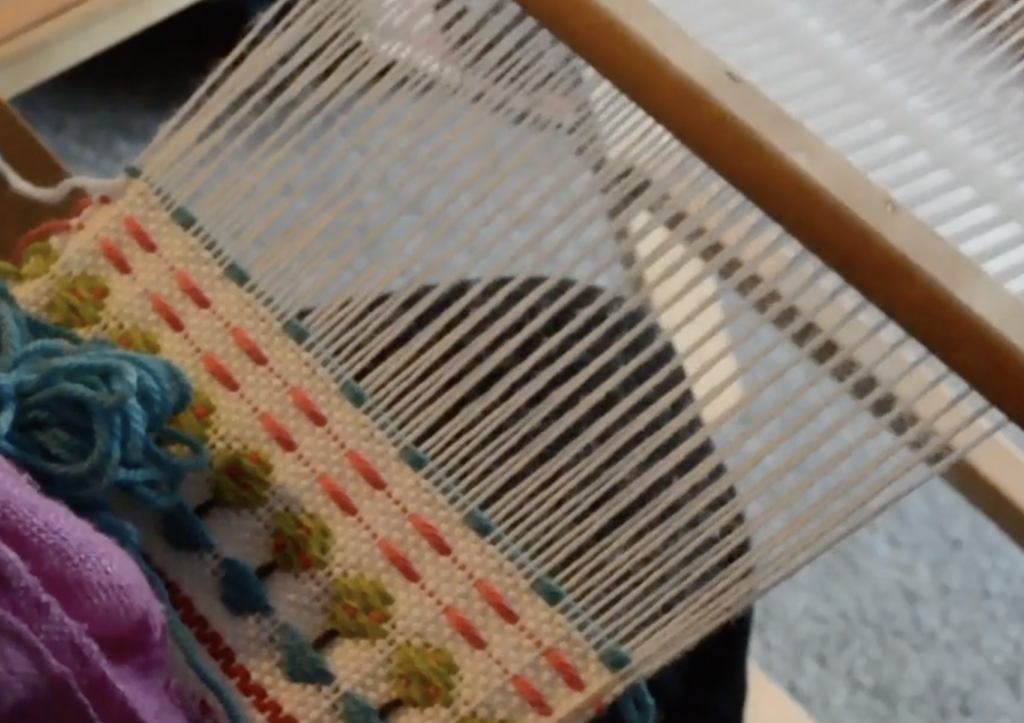
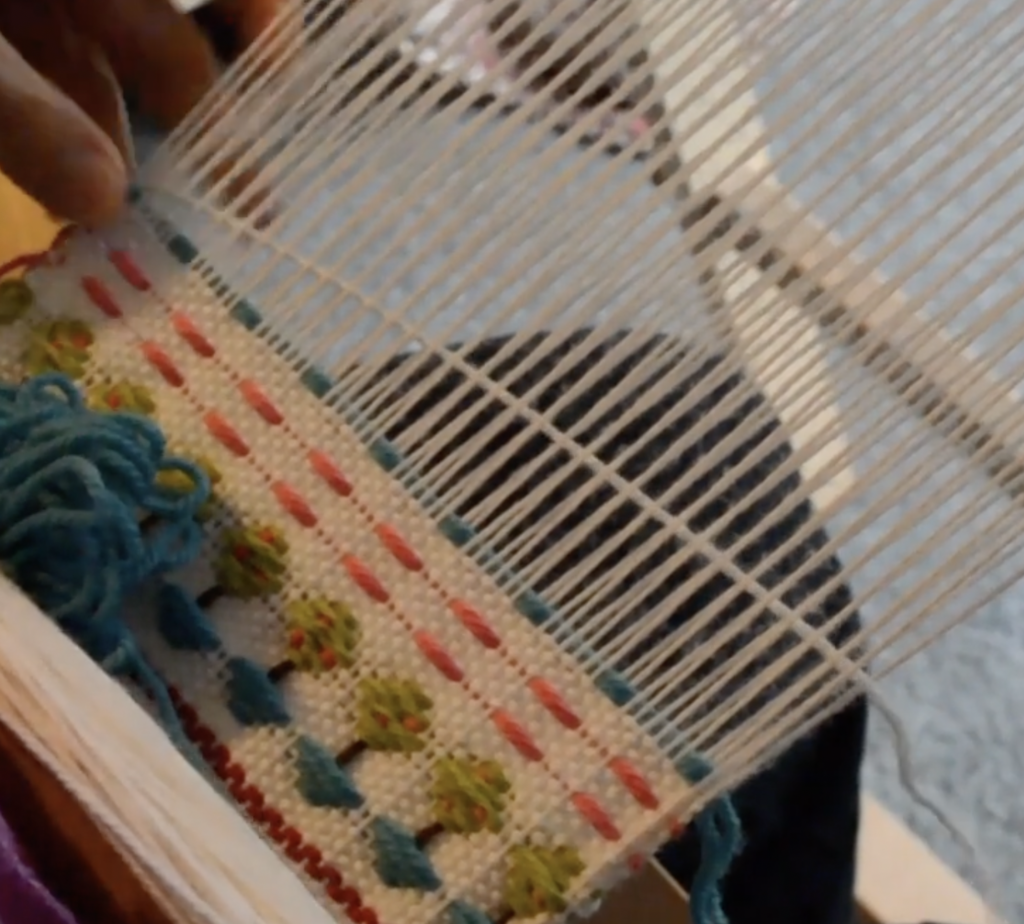
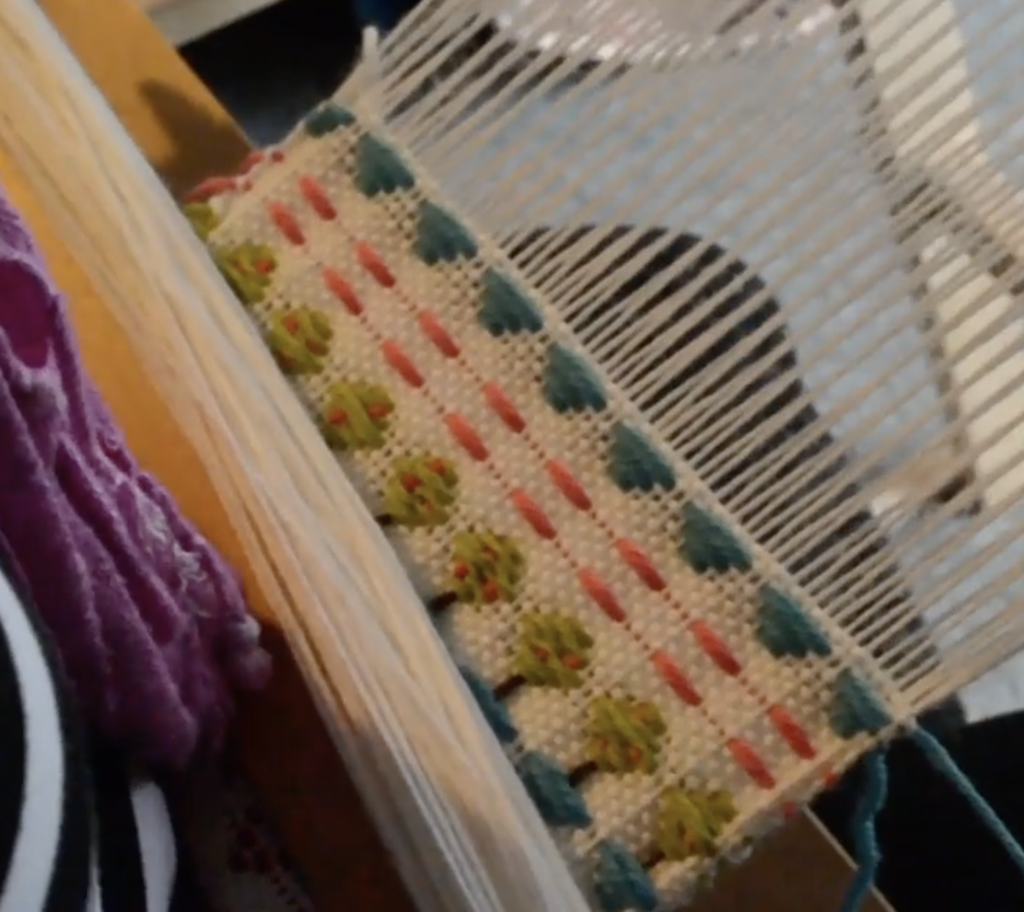
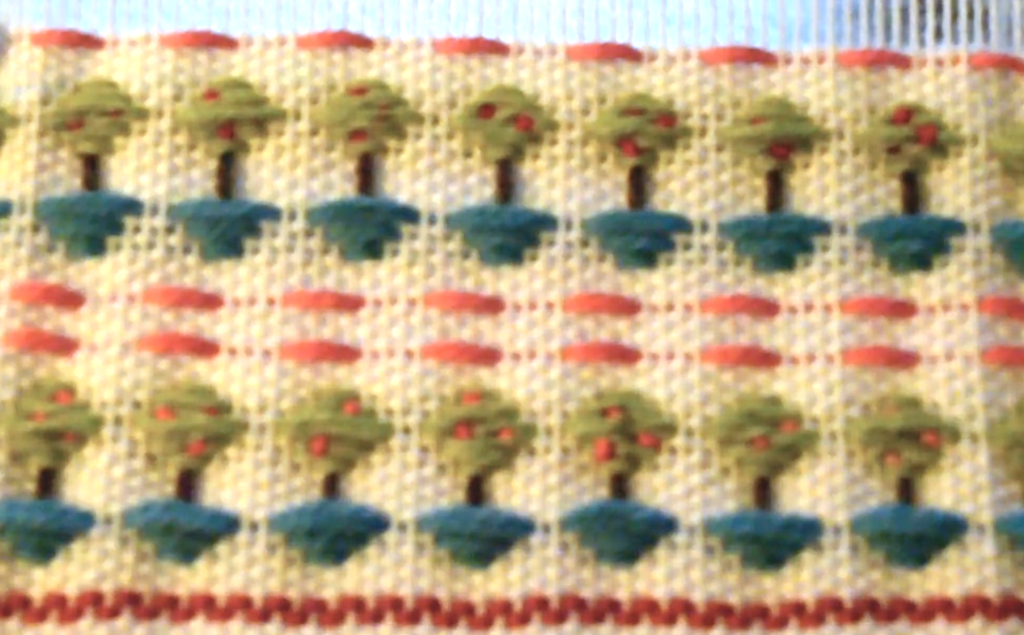
For my Christmas video this year, I decided to again weave reindeer but use a different weave structure for a different look. I already had my Sampleit loom warped for a krokbragd sampler so I set about designing some cute reindeer ensconced in a lovely Fair Isle inspired border.

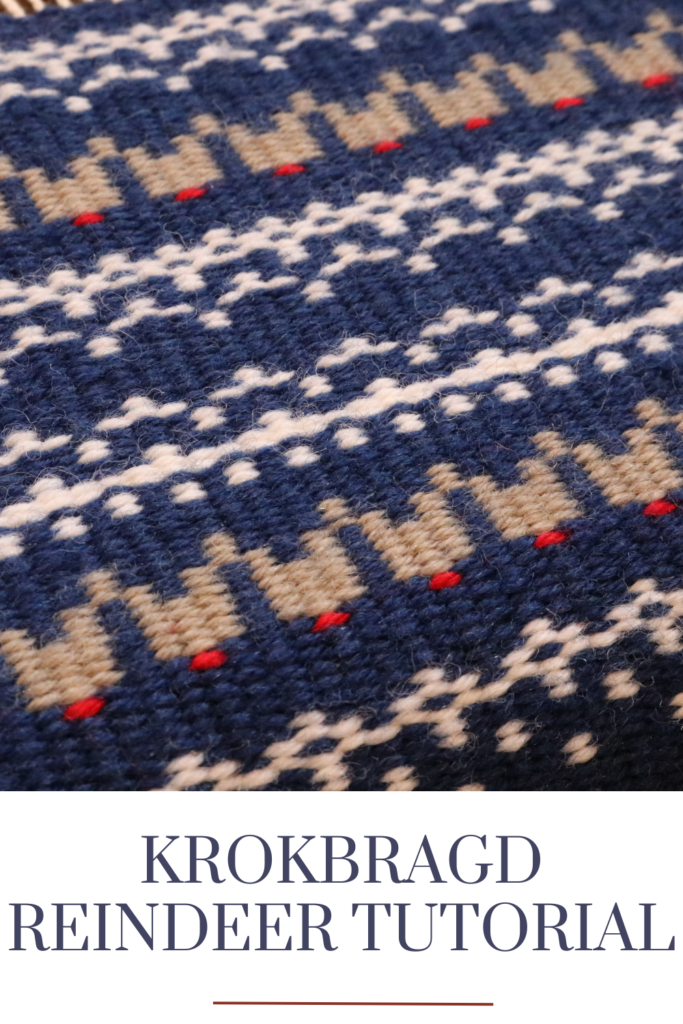
This tutorial uses 4 colours for the weft – navy, white, red and beige. I used Bendigo Woollen Mills Luxury 4 play, which is a fingering weight wool. The warp should be a strong and thinner than the weft, I use a #12 seine twine.

Krokbragd-Reindeer-tutorial-PDFDownload

Be sure to watch the free Youtube tutorial so that you can follow the weaving sequence along with the printable PDF.

If you’re looking for further krokbragd learning resources, check these out:

Krokbragd 101 Online Course…

Krokbragd Youtube Playlist…

All About Krokbragd…

*This post contains affiliate links. For further information, please see my disclosure policy

Until next time…

Happy Weaving!

Filed Under: Krokbragd, Rigid heddle weaving, Rigid Heddle Weaving Patterns, Weaving Tagged With: Celebrations, christmas, krokbragd, reindeer, rigidheddleweaving, tutorial

How to organise string heddle bundles

by Kelly 2 Comments

String heddles are commonly made of texsolv nowadays, making them very strong and simple to use.

String heddles will generally arrive tied in neat bundles when you purchase them brand new. These bundles are very orderly and can just be slipped right on to your shafts. They can then be cut apart and ready for use

But there are times when your string heddles may be less than organised. I call this “string heddle spaghetti!” Having your string heddles in a pile and out of order is not ideal (not to mention a bit of a time waster) but there is a simple way to get them organised into lovely neat bundles once more.

*This post contains affiliate links. For more information, please see my disclosure policy.

Once you know how to make these bundles, you can continue to use the technique to ensure that your string heddles are always in order and ready to use.

I recently purchased some used string heddles, and many of them arrived packed into a bag singly and without order. Time to make some bundles!

I use my warping stand (if you’re interested in making your own, check out this tutorial). A raddle also works really well if you have one. Two warping pegs, clamped to a table would also work. Even a box with 2 chopsticks is a suitable alternative!

You also need some twisty ties. If they are a different colour to your string heddles, that improves visibility, but if they are the same colour, don’t worry, you can still use them.

If your string heddles are already separated, grab one and have a look at it. There should be 2 large loops on either side that you can hold on to. There should be the eye of the heddle in the middle of these loops. When you hold the loops, you want the whole string heddle to lay flat – no twists!

Keeping the string heddle flat, place one of the looped ends over the left peg (or raddle nail or chopstick).

Place the loop at the other end over the right hand peg. If you have a central peg like I do, it doesn’t matter which side of it the eye of the heddle rests against. It is best however, to have it rest on the same side of the central peg for each heddle, to keep the laid out order the same.

Drop the loops so that the string heddle rests on the base of your pegs.

Grab your next string heddle and repeat the same action of holding the loops and placing them on the pegs. Pretty simple? šŸ‘ I like to keep going until I’ve laid out around 100 heddles.

When you have enough to make a bundle, take a twisty tie and take one side of the larger loops on one end of the bundle. Because of the way the heddles are laid out, you will easily be able to see the separated sections.

Take the tie and twist it around this section, twisting the ends of the tie together to secure it.

Take another tie and do the opposite side of the same loop, securing it in the exact same way. Do the same for the loop at the other end of the bundle so that you have 4 ties total.

Slip your bundle off the pegs and it’s ready to use!

If you would like a video tutorial on how to make bundles, check out the one below:

I hope this tutorial was useful to you, please leave your questions or comments down below.

Until next time…

Happy Weaving!

Filed Under: Floor Loom Weaving, Free tutorial, Table loom weaving, Tutorials, Weaving Tagged With: floor loom weaving, string heddles, tutorial

1/5 Warp Floats on a Rigid Heddle Loom

by Kelly 6 Comments

A weaving float is not always viewed as something desirable. But that is usually when it’s unintended or unplanned. Floats can actually be utilised in many ways, particularly for texture and pattern weaving.

So, what is a float? Well, if you think about it, weaving is made up of floats. The plain weave structure or interlacement occurs when the threads go over/under/over/under each other. We wouldn’t generally think of this interlacement as being comprised of floats, but that’s what it is, just really short floats.

*This post contains affiliate links. For further information, please see my disclosure policy.

A float can be described as any thread travelling over another. Most of the time when we refer to floats, we are talking about a thread travelling over more than one other, often a group.

A float can occur either horizontally or vertically. A horizontal float is known as a weft float. A vertical float is known as a warp floats. Today’s tutorial is specifically for warp floats.

In case you need a visual reference on the difference between a warp and a weft float, The Heart Scarf Project uses weft floats (note that the grey weft floats are horizontal).

Weft floats

Today’s tutorial is specifically for rigid heddle weavers.

What you will need:

  • A rigid heddle loom (I used my Ashford 24″ rigid heddle loom. )
  • A pick up stick that is wider than the width of your warp
  • Yarn that is appropriate for the project you’re weaving and the heddle size you’re using. In this tutorial, I am playing around with a sampler and used a dk weight rainbow dyed cotton in the warp and a dk weight navy wool weft. My heddle size was 7.5dpi.

We begin by placing the heddle in the DOWN position so that all slot threads are raised. It is the slot threads that we want to pick up, not the hole threads. You can consider the hole threads as already picked up, by being held in the holes.

If you have not used a pick up stick before, don’t worry, they are very easy to get started with by following some very basic rules. If you want to gain some familiarity with how you might use a pick up stick, check out this video before going through the rest of the tutorial:

If you specifically would like to see what a 1/1 pick up looks like (which is what I use for this tutorial), I demonstrate it in this video at around the 10 minute mark šŸ˜‰

Once your pick up stick is in place you are ready to start weaving the sequence. Your shuttle should be filled with your weft yarn. In my case, I’m using a solid, dark weft to contrast with the colourful warp.

Place the heddle in the DOWN position, throw your shuttle, then beat.

Change to the UP shed and slide your pick up stick forward to sit behind the heddle. There is no need to turn your pick up stick on edge, and in any case it would be very difficult to do so with the up shed being so firm. You can see the pick up stick right against the back of the heddle in the above picture.

Throw your shuttle and beat. Slide the pick up stick to the back of the loom.

Change to the DOWN shed. When you enter the shed with stick shuttle this time, you will need to manually go around the warp edge thread – it won’t catch on it’s own. This is really common when you move away from plain weave. If you need more information on the concept of manually going around the edges, I have a detailed article here.

Throw your shuttle and beat.

Change to the UP shed. Bring the pick up stick forward and lay it flat at the back of the heddle once more. Throw the shuttle and beat. Slide the pick up stick back.

Change to the DOWN shed. Again, you will need to catch the edge warp as you enter the shed. Throw shuttle and beat.

By now you will notice the vertical floats forming and getting longer. Really long floats are not practical, as they will catch on things, so it’s time to halt the float in it’s tracks with a tie down thread.

Change to the UP position. No pick up stick this time! Throw the shuttle and beat.

That is one complete weaving sequence. If you want to continue weaving the pattern, you go back to the beginning and work through the steps again.

If you would like the pick up and weaving sequence in a printable format, please click on the download button.

15-warp-floats-Download

If you would like to see this tutorial in video format, I have you covered!

If you want to explore floats further, I have a lot resources to help (too many to list here!) that you can find here on my blog or Youtube channel.

I also want to recommend Jane Patrick’s The Weaver’s Idea Book. It has a HUGE section on weaving warp and weft floats that you will find very instructive and inspiring.

I hope this was helpful to you, be sure to leave any questions or comments down below!

Until next time…

Happy Weaving

If you enjoy my free content and would like to leave a donation in appreciation, please click here. Thank you for your generosity!

Filed Under: Free tutorial, Rigid heddle weaving, Tutorials, Weaving Tagged With: floats, pick up sticks, tutorial

Studio Sign with Cricut Maker 3 Tutorial

by Kelly 5 Comments

Ever since I moved into my very first studio this year, I’ve wanted to put up an official studio sign. I thought about purchasing one online, but couldn’t decide on one that I liked.

So when Cricut Australia contacted me recently and asked me to partner with them, my first thought was “Awesome! I can make a studio sign!”

If you have never heard of Cricut before, (pronounced “cricket”) you are missing out! I admit that I wasn’t sure exactly what to expect when my Cricut Maker 3 arrived and even felt a bit intimidated by the thought of learning new technology, but I have been very pleasantly surprised.

*This post contains affiliate links. For further information, please see my disclosure policy.

The machine has been very easy to learn and I’m excited by how much more I can explore. Cricut also included a rotary cutting tool that fits into the machine so that I can experiment with cutting out shapes with my hand woven fabric. I can’t wait to do that!

Here are some of the things I’m loving about this machine:

  • The design possibilities are awesome. In addition to the availability of the app, Design Space, which has hundreds of images and fonts, you can also upload your own designs.
  • The Cricut Maker 3 doesn’t just cut paper and vinyl. It can cut fabric, leather, balsa wood – a total of over 300 materials can be used.
  • The Adaptive Tool System matches the cutting direction and pressure to match the material you’re cutting. Tools can be changed according to what you want to do.
  • Design Space is compatible with iOS, Android, Windows and Mac (I use it with my MacBook Pro).

My husband and I worked together on this project so it was double the fun – I love any excuse to work together!

My idea for the studio sign was to repurpose everything to make it a low to no cost project. Thanks to finding materials around our property and of course to Cricut for sending me the Maker 3 plus tools and materials, I am happy to report that the final result was a NO cost project!

We found some planks of wood that had been stacked on top of a low shed. Absolutely perfect, as I wanted to use naturally distressed wood and these planks fit the bill perfectly. We also used some waste wood as the braces at the back of the sign. My husband already had an old sheet of MDF (medium density fibre board), and that was used for the front of the sign.

The cut pieces of distressed wood measured around 18 x 4″ each, with a depth of just over 1.5″.

We loved the rustic look of the timber, so we left it rough without sanding, but we did need to remove the rusty nails!

My husband nailed on two short and narrow pieces of wood (also found on our property) as a brace to hold the two main pieces together. These measure about 7.5 x 1.5″ with a depth of around 1.25″.

Then we took some MDF (plywood would also work) that we had lying around to use as a front plaque on the wood frame. This was an important step, as the Cricut vinyl I wanted to apply to the front of the sign needed a smooth surface to adhere to.

My husband eyeballed the MDF to match the size of the wooden backing. He drew up some quick measurements, then cut the piece, which ended up measuring around 13.5 x 5.5″. He also cut the corners off using our scrollsaw. Then he gave it a good sand with a fine sandpaper to smooth rough edges.

We painted the MDF plaque with some old paint we found in one of our sheds. It just happened to be a great colour that would set off the gold vinyl lettering perfectly! We let this paint dry completely before the next step.

The plaque was then nailed to the wooden backing.

The rest was up to me! I measured the plaque in order to get accurate measurements for my vinyl lettering.

I went into the Cricut Design Space to get my text organised. This is really simple to do using the Design Space app. I simply typed in the text (“Studio”), chose the font, then adjusted the measurements to suit my plaque.😊

My laptop is paired with the Cricut Maker 3 using Bluetooth, which works really well with no need for cables.

Following the prompts from the Design Space app, I lay in the material I’m wanting to cut, in this case Smart vinyl in Champagne. The Smart materials from Cricut don’t require a cutting mat, it simply feeds into the machine, cuts out the design, then feeds out again.

The next step is to peel away the excess vinyl from the design using the handy weeding tool (the hook) to pull up any vinyl still stuck to the backing.

The Transfer Tape is placed over the top of the design. This allows you to peel up your design and place it precisely where you want it to go.

I positioned the design onto the plaque, smoothed it down and removed the transfer tape. All that was left to do was to hang my beautiful new sign outside my studio. I love the way it looks, and it makes my studio feel really official.

I had so much fun making this sign that I couldn’t stop at just one! In Design Space there are so many great images to choose from, so I wanted to take advantage of some of those.

I got my girls involved so that we could work together to make some signs relevant to their own hobbies and spaces.

For my 14 year old horse lover, it was a no brainer to make a sign for her tack room.

My youngest daughter is chicken crazy and the caretaker of our chicken coops.

These signs were all no cost projects for us, thanks to Cricut Australia and New Zealand, and thanks to repurposed materials.

What I’m really looking forward to now is checking out the Cricut rotary cutter tool with some of my handwoven fabric. Stay tuned for that!

If you would like to see the full free video tutorial for how I made the studio sign, click on the video below:

The Cricut Maker 3 can be found at Spotlight or Harvey Norman in Australia. In New Zealand, suppliers are Spotlight and Warehouse Stationary.

You can also find Cricut here-

Instagram: https://www.instagram.com/cricut_anz/

Facebook: https://www.facebook.com/cricutanz/

YouTube: https://www.youtube.com/channel/UCffy4UQ9lfgQPDlyEUCgWPA

Until next time…

Happy Weaving!

Filed Under: Free tutorial, Inspiration, Tutorials, Weaving, Woodworking Tagged With: studio sign, tutorial, woodworking

How to weave little trees on a rigid heddle loom

by Kelly 7 Comments

This is a project I’ve never shared here before but it’s so darn cute, I just know you will love it!

You may have seen some of my overshot style, “branoe” video tutorials on my Youtube channel before. The Snowmen and Reindeer are the most popular.

Well, today’s tutorial follows the exact same technique. You can use this technique on just about any loom, but this tutorial focuses on the rigid heddle loom. If you want to read more about this overshot technique, I’ve written the details for how it works in this post.

*This post contains affiliate links. For further information, please see my disclosure policy.

Here is what you will need to weave your own little trees in pots:

A rigid heddle loom (I used my 24″ but a Sampleit size is fine if you just want a small sample)

7.5 dent reed

A pick up stick wider than the width of your woven piece

Yarns-

There are no set yarns for this project, but I will share what worked well for me:

For the warp I used a light worsted/dk weight (Australian 8 ply) wool in white.

For the weft I used the same wool in a variety of colours. You will need one colour for your pots, brown for the trunk, green for the leaves, and then orange, red or yellow for the fruit (depending on whether you want orange, apple or lemon trees!)

I’m not including specific calculations or measurements for the piece, as this is adjustable and depends on what you’re weaving, but to give you a guide, my sampler was around 8″ width on the loom. It can be a good idea to wind on a 35 – 40″ warp and experiment with my other branoe/overshot tutorials.

You simply warp up and tie on as you would for plain weave. Then you’re ready to pick up.

You can find the pick up sequence PDF here:

Little-Trees-pick-up-sequenceDownload

Unlike other pick up, we leave the heddle in NEUTRAL and pick up the warp threads IN FRONT of the heddle.

You can begin by weaving some plain weave to support your pick up design and give contrast. There are nice little borders you can work as well, if you want to. The border that I have here in pink is just 4 up, 4 down but there are many variations you could do.

When you’re ready to begin weaving your pattern sequence, make sure you follow the pick up outlined in the PDF provided, starting with Row 1. Heddle in neutral, pick up in front of the heddle. Once all the threads are picked up across the warp, slide your pick up stick towards the heddle and place it on edge.

Pick up stick on edge

Your picked up threads will be propped up, changing the interlacement from plain weave. You can then bring in your pattern weft (whichever colour you’re using for the pots as designs are worked from the bottom up). I’m using a blue wool for my pots.

When your weft reaches the other side, take it around the edge warp thread and back into the shed, doubling your weft.

Take your pick up stick out of position and beat the doubled weft into place.

Follow this up with a plain weave pick in your background weft. Choose the plain weave shed (either up or down) that you were up to before you wove your first pattern pick. For me, that was the up position.

Each plain weave pick will be a single, not double weft.

Continue following the pick up and weaving sequence for the pots.

We follow up now with 6 picks of background weft in plain weave. This is because we need a surface to embroider the trunks onto. Weaving narrow trunks (and centering them to match the pots!) is quite difficult, so embroidering whilst the piece is on the loom is a much easier option.

Rather than embroidering right now, we instead move on to the pick up for the tree foliage.

That way, we have sturdy fabric to embroider onto and we can line up the trunks really nicely with the other design elements. So, we move onto step 6 of your pick up instructions.

Continue following the sequence to form the tree foliage. The pattern weft for the foliage is also doubled. Don’t forget to weave a plain weave pick in between every pattern pick. Now we can thread a tapestry needle with some brown wool or embroidery floss to embroider the trunks.

Knot your embroidery yarn to prevent it pulling through the fabric. Come up from the back of the fabric in the middle top of one of the pots, as shown.

Work a straight stitch to the bottom of the foliage. Take the needle down through the fabric and knot it off at the back, burying the tail in the back of the foliage. This prevents your from having super long threads at the back of the work. Knot the end of the yarn again to work the next trunks.

Once all your trunks are done, you can think about embroidering the fruit. I did this by threading up the colour I wanted and working French knots in the foliage – about 3 French knots for each tree.

If you would like to see the video version of this tutorial, including a graph chart for the design, it is available as a part of the Exploring Branoe class, available at the Online Weaving School.

I also have a low cost downloadable PDF ebooklet available. In this resource you will find written instructions for my free video tutorials on Youtube thatĀ use the Branoe technique, all collected and outlined for you in one place šŸ˜‰

I hope you enjoyed this tutorial.

Until next time…

Happy Weaving!

Filed Under: Rigid heddle weaving, Rigid Heddle Weaving Patterns, Tutorials, Weaving Tagged With: little trees, rigid heddle weaving tutorial, tutorial

Hand woven fabric Yo- Yo tutorial

by Kelly 8 Comments

Many hand weavers these days are keen to sew finished pieces, particularly clothing from their hand woven fabric. This is a wonderful development for any weaving journey, as sewing opens up a vast amount of finished objects the weaver can make.

One side effect of all the sewing with hand woven fabric that is starting to happen is that there will be inevitable leftovers. Sewing, particularly clothing usually requires cutting shapes out of your hand woven, meaning that you will have smaller pieces of “waste” fabric leftover. I say “waste” but it’s only waste if you waste it!

*This post contains affiliate links

There are some fun and exciting projects that can be made even with very small pieces of hand woven fabric. One of these is the lovely Suffolk Puff or as it may be more commonly known these days, especially in America, as the Yo-Yo.

What is a fabric Yo-Yo? It’s a small, gathered circle of fabric, usually covered in the middle by a button or similar. They have been around for quite some time, seemingly dating back as far as the early 1600’s in Suffolk, England.

Suffolk Puffs were made from old clothing, quilts, bed sheets and so on, and given new life when joined together as quilts and cushion covers.

The idea is to gather a small circle of fabric at the outer edge with a running stitch. When gathered, the circle forms a sweet little “puff” that can then either be topped with another, smaller puff or a button can be sewn into the centre.

With the finished YoYo you can embellish clothing or bags, sew many of them together as in the days of old, hot glue them on to hair accessories (I’ve done this a lot for my 3 girls) or sew on a brooch backing and wear it as a one of a kind brooch.

Let’s begin with what you will need to sew a YoYo similar to mine.

*A 5 x 5″ square of handwoven (or commercial) fabric

*A 5 x 5″ square of light, fusible interfacing

*Strong sewing thread (I use Gutermann Sew All)

*A sewing needle

*A button to finish with

Begin by cutting the fusible interfacing to fit on the fabric piece. My original fabric piece was larger than 5 x 5″, so I place the interfacing on first. Make sure that you have the correct side of interfacing facing the fabric, otherwise you may destroy your iron! Place a pressing cloth over the top of the interfacing for extra protection. Iron it on and allow to cool once properly fused.

Use an object as a traceable template (I used masking tape) to draw a circle onto your interfacing. It’s fine to use pen, as it only marks the interfacing and will provide a cutting line.

Cut out your circle. Sharp scissors are very handy at this point.

Thread your sewing needle with around a 15″ length of thread and knot the end. Take the needle down through the interfacing side, about 1 centimetre in from the edge.

Stitch a running stitch, making the length of your stitch also around a centimetre in length and maintaining a fairly consistent distance between the stitches.

Continue all the way around the circle.

Pull gently on the end of your thread and the fabric will begin to gather up.

Continue gathering until the fabric forms a hole in the centre and can’t gather anymore.

Now you can decide what you will place in the middle. I’m using a Dorset button that I made previously. If you’re interested in learning more about Dorset buttons or making one yourself, I recommend GinaB Silkworks.

My button is flat backed, so I’m taking my still attached thread through the back of it to begin stitching it on.

Continue to stitch through the button to the back of your puff with small stitches until it’s fully attached and none of the raw edges of your circle hole are showing. Knot off the thread and sink it into the back of the puff where it won’t be seen.

Ta da! What an easy peasy use of scrap fabric! I think these ones should be made into brooches so they can be shown off well.

If you are interested in learning how to make buttons with your hand woven fabric, I have a members only class that shows you how to do that.

This tutorial is available in video format here-

What do you think? Do you have any scraps of hand woven that could be used to make a YoYo? And what about the Dorset buttons, are you interested in having a go at those too? Let me know in the comments, I love to hear from you!

Until next time…

Happy Weaving!

Filed Under: Free Pattern, Free tutorial, Rigid heddle weaving, Sewing, Table loom weaving, Tutorials, Weaving Tagged With: tutorial, yoyo

Van Gogh inspired freestyle tapestry!

by Kelly 5 Comments

It’s hard to know what to say about the present world situation. Strange. Unprecedented. Uncertain. At times, scary.

Many people throughout the world are in isolation or quarantine – some self imposed, others enforced. Countries in lockdown.

My mind can’t help thinking that it all feels very much like a suspense movie or novel. But no, this is the reality of 2020 and coronavirus for all of us. Strange times indeed!

Beyond the feeling of bewilderment though, is one of hope and unique opportunity. We may be isolated in our homes, but we live in the age of the internet, where it easy to stay connected to others and share burdens. Many people have more time than they usually would, to explore interests and hobbies. My Youtube channel and Online Weaving School are great places to be right now!

With that in mind, I have a new Youtube project that is long, slow and relaxing. We could all use a bit of that right now!

The project is inspired by the wonderful Van Gogh painting, The Starry Night. I have long admired this art work for it’s colours, movement and mood. I thought it would translate really well to a tapestry, not as a replica but as inspiration.

I thought this would be a great, calming project because it is adaptable, doesn’t require much planning, is relaxing and free flowing. Oh, and the idea is to use stash yarns so you don’t need to go out to buy more!

All the materials plus the warp calculations are provided in this printable PDF-

Van-Gogh-inspired-tapestryDownload

Some of my stash yarns included wool, cotton, silk, acrylic and handspun, tencel and metallic. Weights included 8/2, lace weight, fingering, light worsted/dk and aran. My favourite weight ended up being the fingering.

The video/s are mostly in real time, something I have not done before. It means long videos, but I was figuring some people might appreciate sitting and weaving with me at this time – step by step and no hurry. And I know how some of you love to know all the details.

Begin with video one, which explains my aims for the tapestry and shows you the yarns I used:

Some additional resources that are relevant and helpful are:

My first freestyle tapestry series for Youtube –

You may be interested in my online course, Tapestry on a Rigid Heddle Loom to learn traditional tapestry techniques.

Then there is my review of the Mirrix Big Sister Tapestry Loom –

And my Tapestry Necklace project –

Filed Under: Free tutorial, Inspiration, Rigid heddle weaving, Tapestry Weaving, Tutorials, Weaving Tagged With: freestyle tapestry, tapestry weaving, tutorial, van gogh

How do I find the right class for me?

by Kelly 20 Comments

Currently there are over 60 classes available on my Online Weaving School. That is a lot of classes!

With all of that information, it can be a little tricky for new visitors to navigate the space according to their weaving level.

This little tutorial will show you how easy it is to find a class to suit you!

I have categorised each class into one of three categories:

  • Suitable for beginners
  • Suitable for weavers with some experience
  • Suitable for advanced

*One disclaimer. These categories are general terms that I put together to help you find your way around my classes. They are not set in stone. And please, don’t be put off trying a class just because it’s marked as advanced. Different weavers learn in a variety of ways and at differing rates. If you’re interested in a class, have a look at it before you determine that it’s not for you.

OK, on your homepage at the top left you will see “Category: All”, with a little green upside down triangle next to “All”.

Click on the upside down triangle and a drop down menu will appear.

There are lots of different categories apart from the three I already mentioned. These are in alphabetical order and just there to further help you find classes.

Scroll down until you reach categories beginning with “S”.

Select the option that you think would be the best fit for your level by clicking on it. I selected “Suitable for beginners”.

You will be taken to a new screen showing you all of the classes that come under the category you collected. From here, you can find out more about any of these classes by simply clicking on the thumbnail.

If you want to check out another category, you simply go back up to the top, click on the upside down triangle next to “Category: All” again and repeat the steps already described.

One of the reasons I chose Teachable as a hosting platform is that I felt it was very straightforward and easy to navigate. However, I have made an additional resource for you, to help make site navigation crystal clear – giving you the best learning experience. This free mini class covers these topics:

  • Sign in
  • Site overview/how to navigate
  • Your avatar
  • Managing your profile
  • Managing your subscriptions
  • How to access/purchase classes

You can access the Teachable Tutorial by clicking here.

I hope this helps you, if you have any questions, please don’t hesitate to comment under this post. I’m always open to suggestions for how I can improve my school, so I welcome your thoughts on this as well.

Until next time…

Happy Weaving!

Filed Under: Online Weaving School, Tutorials Tagged With: online weaving school, tutorial

How to Use Pick-Up Sticks

by Kelly 24 Comments

Pick-up sticks can be a game-changer for rigid heddle weaving. These simple tools expand your loom’s capabilities, allowing you to create intricate patterns beyond plain weave. Whether you’re a beginner or looking to elevate your skills, this guide will help you understand how to use pick-up sticks effectively.

A rigid heddle loom has 2 shafts, essentially the hole threads and the slot threads. These 2 shafts allow you to work plain weave, which is a perfectly lovely weave structure on it’s own, but most weavers will begin with plain weave and then want to increase their own skills and their loom’s capabilities.

*This post contains affiliate links, which means that if you click a link and purchase, I will receive a small commission at no extra cost to you.

This is where pick up sticks enter and shine. Basically, they are simple, flat and smooth lengths of wood. You pick up warp threads and operate the stick/s from behind the heddle/reed. Your pick up sticks need to be longer than the width of your project, or they won’t hold the picked up threads. For my 24″ rigid heddle loom I use 24″ pick up sticks. I can use these same sticks whether my project is narrow or full loom width.

Incorporate one pick up stick and you can weave on 3 shafts. Incorporate two pick up sticks and you can weave on 4 shafts. And you can keep going from there, although you will probably want to learn about installing heddle rods to increase time efficiency. I happen to have a video showing you how to do that:

If that is a bit much for you at the moment, you can run with the knowledge that pick up sticks allow you to weave pretty patterns!

One of the rules of picking up warp threads with a stick is that your heddle needs to be in the “down” position. The threads we want to pick up must be slot threads, as the hole threads are already committed and are therefore inflexible.

Trying to pick up hole threads would be like trying to pick up the same threads twice! The slot threads are normally our shaft 2 threads and when we place the heddle in down position, they are raised.

Because we push our pick up stick/s to the back when not in use and they lay flat between the warp threads, they do not hinder you from being able to still operate shaft 2, as well as an additional shaft when the stick is engaged.

But I don’t think that you need to understand any of the above in order to use one or two pick up sticks, I certainly didn’t know what I was doing when I started with them. I just played around and liked what I saw and you can do the same!

Even if you are using a written pattern, you still don’t need a lot of understanding to follow them. If you see the instructions “1 up, 1 down” for your pick up, it simply means 1 warp thread will sit on top of the pick up stick, the next will sit underneath it and this will repeat across the warp.

Pick up sampler

The instructions for the actual weaving will be a little different, but easy to follow. Here is a simple weaving sequence as an example:

  1. Up (heddle up)
  2. Down (heddle down)
  3. Up, pick up stick (heddle up and slide pick up stick behind the heddle, leaving flat).

If you want to see pick up sticks and examples of pick up patterns demonstrated, watch my free Youtube video:

If you’re interested in exploring pick up in the form of a project, I can help! My Kitchen Cloths on a rigid heddle loom project is available as an online class.

In my Etsy shop, you will find my Lux Hand Towels pattern, which also uses pick up.

Lux Hand Towels

Oh, and let’s not forget the free pattern you receive when you sign up to my email list, the Moroccan Dream Scarf, which is easy enough for beginner pick up stick adventurists and can look so varied, depending on the yarn and colours you decide on.

The Moroccan Dream Scarf

I have some really cool pick up patterns for free, along with a video tutorial in this post.

I’m quite sure that you will be interested in taking a look at my Pick Up Stick Playlist on Youtube:

I also have a comprehensive course, Pick Up Perfection, available for purchase. If you have a membership to the Online Weaving School, this class is included for free.

I hope this has helped you to understand how pick up sticks can be utilised in your weaving. If this post has been useful to you or if you have any questions, please leave me a comment, I love to hear from you 😊

Until next time…

Happy Weaving!

Filed Under: Rigid heddle weaving, Tutorials, Weaving Tagged With: how to use pick up sticks, how to weave patterns, pick up sticks, rigid heddle weaving, rigid heddle weaving tutorial, tutorial

How to hand hem your hand wovens

by Kelly 4 Comments

Hand hemming. It just sounds good, doesn’t it? It takes you back to the days when time was spent stitching with a needle and thread. Quiet, meditative, and artfully skilled.

I’ll be the first to admit that most of my hand woven pieces are hemmed on my sewing machine, due to a lack of time and a love of convenience. But, I do enjoy stitching with a needle and thread at least occasionally, and it does provide a different finish to a machine stitch.

*This post contains some affiliate links, which means if you click on the link and purchase, I receive a very small commission at no extra cost to you.

If you are more interested in hemming your hand wovens on a sewing machine, this post has got you covered. The initial steps are the same, whether you are hemming by hand or machine.

Begin by laying out your washed or wet finished and dried piece. Fold in the corners (“dog ears”) and iron down on the cotton setting of your iron.

Next you begin to fold down the edge that was previously serged or zigzag stitched and press with the iron.

Now we make another fold, a little bigger than the last and press that down as well. Place pins along the fold to help hold it in place during the stitching process.

If you need more details on these steps, this post is more step by step.

Now we are ready to stitch. Use a needle (not a tapestry, you need a sharp point for this task) and a length of good quality sewing thread (I always use Gutermann Sew All Thread) and knot the end of the thread. Slightly lift the edge corner of one of your hems. In this space you will begin your thread and lodge your know to make it invisible.

Take your needle into the base cloth and pull through to lodge the knot. Fold the hem back in place so that the thread is wedged between the hem and the base cloth.

Take the needle into the fold of the hem, close to the corner and close to the edge of the fold. Pull the thread through.

Now, take the needle back to the base cloth, horizontal to the fold. Pick up one or two threads, very close to the fold of the hem, but not on it. This is the fabric underneath the hem. Pull through.

Now, take the thread vertically through the fold of the hem once again. Pull through, and return to the base cloth to repeat these steps.

Once you are proficient at this, you may want to eliminate one step of the process by combining the two stitches into one action. It is best if you watch the video to learn to do that, it is much easier to show and tell!

Finish up by knotting the thread and burying it into the cloth, using your needle. Cut off any loose ends. Give your hem/s a quick press and they’re good to go!

So, what is your preference? Hand hemming or machine? Let me know by leaving a comment!

Do you like the towel I’m hemming in the photos? It is one of 4 towels from my Floor Loom Weaving sequel class. It’s almost finished, won’t be long now! Make sure you’re on my email list to receive notification of when it goes live.

I hope you enjoyed today’s tutorial and until next time…

Happy Weaving!

Filed Under: Sewing, Tutorials, Weaving Tagged With: hand hem, hemming, how to hand hem, needle and thread, tutorial

  • Page 1
  • Page 2
  • Go to Next Page »

Primary Sidebar

Categories

Archives

Meta

  • Log in
  • Entries feed
  • Comments feed
  • WordPress.org

Copyright © 2025 Kelly Casanova Weaving Lessons on the Foodie Pro Theme