• Skip to main content
  • Skip to primary sidebar

Kelly Casanova Weaving Lessons

  • Hi! I’m Kelly!
    • Affiliates Disclosure
  • Online Weaving School Class Index
    • Common account issues
    • Common technical issues
    • What do I get with a membership?
  • New to rigid heddle weaving? Start here!
    • Never heard of the rigid heddle loom?
    • How to weave neat edges on the rigid heddle loom
    • Rigid heddle weaving
    • Rigid Heddle Weaving Patterns
  • Patterns
  • Subscribe

Free Pattern

Mobius Shawl 10 Year Celebration Project

by Kelly Leave a Comment

This project is designed for the adventurous beginner up to the more advanced weaver.

In this article you will see the basic calculations for the Mobius Shawl Project. There is a Deluxe Printable Version of the pattern available here which includes full calculations, step by step instructions with colour photos and also gives the option of calculations for a full shawl or scarf project to give you more choices and options.

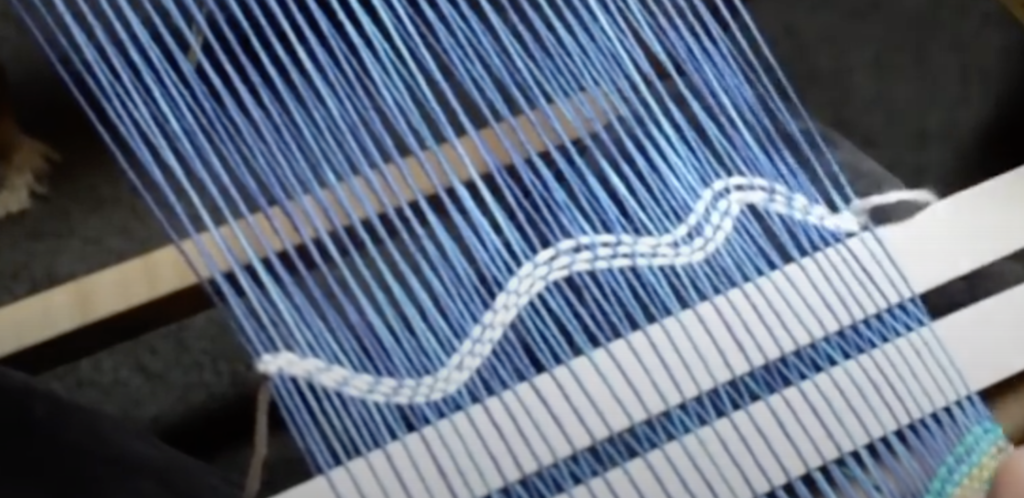
Rigid Heddle Loom Project

To complete this project you do need to know how to warp and weave on your rigid heddle loom, and have ideally completed a project or two (or at least a sample or two).

If you want to learn more about rigid heddle weaving or gain more confidence with your loom before attempting this project, I recommend my online course, Woe to Go Beginner Rigid Heddle Weaving.

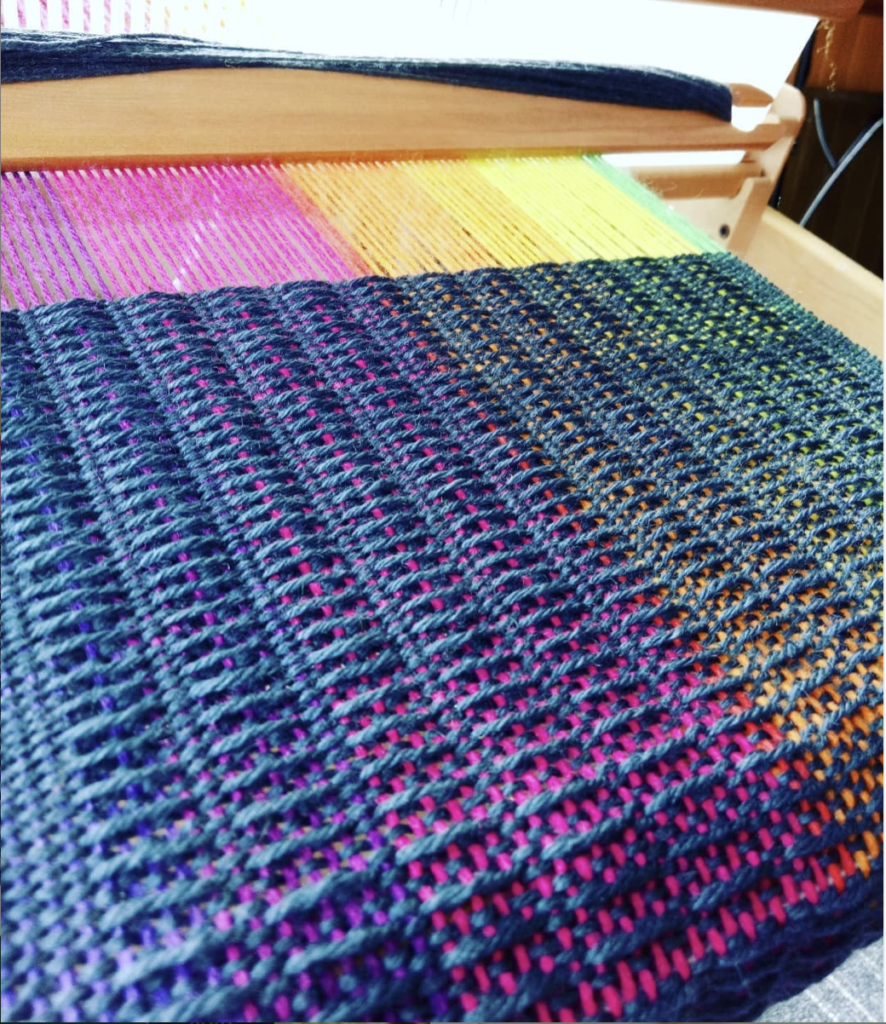
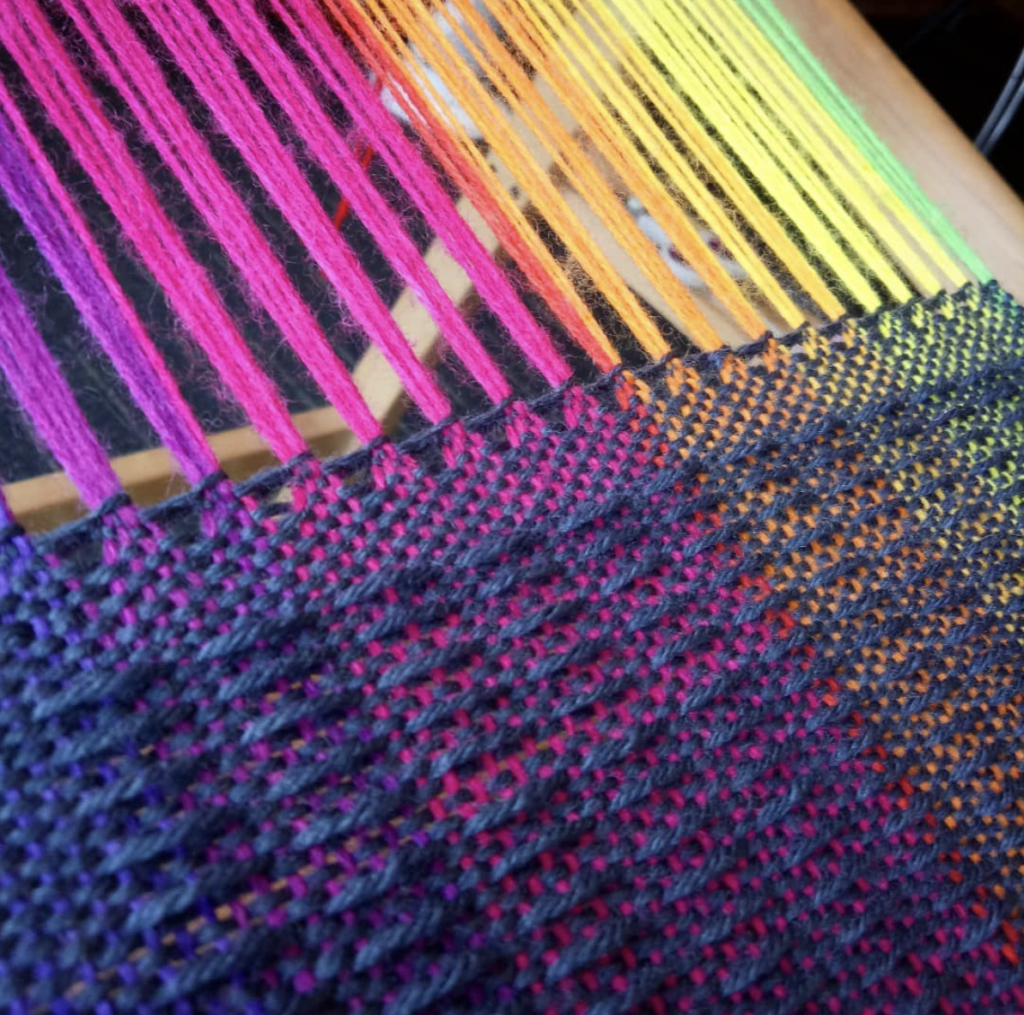
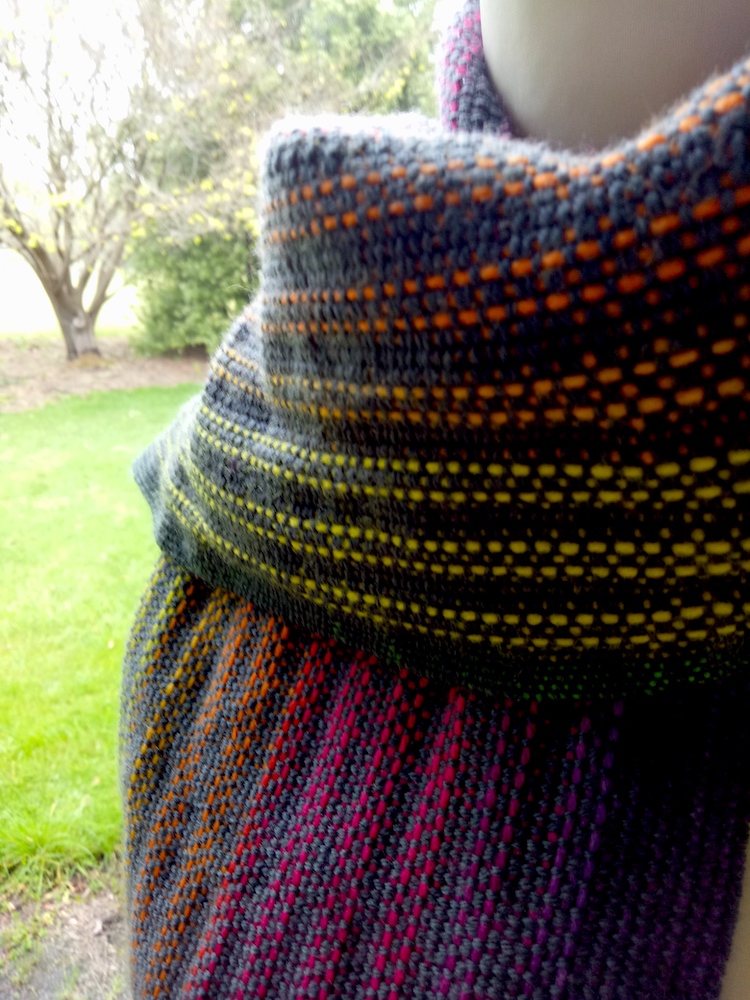
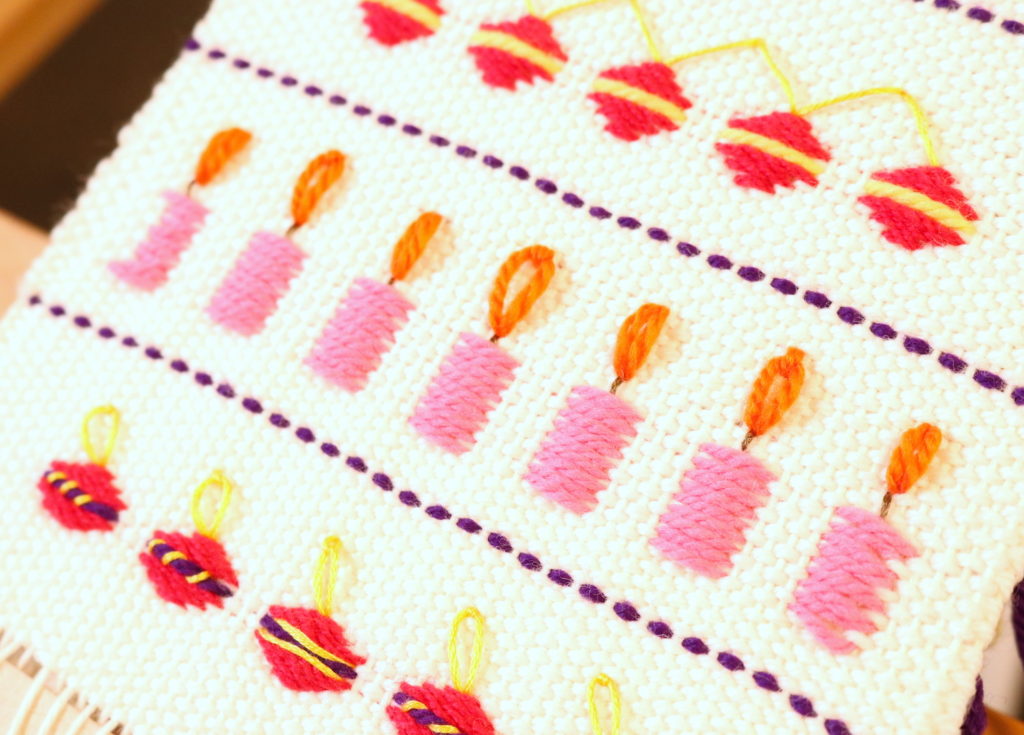
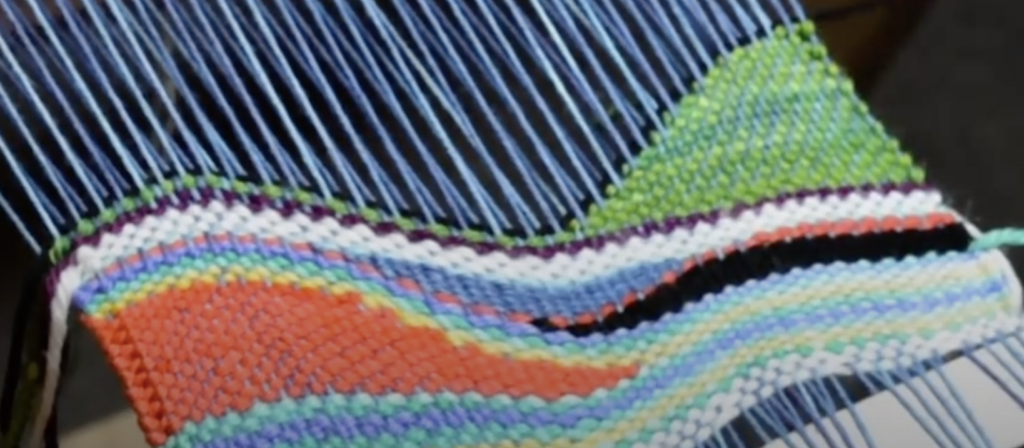
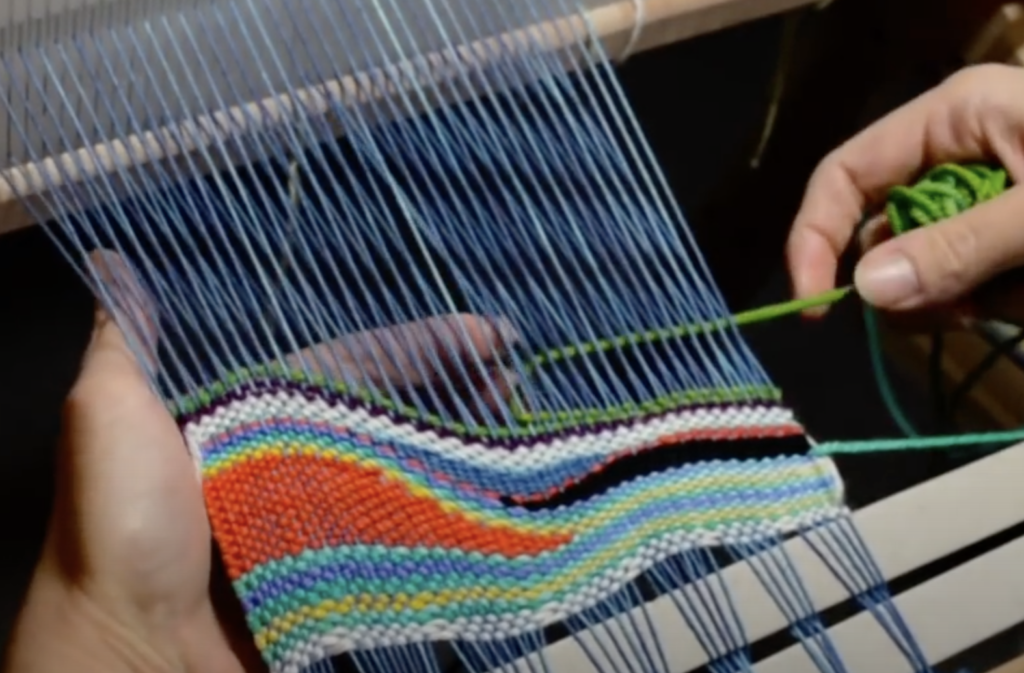
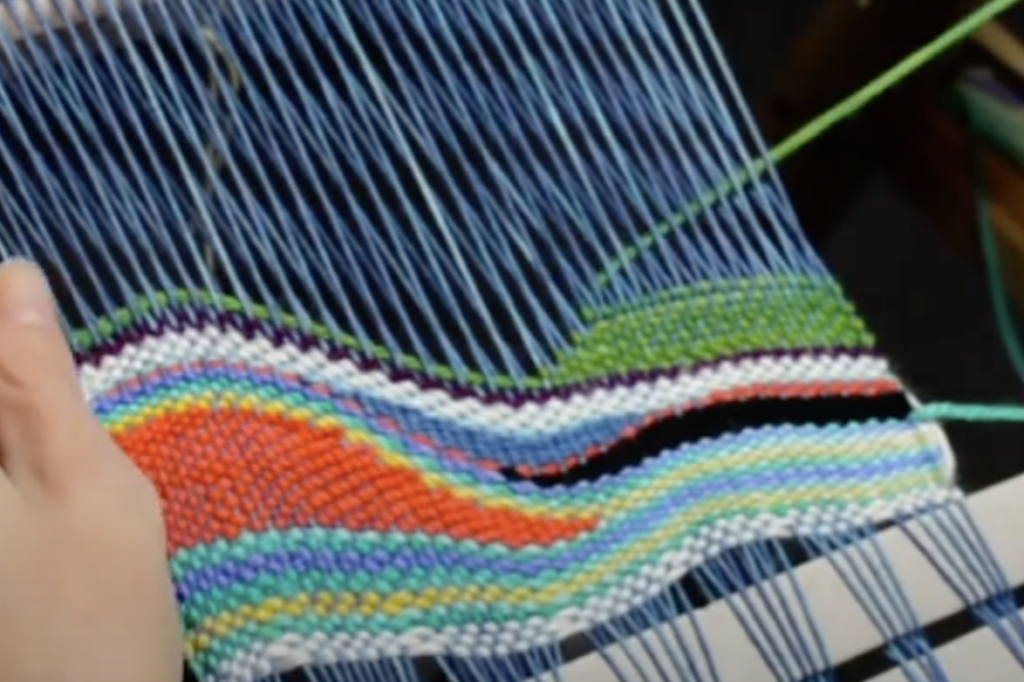
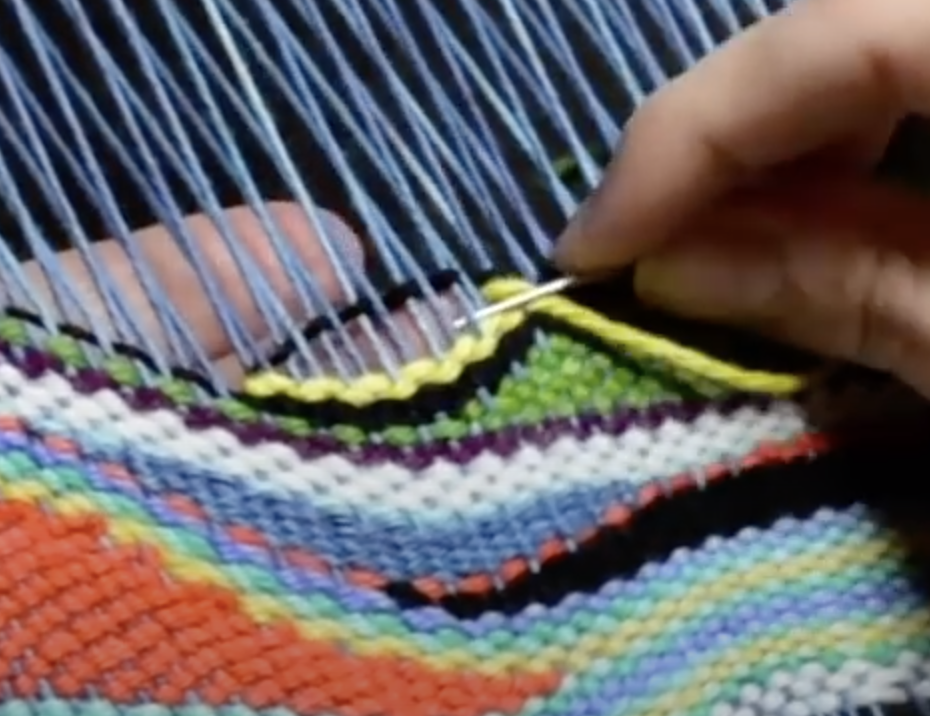
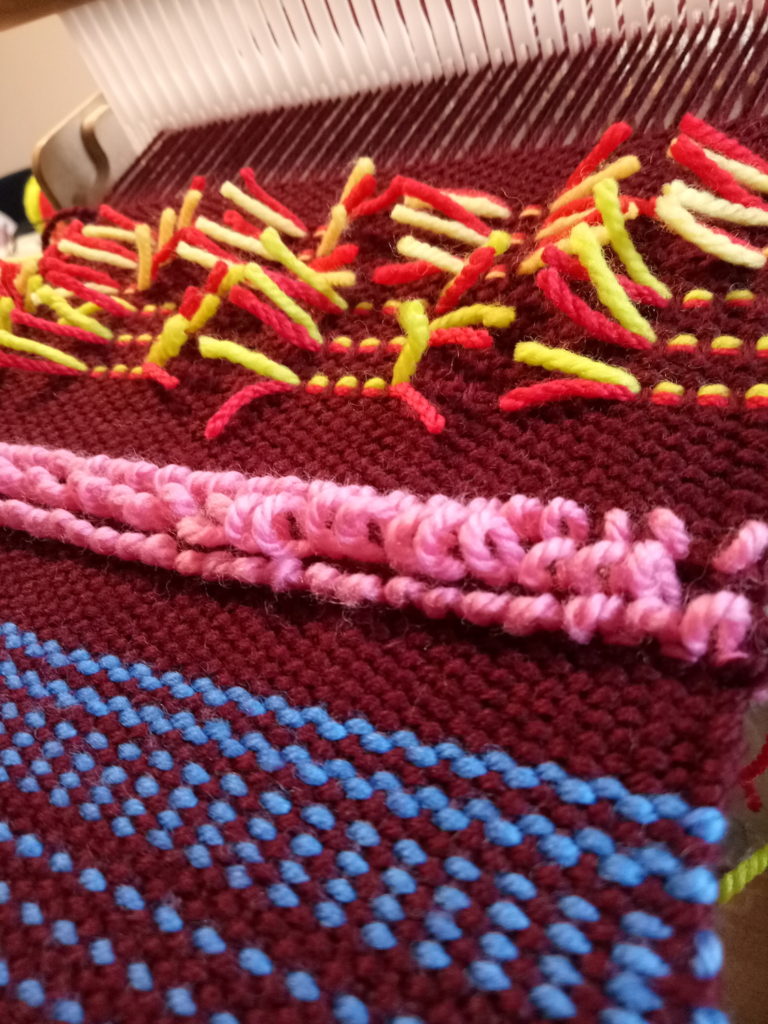
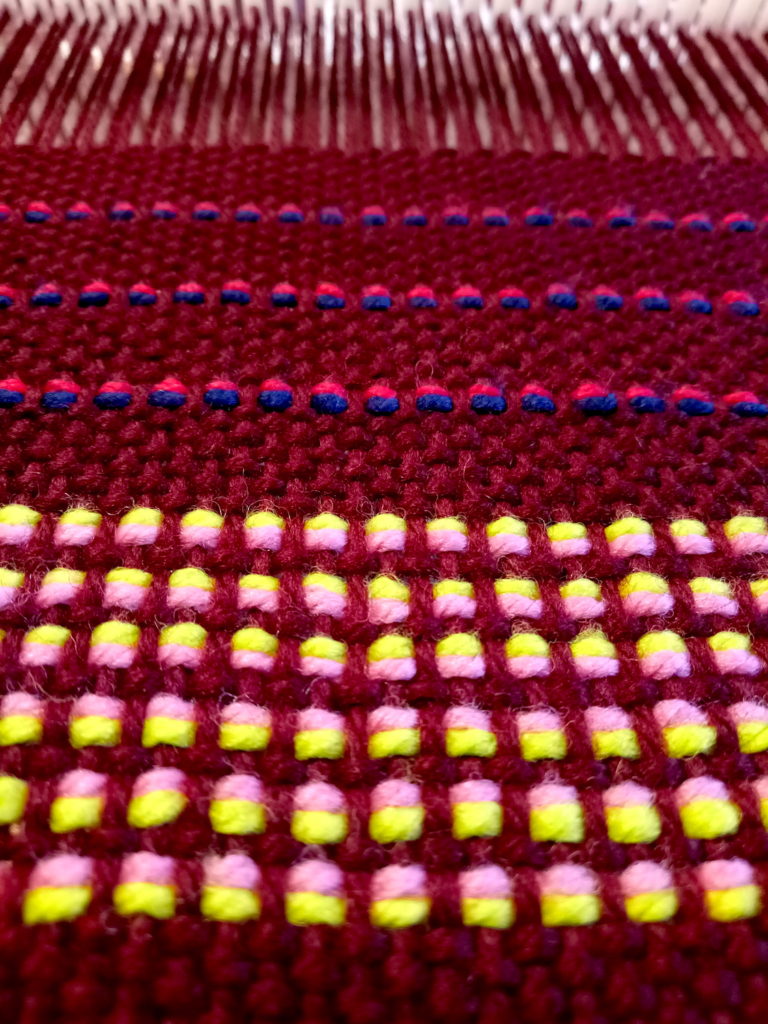
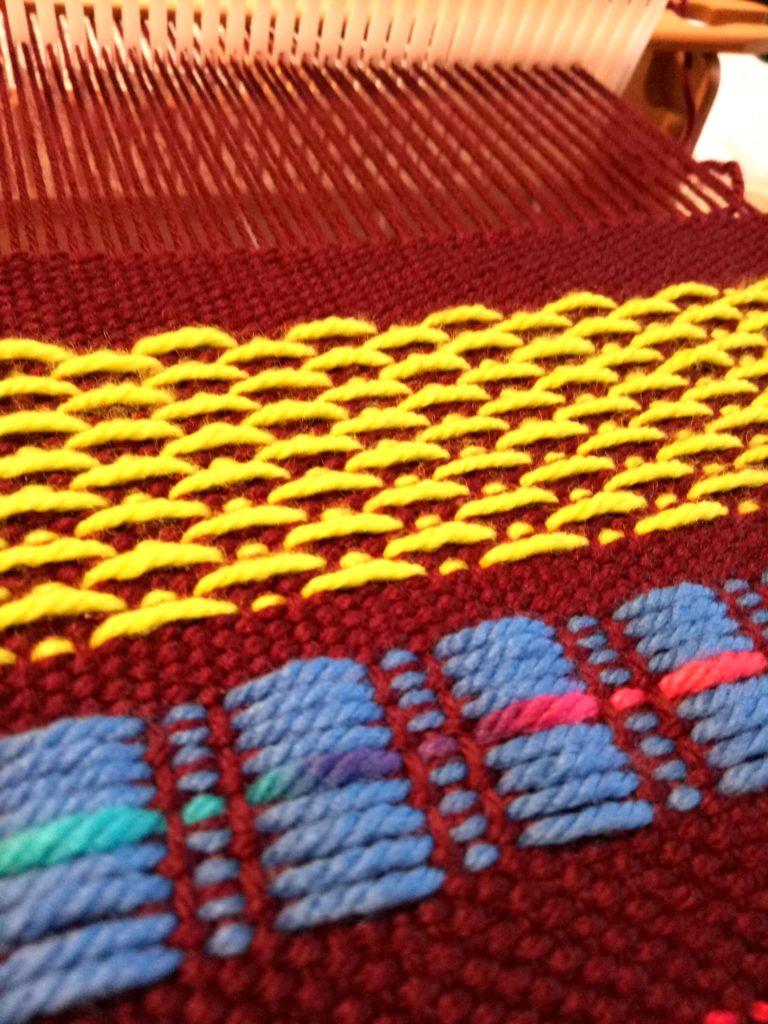
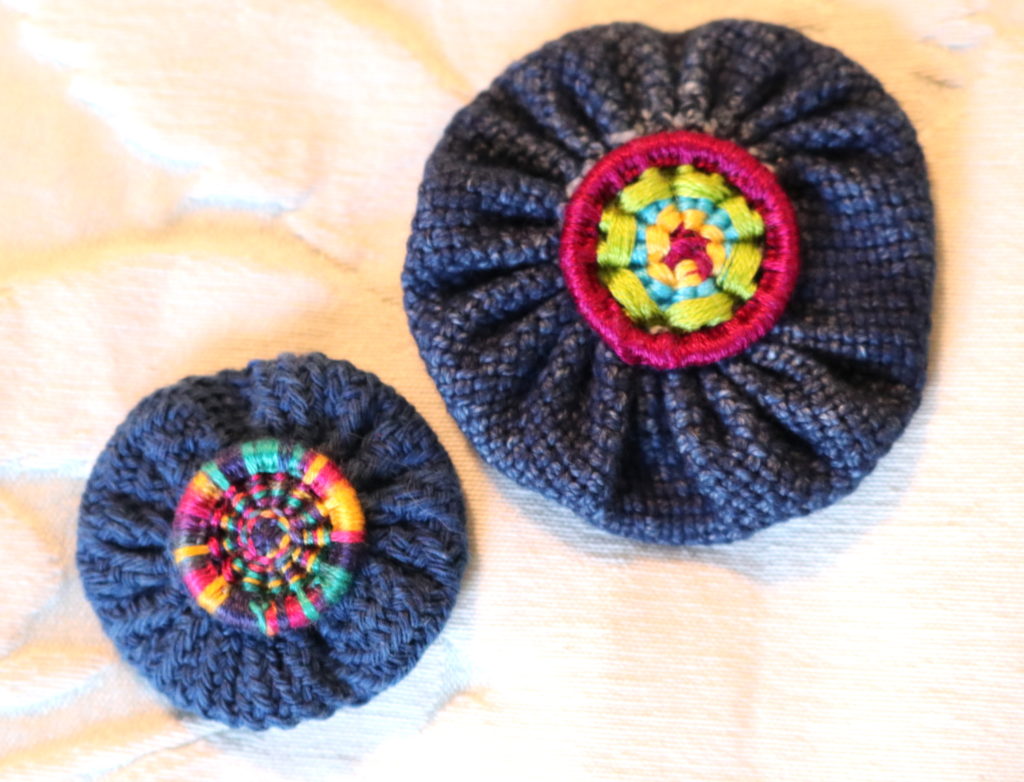
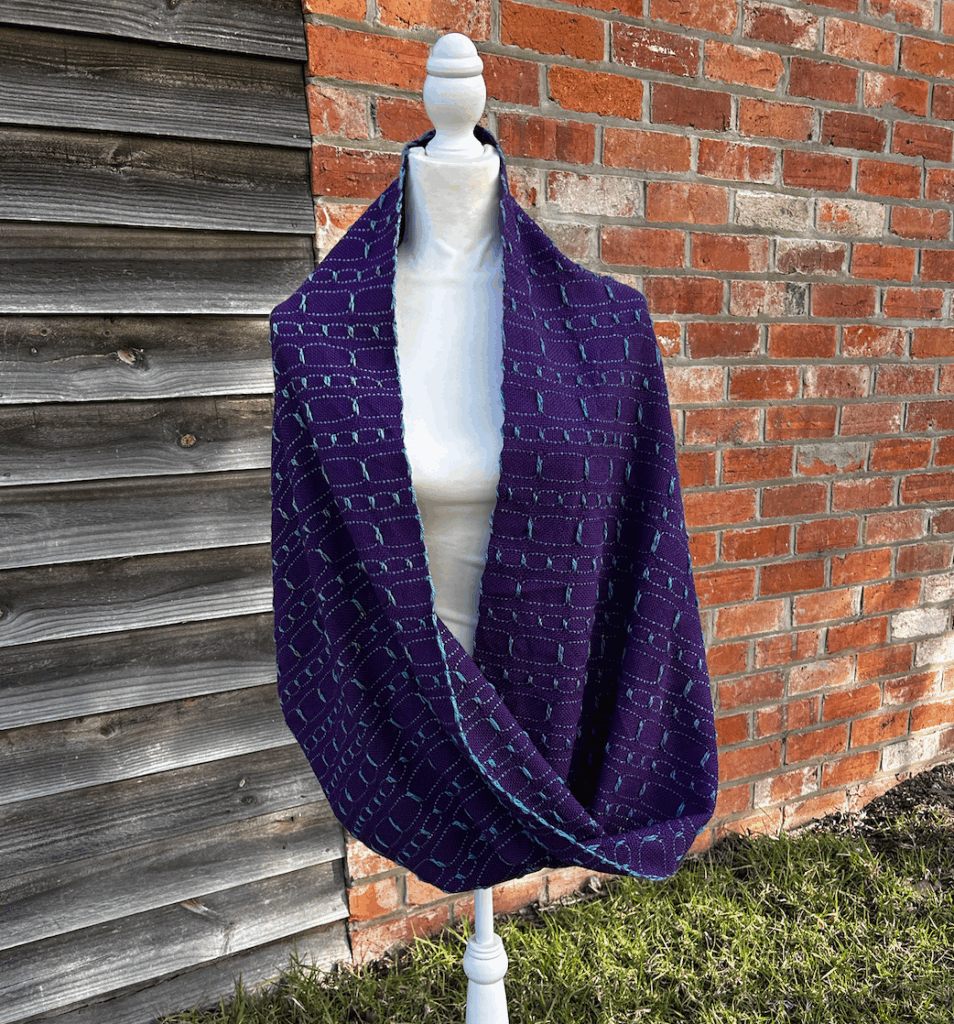
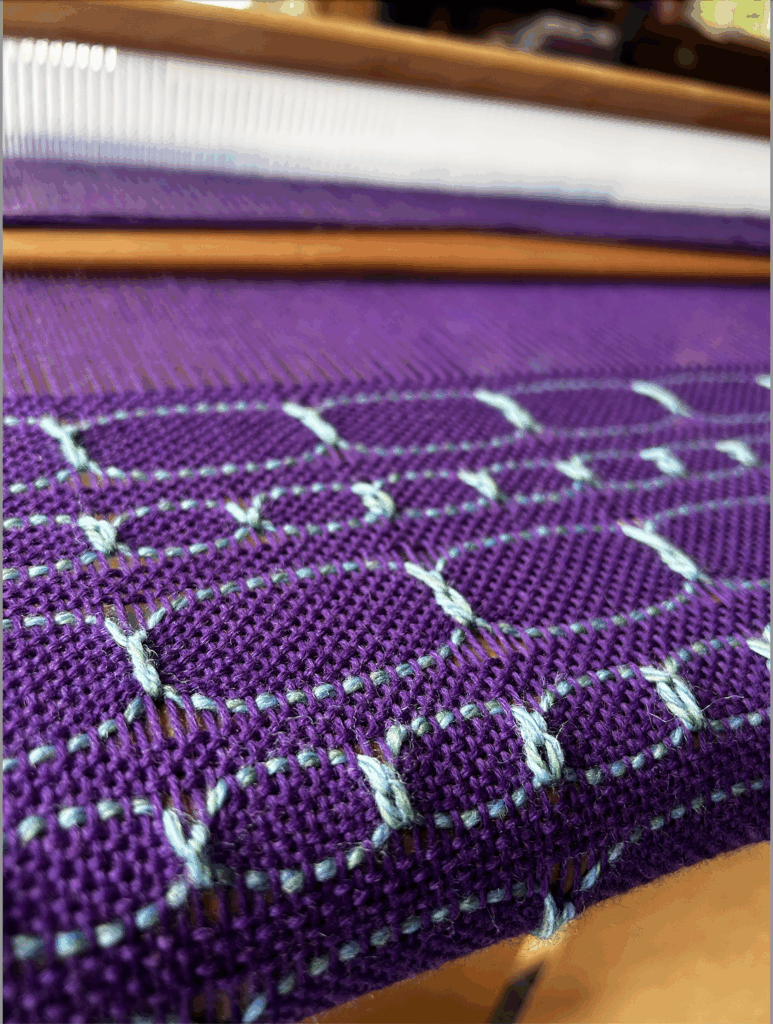
You have a lot of yarn choices for a project like this, but when choosing colours I recommend that your warp/ plain weave weft contrasts well with your pattern weft to make your Danish Medallions pop.

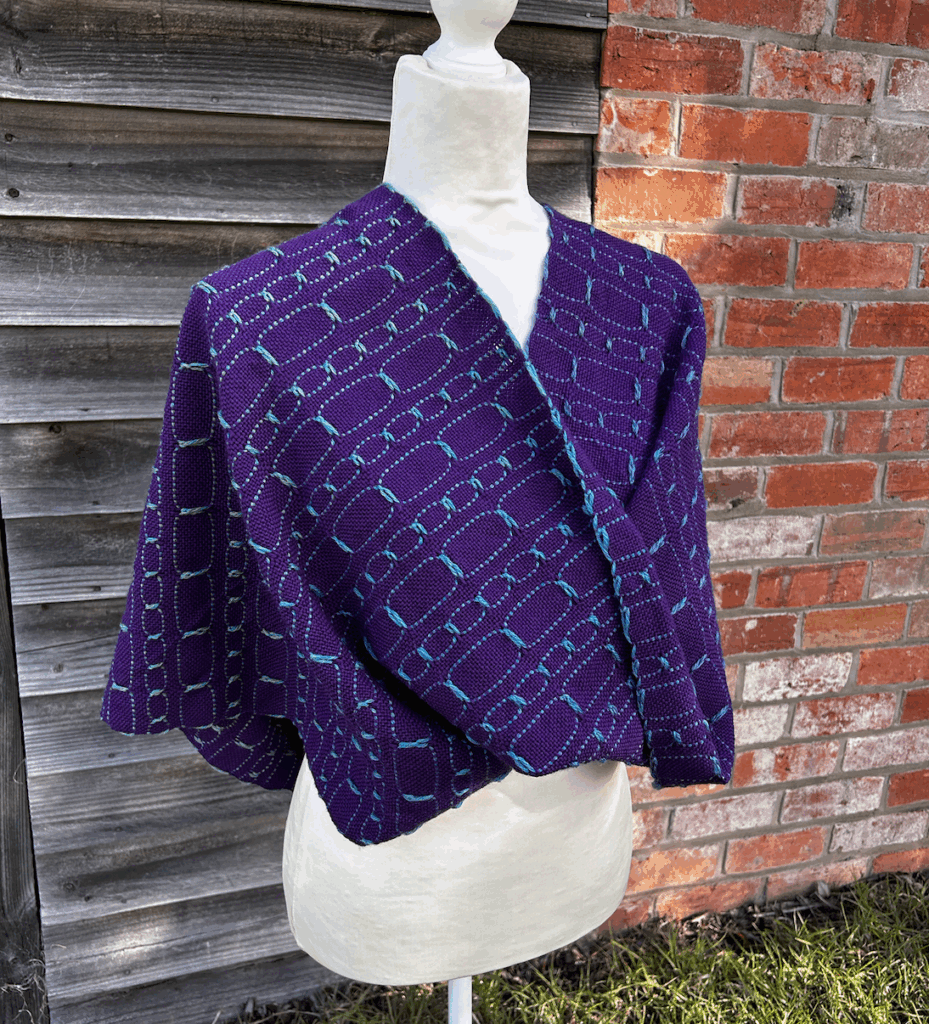
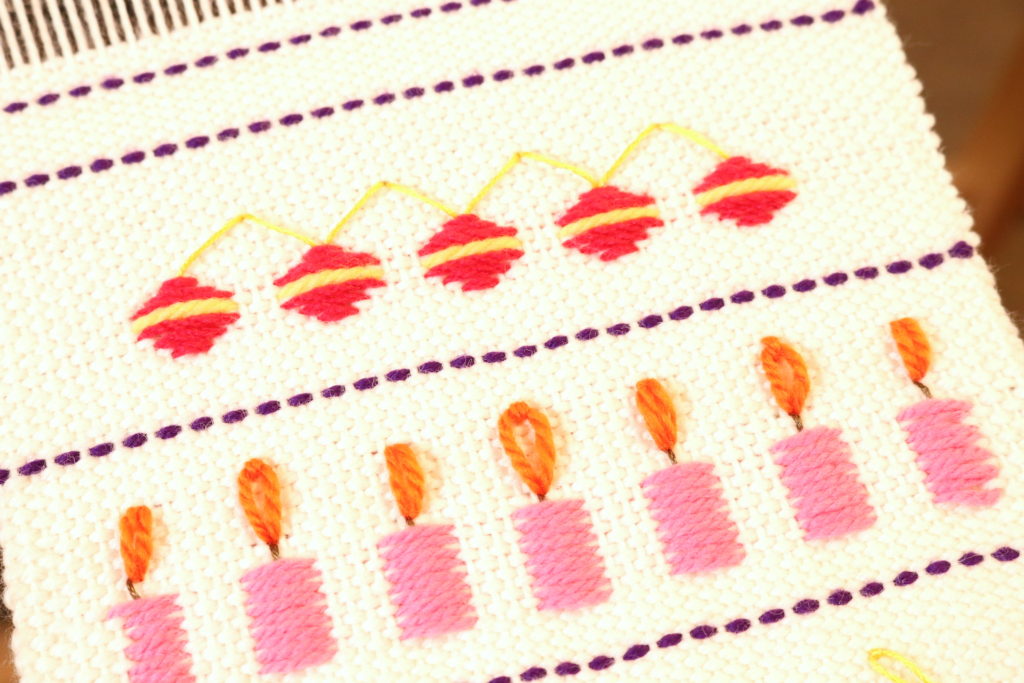
For my shawl I used a fingering weight wool for the warp and plain weave weft and a dk weight wool for the pattern weft.

Be sure to follow along with the video for more specific instructions, and grab the printable 15 page Deluxe pattern if you feel you need step by step instructions.

What you need to complete this project:

* Rigid heddle loom 24” weaving width or wider

* 1 x 10 dent heddle

* 2 stick shuttles longer than the width of the project

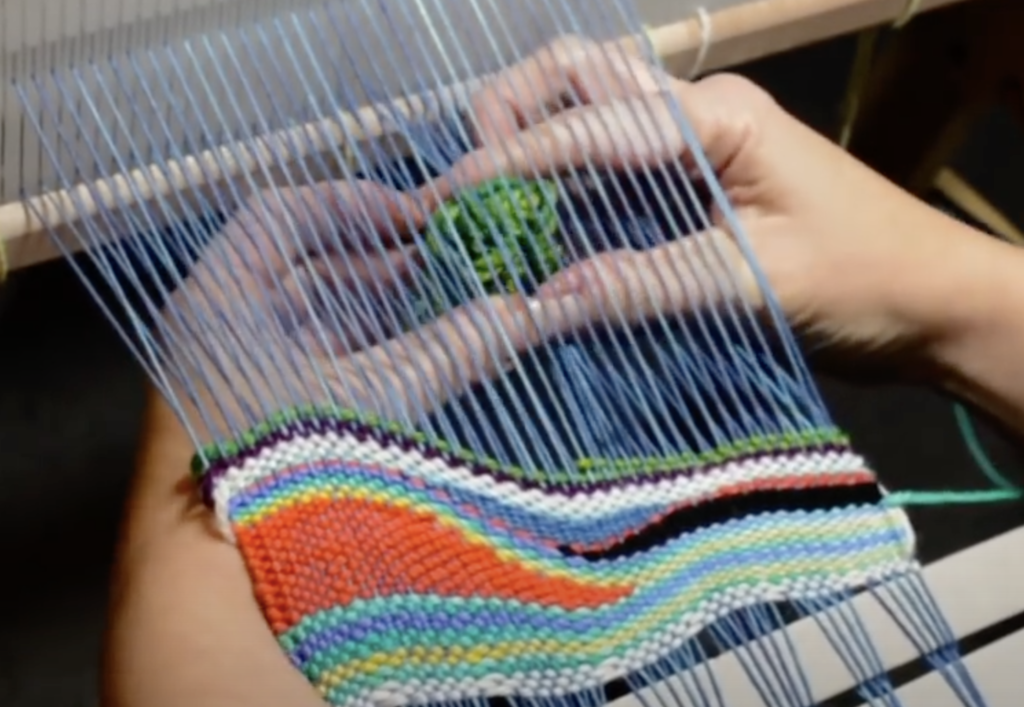
* Crochet hook or threading hook

* Direct warping peg or warping board

* Reed and threading hook

  • Scissors
  • Sewing machine (or sew by hand)

MOBIUS SHAWL PROJECT INFORMATION

Sett – 10

Number of ends – 238

Number of slots – 119

Width on the loom – 23”

Total warp length – 88”

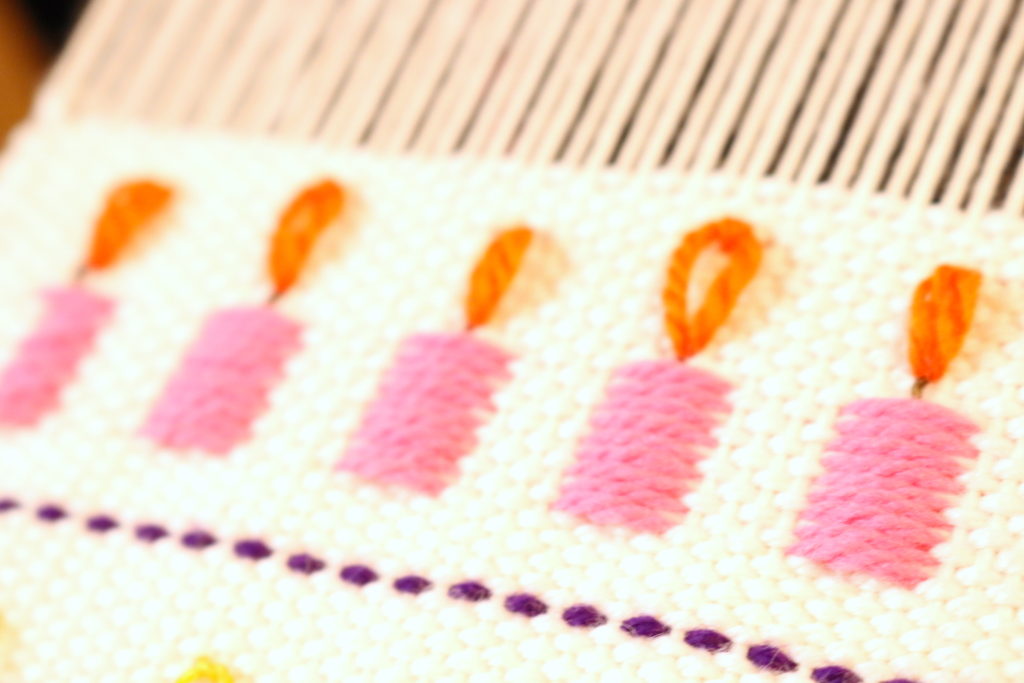
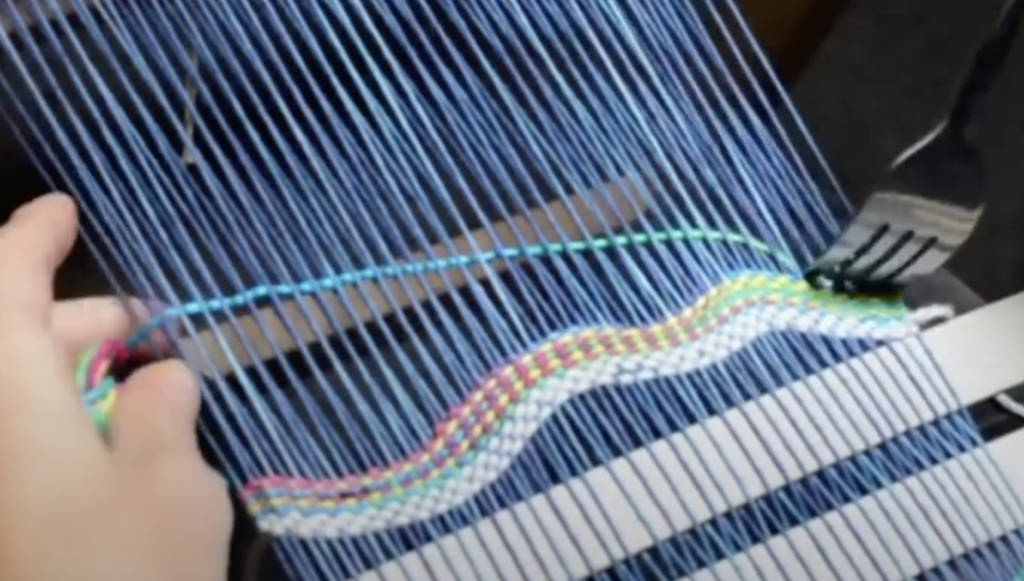
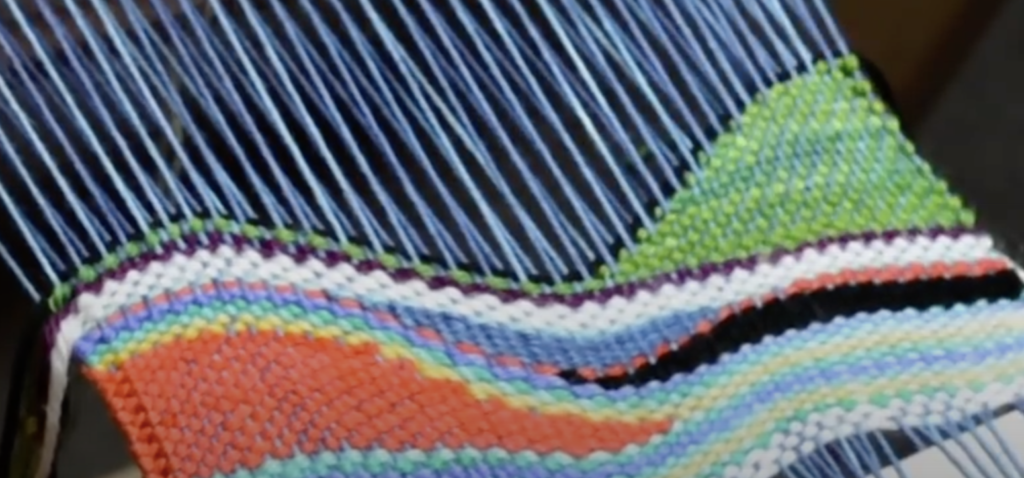
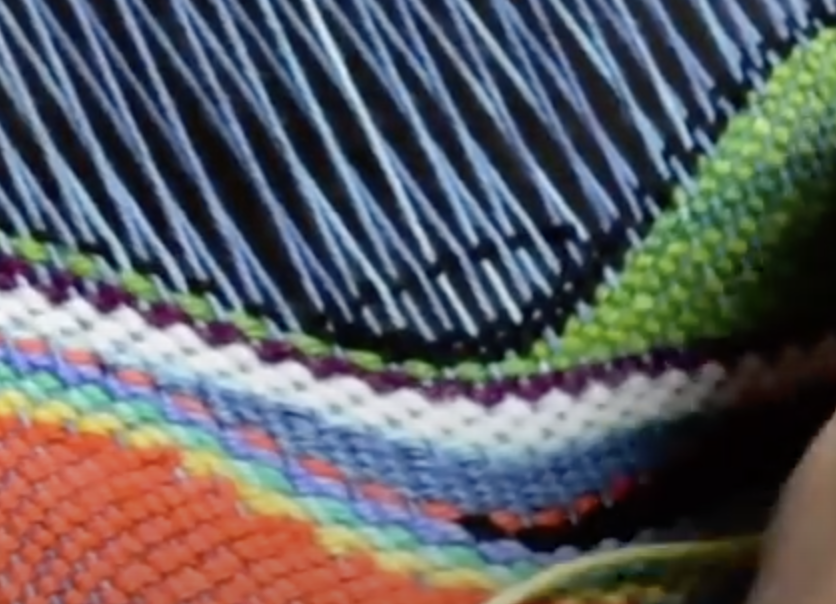
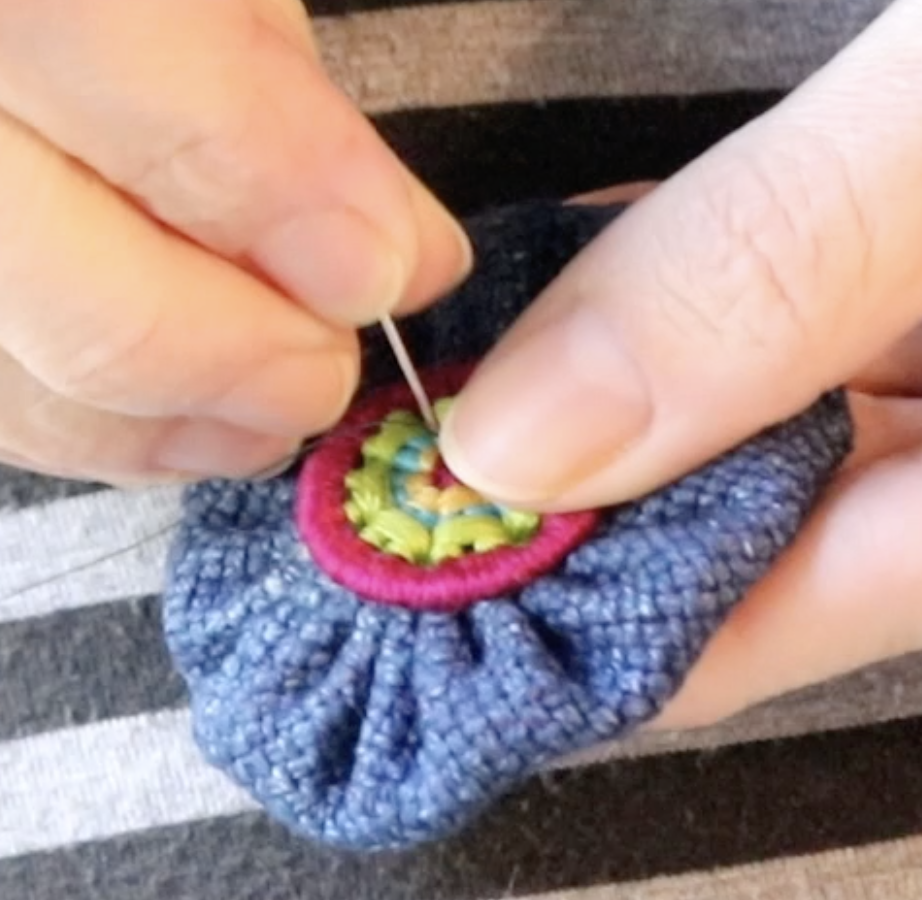
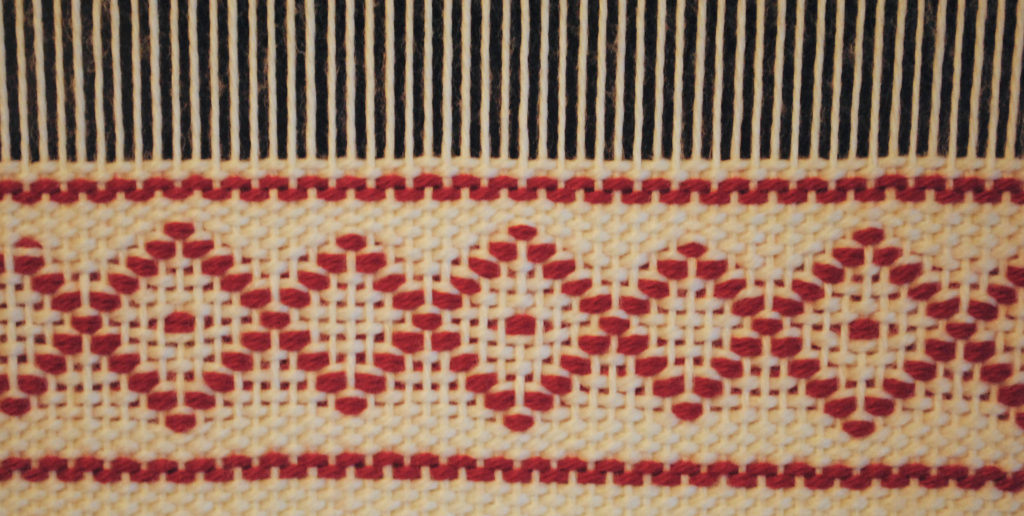
Weave structure – plain weave with Danish Medallions

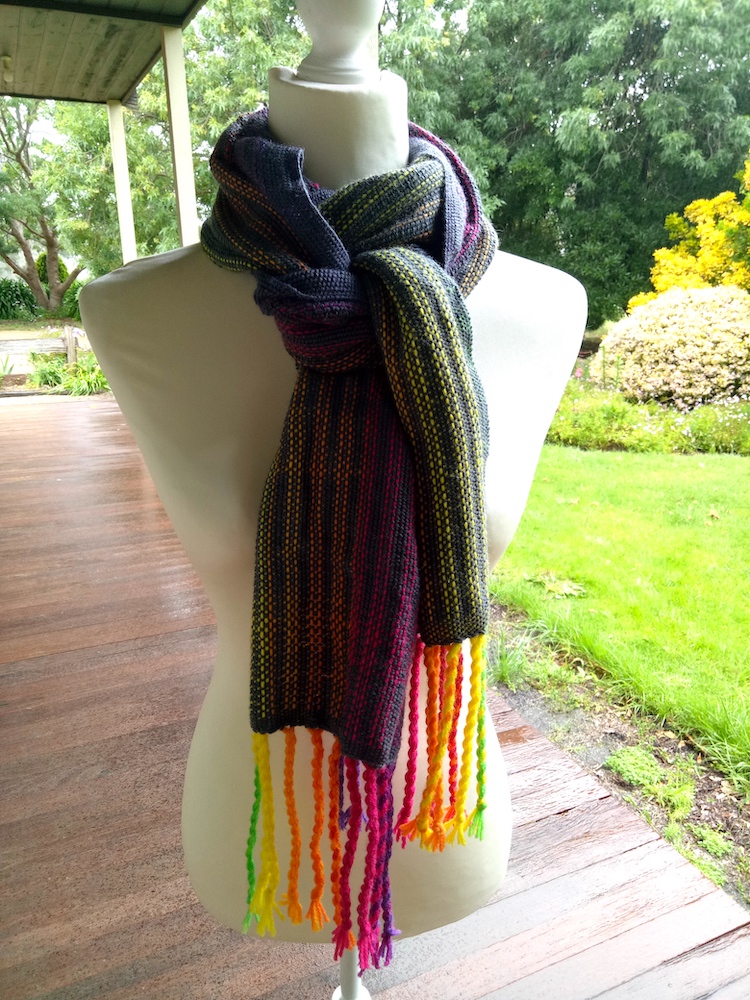
Shawl length off the loom – 75”

Wet finishing – Soak garment in warm, mildly soapy water (don’t agitate) for at least 1 hour. Warm rinse, press out excess water between clean, dry towels, gently pull into shape and dry flat in the shade. Dry completely and cut off tails. Press on appropriate iron setting if needed.

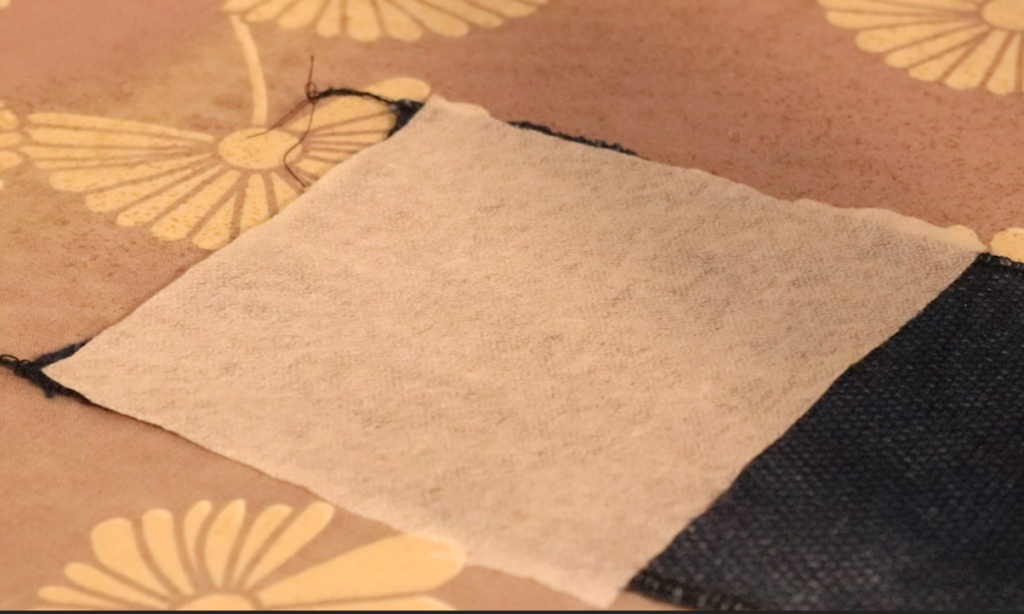
Sewing – Flat felled seam, use sewing machine or hand sew

YARNS:

I chose to use Bendigo Woollen Mills 4 ply Luxury (fingering weight) for warp and plain weave.

I used Bendigo Woollen Mills Prism Mystic 8 ply (DK weight) for the pattern weft.

For the warp-

  • Fingering weight (navy) – 145 grams

For the plain weave weft-

  • Fingering weight (navy) – 109 grams

For the pattern weft-

* DK weight (variegated) –   49 grams

The wraps per inch for the fingering weight yarn: 20 wpi

The wraps per inch for the DK weight yarn:  15 wpi

Possible Yarn Substitutes-

Fingering weight-

Jubilee Yarn Merino Fingering weight

Cascade Heritage Sock Yarn

Berroco Ultra Wool Fine fingering

DK weight-

Wool Weave Hand Dyed Merino dk

Nice Wool Gradient

Be sure to watch the video tutorial on Youtube to follow along with:

This post contains affiliate links. For further information, please see my disclosure policy.

I hope you really enjoy weaving this Danish Medallion Mobius Shawl. Thank you for all your support over the last 10 years, I’m looking forward to the next 10 💕

Until next time…

Happy Weaving!

Filed Under: Free Pattern, Rigid heddle weaving, Rigid Heddle Weaving Patterns, Weaving Tagged With: free weaving project, mobius shawl, rigid heddle weaving project

How Many Projects Is Too Many?

by Kelly 11 Comments

How many projects is too many? 🤔 If you’re anything like me, you’ve probably got more than one project on the go at any given time. Maybe it’s a rigid heddle scarf on the loom, a tapestry sampler, some floor loom experiments, or even a non-weaving project like knitting or sewing. And maybe—just maybe—some of those projects have been “in progress” for quite a while.

Is that a problem? Not necessarily.

In fact, I’ve found that having multiple creative projects on the go can actually be a good thing—for creativity, productivity, and even self-care. But I’ve also learned that this approach doesn’t work for everyone, and even for those of us who love variety, there are a few important things to consider.

Let’s take a look at the pros and cons of juggling multiple projects at once, and how to make it work for you (rather than against you).

The Upside: Why More Than One Project Can Be a Great Thing

There are several reasons why I personally enjoy and benefit from having multiple projects in motion.

💡 It keeps me creatively inspired

When I switch between different techniques, fibres, or project types, I find it actually fuels my motivation. If I feel a bit stuck or bored with one thing, I can take a break and pick up something else that excites me.

🧘‍♀️ It gives my body a break

Different projects involve different movements and muscle groups. For example, weaving at a floor loom can be demanding on the legs and back, while spinning or hand-sewing is more gentle and seated. Rotating between them helps avoid repetitive strain and gives parts of my body a rest.

🎯 It helps me be more productive overall

This might sound counterintuitive, but I often finish more projects when I allow myself to work on a few at once. Why? Because I stay in the flow of creativity rather than getting bogged down in frustration or boredom with a single task.

Turned Tacquete on my Louet David 8 Shaft Floor Loom

The Downside: What to Watch Out For

Of course, having too many projects can come with its own set of challenges.

🕳️ The danger of the “unfinished” pile

Longer-term or more difficult projects can easily end up languishing while I focus on newer, shinier things. Sometimes, they’re forgotten entirely—or feel like a burden when I do remember them.

🏠 The clutter adds up

Let’s be honest—every project takes up space. If you don’t have dedicated storage, and adequate space, things can get messy fast. (Ask me how I know, I have my own studio and things still get out of hand!)

🤹 It can feel mentally overwhelming

Even when projects are tucked away, they take up mental space. That little voice saying “You really should finish that…” can start to sound pretty loud when it’s multiplied by five or six projects.

Are You a One-Thing-at-a-Time or Many-Things-at-Once Kind of Person?

This is the key question. Some people feel scattered and anxious when they have too many projects on the go. Others (like me!) thrive on at least some measure of variety.

Ask yourself:

  • Do you feel inspired or overwhelmed by multiple projects?
  • Are you good at coming back to things, or do you tend to move on permanently?
  • Does your environment support multiple projects, or is it stressing you out?

Being honest about your tendencies, preferences and living situation can help you make better decisions for your creativity and well-being.

Bright & Beautiful Towels PDF Pattern

A Few Things to Consider Before Starting “Just One More”

Before you jump into another project, it’s worth asking:

💰 Can I afford it right now?

Some projects require buying new tools, yarns, or supplies. Do you have the budget to support more than one at a time?

📦 Do I have the space to store it?

Even small projects take up room. Is there somewhere safe and organised you can keep your work-in-progress?

📅 Am I likely to finish it—or will it join the WIP graveyard?

You know yourself best. If you’ve started five projects in the past month and finished none, it might be time to pause and focus. Be honest and know yourself for the best outcome.

What Works for Me

Over time, I’ve found a rhythm that suits both my creative energy and my practical limits.

  • I usually have one main weaving project on the loom, plus one or two side weaving projects plus some other activities like dyeing, sewing, spinning, knitting or crochet.
  • I use small baskets, zip pouches and tote bags (handwoven of course!) to keep WIPs organised and tidy.
  • I allow myself to start something new only if it serves a creative need or solves a problem (not just to avoid a tricky bit on something else!). If there is something I’m feeling super passionate about, I will allow myself to go with that motivation and ride the wave at least some of the time.
  • I keep a simple notebook list of active projects so I can easily jump back in when I have time or energy. I also add future desired projects to this list.

And most importantly—I try not to beat myself up if something takes a long time. Creativity isn’t always linear, and that’s okay.

Theo Moorman Technique Online Course

Final Thoughts: It’s Not About the Number, It’s About the Balance

There’s no magic number of “allowed” projects. What matters is whether your projects are serving you—your creativity, your energy, your enjoyment.

If you’re the kind of person who thrives with multiple projects, embrace it (with some boundaries if needed). If you prefer one at a time, that’s great too. Either way, tune into what works for YOU in this season, and don’t be afraid to change your approach if needed.

*This post may contain affiliate links. For more information, please see my disclosure policy.

If you’re challenged by availability of space, consider whether small loom weaving would be well suited to your situation.

If you find it hard to focus or get anything done with the time that you have, check out the 10 Minute Rule to increase productivity.

I hope you enjoyed this post and feel free to share with us your own thoughts and experiences in the comments below ⬇️

Until next time…

Happy Weaving!

Filed Under: Free Pattern, Rigid heddle weaving, Rigid Heddle Weaving Patterns, Weaving Tagged With: too many projects, weaving projects

How to Make a Potholder Loom – Free Instructions!

by Kelly 12 Comments

Remember the potholder looms from back in the 70’s?

Well, I actually think the humble potholder loom is a little under rated! I mean, it’s simple to use and it must be one of the cheapest looms out there if you make it yourself.

That’s what today’s post is all about. Recently, my husband and I teamed up to make a cheap and easy potholder loom and now we want to share it with all of you!

We’ve put all the information you need to make one of these simple looms into a simple to download file (you can access that below).

Not only that, but I’ve also made a series that you can find on Youtube that will show you two different ways you can weave on your own potholder loom.

You only need some simple materials to get started. Wood, nails, a hammer, some yarn, some wire (or a Tunisian crochet hook) and a regular crochet hook, I find the 5.75mm size is good. A tapestry needle can also be handy for sewing in any loose ends.

So, go ahead and grab your instructions file below and then check out the video tutorial for weaving further down.

Constructing-a-potholder-loom-2023Download

I hope you have fun with this project and until next time…

Happy Weaving!

*This post contains affiliate links. For further information, please see my disclosure policy.

Support My Free Content 😀

Filed Under: Free Pattern, Free tutorial, Potholder loom, Weaving Tagged With: free tutorial, potholder loom

The Heart Scarf Free Rigid Heddle Weaving Project

by Kelly 12 Comments

The Heart Scarf is my free rigid heddle weaving project for the year of 2021. Let me give you a little bit of background as to why I’m doing this and how I came about designing this project.

When the pandemic of 2020 hit, I released the Wash Your Hands Towels project, which was a hugely popular project. I know that all of you appreciated so much, having something concrete, beautiful and creative to be able to fix your minds on in a time where there was such uncertainty.

I loved doing that project so much for you that I wanted to do something similar this year. And something that has really been on my heart and in my mind for most of this year in particular, is that I know there are so many people out there that as a result of everything that’s been happening in the world are chronically lonely.

*This post contains affiliate links. For further information, please see my disclosure policy.

What Is The Heart Scarf Project?

So I wanted to create a project whereby you as the weaver would be weaving this beautiful scarf called The Heart Scarf. And you’d be weaving it with someone in particular in mind, someone who may be struggling with loneliness, perhaps they’re not able to get out and see their family and friends like they normally would.

Or you might know someone who’s struggling, feeling down, perhaps they live alone, or they have some other difficulties that cause them to feel that loneliness, really, that’s one of the most heartbreaking things for me to think of is that there are people out there who are just desperately lonely.

Making Someone’s Day Brighter

If we, as the makers of beautiful things, can do anything to make someone’s day a little bit brighter, then that’s definitely something that I want to be a part of. And I know that many of you would want to as well.

I’ve written a short poem from my heart. This poem is available to print out in either cursive or print, along with the free pattern. Once you’ve finished your scarf, you can package it up with the poem if you so choose, or perhaps with something that you want to write yourself and send it off to the recipient.

Perhaps you’re feeling really lonely yourself, perhaps it’s been an awful year for you, perhaps you’re having a hard time for other reasons. If that’s the case, I would love for you to weave this scarf for yourself and you can consider the words of the poem from me to you.

Let’s get down to the nitty gritty and go over the project details, starting with what you need to complete this project:

A rigid heddle loom.

Now, the width of my scarf on the loom is 11″ and I used my 24″ rigid heddle loom. BUT, if you have a smaller loom, you can absolutely weave this scarf. If you have a 10″ Sampleit or a Cricket, just warp the full width of the loom for a slightly narrower, but equally lovely scarf.

A 7.5 dent heddle/reed.

Again, this doesn’t have to be sett in stone. (Get it? Sett in stone?) If you don’t have a 7.5 dent heddle, you can use your 8 dent. If you want to change the heddle size completely, yes, you can – but you would also need to change to a more appropriate yarn size, so just bear that in mind.

Pick up stick

We use a single pick up stick to create the beautiful, textural scarf pattern. The pattern is simple to pick up with your stick and also simple to weave with a 4 step repeating weaving sequence. You can learn more about weaving with pick up sticks here.

Stick shuttle

You only need one stick shuttle for this project, as we use the same weft yarn and colour throughout the project. As long as it’s wider than the width of the piece on the loom (11″), you’re good to go.

Tapestry needle

This is an essential for hemstitching. My favourite tapestry needle of all time is the Clover Gold Bent Tip Needle. I’ve talked about these needles before, but I love them for several reasons:

  • They slide through hand woven fabric beautifully
  • The bent tip makes it really easy to dive down and come up through the fabric without having to perform hand contortions!
  • They are affordable
  • They are gold! Who wouldn’t love that?! (And if you’re prone to, ahem… losing things, the gleam of the gold is quite helpful!)

Fringe Twister

Whether you twist your fringe or not is optional, but it is a beautiful way to finish your scarf. I talk about some other options for fringes in the finishing video if you want to choose a different way. There are many brands of fringe twisters available, I have had a LeCLerc Fringe Twister for many years and have been very happy with it.

Reed and threading hook

Most rigid heddle looms will come with one or both of these, but I would like to recommend the Ashford Doubled Ended Hook for it’s durability, ease of use and affordability. I have a whole bunch of these little hooks around my studio and my old metal threading hook that used to split all my threads doesn’t get a look in anymore.

Yarn

To see all the yarn details, please download the pattern. For the warp, I used Lion Brand Mandala yarn in Gnome, dk weight. This yarn is an acrylic, but I have some other suggestions in the pattern if you prefer to look at other options. My weft yarn was a super wash wool in dark grey in a fingering weight.

What Weaving Skill Level Is This Project For?

I designed this project to be achievable for beginners but interesting enough for more experienced weavers. If you are an absolute beginner, I recommend that you take my Woe to GO! Beginner’s class before attempting a project like this.

How To Get The Pattern

The file underneath has a “download” button at the bottom. Click on that to download, then choose either to print the file or view it on your screen. The pattern PDF includes all the details you need for the project, including yarn amounts, materials, pick and weaving sequences plus the poem in either cursive or print – your choice!

The-Heart-Scarf-Free-Pattern-1Download

You can view the first of 6 videos on Youtube –

The full video lessons and printable pattern are also available all in one spot at the Online Weaving School if you would prefer to watch there.

I hope you love this project and bring joy to someone’s life (or to your own!) by taking part.

Until next time…

Happy Weaving!

How To Use Pick Up Sticks – Printable Resource

Filed Under: Free Pattern, Free tutorial, Online Weaving School, Rigid heddle weaving, Weaving Tagged With: free project, freeweavingproject, rigid heddle weaving patterns, rigid heddle weaving tutorial, the heart scarf

Baubles and Candles on a rigid heddle loom

by Kelly 11 Comments

With Christmas fast approaching, I wanted to gift you all with something fun and achievable, as well as having a festive theme.

I came up with some simple baubles and candles that I’m confident is suitable for any level of rigid heddle weaver.

This project is very decorative and better suited to low wash items.

*This post contains affiliate links. For more information, please see my disclosure policy.

For the project, I just wove a sampler to illustrate the patterns, but you can use the designs however you please.

What you will need:

A rigid heddle loom (any size is fine if you just want to weave the sample.

A 7.5 dent heddle

A threading/reed hook

A stick shuttle wider than the width of your weaving

A pick up stick wider than the width of your weaving

A tapestry needle

Yarn options:

For my warp I used a light worsted/dk weight wool in white. I used this same yarn for my plain weave. The same yarn, but in different colours was used for the pattern weft. Please see the video for colours used.

For embellishments, I used small amounts of DMC embroidery floss.

Sampler Specifications:

If you wanted to weave a sampler just like mine, here are the basic measurements.

Number of ends: 64 (32 slots)

Approximate width on loom: 8″

Sett: 7.5

Total warp length: 35″

The baubles and candles use the same overshot weaving technique as my reindeer, snowmen, gift boxes and winter trees.

There is a pattern weft that forms the picture or design, and in between every pattern pick is a plain weave pick (either an up or a down shed).

Weaving Instructions:

The Baubles –

I left a border either side of my designs in order to centre them and make sure that none were inadvertently cut in half! I left 6 threads on each side. This is optional, and you an adjust the border threads to suit.

I’m not including the border threads in the weaving steps, but if you watch the video you won’t have any trouble following along with these instructions.

Remember that you need to weave a plain weave row in between every pattern weft.

Step 1. 6 up, 2 down, *7 up, 2 down, repeat from * (7 up, 2 down for the rest of the way across)

Step 2. *5 up, 4 down, repeat from *

Step 3. 4 up, 6 down, *3 up, 6 down, repeat from *

Step 4. Repeat row 3, with a contrast colour

Step 5. Repeat row 3, with the original colour

Step 6. *5 up, 4 down, repeat from *

Step 7. Repeat row 1

The Candles:

For the candles, I left a border either side of 5 threads instead of 6, to work in better with the required calculations for the design.

Step 1. *4 down, 4 up, repeat from *

Step 2. Repeat row 1, alternating plain weave rows with pattern rows.

All of these details are available in a handy PDF for you to print out. You can download and print that right here:

Baubles-and-CandlesDownload

And you will want to watch the video and follow along with the instructions. You will find the free and detailed video here:

I hope you enjoy this project! Thank you all for your AMAZING support this year!

I wish you all a very Merry Christmas! 🎄

Until next time…

Happy Weaving!

Filed Under: Free Pattern, Free tutorial, Inspiration, Rigid heddle weaving, Rigid Heddle Weaving Patterns, Tutorials, Weaving Tagged With: baubles, candles, christmas, free tutorial, rigid heddle loom, rigid heddle weaving, rigid heddle weaving patterns, rigid heddle weaving tutorial

Wash Your Hands Towels Photo Gallery

by Kelly 3 Comments

The Wash Your Hands Towels have been such a successful project.

Weavers from all over the world, most of them in some form of lockdown at the time, took up the challenge to weave some beautiful towels.

*This post contains affiliate links. Please see my disclosure policy for further information.

If this is the first time you have come across this project, you can read all about it in this post.

Basically, I wanted to share a free rigid heddle project to help weavers re-focus and occupy themselves in a positive way during the beginning of the pandemic, when none of us really knew what to expect or how it was going to pan out.

When brainstorming for a project, everywhere I turned I was hearing “wash your hands” and that became my inspiration for the towels.

It was also important that the project be easy enough for beginners but lovely enough to interest more seasoned weavers. It was thrilling to see that weavers of all different levels threw themselves so enthusiastically into this project – and that 3 months later towels are still being produced thick and fast!

Almost every day I’m seeing a new set of towels shared on social media. Many of them are so varied and in a myriad of colour ways.

Some weavers have chosen to follow my instructions exactly, others have changed the colours, and some have merely used my towels as inspiration and put their own spin on the design. I love them all!

One of the yarns I recommend for these towels is Sugar n Cream but I’ve also been hearing really good things about I love this Cotton! It’s not readily available here so I haven’t tried it, but from all reports it’s a really lovely yarn and suitable for this project.

I wanted to create another space to showcase at least some of the towels in a gallery:

I hope this gallery of gorgeousness inspires you to weave a set of Wash Your Hands Towels too!

Make sure you visit this post for the printable PDF, materials list and video class links.

This free class is also available at my Online Weaving School.

Until next time…

Happy Weaving!

Filed Under: Free Pattern, Free tutorial, Health and home, Rigid heddle weaving, Rigid Heddle Weaving Patterns, Tutorials, Weaving Tagged With: rigid heddle weaving tutorial, washyourhandstowels

Free Style Tapestry Weaving on a Rigid Heddle Loom

by Kelly 8 Comments

You know sometimes you do something with absolutely no notion of the possible future repercussions?

That is what happened when I made this freestyle tapestry series. I was really doing it for me, but I decided to turn the camera on and bring my Youtube audience along for the ride.

Since then, the 4 video series has gone viral on Youtube, with one of the videos winging it’s way towards 1 million views! Crazy!

These videos were recorded pre professional lighting and sound equipment. I was using my son’s camera.

This video series on Youtube began after a busy morning, a tired me and a desire to weave something that would be rewarding and yet didn’t take too much brain power.

I was too tired to sit down and calculate a project or go through my stash to see whether I had enough yarn to complete a project.

So instead, I found some bits and pieces of yarns left over from other projects, put a short warp of a fingering weight cotton, hand dyed and left over from a previous project, on my rigid heddle loom (which only took around 20 minutes to do), sat down with my bag of left overs, and just started weaving.

How often do we gift ourselves with this kind of luxury? To weave with no set plan, to invest in the process more so than in the expected outcome? I know that I definitely don’t do this enough!

This kind of weaving is so relaxing and free-ing. It is not a fast way to weave, but when you get in the groove it doesn’t seem to matter how long it takes.

With this kind of weaving we use the basic rules but we bend and stretch them. We say, “I want to do this!”, and we do it. We push the weaving around, we beat it up and down, we put in colour as we go, we use all kinds of yarns. And we love the process.

So, what do you need to get started?

*A rigid heddle loom

Well, a rigid heddle loom is really perfect. It will take care of our 2 sheds and our tension beautifully, so that once warped all we have to think about is the weaving. The heddle goes up, the heddle goes down. Repeat. Simple.

You could do this on a Sampleit or Cricket loom with no problems as you don’t need a wide width – you can make the piece whatever size you wish.

I used a 10 dent heddle for my piece.

You can also weave a piece like this on a simple frame loom or tapestry loom, but using a loom that has the ability to change sheds is really helpful. My Mirrix Big Sister is an example of a tapestry loom with a shedding device.

*A stick shuttle or two.

Using a lot of colours in one project doesn’t lend itself well to stick shuttles, as you would need a lot of them. Therefore, I usually use a couple of stick shuttles and for the rest of the colours I just pass them through with my hands and keep the weft yarn in either butterflies or little balls. Butterflies are neater though. I have a video tutorial on how to make them!

*A threading and reed hook

The reed hook is for pulling threads through the slots of the heddle/reed when you’re warping. The threading hook is to pull the threads through the holes in the heddle/reed when threading the loom after warping. I love and use these Ashford Double Ended Hooks, I have a bunch of them in case I lose any and use them constantly.

*A Tapestry Needle

This is really handy for if you intend to hemstitch your piece and also for needle weaving extra yarn into gappy sections if you want to. A tapestry needle with a bent tip is even better!

*Additional beater

You will need this because we are creating a weft faced weave here, meaning that we want the weft to totally cover the warp. The heddle/reed that we normally use for beating does not push the weft down enough as it is designed more for a balanced weave.

There are a number of options for an additional beater. A large fork works really well. I also have a little tapestry beater that I use. There are “proper” tapestry beaters available as well, but I would only purchase one if I was going to be doing this type of weaving a lot.

What about the warp calculations?

Well, as I pointed out, I didn’t calculate at all, but my warp was around 8 inches wide and 40 inches long.

And the yarns?

A variety of yarns were used, but I did use quite a lot of wool in light worsted/dk weight and also in an aran weight. Some were fingering weight. Some were hand dyed, some were commercial.

I also used some cottons in various weights.

Techniques used:

Mostly this type of weaving is just plain weave (1 pick in the up shed, 1 pick in the down shed, and so on) that is packed down tight.

In some areas I would build up mounds or shapes by taking the weft part of the way through in one shed, change the shed and then take the yarn back the same way I just came in.

For example, I brought the green in from my right in the down shed. Roughly half way across I stopped and took the yarn down through the warp at the back rather than continuing it to the left hand side for a full pick.

I changed into the up shed and took the green back to the left.

This is a classic tapestry technique that allows the weaver to begin building up areas of colour, usually to make shapes.

If you keep ceasing the weft yarn and turning back in the same place each time, you will build a block or straight edged shape. Or, by varying the place in the warp where you turn back the weft, you can taper the shape to make it rounded.

The first and second videos of the series show in detail how this technique is used.

In a number of areas I have used outlining. This is basically putting in a darker weft that either outlines a shape you’ve made or just provides a good contrast between one colour and the outline colour. You can see here that I’ve used some black to outline a green section, and the contrast is very effective:

In some places I combined outlining with needle weaving. Needle weaving allows you get weft yarn into tricky spots. I had created a valley in the middle of my piece, but then I wanted to fill it with a small, highlighted section. I started by outlining a “jewel” shape with my black yarn and a tapestry needle:

Next, I brought in a brightly coloured and highly contrasting hand dyed wool with the needle, and wove that into the space that I had outlined with the black wool:

Needle weaving isn’t the only way to do this, but it’s easy to get exact smaller shapes and sizes within the piece.

If you’re interested to know how the piece actually starts out and how you achieve all those cool curves, the 3rd video restarts another piece in order to show just how it’s done.

And then finally the 4th video has an added bonus of demonstrating how to weave a circle within your piece using a simple template. You can also embellish with embroidery, which I did in some sections of my finished piece. This is easier to do while your weaving is still on the loom.

Due to the huge response from this video series, I decided to make a second freestyle tapestry series for Youtube. This one was inspired by the Van Gogh painting, Starry Night. The video series is filmed mostly in real time and is at a very relaxed, step by step pace.

And, of course you will want to check out the original 4 part video series beginning with part 1:

If you want to get a little more serious or delve into some more traditional techniques for weaving tapestry on your rigid heddle loom, I have an online course that will be just the thing for you.

Some of the topics covered in Tapestry on a rigid heddle Loom include soumak, interlocking, straight lines and how to use a tapestry cartoon. I’m sure you will love it!

Do you have any questions? Have you tried this type of freestyle tapestry weaving? Or do you intend to?

Let me know in the comments below, I love to hear from you!

Until next time…

Happy Weaving!

Filed Under: Free Pattern, Free tutorial, Rigid heddle weaving, Rigid Heddle Weaving Patterns, Tapestry Weaving, Tutorials, Weaving Tagged With: freestyle tapestry, rigid heddle loom, rigid heddle weaving, rigid heddle weaving patterns, rigid heddle weaving tutorial, tapestry weaving

How to weave more stunning patterns on a rigid heddle loom!

by Kelly 9 Comments

Making patterns on your rigid heddle loom is a very popular topic, particularly among newer weavers who are experimenting to see just what they can achieve on a rigid heddle loom.

*This post contains affiliate links. Please see my disclosure for further information.

Last week I made a tutorial that demonstrated 3 ways to jazz up your plain weave.

This is part two of a tutorial on how to jazz up your plain weave. Part one showed you how to use stripes, dots and dashes, loop pile and butterflies to add some extra pizazz. If you missed part one, please start here and progress on to tutorial two afterwards.

You will need a rigid heddle loom to weave this sampler. In the video, you can see that I’ve used my Sampleit loom.

This downloadable PDF has all the information you need to follow this tutorial in conjunction with the video:

More-Ways-to-jazz-up-plain-weave-part-2-copyDownload

For instructions to part one of the tutorial, don’t forget to check out the first article here.

There are so many simple ways to push past plain weave. As I was weaving the sampler I found it hard to limit the number of techniques so that I didn’t end up making this series a year long!

Part two of the tutorial covers and additional 3 techniques that you can use to make your plain weave more exciting or just for fun to explore.

All of these pattern techniques can be worked on a rigid heddle loom that is already set up for plain weave – that is, every hole and slot is threaded.

  1. Doubled Weft (pictured above).

The first technique is straightforward and simple but gives a very cool effect that really pops against the background, contrast colour.

2. Pick Up Rows (the blue blocks below)

This is such a simple concept. I made a pick up pattern and repeated it over and over (with the blue yarn) and only one pick of plain weave (maroon) in between). What you end up with is towers and dots. I had a very small amount of hand dyed rainbow yarn left, so I threw in just one pick in the middle of all the blue, to break it up and create more interest.

3. Staggered Pick Up (the bright green that actually looks like yellow, pictured above).

This is a 2 pick up stick pattern. In the video, I used just one stick and took it out each time I wanted to pick up the other pattern. But, I wouldn’t recommend that unless you’re only weaving a couple of rows, it’s way too tedious. If you want to weave a larger amount of the staggered pickup, a heddle rod is definitely the way to go! Check out this video for how to do that:

And of course, don’t forget to watch video two so that you can see exactly how I worked these techniques:

If you enjoyed this two part series, you will love my Online Weaving School! With over 60 classes currently available, there really is something for everyone. I would love to see you there!

Until next time…

Happy weaving!

Filed Under: All about looms, Free Pattern, Online Weaving School, Rigid heddle weaving, Rigid Heddle Weaving Patterns, Tutorials, Weaving Tagged With: beyond plain weave, rigid heddle weaving, rigid heddle weaving patterns, rigid heddle weaving tutorial

Hand woven fabric Yo- Yo tutorial

by Kelly 8 Comments

Many hand weavers these days are keen to sew finished pieces, particularly clothing from their hand woven fabric. This is a wonderful development for any weaving journey, as sewing opens up a vast amount of finished objects the weaver can make.

One side effect of all the sewing with hand woven fabric that is starting to happen is that there will be inevitable leftovers. Sewing, particularly clothing usually requires cutting shapes out of your hand woven, meaning that you will have smaller pieces of “waste” fabric leftover. I say “waste” but it’s only waste if you waste it!

*This post contains affiliate links

There are some fun and exciting projects that can be made even with very small pieces of hand woven fabric. One of these is the lovely Suffolk Puff or as it may be more commonly known these days, especially in America, as the Yo-Yo.

What is a fabric Yo-Yo? It’s a small, gathered circle of fabric, usually covered in the middle by a button or similar. They have been around for quite some time, seemingly dating back as far as the early 1600’s in Suffolk, England.

Suffolk Puffs were made from old clothing, quilts, bed sheets and so on, and given new life when joined together as quilts and cushion covers.

The idea is to gather a small circle of fabric at the outer edge with a running stitch. When gathered, the circle forms a sweet little “puff” that can then either be topped with another, smaller puff or a button can be sewn into the centre.

With the finished YoYo you can embellish clothing or bags, sew many of them together as in the days of old, hot glue them on to hair accessories (I’ve done this a lot for my 3 girls) or sew on a brooch backing and wear it as a one of a kind brooch.

Let’s begin with what you will need to sew a YoYo similar to mine.

*A 5 x 5″ square of handwoven (or commercial) fabric

*A 5 x 5″ square of light, fusible interfacing

*Strong sewing thread (I use Gutermann Sew All)

*A sewing needle

*A button to finish with

Begin by cutting the fusible interfacing to fit on the fabric piece. My original fabric piece was larger than 5 x 5″, so I place the interfacing on first. Make sure that you have the correct side of interfacing facing the fabric, otherwise you may destroy your iron! Place a pressing cloth over the top of the interfacing for extra protection. Iron it on and allow to cool once properly fused.

Use an object as a traceable template (I used masking tape) to draw a circle onto your interfacing. It’s fine to use pen, as it only marks the interfacing and will provide a cutting line.

Cut out your circle. Sharp scissors are very handy at this point.

Thread your sewing needle with around a 15″ length of thread and knot the end. Take the needle down through the interfacing side, about 1 centimetre in from the edge.

Stitch a running stitch, making the length of your stitch also around a centimetre in length and maintaining a fairly consistent distance between the stitches.

Continue all the way around the circle.

Pull gently on the end of your thread and the fabric will begin to gather up.

Continue gathering until the fabric forms a hole in the centre and can’t gather anymore.

Now you can decide what you will place in the middle. I’m using a Dorset button that I made previously. If you’re interested in learning more about Dorset buttons or making one yourself, I recommend GinaB Silkworks.

My button is flat backed, so I’m taking my still attached thread through the back of it to begin stitching it on.

Continue to stitch through the button to the back of your puff with small stitches until it’s fully attached and none of the raw edges of your circle hole are showing. Knot off the thread and sink it into the back of the puff where it won’t be seen.

Ta da! What an easy peasy use of scrap fabric! I think these ones should be made into brooches so they can be shown off well.

If you are interested in learning how to make buttons with your hand woven fabric, I have a members only class that shows you how to do that.

This tutorial is available in video format here-

What do you think? Do you have any scraps of hand woven that could be used to make a YoYo? And what about the Dorset buttons, are you interested in having a go at those too? Let me know in the comments, I love to hear from you!

Until next time…

Happy Weaving!

Filed Under: Free Pattern, Free tutorial, Rigid heddle weaving, Sewing, Table loom weaving, Tutorials, Weaving Tagged With: tutorial, yoyo

How to weave Reindeer on your rigid heddle loom

by Kelly 4 Comments

Weaving Reindeer on your rigid heddle loom is a fun Christmas project! This follows on from my recent post on weaving Snowmen on a rigid heddle loom.

*This post contains affiliate links

To weave reindeer, we use the same technique of a type of overshot. I was originally inspired to utilise this type of weaving on my rigid heddle loom when I was researching Russian Branoe weaving. I was completely taken by the types and varieties of designs I saw in the examples of Russian work. My mind began working overtime as I thought about how to chart designs and which designs might actually work. If you check out my Pinterest Weaving Board, you will see many wonderful examples of this patterning work.

Just like the snowmen, the pattern is all woven by picking up in front of the heddle, with the heddle in neutral. We weave tabby (plain weave) in between the pattern wefts in order to stabilise the fabric.

If this topic interests you, check out this playlist on Youtube to see all the videos I’ve made employing this same technique.

If you’re wondering how I came up with these designs, firstly I would have an idea for a design. Then I would try to map it out using graph paper by colouring individual blocks (1 block would represent one warp or weft thread) in and leaving others empty until I had a good representation of the image I wanted. Using graph paper also ensures that you can plan for the desired amount of space between each image. This is important because the empty spaces are just as important as the filled spaces to make the design. Some images do not translate well to the loom, as I’ve discovered, but it sure is fun to try!

If you want to weave some reindeer of your own here is what you will need

A rigid heddle loom (I used my 24″ but a Sampleit size is fine if you just want a small sample)

10 dent reed

A pick up stick (it needs to be longer than the width of your project)

A knitting needle is handy but not essential

A tapestry needle

Yarns-

There are no set yarns for this project, but I will share what worked well for me and give suggestions for possible alternatives.

For the warp I used a light worsted/dk weight (Australian 8 ply) wool in white.

My tabby weft (background weft) was a lighter but strong coloured light worsted/dk weight (Australian 8 ply) in wool. 

For the pattern weft, I used a lovely brown alpaca in a light worsted/dk weight. Animal fibres work really well when you’re trying to depict animals in your weaving!

The red and green borders were made with some green and red light worsted/dk wool.

For the embroidered antlers, eyes and noses I used black and red wool in a fingering weight. You don’t need to be a great embroiderer as the details are all just worked in simple straight stitches. You could also use embroidery floss to work the features, if you prefer. Here are some suggestions:

DMC Embroidery floss (my favourite brand)

Anchor Embroidery floss

If you decide to use embroidery floss, don’t separate the strands, use all 6 of them for just the right thickness. Oh, and don’t forget a red nose for our friend Rudolph!

I’ve made the weaving sequence into a printable PDF to make your weaving life just that little bit easier 😉

Reindeer-weaving-sequence Printable PDFDownload

And here is the link to the video that you can use together with this post and the PDF to weave your own lovely little reindeer.

If you’re interested in exploring this technique even further, I recommend my Exploring Branoe Online Weaving class.

I hope this post was helpful to you! I would love to hear your thoughts on this tutorial and answer your questions in the comments section below.

Until next time…

Happy Weaving!

Filed Under: Free Pattern, Free tutorial, Rigid heddle weaving, Tutorials, Weaving Tagged With: how to weave, rigid heddle weaving tutorial, rudolph

  • Page 1
  • Page 2
  • Go to Next Page »

Primary Sidebar

About Kelly Casanova

Hand crafted boat shuttles

Categories

Archives

Meta

  • Log in
  • Entries feed
  • Comments feed
  • WordPress.org

Copyright © 2026 Kelly Casanova Weaving Lessons on the Foodie Pro Theme