• Skip to main content
  • Skip to primary sidebar

Kelly Casanova Weaving Lessons

  • Hi! I’m Kelly!
    • Disclosure
  • Online Weaving School Class Index
    • Common account issues
    • Common technical issues
    • What do I get with a membership?
  • New to rigid heddle weaving? Start here!
    • Never heard of the rigid heddle loom?
    • How to weave neat edges on the rigid heddle loom
    • Rigid heddle weaving
    • Rigid Heddle Weaving Patterns
  • Patterns
  • Subscribe

Health and home

Weaving for Healing: When the Loom Becomes More Than a Hobby

by Kelly Leave a Comment

Over the years, I’ve had so many women quietly tell me the same thing:

“My loom helped me through a really hard time.”

“Weaving is really helping me through this period of grief”.

“Weaving is good for my mental health”.

We don’t often talk about this side of weaving. We talk about the excitement of new projects, yarn choices, techniques and looms. But there’s another layer to it – the quiet support that weaving can offer when life feels heavy.

I want to explore that here – not as therapy advice, because I am definitely not a therapist! Not as a substitute for proper support, because that is absolutely key for healing of any kind.
But as an honest look at why weaving can feel deeply stabilising during stressful or painful seasons.

(And just to reiterate clearly – weaving is not a replacement for professional health care. If you’re struggling, please seek the right support!)

The Comfort of Repetition

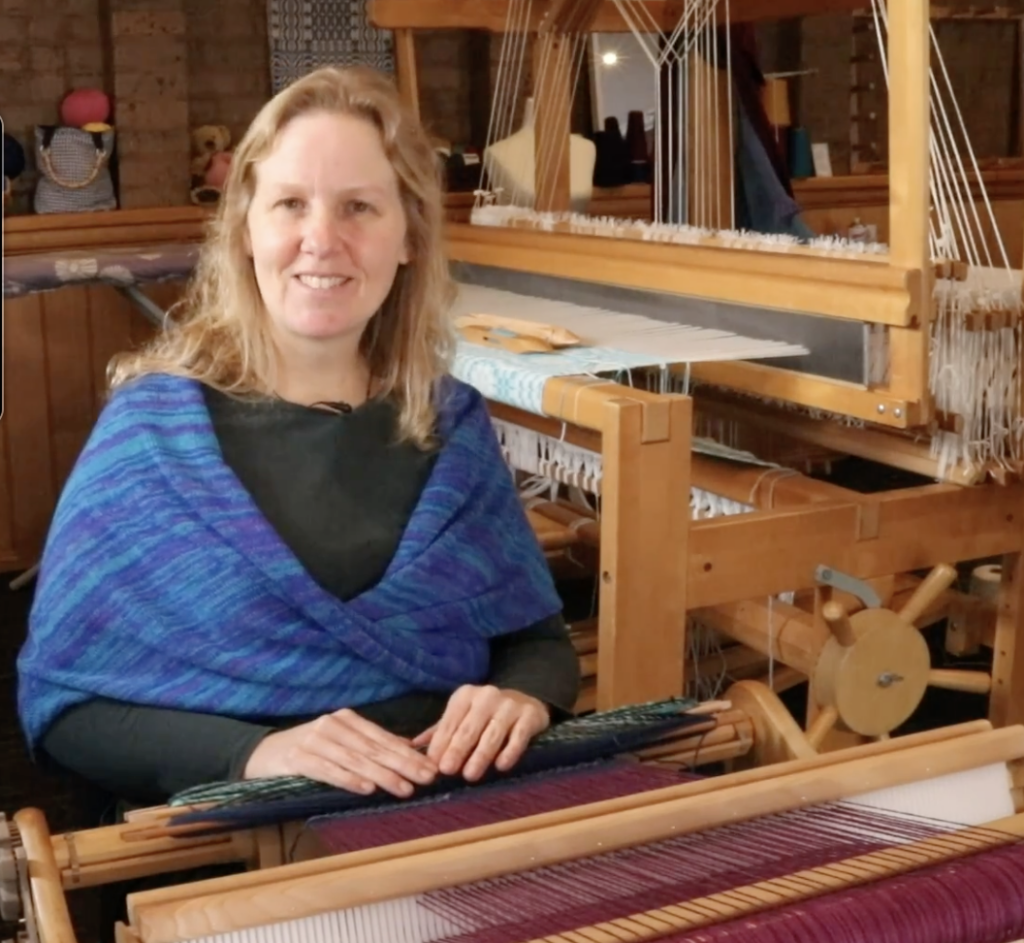
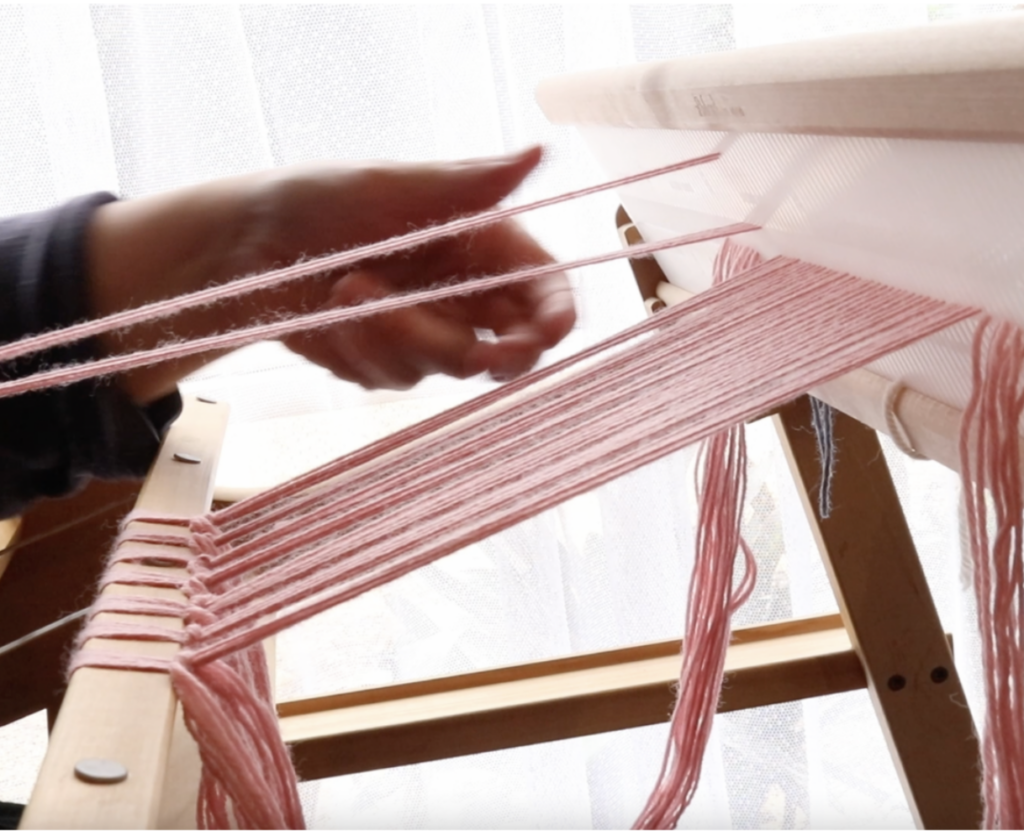
Think about what happens at the loom.

Throw the shuttle.
Beat.
Change shed.
Repeat.

There’s something incredibly regulating and grounding about that gentle rhythm.

When life feels chaotic or uncertain, the loom does not change. The process is the same today as it was yesterday. The loom waits until we’re ready for the next weaving session.

Our nervous systems respond well to predictable, repetitive movement. Both hands working. A steady pace. Clear steps.

You don’t have to make a hundred decisions.
If you run into problems or errors you can address them quietly and in your own time.
Then you progress to the next step.

It’s just you, the weaver, and the loom in that moment of time.

That simplicity can be a relief.

Weaving During Stressful Seasons

There was a period in my life when my son was very ill in hospital for an extended time. It was exhausting and uncertain, and there were so many things completely outside my control. At times, we didn’t know if he would make it.

To add to the distress, I was quite sick with the flu myself and there were many days that I couldn’t be with him at the hospital, which was quite a distance from our home.

During that season, weaving became something steady.

It didn’t solve the situation or remove the stress. Actually, at first I felt selfish for sitting at the loom when I couldn’t be at my son’s side.

But it gave me:

  • A familiar process
  • A quiet mental focus
  • A small sense of completion

When everything else felt unpredictable, the loom was predictable.

The warp was still straight.
The heddle still lifted and lowered.
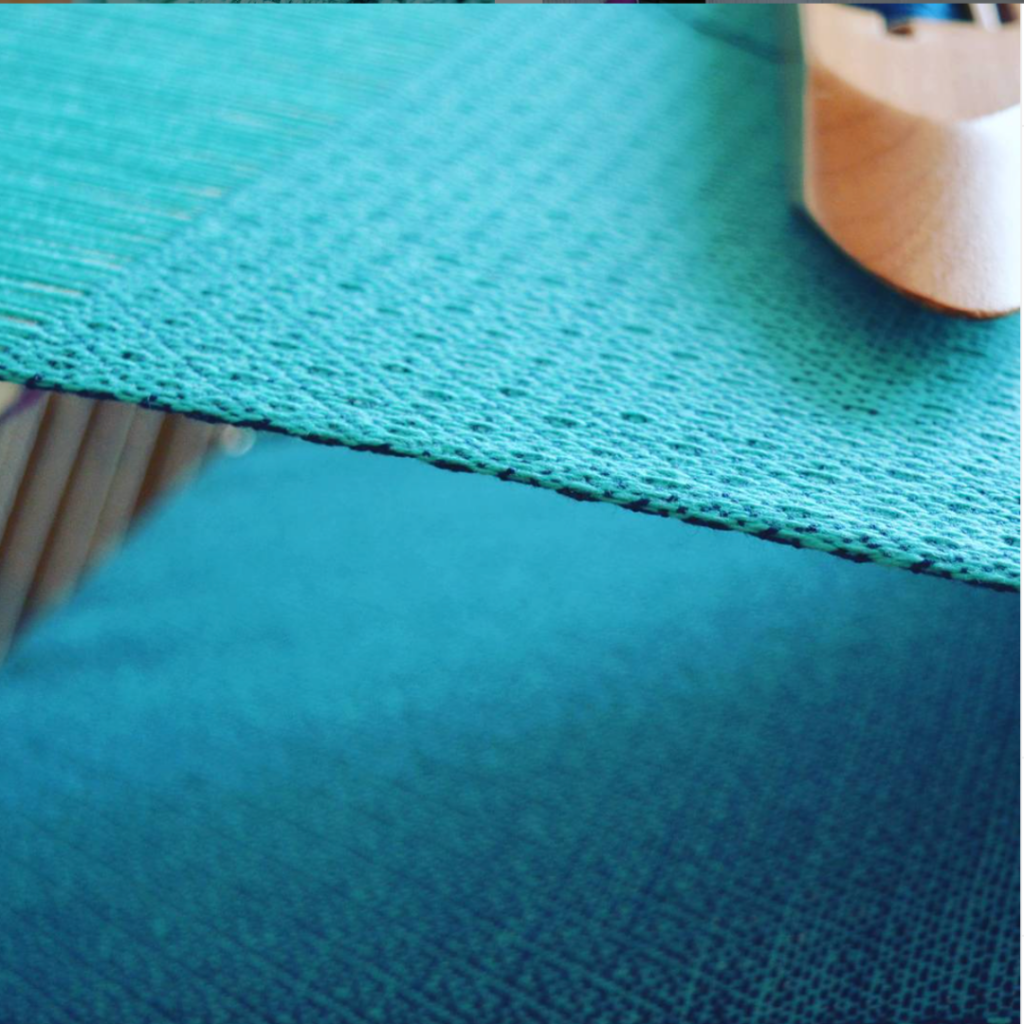
Cloth still formed, one row at a time.

And sometimes, that was enough to steady me for the day. I even made a Youtube video during that time because it helped me to feel I was doing something positive for someone else.

Weaving and Chronic Illness

If you live with chronic illness, you’ll understand how much it can affect your sense of identity and capability.

Energy shifts.
Plans change.
Progress feels inconsistent.

One of the things I’ve appreciated about weaving is that it allows for slowness.

You can sit and weave for ten minutes or longer if you feel up to it.
You can stop without “failing.”

Even weaving a small section of cloth can restore a sense of competency and satisfaction – a reminder that your effort still produces something tangible.

Why Structure Feels Safe

Weaving is built on structure.

Warp first, then weft, tension balanced, order maintained. Step by predicable step.

There is real comfort in that structure.

When your emotions feel messy or overwhelming, when your thoughts lack clarity, working within a clear system can feel grounding. You are not staring at a blank canvas wondering what to do. You follow steps, repeat sequences and see progress.

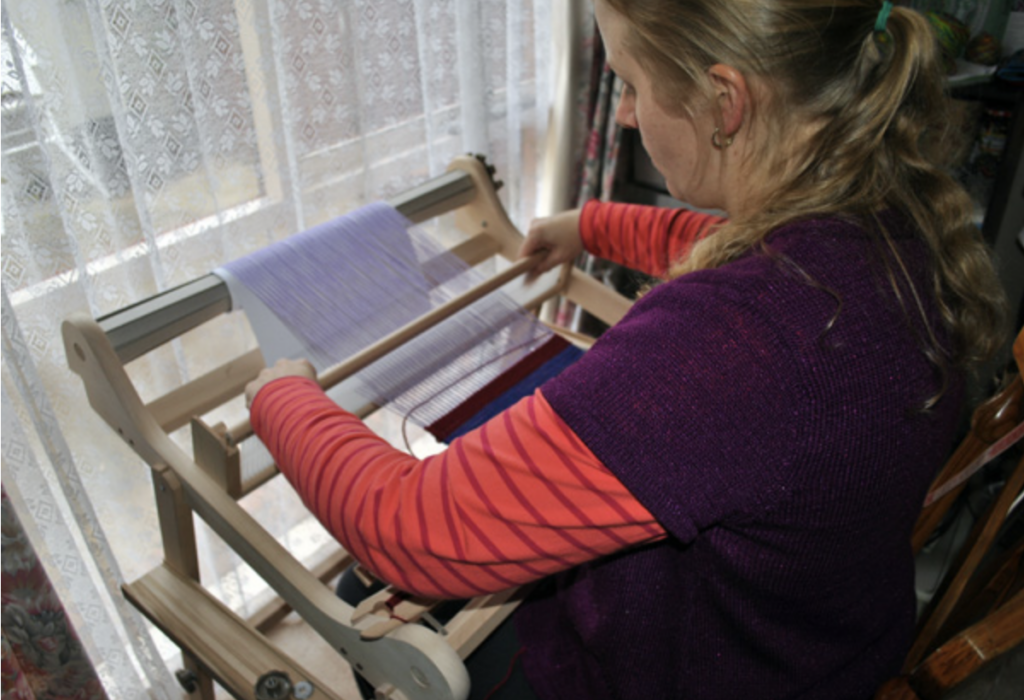
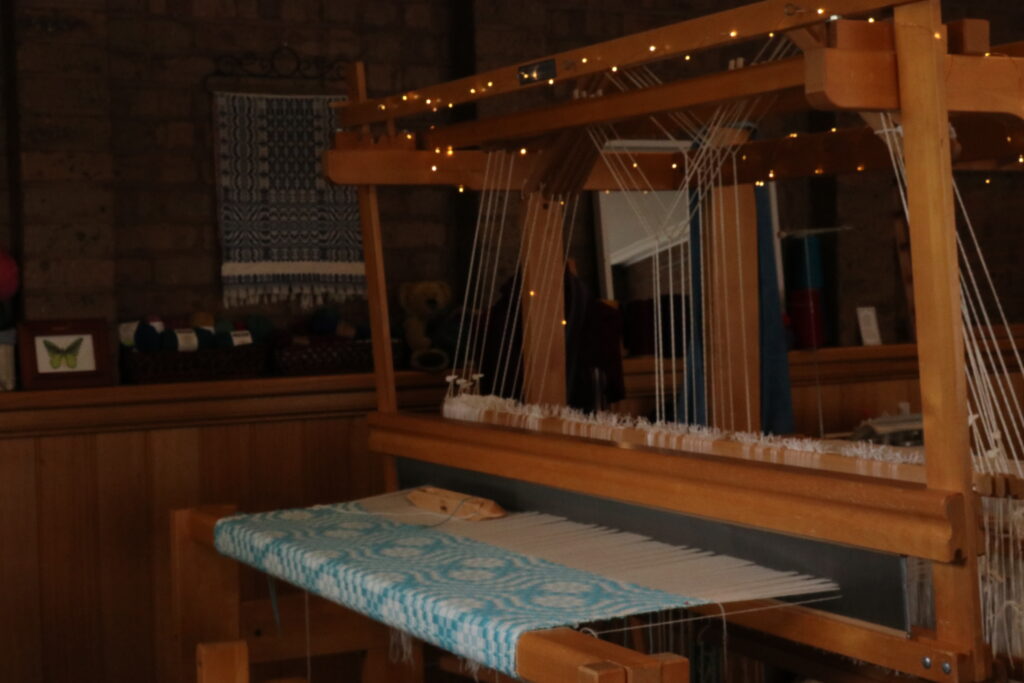
Rigid heddle weaving in particular lends itself beautifully to this. Once your loom is dressed, the work becomes rhythmic and contained. The setup takes less time so is more manageable.

Weaving Through Grief

Grief is difficult to put into words and can be so individual.

Textile work gives your hands something to do when your mind feels foggy. It’s something tangible and stable in a time where nothing feels controllable. Weaving can feel like “something to hold on to”.

Some women choose to:

  • Weave with colours that remind them of someone
  • Create a small memorial piece
  • Weave for someone else who is grieving or going through a difficult stage
  • Incorporate meaningful yarn into a project

Creating a Gentle “Healing Weaving” Practice

If you’re walking through a stressful season and would like to use your weaving as support, here are a few simple ideas:

Keep one loom dressed.
Remove the barrier of setup.

Choose simplicity.
Plain weave. Soft colours. No pressure to be clever.

Weave how you feel.
Ten minutes is enough if that is all you can cope with. Or spend the entire day at the loom if you are able. Whatever feels most healing for you for today.

Let it be private.
Not everything needs to be shared online or with others if you don’t want to. Just like artwork, it can be done just for you.

Notice the rhythm.
The sound of the shuttle.
The beat of the reed.
The growing cloth.

Sometimes the most helpful thing is simply the repetition.

What Weaving Is and Isn’t

Weaving is not a cure for everything.
It’s not therapy and it’s not a fix for trauma.

But it can be:

  • A steady rhythm
  • A quiet anchor
  • A creative outlet
  • A small place of control in a season that feels out of control

Across history, women have woven through war, loss, uncertainty and transition. Cloth has always been made during ordinary days and very hard ones.

There is something deeply human about building structure when life feels unstructured.

If you’ve experienced weaving as something more than just a hobby, I would love to hear about it in the comments.

You may be encouraging someone else more than you realise.

If you are in a season of struggle and don’t feel you’re coping, I urge you to please, get help. Whether it’s talking to friend, family member or someone you trust online. Maybe it’s joining a support group. Or maybe you need to go deeper and seek out professional help. You don’t have to do it all alone ❤️

Until next time…

Happy Weaving!

Filed Under: Healing through Weaving, Health and home, Weaving Tagged With: healing through weaving, mental health

Weaving with Chronic Illness: Tips for Staying Creative on Low-Energy Days

by Kelly 7 Comments

In the fiber arts community, we are often surrounded by images of “hustle.” We see weavers finishing beautiful projects in a weekend or posting daily updates of their perfectly manicured studio spaces.

For a long time, I felt I had to participate in that “polished weaving” version of reality. I only showed up on my good days, hiding away when the fatigue or illness took over.

But the truth is, a large portion of the weaving community lives with chronic illness, injury, or the physical changes that come with aging. After all, we are regular people from all different backgrounds and circumstances. If we only talk about weaving when we are at 100%, we leave out the beautiful, quiet work that happens in the “in-between.”

Hiding behind an illness can also be a missed opportunity to share. It’s only through talking about our difficulties that we discover there are others struggling as well.

If you are struggling to balance your love for the loom with a body that needs extra care, this guide is for you. Here are some ways we can adapt our craft to be a source of healing rather than a source of stress and disappointment.

1. Redefining Productivity: The “Investment” Mindset

When you live with a chronic illness, a “bad day” can feel like a failure. I used to spend my resting hours feeling guilty, thinking about the yardage I wasn’t weaving or the classes I wasn’t filming. Not only that – I felt like a burden on those around me.

I’ve had to learn to turn that narrative around. When you are resting, you aren’t “doing nothing” – you are investing in your next good day.

On the days when your body says “no” to the loom, try these low-impact creative investments:

  • Passive Learning: This is the perfect time to watch YouTube tutorials or documentaries on weaving, textile history or other crafts you love. It keeps your mind engaged and your skills growing without requiring a single physical movement.
  • Digital or Mental Design: Use a tablet or a good old fashioned notebook to sketch out colour palettes, draft patterns and form ideas for future projects.
  • The “Baseline” Grace: Accept that some days are only for survival. Your loom will be there when you feel better. Recognizing that you need a “Quiet Day” is a skill in itself.

2. The Ergonomic Loom: Choosing Your Partner

One of the biggest hurdles to weaving with illness is the equipment itself. We often choose looms based on what they can make, but we should be choosing them based on the reality of our ability to use them.

Make Friends with a Rigid Heddle Loom

Rigid heddle looms are typically smaller and for most weavers, they are easy on the body. Pair a rigid heddle loom with a stand and a comfy chair where you can tuck yourself right in against the loom, and you have a very comfy weaving situation!

Why a Floor Loom Might Be Better Than a Table Loom

It seems counter-intuitive, but for many with chronic pain, a floor loom is actually more accessible than a table loom.

  • Distribution of Work: On a table loom, your upper body does everything. You are constantly reaching for levers and passing the shuttle, which can lead to neck and shoulder strain for some weavers.
  • The Floor Loom Advantage: A well-designed floor loom distributes the work. Your legs handle the heavy lifting of opening the shed, while your arms guide the shuttle. This “whole-body” movement is often much more sustainable for longer weaving sessions.

Looking for “Light” Design

If you are in the market for a floor loom, look for words like “light treadling”. For example, my Louet David Floor loom has been a game-changer for me. It’s designed so that the treadling stays light even with complex tie-ups, and the loom itself is light enough to be moved easily across the floor.

3. Creating a “Restful” Creative Kit

I highly recommend having a “Tier 2” creative hobby—something you can do when you are too unwell for the big loom but too restless to do nothing.

  • The Lap Loom: Small frame looms or tapestry looms can be used in a recliner or even in bed. They allow you to feel the yarn and play with colour without needing to sit upright at a bench. I like to play around with my inkle loom or zoom loom when I don’t feel up to something larger.
  • The Portable Arts: Knitting and crochet are the ultimate companions for chronic illness. They are portable, lightweight, and can be picked up for five minutes or two hours depending on your energy levels.

4. Practical Hacks for the Studio or Creative Space

When you do have the energy to weave, make sure your setup is doing the work for you:

  • Lighter Tie-ups: If your floor loom feels heavy, experiment with your tie-up. Sometimes pressing two treadles at once is physically easier than one heavy treadle.
  • The Dobby Option: While expensive, Dobby looms (mechanical or electric) are the “gold standard” for aging weavers or those with mobility issues because they automate the most strenuous parts of the process.
  • Seated Preparation: When warping, don’t feel like you have to stand at a warping peg. Find ways to sit (try seated warping!), use a warping board at eye level, or take frequent breaks between sections.

5. Weaving Related Activity

You don’t have to be physically weaving to be involved. Tidying up a few things in your weaving space, leafing through your favourite weaving books, prepping yarn or shuttles are simple activities that don’t take a lot of time, but contribute positively towards your next weaving session.

Final Thoughts: You Are Not Alone

The most important point I wanted to share is this: You can still be a weaver. Your limitations might change the way you weave, the speed at which you weave, or the tools you use, but they do not take away your identity as a maker.

Don’t be hard on yourself. Every moment you spend refreshing your body is a moment spent ensuring you can keep weaving for years to come.

And don’t forget gratitude! Be grateful for every minute you get to spend at the loom – it’s a privilege!

I shared a raw and honest video on Youtube about Weaving with a Chronic Illness, you can watch that here:

I’d love to hear from you. How have you adapted your loom or weaving space to fit your needs? Do you have a “go-to” activity for when you’re not well enough to weave? Let’s share our “hacks” and support each other in the comments below.

Until next time…

Happy Weaving!

*This post contains affiliate links. For further information, please see my disclosure policy here.

Filed Under: Health and home, Weaving Tagged With: autoimmune disease, chronic illness, tips for staying creative on low energy days, weaving and illness, weaving with chronic illness

What My Health Reset is Teaching Me: Overcoming Excuses and Finding Strength

by Kelly Leave a Comment

Five weeks ago, I never would have believed I could finish a 25-minute workout—let alone with no modifications. If I had seen this workout back then, I would have said, “That’s too hard. I can’t do that.” But today? I didn’t just do it—I felt strong, energized, and unstoppable. The secret? I didn’t start here. I started small, with just 10-minute beginner workouts. And those tiny steps added up to something life-changing.

Instead of dreading workouts, I wake up excited to move, to walk, to get as much activity in my day as possible because it makes me feel amazing. This shift didn’t happen overnight, but it’s proof that consistency and mindset matter more than we think.

The Turning Point: Breaking Free from Victim Mentality

For those following my journey, you know I’ve struggled with my weight and health for a long time. I’ll be sharing a more detailed update soon, but today I want to focus on the biggest lesson I’ve learned.

The one thing that changed everything? Letting go of my victim mindset.

For years, I told myself:

  • “I’m gaining weight because I have Hashimoto’s disease.”
  • “Perimenopause makes me too tired to work out.”
  • “I can’t exercise because it’s bad for autoimmune disease.”
  • “I’m always hungry because of my condition.”

Excuses. I had convinced myself that my circumstances were impossible to change. I genuinely believed that I couldn’t lose weight, build muscle, or feel better at my age with my health issues. And that belief kept me stuck.

But here’s the truth: I was wrong.

You Are Not a Victim of Your Circumstances

I know that everyone’s situation is unique. Some have severe illnesses, injuries, or other major challenges. I’m not saying you need to follow exactly what I’m doing. But what I am saying is that things can get better from where you are today.

It might take small changes, or maybe big ones, but the most important shift happens in your mind. The moment I stopped playing the victim and started asking, “What CAN I do?” everything changed.

Every Day is a New Opportunity

Every morning, I wake up and say, “Thank you, Lord, for a new day.” I no longer see my health challenges as roadblocks—I see them as opportunities to find better ways to live.

I still have Hashimoto’s. I still have anxiety. I’m still in perimenopause. Those things haven’t disappeared. But what has changed is how I manage them. I’ve discovered that even with my setbacks, I can make progress. I can feel stronger, healthier, and more energetic than I ever thought possible.

You Already Have the Tools—You Just Need to Use Them

Looking back, I realize that I always had the tools to improve my health. I just didn’t know how to use them. I was stuck in a cycle of self-pity, telling myself life was unfair.

But when I cleared out that negative mindset, everything became easier. The hardest part? Just getting started.

So if you’re struggling, feeling stuck, or making excuses like I was—know that you’re not alone. But also know that things can change. You don’t have to be perfect; you just have to take one step at a time.

I hope this post inspires you to look at your own journey with fresh eyes. Start where you are, make small changes, and believe in your ability to improve. You are stronger than you think.

Until next time, friends—keep moving forward!

Filed Under: Health and home, Health Reset, Weaving Tagged With: health reset, healthy lifestyle, motivation, weight loss

Soft White Sandwich Bread Recipe

by Kelly 3 Comments

Jump to Recipe

You will absolutely love this soft white sandwich bread recipe!

I’ve been making bread for a very long time now but there is one thing that many of my loaves were lacking – lightness and softness.

My loaves were often on the dense side, not in an unpleasant way, actually in quite a substantial way, but I did have the desire to be able to make a lighter bread if I wanted to – more like a bakery style sandwich loaf.

So I started testing ingredients and methods and investigating bakery methods.

There are a few things I stumbled upon that led to the formulation of this recipe:

  1. A higher yeast proportion for a faster rise plus using sugar for taste and fast rising
  2. The addition of butter
  3. A long mixing time with the mixer

Using a mixer with a dough hook takes a lot of work out of it for you and just kneads up the most beautiful dough.

I have an older model Kenwood mixer, it does the job OK, but if and when I have to replace it I think I would be leaning towards a Kitchenaid or something similar.

The bread is quite sweet and you could definitely reduce the sugar (though each batch does make 2 loaves) or you could also substitute honey. Other sweeteners I’m not sure on as I haven’t used them.

Personally I don’t use fancy bread tins, just something similar to these rectangle loaf tins and I line them with parchment baking paper on a roll that I then save a reuse many times, this really cuts down on dishes to wash.

Soft Sandwich Bread

5 from 1 vote
Print Recipe Pin Recipe
Cook Time 35 minutes mins
Ingredients Method

Ingredients
  

  • 1 kg White baker's flour
  • 620 ml Warm water
  • 3.5 tsp Instant dried baker's yeast
  • 3 tbs White granulated sugar
  • 2.5 tsp Salt
  • 2 tbsp Butter (room temperature)

Method
 

  1. Place yeast, sugar and warm water in a mixer bowl. Allow to sit until the yeast froths (5-10 minutes).
  2. Add flour and salt and mix on low until ingredients start to incorporate. Keep mixer going as you add softened butter, a couple of cubes at a time. 
  3. Turn mixer up to level 1 and allow machine to knead dough for 10 minutes. Dough should be smooth and soft and pull away from sides of bowl.
  4. Oil bowl lightly, cover with plastic wrap and leave in warm place until dough has doubled in size (may take 45 minutes to 1.5 hours or even longer if placed in a cool place). 
  5. Divide dough into 2. On a lightly floured surface, press each piece out with your hands into a rectangle shape. Roll the rectangle starting at one short end, tucking in ends a little as you go. Pinch the seam lightly. Place in baking tin lined with parchment paper with seam side down. Do the same to the other loaf. (Don’t fuss over this part, just try to get a seam at the bottom)
  6. Cover lightly with plastic wrap and leave until risen, this can take 20 minutes to 1 hour, depending on room temperature.
  7. Preheat oven to 200C (fan forced) or 210 conventional.
  8. Bake loaves for 35mins.
    Allow to cool on a rack before cutting.

The bread is freshest when eaten on the same day but it makes wonderful toast for days after that! If it gets a little old, you can throw it in the freezer to use for fresh breadcrumbs.

I love eating it toasted and topped with eggs from our homestead. The bread also freezes well, I leave the loaves whole to freeze, or you could cut into smaller pieces if you need less bread at once.

I hope you enjoy this recipe. If you try it out I would love your feedback 😊

Would you like to see just how I make this bread? Check out my instructional video:

Until next time…

Happy Baking!

This post contains affiliate links. For more details please see my disclosure policy.

Filed Under: Health and home, Recipes Tagged With: recipes, Recipes and food, soft sandwich loaf

Lost your creative mojo? Read this!

by Kelly 10 Comments

Every creative person experiences a loss of mojo at some point.

You know that feeling when you really want to be creative but you either can’t figure out what to do, or you simply don’t have the mental or physical energy to begin?

Thankfully there are some concrete steps you can take to make your way out of this uninspiring headspace and regain that creative mojo.

Here are the tips that always get me back on track:

HEALTH FIRST

An absolute essential is to take stock of your current overall health status. Have you been looking after yourself physically and mentally? Are you getting adequate sleep? Is your loss of mojo a result of over tiredness? If you have a chronic illness are you getting correct treatment or doing all the things you know you should be doing to avoid flare ups?

Although it’s not something that you can necessarily get on top of right away, it’s something that needs your attention first. If you have been neglecting any aspect of your health, start taking steps right now to improve that situation!

MESS IS STRESS

Cleaning up your creative space when you’re lacking energy may not sound like the best advice, but for me this is one of the best ways for me to feel inspired again.

I find that a cluttered space can also make me feel cluttered mentally, which is stifling to creativity. I never regret having a good old fashioned clean up as it allows me start afresh and start to feel like so much is possible again!

Another side benefit of cleaning up your space is you often rediscover lost materials, ideas or even partially started projects. Sorting these things will help you to prioritise and decide on what to do next. Sometimes that will be working on a project to get it finished and sometimes it could be more ideal that you get your creativity flowing again by starting something brand new.

Once you start cleaning you may not feel like stopping. Perhaps you will come up with a new layout or more ways to organise your creative stuff for the future too.

RESOURCES FOR INSPIRATION

Inspiration is actually everywhere, we just don’t always see it.

When I’m lacking mojo I love to flip through some of my favourite books. It can remind me of ideas I’ve already had or weaving drafts I’ve been wanting to try, or it can give me an idea for a new project.

It can be helpful to search on Pinterest and grab some new pins for your inspiration boards.

Youtube is an amazing resource for learning and inspiration where you can find almost anything you want to learn. Did you know that I have almost 400 videos on my weaving channel now? I also have a second channel, Providence Ridge that is a great source of inspiration.

Product image

Premium Membership

Access to full class library for one annual fee. All prices are in US dollars

1926 students enrolled

Last updated Feb 4th, 2026

Select a Pricing Plan
Buy now

You can find more online inspiration in the form of podcasts, Facebook groups and other online communities. When you have a membership with the Online Weaving School you gain access to a wonderful members only group.

GO AWAY

Here is another idea that seems counterproductive but actually works – get away from your familiar surroundings for a little while!

You know what they say, absence makes the heart grow fonder. By removing yourself from what you’re accustomed to seeing and doing you can come back to it with fresh eyes and a new appreciation.

Not only that, but often you will find new inspirations in a different setting. Whether it’s a nature hike, a visit to the beach, a road trip, visiting galleries or so much more, you can be inspired by nature or things you don’t see everyday.

TRY SOMETHING NEW

Perhaps you’re feeling bogged down by your craft. How about trying something new? I have done this frequently over the years and what I have discovered is that, rather than take me away from my main craft (in my case – weaving!) the more skills you learn the more you can contribute to that chosen craft.

And if you do try something new and feel that is the right time for you to move away from what you have been doing into this new endeavour, that is also a good thing. As an artist/craftist/maker we often feel compelled to be creative and to use our hands to make things. We don’t need to restrict ourselves in this and there are so many ways to achieve artistic expression.

I hope this article has been helpful to you!

Until next time…

Happy Weaving!

Filed Under: Books, Health and home, Inspiration, Online Weaving School, Personal development, Weaving Tagged With: creativity, health, inspiration, mental health, mojo

Easy Sourdough Granola Recipe: A Delicious Twist for Healthy Homemade Breakfasts

by Kelly Leave a Comment

Looking for a delicious way to use up your sourdough discard? Try making homemade sourdough granola! This easy recipe combines the wholesome goodness of homemade granola with the unique flavor and crunch that sourdough starter adds.

It’s a game-changer for your breakfast or snack routine—perfectly crispy, flavourful, and a great way to reduce food waste.

Sourdough granola makes the perfect breakfast topping for fresh fruit and creamy Greek yogurt—a delicious and nutritious way to start your day!

Jump to Recipe

Personally, I love little clusters in my granola, and in the past I have used egg white (like in this recipe) to achieve a bit of chunkiness. But using sourdough starter binds all the ingredients together into clumps so well that there is no need for any additional binders.

You can control the level of crunch by experimenting with the baking times. For more crunch, bake longer. For less crunch, bake a little less.

You can also choose to have add ins or to just make the base recipe, depending on your own taste preferences. I love add ins and these are put in at the end of baking.

Some add in ideas that I regularly use are dried fruits like sultanas, apricots, figs, dates and apple. If you are a fan of nuts, any nut goes well with this recipe! One of my personal favourites is almonds.

This is such a simple and adaptable recipe, just mix wet ingredients and dry separately, then mix together before baking.

The dry ingredients all get thoroughly coated, making a clumpy, crunchy granola once baked.

Sourdough Granola

Print Recipe Pin Recipe
Ingredients Method

Ingredients
  

  • 5 cups Rolled oats
  • 1 cup Desiccated or shredded coconut
  • 2 tsp Cinnamon powder
  • 1 cup Sourdough discard or starter
  • 3 tbsp Olive oil
  • 2 tsp Vanilla extract
  • 1/2 cup Honey or brown sugar (or equal mix of the two)
  • Drizzle Maple syrup (optional)
  • 3/4 cup Dried fruit of your choice
  • 1/2 cup Nuts of your choice (optional)

Method
 

  1. Pre heat oven to 160 degrees Celsius
  2. Place all dry ingredients (except fruit and nuts) in a large bowl and mix.
  3. Place all wet ingredients in separate bowl or glass jug and mix thoroughly.
  4. Pour wet ingredients over dry and mix thoroughly.
  5. Line a large roasting tray or a tray with sides. I use non stick baking paper. Alternatively, use a non stick tray.
  6. Tip your mixture into the tray and even out to make an even layer.
  7. Place in the oven for 10 minutes, remove the tray and turn the granola with a spatula.
  8. Place back in the oven and repeat until desired darkness is achieved. I recommend a total cooking time of 30 – 40 minutes.

Don’t forget to stir in your add ins at the end, if you’re using them! Once completely cooled, store in an airtight container (I like to use mason jars).

You can eat this granola on it’s own as a snack, on top of fresh fruit, with milk of your choice or one of my personal favourites, on top of yoghurt.

If you love to customise, here are some add in options:

Add ins (examples of)

1/2 cup chopped peanuts

1/4 cup chopped almonds

1/4 cup sunflower seeds

1/4 cup chopped macadamias

1/4 cup chopped cashews

1/4 cup pistachios 

1 cup LSA (linseed, sunflower and almond meal) mix

Chopped dried fruit eg. apricots, peach, paw paw, apple, dates, cranberries

Rules for add ins

*For seeds and nuts, add these in at the dry mix stage. 

*For dried fruit add ins, mix in when the muesli has finished baking.

Allow the muesli to cool before placing it in an airtight container. Serve with milk or use as a delicious topping on stewed fruit and yoghurt. 

Sourdough granola isn’t just a delicious treat for your own table—it also makes a thoughtful and delightful gift! Simply place it in an attractive jar, tie it with a ribbon, and you’ve got a homemade present that’s sure to impress. Whether you’re enjoying it as a crunchy breakfast topping or sharing it with loved ones, this recipe is a wonderful way to make the most of your sourdough discard while adding a little extra joy to every day.

I hope you love it as much as I do! 👩‍🍳

*This post contains affiliate links. For further information please see my disclosure policy.

Filed Under: Health and home, Recipes, Weaving Tagged With: granola, my recipes, recipes, Recipes and food, sourdough

Healthy Hot Chocolate

by Kelly Leave a Comment

I started looking around for a healthy hot chocolate preparation recently with the desire to replace my not so healthy evening chocolate drink of Milo.

It’s not that I don’t love Milo – I really do, and I’ve been drinking it since I was a kid, but it contains a lot of sugar.

I’ve also started taking collagen powder recently and was looking for something I could incorporate the powder into to make it taste better. I’m not a fan at all of the flavour of unflavoured collagen powder!

What I found while looking for the ultimate healthy hot chocolate mix was quite interesting. I found that:

  1. There are many, many healthier hot chocolate powders available
  2. They are prohibitively expensive
  3. Most have ingredients that you can put together at home yourself

So I set about making my own recipe, using simple ingredients that I had on hand.

The thing about a recipe like this is you can cater it to suit yourself in so many ways. For example, instead of using hot water you could use your favourite milk or milk alternative as the liquid. Just warm all the ingredients together, make sure they are stirred well and you have a deluxe version!

If you’re looking for a dairy milk alternative, any of the following would work for this recipe:

  • Coconut milk
  • Almond milk
  • Oat milk

You could use your favourite sweetener in place of the honey (like monkfruit sweetener or stevia)

If you don’t like the taste of cinnamon, just leave it out. You could do other add ins like protein powder or magnesium powder to increase the health benefits. There are lots of options!

If you are a lover of dark chocolate (hello!) you could also melt and mix that in.

Kelly

Healthy Hot Chocolate

Print Recipe Pin Recipe
Prep Time 1 minute min
Servings: 1 serve
Ingredients Method

Ingredients
  

  • 1 tsp Cocoa powder
  • 1 scoop Collagen powder
  • 1/4 tsp Cinnamon powder
  • 1 teaspoon Raw honey
  • 250 ml Hot/warm liquid I use a mixture of hot water and dairy milk

Method
 

  1. Add the dry ingredients and honey to your cup. Pour in the hot liquid and stir well. Add milk or other liquid, if using.

Filed Under: Health and home, Recipes, Weaving Tagged With: hot chocolate, recipe, Recipes and food, weight loss and health

Make your own roll on perfume

by Kelly 5 Comments

I’ve never been a great fan of commercially available perfume. It’s very challenging to find a scent I actually like enough to wear and I find a strong scent is overpowering and sickly.

I do love essential oils though, so when I made my first roll on perfume, I was hooked!

*This post contains affiliate links. For further information, please read my disclosure policy.

I think roll on is an awesome alternative to shop bought perfume for several reasons:

  1. There are so many essential oils available so it’s not hard to find scents you enjoy.

2. It’s cost effective. Yes, good quality essential oil can be expensive, but you only use 20 drops per 10ml roller bottle.

3. A bottle lasts a long time and the scent lasts well on your skin.

4. The ingredients are all natural.

5. The scent is less “cloying” and more subtle than many commercial perfumes.

6. You can custom make your own scent combinations.

I know a lot of people talk about the health benefits of essential oils and I’ll be completely up front about the way I personally use them. I have never discerned any physical health benefits from my use of essential oils. I just like the scents, both on my skin and diffused into the air. Nice scents make me happy, and that is why I use them!

You don’t need to be daunted by the idea of making your own perfume, it’s really so simple you won’t believe it!

You will need a few key ingredients though, and you may not have these already.

For Australian readers, these products can all be purchased from an Australian based company:

  • Essential oils You can purchase these as either single oils (eg. lavender) or blended (will usually have a name eg. “harmony blend”.)
  • Fractionated Coconut oil (This oil is formulated to not solidify at room temperature. This is important, as we need a liquid carrier).
  • Glass roller bottles in amber OR deluxe

Or, for my international visitors, these products can be purchased on Amazon.

  • Essential oils. You can purchase these as either single oils (eg. lavender) or blended (will usually have a name eg. “harmony blend”.)
  • Fractionated Coconut oil
  • Glass roller bottles

Safety warning:

Not all essential oils are recommended for use on the skin. Many can be used safely when mixed with a carrier (as we do to make the perfume roller bottles) but you should always spot test before you start using them routinely, just to ensure there is no reaction. There are some oils that should not be used during pregnancy.

There is a really good article here that lists the potential dangers of oils if not used correctly, and this page lists oils that are either safe or not safe during pregnancy.

Let me show you how easy it is to make these!

The recipe for the bottle I’m making here is my absolutely favourite. It’s like candy floss without the sickliness! This is for one 10ml roller bottle:

  • A little less than 10ml of fractionated coconut oil
  • 14 drops lavender essential oil
  • 3 drops geranium essential oil
  • 3 drops rose 3% essential oil

Firstly, gather all your ingredients together, including the essential oils (if using more than one) you will need. Remove the lid and the roller seal from the top of your bottle so that it’s open at the top.

Pour in the coconut oil until the bottle is around halfway full.

Now drip in your chosen essential oils. If you have a larger bottle of essential oil without a stopper, you may want to use a drip tool for better precision.

Continue to fill the bottle with your coconut oil, but don’t fill to the very top, as this leaves no room for shaking and could overflow when you put your roller top back on.

Place the roller top back on, pushing it down so that it seals. Replace the lid.

Give the bottle a light shake and you’re good to go!

I like to roll my scents onto my wrists and on my neck, below my ear lobes.

I also love to diffuse scents in my studio while I’m working or in my bedroom, it feels so luxurious. I use a diffuser similar to this one, which is great for someone as forgetful as me, as it shuts off automatically if the water dries out. I hope you enjoy making your own perfumes! If you make some of these, I would love to hear what you think of them, so be sure to come back and leave me a comment 😊

Until next time…

Happy Weaving!

Filed Under: Health and home, Inspiration, Weaving Tagged With: diy perfume, essential oils, homemade perfume, roller perfume

Soft and Sweet Bread Rolls

by Kelly 2 Comments

Our family just loves fresh, home baked bread.

I bake all the bread for my family, four loaves at a time. That way we have some fresh and some to store in the freezer for the following days.

But there are some days (more often than I care to admit!) when we’ve run out of loaves and I need to do something fast! Those are the days that my rolls make an appearance. They are much quicker to make than bread loaves and I can get them to the table super fast.

These rolls are very similar to how I make my scrolls, but you bake the dough as rolls instead of being rolled up with fillings.

There are many fillings you can serve in the rolls once they are baked. You can serve them warm or allow to completely cool first. Here are some serving ideas:

I posted on Instagram that I was serving bacon and avocado rolls and everybody wanted to know about them!

Bacon and avocado-

Serve the rolls while still warm. Cut open, spread with mayonnaise, mashed avocado, cheese and fried bacon.

With soup-

You can make the rolls “dinner roll” size if desired. Serve warm, spread with butter. This makes a real meal out of your soup and completes it perfectly.

Egg and bacon rolls-

Similar to the avo and bacon, only this time you also fry eggs with your bacon. Serve with or without cheese and mayonnaise.

Dinner roll sized

Ham and salad-

Allow rolls to cool before cutting open. Serve with ham and whatever salad you like, whether it’s some mixed leaves or a coleslaw.

Hamburger or Veggie burger-

These rolls make great hamburger buns! Fry your meat or veggie patty and team with your favourite extras in the roll. Personally, we’re fans of hamburgers “with the lot”! You can make Hawaiian style burger by adding a ring of tinned pineapple.

For afternoon tea-

These are delicious enough to serve with butter and jam or marmalade for an English style afternoon tea.

Grilled cheese-

My kids love it when I do this. Cut the rolls in half. Using a grill, lightly toast both sides of each half. Top the halves with cheese and place back under grill until melted. Delicious for lunch or paired with soup.

Kelly

Soft and Sweet Bread Rolls

Delicously light and soft rolls for any meal
Print Recipe Pin Recipe
Prep Time 10 minutes mins
Cook Time 30 minutes mins
Rising time 1 hour hr 20 minutes mins
Servings: 9
Ingredients Equipment Method

Ingredients
  

  • 800 grams Bread flour You can do all white flour or a mix. I like to do 200grams wholemeal and 600grams white flour.
  • 1 tbsp Dry active yeast
  • 2 tbsp White sugar or honey
  • 2 tsp Salt
  • 3 tbsp Sunflower oil
  • 2 & 2/3 cup warm water or milk I use milk powder in water

Equipment

  • Stand mixer (optional)
  • Oven

Method
 

  1. Place all dry ingredients in mixer bowl, fitted with a dough hook. Place in a mixing bowl if mixing by hand. Mix lightly to combine.
  2. Combine oil and warm water/milk in a jug. If using honey, add it with the liquids also.
  3. Set the mixer on minimum and gradually pour the wet ingredients into the dry. Keep mixing until well combined, then turn the machine up to number 1 mixing for 5 minutes. If mixing by hand, mix all ingredients until thoroughly combined, then knead for 5 minutes.
  4. Place some oil in the bottom of the bowl to prevent the dough from sticking while rising.
  5. Place a clean towel over the bowl and allow the dough to double in size. The time this takes depends on the room temperature. It can take anywhere from 30 minutes to 1 hour.
  6. When doubled in size, take the dough out of the bowl and press down to expel air. Cut into roughly 9 equal pieces. If you want larger rolls, make 6 equal pieces. Form the pieces into little rounded ball shapes and pinch underneath to ensure seams are underneath.
  7. Place into greased or non stick baking tray (I like to use non stick baking paper to line it). Place the balls in lines to fit your tray. The balls should touch each other. Cover loosely with the towel once more.
  8. Preheat oven to 220 degrees celsius (428F) conventional or 200 (392F) fan forced. Allow the rolls to rise for around 15 – 20 minutes.
  9. Bake in oven for 20-30 minutes (this will vary according to your oven) or until nicely browned.
  10. Remove from oven and place rolls on a cooling rack.

Would you prefer to see this post in video format? Let me know in the comments if you do, and I’ll see what I can come up with 😉

If you are interested in baking your own bread, check out these resources:

Milk and Honey Bread

Whole Wheat No Knead Bread Recipe

Zucchini Bread Recipe

Easy Flat Bread Recipe

Cheese and Bacon Scrolls

I hope this recipe blesses you and that you love these yummy rolls as much as our family!

Filed Under: Health and home, Recipes, Tutorials, Weaving Tagged With: breadrolls, recipe, recipes

How to sit correctly at a rigid heddle loom

by Kelly 16 Comments

In my last post, I spoke about my back pain journey and gave all my best hints to help you avoid experiencing pain while weaving on your floor loom.

That post was very popular and many of you asked if I could do something similar for weaving on your rigid heddle loom. A floor loom and a rigid heddle loom are quite different when it comes to seating, and while a lot of the same principles I talked about in my last article regarding posture still apply, I think it’s worth going over the options.

*This post contains affiliate links. For more details, please see my disclosure policy.

I’d like to point out that, even though some of these are not my personal preference, that doesn’t mean that they’re not right for you. And, if you are using a seating arrangement currently that works really well and allows you to weave pain free – don’t change it!

Regular chair-

Some weavers use a regular, straight backed dining chair to weave. This is what I started off with when I began my rigid heddle journey, but it did not suit me at all. I did find it better if I bolstered my lower back by wedging a cushion between my back and the chair when weaving, but it was still not comfortable for me.

Weaving bench–

I would not use a weaving bench or piano stool with my rigid heddle. The length of the stool does not allow me to get right in close to the loom, and there is no back support.

Office chair–

This is what I use and I’m going to go over in more depth why I think it is the best option in a moment.

With a stand-

I do recommend weaving with a stand for loom sizes 24″ and above. This is because the larger/wider the loom, the more difficult it is to prop against a table to weave, and the longer your reach distance will be. A longer reach distance means more stress on your body.

Without a stand-

I don’t use a stand for my Sampleit 10″ loom because it’s so small, light and portable that I can weave on it just about anywhere, it makes a great lap loom. You don’t have to have a stand for your rigid heddle, but I do think it’s really worthwhile investment. If you have or are looking at purchasing a really large loom, such as a 32 or 48″, I would definitely be wanting a stand.

I want to talk now a little more about my office chair and why I think it’s the perfect solution. I was lucky enough to get my chair for free when my husband’s workplace was closing an office and it was barely used!

  • Height adjustable
  • Contoured
  • Back rest adjustable
  • Tiltable

    All of this means that I can sit right in close to my loom and adjust the chair to be as comfortable as I could possibly want to be. My back, shoulders and neck are not stressed because my body is so well positioned.

Because my chair is on wheels, it’s really quick to make minor adjustments to get closer to or further from the loom.

My feet are either flat on the floor or positioned on top of the stand’s stabilising bar, meaning the loom is very stable.

Now, just because we have a super duper chair with nice back support doesn’t mean we can get lazy about posture. Yes, it’s still possible to slouch, bend or tilt your body in ways that will wear on your back over time.

So don’t forget those good posture points – a straight back, level shoulders, elbows resting comfortably on the front beam.

Regular breaks are important, to give your body an opportunity to move about in a different way after being in one position for a while. If you want to read more about posture, breaks and stretching, I recommend you read over this post.

And to see my seating position in action, I’ve made a video for you. The video shows both how I sit with my loom on a stand and how I sit when not using a stand. You can click below to check that out:

I hope this post was helpful to you and gets you thinking about ways you can maximise your weaving time by minimising back, neck and shoulder pain.

Until next time…

Happy Weaving!

Filed Under: Free tutorial, Health and home, Inspiration, Rigid heddle weaving, Tutorials, Weaving Tagged With: back pain, posture, rigid heddle weaving

  • Page 1
  • Page 2
  • Page 3
  • Go to Next Page »

Primary Sidebar

About Kelly Casanova

Hand crafted boat shuttles

Categories

Archives

Meta

  • Log in
  • Entries feed
  • Comments feed
  • WordPress.org

Copyright © 2026 Kelly Casanova Weaving Lessons on the Foodie Pro Theme