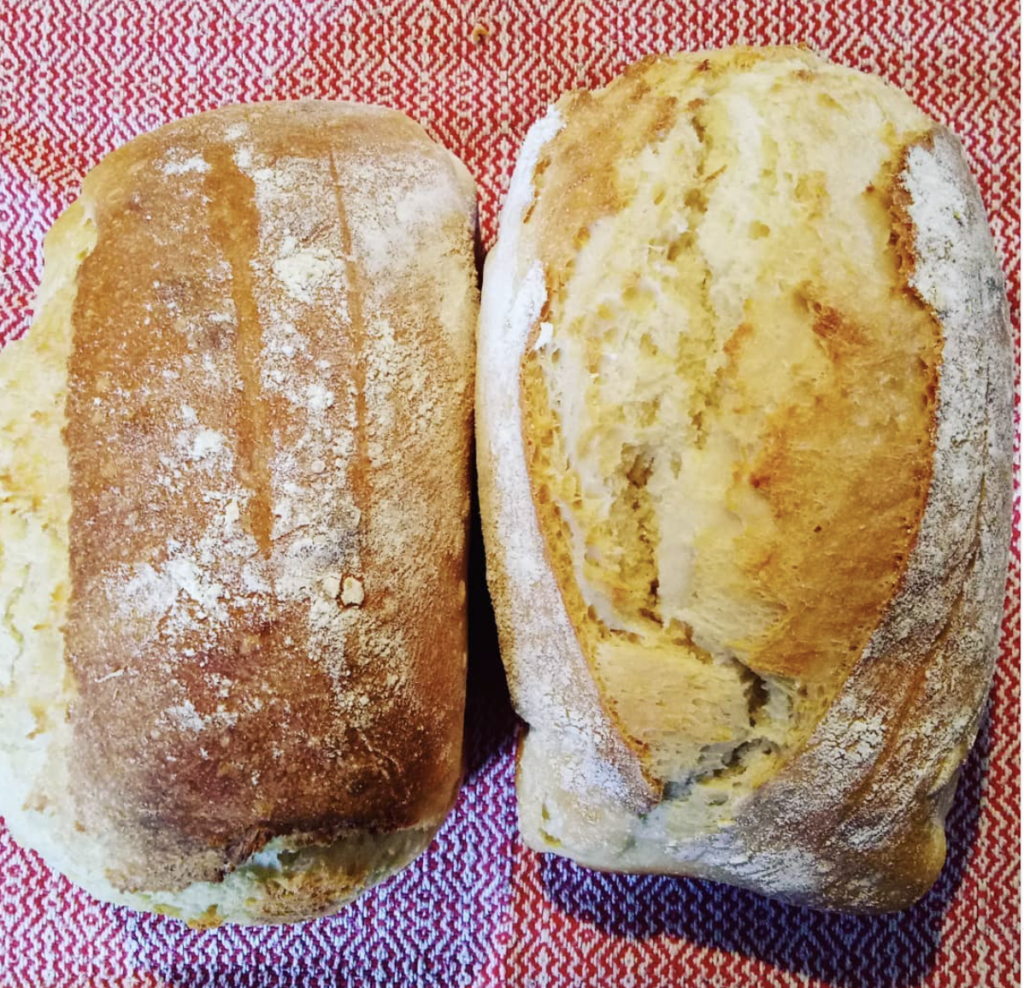
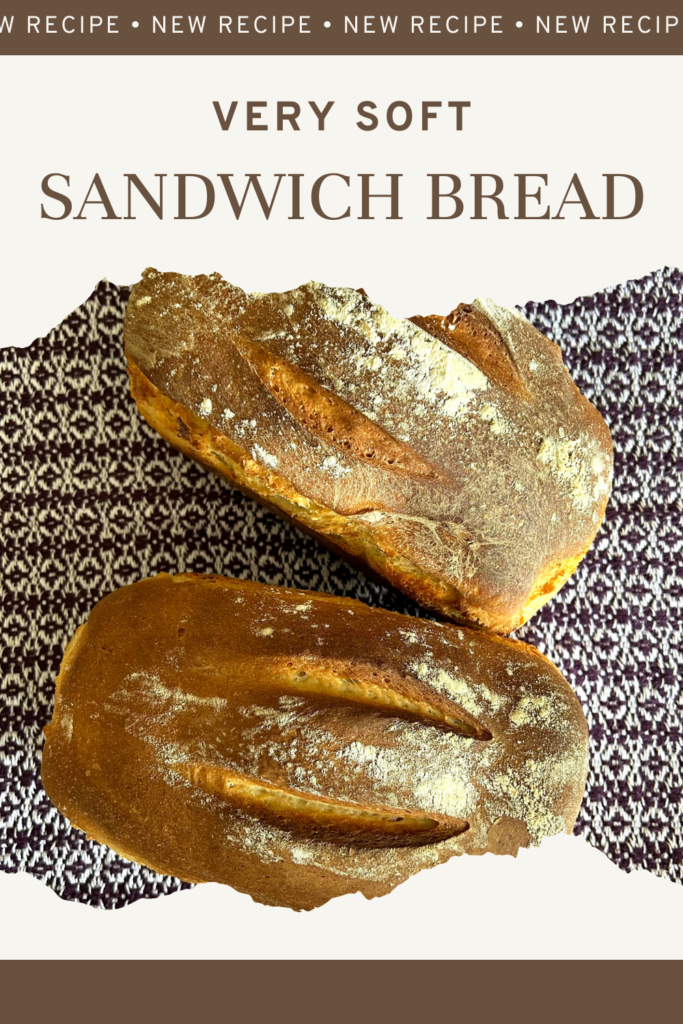
• Skip to main content
  • Skip to primary sidebar

Kelly Casanova Weaving Lessons

  • Hi! I’m Kelly!
    • Disclosure
  • Online Weaving School Class Index
    • Common account issues
    • Common technical issues
    • What do I get with a membership?
  • New to rigid heddle weaving? Start here!
    • Never heard of the rigid heddle loom?
    • How to weave neat edges on the rigid heddle loom
    • Rigid heddle weaving
    • Rigid Heddle Weaving Patterns
  • Patterns
  • Subscribe

recipes

Soft White Sandwich Bread

by Kelly 3 Comments

Jump to Recipe

I’ve been making bread for a very long time now but there is one thing that many of my loaves were lacking – lightness and softness.

My loaves were often on the dense side, not in an unpleasant way, actually in quite a substantial way, but I did have the desire to be able to make a lighter bread if I wanted to – more like a bakery style sandwich loaf.

So I started testing ingredients and methods and investigating bakery methods.

There are a few things I stumbled upon that led to the formulation of this recipe:

  1. A higher yeast proportion for a faster rise plus using sugar for taste and fast rising
  2. The addition of butter
  3. A long mixing time with the mixer

Using a mixer with a dough hook takes a lot of work out of it for you and just kneads up the most beautiful dough.

I have an older model Kenwood mixer, it does the job OK, but if and when I have to replace it I think I would be leaning towards a Kitchenaid or something similar.

The bread is quite sweet and you could definitely reduce the sugar (though each batch does make 2 loaves) or you could also substitute honey. Other sweeteners I’m not sure on as I haven’t used them.

Personally I don’t use fancy bread tins, just something similar to these rectangle loaf tins and I line them with parchment baking paper on a roll that I then save a reuse many times, this really cuts down on dishes to wash.

Soft Sandwich Bread

5 from 1 vote
Print Recipe Pin Recipe
Cook Time 35 minutes mins

Ingredients
  

  • 1 kg White baker's flour
  • 620 ml Warm water
  • 3.5 tsp Instant dried baker's yeast
  • 3 tbs White granulated sugar
  • 2.5 tsp Salt
  • 2 tbsp Butter (room temperature)

Instructions
 

  • Place yeast, sugar and warm water in a mixer bowl. Allow to sit until the yeast froths (5-10 minutes).
  • Add flour and salt and mix on low until ingredients start to incorporate. Keep mixer going as you add softened butter, a couple of cubes at a time. 
  • Turn mixer up to level 1 and allow machine to knead dough for 10 minutes. Dough should be smooth and soft and pull away from sides of bowl.
  • Oil bowl lightly, cover with plastic wrap and leave in warm place until dough has doubled in size (may take 45 minutes to 1.5 hours or even longer if placed in a cool place). 
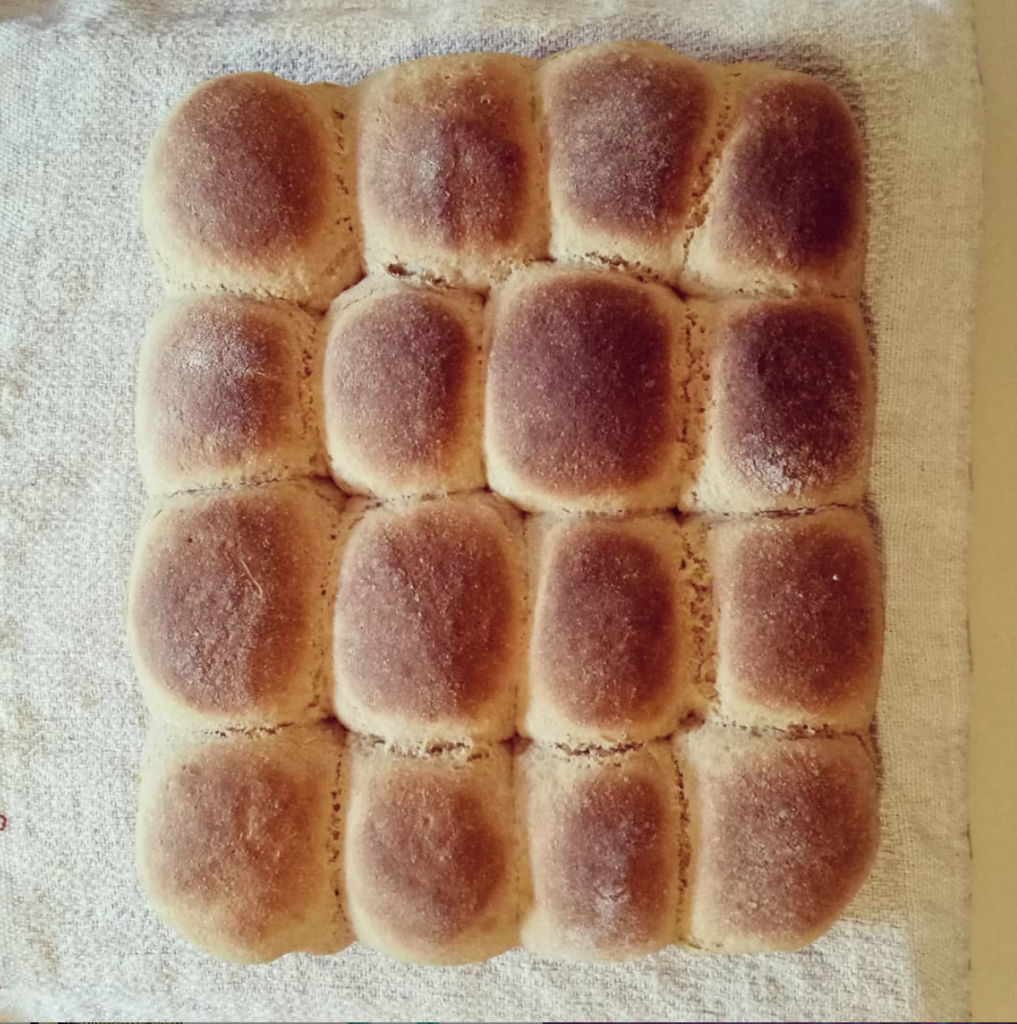
  • Divide dough into 2. On a lightly floured surface, press each piece out with your hands into a rectangle shape. Roll the rectangle starting at one short end, tucking in ends a little as you go. Pinch the seam lightly. Place in baking tin lined with parchment paper with seam side down. Do the same to the other loaf. (Don’t fuss over this part, just try to get a seam at the bottom)
  • Cover lightly with plastic wrap and leave until risen, this can take 20 minutes to 1 hour, depending on room temperature.
  • Preheat oven to 200C (fan forced) or 210 conventional.
  • Bake loaves for 35mins.
    Allow to cool on a rack before cutting.

The bread is freshest when eaten on the same day but it makes wonderful toast for days after that!

I love eating it toasted and topped with eggs from our homestead. The bread also freezes well, I leave the loaves whole to freeze, or you could cut into smaller pieces if you need less bread at once.

I hope you enjoy this recipe. If you try it out I would love your feedback 😊

Would you like to see just how I make this bread? Check out my instructional video:

Until next time…

Happy Baking!

This post contains affiliate links. For more details please see my disclosure policy.

Filed Under: Health and home, Recipes Tagged With: recipes, Recipes and food, soft sandwich loaf

Easy Sourdough Granola Recipe: A Delicious Twist for Healthy Homemade Breakfasts

by Kelly Leave a Comment

Looking for a delicious way to use up your sourdough discard? Try making homemade sourdough granola! This easy recipe combines the wholesome goodness of homemade granola with the unique flavor and crunch that sourdough starter adds.

It’s a game-changer for your breakfast or snack routine—perfectly crispy, flavourful, and a great way to reduce food waste.

Sourdough granola makes the perfect breakfast topping for fresh fruit and creamy Greek yogurt—a delicious and nutritious way to start your day!

Jump to Recipe

Personally, I love little clusters in my granola, and in the past I have used egg white (like in this recipe) to achieve a bit of chunkiness. But using sourdough starter binds all the ingredients together into clumps so well that there is no need for any additional binders.

You can control the level of crunch by experimenting with the baking times. For more crunch, bake longer. For less crunch, bake a little less.

You can also choose to have add ins or to just make the base recipe, depending on your own taste preferences. I love add ins and these are put in at the end of baking.

Some add in ideas that I regularly use are dried fruits like sultanas, apricots, figs, dates and apple. If you are a fan of nuts, any nut goes well with this recipe! One of my personal favourites is almonds.

This is such a simple and adaptable recipe, just mix wet ingredients and dry separately, then mix together before baking.

The dry ingredients all get thoroughly coated, making a clumpy, crunchy granola once baked.

Sourdough Granola

Print Recipe Pin Recipe

Ingredients
  

  • 5 cups Rolled oats
  • 1 cup Desiccated or shredded coconut
  • 2 tsp Cinnamon powder
  • 1 cup Sourdough discard or starter
  • 3 tbsp Olive oil
  • 2 tsp Vanilla extract
  • 1/2 cup Honey or brown sugar (or equal mix of the two)
  • Drizzle Maple syrup (optional)
  • 3/4 cup Dried fruit of your choice
  • 1/2 cup Nuts of your choice (optional)

Instructions
 

  • Pre heat oven to 160 degrees Celsius
  • Place all dry ingredients (except fruit and nuts) in a large bowl and mix.
  • Place all wet ingredients in separate bowl or glass jug and mix thoroughly.
  • Pour wet ingredients over dry and mix thoroughly.
  • Line a large roasting tray or a tray with sides. I use non stick baking paper. Alternatively, use a non stick tray.
  • Tip your mixture into the tray and even out to make an even layer.
  • Place in the oven for 10 minutes, remove the tray and turn the granola with a spatula.
  • Place back in the oven and repeat until desired darkness is achieved. I recommend a total cooking time of 30 – 40 minutes.

Don’t forget to stir in your add ins at the end, if you’re using them! Once completely cooled, store in an airtight container (I like to use mason jars).

You can eat this granola on it’s own as a snack, on top of fresh fruit, with milk of your choice or one of my personal favourites, on top of yoghurt.

If you love to customise, here are some add in options:

Add ins (examples of)

1/2 cup chopped peanuts

1/4 cup chopped almonds

1/4 cup sunflower seeds

1/4 cup chopped macadamias

1/4 cup chopped cashews

1/4 cup pistachios 

1 cup LSA (linseed, sunflower and almond meal) mix

Chopped dried fruit eg. apricots, peach, paw paw, apple, dates, cranberries

Rules for add ins

*For seeds and nuts, add these in at the dry mix stage. 

*For dried fruit add ins, mix in when the muesli has finished baking.

Allow the muesli to cool before placing it in an airtight container. Serve with milk or use as a delicious topping on stewed fruit and yoghurt. 

Sourdough granola isn’t just a delicious treat for your own table—it also makes a thoughtful and delightful gift! Simply place it in an attractive jar, tie it with a ribbon, and you’ve got a homemade present that’s sure to impress. Whether you’re enjoying it as a crunchy breakfast topping or sharing it with loved ones, this recipe is a wonderful way to make the most of your sourdough discard while adding a little extra joy to every day.

I hope you love it as much as I do! 👩‍🍳

*This post contains affiliate links. For further information please see my disclosure policy.

Filed Under: Health and home, Recipes, Weaving Tagged With: granola, my recipes, recipes, Recipes and food, sourdough

Soft and Sweet Bread Rolls

by Kelly 2 Comments

Our family just loves fresh, home baked bread.

I bake all the bread for my family, four loaves at a time. That way we have some fresh and some to store in the freezer for the following days.

But there are some days (more often than I care to admit!) when we’ve run out of loaves and I need to do something fast! Those are the days that my rolls make an appearance. They are much quicker to make than bread loaves and I can get them to the table super fast.

These rolls are very similar to how I make my scrolls, but you bake the dough as rolls instead of being rolled up with fillings.

There are many fillings you can serve in the rolls once they are baked. You can serve them warm or allow to completely cool first. Here are some serving ideas:

I posted on Instagram that I was serving bacon and avocado rolls and everybody wanted to know about them!

Bacon and avocado-

Serve the rolls while still warm. Cut open, spread with mayonnaise, mashed avocado, cheese and fried bacon.

With soup-

You can make the rolls “dinner roll” size if desired. Serve warm, spread with butter. This makes a real meal out of your soup and completes it perfectly.

Egg and bacon rolls-

Similar to the avo and bacon, only this time you also fry eggs with your bacon. Serve with or without cheese and mayonnaise.

Dinner roll sized

Ham and salad-

Allow rolls to cool before cutting open. Serve with ham and whatever salad you like, whether it’s some mixed leaves or a coleslaw.

Hamburger or Veggie burger-

These rolls make great hamburger buns! Fry your meat or veggie patty and team with your favourite extras in the roll. Personally, we’re fans of hamburgers “with the lot”! You can make Hawaiian style burger by adding a ring of tinned pineapple.

For afternoon tea-

These are delicious enough to serve with butter and jam or marmalade for an English style afternoon tea.

Grilled cheese-

My kids love it when I do this. Cut the rolls in half. Using a grill, lightly toast both sides of each half. Top the halves with cheese and place back under grill until melted. Delicious for lunch or paired with soup.

Soft and Sweet Bread Rolls

Kelly
Delicously light and soft rolls for any meal
Print Recipe Pin Recipe
Prep Time 10 minutes mins
Cook Time 30 minutes mins
Rising time 1 hour hr 20 minutes mins
Servings 9

Equipment

  • Stand mixer (optional)
  • Oven

Ingredients
  

  • 800 grams Bread flour You can do all white flour or a mix. I like to do 200grams wholemeal and 600grams white flour.
  • 1 tbsp Dry active yeast
  • 2 tbsp White sugar or honey
  • 2 tsp Salt
  • 3 tbsp Sunflower oil
  • 2 & 2/3 cup warm water or milk I use milk powder in water

Instructions
 

  • Place all dry ingredients in mixer bowl, fitted with a dough hook. Place in a mixing bowl if mixing by hand. Mix lightly to combine.
  • Combine oil and warm water/milk in a jug. If using honey, add it with the liquids also.
  • Set the mixer on minimum and gradually pour the wet ingredients into the dry. Keep mixing until well combined, then turn the machine up to number 1 mixing for 5 minutes. If mixing by hand, mix all ingredients until thoroughly combined, then knead for 5 minutes.
  • Place some oil in the bottom of the bowl to prevent the dough from sticking while rising.
  • Place a clean towel over the bowl and allow the dough to double in size. The time this takes depends on the room temperature. It can take anywhere from 30 minutes to 1 hour.
  • When doubled in size, take the dough out of the bowl and press down to expel air. Cut into roughly 9 equal pieces. If you want larger rolls, make 6 equal pieces. Form the pieces into little rounded ball shapes and pinch underneath to ensure seams are underneath.
  • Place into greased or non stick baking tray (I like to use non stick baking paper to line it). Place the balls in lines to fit your tray. The balls should touch each other. Cover loosely with the towel once more.
  • Preheat oven to 220 degrees celsius (428F) conventional or 200 (392F) fan forced. Allow the rolls to rise for around 15 – 20 minutes.
  • Bake in oven for 20-30 minutes (this will vary according to your oven) or until nicely browned.
  • Remove from oven and place rolls on a cooling rack.
Keyword baking, bread, bread roll

Would you prefer to see this post in video format? Let me know in the comments if you do, and I’ll see what I can come up with 😉

If you are interested in baking your own bread, check out these resources:

Milk and Honey Bread

Whole Wheat No Knead Bread Recipe

Zucchini Bread Recipe

Easy Flat Bread Recipe

Cheese and Bacon Scrolls

I hope this recipe blesses you and that you love these yummy rolls as much as our family!

Filed Under: Health and home, Recipes, Tutorials, Weaving Tagged With: breadrolls, recipe, recipes

Milk and Honey Bread

by Kelly 10 Comments

Milk and honey bread is a luxury bread, or at least, I think so!

Soft, sweet, moist and light all at once!

Milk and honey bread is a real treat in our home and the kids absolutely love it.

*This post contains affiliate links

Since the coronavirus pandemic began I had not been able to find white flour anywhere to buy. I know it’s been the same for many of you, as the need and desire for home baking has increased and suppliers were overwhelmed with trying to restock.

I’m so grateful to have my grain mill and we do love whole wheat bread (find my own recipe here), but occasionally I love to make an all white bread for my family as a treat.

Well, this week, my husband was able to buy a 10kg bag of unbleached white flour. I usually buy 25kg bags, but when he walked in with the 10kg bag it was as if he had walked in with a sack of gold, I was so excited!

So, the first thing I decided to do with this new bag of white flour was to make the milk and honey bread that I had not been able to bake for so long.

This bread makes wonderful sandwiches and is especially delicious when eaten on the same day it’s baked. But, I must tell you that it makes the.most.wonderful. toast on the next and subsequent days!

There are only 6 basic ingredients to this recipe. It takes a little longer with a few more steps than my Whole Wheat Bread recipe, but trust me, it’s worth the effort!

This recipe makes 2 x 500gram or 1 pound loaves. I find it easiest to bake them in loaf tins, (these ones look great!) as the dough is very moist and doesn’t cope so well with being a round loaf on a tray – it won’t hold shape that way.

Milk and Honey Bread

Soft, sweet, deliciously moist!
5 from 1 vote
Print Recipe Pin Recipe

Ingredients
  

  • 2 cups Warm milk Made up milk powder is fine too
  • 1 teaspoon Dry active yeast
  • 2 tbsp Honey
  • 3 cups White, unbleached, plain flour
  • 2.5 tsp salt
  • 4 – 4.5 cups White, unbleached, plain flour (additional)
  • 1.5 cups Warm water

Instructions
 

  • Whisk warm milk and honey together in a large bowl. Sprinkle the yeast over the top and allow to sit for 5 minutes.
  • Whisk in 3 cups of white plain flour, 1 at a time. Cover this mixture with a clean kitchen towel and allow to sit for 30 minutes.
  • Whisk the salt into the yeast and flour mixture.
  • Whisk in the warm water, making a thin batter like mixture.
  • With a wooden spoon, stir in the remaining flour, 1 cup at a time. If your mixture is too wet, you can add more flour. If it is too dry, don't add the full amount of flour recommended (which is why we add 1 cup at a time). Aim for a dough that is very moist, quite sticky, but not too difficult to handle.
  • Use my dough turning method as outlined in the post.
  • Sprinkle dough lightly with flour, cover with clean kitchen towel and leave to rise until doubled in size, usually 1 – 2 hours, depending on your room temperature.
  • Shape the dough into 2 loaves and place them in loaf tins, either oiled or lined with baking paper. Cover again with towel.
  • Preheat oven to 225 degrees celsius or 437 farenheit.
  • Allow dough to rise 20 – 30 minutes or until the dough looks nice and risen in the tins. Slash the tops and place in the oven.
  • Bake for 35 – 40 minutes or until golden brown on top.
  • Cool loaves on a baking rack.

To review the dough turning method as shown in this video:

I hope you enjoy this bread as much as my family does. If you try the recipe and love it, will you do me the big favour of leaving a 5 star review? I would appreciate that so much! I would also appreciate if you try this recipe and are on Instagram, please tag me so that I can share your loaves in my stories. Feel free to use the hashtag #kellysmilkandhoneybread as well.

As always, if you have any questions about this recipe, please leave a comment, I love to hear from you.

Until next time…

Happy Baking!

Filed Under: Health and home, Recipes Tagged With: milk and honey bread, my recipes, recipes

Goodness Gracious Energy Balls

by Kelly 6 Comments

I seem to be craving sweet, nutrient dense foods frequently in the afternoons.

A cup of tea with something sweet around 3-4pm seems to be just what I need. I used to have a sweet, commercial cookie to dip in my tea, but that is way behind me now!

Something that I love about switching to a healthier lifestyle is that I have found I don’t have to compromise on taste or treats – I just need to find a way to make it tick some healthy boxes.

*This post contains affiliate links

And, if it’s quick and easy to prepare a batch that I can then have waiting for me in the fridge or pantry – even better!

These little energy balls tick all the boxes and then some!

They are sweet, slightly salty, substantial, economical and so fast to make.

To throw these together, I only used ingredients that were already in my pantry and that are always there.

The goodness and simplicity of oats, combined with favourites such as honey and peanut butter, (I can not get enough of the stuff!) coconut, linseeds (flaxseeds) , plump raisins, tahini and vanilla extract. So simple, so delicious!

A recipe like this is so adaptable too, you can put in whatever healthy ingredients you have on hand that you think will work.

*Change the linseeds for sunflower seeds.

*Add some chopped nuts to the mix.

*Switch honey for maple syrup or other natural sweetener.

*Switch the raisins for craisins, chopped dried fig, chopped dates or sultanas.

*Add in some chopped, dark chocolate.

*Dip half of each ball in some melted dark chocolate.

Goodness Gracious Energy Balls

Healthy snack balls that taste amazing!
5 from 1 vote
Print Recipe Pin Recipe
Prep Time 10 minutes mins
Servings 14 serves

Ingredients
  

  • 1.5 cups Quick or rolled oats
  • 0.5 cups Dessicated coconut
  • 2 tbsp Linseeds (whole)
  • 3 tbsp Raisins
  • 2 tbsp Peanut butter
  • 3 tbsp Tahini
  • 2 tbsp Honey
  • 2 tsp Vanilla extract

Instructions
 

  • Mix all ingredients together in a large bowl. I find it easiest to get my hands into the bowl and squeeze everything together. Once well combined, squeeze and roll into balls and store in the fridge.
    *Note – if your mixture is a little dry, add more honey
    ** If you want to make your balls a little more decadent, add some chopped, dark chocolate!
Keyword bliss ball, healthy treat, healthyfood

If you try out this recipe, I’d love to hear if you enjoyed it!

Filed Under: Health and home, Recipes Tagged With: bliss ball, healthy lifestyle, healthy recipe, recipe, recipes

Afternoon Choc Hit Bliss Balls

by Kelly 6 Comments

Do you have that typical afternoon slump? For me, it happens around 3:30 – 4pm. I always try to look after myself by having a cup of tea and, if I’m lucky, putting my feet up for a few minutes.

*This post contains affiliate links

It’s also the time of day that I start craving a sweet treat. To have something sweet but healthy on hand is a great way to prevent myself from scoffing something that is not so good for me.

Bliss balls are the perfect treat. You can make them in the size you want and from a variety of healthy ingredients. They are quick and easy to throw together. Oh, and they are absolutely delicious!

For this recipe, I’ve used some simple ingredients like almond meal, cocoa powder , local honey, maple syrup, freshly squeezed orange juice (if you love an orange zing, you could even include some orange zest!), vanilla extract and dessicated coconut (optional).

I hope you enjoy my recipe!

Afternoon Choc Hit Bliss Ball

Kelly
A delicious and healthy afternoon treat
5 from 1 vote
Print Recipe Pin Recipe
Prep Time 10 minutes mins

Ingredients
  

  • 1.5 cups Almond Meal
  • 2 tbsp Cocoa powder
  • 1 tbsp Honey
  • 1 tbsp Maple syrup
  • 1 tbsp Fresh orange juice
  • 1 tsp Vanilla extract
  • Dessicated coconut (optional for rolling)

Instructions
 

  • Place all ingredients in a medium sized bowl.
  • Mash together using a fork until well combined.
  • Roll into balls.
  • Roll in dessicated coconut or extra cocoa
  • Store in the fridge in a container.
Keyword bliss ball, healthy treat

Here is a little tip: If you can bear to let the balls sit in the fridge overnight, they taste even better the next day!

If you make this recipe, I would love to hear how you liked it, simply leave me a comment below 😊

Filed Under: Health and home, Recipes Tagged With: bliss ball, healthy, recipes

Kelly’s Easy, No Bake Slice

by Kelly Leave a Comment

This is the kind of recipe I’ll whip up when I need a morning tea or a slice to take to a friend’s house or event. It is very similar to this M&M slice I posted waaaaaaaaaay back in 2010 (yep, I’ve been blogging a really long time!)

The beauty of it is that you can adjust the ingredients to suit you and it will still turn out well!

*This post contains some affiliate links, meaning that if you click on the link and purchase, I receive a small commission at no extra cost to you.

It’s so easy that kids love to make it and they don’t have to wait too long to enjoy the fruits of their labour.

Kelly’s Easy No Bake Slice

Kelly
So quick and easy with minimal ingredients. Great for kids 
Print Recipe Pin Recipe
Prep Time 12 minutes mins
Total Time 12 minutes mins

Ingredients
  

  • 1 packet Marie Biscuits
  • 1 cup Desiccated coconut
  • 2 tablespoons Melted Butter
  • 1 teaspoon Vanilla extract or essence
  • 1 395 gram tin Condensed milk
  • 1/4 cup Add ins, such as chopped chocolate
  • 2 cups Soft icing sugar, sifted
  • 1 tablespoon Cocoa powder, sifted
  • 1 tablespoon Soft butter
  • 1 or more tablespoons Very hot water

Instructions
 

  • Crush Marie biscuits until fine. I use a food processor for this. Place in a large bowl.
    Add coconut, melted butter, condensed milk, vanilla and add ins, if using. Mix until well combined.
    Line a 8 x 13″ slice tin with baking paper or grease with butter. 
    Place your mixture into tin and press down with the back of a spoon (kids like to use their hands) until flat and spread out. Refrigerate while you make the icing.
    Sift the icing sugar and cocoa powder together in a bowl. Place the butter into the bowl. Pour the hot water over the butter, softening and melting it a little. Stir these ingredients vigorously until smooth. Adjust the water as necessary, adding more if needed.
    Pour the icing over the slice base and spread out until covered.
    Place back in the fridge until set (a couple of hours, or until the kids can wait no longer!)

*Tips

  • To crush the biscuits, place them in a strong plastic bag (like a zip lock bag), break biscuits into halves or quarters and roll over the bag with a rolling pin, crushing the biscuits until they are fine. This is best done in small batches.

OR

  • To prepare the biscuits in a matter of seconds, throw the whole packet of biscuits (minus the wrapping of course!) into a food processor.
  • A slice tin is very handy but not absolutely necessary. You can use any tray of a similar size with slightly raised sides. You could even forgo the slice option and roll the mixture into balls, then into cocoa or extra coconut.
  • After spreading the icing on, I sprinkled some extra coconut on top.

I hope you enjoy this recipe, let me know if you give it a go!

Filed Under: Recipes Tagged With: no bake slice, recipes, slice recipe

Easy, frugal, bread, onion and tomato bake

by Kelly 1 Comment

This is such an easy and economical dish and had the added bonus of using up some ingredients that might be past their best.
There is no need to be exact with quantities either, it’s that sort of dish.

I started with some thick slices of homemade bread that was slightly stale and buttered each slice lightly. Cut into cubes.
I chopped 1/2 a red onion.
I chopped roughly 10 tomatoes that were getting a bit old but still perfectly useable.
All this goes into a bowl together and drizzled with some olive oil. Sprinkle with garlic salt if desired and season with pepper.
I tipped all this into a baking dish and sprinkled with a little parmesan, then grated tasty cheese.
Pop into a hot oven (about 180 degrees C or 350 F) until golden brown on top.
Serve!

Filed Under: Recipes Tagged With: frugal living, my recipes, recipes

Labneh

by Kelly 6 Comments

I may have a new addiction. Labneh. I made some from my homemade yoghurt and all I can say is wow. If you’ve never tried it you really should!

I started with 1 kg homemade yoghurt. I’ve detailed one method here and my current preferred method here for making your own yoghurt.
I have written instructions for labneh in the past but I like this way of doing it more, it’s easier and it makes more sense to use a colander.

So, you have your large square of muslin lining the colander and just dump your yoghurt in the middle. Have the colander set over a bowl or container to catch the whey.

To keep the muslin tidy and to let gravity work for you, tie the corners of the cloth loosely around a wooden spoon handle so that it is slightly suspended. 

Place in the fridge and leave for 24 hours. Make sure your bowl or container is big enough to collect the whey, or pour off the whey occasionally so it doesn’t overflow (don’t get rid of it though, it’s precious! More of that in a future post.)
Unwrap the labneh. Stir in half a teaspoon of good salt and whip it up a bit with a fork. Now it’s ready to store in an airtight container in the fridge. There are so many ways to use it – my favourite is to spread generously on a slab of homemade bread drizzled with some extra virgin olive oil or to place globs of it in a yummy salad. You can roll balls of it in herbs and place in olive oil. Just digging a spoon into it is a major temptation! 

With homemade yoghurt, labneh is a mild, creamy, healthy delight that you may well find as addictive as I do!

Filed Under: Uncategorized Tagged With: my recipes, recipes, Recipes and food

Rock cakes

by Kelly 7 Comments

These are a firm favourite in our family, a recipe that I come back to over and over. They are quick to make, use relatively few ingredients and are pretty healthy. They could be made healthier with wholemeal flour and a sugar substitute, but I’m happy to serve these to my kids as they are, knowing that they are fresh, home baked with no additives or preservatives 🙂

Our kids love to eat them warm from the oven, tops sliced off and spread with butter that melts in. They also love to top them with jam and cream (especially if the jam is home made!)

Here is the recipe for you to try, the kids like to help make them too.

Makes about 9 large rock cakes.

2 cups SR flour
1/4 teaspoon salt
1/2 teaspoon mixed spice (or you can use your favourite spices e.g. a combination of cinnamon, nutmeg and clove)
90grams butter
1/3 cup sugar of substitute
1/2 cup dried fruit (I used a mix of raisins, sultanas and currants)
1 egg
Milk to mix to a thick batter (around 1/2 cup?)
Raw sugar to top (optional)

Preheat oven to 190C and prepare a muffin tin with muffin patty pans. It helps to grease the top of the tray very lightly to prevent sticking. 
Sift flour, salt and spices into a large bowl. Add the chopped butter and rub into the flour until it resembles breadcrumbs. This step can be done in a food processor if you’re feeling lazy (but then you have to wash the food processor bowl, so not worth the trouble to me!) Stir in the sugar and dried fruits. 
Add the egg and some of your milk and start mixing. You’re going for a very thick, sticky batter, not dry at all. 
When thoroughly mixed, spoon the batter into the patty pans, filling about 3/4 of the way. This will give you a large cake that doesn’t spill over the edge of the tin too much.
Sprinkle the tops of the batter with raw sugar (this is optional). 
Bake for around 18 minutes or until the tops are golden.
Turn out of tin onto a baking tray and watch them disappear!

Filed Under: Uncategorized Tagged With: recipes, Recipes and food

  • Page 1
  • Page 2
  • Page 3
  • Go to Next Page »

Primary Sidebar

Categories

Archives

Meta

  • Log in
  • Entries feed
  • Comments feed
  • WordPress.org

Copyright © 2025 Kelly Casanova Weaving Lessons on the Foodie Pro Theme