• Skip to main content
  • Skip to primary sidebar

Kelly Casanova Weaving Lessons

  • Hi! I’m Kelly!
    • Disclosure
  • Online Weaving School Class Index
    • Common account issues
    • Common technical issues
    • What do I get with a membership?
  • New to rigid heddle weaving? Start here!
    • Never heard of the rigid heddle loom?
    • How to weave neat edges on the rigid heddle loom
    • Rigid heddle weaving
    • Rigid Heddle Weaving Patterns
  • Patterns
  • Subscribe

recipes

Apple walnut bread

by Kelly 3 Comments

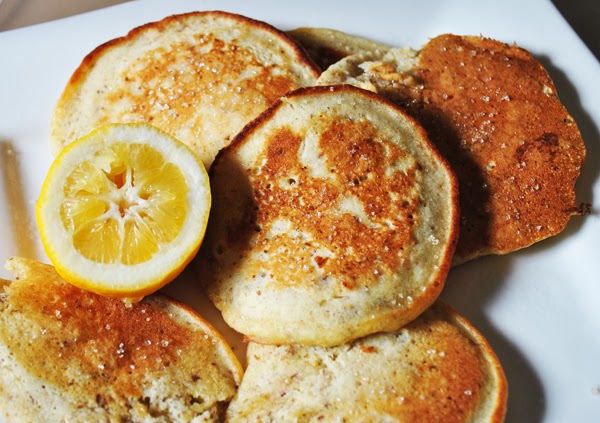
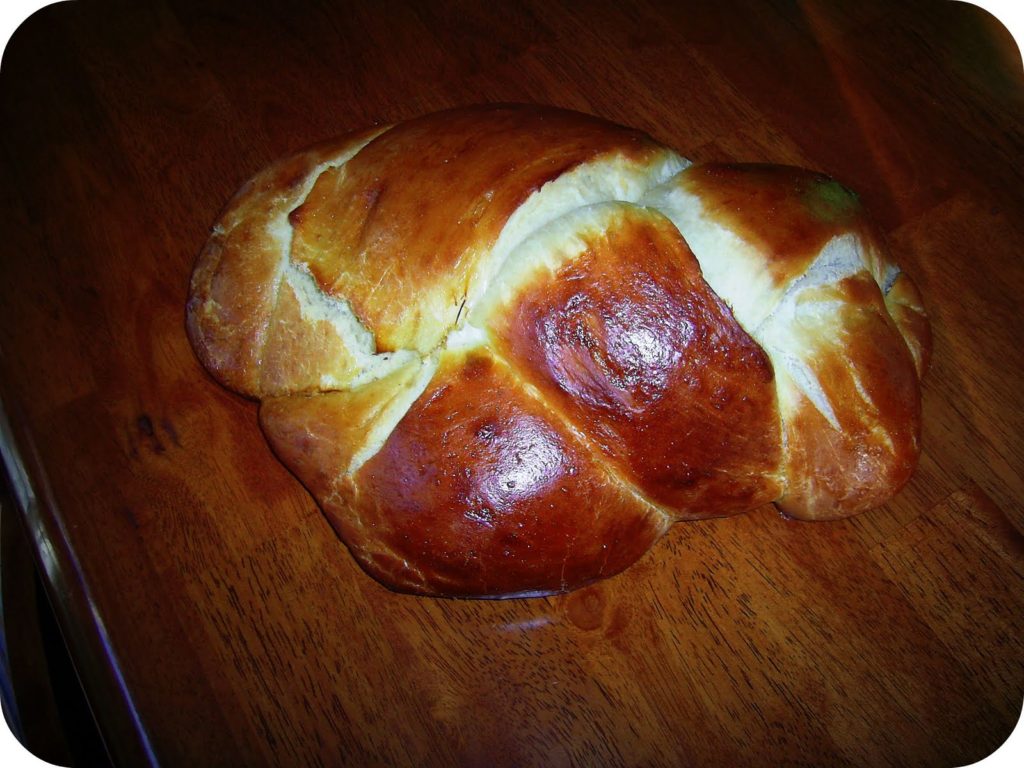
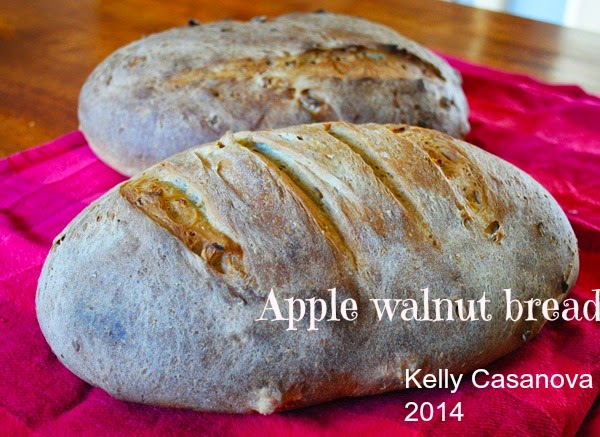
Here is the 2nd recipe from my recently inspired brain šŸ™‚

Makes 2 large loaves.

150grams wholemeal flour
850grams white bread flour
3 teaspoons instant dry yeast
2 tablespoons brown sugar
2 teaspoons cinnamon
2 teaspoons salt
3 tablespoons butter
300ml milk
1 teaspoon molasses
350ml warm water
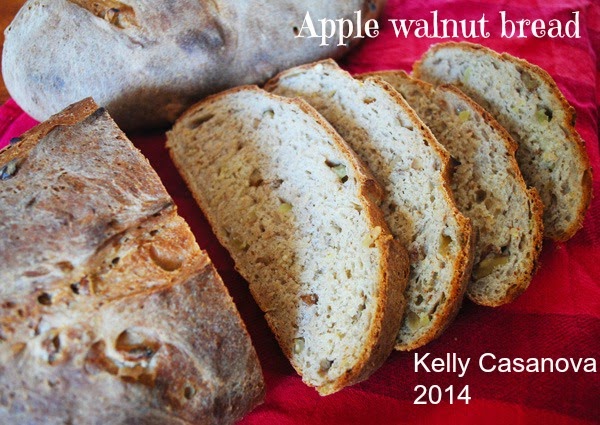
1 apple, peeled and chopped finely
100g chopped walnuts

Heat milk, butter and molasses until butter has just melted.
Place all dry ingredients into mixer with dough hook attached. (Yes, you can make by hand, just mix with wooden spoon at this point).

Start the mixer on low and gradually pour in the milk mixture, followed by the warm water. Allow to mix for 5 minutes, then add apple and walnuts. Mix for a further 5 minutes on low. (Or by hand until well mixed, then knead for at least 5 minutes). The mixture is very moist.

Make an oil spot on your bench (any veg oil is fine) and tip the dough onto it. Oil the inside of the bowl and place the dough back in, cover with oiled plastic wrap. Allow to rise for an hour.

Tip the dough back onto the oiled bench and cut in half with a sharp knife. Don’t knead or attempt to press the air out. Gather the dough at the top of each piece so that it become circular or oval shape. Turn upside down onto a baking tray lined with baking paper (so that the smooth side is now facing up). Repeat with other loaf. Re-cover with the plastic wrap.

Preheat oven to 250 degrees (C) while the loaves sit for 20 minutes.
Slash loaves with a sharp knife (if desired).
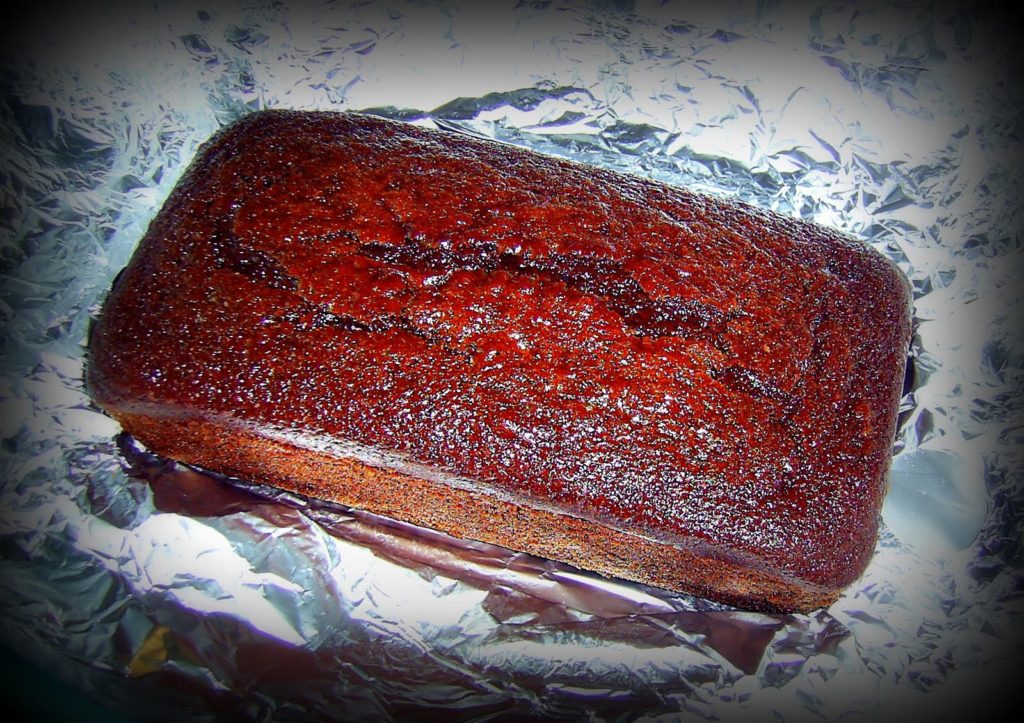
Bake for 5 minutes at 250, then turn down to 220 degrees (C) for a further 30 minutes.

Cool on a wire rack. Delicious warm with butter and cold with home made jam šŸ™‚

I’d love to hear your thoughts if you use my recipe and suggestions for improvements are also welcome. 
Would you like my recipes to be printable? Let me know, then I’ll find out how to get the print option thingy!

Filed Under: Uncategorized Tagged With: bread, recipes, Recipes and food

Apple choc cake recipe

by Kelly 2 Comments

This is my 8 year old daughter’s first recipe and she wanted to share it with you all. It is a seriously delicious and moist cake!
1 cup of SR flour, sifted
120 grams butter, melted
1/2 cup white sugar
1 cup whole milk
2 eggs, whisked
1 teaspoon vanilla extract
2 teaspoons desiccated coconut
1/4 cup choc dots (white or brown)
1/2 apple, diced
Pre heat oven to 170 degrees (C). Place flour, sugar and coconut in a bowl. Add milk, eggs and vanilla, whisk until smooth. Place rest of ingredients in the same bowl and stir. Place in a greased cake tin (use baking paper on the bottom to prevent sticking). Put in oven for about 40 minutes, check the middle with a skewer for doneness.
 Gem says you can eat it either iced or un-iced, we have had it both ways and it’s great with or without! Enjoy!

Filed Under: Uncategorized Tagged With: Homeschooling, recipes, Recipes and food

Healthier pikelets

by Kelly 2 Comments

1 cup SR white flour
1 cup SR wholemeal flour
1/2 cup of LSA mix *
1 egg
1/3 cup sugar
2.5 – 3 cups of milk kefir (if you don’t have kefir, then plain milk will work fine)
Whisk all ingredients together. Heat a frying pan, add some rice bran oil or coconut oil. You want the pan nice and hot (not smoking!) Place spoonfuls of the batter in the pan and cook each side until done. 
Serving suggestions:
There are so many, but here are a few family favourites.
Fresh lemon juice and raw sugar
Butter and cinnamon sugar (just mix cinnamon and sugar together in a jar)
Jam and cream
Maple syrup or honey and cream
Raspberries dusted with icing sugar
Sliced banana and honey or brown sugar
Even just plain butter is nice!
These will disappear very quickly if there are small mouths around, enjoy!
They freeze very well if you want to make extras.
*LSA mix is linseed, sunflower seed and almond meal. It is available in health shops, health food section of the supermarket or at online whole food stockists like this.

Filed Under: Uncategorized Tagged With: recipes, Recipes and food

Another chocolate cake recipe

by Kelly 2 Comments

Therese requested this recipe, or actually one of her children did, so here it is!

2 cups sugar
3 eggs
1 cup plain yoghurt
3/4 cup cocoa
200g soft butter
1 & 1/2 tspn vanilla essence
1 tspn bicarb soda
1/4 tspn salt
3 cups SR flour
1 cup of hot, strong espresso OR 1 cup hot water with 3 heaped tspns instant coffee

Place all ingredients in this order in a food processor for 1 minute. Place in greased baking tin (2 loaf tins or 1 20cm tin)
Cook at 160 degrees (C) for about 1 hour, use a skewer in the middle to test for readiness.

This goes really well in the freezer.

Buttercream icing:

I usually beat a couple of tablespoons of butter until creamy, then gradually beat in icing sugar (and cocoa if you want chocolate icing- food colouring if you want it coloured) until it starts to get very thick. You can also add a small dash of milk to make it more creamy or to make a larger quantity so you can add more icing sugar without it being too dry.

This makes a really good. moist and flavoursome cake without being too rich or over the top.

Filed Under: Uncategorized Tagged With: recipes, Recipes and food

Nougat

by Kelly 1 Comment

I’ve wanted to try nougat for a long time but always seemed to find a reason not to. Didn’t have the right equipment, specialty ingredients, seemed too difficult…. and on and on.
My husband very kindly made it his quest to get me every tool and ingredient I needed. So I made some.

I’m partially happy with the result. It tastes really delicious but is way too gloopy. I used this recipe, next time I’ll try another recipe and see if it’s any better, in the meantime I’ll enjoy having mouthfuls of sweet and tasty gloop!

Filed Under: Uncategorized Tagged With: recipes, Recipes and food

Mixed berry muffins

by Kelly 1 Comment

               The boy made these yesterday and they were deliciously moist and sweet.

2 cups SR flour
3/4 cup buttermilk (or milk with 1 teaspoon of lemon juice or vinegar)
1 teaspoon vanilla essence or extract
1/2 to 1 cup of mixed berries or any type of berries
2/3 cup sugar
1 egg
125g melted butter


Preheat oven to 180 degrees (C)
Combine sifted flour and sugar in a bowl.
Stir in combine melted butter and buttermilk, egg and vanilla.
Lightly stir in berries.
Spoon into patty pans place in muffin tin, fill to near the top for large muffins or 3/4 full for smaller ones.
Cook for about 20 minutes or until turning golden brown on top (don’t overcook though!)
Dust icing sugar on top and leave to cool.

Filed Under: Uncategorized Tagged With: recipes, Recipes and food

Nori rolls

by Kelly Leave a Comment

Nori rolls (also known as California rolls) are so easy and healthy to make. Not to mention – totally delicious! My husband made these ones this morning. The filling can be as basic or extravagant as you want, we went for basic today.
You will need:
Seaweed sheets
Japanese rice (sushi rice)
Sushi vinegar
These are all available at Asian (particularly Japanese) food stores. Follow the instructions for cooking the rice, we use our rice cooker which does a perfect job.
thin strips of carrot, cucumber, other crunchy vegetable
avocado
toasted sesame seeds (optional)
Benito flakes (optional)

You simply lay out your seaweed sheets, lay on a thick line of your rice with the vinegar and sesame seeds mixed in, lay your filling ingredients on top of the rice and roll tightly. Brush a little water along the end of the sheet to make it stick.

Refrigerate until soft. Eat and enjoy! My children love these. You can dip the ends in soy sauce if you like.

If you’re unsure about the rolling technique I’m sure Youtube would have a bunch of videos. Some people use bamboo rolling mats, but we don’t find it necessary.

Filed Under: Uncategorized Tagged With: recipes, Recipes and food

Chocolate Cake

by Kelly Leave a Comment

With the plethora of chocolate cake recipes out there one may be forgiven for assuming that all chocolate cakes are created equal. However, like any dish there are so many variables to the end result. I must admit  my Grandmother’s recipe, although quick and easy fell very short of delicious. So today I’ve tried a new recipe, and it’s pretty good. Moist, flavoursome and makes a big family cake. So here’s the recipe:
125 grams butter
2 cups plain flour 
2.5 teaspoons baking powder
2 eggs
1.5 cups milk
2 tablespoons golden syrup
3 tablespoons cocoa
1 cup sugar
1 teaspoon vanilla essence
2 teaspoons baking soda (bicarb)
Prepare a large cake tin (I used my fruit cake tin) with baking paper and oil or butter.
Melt butter and syrup. In a bowl sift flour, cocoa and baking powder.
Add the sugar and eggs, then vanilla, milk and baking soda, beat for 1 – 2 minutes.
Mix in the butter and syrup liquid, beat for less than 1 minute. Pour into tin, bake in a moderate oven for 35 – 40 minutes.
*Note – I ended up cooking mine for longer than stated as it was still gooey in the middle, so keep checking it with a skewer. I also covered the top of the cake with baking paper after the first 20 minutes of cooking to prevent burning or overcooking.

Filed Under: Uncategorized Tagged With: recipes, Recipes and food

Bread baking

by Kelly Leave a Comment

I don’t get nearly enough time for baking bread these days, I can’t wait to get back to baking instead of buying again. The very cool and wintery conditions here have me pining for baking (and eating) hot bread again so I thought I’d try some online recipes.

First up was the essential winter indulgence, raisin bread. I used a recipe from here. I made a few modifications. The recipe says for two loaves, however there was only enough dough for one loaf. The result: a nice tasting loaf but very crumbly (you can see it falling apart a little after being cut). The children like it though, and we all had raisin toast for breakfast. Very nice!

Now here is something I’ve never tried – Challah, a traditional Jewish bread. This one is good if you have surplus eggs, as I do at the moment. Mine turned out a little less attractive than some, but you have to love that shine on the crust! The recipe was from here  and was very nice when eaten warm – moist and sweet. Unfortunately it’s a bit of a write off today, but still ok for toast.

Filed Under: Uncategorized Tagged With: bread, recipes, Recipes and food

Home made pasta

by Kelly 2 Comments

Home made pasta is superb and surprisingly easy to make. It is time consuming but worth it!

Serves 4 – 5
500 grams fine pasta flour (also known as “tipo 00”)
5 large eggs (free range are best)

Place flour in a bowl and make a well in the middle, crack your eggs into the hole.
Start to whisk eggs into flour using a fork until it comes together as a firm dough. If your mix is too dry you can add another egg, but don’t let the dough become too sticky or wet.
Knead the dough until smooth and firm. Place a damp tea towel over the dough.
Cut a small piece off the dough and re-cover the rest.
Following your pasta machine instructions, roll the small piece of dough through on the largest setting (1). 
Fold flattened dough over as shown and roll through the number 1 setting again. Repeat a few times.  I dust lightly with flour so that it rolls through smoothly. Change the setting to 2 and roll through once. Keep changing the setting until you are on the flattest setting and your dough is long, thin and flat.
If your dough is really long, cut in half to make it more manageable. Dust both sides lightly with flour.
Now carefully feed your flattened dough through either the spaghetti or fettucini setting (I’m doing fettucini here). Lay the strips on your hand as they roll out rather than letting them sit on the bench.
Hang your pasta up to dry. I’m yet to discover the best way to do this, but I use a clothing rack which gives me plenty of hanging space.
When dry (usually a couple of hours, depending on the weather) collect all your pasta into a bowl or bag. Drop into a large pot of boiling, salted and oiled water and stir. Don’t leave the pot as it only takes a few minutes to cook. Keep testing until al dente, then drain.

Here’s the best part! I served my pasta with a home grown tomato and basil sauce, sprinkled with parmesan, sliced avocado and sprinkled over fresh parsley.

Delicious and healthy!

Filed Under: Uncategorized Tagged With: recipes, Recipes and food

  • « Go to Previous Page
  • Page 1
  • Page 2
  • Page 3
  • Go to Next Page »

Primary Sidebar

Categories

Archives

Meta

  • Log in
  • Entries feed
  • Comments feed
  • WordPress.org

Copyright © 2025 Kelly Casanova Weaving Lessons on the Foodie Pro Theme