• Skip to main content
  • Skip to primary sidebar

Kelly Casanova Weaving Lessons

  • Hi! I’m Kelly!
    • Disclosure
  • Online Weaving School Class Index
    • Common account issues
    • Common technical issues
    • What do I get with a membership?
  • New to rigid heddle weaving? Start here!
    • Never heard of the rigid heddle loom?
    • How to weave neat edges on the rigid heddle loom
    • Rigid heddle weaving
    • Rigid Heddle Weaving Patterns
  • Patterns
  • Subscribe

bread

Delicious light rye sourdough artisan bread recipe

by Kelly 3 Comments

Jump to Recipe

Make sure you follow the Light Rye Sourdough loaf recipe steps, but I am adding some further details below for clarity.

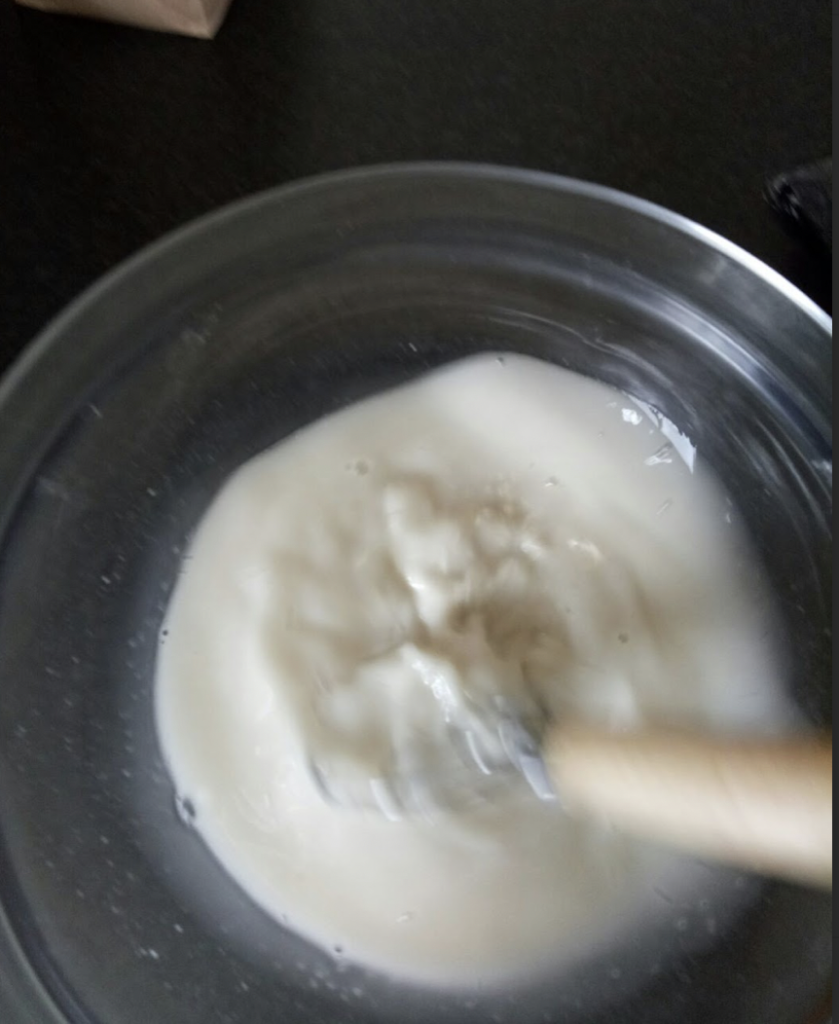
Start by whisking your honey (I use locally produced honey) into the water. I always make sure that my water is at room temperature. Then add your sourdough starter and whisk.

I like to use my danish dough whisk for this step, it helps to combine the starter and water beautifully. Ideally, you won’t have any lumps of starter. If you don’t have a dough whisk, you can use a balloon whisk or a regular old spoon.
In the next step you add the salt and flours and mix to combine, again the dough whisk works great for this. You don’t need to over mix, you just want the wet and dry ingredients combined so that there are no surprise pockets of dry flour left.
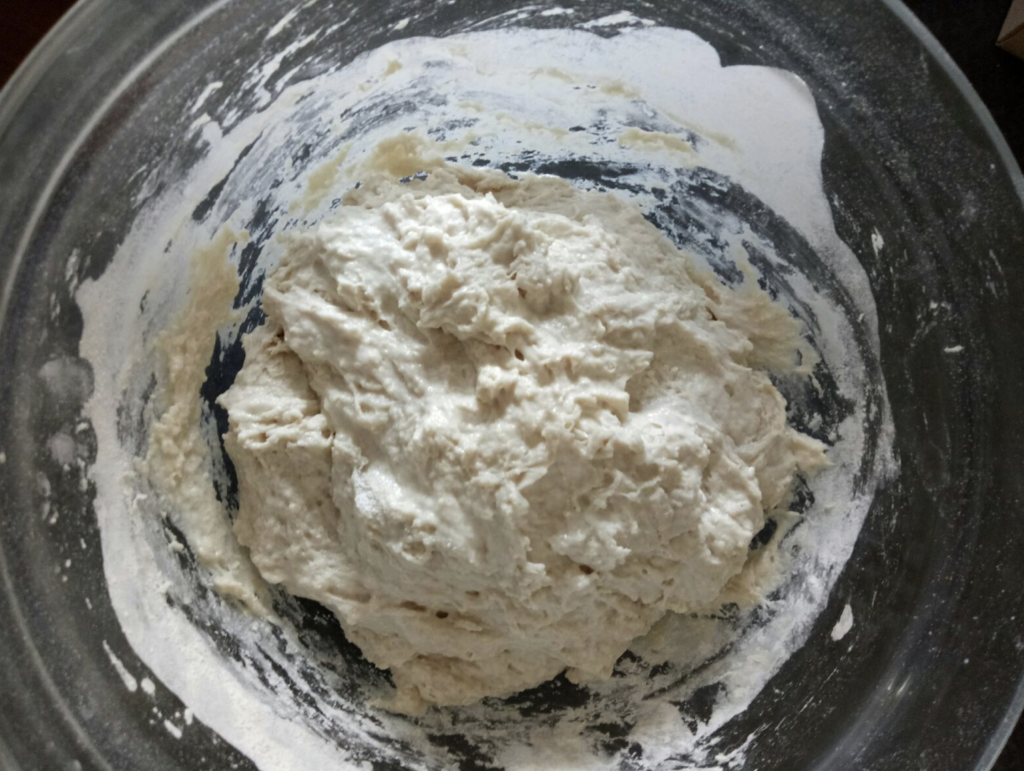
Your dough will look kind of rough and shaggy. Now that the flours are incorporated, cover the dough (I use plastic wrap for this as it creates some humidity and prevents drying out) and leave it to sit for around 1 hour.
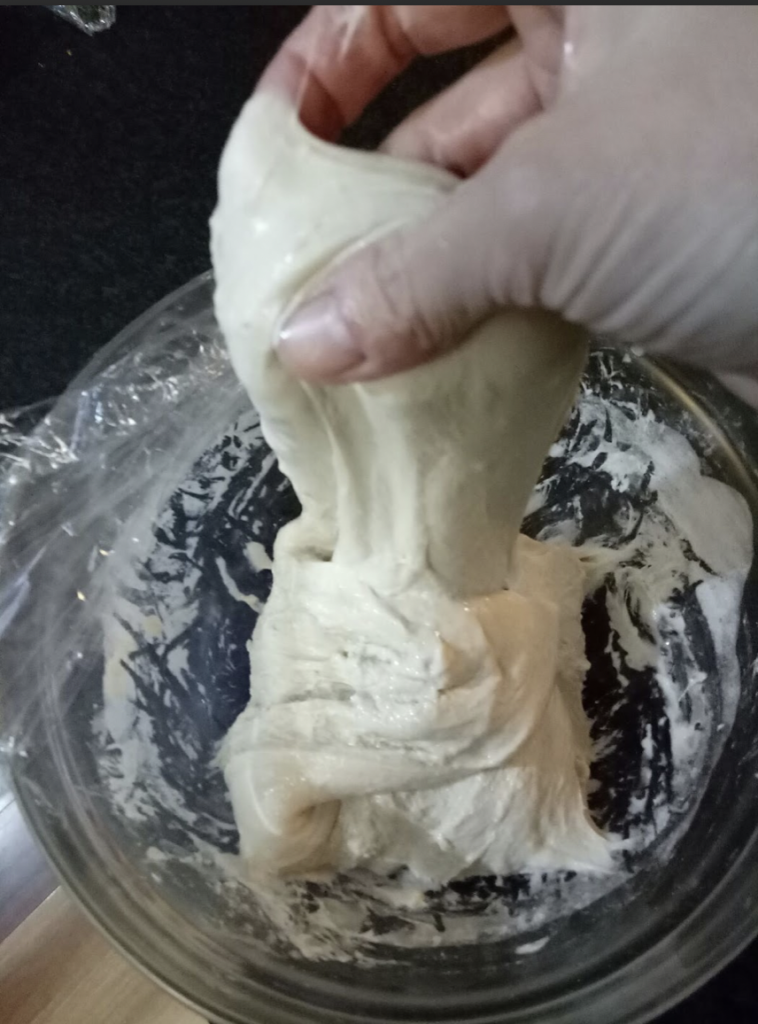
Now we start stretch and folds at half hour intervals, for a total of 5 times. If you’ve never heard of stretching and folding dough, check out this Youtube video (though I don’t do it as neatly and carefully as they do!) Wet hands are a must for stretch and folds.
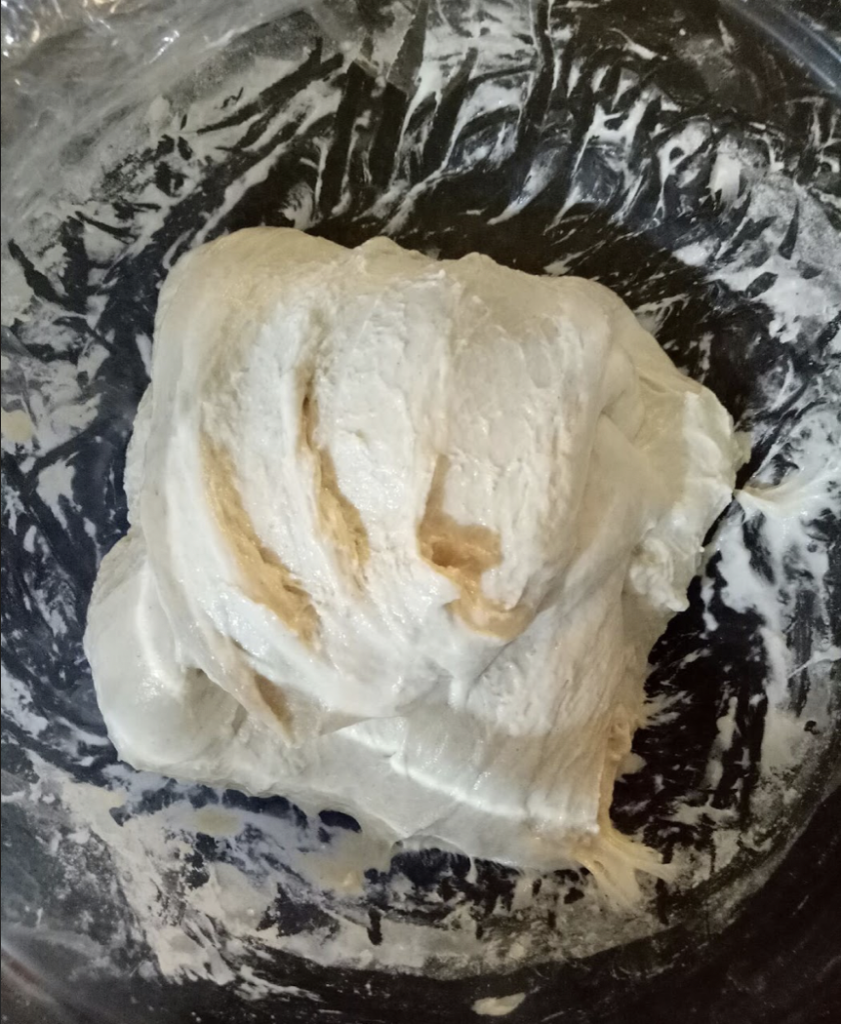
By the time you do your last stretch and fold you should have a lovely smooth and glossy dough. Cover and allow to sit until the dough has increased by around 30%. Setting it in a warm place helps. It’s tricky giving an exact time for how long this will take, due to room temperature variables. Suffice to say, it will take longer in winter than it will in summer!

When your dough has increased sufficiently, you can shape (again, Youtube is your friend for this – search “shaping a boule”).

Now you can complete the second rise, which can either be done in the fridge overnight (as detailed in the recipe below) or on the bench, covered with plastic wrap or a damp towel for a “same day” bake.

I only bake on the same day when the weather is warmer, otherwise the dough will take a long time to rise. On a warm day, I will let it second rise for around 2 -4 hours.

The refrigerator method can be convenient for “next day” baking as you can wake up in the morning, remove your dough from the fridge, warm your oven and have fresh bread by lunchtime (just remember to allow for cooling time).
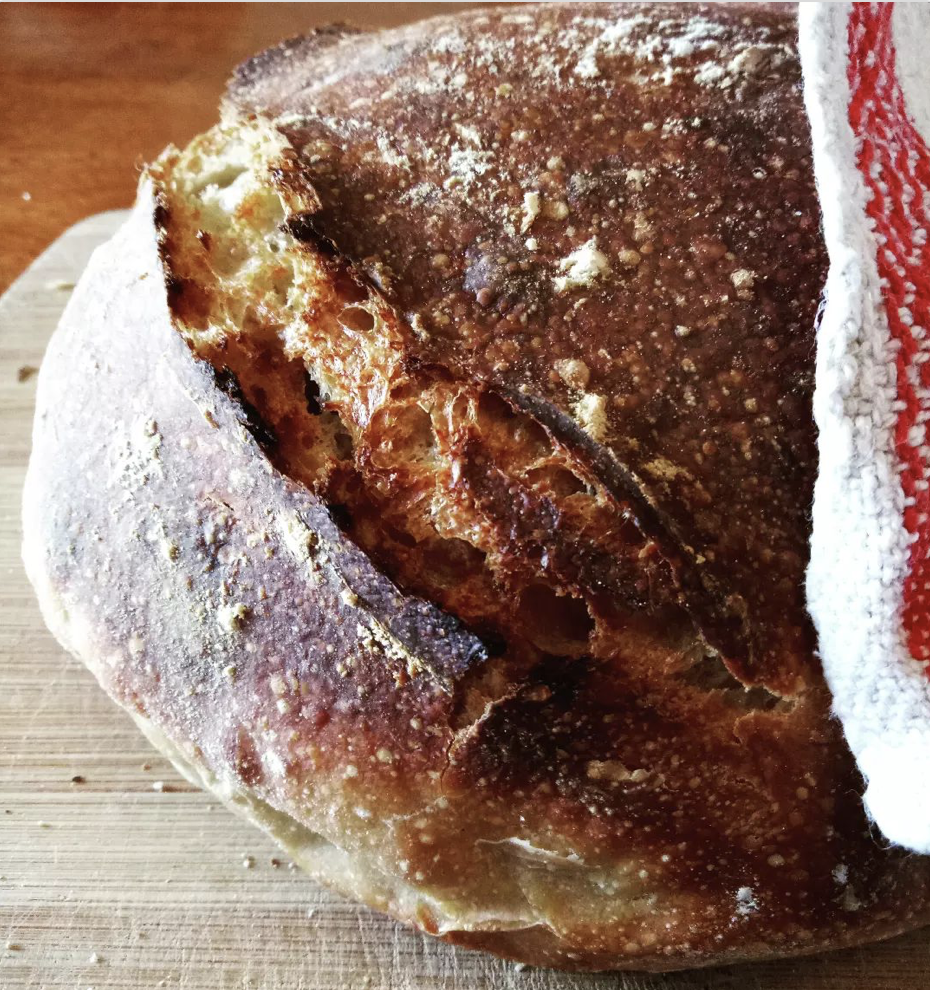
Light Rye Sourdough

5 from 1 vote
Print Recipe Pin Recipe

Ingredients
  

  • 160 grams Active sourdough starter
  • 350 mls Water (room temperature) * More water may be needed
  • 1 tbsp Raw honey
  • 200 grams Light rye flour
  • 300 grams Strong white baker's flour
  • 1 & 3/4 tsp salt

Instructions
 

Make the dough

  • Place water and honey in large bowl and whisk together to combine.
  • Add sourdough starter to water and mix until starter is dispersed in water.
  • Add flours and salt and mix until a shaggy dough forms. If the dough seems dry, add some water in small amounts.
  • Cover the bowl and allow to sit for around 1 hour.

Stretch and folds

  • With wet hands, stretch and fold the dough, rotating the bowl 4 times total.
  • Cover and sit for 30 minutes.
  • Continue the stretch and folds, followed by a 30 minute rest for a total of 5 times. (Total time – 2 hours).
  • Cover and allow the dough to prove at room temperature. The amount of time will depend on how warm your kitchen is. This stage may take 1 hour, it may take 6 hours. You want your dough size to increase by around 30% – not to double.
  • At the end of this step, your dough should look light, slightly puffy and glossy. You may see bubbles, this is a good sign.
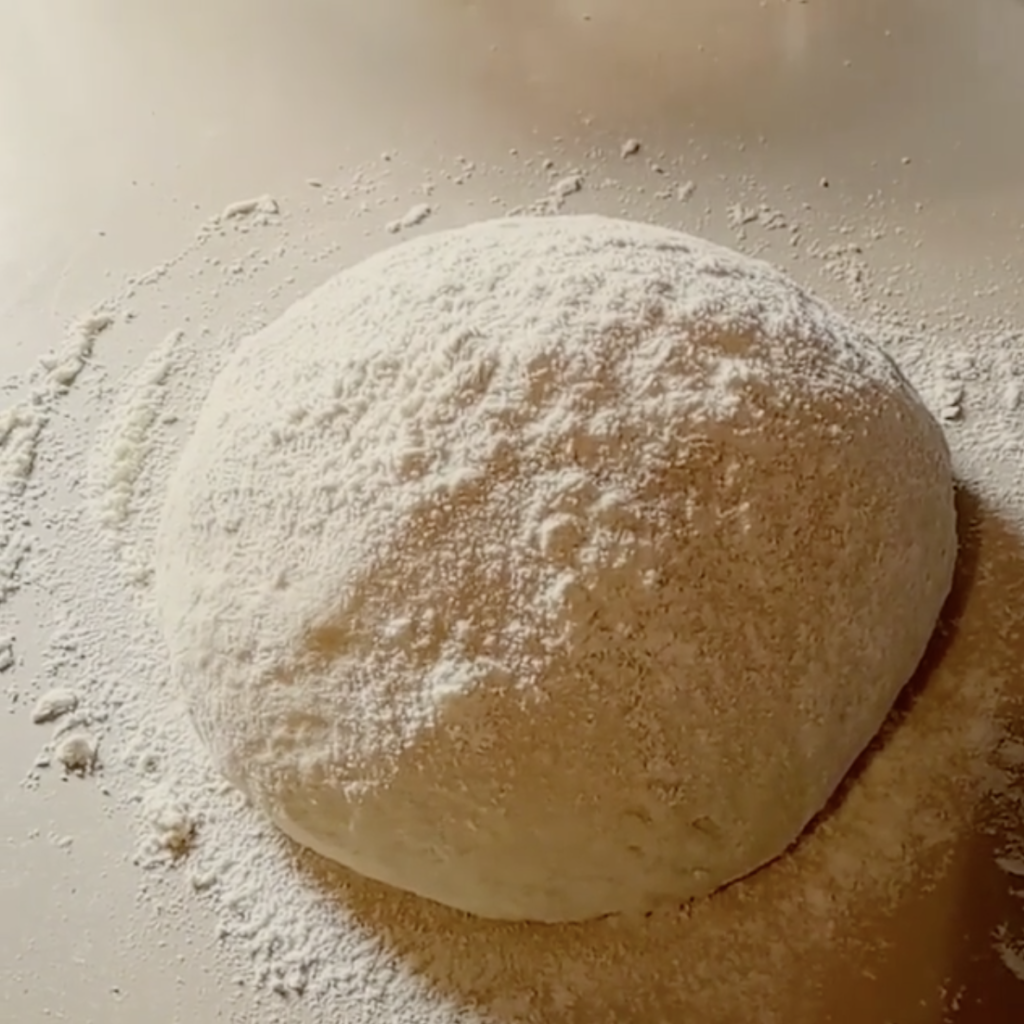
  • Tip the dough onto a well floured surface and shape. Place into a bowl lined with baking paper/non stick parchment paper or a banneton basket and place in refrigerator overnight, covered.
  • In the morning, remove the dough and place on bench.
  • Heat a cast iron dutch oven with the lid on at your hottest oven temperature. I use a fan forced oven at a temperature of 240 degrees celsius. I place the dutch oven in the middle of the oven.
  • After 30 minutes, remove the dutch oven and take off the lid. Careful, it's very hot!
  • Slash the dough using a knife or lame. I do this before it goes near the dutch oven, to avoid the possibility of burning myself. Use the baking paper as a kind of sling to move the dough to the dutch oven.
  • Turn the oven down to 220 degrees.
  • Place the lid back on and put the dutch oven back in the oven for 20 minutes of covered baking.
  • Remove the lid and continue to bake uncovered for another 25 minutes.
  • Take the dutch oven out and again, use the baking paper to pick up the loaf and place it on a cooling rack, removing the baking paper as you do.
  • Allow the loaf to cool completely before slicing.
Keyword baking, bread, sourdough

I hope you enjoy this bread as much as my family does!

Until next time…

Happy Baking!

Filed Under: Recipes, Weaving Tagged With: baking, bread, make bread at home, Recipes and food, sourdough, sourdough light rye loaf

Easy flat bread recipe

by Kelly 10 Comments

When I need bread in a hurry, I make flat bread! It is quick, cheap, easy, and means I can have fresh bread in under an hour. I often serve it as a wrap with salad, meat, dip, falafels – whatever, it’s all good! And if you have leftovers, the next day you can toast it into healthy chips for dip or use it as a pizza base.


Ingredients:
4 cups plain, unbleached flour
2.5 teaspoons yeast
1 teaspoon salt
350 – 450ml warm water

Place dry ingredients into a large bowl and mix. Make a well in the middle and add the water, about half at first and increase as you need to. You may not need all the water – it depends on your climate and the dryness of your flour. You want a very moist, but not sloppy dough. Mix until the dough comes together and there are no dry spots remaining. 

Turn the dough onto a floured surface and knead for a couple of minutes, until the dough is soft and supple. Flour or oil the bottom of the bowl and place the dough back in. Cover with a clean tea towel.
Allow to rise for approximately 45 minutes to 1 hour or until doubled in size. Once again, this time will vary according to your climate.
Once the dough has risen, cut off lumps of dough about as large as the palm of your hand.
On a well floured surface, flatten the dough first with the palm of your hand, turning it over the coat both sides with flour. 
Now roll the dough out until you have a round that will fit in your pan and is quite thin, but not too thin to pick up and transfer to the pan. (I just pick it up with my hands).
Place the round into a preheated, very hot non stick frypan. Do not add an oil – we want a dry fry.
When the surface of the round begins to bubble and puff, turn over to cook the other side. It only takes a minute or two on each side. You may have to adjust the heat as you go to ensure the bread cooks quickly but doesn’t burn. Every few rounds, you may wish to  quickly wipe out the surface of the frypan with wet paper towel or a damp cloth as flour can accumulate and start to burn. 

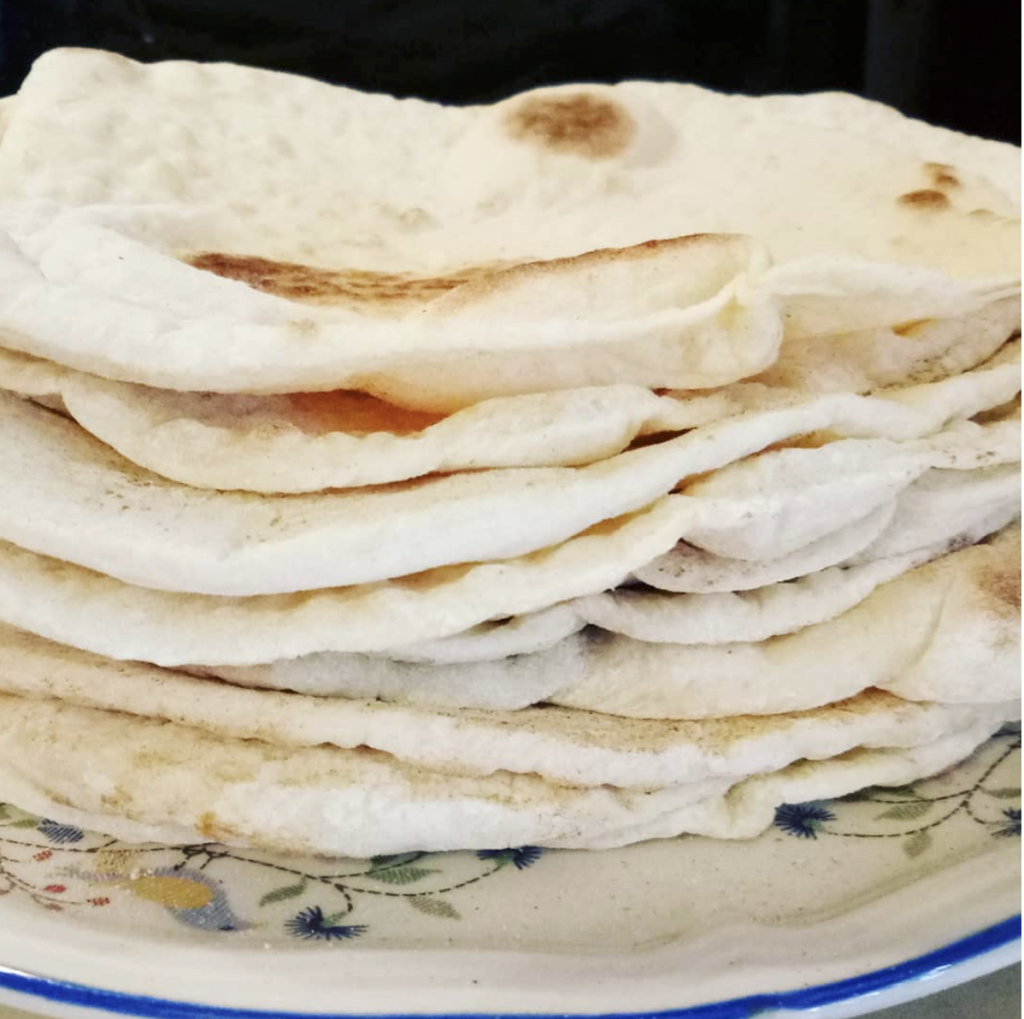
Stack your bread rounds on a plate and cover with a clean towel until ready to use.

My kids love to eat them fresh out of the pan, smothered with butter! If I can keep them out of the kitchen for long enough, I often serve this bread with homemade hommus or labneh.
I would love to do a video to accompany this flat bread recipe sometime, would that interest you? Let me know!


Filed Under: Recipes Tagged With: bread, my recipes, Recipes and food

Whey, sourdough, yeasted – what should I call this bread recipe!

by Kelly 1 Comment

I’ve been playing around a lot in the kitchen lately. Grinding grain, making lots of good food from scratch, preserving, culturing, what fun!


I made this bread as an experiment today and it was a success. It’s a little unconventional in the combination of ingredients, but it works, so here is the recipe!


Whey Loaf (I decided on a simple title!)

Makes 2 loaves


Ingredients
450 grams wholemeal flour (freshly ground if possible)
50 grams rye flour
500 grams white plain flour
2 teaspoons yeast
1/4 cup sourdough starter
200ml whey, room temperature
2 teaspoons salt
2 tablespoons of honey
3 tablespoons sunflower oil
500ml warm water


Method

Place all dry ingredients in a large mixing bowl. Add sourdough starter and whey. Start up your mixer with a dough hook (or mix with wooden spoon if mixing by hand). Mix honey and oil with warm water and gradually add to mix. Continue to mix on low for 10 minutes, or mix by hand until combined and then knead for 10 minutes or until elastic.


Place dough in an oiled bowl and cover with glad wrap. Allow to double in size (usually an hour depending on the weather).


Divide dough into 2 loaves and shape either into bread tins or into rounds on a tray. If using tins, be sure to oil them or for trays, use good quality baking paper to avoid any sticking. Cover with glad wrap once again and allow to sit for another 45 minutes – 1 hour.


In the meantime, preheat oven to 250 degrees (C).
Slash tops of loaves with a sharp knife or razor blade and place in oven. Set the timer for 5 minutes. 
Turn oven down to 220 deg (C) and bake for a further 30 minutes*.
Turn out and cool on wire rack.


* Due to the wholemeal flour, your loaves may brown more than you would like. If they start to brown too much, cover with a large piece of foil for the remainder of the baking time.


Filed Under: Uncategorized Tagged With: bread, my recipes, Recipes and food

The Simple Life

by Kelly 5 Comments

It’s quite a popular topic nowadays, the “simple life” and how to obtain it. Do some people spend so much time pursuing this so called simplicity and their ideal of what that is that they miss the point entirely? 


Is the simple life about living the dream or living the reality? The dream for me is a country property and earning a good income through a  handmade business. The reality is suburbia, traffic, very little time to devote to a business of any kind and a very limited budget. But that’s not the point, right? 

The point is, what can I do right now to live the simple life given my circumstances? 


I was pondering the simple life and what simplicity means to me. It occurred to me that one of the most rewarding parts of simple living is that you can take very little and turn it into something 
special.

Home made bread for example. Usually 4 ingredients. Inexpensive, ordinary ingredients. Add time, love, technique and you have something awesome.

Weaving is another example. With threads and a loom I can make the most beautiful variety of things.


Soap making? Once again, very few ingredients. A bit of time and attention and you have a whole batch of creamy, natural soap for your family.


That property in the country may or may not ever happen, in the meantime I will try to be grateful for all I have and all I can do. And if it does happen, I guess I’ll be well prepared šŸ™‚

Filed Under: Uncategorized Tagged With: bread, frugal living, simple living, soap making, weaving

Frugal February in the kitchen

by Kelly 4 Comments

The months of December through to March are our most challenging financially. Christmas, followed by holidays, plus bills and insurance mean that we really have to pull in the reigns and make an extra effort to save money. I thought I would share with you a few of the thrifty things I’ve been doing in the kitchen. 


Last month I set myself a water challenge. It’s Summer here in Australia and we’re using a lot of water on the garden (we have a tank for the garden, but without rain there is no tank water). 


*Place a container in the sink and use the water from rinsing fruit, vegetables and eggs on the garden.
* Run water into a jug while waiting for hot water – I get heaps of water this way, which either goes into our purification jug or onto the garden.
*Halve the amount of water you normally wash up with. There is no need to fill the sink with hot water to do the dishes! I’ve been really surprised by how little I can use for this purpose. This goes for floor washing too – you don’t need that much (not that I wash my floors all that often, ahem..)
Next up is the use of appliances and utilities (gas, electricity) in the kitchen.

*If steaming vegetables, boil until steaming is underway, turn off the gas and keep the lid on. I find this is enough to steam the veggies without having to use another 5 – 10 minutes of gas.
*The oven can also be turned off early. When I make bread, I turn off the oven 5 minutes before the bread is done and let it sit with the door closed. It stays hot enough to cook and it saves 5 minutes of cooking time. Add that up over a year and it would be a lot of time!
*Bake your own bread. I’ve been doing this for a long time and it saves us a lot of money. The whole family prefers homemade loaves too. I bake 4 at a time to get the most out of the oven.
*Think about the appliance before you use it. Is it really necessary to plug into the electricity if you can do it by hand? For example, we sweep hard floors instead of vacuuming, our cooking ingredients are often mixed by hand and all our dishes are done in the sink with no dishwasher.

I’d love to hear your frugal tips for February too!

Filed Under: Uncategorized Tagged With: bread, frugal living, Recipes and food

Sourdough

by Kelly 2 Comments

I’ve tried sourdough starters from scratch many times. Some of the starters went really well but baked really poorly. Others just went off. I became despondent. But something about the warmer weather gets me to thinking about sourdough and I always feel like having another go. This time around I decided to increase my chances of success by buying a starter. I got a partially dehydrated starter from Sourdough Companion, followed the instructions to “wake it up” and away I went!

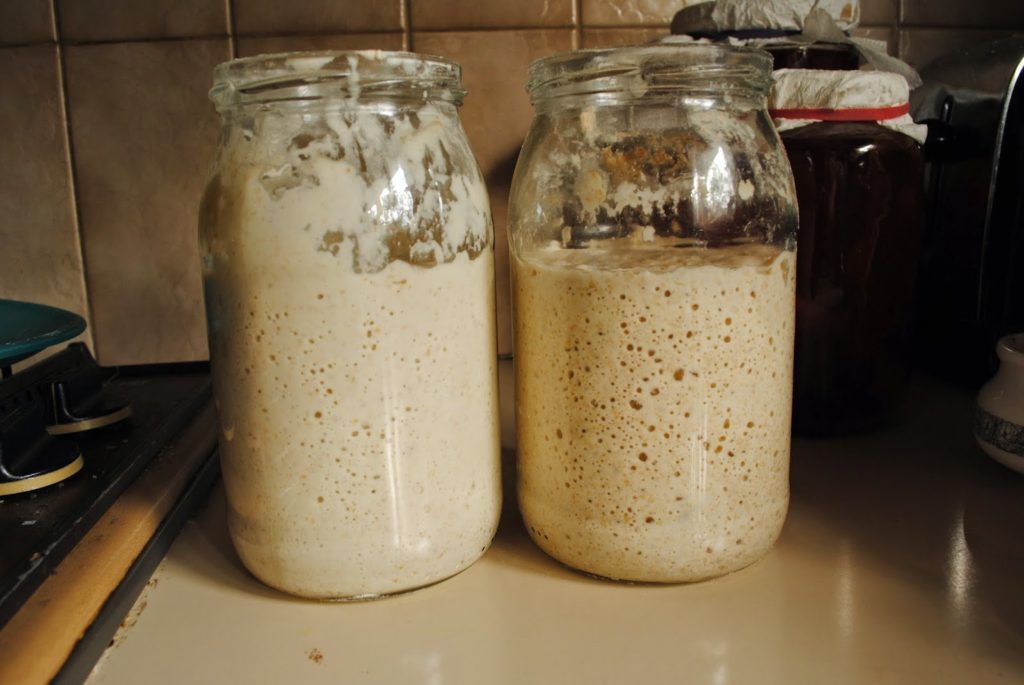
After the starter was activated (about 24 hours after adding water) I divided it in two to start the feeding stage. The one on the left was fed with organic white flour and filtered water. The one on the right was fed with wholemeal flour and filtered water. I wanted to divide them in case of disaster – my hope was that at least one would survive.
24 hours later they looked like they do in the picture above. Increased in size, lovely bubbly holes and a pleasant, slightly sour aroma.


After this first feeding the starter was ready to bake with. Wanting to remain on the cautious side, I decided to bake plain white loaves. Very simple ingredients – white flour, starter, salt and water.
I baked on a very warm day, so total rising time was around 6 hours, which was perfect. They turned out great!


Two days later I did my second bake. I kept the starters in the fridge in between and got them out for 2 hours before using. This time I tried overnight proving – one batch of dough in the fridge and one out on the bench top on a relatively cool night. I didn’t get as much rise (even overnight which ended up being about 14 hours total proving time!) However, the resulting bread still had a great taste and dense, springy texture.


I’m very happy to be able to add sourdough to my bread making repertoire and now plan to bake sourdough twice a week and yeasted bread once or twice a week (my 5 year old does not have the acquired taste for sourdough yet!) My starters are happily living in the fridge in between bakes and do very well after an outing and a feed.


Filed Under: Uncategorized Tagged With: baking, bread, Recipes and food, sourdough

Everyday bread

by Kelly 2 Comments

This is the recipe I make for a delicious yet not too time consuming bread for every day use. Makes 2 large loaves.

100g wholemeal flour
900g unbleached plain flour
2.5 teaspoons dried yeast
2.5 teaspoons salt
3 tablespoons sunflower oil
Approx 700ml warm water (varies with temp, dryness of flour etc)
Place all dry ingredients into your mixmaster’s mixing bowl with the dough hook fitted. Start machine on low and drizzle most of the water in. Allow to mix for a minute or so, then add more water if needed. The dough should be really moist but not so sticky it can’t be handled. 
Keep mixing on low for at least 5 minutes. Turn out of bowl onto an oiled bench and oil the bottom and inside of the bowl. Place the dough back in the bowl, oil the top lightly and cover with plastic wrap. Leave for 1.5 hours or until double in size. In cooler weather this will take longer.

Turn the dough out onto a bench and cut in half with a sharp knife. Knead each piece lightly then shape into required shape. You can do freeform loaves or use bread tins – I do either depending on my mood šŸ™‚ Freeform loaves can be placed on baking trays. Cover loaves with plastic wrap to rest.
Preheat your oven to 250 degrees (C). Allow the loaves to sit for 30 minutes. Slash the tops with a sharp knife and place in the oven. Set the timer for 5 minutes. When timer goes off, turn the temperature down to 230 degrees and set the timer to 30 minutes.
Remove from oven when done and cool on a baking rack. 

Linking up with Creative Friday.

Filed Under: Uncategorized Tagged With: bread, my bread recipe, Recipes and food

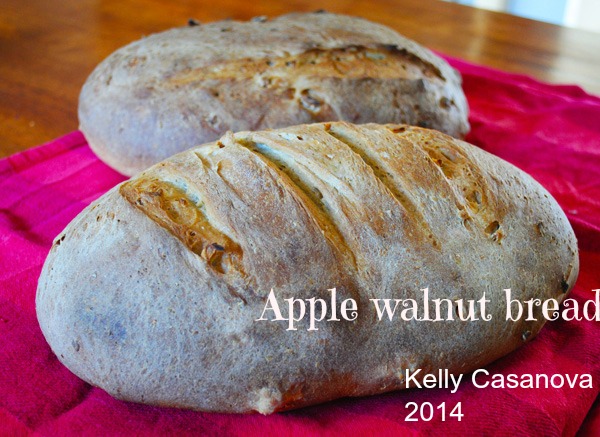
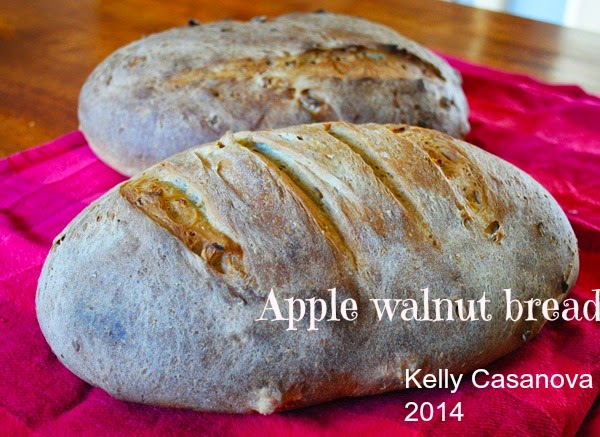
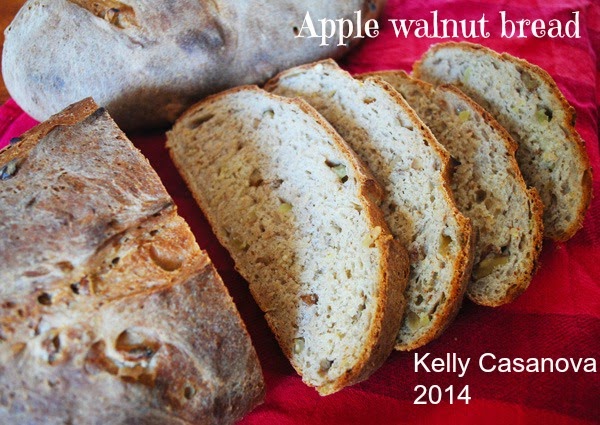
Apple walnut bread

by Kelly 3 Comments

Here is the 2nd recipe from my recently inspired brain šŸ™‚

Makes 2 large loaves.

150grams wholemeal flour
850grams white bread flour
3 teaspoons instant dry yeast
2 tablespoons brown sugar
2 teaspoons cinnamon
2 teaspoons salt
3 tablespoons butter
300ml milk
1 teaspoon molasses
350ml warm water
1 apple, peeled and chopped finely
100g chopped walnuts

Heat milk, butter and molasses until butter has just melted.
Place all dry ingredients into mixer with dough hook attached. (Yes, you can make by hand, just mix with wooden spoon at this point).

Start the mixer on low and gradually pour in the milk mixture, followed by the warm water. Allow to mix for 5 minutes, then add apple and walnuts. Mix for a further 5 minutes on low. (Or by hand until well mixed, then knead for at least 5 minutes). The mixture is very moist.

Make an oil spot on your bench (any veg oil is fine) and tip the dough onto it. Oil the inside of the bowl and place the dough back in, cover with oiled plastic wrap. Allow to rise for an hour.

Tip the dough back onto the oiled bench and cut in half with a sharp knife. Don’t knead or attempt to press the air out. Gather the dough at the top of each piece so that it become circular or oval shape. Turn upside down onto a baking tray lined with baking paper (so that the smooth side is now facing up). Repeat with other loaf. Re-cover with the plastic wrap.

Preheat oven to 250 degrees (C) while the loaves sit for 20 minutes.
Slash loaves with a sharp knife (if desired).
Bake for 5 minutes at 250, then turn down to 220 degrees (C) for a further 30 minutes.

Cool on a wire rack. Delicious warm with butter and cold with home made jam šŸ™‚

I’d love to hear your thoughts if you use my recipe and suggestions for improvements are also welcome. 
Would you like my recipes to be printable? Let me know, then I’ll find out how to get the print option thingy!

Filed Under: Uncategorized Tagged With: bread, recipes, Recipes and food

Wholemeal, rye and linseed bread

by Kelly Leave a Comment

I’m back into baking (at least on the cooler days anyway!) and that means more experiments for me. I still dream of having my own grain mill and grinding my own grain. I’m having another go at a sourdough starter too, hopefully with more success this time around.
Imagine baking with your own sourdough starter + freshly ground flour, now wouldn’t that feel authentic!

So, here is what I came up with yesterday – Wholemeal, rye and linseed loaf.


200g wholemeal flour
100g rye flour (I used organic)
700g good quality unbleached plain flour
1 teaspoon dry yeast
2 tablespoons linseeds (whole)
2.5 tablespoons sunflower oil
2.5 teaspoons salt
 around 700 ml warm water – you may need less or more.

Mix flours, seeds and yeast in a mixmaster bowl. Attach dough mixers and arrange bowl ready for the machine to mix it.  Start the machine mixing on low. Start to slowly pour in the water, taking several breaks to observe the wetness of the dough. Don’t add in all the water yet. Add the oil, allow to mix in, then add the salt.
* I do the water by feel. What you want with this dough, given that it has rye and wholemeal components which have the potential to be dry, is a nice moist dough. Keep adding the water until you’re happy the dough is moist enough.  It should look sticky. I make this dough much wetter than my usual white loaf.
Keep it mixing for about 10 minutes.

Turn out onto an oiled surface and knead the dough – stretching it out and pulling it in. This part is not absolutely necessary but I always do it to get a feel for the dough. It shouldn’t feel too stiff and definitely shouldn’t feel dry. It should be sticky and firm but stretchy to handle.

Place in an oiled bowl and cover with oiled cling wrap. Now, this is important: this dough requires a long rising time as we only used a little yeast. The long rising time also allows the flavours to develop beautifully. I won’t give you a perfect time frame, it depends on the weather, but at least a few hours rising time to double in size.

When doubled in size turn out onto the oiled surface again and press and shape into loaves. You can make just freeform loaves on a tray or place them in loaf tins as I did. Cover with the same oiled wrap and set aside to rise again, until the dough is high in the tin or doubled again on the tray. Lets say about an hour šŸ™‚ While the second rise is happening, preheat the oven to 240 degrees (C).

Slash the loaves with a sharp knife.

Place in the very hot oven for 12 minutes.
After 12 minutes, turn the oven down to 190 deg. (C) and continue to cook for another 20 minutes.

Turn out onto baking racks and cool.

Filed Under: Uncategorized Tagged With: bread, Recipes and food

My honey and oat bread

by Kelly 4 Comments

I’m a bread nut. I’ll admit it. I’ve had this fascination with hand made bread for years and as such have had quite a bit of practice at using, tweaking and producing my own recipes. It’s an ongoing process and one that I enjoy, I feel I’ll never know enough about breadmaking and there is always more to learn. It’s also something I would love to teach to others.
I hope you enjoy my latest loaf, it’s a little sweet but not overly, so can be eaten with savoury foods also.
This recipe makes 2 good sized loaves.
Ingredients

100g wholemeal flour
900g white flour
1/4 cup rolled oats
2.5 teaspoons dried yeast
2.5 teaspoon salt
1 tablespoon honey (I use a gorgeous local honey)
2 tablespoons sunflower oil
625ml warm water

Method

I use the dough mixer on my mixmaster then finish off the kneading by hand. It can be kneaded just by hand.
Mix all ingredients in a large bowl. Mix on low for 5 – 10 minutes or if kneading by hand, do so for 10 minutes. Your dough should be fairly sticky and moist.
Tip out onto an oiled bench and with oiled hands knead for a couple of minutes (I find this step important to get a feel for the dough and ensure that all is well).
Oil the bottom of your bowl, place the dough in and oil the top. Cover with plastic wrap and set aside to rise. 
When doubled in size tip the dough onto the bench again and either knead or press into the shape you would like. For example, the bread pictured was pressed into a rectangle, the sides rolled in and then the whole thing rolled up and placed in the bread tin. You can just knead it into a round if you wish and place it on a tray.
Cover and set aside for about 45 minutes.
Preheat your oven to 240 degrees (C).  If you want to, slash your loaf with a sharp blade. Place in the oven for 10 minutes. This makes a lovely crunch crust. After this time, reduce the temperature to 190 degrees for another 20 minutes or until the loaf is well browned.
Turn out onto a baking rack to cool or get stuck into it while it’s still warm!
If you try it please let me know what you think šŸ™‚

Filed Under: Uncategorized Tagged With: bread, Recipes and food

  • Page 1
  • Page 2
  • Go to Next Page »

Primary Sidebar

Categories

Archives

Meta

  • Log in
  • Entries feed
  • Comments feed
  • WordPress.org

Copyright © 2025 Kelly Casanova Weaving Lessons on the Foodie Pro Theme