• Skip to main content
  • Skip to primary sidebar

Kelly Casanova Weaving Lessons

  • Hi! I’m Kelly!
    • Disclosure
  • Online Weaving School Class Index
    • Common account issues
    • Common technical issues
    • What do I get with a membership?
  • New to rigid heddle weaving? Start here!
    • Never heard of the rigid heddle loom?
    • How to weave neat edges on the rigid heddle loom
    • Rigid heddle weaving
    • Rigid Heddle Weaving Patterns
  • Patterns
  • Subscribe

make bread at home

Delicious light rye sourdough artisan bread recipe

by Kelly 3 Comments

Jump to Recipe

Make sure you follow the Light Rye Sourdough loaf recipe steps, but I am adding some further details below for clarity.

Start by whisking your honey (I use locally produced honey) into the water. I always make sure that my water is at room temperature. Then add your sourdough starter and whisk.

I like to use my danish dough whisk for this step, it helps to combine the starter and water beautifully. Ideally, you won’t have any lumps of starter. If you don’t have a dough whisk, you can use a balloon whisk or a regular old spoon.
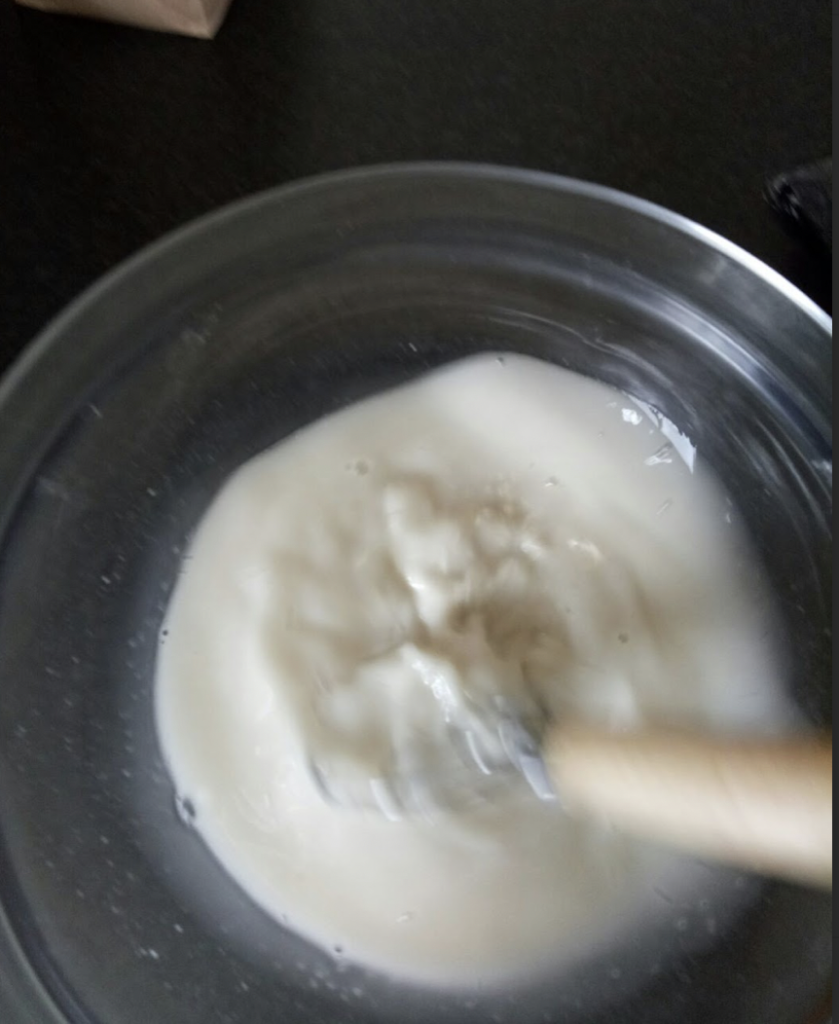
In the next step you add the salt and flours and mix to combine, again the dough whisk works great for this. You don’t need to over mix, you just want the wet and dry ingredients combined so that there are no surprise pockets of dry flour left.
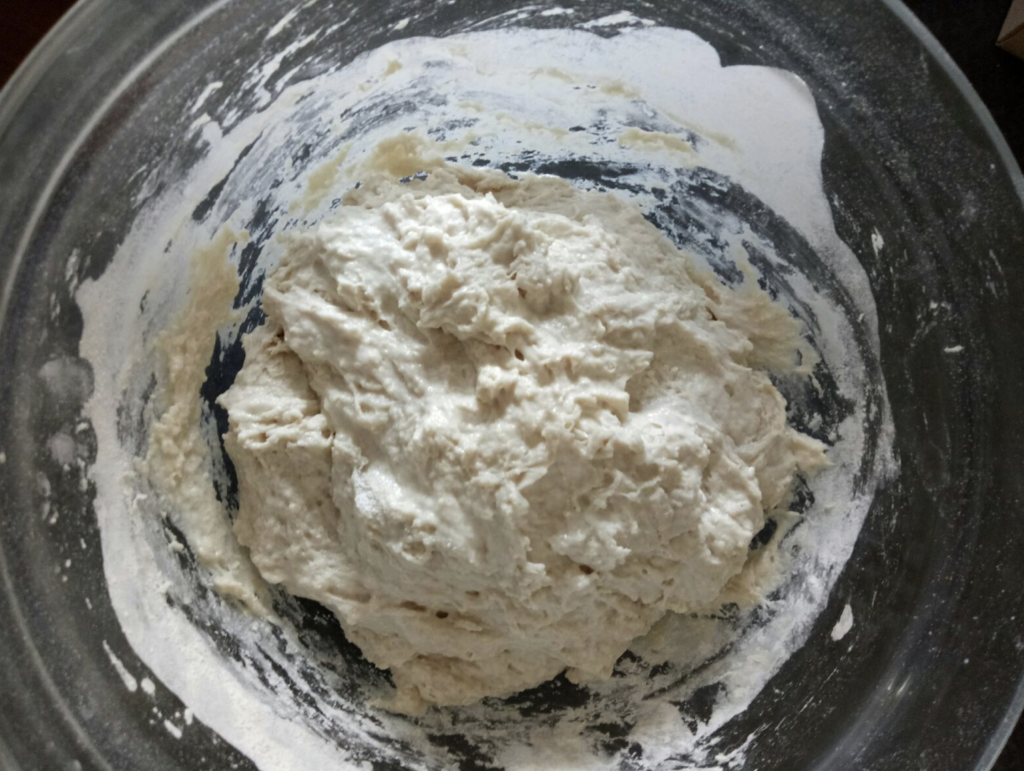
Your dough will look kind of rough and shaggy. Now that the flours are incorporated, cover the dough (I use plastic wrap for this as it creates some humidity and prevents drying out) and leave it to sit for around 1 hour.
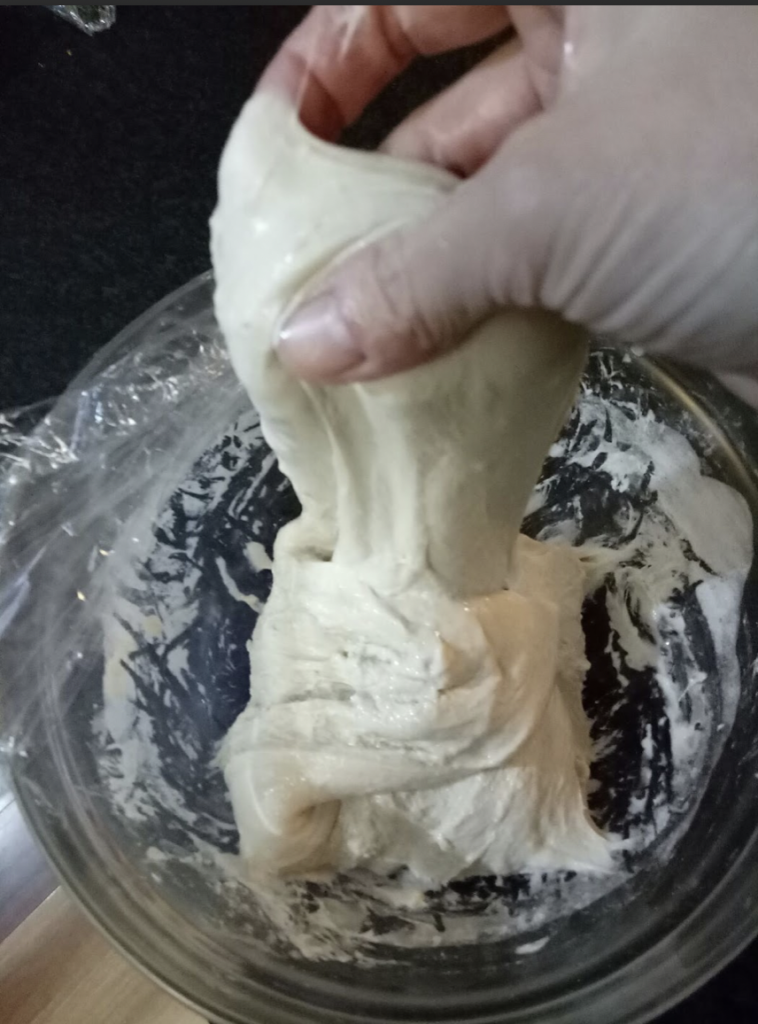
Now we start stretch and folds at half hour intervals, for a total of 5 times. If you’ve never heard of stretching and folding dough, check out this Youtube video (though I don’t do it as neatly and carefully as they do!) Wet hands are a must for stretch and folds.
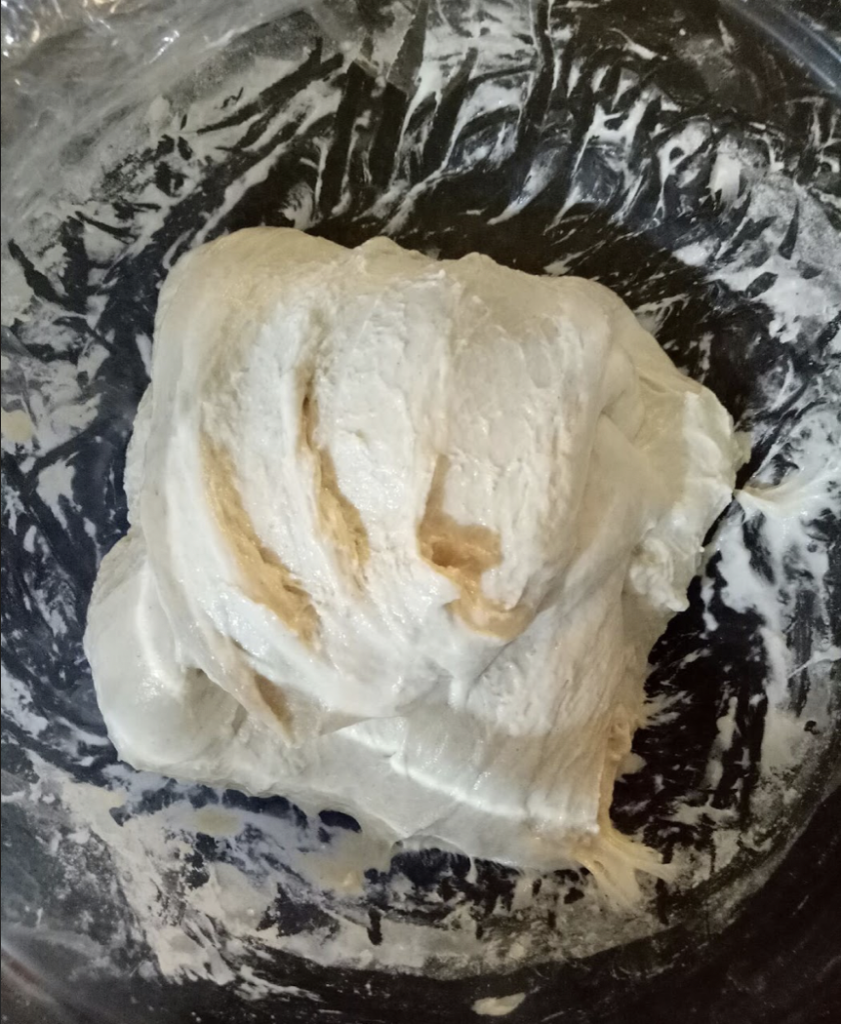
By the time you do your last stretch and fold you should have a lovely smooth and glossy dough. Cover and allow to sit until the dough has increased by around 30%. Setting it in a warm place helps. It’s tricky giving an exact time for how long this will take, due to room temperature variables. Suffice to say, it will take longer in winter than it will in summer!

When your dough has increased sufficiently, you can shape (again, Youtube is your friend for this – search “shaping a boule”).

Now you can complete the second rise, which can either be done in the fridge overnight (as detailed in the recipe below) or on the bench, covered with plastic wrap or a damp towel for a “same day” bake.

I only bake on the same day when the weather is warmer, otherwise the dough will take a long time to rise. On a warm day, I will let it second rise for around 2 -4 hours.

The refrigerator method can be convenient for “next day” baking as you can wake up in the morning, remove your dough from the fridge, warm your oven and have fresh bread by lunchtime (just remember to allow for cooling time).
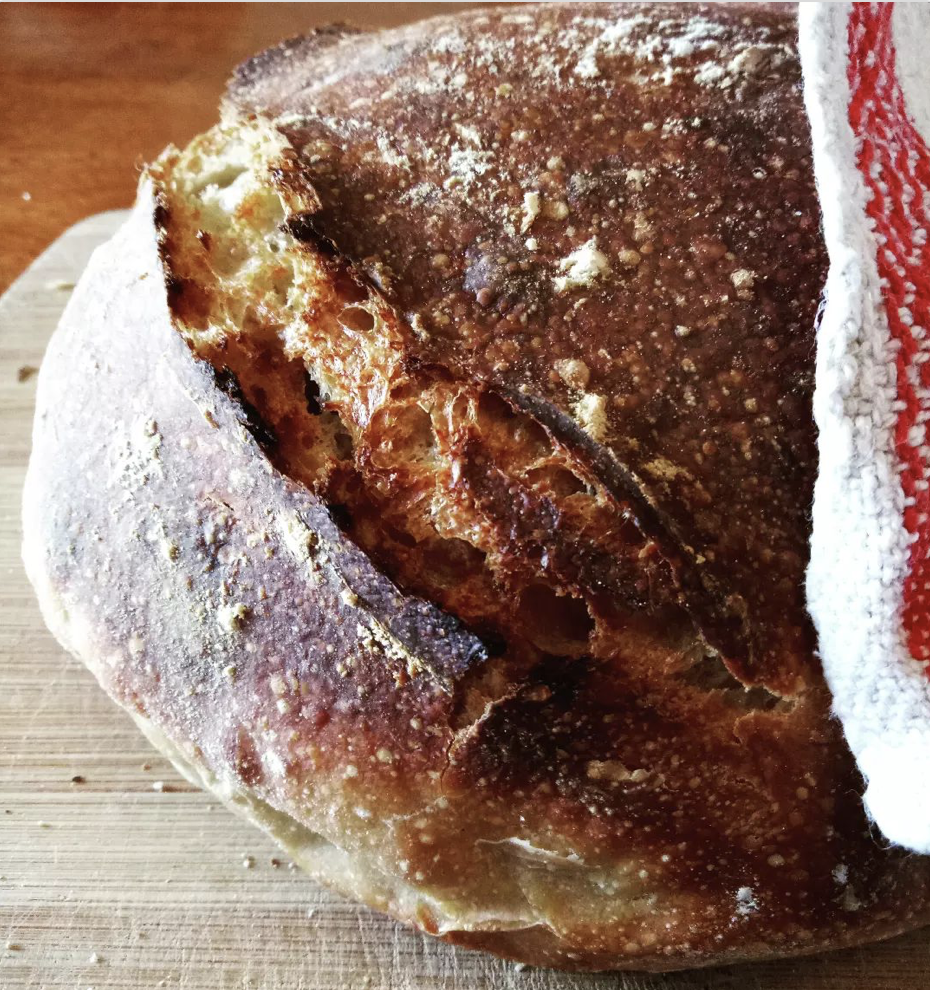
Light Rye Sourdough

5 from 1 vote
Print Recipe Pin Recipe

Ingredients
  

  • 160 grams Active sourdough starter
  • 350 mls Water (room temperature) * More water may be needed
  • 1 tbsp Raw honey
  • 200 grams Light rye flour
  • 300 grams Strong white baker's flour
  • 1 & 3/4 tsp salt

Instructions
 

Make the dough

  • Place water and honey in large bowl and whisk together to combine.
  • Add sourdough starter to water and mix until starter is dispersed in water.
  • Add flours and salt and mix until a shaggy dough forms. If the dough seems dry, add some water in small amounts.
  • Cover the bowl and allow to sit for around 1 hour.

Stretch and folds

  • With wet hands, stretch and fold the dough, rotating the bowl 4 times total.
  • Cover and sit for 30 minutes.
  • Continue the stretch and folds, followed by a 30 minute rest for a total of 5 times. (Total time – 2 hours).
  • Cover and allow the dough to prove at room temperature. The amount of time will depend on how warm your kitchen is. This stage may take 1 hour, it may take 6 hours. You want your dough size to increase by around 30% – not to double.
  • At the end of this step, your dough should look light, slightly puffy and glossy. You may see bubbles, this is a good sign.
  • Tip the dough onto a well floured surface and shape. Place into a bowl lined with baking paper/non stick parchment paper or a banneton basket and place in refrigerator overnight, covered.
  • In the morning, remove the dough and place on bench.
  • Heat a cast iron dutch oven with the lid on at your hottest oven temperature. I use a fan forced oven at a temperature of 240 degrees celsius. I place the dutch oven in the middle of the oven.
  • After 30 minutes, remove the dutch oven and take off the lid. Careful, it's very hot!
  • Slash the dough using a knife or lame. I do this before it goes near the dutch oven, to avoid the possibility of burning myself. Use the baking paper as a kind of sling to move the dough to the dutch oven.
  • Turn the oven down to 220 degrees.
  • Place the lid back on and put the dutch oven back in the oven for 20 minutes of covered baking.
  • Remove the lid and continue to bake uncovered for another 25 minutes.
  • Take the dutch oven out and again, use the baking paper to pick up the loaf and place it on a cooling rack, removing the baking paper as you do.
  • Allow the loaf to cool completely before slicing.
Keyword baking, bread, sourdough

I hope you enjoy this bread as much as my family does!

Until next time…

Happy Baking!

Filed Under: Recipes, Weaving Tagged With: baking, bread, make bread at home, Recipes and food, sourdough, sourdough light rye loaf

How to make bread – my No Knead Whole Wheat Bread Recipe

by Kelly 25 Comments

I’ve been making home baked bread for my family for at least 15 years (yes, I supply ALL the bread, but I have helpers too!) I started baking our bread at home for a few reasons – curiosity, nutrition, economy and self sufficiency. It is the perfect time right now to learn how to bake bread at home.

The idea of knowing exactly what was going into our bread, the superior taste and the cheapness of making it has made baking our own a priority.

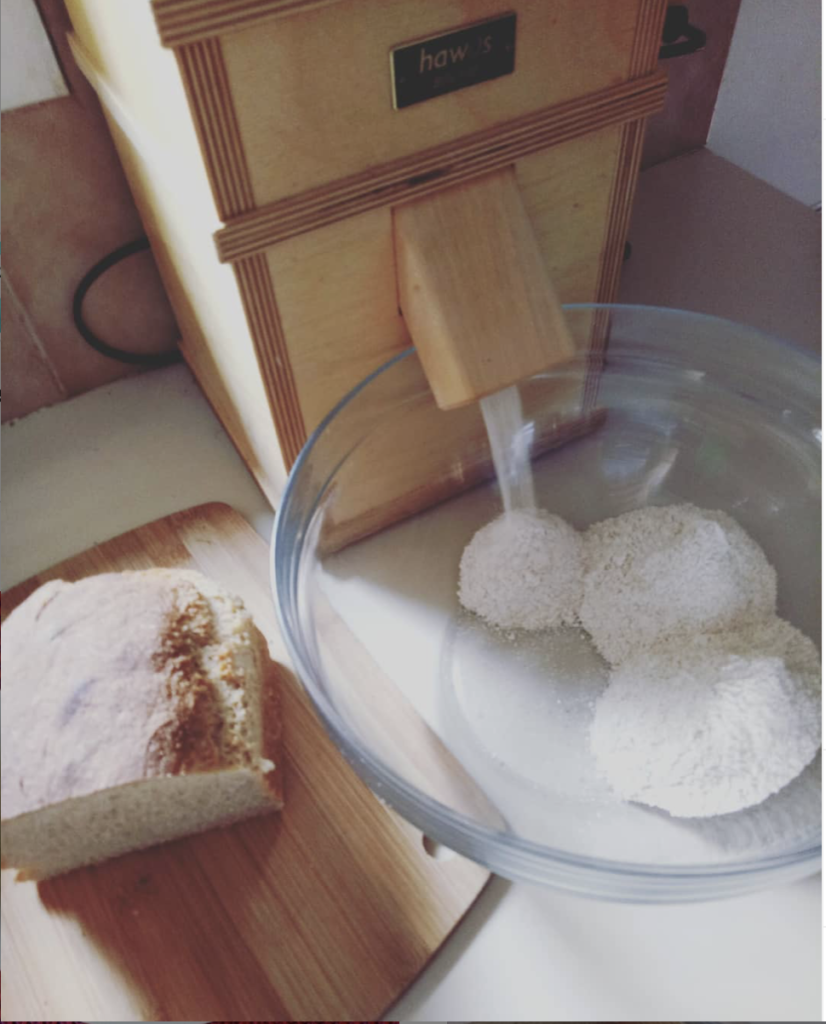
Around 4 years ago, I bought a Hawos Billy 100 grain mill after wanting one for 10 years (I’m very patient 😎). It sits out on the kitchen bench as it’s in constant use. The first time we set up the mill and ground some wheat, I tasted some on it’s own and was immediately hooked. I had bought commercial wholemeal flour from the supermarket, but grinding it fresh is really next level.

*This post contains affiliate links

I buy my wheat from Simply No Knead and have it delivered. If you’re in the U.S. and looking for some wheat to grind , you can get hard white wheat berries here. If you’re wondering about the differences between red and white wheat, check out this helpful article.

Milling our own grain is a huge blessing at this time when currently there is no commercial flour available to buy due to coronavirus related panic buying. I bulk buy my wheat in 20 kg bags and have plenty of it, I’m so thankful.

I’ve always wanted to share with you all how I make bread. Over the many years of baking for my family, I’ve devised my own methods to make the process faster, easier and more achievable. My methods are no knead, low mess, low ingredients and very straightforward. I’ve tweaked my methods to streamline the process and am very happy to share this with you!

Now, if you have flour and wish to use that, go ahead! This recipe is very adaptable and has the same basic components of flour, yeast, salt, water and oil. You can use white or wholemeal flour, or a combination, they all work. You may have to adjust your liquid amounts slightly, as wholemeal flour takes up more water.

If you prefer your bread on the sweet side, you may want to add in two tablespoons of cane sugar or two tablespoons of honey. I do this occasionally as an extra treat for the kids.

Then you will just need a large mixing bowl, a wooden spoon, 2 bread tins, and you’re ready to bake some delicious bread! If you are going to make bread a lot, you will want a good bread knife, it will take the headache out of slicing. My husband gifted me this Mundial Serrated Knife right at the beginning of my bread baking journey and I use it every single day. Alright, let’s check out the recipe!

Let’s just go over some measurements first so that we’re clear on amounts. If you don’t know how much grain to mill to get the required amount of flour, 5.5 cups of whole wheat grains grinds up to 7.5 cups of flour. This amount of grain and flour also equals 1 kilogram (2.2 pounds). 1 litre of water is equivalent to 1.05 quarts.

No Knead Wholewheat bread

Kelly
5 from 2 votes
Print Recipe Pin Recipe
Servings 2 loaves

Ingredients
  

  • 7.5 cups Wholewheat flour (I use freshly milled)
  • 1.5 tsp Instant dried yeast
  • 2.5 tsp Salt
  • 1 litre Warm water (Around 1 quart)
  • 3 tbsp Sunflower oil

Instructions
 

  • Weigh and mill your whole wheat grain, if using. Otherwise, measure out your commercial wholewheat flour into a large bowl.
  • Add yeast and salt to flour and mix through with a wooden spoon.
  • Mix the warm water and oil together in a jug.
  • Make a well in the middle of your flour and pour all of the liquid in.
  • With a wooden spoon, mix gently to begin combining the wet and dry ingredients.
  • When the water is no longer "sloshy", use a chopping action with the wooden spoon to bring ingredients together. You want to eliminate any dry flour spots.
  • Once combined and completely wet, let the dough sit in the bowl for 3 – 5 minutes.
  • Using the folding technique shown in the video, fold the dough whilst turning the bowl slightly. Fold it around 5 times. Then allow dough to sit for 3 – 5 minutes again.
  • Repeat the folding technique 2 more times for a total of 3 times. You will notice the dough begin to change and become elastic.
  • Sprinkle with flour, cover with a cloth and allow to sit until approximately doubled. Depending on the temperature in your kitchen, this could be 1 – 2 hours. My dough took around an hour to double in a warmish kitchen.
  • Oil or flour your bench surface and tip the dough out. It will be stretchy and airy.
  • Fold the dough in on itself on each side. Cut in half with a sharp knife.
  • Shape the two pieces of dough into loaves according to the video instructions. Place in prepared loaf tins.
  • Sprinkle with flour and cover with cloths to rest for around 30 minutes. Begin to preheat your oven to 225 degrees celsius (437 farenheit).
  • Score your risen loaves with a sharp knife and place in the oven for 35 minutes.
  • Remove from the oven and tins and place on a cooling rack. Allow to cool completely before cutting open.

Did I tell you that this bread freezes well? I make up a batch of 4 loaves at a time, the maximum amount my oven will hold. I usually keep one loaf out for the next couple of days (if it lasts that long, often it does not) and put the rest in individual freezer bags, tie them up well and freeze until needed.

You will want to watch the video I’ve put together in order to learn the techniques I use, as these are crucial to the success of your loaves.

I hope you enjoy this recipe and bake some bread for your family! Please leave any questions in the comments section, let me know if you are going to give it a try, or if you already have. I’d love to hear from you!

Until next time…

Happy baking!

Filed Under: Health and home, Recipes, Tutorials Tagged With: how to make bread, make bread at home, recipe, wholewheat bread recipe

Primary Sidebar

Categories

Archives

Meta

  • Log in
  • Entries feed
  • Comments feed
  • WordPress.org

Copyright © 2025 Kelly Casanova Weaving Lessons on the Foodie Pro Theme