• Skip to main content
  • Skip to primary sidebar

Kelly Casanova Weaving Lessons

  • Hi! I’m Kelly!
    • Disclosure
  • Online Weaving School Class Index
    • Common account issues
    • Common technical issues
    • What do I get with a membership?
  • New to rigid heddle weaving? Start here!
    • Never heard of the rigid heddle loom?
    • How to weave neat edges on the rigid heddle loom
    • Rigid heddle weaving
    • Rigid Heddle Weaving Patterns
  • Patterns
  • Subscribe

my recipes

Easy Sourdough Granola Recipe: A Delicious Twist for Healthy Homemade Breakfasts

by Kelly Leave a Comment

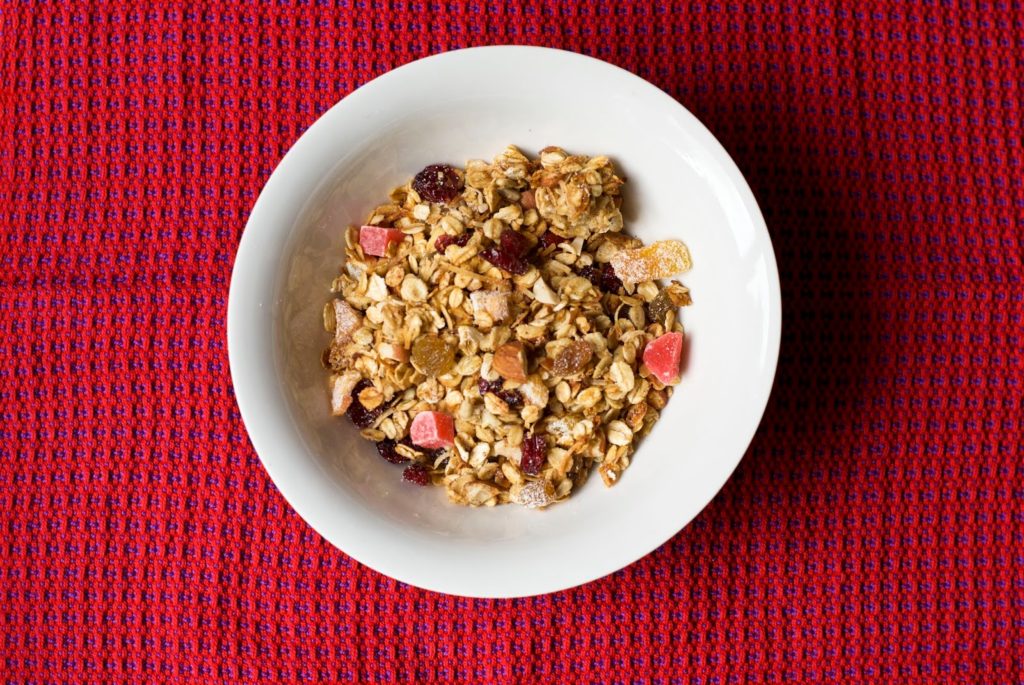
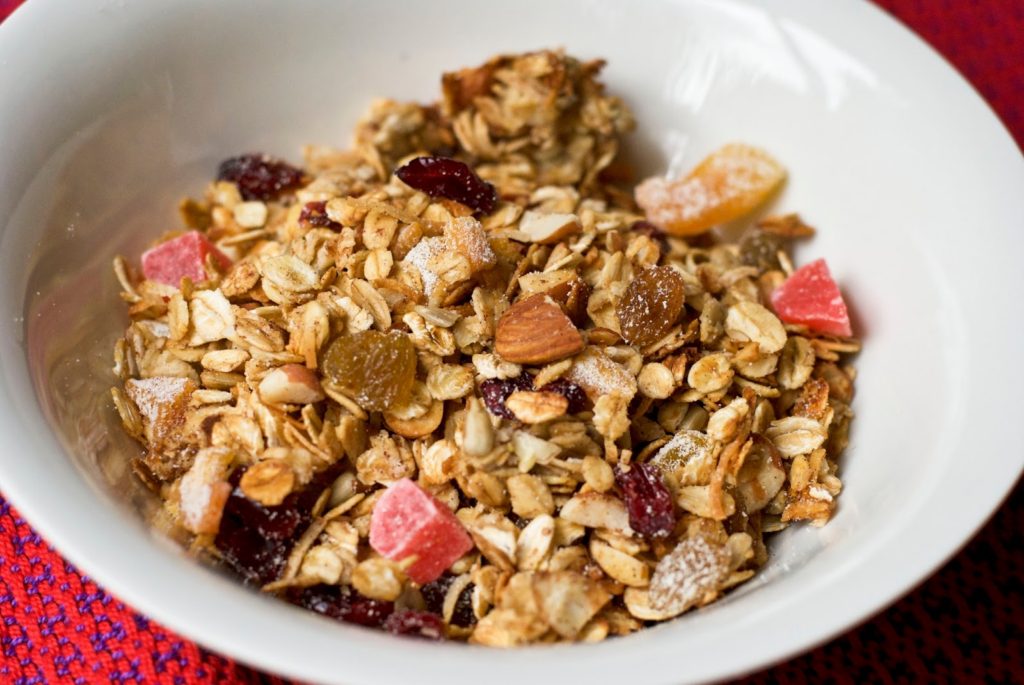
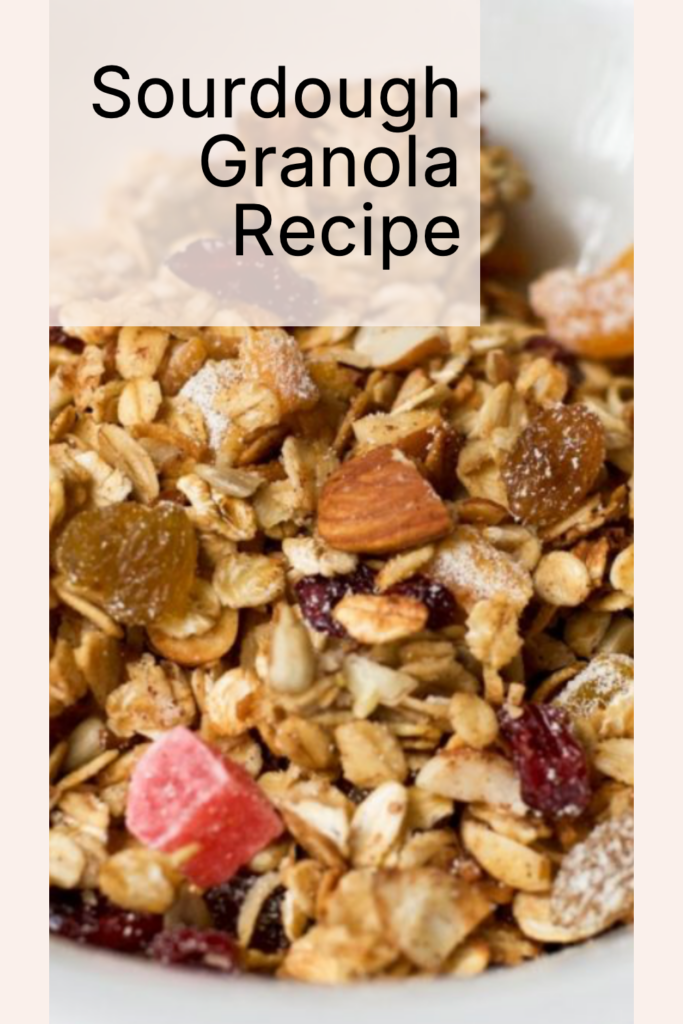
Looking for a delicious way to use up your sourdough discard? Try making homemade sourdough granola! This easy recipe combines the wholesome goodness of homemade granola with the unique flavor and crunch that sourdough starter adds.

It’s a game-changer for your breakfast or snack routine—perfectly crispy, flavourful, and a great way to reduce food waste.

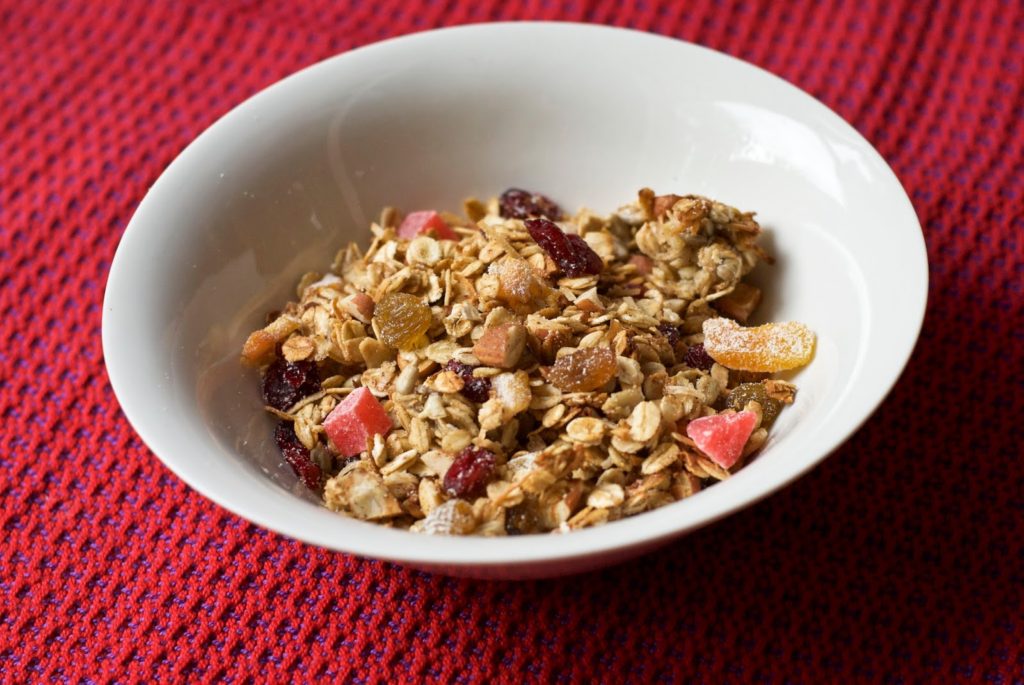
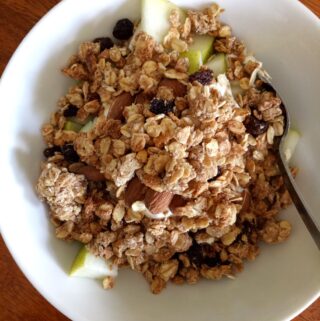
Sourdough granola makes the perfect breakfast topping for fresh fruit and creamy Greek yogurt—a delicious and nutritious way to start your day!

Jump to Recipe
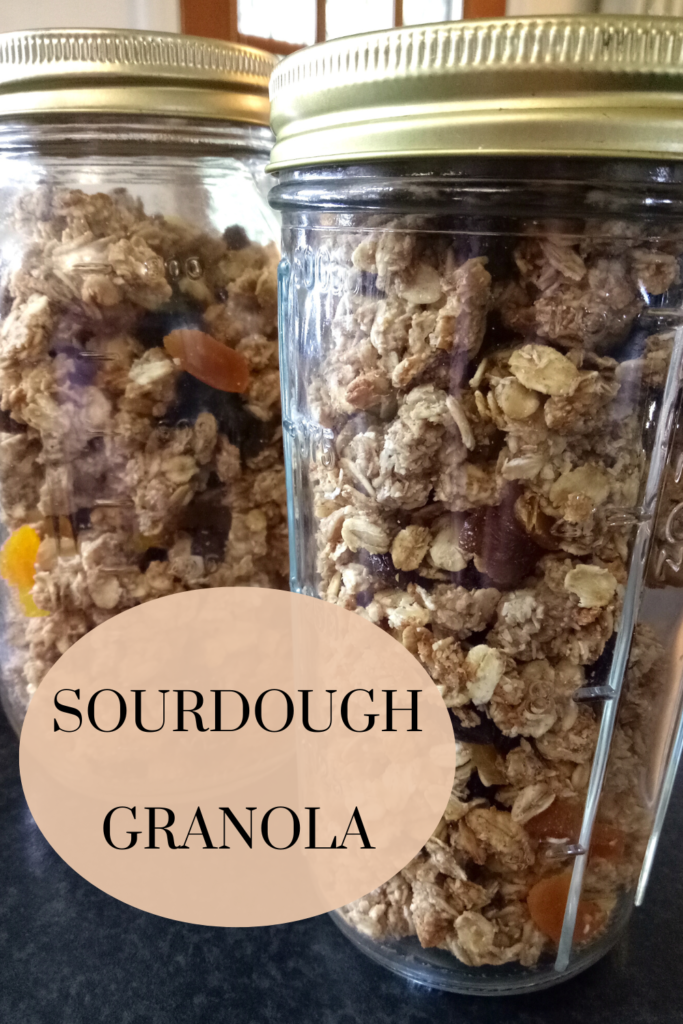
Personally, I love little clusters in my granola, and in the past I have used egg white (like in this recipe) to achieve a bit of chunkiness. But using sourdough starter binds all the ingredients together into clumps so well that there is no need for any additional binders.

You can control the level of crunch by experimenting with the baking times. For more crunch, bake longer. For less crunch, bake a little less.

You can also choose to have add ins or to just make the base recipe, depending on your own taste preferences. I love add ins and these are put in at the end of baking.

Some add in ideas that I regularly use are dried fruits like sultanas, apricots, figs, dates and apple. If you are a fan of nuts, any nut goes well with this recipe! One of my personal favourites is almonds.

This is such a simple and adaptable recipe, just mix wet ingredients and dry separately, then mix together before baking.
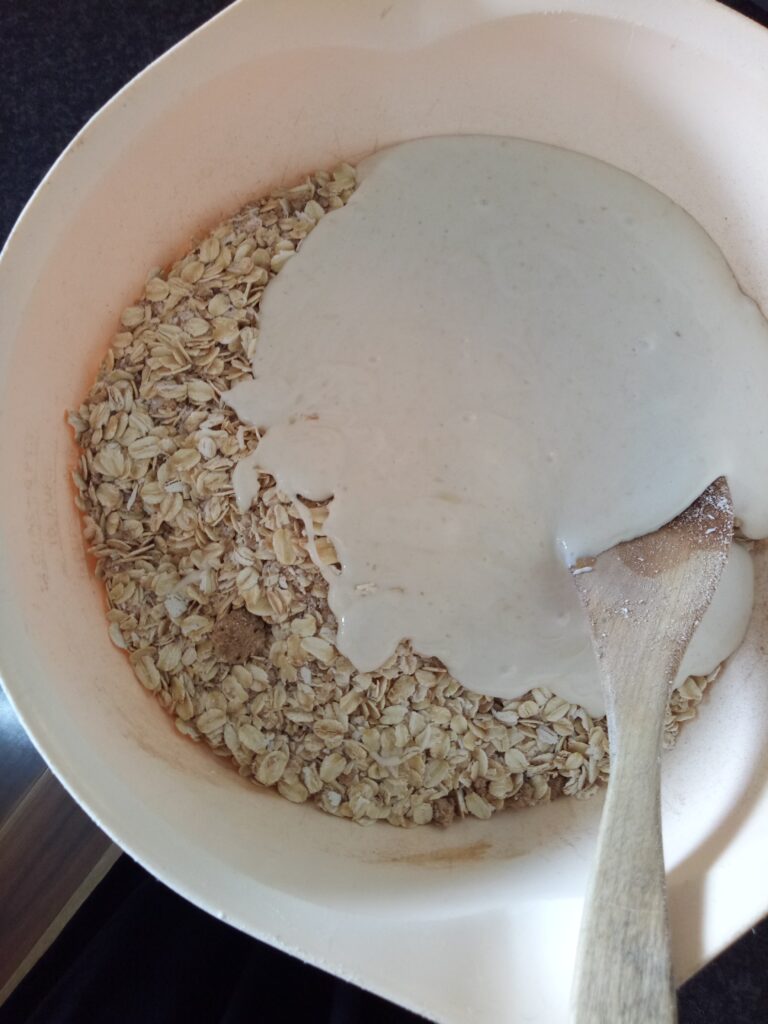
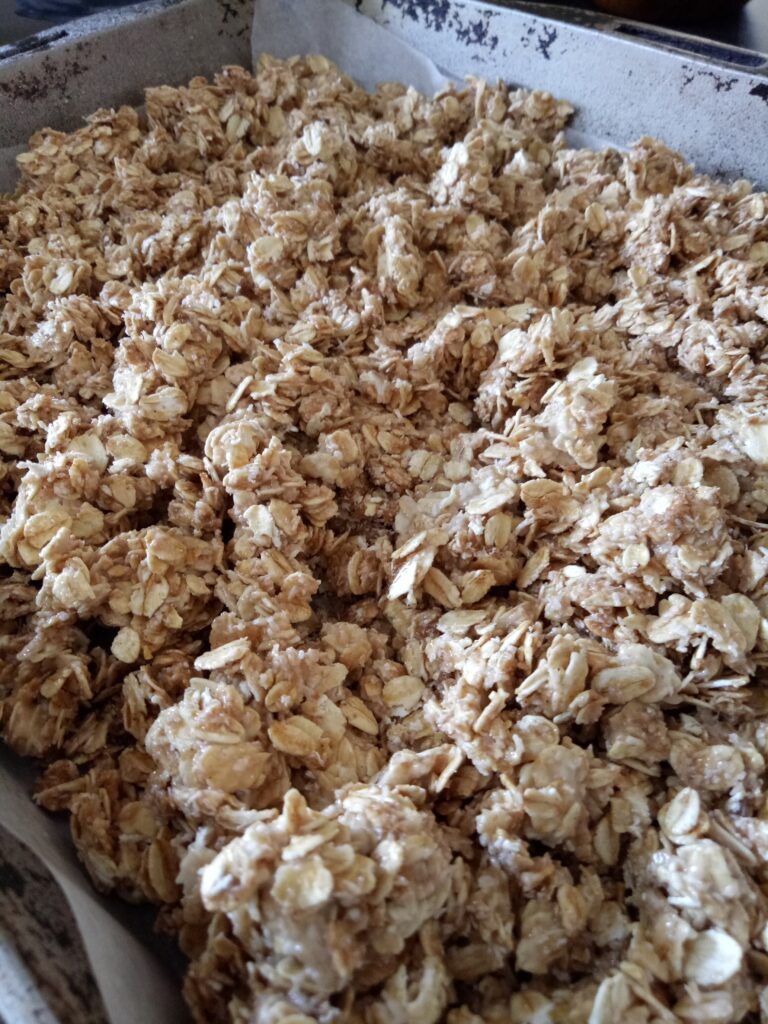
The dry ingredients all get thoroughly coated, making a clumpy, crunchy granola once baked.
Sourdough Granola

Print Recipe Pin Recipe

Ingredients
  

  • 5 cups Rolled oats
  • 1 cup Desiccated or shredded coconut
  • 2 tsp Cinnamon powder
  • 1 cup Sourdough discard or starter
  • 3 tbsp Olive oil
  • 2 tsp Vanilla extract
  • 1/2 cup Honey or brown sugar (or equal mix of the two)
  • Drizzle Maple syrup (optional)
  • 3/4 cup Dried fruit of your choice
  • 1/2 cup Nuts of your choice (optional)

Instructions
 

  • Pre heat oven to 160 degrees Celsius
  • Place all dry ingredients (except fruit and nuts) in a large bowl and mix.
  • Place all wet ingredients in separate bowl or glass jug and mix thoroughly.
  • Pour wet ingredients over dry and mix thoroughly.
  • Line a large roasting tray or a tray with sides. I use non stick baking paper. Alternatively, use a non stick tray.
  • Tip your mixture into the tray and even out to make an even layer.
  • Place in the oven for 10 minutes, remove the tray and turn the granola with a spatula.
  • Place back in the oven and repeat until desired darkness is achieved. I recommend a total cooking time of 30 – 40 minutes.

Don’t forget to stir in your add ins at the end, if you’re using them! Once completely cooled, store in an airtight container (I like to use mason jars).

You can eat this granola on it’s own as a snack, on top of fresh fruit, with milk of your choice or one of my personal favourites, on top of yoghurt.

If you love to customise, here are some add in options:

Add ins (examples of)

1/2 cup chopped peanuts

1/4 cup chopped almonds

1/4 cup sunflower seeds

1/4 cup chopped macadamias

1/4 cup chopped cashews

1/4 cup pistachios 

1 cup LSA (linseed, sunflower and almond meal) mix

Chopped dried fruit eg. apricots, peach, paw paw, apple, dates, cranberries

Rules for add ins

*For seeds and nuts, add these in at the dry mix stage. 

*For dried fruit add ins, mix in when the muesli has finished baking.

Allow the muesli to cool before placing it in an airtight container. Serve with milk or use as a delicious topping on stewed fruit and yoghurt. 
Sourdough granola isn’t just a delicious treat for your own table—it also makes a thoughtful and delightful gift! Simply place it in an attractive jar, tie it with a ribbon, and you’ve got a homemade present that’s sure to impress. Whether you’re enjoying it as a crunchy breakfast topping or sharing it with loved ones, this recipe is a wonderful way to make the most of your sourdough discard while adding a little extra joy to every day.

I hope you love it as much as I do! 👩‍🍳

*This post contains affiliate links. For further information please see my disclosure policy.

Filed Under: Health and home, Recipes, Weaving Tagged With: granola, my recipes, recipes, Recipes and food, sourdough

Milk and Honey Bread

by Kelly 10 Comments

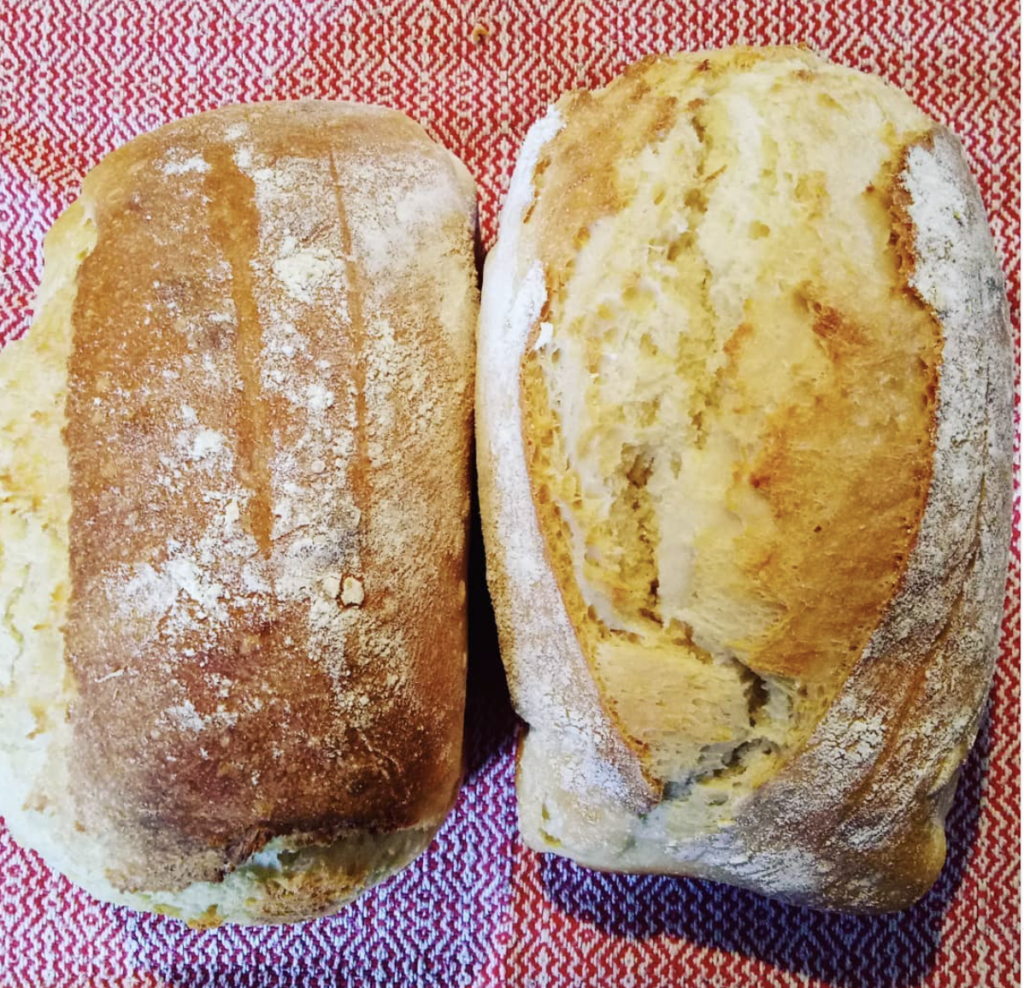
Milk and honey bread is a luxury bread, or at least, I think so!

Soft, sweet, moist and light all at once!

Milk and honey bread is a real treat in our home and the kids absolutely love it.

*This post contains affiliate links

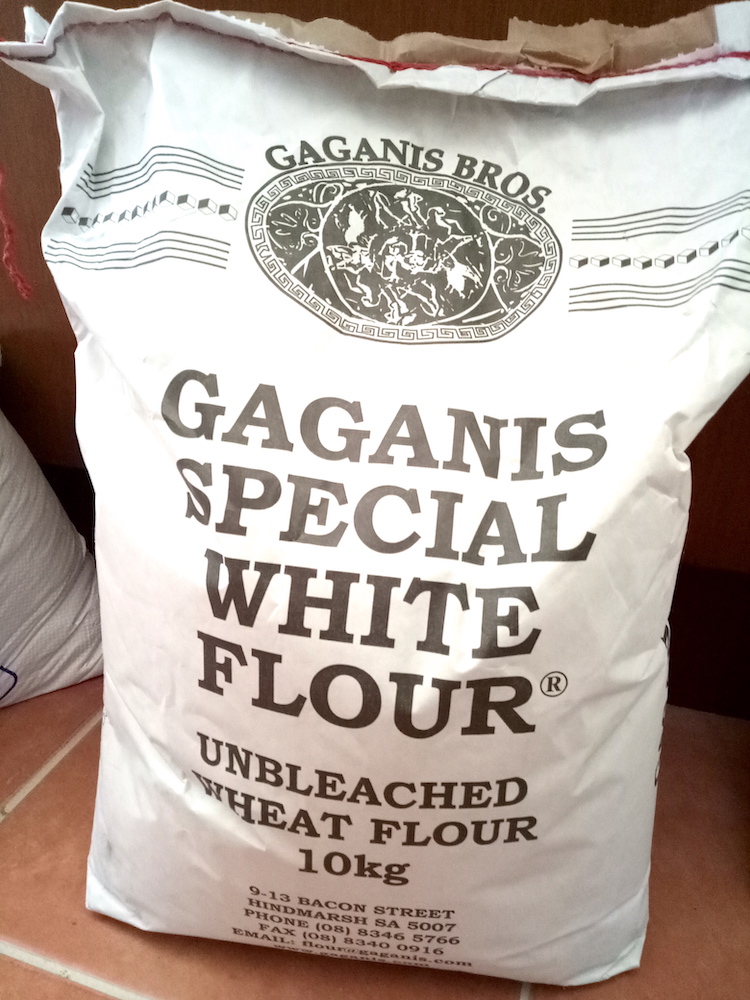
Since the coronavirus pandemic began I had not been able to find white flour anywhere to buy. I know it’s been the same for many of you, as the need and desire for home baking has increased and suppliers were overwhelmed with trying to restock.

I’m so grateful to have my grain mill and we do love whole wheat bread (find my own recipe here), but occasionally I love to make an all white bread for my family as a treat.

Well, this week, my husband was able to buy a 10kg bag of unbleached white flour. I usually buy 25kg bags, but when he walked in with the 10kg bag it was as if he had walked in with a sack of gold, I was so excited!

So, the first thing I decided to do with this new bag of white flour was to make the milk and honey bread that I had not been able to bake for so long.

This bread makes wonderful sandwiches and is especially delicious when eaten on the same day it’s baked. But, I must tell you that it makes the.most.wonderful. toast on the next and subsequent days!

There are only 6 basic ingredients to this recipe. It takes a little longer with a few more steps than my Whole Wheat Bread recipe, but trust me, it’s worth the effort!

This recipe makes 2 x 500gram or 1 pound loaves. I find it easiest to bake them in loaf tins, (these ones look great!) as the dough is very moist and doesn’t cope so well with being a round loaf on a tray – it won’t hold shape that way.

Milk and Honey Bread

Soft, sweet, deliciously moist!
5 from 1 vote
Print Recipe Pin Recipe

Ingredients
  

  • 2 cups Warm milk Made up milk powder is fine too
  • 1 teaspoon Dry active yeast
  • 2 tbsp Honey
  • 3 cups White, unbleached, plain flour
  • 2.5 tsp salt
  • 4 – 4.5 cups White, unbleached, plain flour (additional)
  • 1.5 cups Warm water

Instructions
 

  • Whisk warm milk and honey together in a large bowl. Sprinkle the yeast over the top and allow to sit for 5 minutes.
  • Whisk in 3 cups of white plain flour, 1 at a time. Cover this mixture with a clean kitchen towel and allow to sit for 30 minutes.
  • Whisk the salt into the yeast and flour mixture.
  • Whisk in the warm water, making a thin batter like mixture.
  • With a wooden spoon, stir in the remaining flour, 1 cup at a time. If your mixture is too wet, you can add more flour. If it is too dry, don't add the full amount of flour recommended (which is why we add 1 cup at a time). Aim for a dough that is very moist, quite sticky, but not too difficult to handle.
  • Use my dough turning method as outlined in the post.
  • Sprinkle dough lightly with flour, cover with clean kitchen towel and leave to rise until doubled in size, usually 1 – 2 hours, depending on your room temperature.
  • Shape the dough into 2 loaves and place them in loaf tins, either oiled or lined with baking paper. Cover again with towel.
  • Preheat oven to 225 degrees celsius or 437 farenheit.
  • Allow dough to rise 20 – 30 minutes or until the dough looks nice and risen in the tins. Slash the tops and place in the oven.
  • Bake for 35 – 40 minutes or until golden brown on top.
  • Cool loaves on a baking rack.

To review the dough turning method as shown in this video:

I hope you enjoy this bread as much as my family does. If you try the recipe and love it, will you do me the big favour of leaving a 5 star review? I would appreciate that so much! I would also appreciate if you try this recipe and are on Instagram, please tag me so that I can share your loaves in my stories. Feel free to use the hashtag #kellysmilkandhoneybread as well.

As always, if you have any questions about this recipe, please leave a comment, I love to hear from you.

Until next time…

Happy Baking!

Filed Under: Health and home, Recipes Tagged With: milk and honey bread, my recipes, recipes

Healthful Toasted Muesli (Granola)

by Kelly 10 Comments

 
I know, I know, there are thousands of recipes for toasted muesli (or granola) on the internet. But I’ve been fiddling around to try and make a healthy, not too oily, but not too dry recipe.


And I’ve hit on something pretty darn good! There is the base recipe, but then you can add to that according to what you have at the time. This batch was timed to coincide with a visit to a Lebanese nut shop, so we had a lot of extra delights to put in.
 
The best part is that many of these ingredients are easily accessible and may be in your pantry already.


It includes those wonderful staples such as rolled oats, raw honey, olive oil, shredded coconut, vanilla extract and sultanas.
 
All you need to make this recipe is an oven and a roasting pan.
 

Healthful Toasted Muesli (Granola)

Kelly
Base recipe
5 from 1 vote
Print Recipe Pin Recipe
Prep Time 5 minutes mins
Cook Time 30 minutes mins

Equipment

  • Oven, roasting tray

Ingredients
  

  • 5 cups rolled oats
  • 1/4 cup honey
  • 3 tbsp olive oil
  • 1 cup shredded or desiccated coconut
  • 2 tsp vanilla extract
  • 1 egg white (optional)
  • 1/2 cup sultanas

Instructions
 

  • Preheat oven to 170 degrees (C).
  • Mix all dry ingredients in a tray with sides so it doesn’t spill. A roasting tray is ideal.
  • Warm the honey until runny and mix in olive oil and vanilla. Pour evenly over dry mix. Mix thoroughly.
  • Now pour over the egg white and mix thoroughly.
  • Place tray in the oven and set the timer for 10 minutes.
  • After 10 minutes, take out the tray, turn the ingredients and return to the oven.
  • Repeat until the muesli has baked for 30 minutes.
  • Remove from oven and stir in the sultanas.

This recipe is super flexible, making it great for when you have certain ingredients on hand. Here are a few options for ways you can vary your muesli.

Add ins (examples of)
1/2 cup chopped peanuts
1/4 cup chopped almonds
1/4 cup sunflower seeds
1/4 cup chopped macadamias
1/4 cup chopped cashews
1/4 cup pistachios 
1 cup LSA mix
Chopped dried fruit eg. apricots, peach, paw paw, apple, dates, cranberries
Rules for add ins
*For seeds and nuts, add these in at the dry mix stage. 
*For dried fruit add ins, mix in when the muesli has finished baking.
 
Allow the muesli to cool before placing it in an airtight container. Serve with milk or use as a delicious topping on stewed fruit and yoghurt.
 
Also makes a delightful gift when placed in an attractive jar.

I hope you enjoy this recipe! Don’t forget to comment and let me know how yours turned out. If you love it, you could even leave me 5 stars 😉

Filed Under: Health and home, Recipes Tagged With: frugal living, healthy food, muesli, my recipes, Recipes and food

Healthy lifestyle plus a recipe for you

by Kelly 10 Comments

If you follow me on social media you will already know that I’ve embarked on a healthier lifestyle. It has been just over 2 weeks and I feel like I’m adjusting – it was very hard initially! 


I’m not the sort who copes well with small changes – I’m more of an “all in” kinda girl, so it was important for me to make major changes.


Although I’d like to share my thoughts in more detail with you as I go along, for now I’ll just show some examples of what I’ve been eating. It’s actually been pretty easy to put together healthy meals for myself, even though this seemed daunting at first. I thought it would be too difficult and too expensive to not always eat what the family was eating. It turns out that this was just one of many excuses I’d been storing up in my head!

I have lost a little weight, which has been encouraging.


So, here is a snapshot of what my healthy eating has been looking like. Most of these are pretty simple, throw together, low cook dishes without a real recipe. Just how I like it.


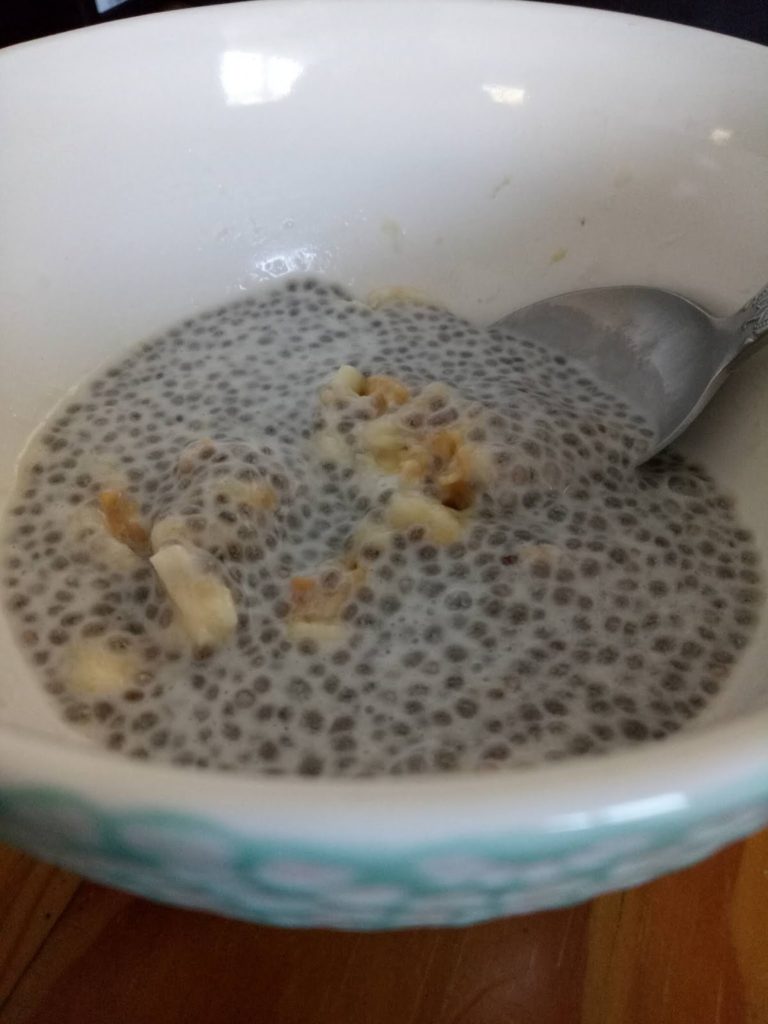
Lets start with sweets. (Also just how I like it!) Chia vanilla pudding with peanut butter banana. It looks sloppy and not all that appetising but as an afternoon snack, it is THE BOMB!

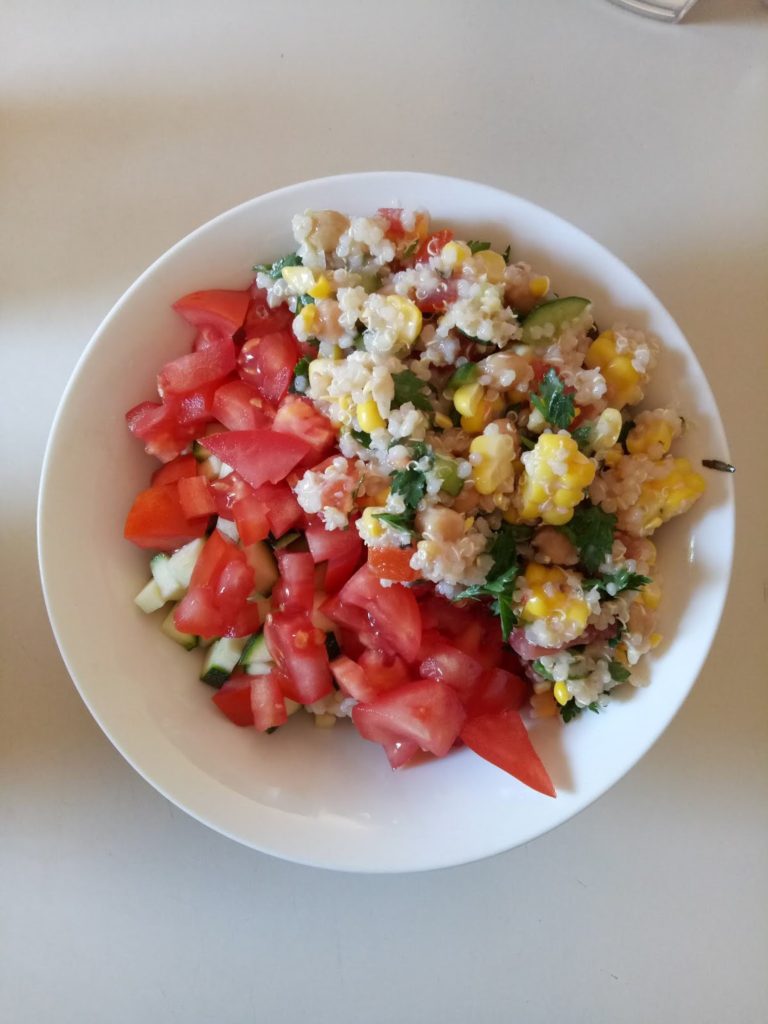
I can’t take credit for the delicious Quinoa and corn salad, my husband made that (he is an awesome cook). Thrown together with some chopped raw zucchini and tomato and voila! Lunch!


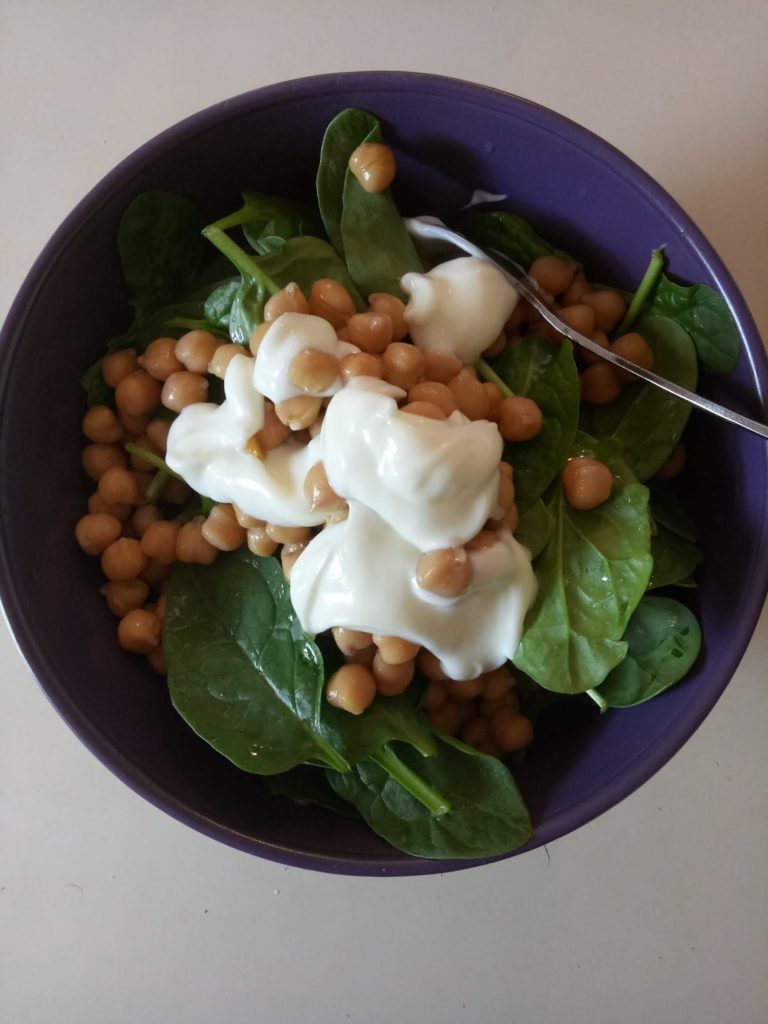
Baby spinach and chickpea salad with lemon and yoghurt dressing. Another light and easy lunch.

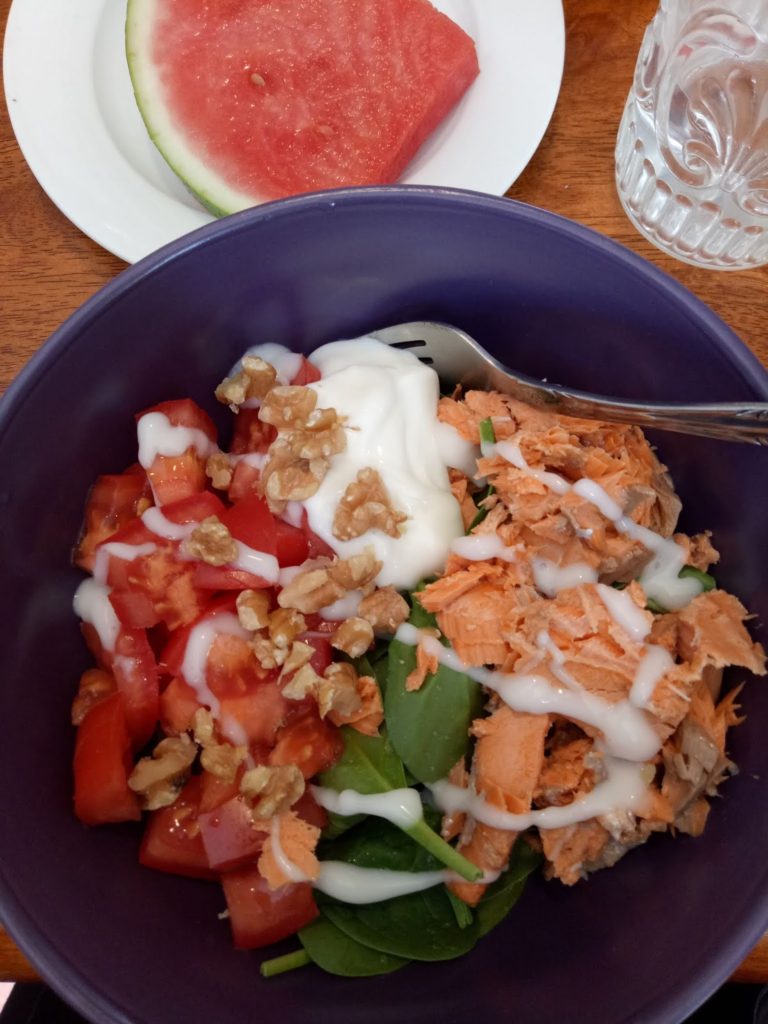
There is a bed of brown rice under the tomato, spinach leaves, red salmon and walnuts. Topped with low fat yoghurt and low fat mayonnaise. 

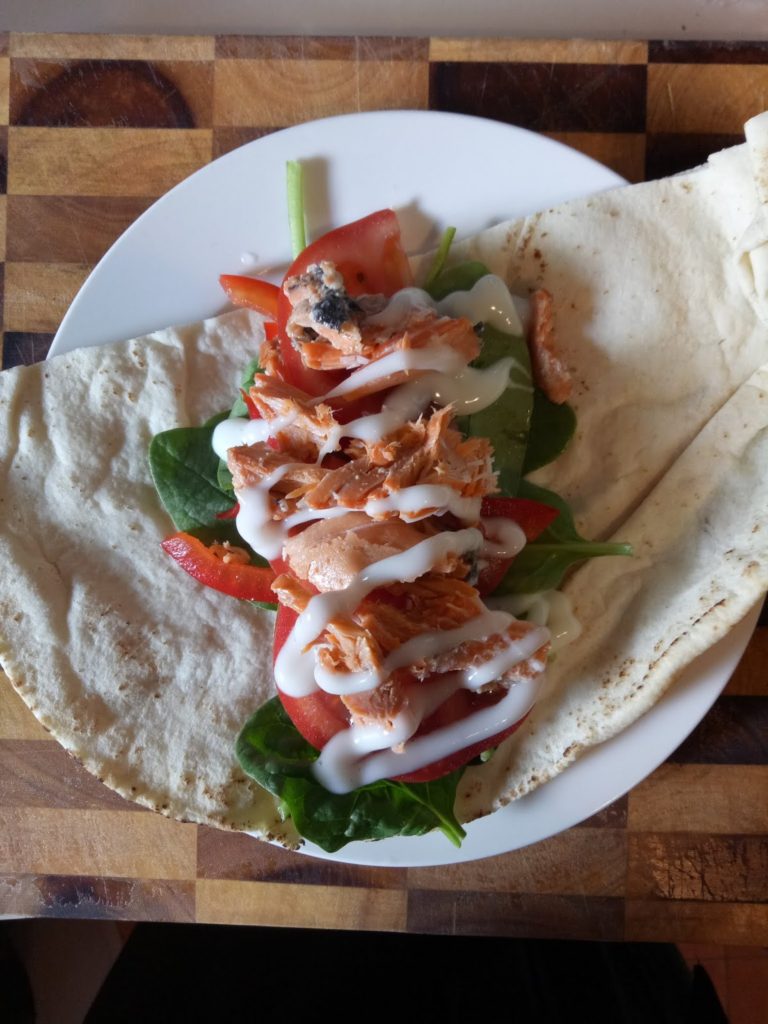
Salmon and salad pita wrap.


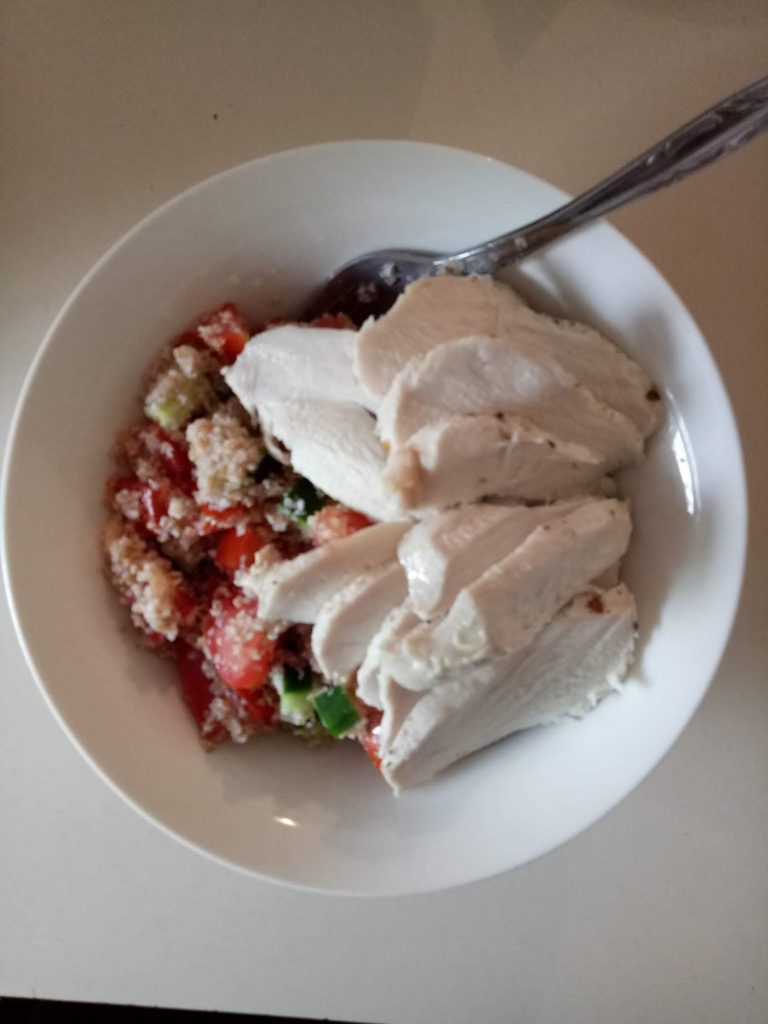
Half a chicken breast, drizzled with sesame oil, seasoned and baked in foil in the oven and served with a bulgur wheat, tomato and cucumber salad. Squeeze of lemon juice and done.

OK, here comes the recipe, because, if you’re like me, one of your biggest challenges is your sweeter than sweet tooth.

Lets call them my

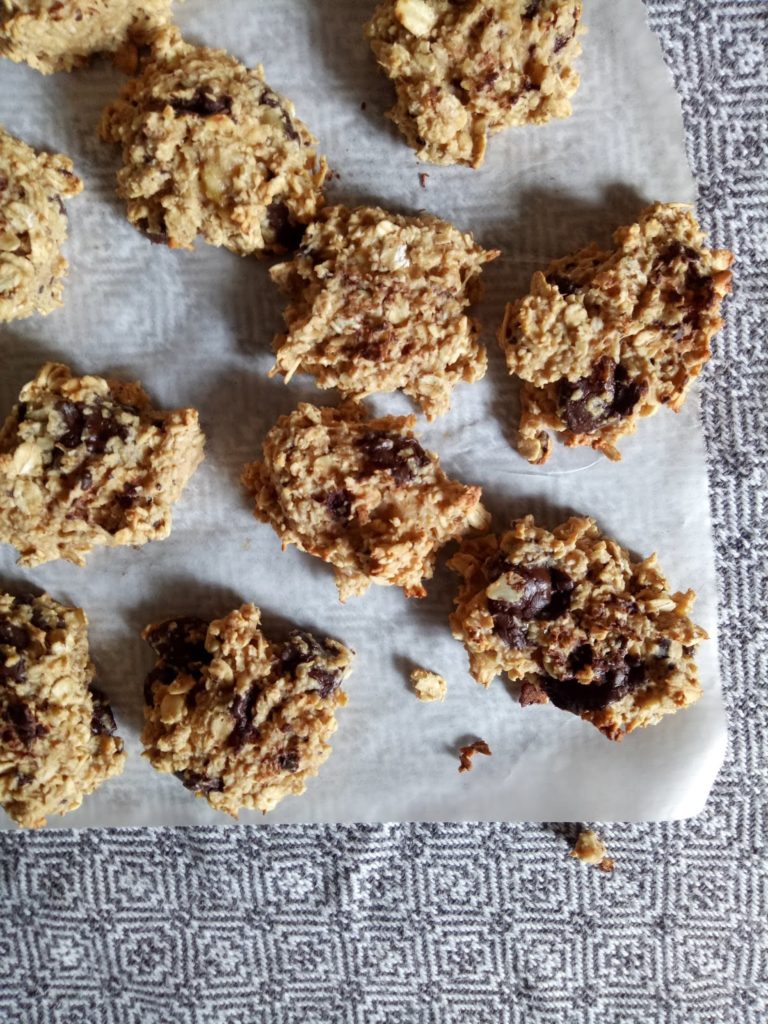
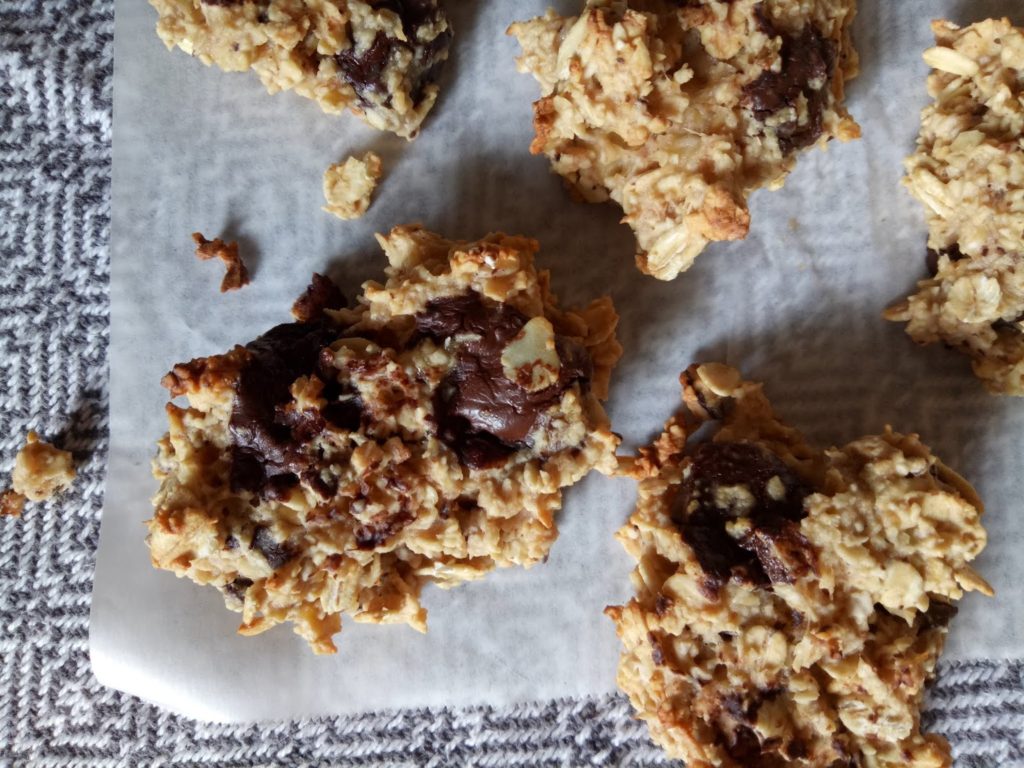
Rustic Banana Biscuits

Ingredients:

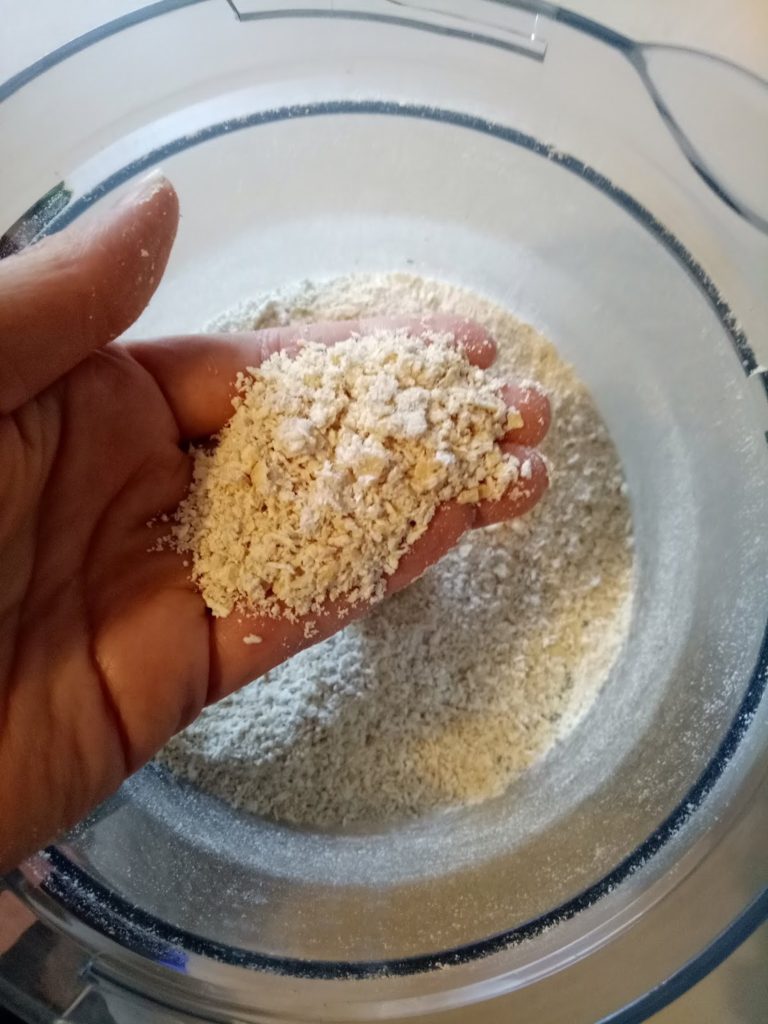
2 cups rolled oats, blitzed in a food processor
2/3 of a cup of rolled oats extra
2 large, very ripe bananas
1 small egg
1 tablespoon peanut butter
50grams dark chocolate, chopped into chunks


Preheat oven to 180 degrees celsius (350 F). Blitz your 2 cups of rolled oats in the food processor until fairly smooth.

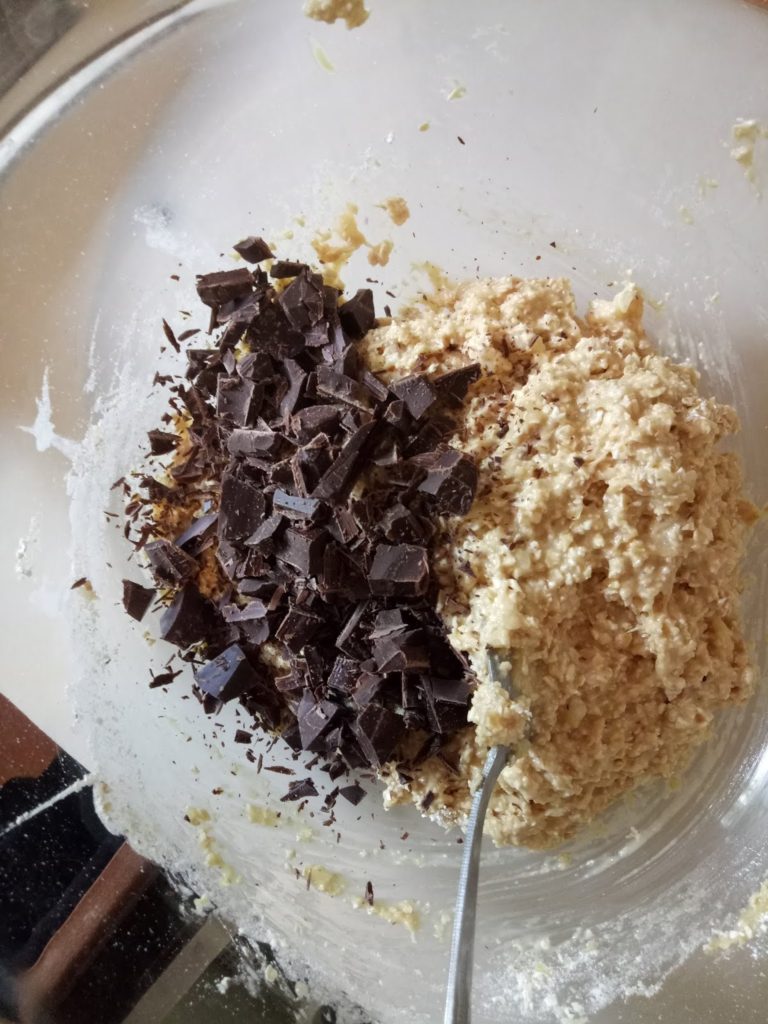
Mash your bananas, stir in the peanut butter. Whisk in egg with a fork. Add both batches of oats and mix well. Add the chocolate, mixing all ingredients together.


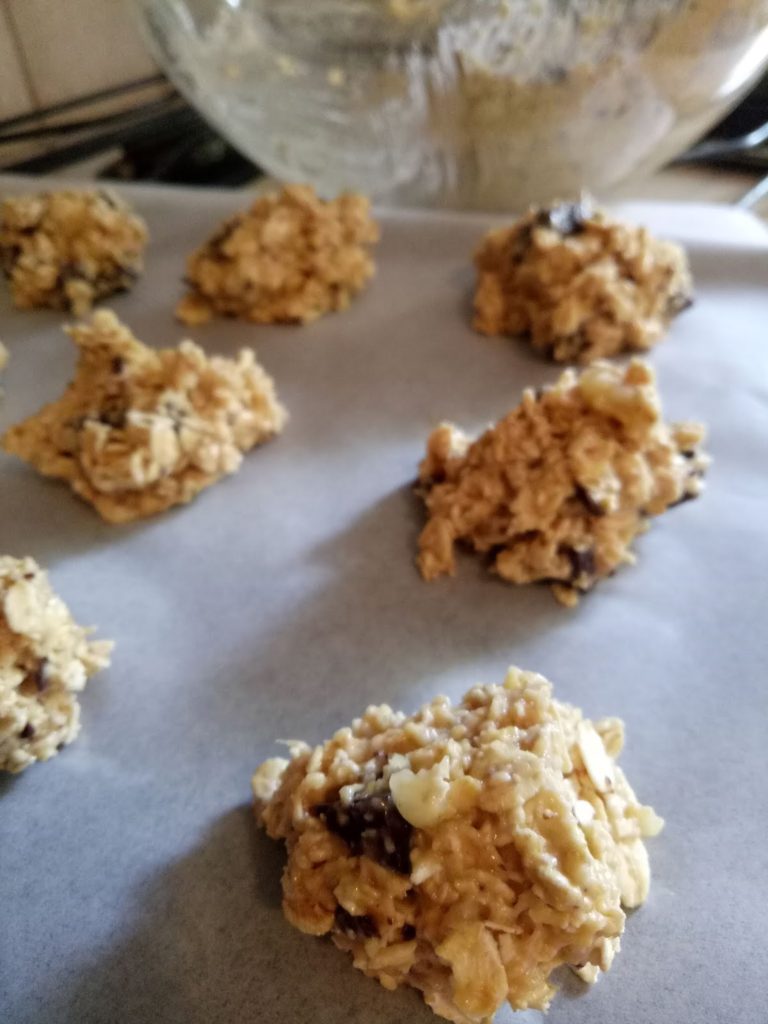
Place scant dessertspoon full of mixture in blobs on a tray lined with baking paper. Press tops lightly with a fork.

Bake for 12 minutes or until browning. Cool on a baking rack.


Perfect for a healthy afternoon snack with a hot cup of tea.

Bon appetit!

I have made a Facebook group so that I have a place to share information and support others (as well as get some much needed support myself!) Please join if you would like to be involved! 

Did you like this post? Would you like me to share more of my healthy journey? Let me know by leaving a comment, I’d love to hear your thoughts!


Filed Under: Health and home, Recipes Tagged With: healthy eating, healthy lifestyle, my recipes, weight loss and health

Easy flat bread recipe

by Kelly 10 Comments

When I need bread in a hurry, I make flat bread! It is quick, cheap, easy, and means I can have fresh bread in under an hour. I often serve it as a wrap with salad, meat, dip, falafels – whatever, it’s all good! And if you have leftovers, the next day you can toast it into healthy chips for dip or use it as a pizza base.


Ingredients:
4 cups plain, unbleached flour
2.5 teaspoons yeast
1 teaspoon salt
350 – 450ml warm water

Place dry ingredients into a large bowl and mix. Make a well in the middle and add the water, about half at first and increase as you need to. You may not need all the water – it depends on your climate and the dryness of your flour. You want a very moist, but not sloppy dough. Mix until the dough comes together and there are no dry spots remaining. 

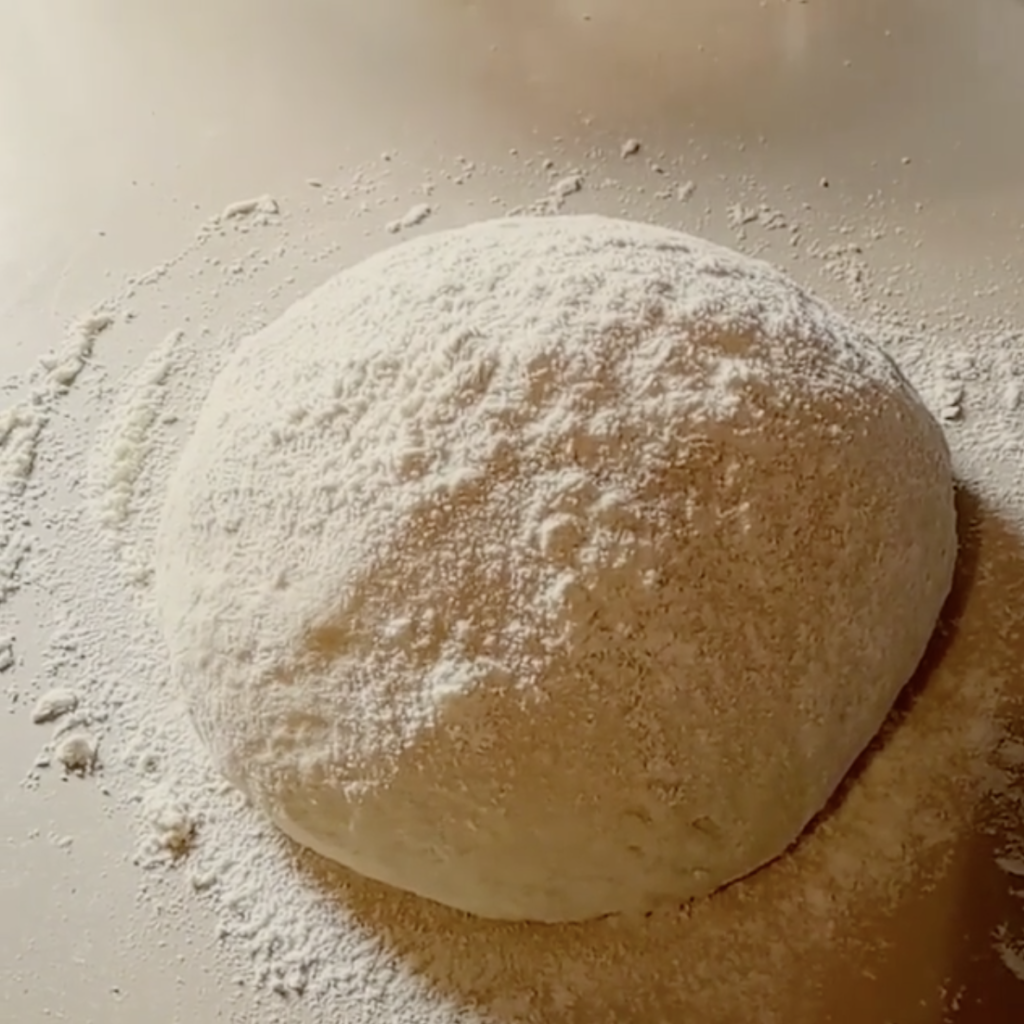
Turn the dough onto a floured surface and knead for a couple of minutes, until the dough is soft and supple. Flour or oil the bottom of the bowl and place the dough back in. Cover with a clean tea towel.
Allow to rise for approximately 45 minutes to 1 hour or until doubled in size. Once again, this time will vary according to your climate.
Once the dough has risen, cut off lumps of dough about as large as the palm of your hand.
On a well floured surface, flatten the dough first with the palm of your hand, turning it over the coat both sides with flour. 
Now roll the dough out until you have a round that will fit in your pan and is quite thin, but not too thin to pick up and transfer to the pan. (I just pick it up with my hands).
Place the round into a preheated, very hot non stick frypan. Do not add an oil – we want a dry fry.
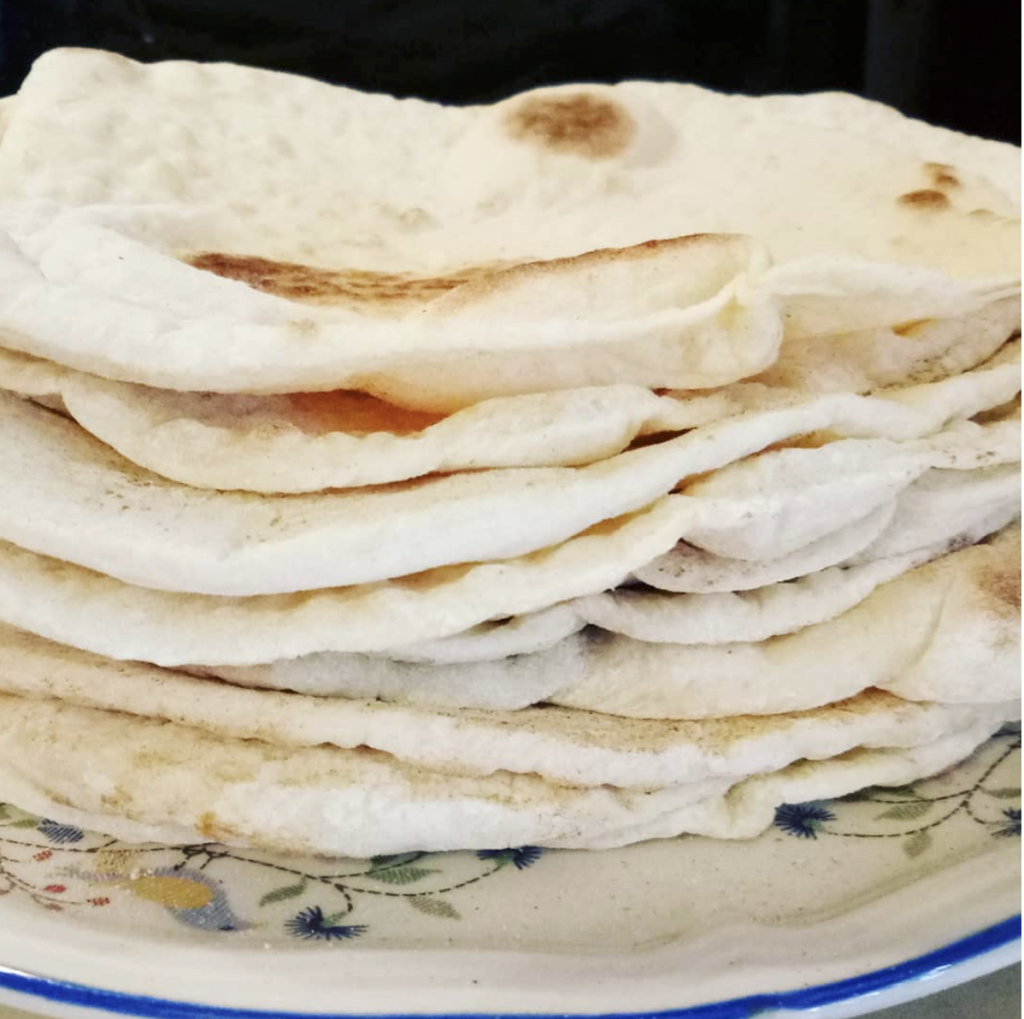
When the surface of the round begins to bubble and puff, turn over to cook the other side. It only takes a minute or two on each side. You may have to adjust the heat as you go to ensure the bread cooks quickly but doesn’t burn. Every few rounds, you may wish to  quickly wipe out the surface of the frypan with wet paper towel or a damp cloth as flour can accumulate and start to burn. 

Stack your bread rounds on a plate and cover with a clean towel until ready to use.

My kids love to eat them fresh out of the pan, smothered with butter! If I can keep them out of the kitchen for long enough, I often serve this bread with homemade hommus or labneh.
I would love to do a video to accompany this flat bread recipe sometime, would that interest you? Let me know!


Filed Under: Recipes Tagged With: bread, my recipes, Recipes and food

Easy, frugal, bread, onion and tomato bake

by Kelly 1 Comment

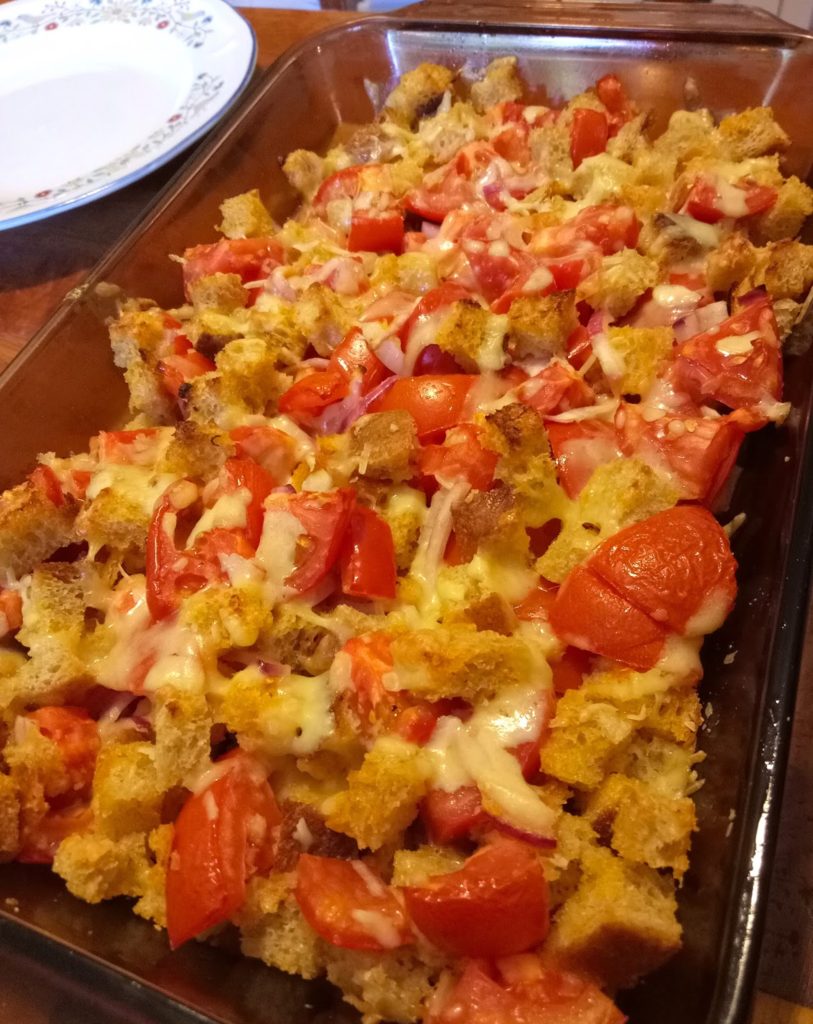
This is such an easy and economical dish and had the added bonus of using up some ingredients that might be past their best.
There is no need to be exact with quantities either, it’s that sort of dish.

I started with some thick slices of homemade bread that was slightly stale and buttered each slice lightly. Cut into cubes.
I chopped 1/2 a red onion.
I chopped roughly 10 tomatoes that were getting a bit old but still perfectly useable.
All this goes into a bowl together and drizzled with some olive oil. Sprinkle with garlic salt if desired and season with pepper.
I tipped all this into a baking dish and sprinkled with a little parmesan, then grated tasty cheese.
Pop into a hot oven (about 180 degrees C or 350 F) until golden brown on top.
Serve!

Filed Under: Recipes Tagged With: frugal living, my recipes, recipes

Whey, sourdough, yeasted – what should I call this bread recipe!

by Kelly 1 Comment

I’ve been playing around a lot in the kitchen lately. Grinding grain, making lots of good food from scratch, preserving, culturing, what fun!


I made this bread as an experiment today and it was a success. It’s a little unconventional in the combination of ingredients, but it works, so here is the recipe!


Whey Loaf (I decided on a simple title!)

Makes 2 loaves


Ingredients
450 grams wholemeal flour (freshly ground if possible)
50 grams rye flour
500 grams white plain flour
2 teaspoons yeast
1/4 cup sourdough starter
200ml whey, room temperature
2 teaspoons salt
2 tablespoons of honey
3 tablespoons sunflower oil
500ml warm water


Method

Place all dry ingredients in a large mixing bowl. Add sourdough starter and whey. Start up your mixer with a dough hook (or mix with wooden spoon if mixing by hand). Mix honey and oil with warm water and gradually add to mix. Continue to mix on low for 10 minutes, or mix by hand until combined and then knead for 10 minutes or until elastic.


Place dough in an oiled bowl and cover with glad wrap. Allow to double in size (usually an hour depending on the weather).


Divide dough into 2 loaves and shape either into bread tins or into rounds on a tray. If using tins, be sure to oil them or for trays, use good quality baking paper to avoid any sticking. Cover with glad wrap once again and allow to sit for another 45 minutes – 1 hour.


In the meantime, preheat oven to 250 degrees (C).
Slash tops of loaves with a sharp knife or razor blade and place in oven. Set the timer for 5 minutes. 
Turn oven down to 220 deg (C) and bake for a further 30 minutes*.
Turn out and cool on wire rack.


* Due to the wholemeal flour, your loaves may brown more than you would like. If they start to brown too much, cover with a large piece of foil for the remainder of the baking time.


Filed Under: Uncategorized Tagged With: bread, my recipes, Recipes and food

Labneh

by Kelly 6 Comments

I may have a new addiction. Labneh. I made some from my homemade yoghurt and all I can say is wow. If you’ve never tried it you really should!

I started with 1 kg homemade yoghurt. I’ve detailed one method here and my current preferred method here for making your own yoghurt.
I have written instructions for labneh in the past but I like this way of doing it more, it’s easier and it makes more sense to use a colander.

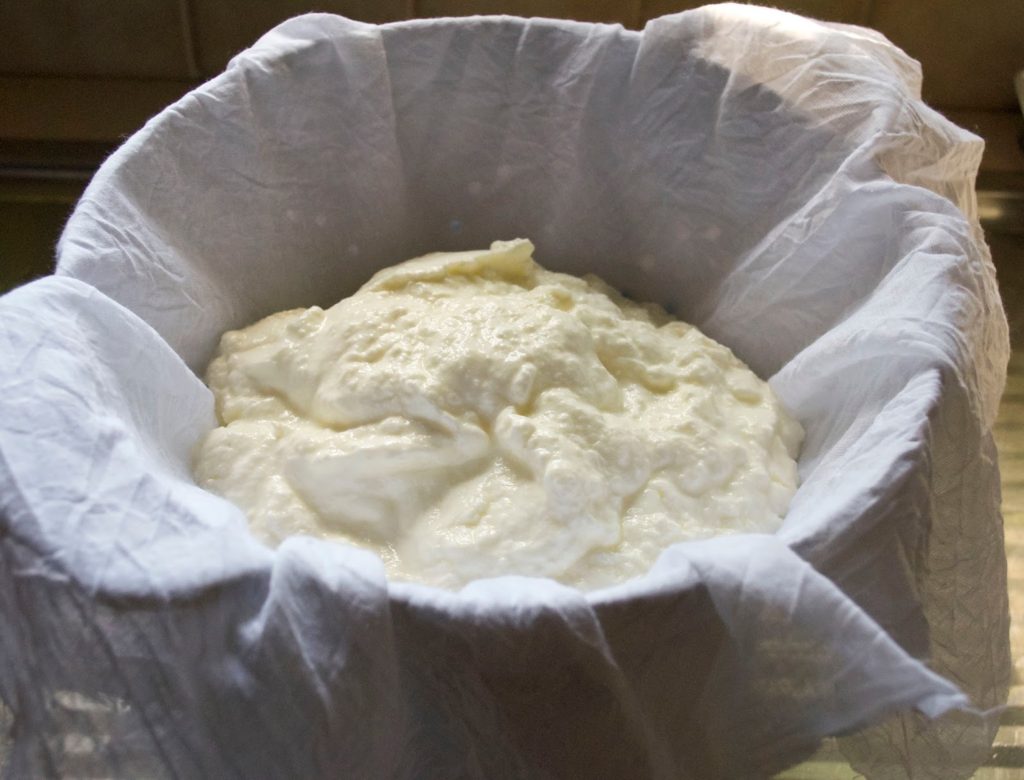
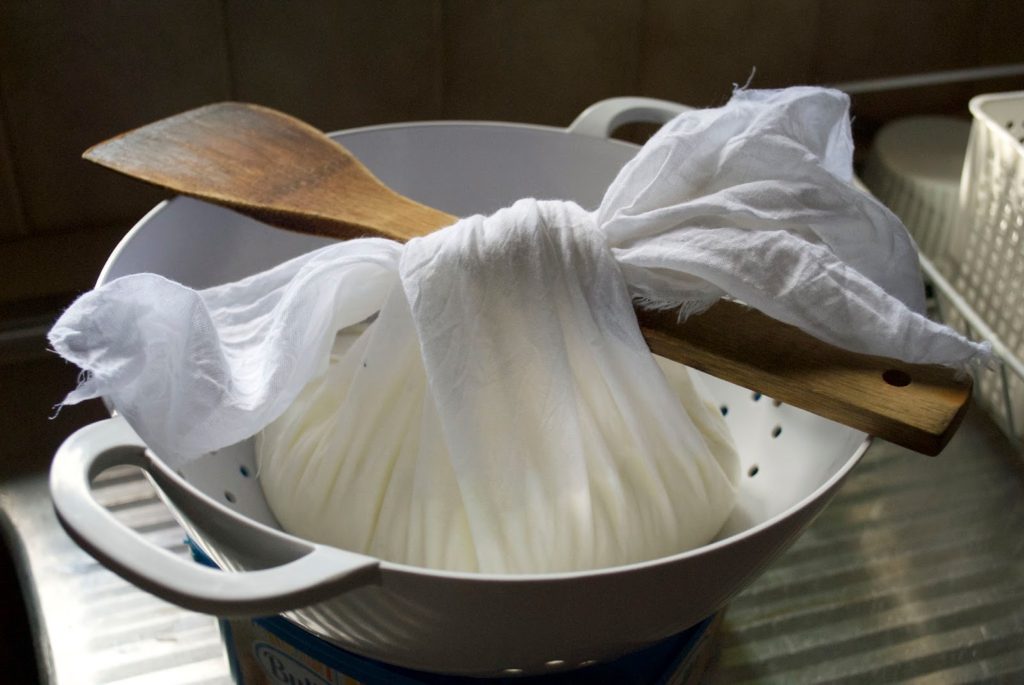
So, you have your large square of muslin lining the colander and just dump your yoghurt in the middle. Have the colander set over a bowl or container to catch the whey.

To keep the muslin tidy and to let gravity work for you, tie the corners of the cloth loosely around a wooden spoon handle so that it is slightly suspended. 

Place in the fridge and leave for 24 hours. Make sure your bowl or container is big enough to collect the whey, or pour off the whey occasionally so it doesn’t overflow (don’t get rid of it though, it’s precious! More of that in a future post.)
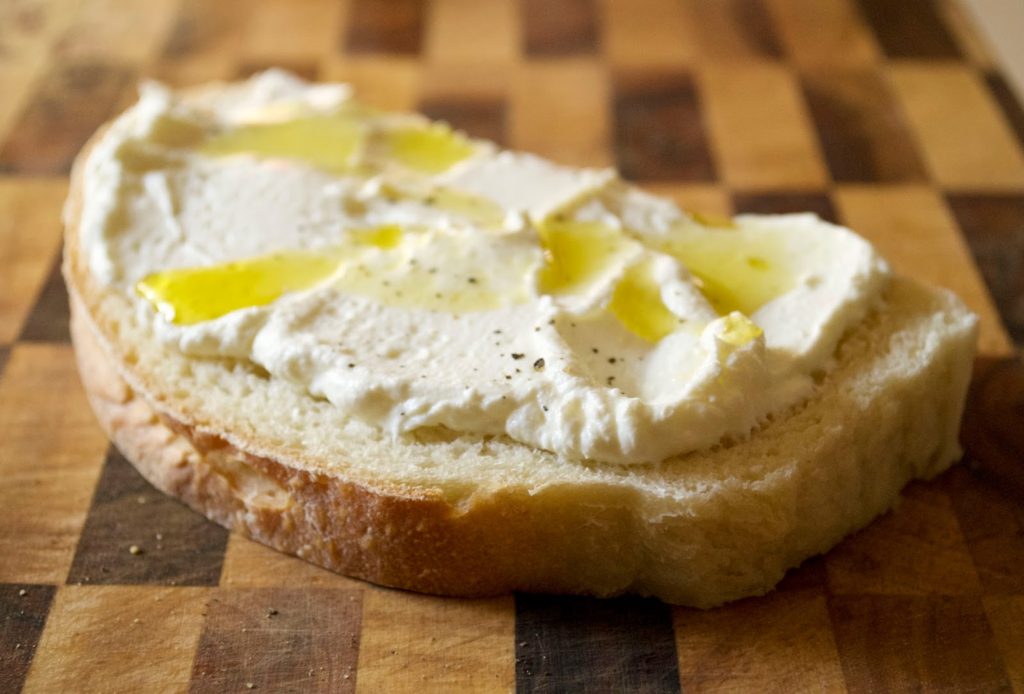
Unwrap the labneh. Stir in half a teaspoon of good salt and whip it up a bit with a fork. Now it’s ready to store in an airtight container in the fridge. There are so many ways to use it – my favourite is to spread generously on a slab of homemade bread drizzled with some extra virgin olive oil or to place globs of it in a yummy salad. You can roll balls of it in herbs and place in olive oil. Just digging a spoon into it is a major temptation! 

With homemade yoghurt, labneh is a mild, creamy, healthy delight that you may well find as addictive as I do!

Filed Under: Uncategorized Tagged With: my recipes, recipes, Recipes and food

Whole wheat raspberry and banana hot cakes

by Kelly 3 Comments


I got a grain mill! Yes, the 10 year wait was worth it, it is a Hawos Billy 100 and it’s really wonderful. It was a huge toss up between electric and hand operated, but I’m so glad I went with electric as I think having to hand grind would put me off wanting to use it.

Today I have a recipe to share that I made with my first batch of freshly ground wheat. Wow, what a blessing to have food that nutritious and delicious!


This was my healthy lunch experiment for the kids and they turned out so beautifully! The children quickly became like lions to the prey, they absolutely loved them. Moist, fluffy and so healthy!

Ingredients

4 cups of freshly ground whole wheat flour (or packaged whole wheat flour)
2 tablespoons LSA mix (ground linseed, sunflower and almond)
4 teaspoons baking powder
1 teaspoon cinnamon
5 egg whites, beaten until stiff
1 egg yolk
1/4 cup of date syrup or honey
1 over ripe banana, mashed
3 cups milk (full fat, low fat or skim are fine)
2 tablespoons natural yoghurt
1/2 cup raspberries (I used frozen)

Method

Place all dry ingredients together in a large bowl. 
Beat egg whites until stiff.
Whisk together egg yolk, syrup (or honey), banana, milk and yoghurt. 
Pour these wet ingredients into the dry and mix thoroughly. Fold in the beaten egg whites along with the raspberries.
Fry in a hot, non stick pan or a regular pan with a little rice bran oil to prevent sticking. 

Serve warm. I served with a dollop of yoghurt, dusting of icing sugar, raspberries and drizzled with maple syrup.
For a special dessert these would be awesome with whipped cream or ice-cream and raspberry coulis. 

Filed Under: Uncategorized Tagged With: healthy eating, my recipes, Recipes and food, weight loss and health

Prickly Pear syrup recipe

by Kelly 2 Comments


I’ve been doing some research into Navajo natural dyeing techniques – prickly pear fruit with it’s fabulous, vivid magenta to strong pink colour would be an obvious choice. 


I was afraid of the possible, painful consequences of harvesting the fruit, but following some instruction from my somewhat experienced husband, I went ahead and I’m so glad I did. Harvesting and preparation instructions are here.


Not only did I pick and prepare enough fruit to start my yarn dyeing experiment, I also came up with a delicious syrup! Here is the recipe for you:


Ingredients:
1.1kg ripe prickly pear fruit
500grams white sugar
1 teaspoon citric acid


Method:
When the fruit is prepared and peeled (see harvesting and preparation method here) chop each fruit into 3 and blend in a food processor. No food processor? Place in a bowl and mash really well with a potato masher. Place a strainer or colander over a large saucepan. Strain the juice, leaving the seeds in the strainer. Use a spoon to push through all that goodness. 
Once you have your juice, add the sugar and citric acid. Warm over a low heat until sugar in dissolved, then increase heat to medium until the liquid comes to a light boil. Boil for no more than 5 minutes.
Allow to cool, poor into a glass bottle or similar and keep in the fridge.


Uses:
Can be used as a cordial, just mix with water, mix with mineral water and ice for a refreshing drink, drizzle over ice-cream, yoghurt, pancakes, waffles or fruit salad. Anything you would use a fruit syrup for, this syrup can be used.


Hope you enjoy it!

Filed Under: Uncategorized Tagged With: Gardening, my recipes, Recipes and food

  • Page 1
  • Page 2
  • Go to Next Page »

Primary Sidebar

Categories

Archives

Meta

  • Log in
  • Entries feed
  • Comments feed
  • WordPress.org

Copyright © 2025 Kelly Casanova Weaving Lessons on the Foodie Pro Theme