• Skip to main content
  • Skip to primary sidebar

Kelly Casanova Weaving Lessons

  • Hi! I’m Kelly!
    • Disclosure
  • Online Weaving School Class Index
    • Common account issues
    • Common technical issues
    • What do I get with a membership?
  • New to rigid heddle weaving? Start here!
    • Never heard of the rigid heddle loom?
    • How to weave neat edges on the rigid heddle loom
    • Rigid heddle weaving
    • Rigid Heddle Weaving Patterns
  • Patterns
  • Subscribe

Gardening

Prickly Pear syrup recipe

by Kelly 2 Comments


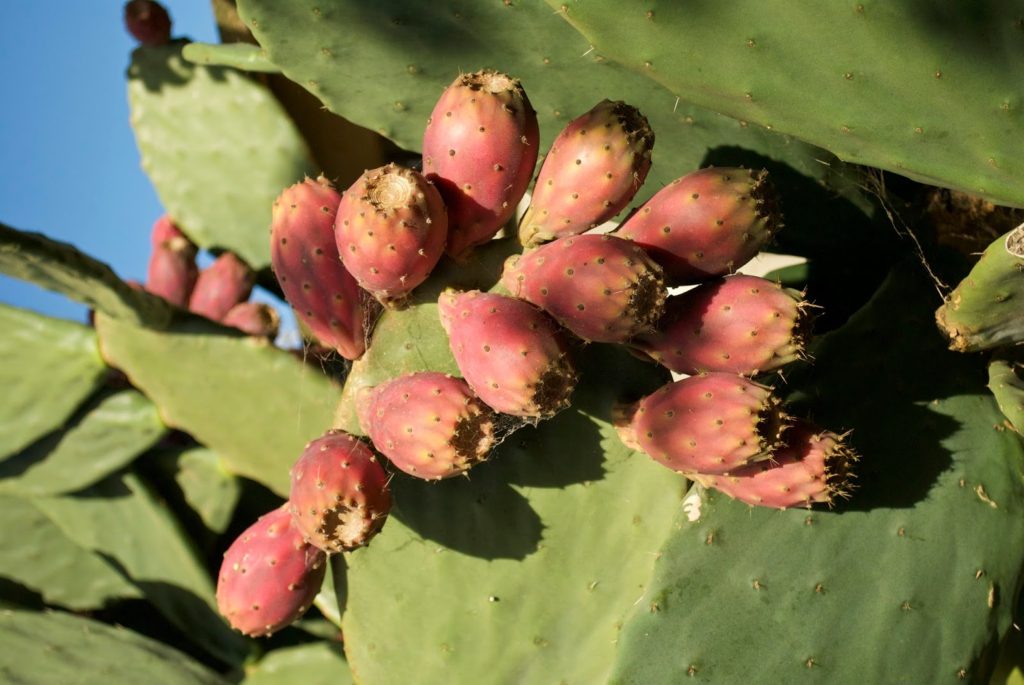
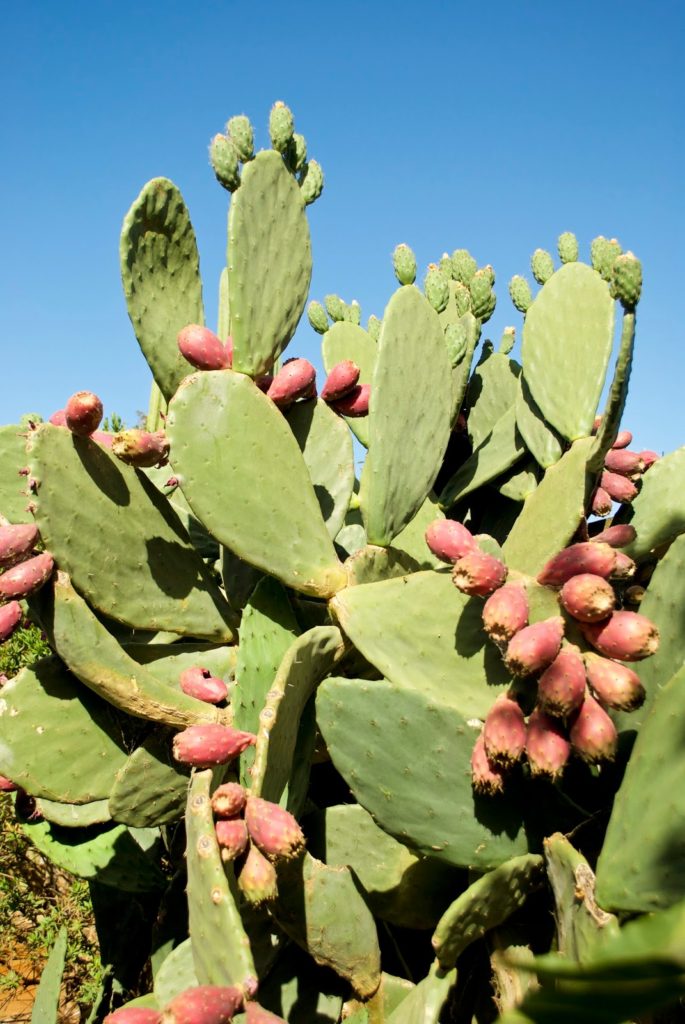
I’ve been doing some research into Navajo natural dyeing techniques – prickly pear fruit with it’s fabulous, vivid magenta to strong pink colour would be an obvious choice. 


I was afraid of the possible, painful consequences of harvesting the fruit, but following some instruction from my somewhat experienced husband, I went ahead and I’m so glad I did. Harvesting and preparation instructions are here.


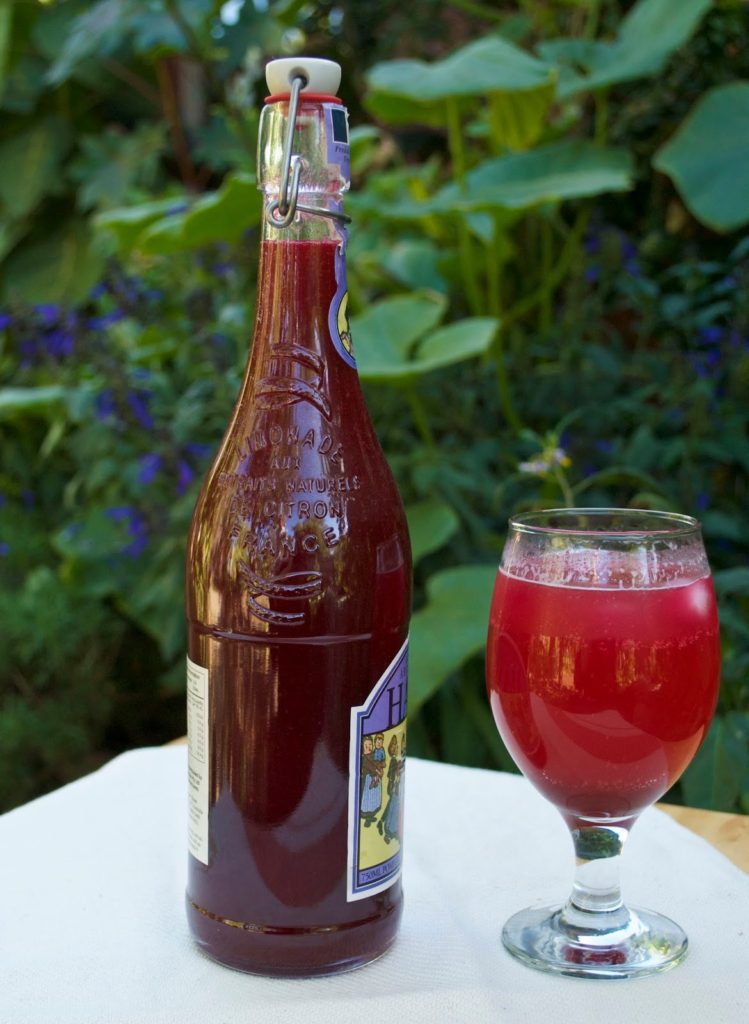
Not only did I pick and prepare enough fruit to start my yarn dyeing experiment, I also came up with a delicious syrup! Here is the recipe for you:


Ingredients:
1.1kg ripe prickly pear fruit
500grams white sugar
1 teaspoon citric acid


Method:
When the fruit is prepared and peeled (see harvesting and preparation method here) chop each fruit into 3 and blend in a food processor. No food processor? Place in a bowl and mash really well with a potato masher. Place a strainer or colander over a large saucepan. Strain the juice, leaving the seeds in the strainer. Use a spoon to push through all that goodness. 
Once you have your juice, add the sugar and citric acid. Warm over a low heat until sugar in dissolved, then increase heat to medium until the liquid comes to a light boil. Boil for no more than 5 minutes.
Allow to cool, poor into a glass bottle or similar and keep in the fridge.


Uses:
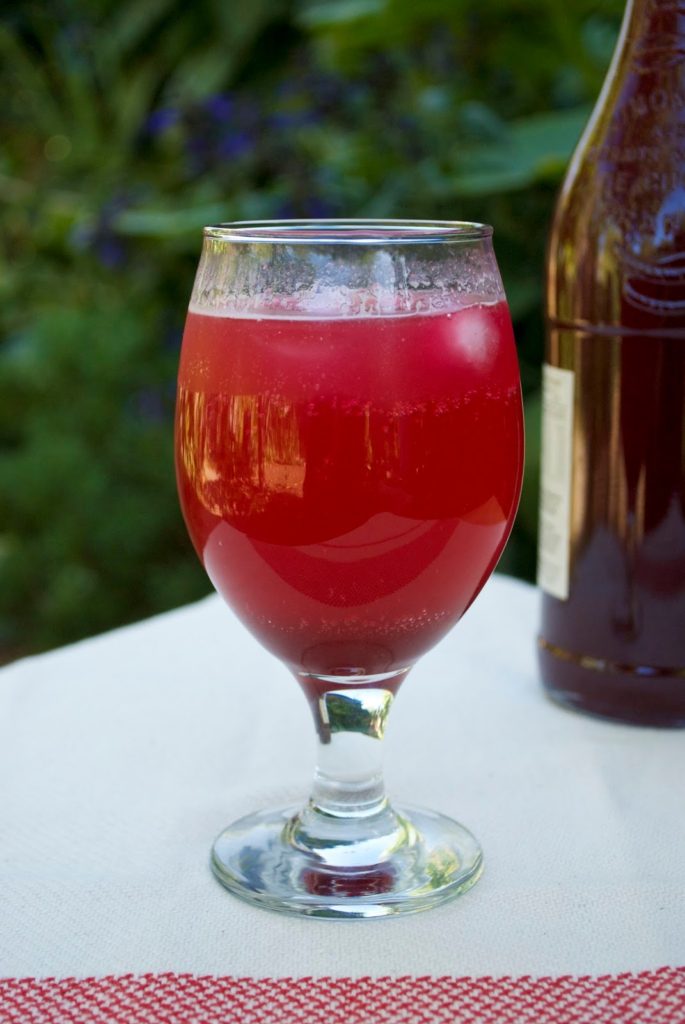
Can be used as a cordial, just mix with water, mix with mineral water and ice for a refreshing drink, drizzle over ice-cream, yoghurt, pancakes, waffles or fruit salad. Anything you would use a fruit syrup for, this syrup can be used.


Hope you enjoy it!

Filed Under: Uncategorized Tagged With: Gardening, my recipes, Recipes and food

Harvesting and preparation of prickly pear fruit.

by Kelly Leave a Comment

Ouch! Yep, those little spikes hurt and there are plenty of them. But don’t let that deter you – the prickly pear has delicious fruit and you can even eat the paddles (leaves also known as napales) but in my opinion that is an acquired taste, as in, one that I personally have not acquired!


What you need:


Good quality kitchen/washing up gloves. The good quality part is important, they are tougher! *See note.
A plastic bucket
Long handled tongs
Small, sharp paring knife
A large mixing bowl or similar to put your peeled fruit into.
Plastic bag
Water


What to do:


This first part is completed outside.


Half fill your bucket with water. Stand back from the cactus (the long handled tongs give you further reach). The hair like spines (glochids) will begin to come off as soon as your tongs touch the fruit, so be aware of where they are falling. For this reason it is better not to harvest on a really windy day.
Grabbing the fruit with the tongs, give a twist or two and place the fruit straight into the bucket. Continue this process until you have the number you require. Make sure the water is covering the fruit.


Now tip the water out, somewhere that no one is likely to walk or weed etc. Using a hose, spray water into the bucket onto the fruit, covering it once more. Tip out once again. You can repeat the spray and tip one more time (I do).


Put on your gloves. If your gloves are strong you should be fine to pick up the fruit now. Cut off each end and make a slit down the centre with the knife. Begin to peel back the skin from the slit until it is all removed. Place the skin either back in the bucket or straight into the plastic bag. Place the peeled fruit into the bowl. Continue for all fruit.


Now you can take the fruit inside to use. I give one last rinse in water just in case there are any remaining spikes. It is delicious fresh or there are lots of interesting recipes to try (I have a prickly pear syrup recipe coming soon!)


Clean up:
I throw all the peelings into the regular rubbish bin in a plastic bag. As far as I know, the peelings can not be composted due to the spines – I certainly don’t want them ending up in my compost. If you have successfully composted peelings, I would be most interested to know.


* I used good quality kitchen gloves to prepare the fruit. After working in the kitchen with the peeled fruit, I went back outside to clean up the peelings. However, I put on a different pair of kitchen gloves, a lower quality, thinner pair. As soon as I touched the bucket with the peelings, I got spiked. So it really is worth having the good quality gloves!

Filed Under: Uncategorized Tagged With: compost, Gardening, Recipes and food, Tutorials

Fickle

by Kelly 6 Comments

I’ve definitely caught the weaving bug now that the weather is cool and often rainy. The loom is very well dressed these days! 
Sometimes I lament that I seem unable creatively to stick to one thing for long – as the title of this post suggests, I am very fickle! I become obsessed with doing something (weaving right now) for a length of time, and then it’s on to the next thing. 

This can have benefits – I do come back to things, they don’t get abandoned entirely, unless I really don’t enjoy it. I’m fairly multi skilled and most, if not all of those skills can be used together. However, I often think it would be really wonderful if I could keep the focus on just one or two things and really build that skill to a high level. It seems that the need for change and newness are just part of my restless nature.

I’m still taking photos but the photography passion has subsided a little too. Sigh, such a pity. I’ll keep going regardless, I still have much to learn and many improvements to make.

The rain brings fresh inspiration and life to the garden. We have lots of plans for renewing the garden.

The mexican orange blossom is so pretty in a vase with it’s dark, lush leaves and dainty, sweet flowers.

Plenty of lemons on the tree, but no eggs from the chooks! I just find that when there are lemons around I always want some eggs as well.

The classic and dainty foxglove.

How about you? What’s happening in your part of the world? How are you finding the gradual change in seasons? What are you working on? I’d love to hear from you!

Filed Under: Uncategorized Tagged With: Gardening, photography, weaving

Progress

by Kelly 2 Comments

I submitted my fifth assignment during the week for the photography course I’m doing and am happy to say that I’m powering along, soon I’ll be to the half way mark. 

This was a challenging “low key” image. I’m loving trying new things with the camera.

We have had so much rain over the past week that the garden is like a different space now. It’s so great to be going into Summer with a green garden and full rain tank.


The vegetable garden is an assortment of things mostly grown from seed. Tomatoes are coming and we just ate some of the first dwarf beans today, good stuff!

Filed Under: Uncategorized Tagged With: Gardening, photography

Back to basics, frugality revisited.

by Kelly 4 Comments

Christmas, interstate holidays and unfortunately timed car repairs and insurance bills have left things a little tight for us of late. Very little is being saved and the bills and expenses just keep rolling in. 
I spent a bit of time having a sook about our own little economic downturn but when I got tired of feeling sorry for myself I decided to get over it and take on a frugal challenge. 
It’s amazing that even when you live a frugal lifestyle you can always find little areas where money is not being used as wisely as it could. So, here are a few things I’m doing this month to make positive changes.
I’ve been making my own laundry gel for ages (great stuff!) and also my own cleaning spray (I add some lavender or tea tree essential oil to make cleaning more bearable!) for a few months.  As I’ve mentioned before, the recipes I use are from the excellent book “Saving Mum”. 

Recently I found that I could make an excellent toilet spray simply by placing water and essential oils in an old spray bottle. I’d tried it in the past and wasn’t thrilled with the results, but I’ve found that the essential oils needed to be stronger. I also make up a really small batch at a time (say about 100ml)  to keep it fresh.
For my 3 long haired girls I squirt a little hair conditioner into an old spray bottle, top it up with water and use it as a de-tangler. This morning I also made up a batch of dish liquid and will be trying that out. I’m nearly due to do a big batch of soap too. Sometimes I use my soap to wash the girl’s hair.

After the hot and dry summer our garden has been re-planted with vegetables and the kids each have their own plot. Here are my husband’s cos lettuces. I still can’t work in the garden much because of my back issues but I live in hope that I’ll be able to return soon.

I have been wanting to replace our large side gate for 9 years now (ever since we moved in) as it is broken and very difficult to open, not to mention old and unattractive. We never seem to have enough spare cash to complete this job! So, new tactics. We have a money jar in our bedroom as husband often chucks a handful of coins from his pockets in there when getting undressed. The coins are used for small shopping trips and the rest goes into our charity jar in the kitchen. I’ve placed a little box beside the bedroom jar and place the gold coins in the box, with the silver change going to the charity jar as before. Gold coins can add up quickly and I have $15 in my “replace side gate” box already. Who knows how long it will take to save the required amount but at least I feel better because I’m moving towards the goal šŸ™‚


We found a way to do cheap and beautiful eggs for our table display. We dyed cheap supermarket cage eggs with egg dye, then used these super cool “Happy Wraps” to decorate with. I picked up the wraps and dye at a continental grocer very cheaply. They were so easy to make and look fantastic.

For Easter eggs my husband found a warehouse outlet that sells good brands (Red Tulip, Cadbury) eggs at heavily discounted prices. We also intend not to go overboard with chocolate for the kids as we tend to – they really don’t need bucket loads!

There are plenty more things I’m doing to be more frugal at the moment, but this post is getting rather long, so maybe next time.

How about you? Feeling the pinch? Taking any positive steps to help?

Filed Under: Uncategorized Tagged With: Celebrations, frugal living, Gardening

Making great compost

by Kelly Leave a Comment

This time last year I was a complete flop at making compost. We have always had plenty of material to make compost with, but for some reason it just wasn’t happening. I read about compost from a variety of sources and it seemed complicated. Then I got a Don Burke book from the library and after reading the section on compost something clicked. Since then, I’ve been making great compost and I’m happy to share what I know with you.
Here is some of my compost from the ready to use heap.

And this is what the working compost heap looks like – lets call it a work in progress!

The ready to use heap. My husband and a friend made this with star pickets, old lattice, bamboo and black plastic. It’s about 1.5 metres high and has an opening door at the front for easy access.

I find that compost performs better if it’s contained rather than just a heap, but it’s fine to start out with a heap if you need to.

This is my working pile – an old heavy duty plastic drum with holes drilled in the sides near to the bottom. I swap between the 2 heaps. So, when this blue one (my current “working” compost) is full enough I will leave it to sit and stop adding to it. By that time, the black heap will be all used up on the garden and ready to start working and being added to again.
So, here are my key elements to good compost:
* Balance ingredients. If you only put in kitchen scraps your heap won’t be happy. Lets looks at what I have in my working pile at the moment. Kitchen scraps (veg peelings, tea leaves, coffee grounds, paper towel, shredded newspaper, grass clippings, leaves in Autumn (brilliant!) straw, garden soil and any organic matter. No meat or bread scraps unless you want some visitors of the rodent variety!)
*Moisture. This is important. I’ve discovered that my compost used to be too dry/too wet – I didn’t have the balance right. It should be moist and if you get the right balance of ingredients it’s easy to control the moisture content. If it’s too wet, add a little dirt, straw or shredded newspaper. If it’s too dry, water it or add more wet ingredients (leftover tea from the pot, more veg scraps).
*Cut up ingredients. All the veg scraps or garden cuttings should be chopped up to maximise the breaking down process. I used to put in huge chunks of old vegetables or big sticks thinking they would break down – it doesn’t work. I only use the more fleshy garden cuttings, all woody cuttings go into our green council bin, which is taken away and mulched. If you have your own mulched you can do this yourself.
*Turn regularly. Also really important! I use a pitchfork and turn both composts every 2 days or so. You don’t have to do it this often but at least once a week this should be done.
What have I left out? Any questions, ask away!

Filed Under: Uncategorized Tagged With: compost, frugal living, Gardening

Beneficial beetroot

by Kelly 1 Comment

Easy to grow, highly nutritious and absolutely delicious – you haven’t really lived until you’ve eaten a freshly harvested, home grown beetroot!
Beetroot are high in folic acid, fibre, manganese and potassium. That’s just the root, the leaves are also edible (I think it would be a waste not to eat them!). The leaves are high in calcium, vitamins A and C and iron. They are also delicious! There are many other reported health benefits from beetroot consumption too.

Beetroot are easy to grow and take up little space in the garden as the leaves grow quite upright. They require minimal care and don’t seem vulnerable to many garden pests, so it is simple to grow them organically as we do.  
You can even dye yarn with beetroot – not something I’ve tried, but if you were lucky enough to have a bumper crop….
How to eat them?
Roasted, steamed, boiled, raw (grated into salad etc), juiced!
I have a tray roasting right now in the oven with olive oil, salt and pepper, so easy.
The leaves can be used like silverbeet or spinach. My favourite way to eat them is either tossed and chopped into a stirfry or steamed lightly and served with extra virgin olive oil, organic apple cider vinegar and salt and pepper.

Filed Under: Uncategorized Tagged With: frugal living, Gardening, Recipes and food

Spring in the garden

by Kelly Leave a Comment

I couldn’t resist getting out in the garden with the camera in between rain showers this morning.

When Spring arrives I feel it really is my favourite season.
Then when it comes to Autumn I say the same. I guess I can’t decide.

Husband was out planting seeds yesterday when it was very warm and windy and the timing turned out  perfectly with the cool and showery day today.

Can’t you just smell that orange blossom?

I hope you’re having a wonderful day, whatever the season in your part of the world may be.

Filed Under: Uncategorized Tagged With: Gardening

“So much scope for the imagination”…

by Kelly 1 Comment

As Anne Shirley so delicately put it. My lovely husband gave me a beautiful little set of German watercolours for Christmas. They will compliment my watercolour pencils and the garden is the perfect place to look for inspiration.

I hope you’re finding some time to relax and look around you too šŸ™‚
God bless.

Filed Under: Uncategorized Tagged With: Drawing/painting, Gardening

Flower pressing

by Kelly Leave a Comment

What a great time of year for flower pressing, when our garden spoils us for choice!

I picked up this flower press from the oppy fairly cheaply, but if you don’t have one you can always make your own.

The leftovers can be floated in a glass bowl or jug – very pretty! Or, if you’re feeling particularly adventurous you could try a frozen flower bowl – beautiful!
I’m in my element today, working on a custom embroidery design – actually I’m just really chuffed that someone likes my work enough to ask me to design for them!
The rest of the weekend involves Mass, children’s piano concert, another Christmas gathering and plenty of errands to run and catching up to do.
I hope your weekend is a very fruitful one.
God bless.

Filed Under: Uncategorized Tagged With: embroidery, Gardening

  • Page 1
  • Page 2
  • Page 3
  • Go to Next Page »

Primary Sidebar

Categories

Archives

Meta

  • Log in
  • Entries feed
  • Comments feed
  • WordPress.org

Copyright © 2025 Kelly Casanova Weaving Lessons on the Foodie Pro Theme