• Skip to main content
  • Skip to primary sidebar

Kelly Casanova Weaving Lessons

  • Hi! I’m Kelly!
    • Disclosure
  • Online Weaving School Class Index
    • Common account issues
    • Common technical issues
    • What do I get with a membership?
  • New to rigid heddle weaving? Start here!
    • Never heard of the rigid heddle loom?
    • How to weave neat edges on the rigid heddle loom
    • Rigid heddle weaving
    • Rigid Heddle Weaving Patterns
  • Patterns
  • Subscribe

Free Pattern

How to weave Snowmen on your rigid heddle loom

by Kelly 9 Comments

Snowmen are not something you might naturally think of when wondering what to weave next on your rigid heddle loom, but I love any excuse to make pictures on my loom, especially if they are as cute as these little snowmen guys are!
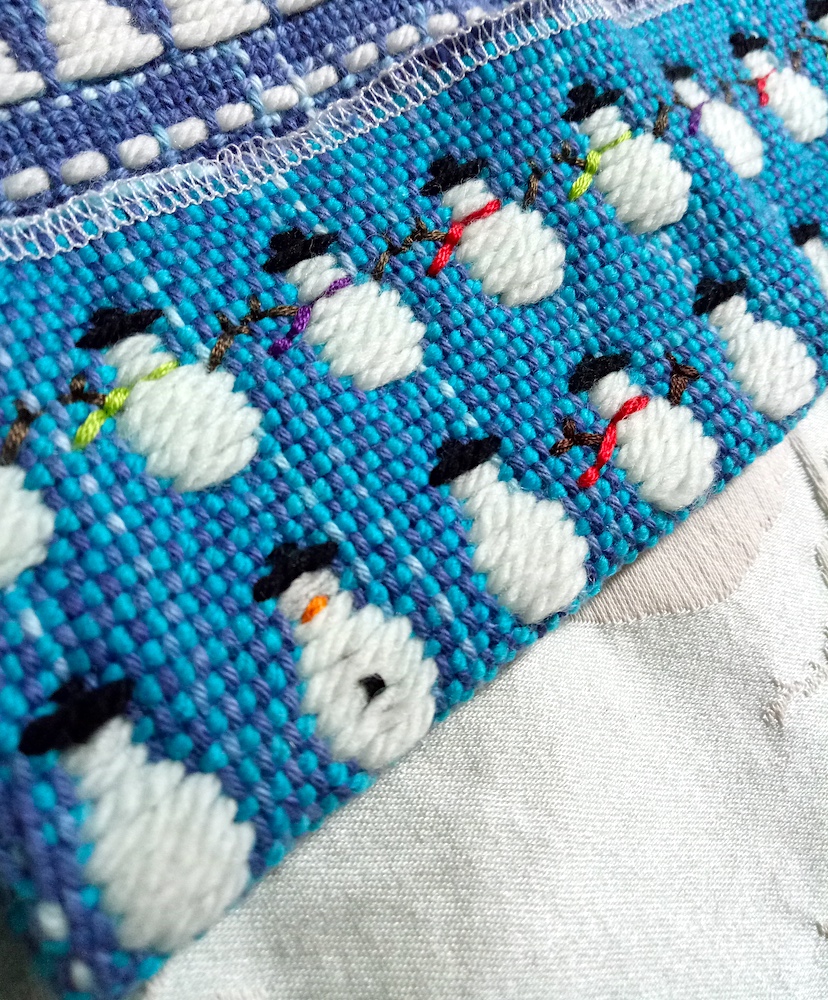
Weaving snowmen on your rigid heddle loom may not be as difficult as you think. We employ a type of overshot technique to create floats. Depending on the length of each float, we can then arrange them to make pictures. We warp the loom as we normally do for plain weave.

Overshot usually uses a thicker weft for the patterning (or floats) and a thinner, contrasting weft for the background (plain weave, commonly known as “tabby” when used in this way).

*This post contains affiliate links.

The weft floats do not become incorporated into the fabric, they literally float on top, which is why we use tabby in between pattern rows to tie the whole thing down and create a stable fabric. It also gives that lovely, slightly 3D effect of the pattern or picture being slightly raised.
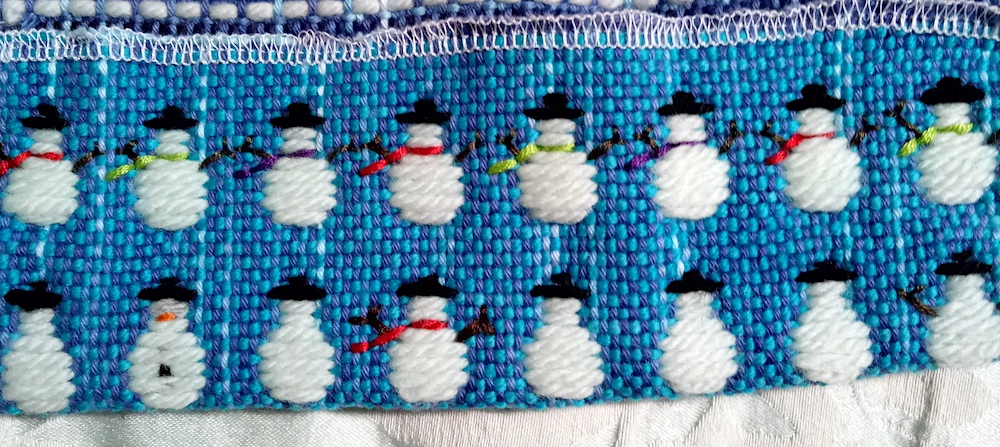
Because of the varying length in floats, there is something you need to keep in mind when doing this kind of weaving. Quite often, and particularly with a thicker yarn like I’ve used for this sample, the floats at the back of the work will be long. This might make the piece unsuitable for some uses. For example, a kitchen towel with long floats on the back is not ideal. The floats will catch on things and likely become a bit ratty and not neat looking over time. That is the other consideration – the back does not always look attractive and you may not want it on show. In my sample below, you can see the added untidiness of my having embroidered on details like the scarves.
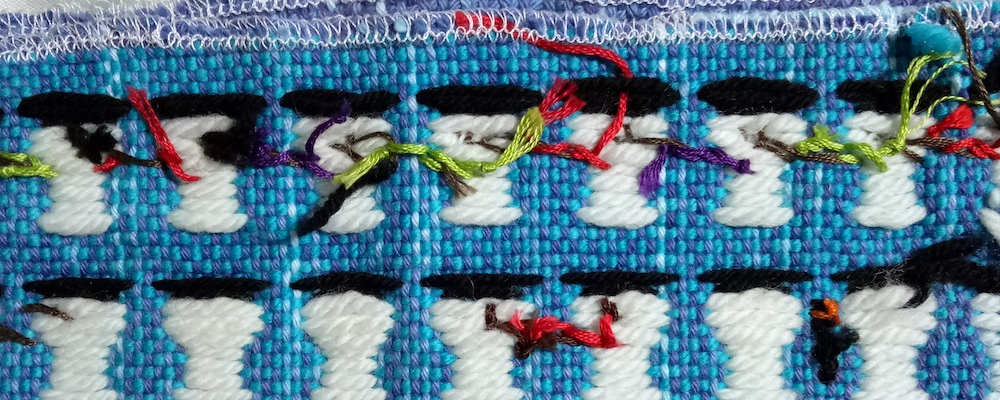
The back of the sample

A way around this issue is to plan to use this technique in a pattern where the back of the work will not show. Some ideas are notebook or journal covers, a table centrepiece or runner where you intend to sew a backing to the piece, a cute Christmas wall hanging and so on.

Here is what you will need to weave a sample like this one:

A rigid heddle loom (I used my 24″ but a Sampleit size is fine if you just want a small sample)

10 dent reed

A pick up stick

A knitting needle is handy but not essential

Yarns-

There are no set yarns for this project, but I will share what worked well for me and give suggestions for possible alternatives.

For the warp I used a fingering weight (Australian 4 ply) cotton in a hand dyed medium to dark blue. Rug warping cotton would work fine.

My tabby weft (background weft) was a lighter but strong coloured light worsted/dk weight (Australian 8 ply) in wool.

For the pattern weft, I used a cream coloured aran weight (Australian 10ply) in wool.

For the little hats, I used some black fingering weight wool – you don’t need very much of that.

I love to use wool, particularly for the patterning in this type of weaving because it works so well. Because it has that lovely fluff and bounciness, it fills in any gaps between pattern wefts and makes the design look full. You will notice that my pattern weft is only slightly thicker than my tabby weft, but the pattern weft still stands out due to it’s loftiness.
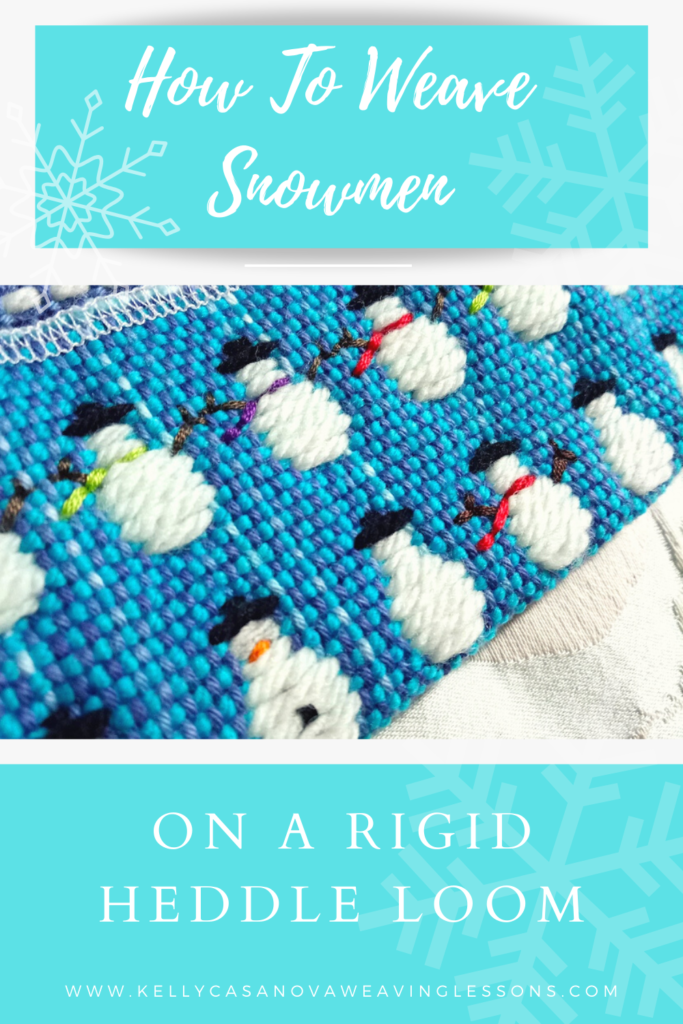
The embroidered details are what really bring these little snowmen to life. Stick arms, scarves, eyes, carrot noses, buttons down the front – the amount of detail is up to you. You don’t need to be a great embroiderer as the details are all just worked in simple straight stitches. For the scarves, to give them that really nice shiny look, I used Bambu 7. This yarn can be quite difficult to obtain, so here are some alternatives:

5/2 bamboo weaving yarn

Pure Bamboo yarn

DMC Embroidery floss (my favourite brand)

Anchor Embroidery floss

If you decide to use embroidery floss, don’t separate the strands, use all 6 of them for just the right snowman thickness.

If you would like to weave some snowmen of your own, here is a printable PDF that gives you the weaving sequences and details:

Snowmen-on-a-rhlDownload

You will also want to watch and follow along with the instructional video to see the weaving in action:

I hope you enjoyed this tutorial! Let me know if you weave some little snowmen of your own, and as always, leave any comments or questions underneath, I love to hear from you!

Until next time…

Happy Weaving!

Filed Under: Free Pattern, Free tutorial, Rigid heddle weaving, Tutorials, Weaving Tagged With: rigid heddle weaving, rigid heddle weaving patterns, rigid heddle weaving tutorial, snowmen

7 Tips for weaving on an Inkle loom plus free pattern!

by Kelly 25 Comments

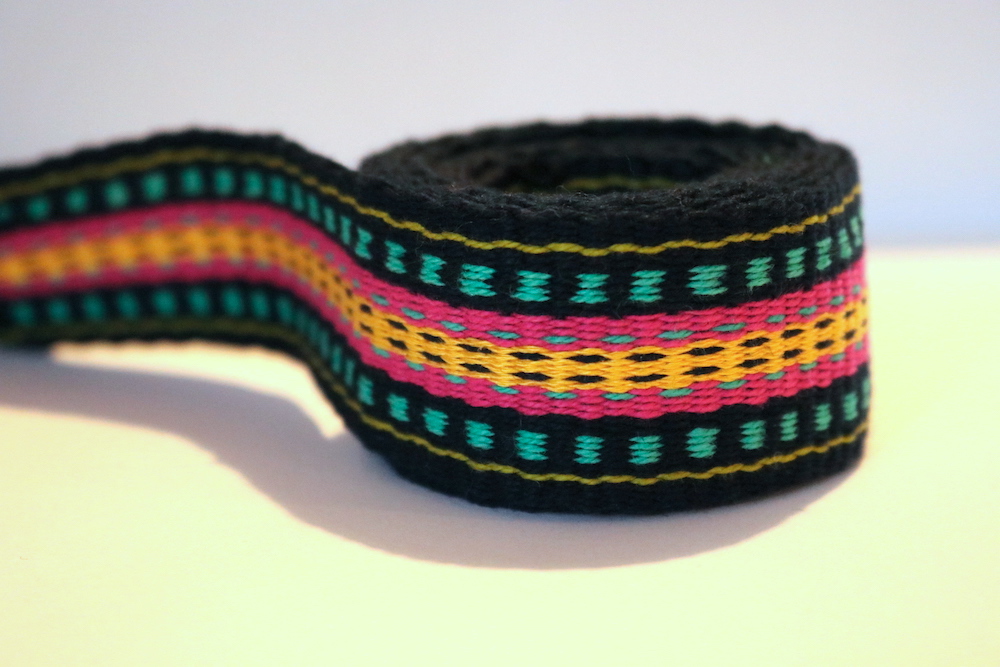
Inkle loom weaving is so fun, easy to learn and affordable to begin.

If you’ve been thinking about starting to weave on an inkle loom, I strongly encourage you to have a go. Inkle looms are simple devices that won’t take up much space and won’t break the bank either.

If you’re an absolute beginner weaver, an inkle loom is the perfect way to test the waters without making a big investment. Ashford makes two sizes, the Inkle Loom and the Inklette. The Woolery have put together a nifty starter’s kit that includes an Inklette, yarn to get you started, and Anne Dixon’s fabulous pattern book.

*This post contains affiliate links

There are only two sheds on an inkle loom – up and down. In the warping process, you alternate between heddled and unheddled warp threads. When you are ready to weave, you an either push down on the warp threads to achieve a shed or lift them up to achieve the other shed.

If you’ve never seen an inkle loom in action, my Youtube series in which we weave a lovely floral band, from start to finish is an excellent place to start:

If you want to learn more about the basics of inkle looms, I wrote a blog post about it here.

First we will go through the tips I want to share to help you weave better inkle bands, and then we will talk about all the details of the free project.

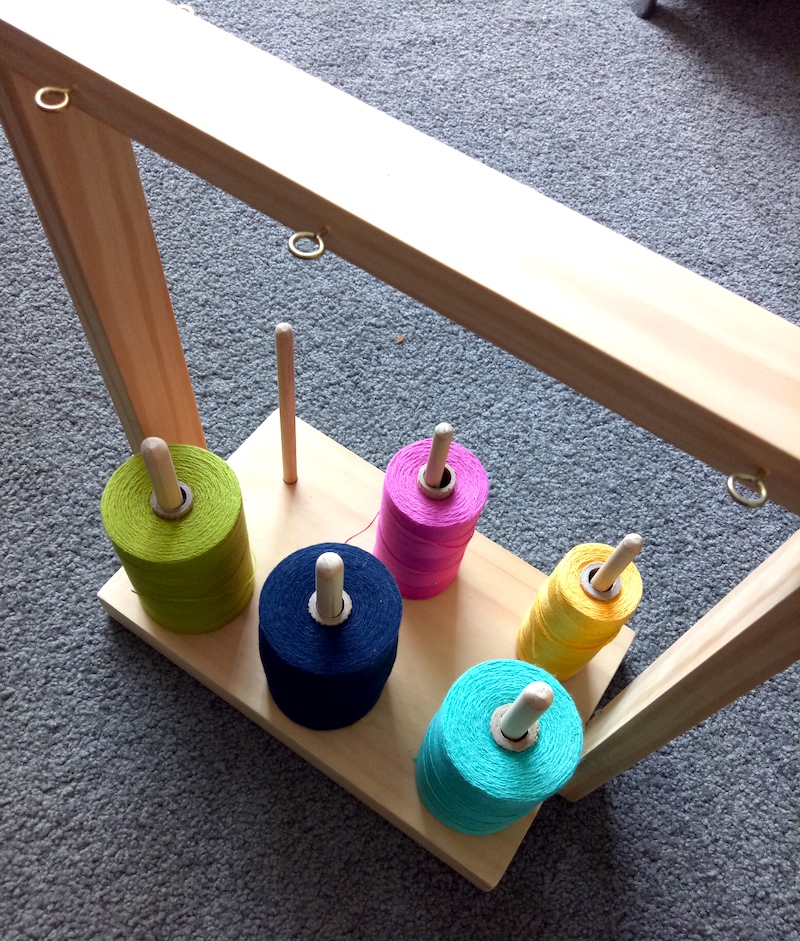
Tip 1- Use a warping stand or similar to feed the yarn easily off the cone while you’re warping the loom.

This is not essential but it just makes the warping process so much easier. I don’t have to worry about yarn cones toppling over or not feeding off the cone smoothly. It also helps to keep the cones separate and far enough apart that the threads won’t tangle with each other as you’re changing colours. I just pop the warping stand underneath the table that I have the loom sitting on for warping and away we go.

You can purchase warping stands complete and ready to go, but if you want to save some cash, you could make one yourself like my husband and I did:

Tip 2- Find a comfortable position in which to weave

One of the bonuses of an inkle loom is that you can take it anywhere. But it’s still important to think about your posture and find the most comfortable ways to weave, especially if you’re going to be at it for a while.

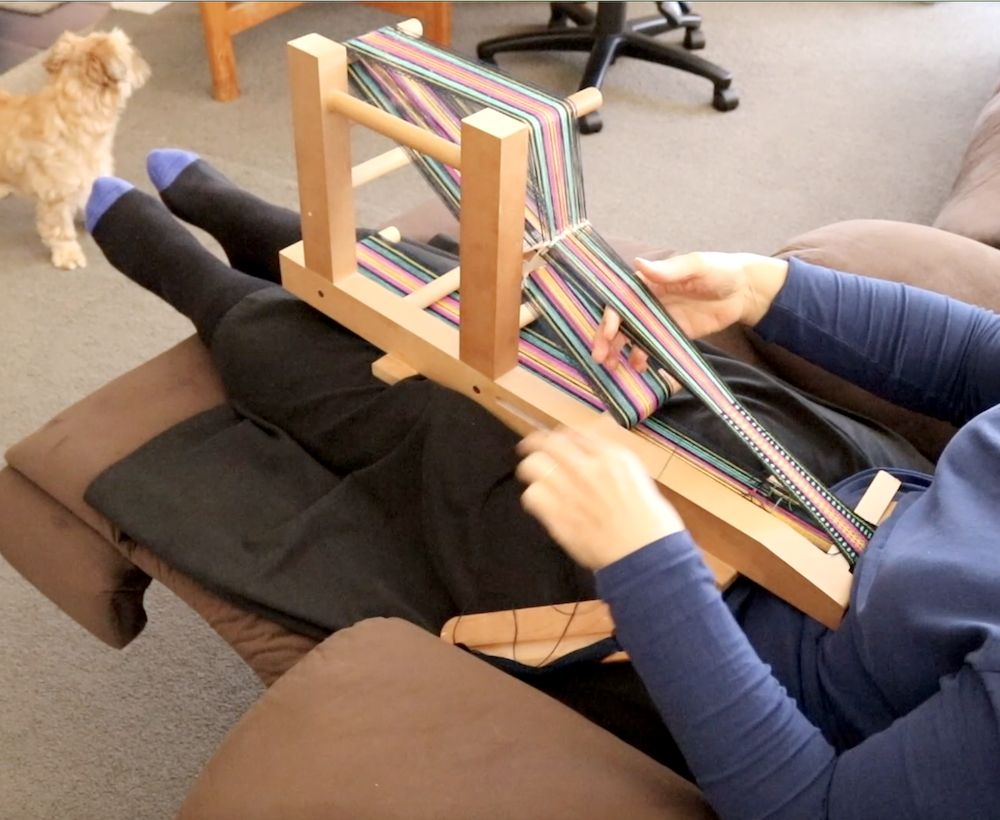
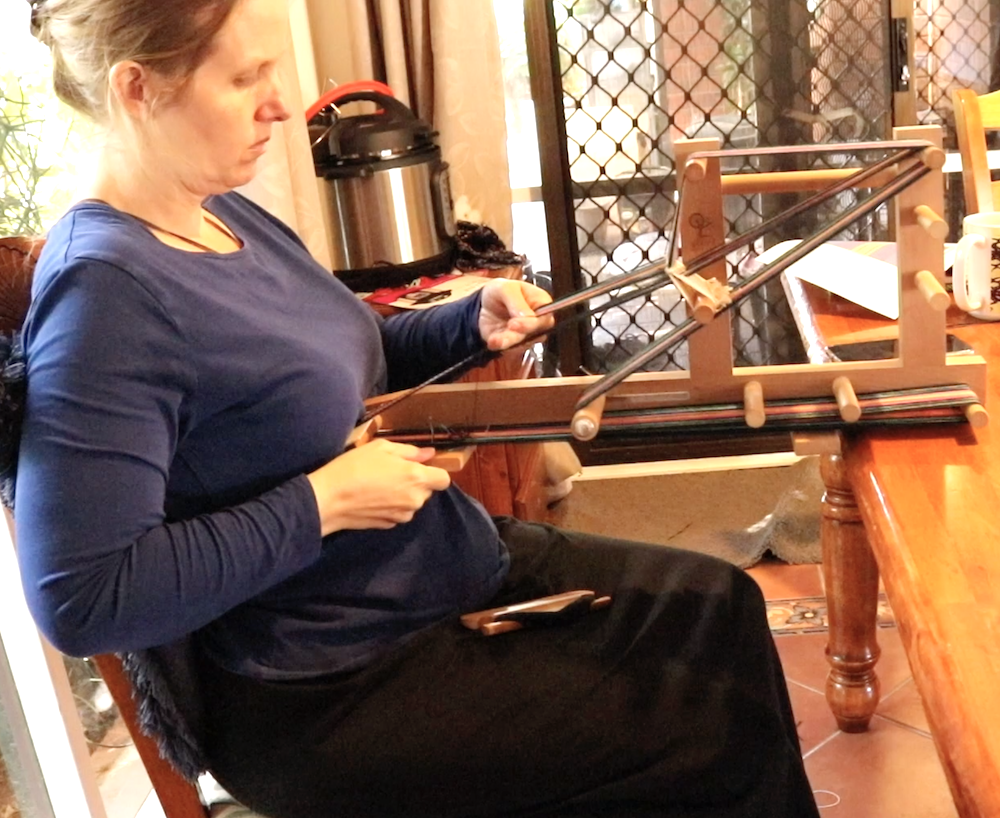
Some inkle weavers will clamp the loom to a table to keep it sturdy but I like to have it close to my body where I can comfortably reach to change sheds and beat. I also like to rest the loom against my body to keep it sturdy, as I find that feels most natural to me. If I’m using a table to rest the back of the loom on, that position would look something like this:

Note the comfortable, high backed chair with additional cushion to keep my back comfy. The loom rests on the edge of the table by placing the horizontal wooden bar against it, and the front of the loom rests at about the bottom of my bra level (sorry, couldn’t think of a better description!)

My favourite position is sitting in my recliner with my feet up. That’s my idea of relaxation!

Once again, the front of the loom is pressed against my body for sturdiness and ease of beating.

Tip 3- Additional warp tensioning

You should do your best to achieve really good tension using your tensioning peg, but if you feel you are lacking a little, you can take a small section of cardboard separator and wedge that in at the starting peg, underneath your band.

You can also wedge an additional piece at the top back peg if needed. It really does make a difference!

Tip 4- Weft tensioning is different to other weaving.

If you come from rigid heddle weaving, you will be used to fixing up your edges as the weft travels around the warp threads, especially if you use my neat edges technique. But inkle weaving is different. Your warp threads are under high tension and the weave is warp faced, not balanced. If I’m asked how much tension to place on your edges with your weft thread, I would say probably more than you think. You want to really pull each weft pick into place and feel it move to create a very firm band. This is something that each inkle weaver needs to find a sweet spot for, but a hint is that you need enough tension so that your weft thread is not looped, bubbled or otherwise really visible at the edges, but not so much that your edges end up bumpy, lumpy or wavy rather than nice and straight.

Tip 5- Use the first 2 inches as practice

To be honest, your first 1.5 – 2″ is probably not going to be so pretty. It takes a little time for the warp to come together and for you to find the right amount of weft and warp tension, as well as a suitable beat. Don’t worry about those first couple of inches, I generally cut that part off and don’t use it.

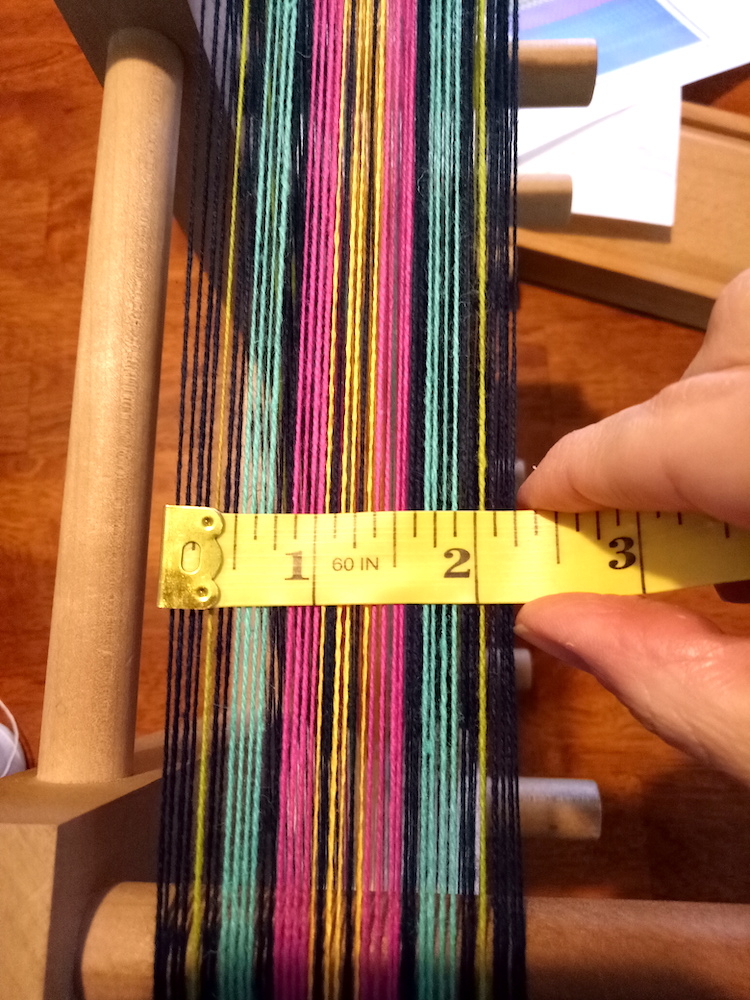
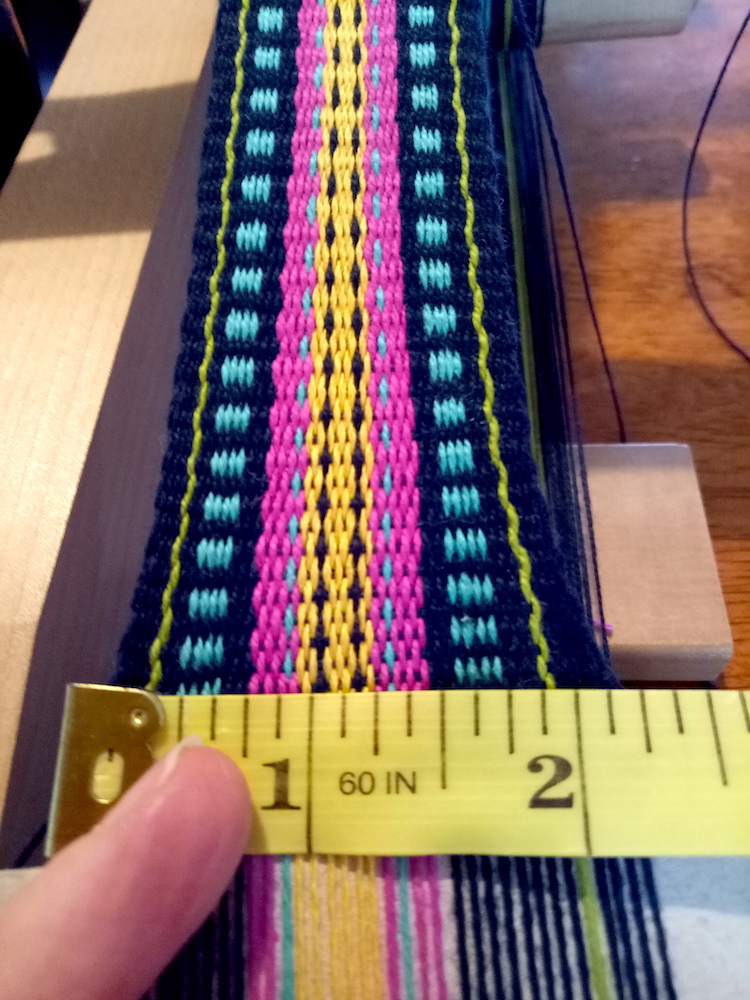
Tip 6- Your woven band will be much, much narrower than your warp

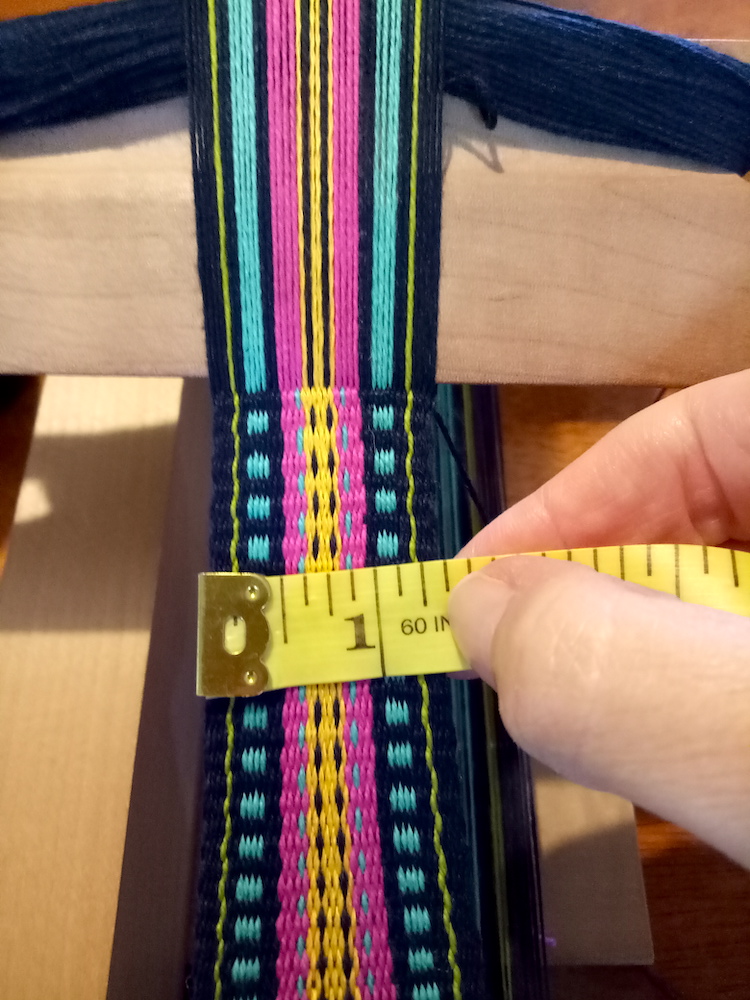
I have some measurements here to demonstrate just how much narrower.

Here is my warp before I began weaving and the threads are all sitting in order. They are not pushed really close together or anything, so there is a little bit of natural spacing.

As soon as I start to weave, the band begins to narrow and draw in. It’s up to me to practice and find the right amount of draw in and tension to make a firm, consistent band.

And, by this stage I’m in my happy place with tension and the band remains a consistent width as long as I keep tensioning in the same way.

Tip 7- Your tension will improve

At the very beginning of your band, you may find it hard to get as tight a tension as you would wish for. If that is the case, try tip 3, but also know that when you have woven a little and can advance your warp for the first time, your tension will improve dramatically. Actually, the same can be said of all the looms I own. The initial weaving is a little “getting to know you” session and once you are over the first hump (advancing the warp) everyone becomes much more settled and happy.

OK, that was the last tip I have for you today, so let’s get onto the free project discussion!

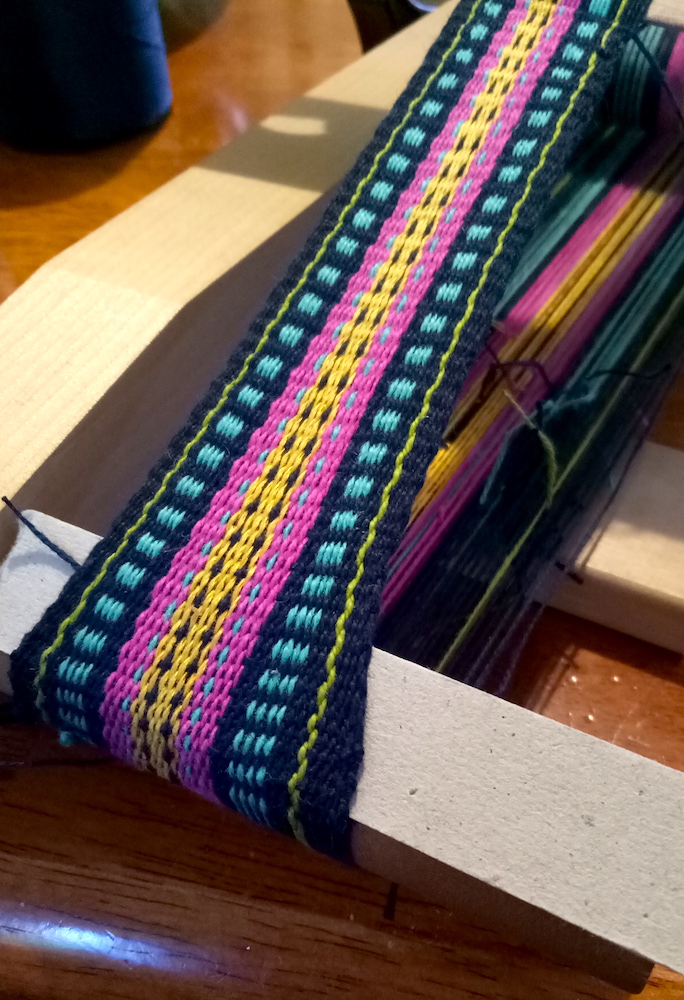
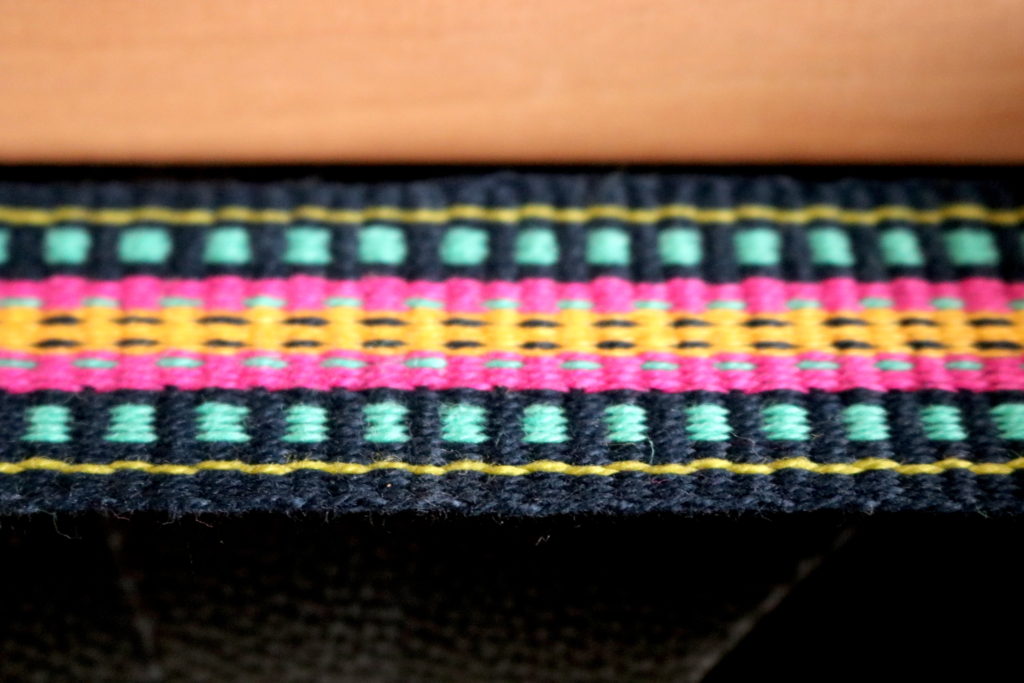
I must admit that I’m quite smitten with this inkle band and that’s why I knew I had to share it with all of you.

I have included the pattern draft I designed in the PDF, but if that is a bit beyond you, don’t worry, I’ve also included the colour order so that you can weave this band, regardless of your level. You can download and print out the pattern here:

Free-Inkle-band-patternDownload

If you are interested in using the exact same yarns that I have for this project, here are the details:

8/2 Maurice Brassard unmercerised cotton in Navy

8/2 Maurice Brassard unmercerised cotton in Fuchsia

8/2 Maurice Brassard unmercerised cotton in Limette pale (green)

8/2 Maurice Brassard unmercerised cotton in Peacock

8/2 Maurice Brassard unmercerised cotton in Jaune Fonce (yellow)

I’m not going to give exact quantities, but this band does not use an awful lot of yarn and is a great way to use up smaller quantities of leftovers. I made the shortest warp that my inkle loom takes. I used navy as the weft, as it is best to use the same colour as your warp edges, it helps to blend it in and make neat looking edges.

My band measurements when finished and off the loom were about 59 x almost 1.5 inches.

I hope you enjoy weaving your own band! If you are interested in increasing your knowledge or want access to a lot of pattern examples and types for your inkle loom, I highly recommend Anne Dixon’s wonderful book The Weaver’s Inkle Pattern Directory. I do have this book listed in my Amazon shop as well, but for some reason it is crazy expensive to buy on there at the moment!

Be sure to check out my Inkle weaving tips video on Youtube to see some of the tips in action:

If you’re looking for comprehensive Inkle instruction, check out my Inkle Weaving Course online.

Leave me any questions or comments you have down below, I love to hear from you!

Until next time…

Happy Weaving!
Filed Under: Free Pattern, Free tutorial, Inkle Weaving, Weaving Tagged With: free pattern, inkle weaving tips, inkle weaving tutorial

What is Clasped Weft? A step by step tutorial.

by Kelly 23 Comments

Just when you think you’ve tried everything in weaving, you come across something different, like Clasped Weft.
Clasped weft can be a great “next step” for newer weavers with a few plain weave projects completed and who are ready for something a bit more adventurous.
The cool thing about weaving clasped weft is that, similar to Colour and Weave, most of the work is in using colours to make your weaving look fancy, when in actual fact it is quite simple.
The clasped weft technique uses 2, 3 or 4 interlocking weft colours. Using 2 colours to begin with is the easiest and least complicated approach. If you have done any tapestry, you may already be familiar with the interlocking technique.
*This post contains affiliate links. for more information, see my disclosure policy.

We mainly use a plain weave structure (though clasped weft can actually be used in other structures, such as twill). It is a perfect technique for a rigid heddle loom, because, although it’s simple, it looks special and has big impact.


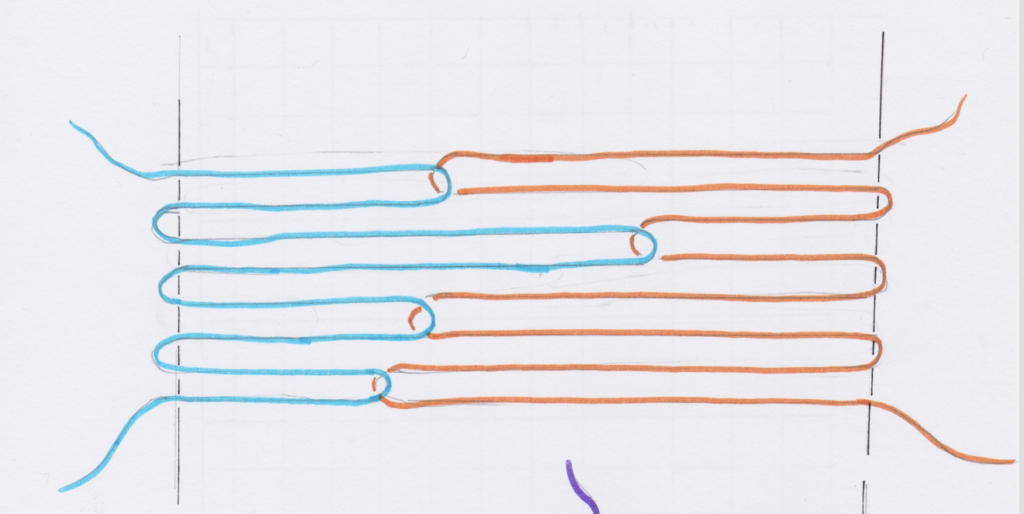
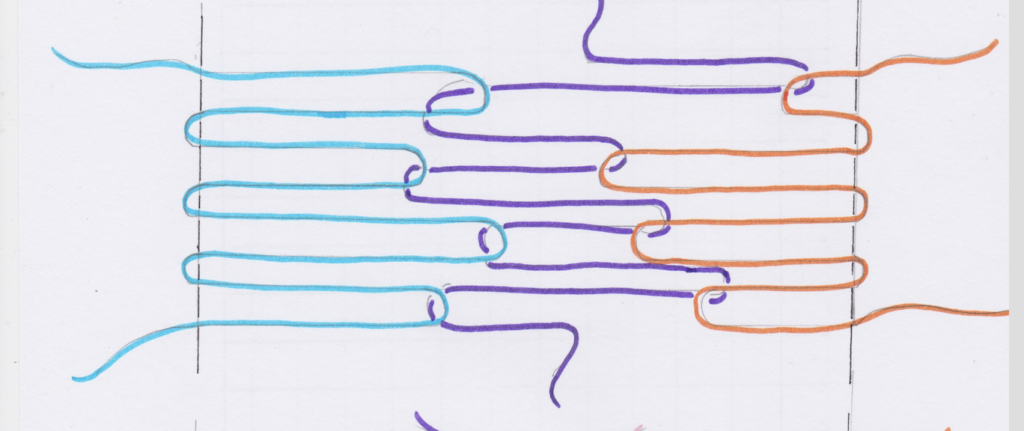
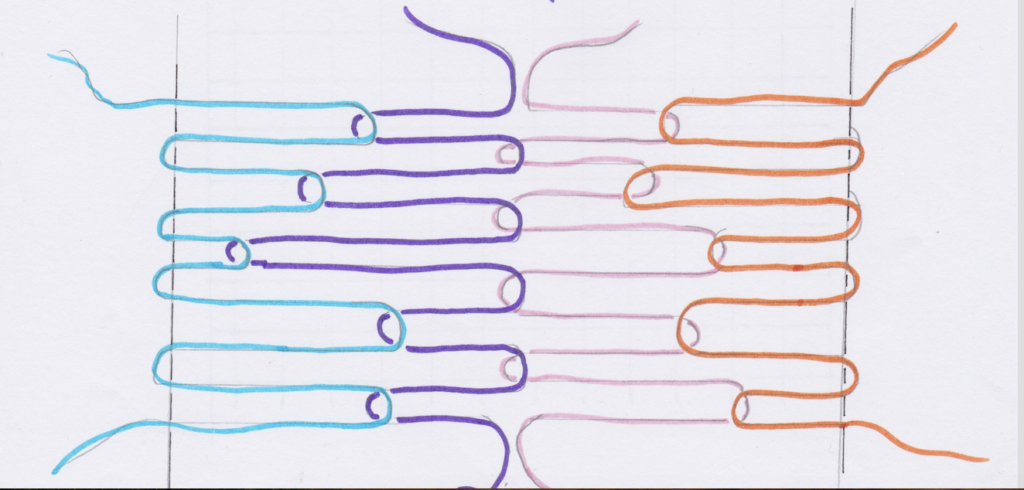
Before we go through the tutorial steps, let’s look at some (rather poorly drawn, sorry about that!) diagrams to get a clearer idea of how this works. The drawings are over simplified, as I haven’t drawn in the warp and weft interlacement, but I have drawn in the edge warp threads:

Clasped weft with 2 weft colours.

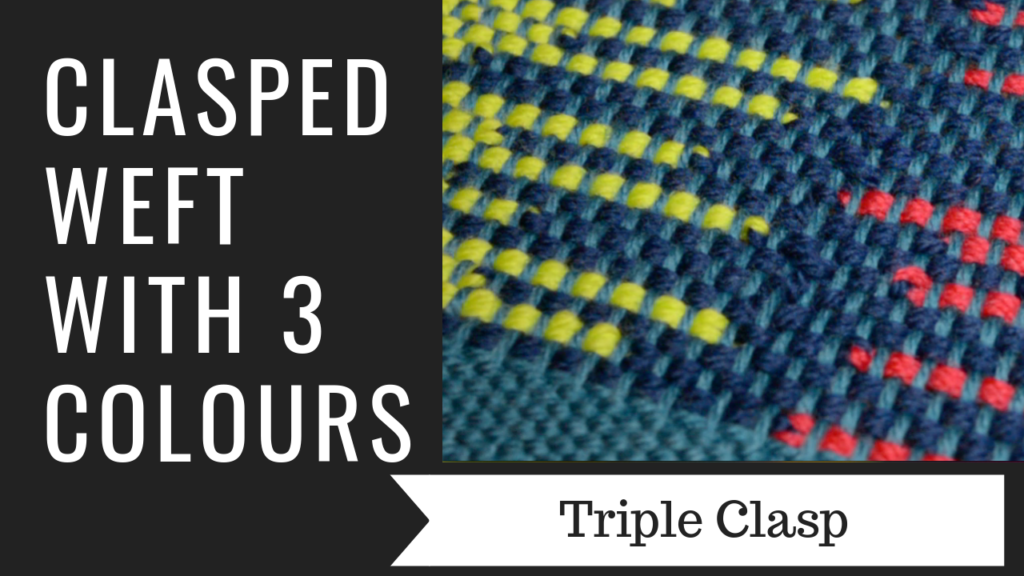
Clasped weft with 3 colours.

Clasped weft with 4 colours.

Now let’s go through the tutorial steps so that you can get clear on how clasped weft is actually woven. Today, we are just focusing on working the two weft colour technique, as I believe this is the best place to begin if you’re not familiar with clasped weft or haven’t attempted it before.
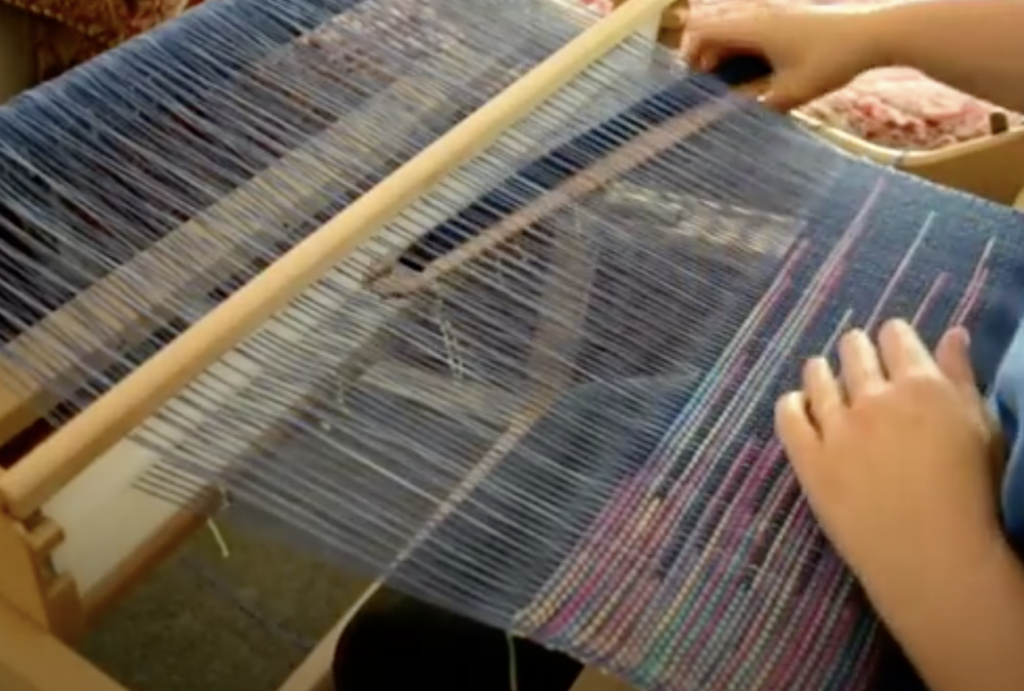
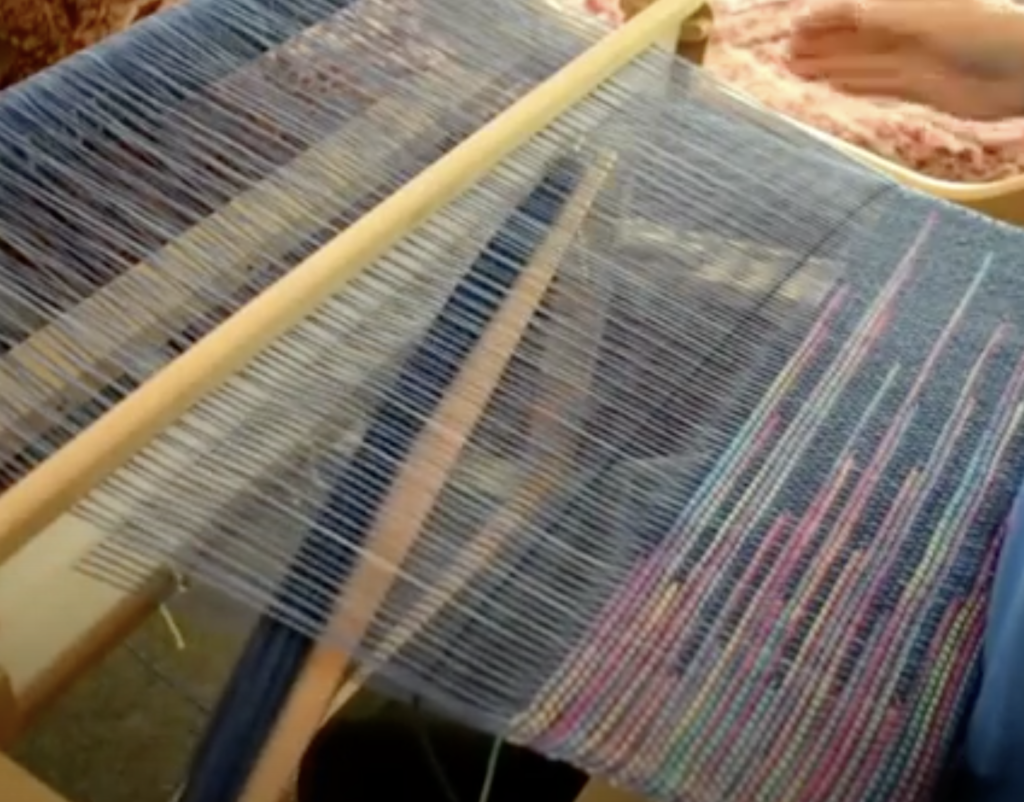
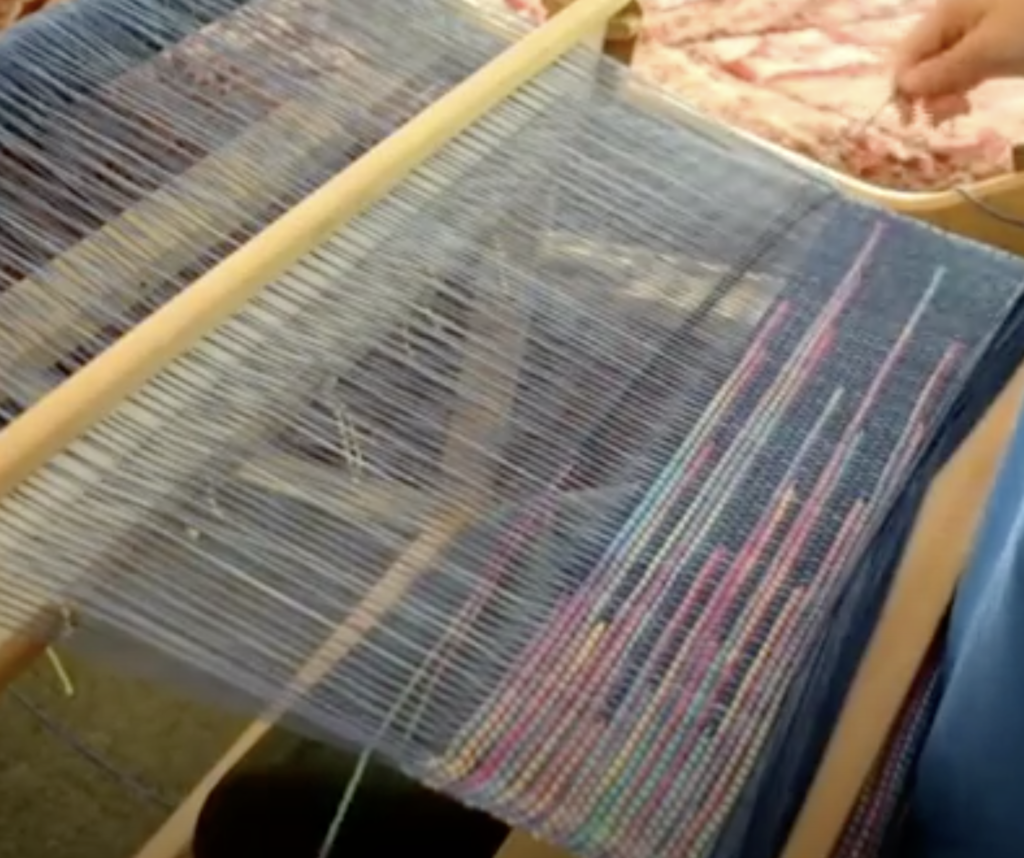
Begin with two contrasting weft yarns of the same weight. I have used one with a dark navy colour and another that is variegated with bright colours.
See the tips section below for more on why variegated works perfectly.
My warp and weft yarns were all light worsted/dk/ Australian 8 ply weight. Wool, acrylic or cotton are all fine.
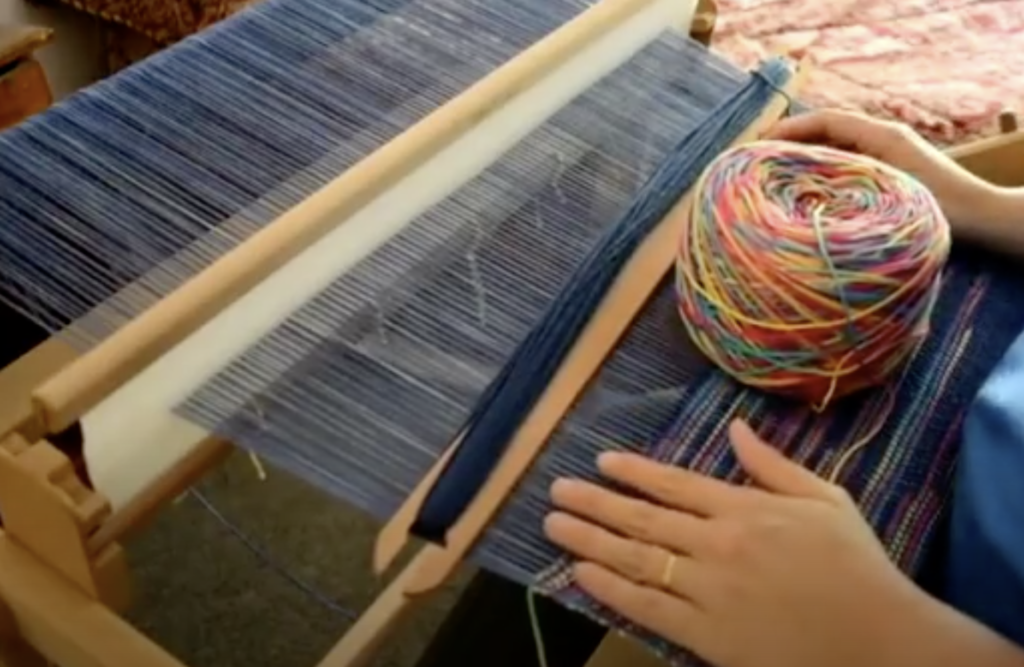
One weft yarn is loaded onto a stick shuttle, in my case this was the dark navy. The other colour is left in a ball or on the cone. My variegated colour was in a skein and so I wound it into a yarn cake with my ball winder.
A yarn cake (also known as a centre pull ball) is particularly good to work with for clasped weft, because it sits nice and flat on the floor and won’t roll away. The yarn also feeds off the yarn cake seamlessly, which makes the whole process that little bit easier. If you have a ball, you may want to sit it in a box or basket on the floor to contain it.
Place the ball of yarn on the floor at your left. It doesn’t matter if you place it on the right or left, but for the purpose of this tutorial it’s on the left.
Because the ball (let’s call it the contrast yarn) is on the left, we enter the shed with the stick shuttle on the right. Again, it doesn’t matter whether you are in the up or down shed, but I am beginning in the down shed.
Take your stick shuttle across from the right hand side to the left as though you’re going to weave a regular plain weave pick.
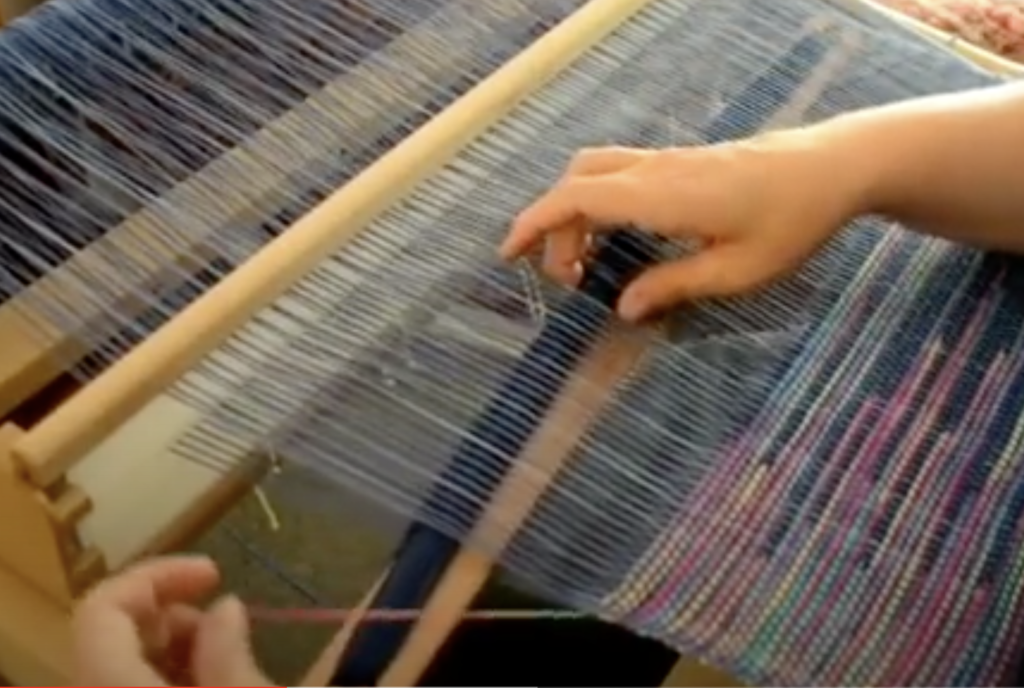
When your shuttle reaches the left hand side, pick up the contrast yarn and place it over the top of the stick shuttle.

Take the shuttle the rest of the way through the shed at the left – as you would for your normal plain weave pick.

On the right hand side (where your shuttle entered), tidy up and prepare your weft yarn as though you’re going to beat the pick in. If you’re not familiar with how to do this, watch my free video on How to Weave Neat Edges.  DON’T BEAT.

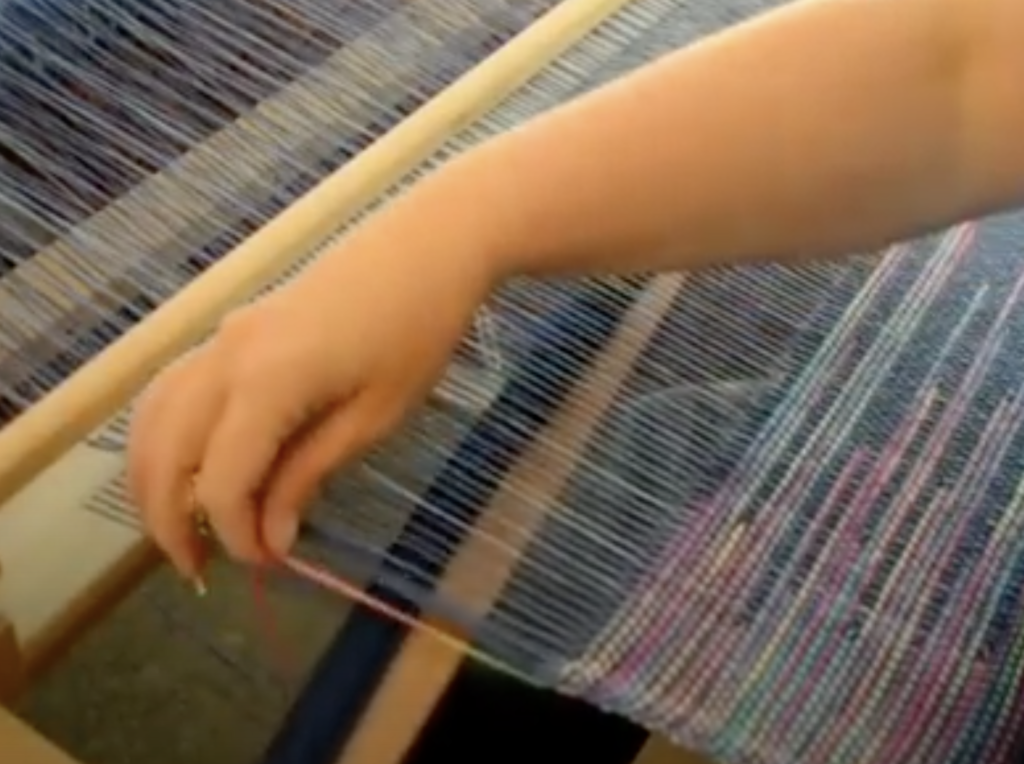
Take the shuttle straight back into the same shed. Don’t change sheds, and don’t beat! Take the shuttle through, back to the right where you first entered the shed.
As you return the shuttle to the right, you will find that the navy yarn is linked or clasped with the contrast yarn. This means that the contrast yarn is pulled into the shed. Now you get to decide how far you will pull the contrast yarn into the shed. A little? A lot? Your choice, depending on the effect you want to achieve.
Hold both yarns under tension on either side to manipulate where you want the two yarns to go.
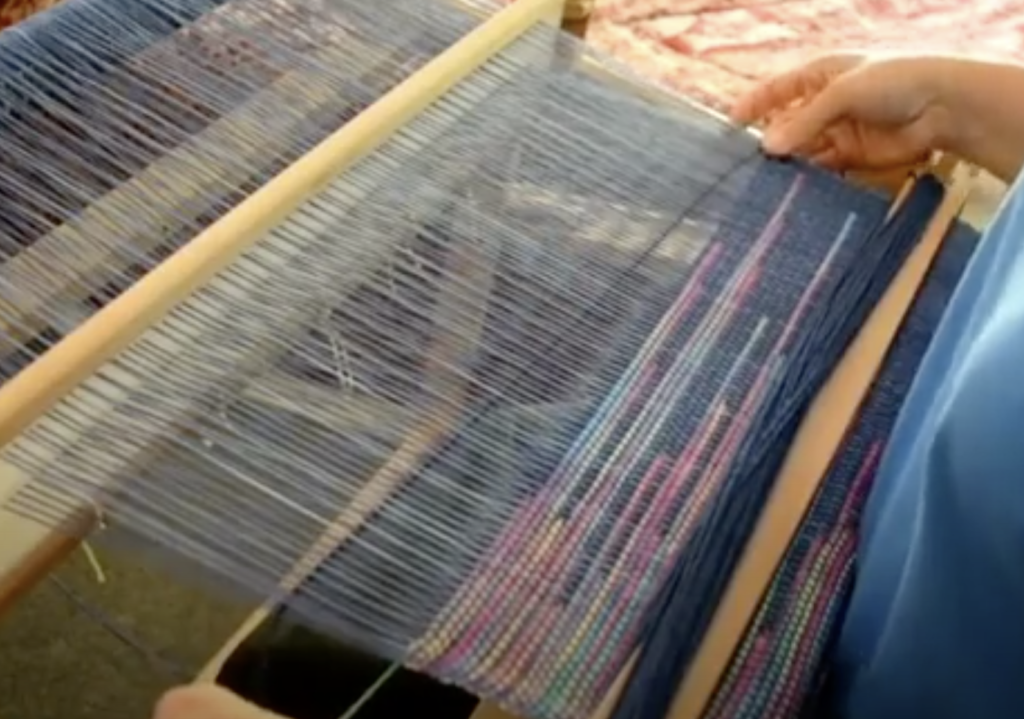
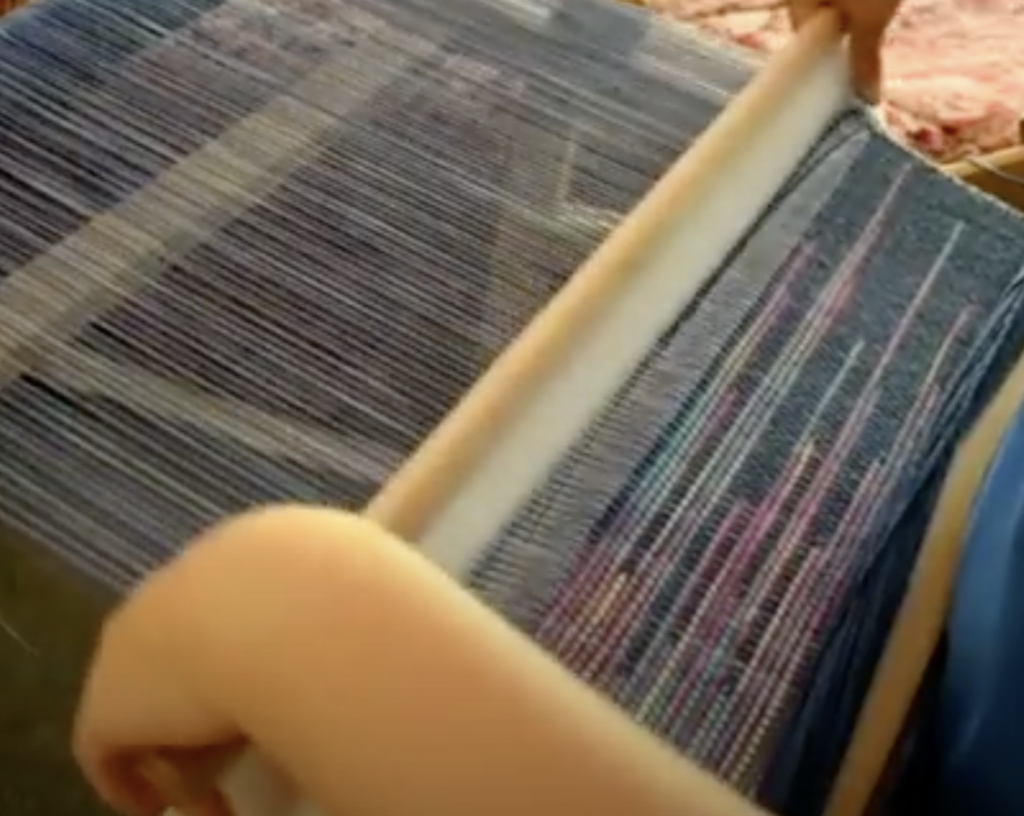
When you’re happy with the yarn positioning, beat the picks into place. You will notice that both yarns are now doubled in the shed.
Change to the next shed (in my case I had been working in the down shed, so I go on to change to the up shed).
Continue weaving in the exact same manner in the new shed and repeat until you’ve finished weaving.
Isn’t your head just swimming with all the possibilities of this wonderful technique?
Clasped weft can be extremely planned or extremely random. It looks wonderful both ways and is just so much fun to weave.
Here are a few recommendations for best results:
1. Use contrasting weft colours.
Light and dark will make the weaving pop. 
2. Use the same weight yarn for both warp and weft.
You will get better results and avoid the not so pretty lumps and bumps that can occur at interlocking points.
3. Variegated yarn is perfect for this.
For the 2 colour clasped weft technique, a variegated yarn with a contrasting yarn looks really cool! (See photos below and above).

              4. Using the same colour as the warp for one of your weft colours works great.

Too much colour can confuse the contrast of the clasped weft lines. In the tutorial, I used the same navy yarn for warp and weft no.1. I then used a contrast yarn for weft no.2.

If you like the look of clasped weft as much as I do, I have some great news for you! I have 3 free Youtube video tutorials that will teach you each of these techniques. Start with video 1 so that you can practice the technique, before moving on to the others. 

Clasped Weft with 2 colours
Clasped Weft with 3 colours
Clasped Weft with 4 colours
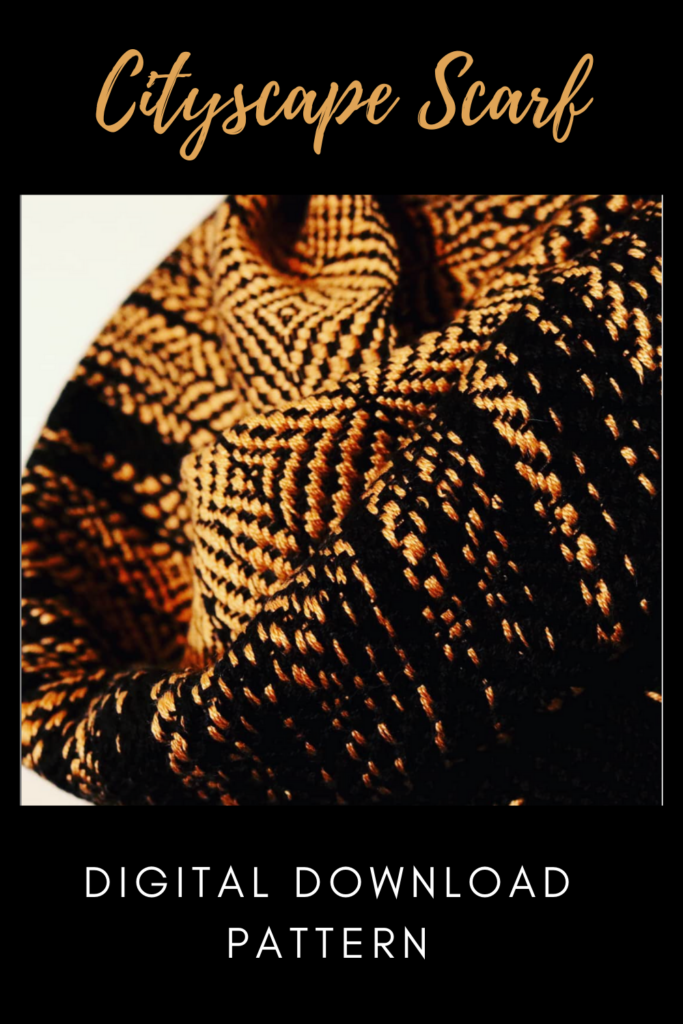
I mentioned that the clasped weft technique can also be used for other weave structures. This can create really interesting and impressive special effects. One of my Etsy patterns, The Cityscape Scarf is a perfect example of a clasped weft combined with a twill.
Try it out and let me know what you think. Leave me a comment here or under any of the Youtube videos, I love to hear from you!
Until next time…
Happy Weaving!
Filed Under: 4 shaft weaving, Free Pattern, Free tutorial, Inspiration, Online Weaving School, Rigid heddle weaving, Rigid Heddle Weaving Patterns, Tutorials, Weaving Tagged With: clasped weft, my youtube channel, rigid heddle weaving tutorial, weaving

Spring Table Runner Free Rigid Heddle Project!

by Kelly Leave a Comment

Winter is fast approaching us here in Australia, but for those in the Northern Hemisphere, you are looking forward to the mildness and beauty of Spring. It’s a wonderful time to be freshening up household linens and table decor with new hand wovens!
 
*This post contains affiliate links
 
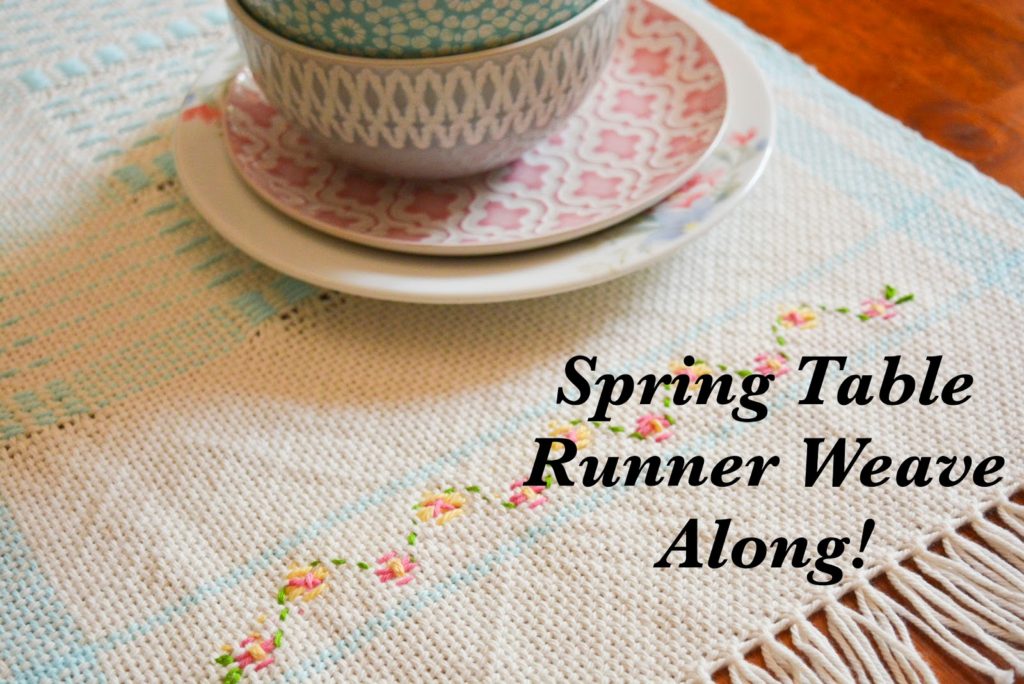
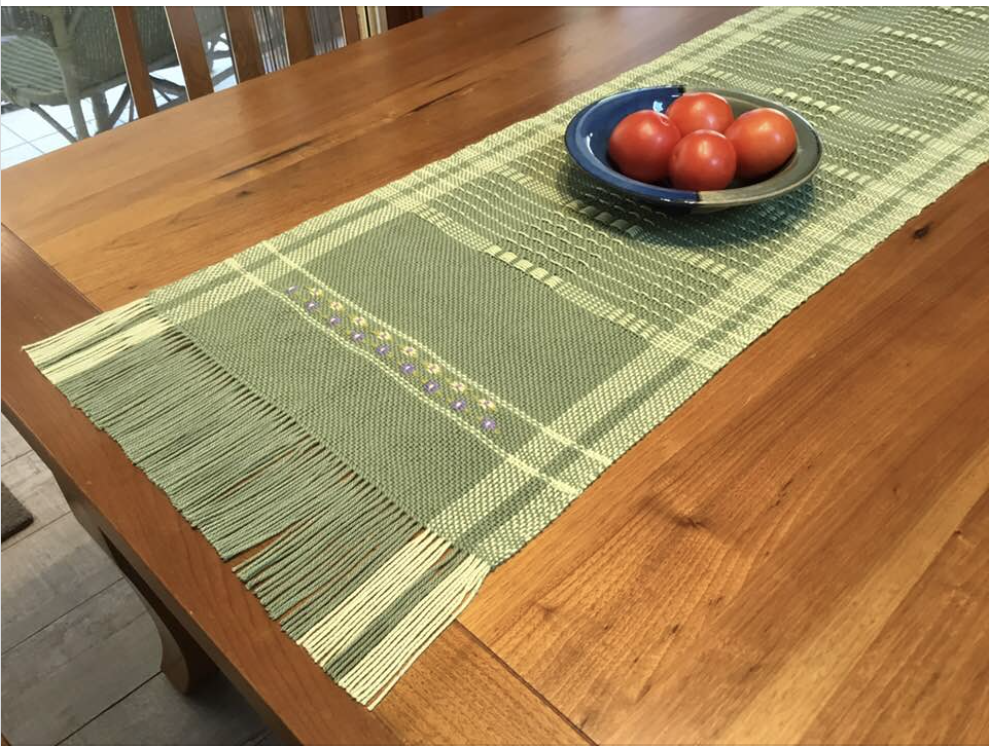
The Spring Table Runner project was initially run as a weave along, but can of course be undertaken at any time. I chose light and pastel colours to give that spring feel and also embroidered a delicate spray of flowers on either end of the runner to really make it feel like Spring.

 
The table runner is woven with lovely thick and soft cotton for easy care. The design is worked by using colour in the warp and weft, plus some simple pick up for additional interest.
 
You can download the free, printable PDF for the Spring Table Runner right here-  
Spring-Table-RunnerPDFDownload

What you will need to complete this project:

*A rigid heddle loom, 20″ or wider

*A 7.5 dent reed/heddle

* 2 x stick shuttles, at least as long as the width of your project

*A pick up stick, longer than the width of your project

*A double ended reed and heddle hook or a separate threading hook and reed hook

I know that many of you do not have access to the same yarns that I do. Let’s have a look at some suitable yarns you could use to complete this project:

For the 10 ply/ worsted/aran weight:

Bendigo Woollen Mills Cotton 10 ply

Lily Sugar n Cream cotton

Lion Brand 24/7 Cotton

Knit Picks Dishie Worsted cotton

Hobby Lobby I Love This Cotton

For the 8 ply/ light worsted/dk weight:

Bendigo Woollen Mills Cotton 8ply

Cestari Old Dominion 100% cotton

Maurice Brassard 8/8 cotton

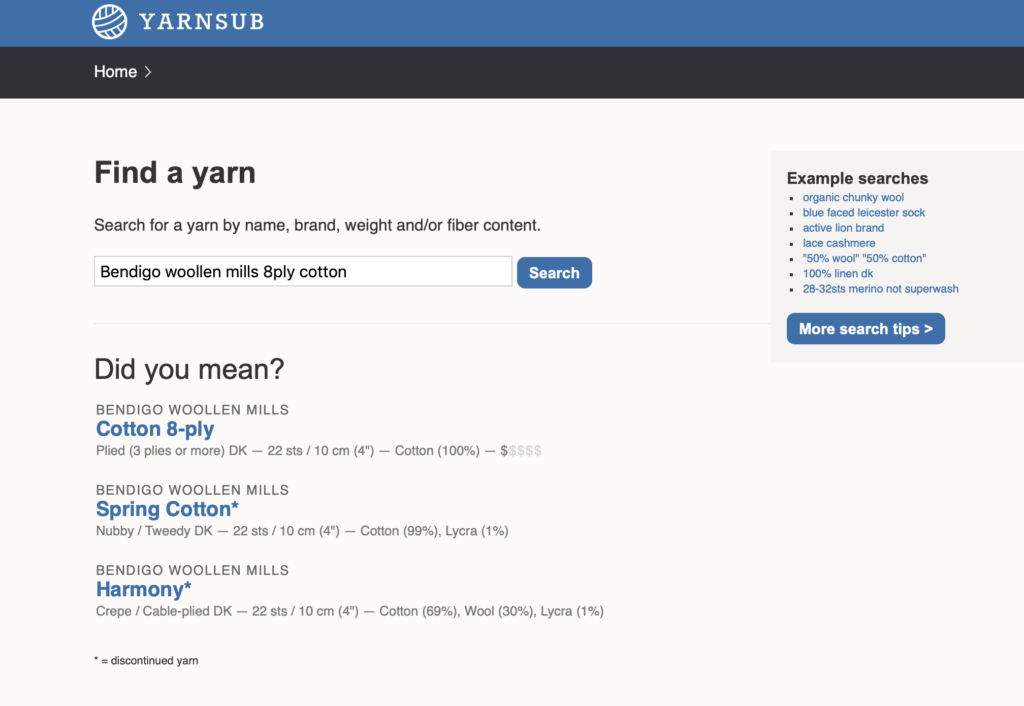
Yarnsub.com is also an excellent resource for finding a variety of yarns with similar characteristics to what I used. It is a simple site to use, but if you’re unsure, here is an example:

On the homepage, enter into the search box the yarn than you wish to substitute. Here I’ve entered “Bendigo Woollen Mills 8ply cotton”.

Hit “enter” on your keyboard or click on the little spy glass. Choose the correct yarn from the list below. In this case, I will click the top yarn.

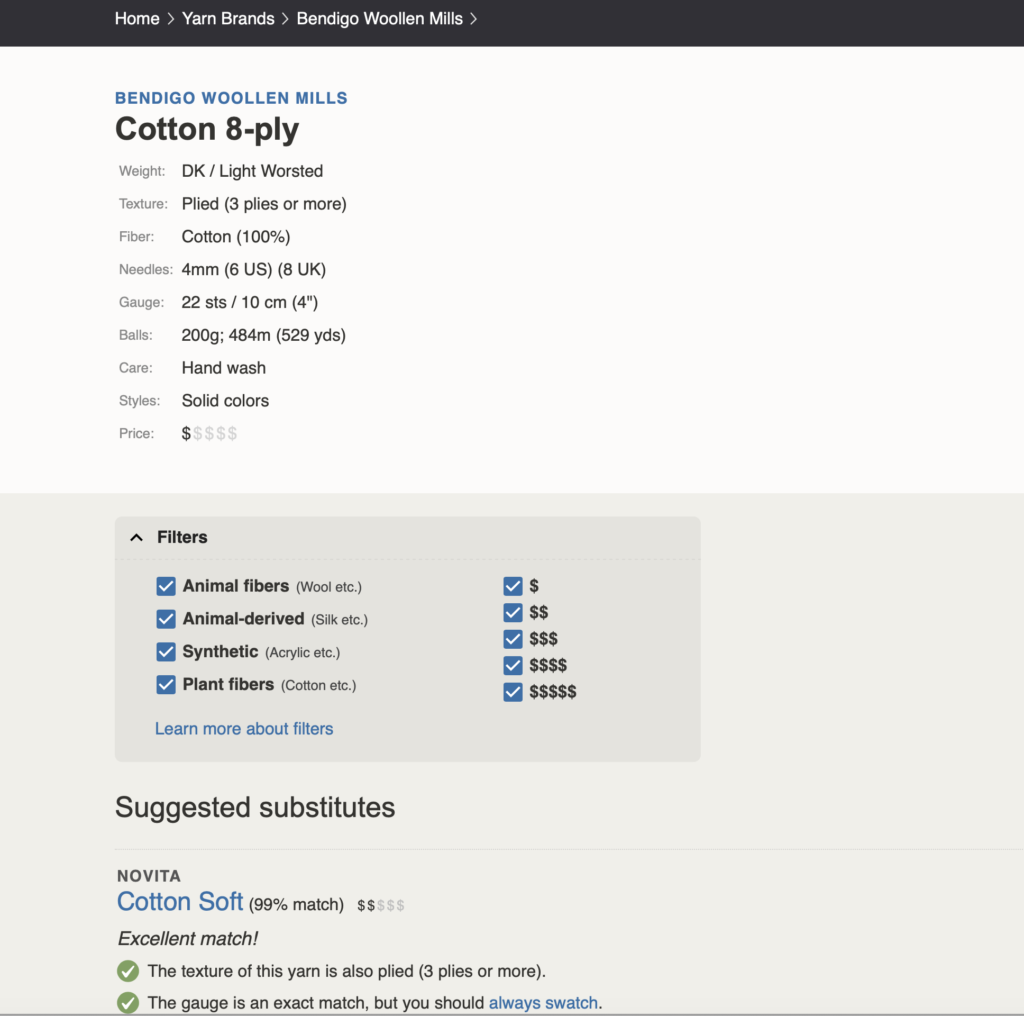
When you see this page, start scrolling down for all of the listed possible matches or near matches. This particular search gave 50 results!! You will see after each suggested yarn there is a percentage match – that will tell you how well the suggested substitute matches your original search. It’s brilliant!

You can of course substitute colours depending on availability and individual tastes. One of my favourite runners that I’ve seen is this one, woven by Juliet.

A very different colour scheme is used here, but still feels very Spring like and is absolutely beautiful!

The entire playlist of videos for the class can be found here-

The video series plus PDF can also be viewed at my Online Weaving School, if you prefer.

I really hope that this Spring Table Runner brings a little freshness to your table and joy into your home!

If you have any questions or comments, please leave them under this post, I would love to hear from you.

Until next time…

Happy Weaving!
Filed Under: Free Pattern, Free tutorial, Health and home, Inspiration, Rigid heddle weaving, Tutorials, Weaving Tagged With: Kelly casanova weaving lessons, rigid heddle weaving, rigid heddle weaving tutorial, spring table runner

Clasped Weft weaving on a rigid heddle loom

by Kelly 1 Comment

My latest video is now available to view, I hope you enjoy it!

Filed Under: Free Pattern, Free tutorial, Rigid heddle weaving Tagged With: clasped weft, rigid heddle weaving tutorial, weaving

3/1 lace on the rigid heddle loom

by Kelly 2 Comments

I was so encouraged by the positive feedback received on my last two videos that I decided to make another! This one is the pattern I’m using for my current tea towel project and includes a handy tip on recording information as you go. Hope you like it!

Filed Under: Free Pattern, Free tutorial, Online Weaving School, Rigid heddle weaving, Tutorials, Weaving Tagged With: rigid heddle weaving tutorial, weaving

  • « Go to Previous Page
  • Page 1
  • Page 2

Primary Sidebar

Hand crafted boat shuttles

Categories

Archives

Meta

  • Log in
  • Entries feed
  • Comments feed
  • WordPress.org

Copyright © 2025 Kelly Casanova Weaving Lessons on the Foodie Pro Theme