• Skip to main content
  • Skip to primary sidebar

Kelly Casanova Weaving Lessons

  • Hi! I’m Kelly!
    • Disclosure
  • Online Weaving School Class Index
    • Common account issues
    • Common technical issues
    • What do I get with a membership?
  • New to rigid heddle weaving? Start here!
    • Never heard of the rigid heddle loom?
    • How to weave neat edges on the rigid heddle loom
    • Rigid heddle weaving
    • Rigid Heddle Weaving Patterns
  • Patterns
  • Subscribe

my youtube channel

Tapestry weaving on a rigid heddle loom

by Kelly 9 Comments

Tapestry weaving is something I like to do just sometimes, when the mood takes me. Well, the mood did take me recently and I decided to follow one of my favourite themes that I haven’t really explored yet – House on a hill, by the sea.


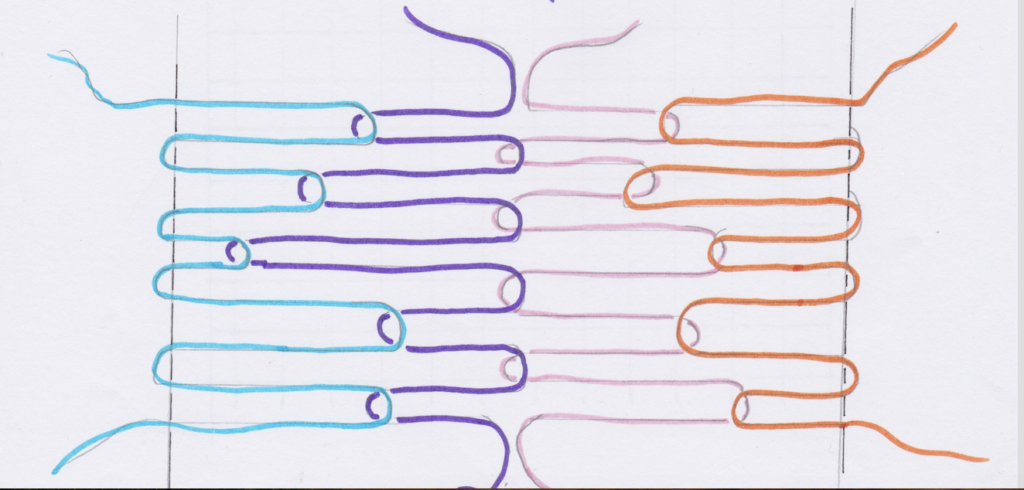
I wanted to do just small tapestries, as I planned on doing several variations on the one theme, and as a tapestry is a time investment, I thought the smaller, the better. I also have a soft spot for little things.
*This post contains affiliate links. For further information, please see my disclosure policy.


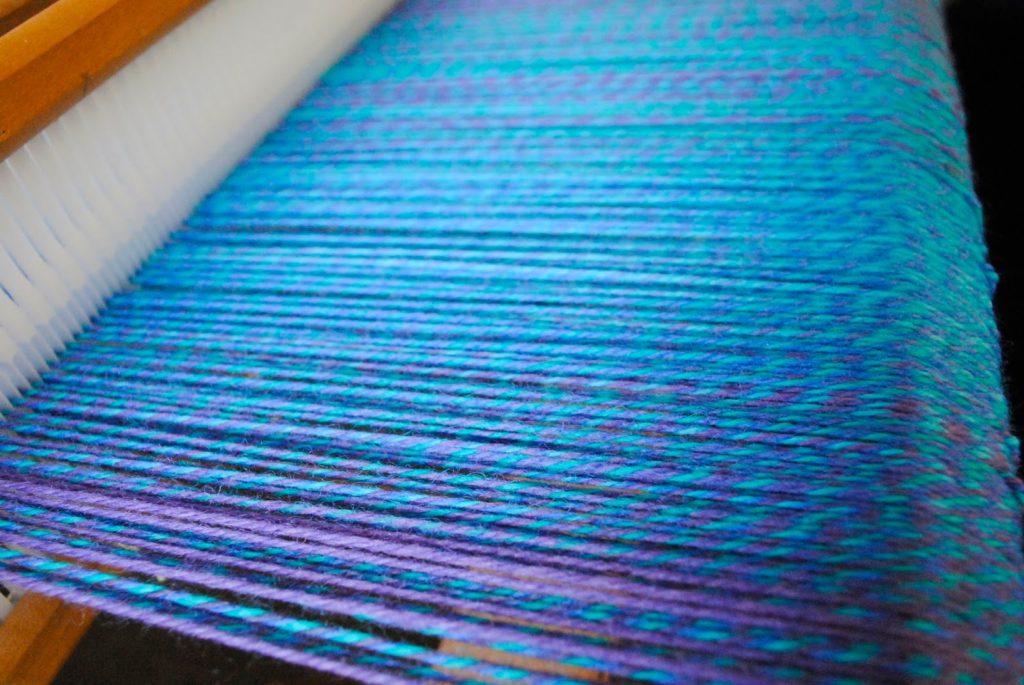
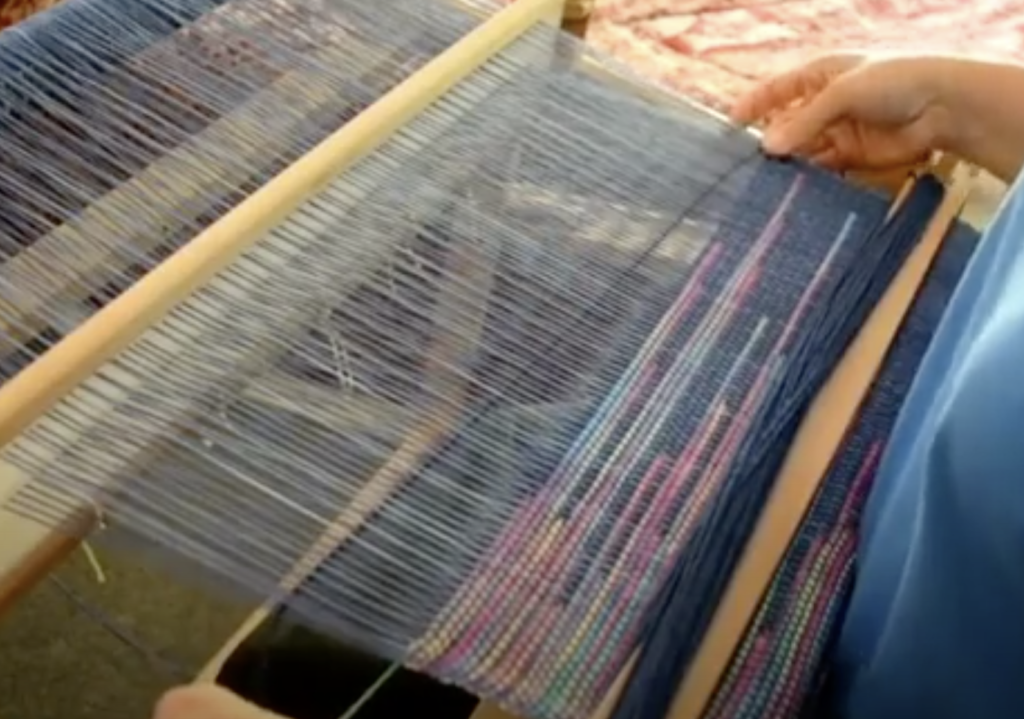
I warped my Sampleit loom with Ashford tapestry cotton, which is my go to tapestry warp. I used a 7.5 dent heddle/reed because that is the only size I have for the Sampleit, but a 10 – 12.5 dent heddle/reed would be preferable.


Each tapestry measures approximately 3.5″ X 4″.

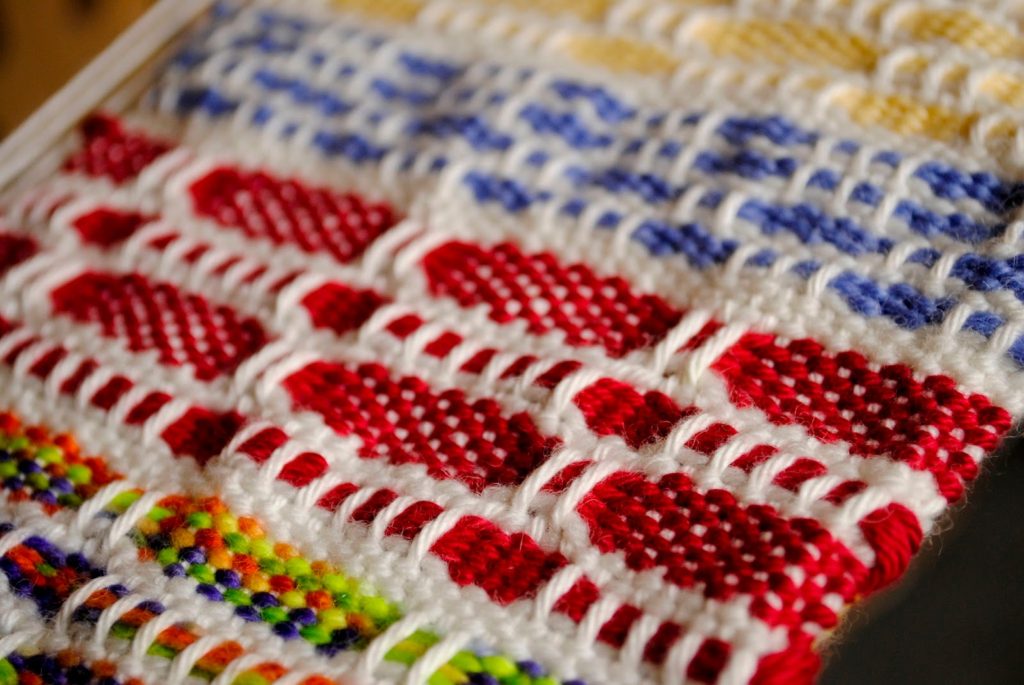
Tapestry 1 was woven with scraps from my stash bag. My very messy, tangly stash bag! It has smaller pieces or balls of all sorts of yarns from past projects, but mostly fingering to worsted weight.
Incorporated into this piece are pieces of wool, cotton, bamboo, silk, alpaca and some unidentified freebie from long ago.


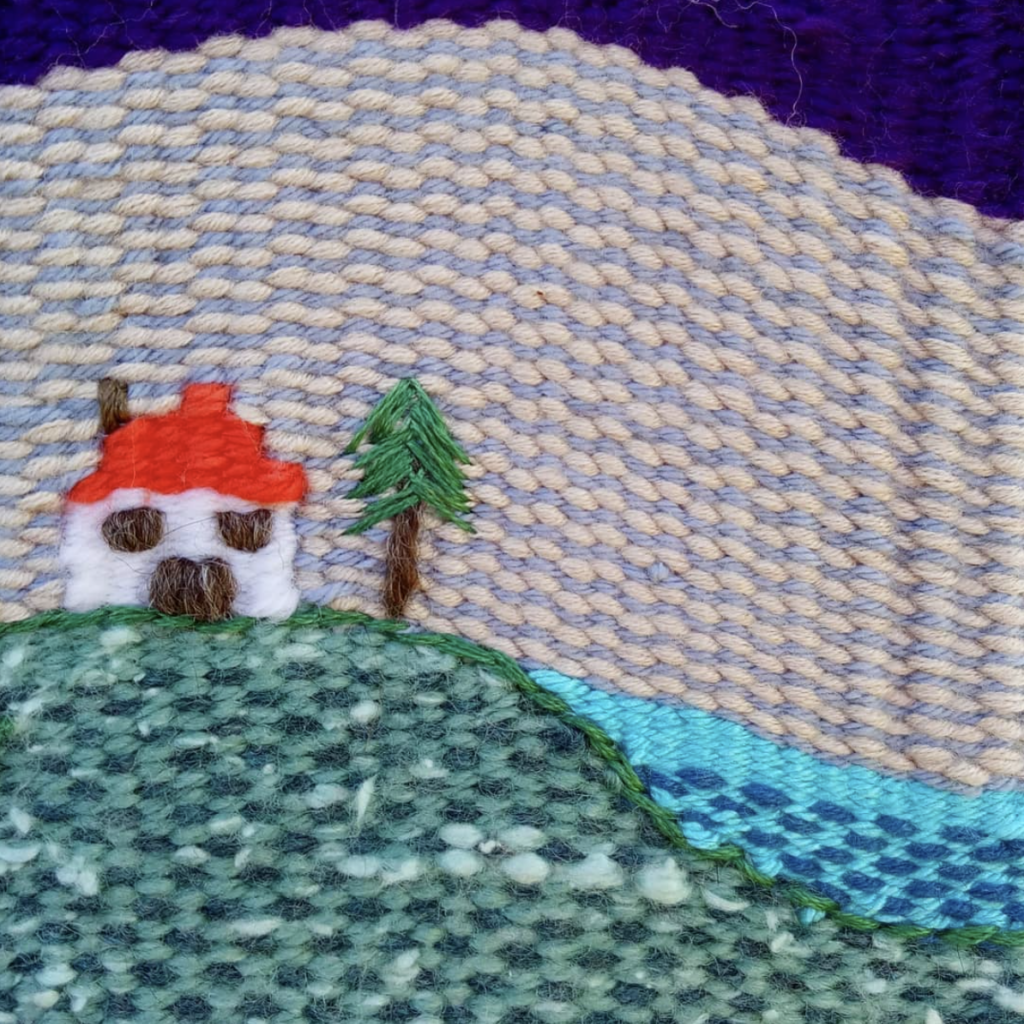
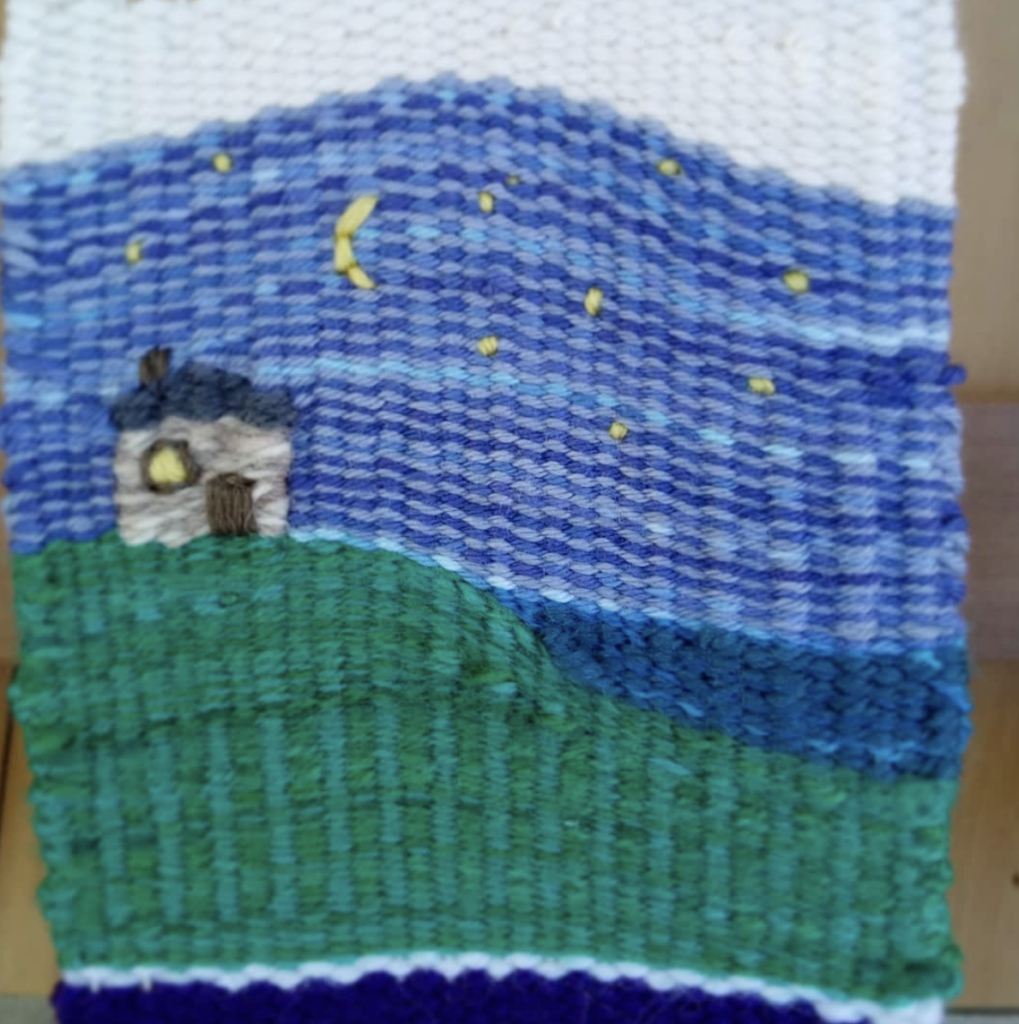
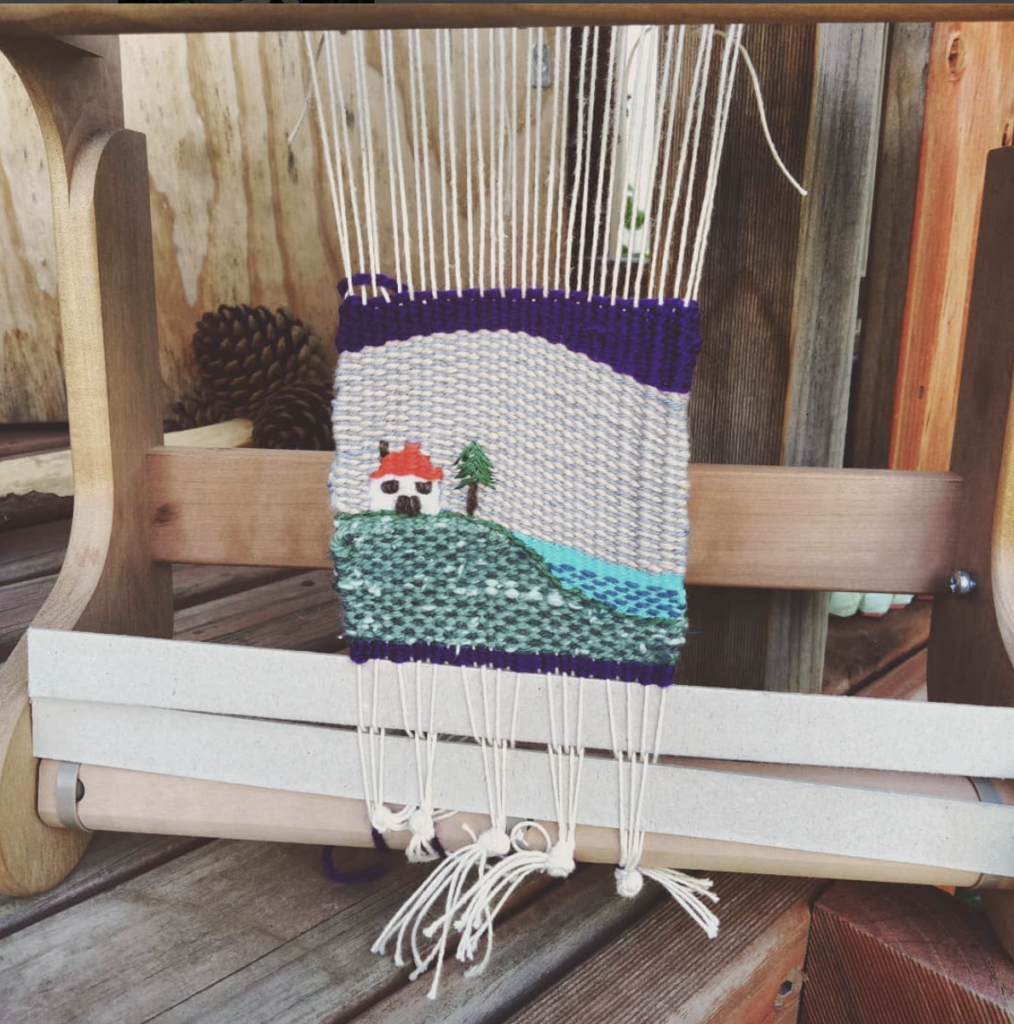
For Tapestry 2 I was going for a “twilight” look, so I chose a limited colour palette of greens, blues, greys and muted colours.

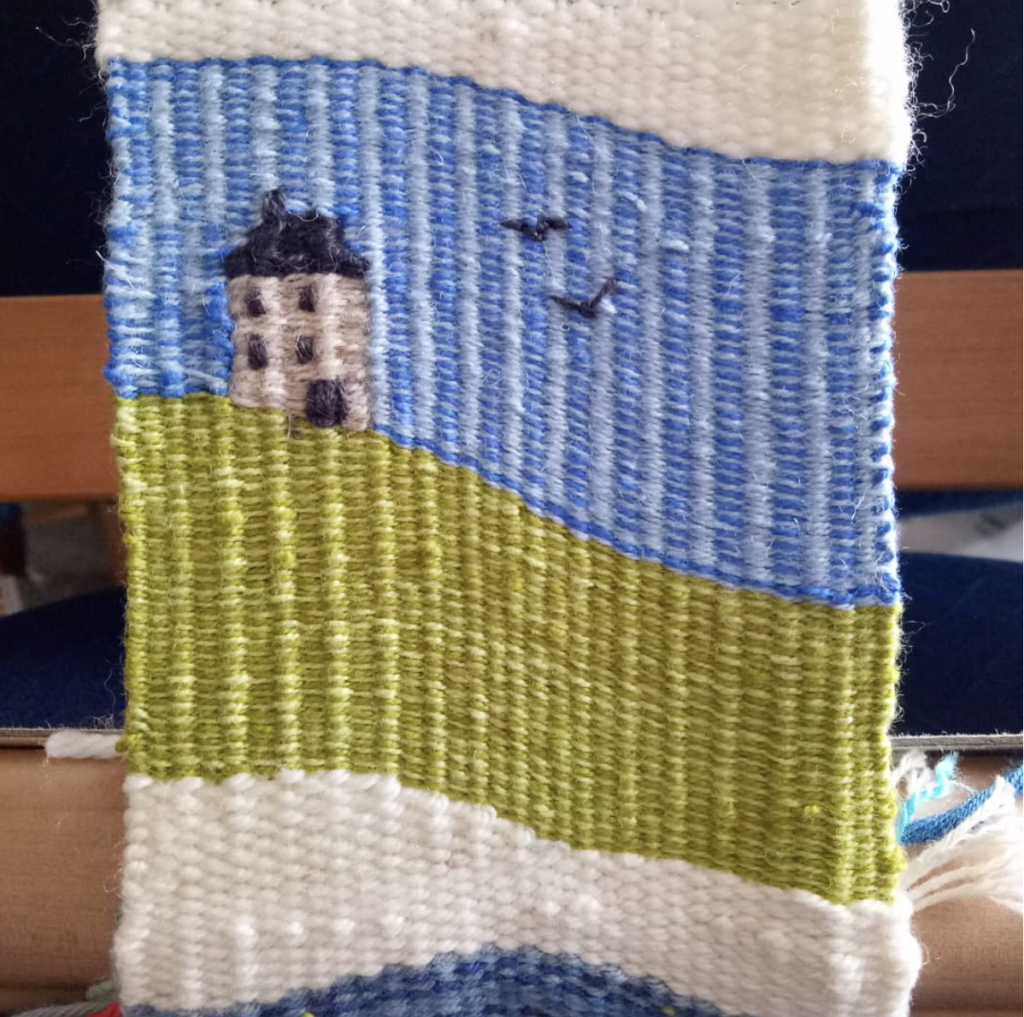
Tapestry 3 was woven entirely with 8/2 size weaving thread in cotton and cottolin. I also chose a muted colour palette for this one.
It ended up being my favourite of the three, I like the look of the finer yarn and details. It took a good deal longer to weave due to the thin yarn, but it was so relaxing, I didn’t mind at all!


I plan to do a couple more little tapestries on this warp, but they will have to wait until I have a bit more time.

A book that really helped me get started with tapestry is Tapestry Weaving by Kirsten Glasbrook. It is not a highly detailed book, which I think makes it great for beginners. She shows the basic techniques, gives projects for you to try and then later there are examples of her own work in a gallery. I have had this book for years and still refer back to it for information and inspiration.
Rebecca Mezoff has a detailed book, The Art of Tapestry Weaving which is also a terrific resource.
Tommye Scanlin’s book Tapestry Design Basics and Beyond is a great book, but if you’re just starting out in tapestry, I would go with the either both or one of the above to begin with.
 
 
I also have an  Tapestry on a Rigid Heddle Loom online class, which is easy to follow and a great place to start out.
 
Also, in this Youtube video, I discuss why tapestry can be done on a rigid heddle loom, but why it’s not entirely ideal:

 
I hope you enjoyed this post.
Until next time…
Happy Weaving!


Filed Under: Tapestry Weaving Tagged With: Kelly casanova weaving lessons, my youtube channel, rigid heddle weaving, tapestry, tapestry weaving

Where it all started (long post!)

by Kelly 19 Comments

My 3 year Youtube channel anniversary came and went without my noticing back in August. I was looking through my list of 159 (!!) videos tonight and noted the date of my first video, way back in 2015.


While these years have flown so fast and so much has happened since I hesitatingly uploaded that first video, I thought it a good time to reflect and share a bit more of my journey with you, particularly if you have only found me recently.


Some of you have been with me almost since that first video, and I believe that I have most to thank you for. It is the first viewers who encouraged me to make more videos, who threw amazing compliments in my direction, and who have shown me so much love these past 3 years.


So, lets go way back to the beginning. Before weaving, I had many, many crafts under my belt.
One of them was knitting, which I used to indulge in a great deal until a painful shoulder Repetitive Strain Injury reared it’s ugly head and left me just a “sometimes knitter”. Anyway, I had learned an immense amount of helpful knitting techniques from kind people on Youtube.
When I had been weaving for some time and was really excited about what I was doing and learning (still am!) I had the idea of contributing to the Youtube craft community by sharing a little of what I knew. I borrowed my son’s little camcorder, and, with pretty poor visual and even worse audio, I recorded a Waffle Weave on a rigid heddle loom video. This is an updated version:

[embedyt] https://www.youtube.com/watch?v=FuhY5e1X4-k[/embedyt]

I didn’t expect that many people would watch it, and that was fine by me, I just wanted to share with anyone who may be interested. It wasn’t long before I started getting comments and very positive feedback. People were asking me to make more videos and I couldn’t believe it.

Me? Introverted, dull as dishwater housewife me? I was pretty astounded at the response!


I made some more videos and I discovered something about myself. I loved teaching! I had taught my kids at home for a long time (my oldest homeschooler is now 20!), but this was teaching adults something I was really passionate about and I wanted to keep doing that!


As I made the videos, the cost of materials started adding up and I had no job or real income at this time. Youtube had a “paid channels” feature and so, I started one. I charged roughly $2 per person, per month and this enabled me to keep going because people joined and paid. 


In my “spare time” I started putting together some weaving designs to sell in my Etsy shop. I now have many designs, and once again, I’ve been amazed at the response. I also love designing and look forward to continuing doing that. 


Back to Youtube, where it was abruptly announced that the paid channel platform was closing. This left me with a quandary – should I try to find another platform or is this a sign that I should close down. Well, my students came to my rescue and begged me to continue.

A short time later, I found a great hosting platform – Teachable and have been with them ever since. Youtube closing the paid channels was a HUGE blessing in so many ways and has allowed to go forward in ways I could not have imagined. If you haven’t seen my Online Weaving School, please check it out to see what I’m talking about! 


I now have 61 classes available, including my first floor loom course. Being on a professional platform has challenged me to do better and construct my classes to give students an optimal learning experience. I must be doing something right, because the school continues to grow and I continue to get awesome feedback. 


All of this has been made possible because people like you support me in so many ways. You support me with your enthusiasm for weaving and learning. You support me financially, which allows me to continue to grow this little business. You support me on a personal level with your kind messages and many prayers over the years. 


A topic that is often discussed in business circles is “success”. Success to many, seems to be when you reach 6 figures, as though there is some magic monetary value that means you have made it.

 I earn a living (maybe not a lavish one by the opinion of many, but it helps to feed and clothe my family!), I get to do what I absolutely love, and I’m surrounded by wonderful, supportive people. 
Am I successful? Heck, yeah!


I want to thank you all for making this happen. I had no idea that I was capable of running a business that began with a hobby and a passion. My hope is that I can continue to do this for the rest of my life, and with all the plans and ideas I have for my online school for the future, I shouldn’t have too much trouble achieving that goal!


God has blessed me abundantly through this venture, I pray He blesses you too!


Filed Under: Weaving Tagged With: Kelly casanova weaving lessons, my youtube channel

What is Clasped Weft? A step by step tutorial.

by Kelly 23 Comments

Just when you think you’ve tried everything in weaving, you come across something different, like Clasped Weft.
Clasped weft can be a great “next step” for newer weavers with a few plain weave projects completed and who are ready for something a bit more adventurous.
The cool thing about weaving clasped weft is that, similar to Colour and Weave, most of the work is in using colours to make your weaving look fancy, when in actual fact it is quite simple.
The clasped weft technique uses 2, 3 or 4 interlocking weft colours. Using 2 colours to begin with is the easiest and least complicated approach. If you have done any tapestry, you may already be familiar with the interlocking technique.
*This post contains affiliate links. for more information, see my disclosure policy.

We mainly use a plain weave structure (though clasped weft can actually be used in other structures, such as twill). It is a perfect technique for a rigid heddle loom, because, although it’s simple, it looks special and has big impact.


Before we go through the tutorial steps, let’s look at some (rather poorly drawn, sorry about that!) diagrams to get a clearer idea of how this works. The drawings are over simplified, as I haven’t drawn in the warp and weft interlacement, but I have drawn in the edge warp threads:

Clasped weft with 2 weft colours.

Clasped weft with 3 colours.

Clasped weft with 4 colours.

Now let’s go through the tutorial steps so that you can get clear on how clasped weft is actually woven. Today, we are just focusing on working the two weft colour technique, as I believe this is the best place to begin if you’re not familiar with clasped weft or haven’t attempted it before.
Begin with two contrasting weft yarns of the same weight. I have used one with a dark navy colour and another that is variegated with bright colours.
See the tips section below for more on why variegated works perfectly.
My warp and weft yarns were all light worsted/dk/ Australian 8 ply weight. Wool, acrylic or cotton are all fine.
One weft yarn is loaded onto a stick shuttle, in my case this was the dark navy. The other colour is left in a ball or on the cone. My variegated colour was in a skein and so I wound it into a yarn cake with my ball winder.
A yarn cake (also known as a centre pull ball) is particularly good to work with for clasped weft, because it sits nice and flat on the floor and won’t roll away. The yarn also feeds off the yarn cake seamlessly, which makes the whole process that little bit easier. If you have a ball, you may want to sit it in a box or basket on the floor to contain it.
Place the ball of yarn on the floor at your left. It doesn’t matter if you place it on the right or left, but for the purpose of this tutorial it’s on the left.
Because the ball (let’s call it the contrast yarn) is on the left, we enter the shed with the stick shuttle on the right. Again, it doesn’t matter whether you are in the up or down shed, but I am beginning in the down shed.
Take your stick shuttle across from the right hand side to the left as though you’re going to weave a regular plain weave pick.
When your shuttle reaches the left hand side, pick up the contrast yarn and place it over the top of the stick shuttle.

Take the shuttle the rest of the way through the shed at the left – as you would for your normal plain weave pick.

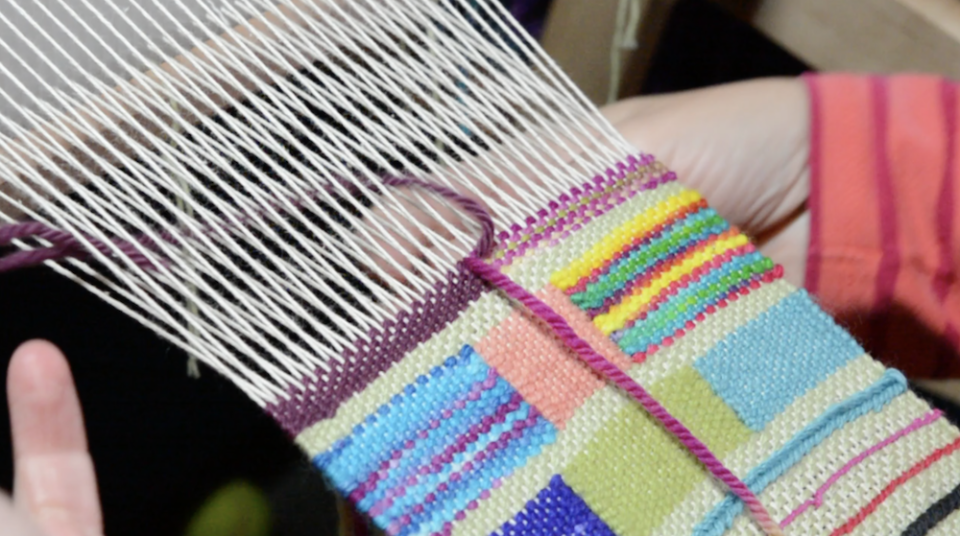
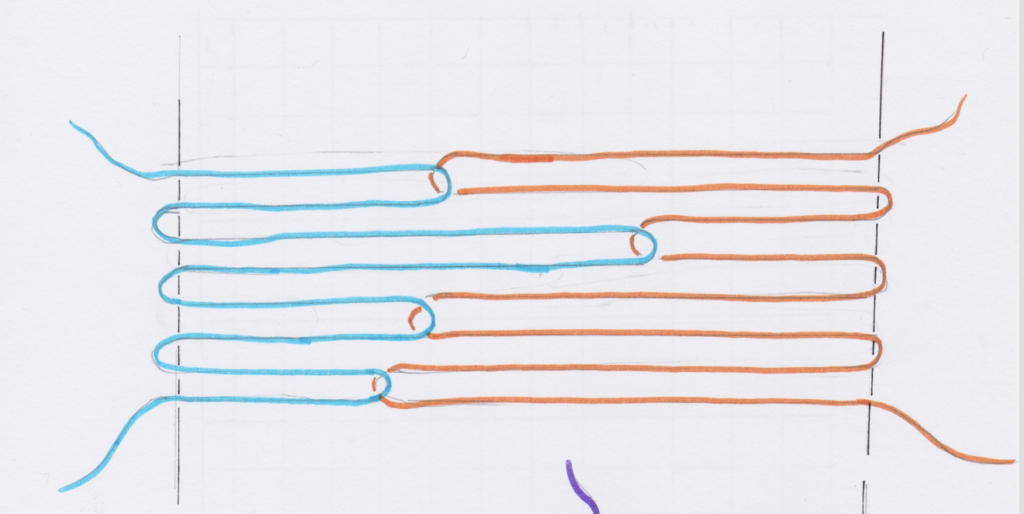
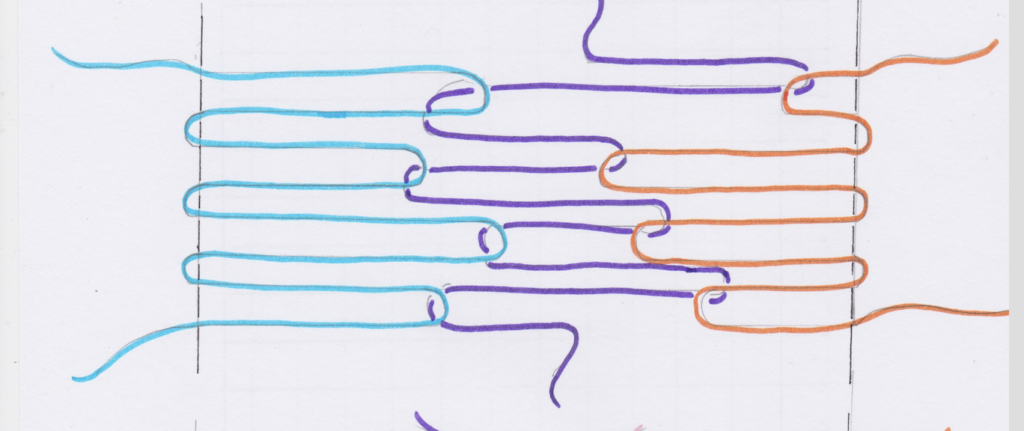
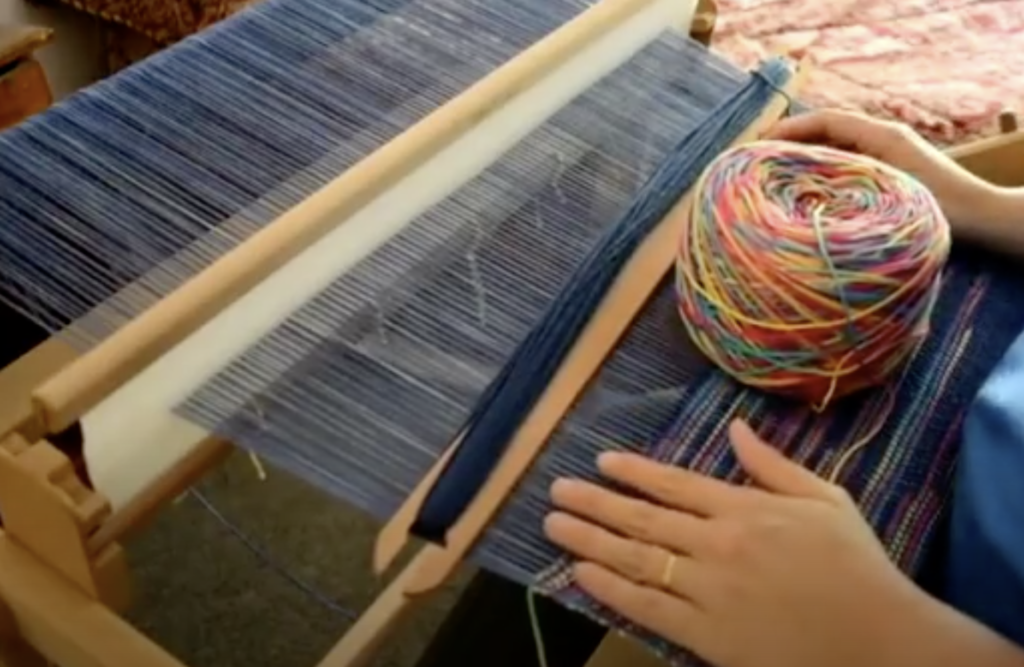
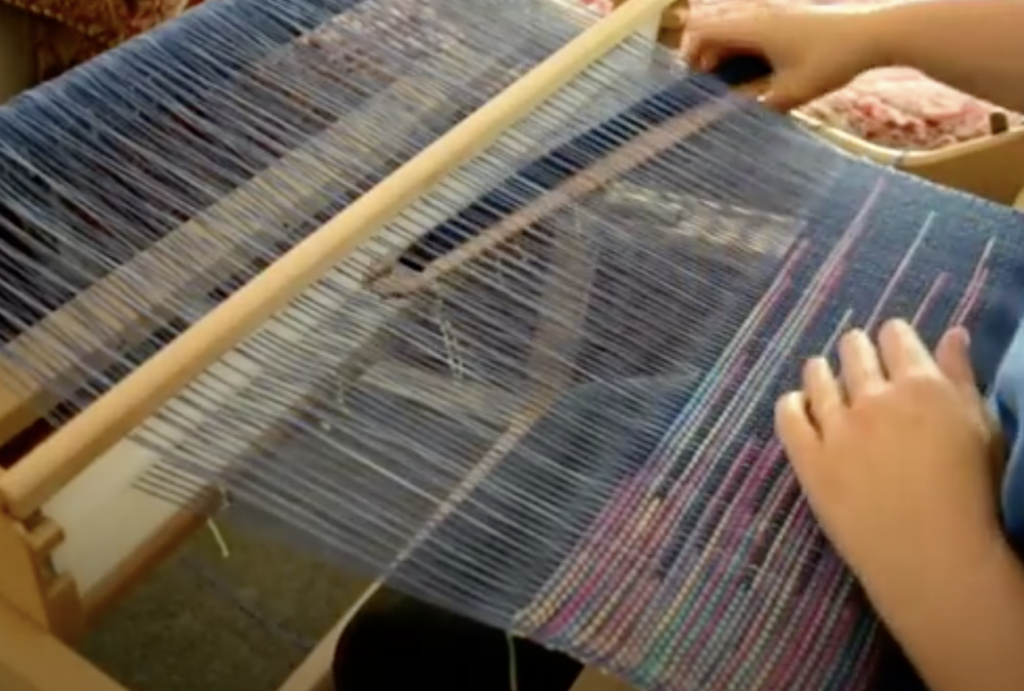
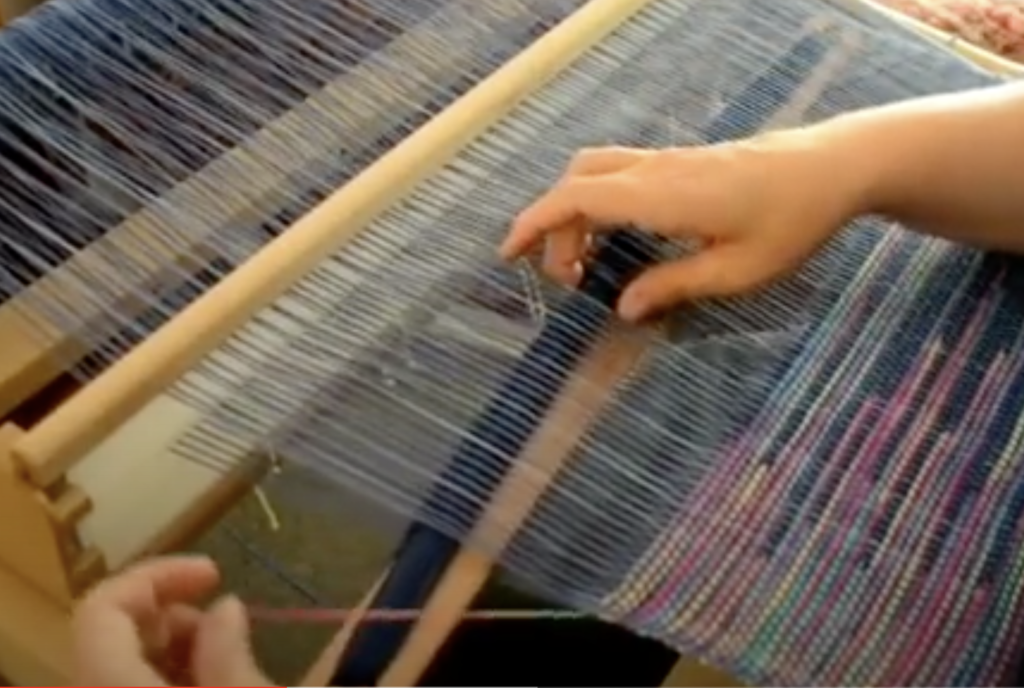
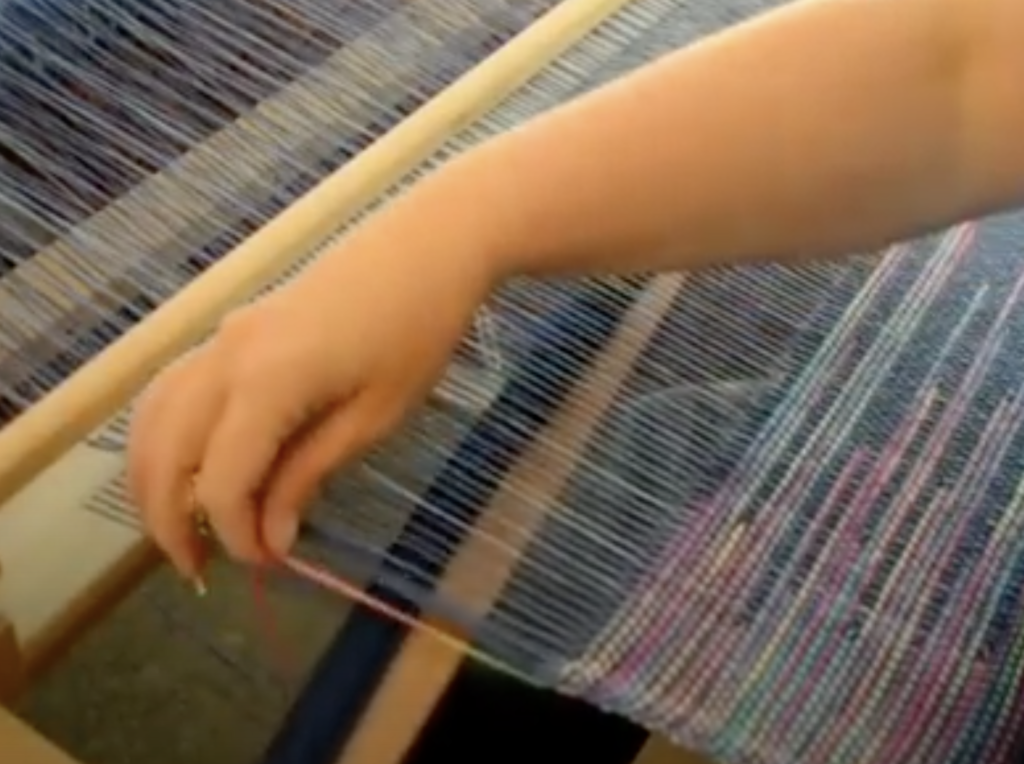
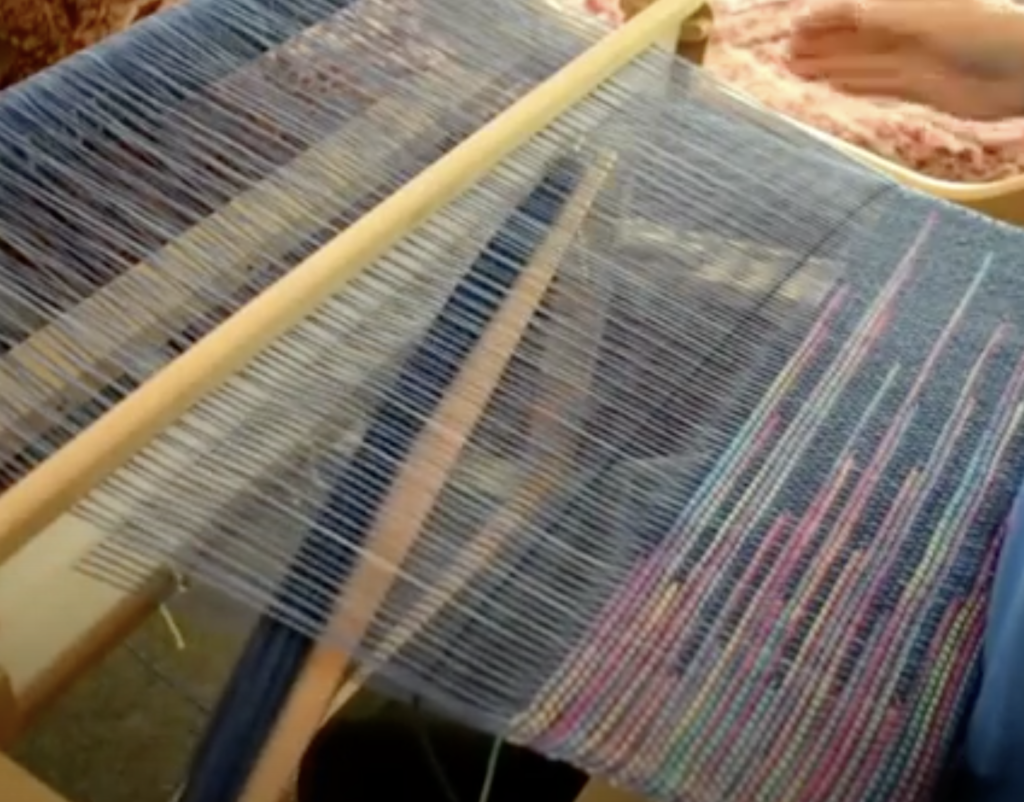
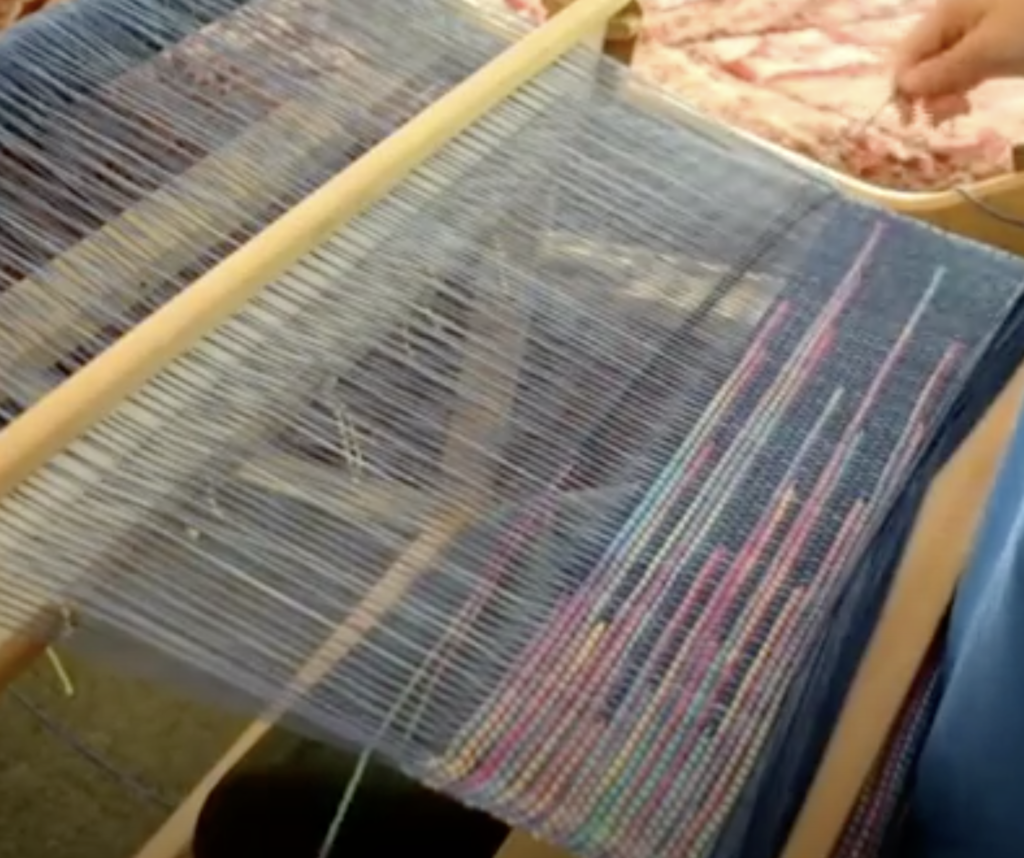
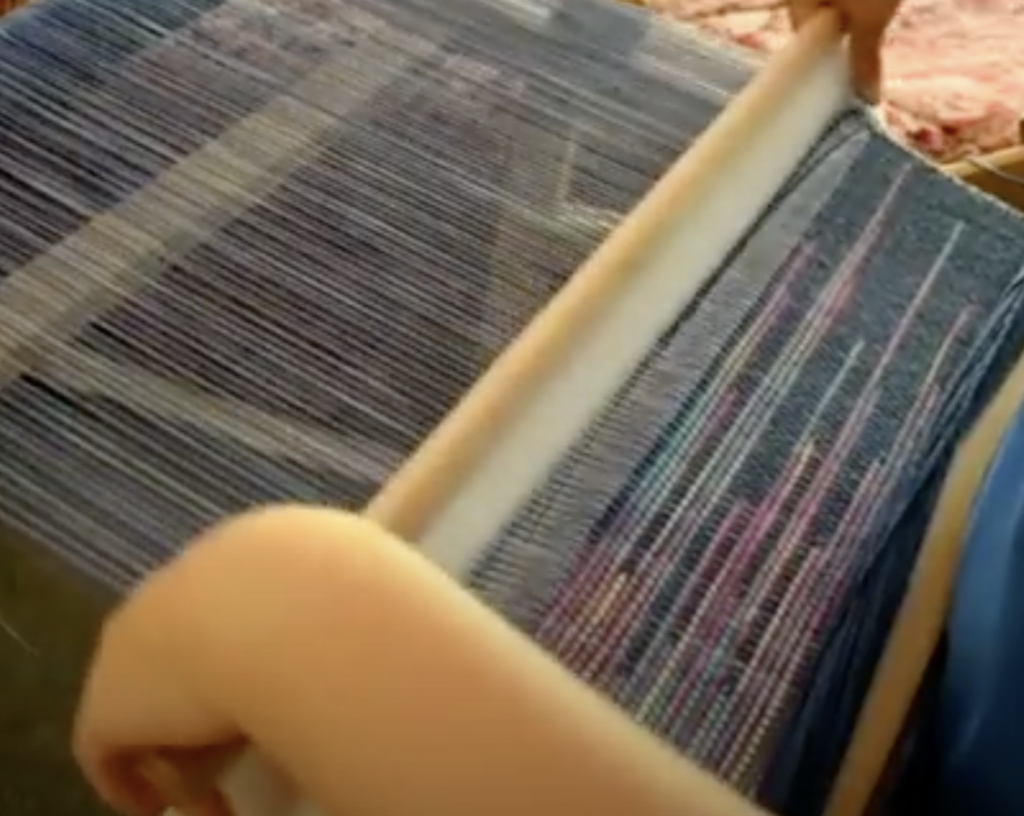
On the right hand side (where your shuttle entered), tidy up and prepare your weft yarn as though you’re going to beat the pick in. If you’re not familiar with how to do this, watch my free video on How to Weave Neat Edges.  DON’T BEAT.

Take the shuttle straight back into the same shed. Don’t change sheds, and don’t beat! Take the shuttle through, back to the right where you first entered the shed.
As you return the shuttle to the right, you will find that the navy yarn is linked or clasped with the contrast yarn. This means that the contrast yarn is pulled into the shed. Now you get to decide how far you will pull the contrast yarn into the shed. A little? A lot? Your choice, depending on the effect you want to achieve.
Hold both yarns under tension on either side to manipulate where you want the two yarns to go.
When you’re happy with the yarn positioning, beat the picks into place. You will notice that both yarns are now doubled in the shed.
Change to the next shed (in my case I had been working in the down shed, so I go on to change to the up shed).
Continue weaving in the exact same manner in the new shed and repeat until you’ve finished weaving.
Isn’t your head just swimming with all the possibilities of this wonderful technique?
Clasped weft can be extremely planned or extremely random. It looks wonderful both ways and is just so much fun to weave.
Here are a few recommendations for best results:
1. Use contrasting weft colours.
Light and dark will make the weaving pop. 
2. Use the same weight yarn for both warp and weft.
You will get better results and avoid the not so pretty lumps and bumps that can occur at interlocking points.
3. Variegated yarn is perfect for this.
For the 2 colour clasped weft technique, a variegated yarn with a contrasting yarn looks really cool! (See photos below and above).

              4. Using the same colour as the warp for one of your weft colours works great.

Too much colour can confuse the contrast of the clasped weft lines. In the tutorial, I used the same navy yarn for warp and weft no.1. I then used a contrast yarn for weft no.2.

If you like the look of clasped weft as much as I do, I have some great news for you! I have 3 free Youtube video tutorials that will teach you each of these techniques. Start with video 1 so that you can practice the technique, before moving on to the others. 

Clasped Weft with 2 colours
Clasped Weft with 3 colours
Clasped Weft with 4 colours
I mentioned that the clasped weft technique can also be used for other weave structures. This can create really interesting and impressive special effects. One of my Etsy patterns, The Cityscape Scarf is a perfect example of a clasped weft combined with a twill.
Try it out and let me know what you think. Leave me a comment here or under any of the Youtube videos, I love to hear from you!
Until next time…
Happy Weaving!

Filed Under: 4 shaft weaving, Free Pattern, Free tutorial, Inspiration, Online Weaving School, Rigid heddle weaving, Rigid Heddle Weaving Patterns, Tutorials, Weaving Tagged With: clasped weft, my youtube channel, rigid heddle weaving tutorial, weaving

10,000 subscribers giveaway!

by Kelly 161 Comments

Welcome to this very special giveaway! To celebrate 10,000 subscribers on Youtube I have the pleasure of giving away to one of you lucky people, an Ashford 40cm Rigid Heddle loom along with a one year subscription to my Online Weaving School. How exciting! 


To enter, use the Rafflecopter widget below. You can choose the number of entries you get by completing the tasks – the number you complete is up to you.

a Rafflecopter giveaway

The giveaway will be drawn on December 26th 2017. Best of luck to you!

Filed Under: Uncategorized Tagged With: giveaway, my youtube channel, rigid heddle loom, rigid heddle weaving

Log Cabin Table Runner series

by Kelly Leave a Comment


The newest series on my Weaving Lessons Channel is a beautiful table runner that utilises the log cabin technique. This is a colour and weave technique on a rigid heddle loom that looks very complicated but is all about the colour order and arrangement.

The exciting news is that this project is also my first PDF weaving pattern in my Etsy shop! Hopefully it will be the first of many patterns for me.

And if you don’t fancy a table runner, how about a gorgeous scarf? 
So many possibilities with a striking pattern and simple loom!

Filed Under: Rigid heddle weaving Tagged With: Etsy, my weaving lessons channel, my youtube channel, rigid heddle weaving, rigid heddle weaving tutorial

Houndstooth sampler placemats

by Kelly 1 Comment

I present you with the newest lesson on my Weaving Lessons channel!

I haven’t really delved into colour and weave in any previous lessons and I thought it was high time to explore these fascinating techniques with you.
Like much of rigid heddle weaving, houndstooth is deceptively simple. The weave structure is plain weave, the wow factor comes from the threading of colours. The lesson includes detailed video instructions as well as a printable PDF with extra information and calculations.
Perfect for beginner weavers and a quick project for the more experienced, I hope you can join me for this one!

Filed Under: Rigid heddle weaving Tagged With: houndstooth, my weaving lessons channel, my youtube channel, placemats, rigid heddle weaving, rigid heddle weaving tutorial

Slouchy satchel bag – new lessons

by Kelly 1 Comment

Remember that gorgeous looking warp from my last post? This is the result! The whole project was woven on the rigid heddle loom with two heddles but different techniques. The bag was woven as a tube so it’s completely seamless, and the strap was woven as double weave, providing a firm and sturdy fabric.

A lot of people have commented on the yarn, and rightly so, it is wonderful. It’s called Bloom and is available from Bendigo Woollen Mills.

If you’re interested in weaving your own bag, the lessons are available on my Weaving Lessons channel and include all the instructions you will need from materials, warping, sewing and finishing. 

I look forward to seeing you there! 

Filed Under: Uncategorized Tagged With: my weaving lessons channel, my youtube channel, rigid heddle weaving, rigid heddle weaving tutorial, weaving

Double heddle weaving

by Kelly 1 Comment

Recently on my Weaving Lessons channel, we explored some of the possibilities of weaving with two heddles on a rigid heddle loom. It’s these sort of techniques that really open up the imagination of what can be achieved on this humble loom. We covered sett, patterning, twill, double layer and tube weaving. Fascinating stuff! 

I love to polish off a series with a project or two, to enable students to see the new techniques in action and apply them practically.

I’m not telling what the project is (yet), but if this warp is anything to go by, it’s going to be a beauty! This pure new wool is “Bloom” from Bendigo Woollen Mills and is just a delight to look at, a beautiful intricacy of colours.

I’ll be back once the videos for this project are posted, stay tuned!

Filed Under: Free tutorial, Online Weaving School, Rigid heddle weaving, Rigid Heddle Weaving Patterns, Tutorials, Weaving Tagged With: my youtube channel, rigid heddle weaving, rigid heddle weaving tutorial, weaving, wool

I’m a silly sausage!

by Kelly 10 Comments

What?! 6 months since I last took the time to post here?! Outrageous!
But let me explain.

Just over a year ago I uploaded a couple of weaving videos to Youtube. I was just interested in sharing, considering I don’t actually know any real life weavers, I suppose I was welling up with excitement at all my weaving discoveries. And sharing is fun!


So, what happened? Well, very unexpectedly, the videos were well received. People started subscribing to my channel and talking about them in Facebook weaving groups. And they’re still subscribing and talking!


All of the enthusiasm and positive feedback inspired me to make more videos. The rest, as they say, is history! 


I now have two Youtube channels. One is free to watch, the other is on a paid subscription basis. I started the paid channel because many (most) of my videos take hours in the planning, filming, editing and instructing. Plus the cost of all the materials. I have made the channel affordable and aim to have a huge library of videos available to subscribers, as well as exciting projects, techniques and the occasional giveaway. It’s the place that I’m happy to give away my weaving secrets 🙂 I’m really pleased that many have joined this new channel and hope that it grows over the next year. 


Growing the dream. 
All of the above has allowed me to hope a little more that my dreams may be possible. I may eventually be able to move past the “pocket money” stage of online teaching into the “actual income” stage. I may be able to start teaching real life classes.
And ultimately, one day, I may be able to have my own teaching studio. Big ask, I know!


in 2017 I’ll be putting a lot of work into my paid channel. Doing videos for both channels this year has been rewarding in many ways, but in addition to my homeschooling commitments I have found myself a little burnt out and suffering some niggly health conditions at this end of the year. I feel I spent way too much precious time sitting at the computer! So, the paid channel will be my main focus next year. 


If you haven’t seen my channels yet, you can find the free one here and the paid channel here.

I hope you had a most blessed Christmas and a Happy New Year to you all!


I’ll try to make it here more often, really I will…


Filed Under: Uncategorized Tagged With: Catholicism, Celebrations, my youtube channel, rigid heddle weaving, weaving

Honeycomb without the calories

by Kelly 6 Comments


The title is a little misleading, I am, of course referring to the weave structure honeycomb rather than something edible. 

It is a gorgeous structure though, and one that is easy to achieve despite the fact that it looks quite involved. 

Check out my latest video series on weaving honeycomb on a rigid heddle loom.

Follow this link to the introductory video!

Filed Under: Free tutorial, Rigid heddle weaving, Rigid Heddle Weaving Patterns, Tutorials Tagged With: honeycomb, my youtube channel, rigid heddle weaving, rigid heddle weaving tutorial

  • Page 1
  • Page 2
  • Go to Next Page »

Primary Sidebar

Categories

Archives

Meta

  • Log in
  • Entries feed
  • Comments feed
  • WordPress.org

Copyright © 2025 Kelly Casanova Weaving Lessons on the Foodie Pro Theme