Painting with Yarn: Why I’m Obsessed with Inlay Weaving
Have you ever been halfway through a project and thought, “I wish I could just add a little something right here”? Maybe a splash of color, a geometric shape, or a bit of thick, cozy texture that stands out from the rest of the fabric?
If so, let me introduce you to one of my absolute favourite “secret weapons”: The Inlay Technique.
What Exactly is Inlay?
Think of inlay as “painting” while you weave. Unlike traditional patterns where the yarn goes from edge to edge (selvedge to selvedge), inlay allows you to place extra bits of yarn exactly where you want them.
The best part? It doesn’t change the structure of your cloth. Your base fabric stays strong and stable, while your “inlay” yarn sits beautifully on top, almost like it’s floating.
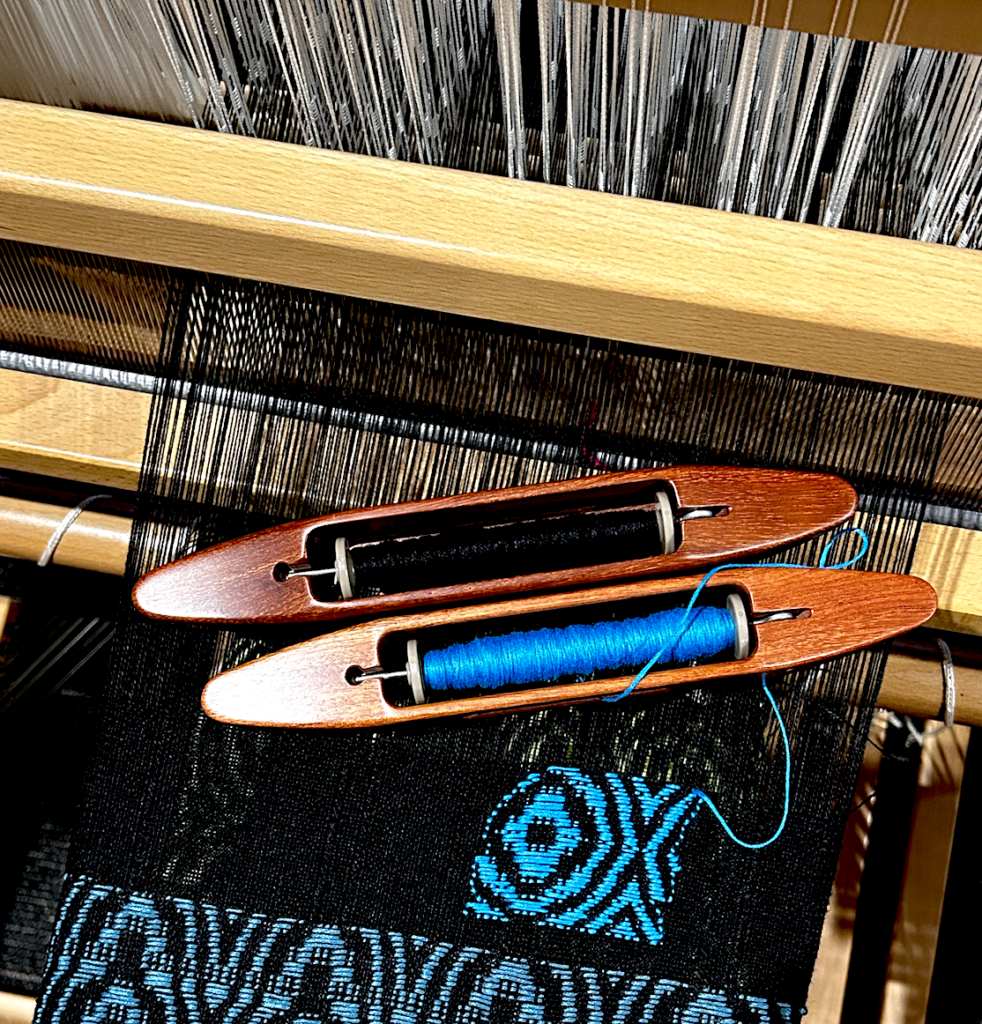
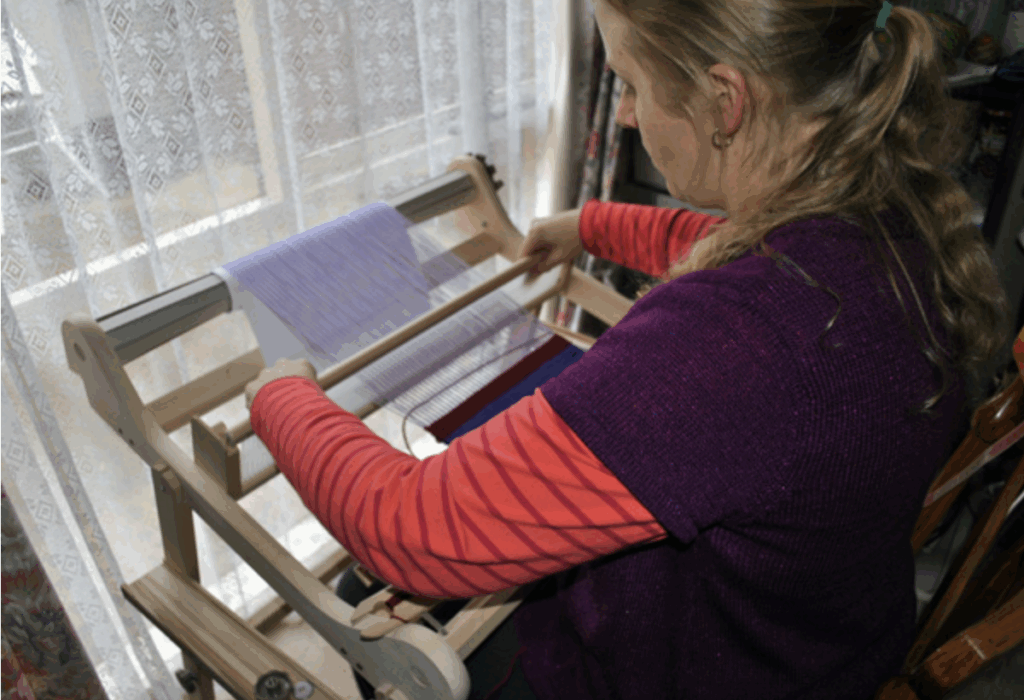
For this shawl I wove for WEFT magazine I used a variety of techniques including Brook’s Bouquet and Clasped Weft. I added in some inlay sections using Lang Yarns Mille Colour Socks and Lace Luxe yarn. You can see in the photo above that I introduced 5 balls of discontinuous weft to build the inlay sections.
How Does Inlay Work?
Typically you will have a plain weave background with a supplementary weft as the inlay. But inlay is also really fun to use in a variety of weave structures, because the same principle applies.
The inlay is created with an additional weft that can be introduced anytime, anywhere. You can explore a variety of yarns to use as your supplemental weft and you are in total control of the placement of the design.
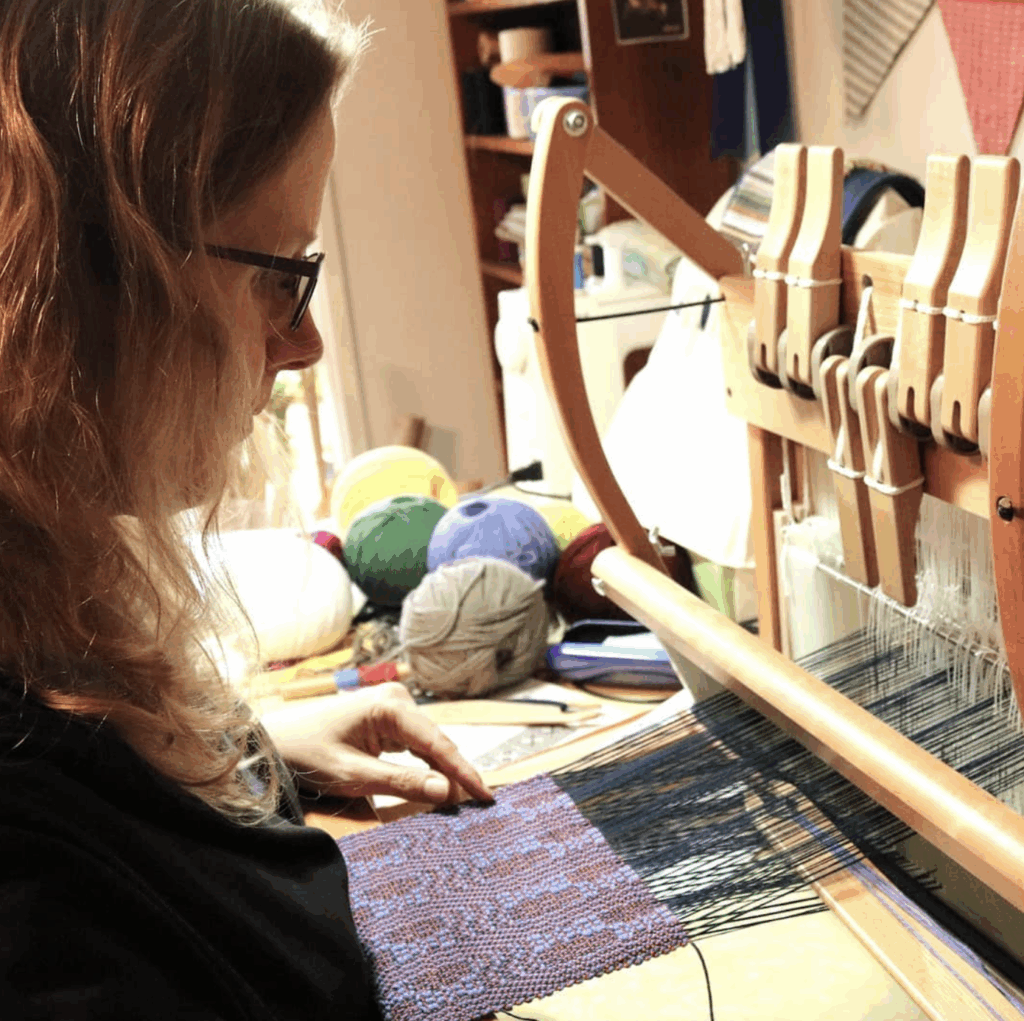
I had so much fun playing around with this sampler. The warp on my floor loom was threaded for overshot. I woven a section of tabby (plain weave, also the ground fabric) in black and then introduced my supplementary bamboo weft in blue. Rather than weave the overshot from edge to edge, I used the shuttle to move in and out of the warp in the section where I wanted the overshot “window”.
Why You’ll Love It
No Fancy Equipment: Just your regular loom, whether it’s a rigid heddle, table loom, floor loom or frame loom.
Stash Busting: It’s the perfect way to use those tiny, beautiful scraps of luxury yarn you’ve been saving.
Total Freedom: You aren’t locked into a repeating pattern. You can change your mind and add a new shape whenever the mood strikes. Plan ahead or make it up as you go along, the choice is yours!
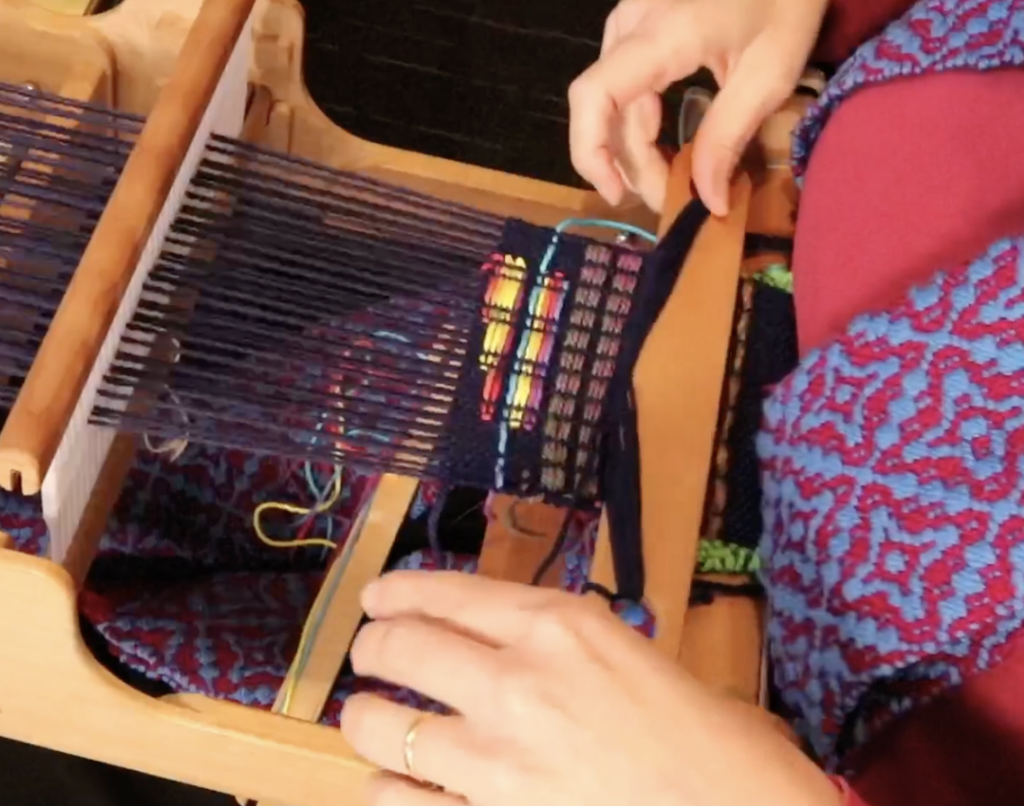
On a rigid heddle loom, you can combine pick up techniques with inlay to create colourful sections of weft or warp floats. Again, you decide on placement. By following up each inlay pick with a plain weave pick you create a stable background fabric.
A Little Tip to Get Started
When you’re choosing your inlay yarn, try something a bit thicker or more “toothy” than your background yarn. This helps the design pop and gives your finished piece that gorgeous, tactile quality that hand weaving is all about.
Inlay can also be used in a more organised fashion, like I did for The Heart Scarf. I wanted to have a plain weave border at each edge with the pick up floats pattern in the middle.
Ready to Dive Deeper into Inlay?
If you’re longing to explore inlay in more depth, I’d love to have you in my online rigid heddle inlay class! This is a member’s only class for members of the Online Weaving School.
Inlay is one of those techniques that feels like a total “lightbulb moment.” Once you try it, you’ll start seeing possibilities for it in every scarf, towel, and wall hanging you plan.
Have you tried adding extra textures to your weaving before, or is this your first time hearing about inlay? Are you eager to give it a try? I’d love to hear your thoughts in the comments!
It’s a question that pops up in my inbox so frequently: “Which table loom should I buy?“ Specifically, the debate usually centers around the Louet Jane versus the Ashford Table Loom.
Now that I have extensive experience with both – and have recently spent quite a bit of time with the Lojan Flex as well, I can finally offer a comparison. Each of these looms has a distinct “personality, and style” and the right choice really depends on your budget, your space, and to some extent, personal preference.
As a disclaimer, all comparisons and thoughts shared here are my own, based on my experience. Experiences and preferences differ, so please keep that in mind as you read 😉
The price comparisons I give are relevant to the time this article was written and are subject to change. All pricing given is in USD and sourced from The Woolery and Revolution Fibers.
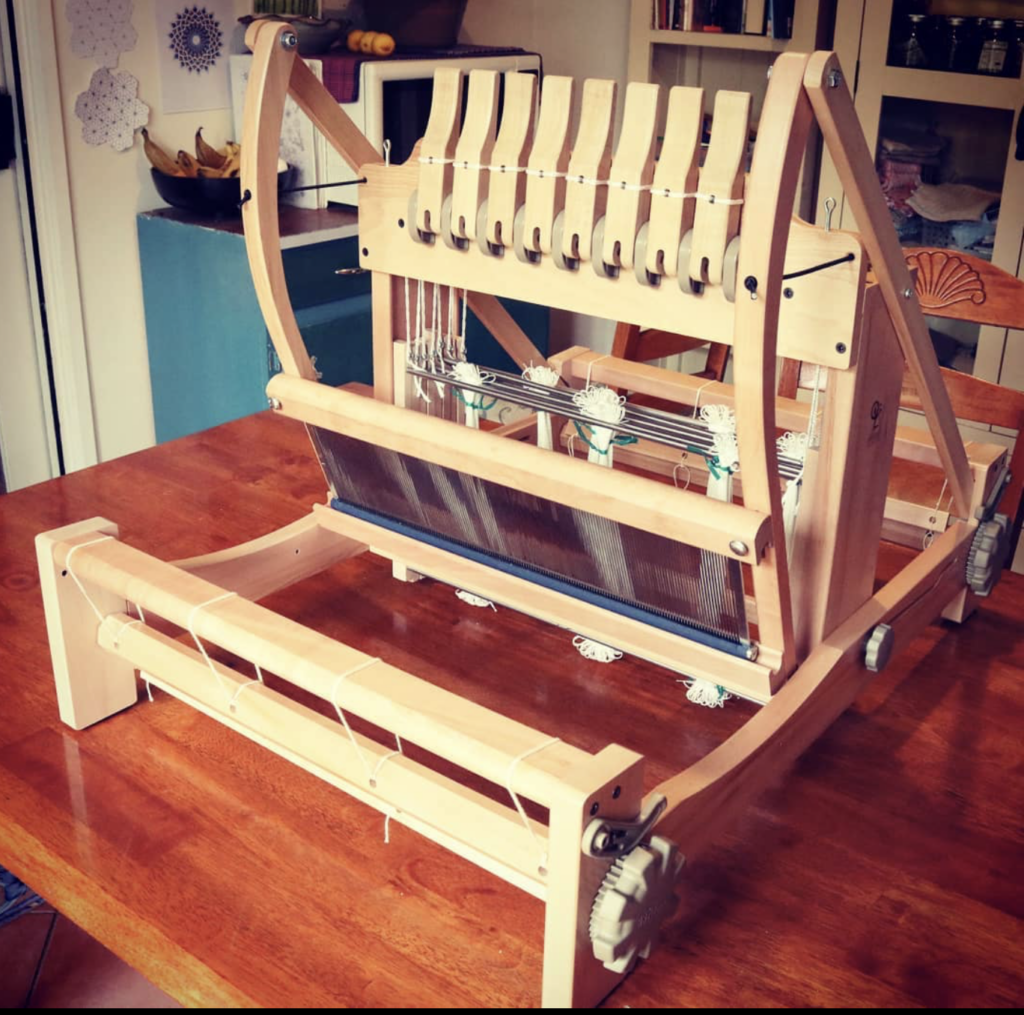
1. The Louet Jane (16 Shaft, 90cm)
The Jane is often considered the “luxury vehicle” of table looms. It is a workhorse designed for weavers who want floor-loom capabilities in a smaller footprint.
When my very first Jane arrived and I began the assembly process, it all felt so very familiar. Louet looms are made and designed with a distinct look and feel, and as I have owned a Louet David Floor loom for many years, I already felt that I knew the Jane table loom to some extent.
Louet looms have a smooth and shiny finish, are sleek and beautiful to look at.
Pros:
Exceptional Sturdiness: This loom feels incredibly solid. There is very little “give” when you are weaving, which translates to high-quality cloth.
High Tension: If you like to weave with a firm warp, the Jane handles it beautifully without any bowing or straining.
Floor Loom Vibes: I bought the floor stand with my 90cm Jane, as it’s a large loom and I didn’t want to have to weave standing. Using it on the stand really feels similar to using a floor loom, without the treadles.
Cons:
The Price Tag: This is a significant investment. It is comfortably the most expensive option of the three.
Threading Ergonomics: Because the 16-shaft model is quite deep, you are reaching back a fair distance to thread. When mounted on a stand, finding the right “sweet spot” for height can be a bit of a challenge for your back.
Lever Feel: While the levers are functional, they feel a bit different than the Ashford style; it’s a matter of personal preference, but they take some getting used to.
No Treadle Kit: If you don’t like using levers to operate your shafts, this may not be the loom for you. There is no treadle kit available.
The Ashford is perhaps one of the best known and used table looms in the world. It is the loom many of us learned on (myself included), and for good reason.
Pros:
The Lever System: In my opinion, Ashford has nailed the lever setup. They are intuitive, smooth, and easy to use.
Value for Money: The lower cost point makes this a more accessible table loom for beginners. You get a lot of loom function for a lower price point.
Lightweight: It’s easy to move around the house or take to a guild meeting (depending on size)
Treadle Kit: There is a treadle kit available for some Ashford table looms. You do need to have your loom on a stand to use treadles, and you can only attach 4 treadles, even if it’s an 8 shaft loom.
Cons:
Structural Flex: The Ashford looms are generally more lightweight. Under high tension, I’ve experienced the back apron rod bending, which can be a bit frustrating.
Tension Limits: It simply won’t hold the “rock-hard” tension that some other table looms can, which might limit you if you like to weave with really optimal tension.
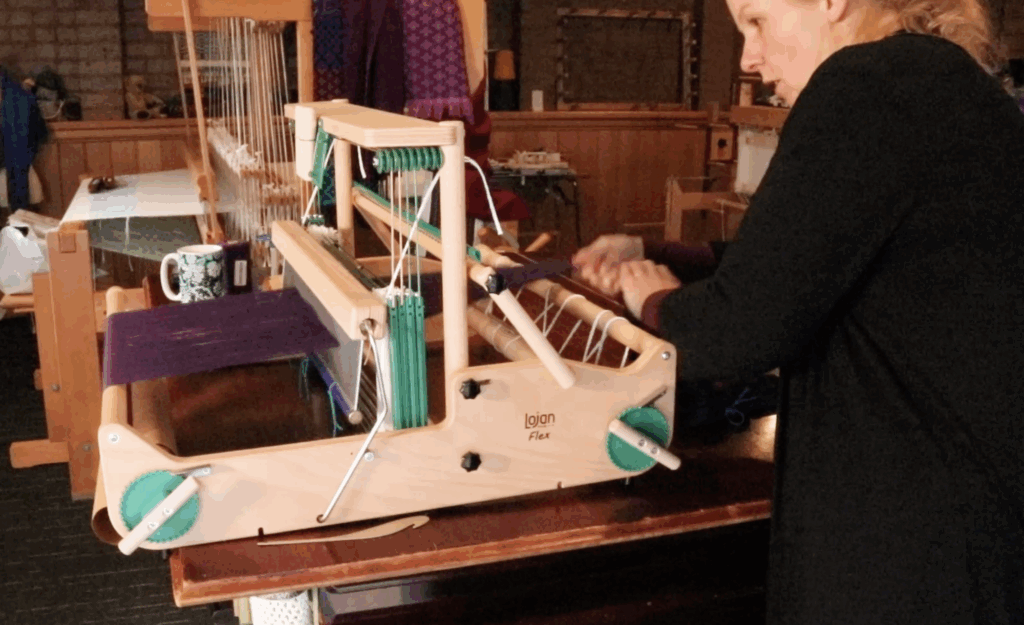
The “new kid on the block” is the Lojan Flex. This is a unique hybrid loom: you can start with a rigid heddle loom and add a shaft conversion kit. Or, if the rigid heddle aspect doesn’t interest you, the Flex can be purchased fitted with 4 – 8 shafts (known as the Flex Shaft Loom.)
Pros:
Ultimate Versatility: It’s the best of both worlds. You can swap back to rigid heddle weaving whenever you like.
Superb Comfort: This is surprisingly one of the most comfortable looms I’ve ever used as a table loom. When it’s on the floor stand, the levers and the weaving area feel very close to your body, so you avoid unnecessary reaching or stretching.
Easy Threading: Because the loom is compact, you aren’t reaching deep into a “castle” to find your heddles. It’s very easy on the eyes and back.
Shaft Upgrades: This is a very adaptable loom. Whether you start out using it as a rigid heddle loom or not, you still have the ability to upgrade from 4 shafts to 8 by adding an extra shaft kit.
Tension: The Flex holds excellent tension.
Cons:
The Beater: Unlike the other two table looms already mentioned, the Lojan Flex Shaft Loom doesn’t have a full beater frame. The beater bar is a bit thick to grip, and because it’s so light, it can feel a little “flimsy” compared to the more traditional overhead or underslung beaters on the Louet or Ashford. This is literally the only thing I don’t love about this loom.
Limited Weaving width: Currently this loom is only available in 30cm and 50cm weaving widths. Lojan is an innovative company but they are also relatively new, so I wouldn’t be at all surprised if they bring one wider widths in the future, as they continue to expand.
Choosing a loom is a very personal decision, but here is my “quick guide” to help you decide:
If you…
Then go for…
Want great tension and a premium, floor loom feel?
Louet Jane
Are on a budget but want a reliable, classic multi-shaft experience?
Ashford
Want versatility, portability, comfort, and the ability to switch to rigid heddle?
Lojan Flex
I haven’t specifically covered shafts and how many are available with each of these looms, because there are many options. Your choice of shafts is going to depend on what you want to weave. Try to consider the kind of weaving that appeals to you currently, but with the understanding that this may grow and change over time.
If you are just starting out in Table Loom Weaving, I recommend you take my beginner’s course. It covers everything you need to know and can be used with any table loom.
Choosing between a table loom and a floor loom is one of the biggest decisions a weaver can make. While both allow you to weave intricate multi-shaft weave structures, the way you achieve that – using hand-operated levers versus foot-operated treadles can completely change the weaving experience.
In my latest video, Levers vs. Treadles (Free Pattern Included!), I break down the physical differences, pros and cons, and the rhythm of each setup. I also use the free weaving draft included in this article (scroll to the bottom for your free copy 😉) and show you how I would approach the tie up for both levers and treadles.
The Table Loom Experience: Weaving with Levers
Table looms are often the entry point for multi-shaft weaving and this was certainly the case for me. Instead of using your feet, you use hand-operated levers (usually located on the side or the top of the castle) to lift your shafts.
The Pros:
Portability: These looms are frequently much smaller, lighter and can be moved easily, making them perfect for workshops. Most table looms have a foldable castle.
Ease of Setup: There is no “tie-up” process, because basically, the shafts are permanently tied up. If you want shaft 1 and 3 to go up, you just flip levers 1 and 3.
Visual Learning: It’s very easy to see exactly which shafts are raised, which is great for beginners learning to read drafts.
The Cons:
Slower Speed: Every time you throw the boat shuttle, you have to take your hand off it to flip the levers. This breaks your weaving rhythm. It also means frequently putting the boat shuttle down to free up your extra hand.
Physical Strain: Using your arms and shoulders to lift shafts for hours can lead to fatigue more quickly than using your legs. This can depend on the size of your table loom and how you have it set up.
The Floor Loom Experience: Rhythm with Treadles
Floor looms are designed for production and ergonomic flow. By moving the shaft control to your feet, your hands are free to focus entirely on throwing and catching the shuttle.
The Pros:
Speed and Rhythm: Once you get into a “dance” with your treadles, the weaving goes significantly faster.
Ergonomics: Pushing down with your legs is generally less tiring than lifting levers with your arms, allowing for longer weaving sessions. Using your whole body to weave can feel very balanced.
Complexity Made Easy: While the tie-up takes time at the start, once it’s done, a single foot press can lift (or lower, depending on your loom type) multiple shafts at once.
The Cons:
Space: They require a dedicated space in your home.
The Tie-up: Crawling under the loom to tie treadles to shafts can be a bit of a workout! If you have back issues, the less time you spend hunched on the floor, the better!
Which Should You Choose?
If you are short on space or want a loom you can take to guild meetings, the Table Loom is a fantastic tool. However, if you find yourself wanting to weave long projects (like yardage for clothing or multiple towels) or if you want to find a faster “flow,” the Floor Loom is the way to go.
Tips For Weaving with Levers
I always recommend to purchase a stand with your table loom. Although it’s an extra expense, it is worth the investment long term.
Weaving with your table loom on a stand allows you to get very close to the loom and levers, providing a greater level of comfort and less arm/shoulder/neck fatigue. You can usually adjust the height of the stand too (or use a height adjustable chair) to get the perfect height for you.
You can speed up your weaving process a little by flipping more than one lever at a time. Once you get used to it, you will find yourself doing this naturally.
Using a table loom with levers means you don’t have to be “treadle conservative”. Your levers are not limited to a specific tie up like treadles are, so pattern explorations are much more possible.
Tips for Weaving with Treadles
Opt for “light treadling” when you can. What this means is try not to tie too many shafts up to any one treadle, as this will make the treadling heavy and hard on your back.
If you find the number of treadles on your loom (or lack thereof) a bit limiting, try a skeleton tie up or use a treadle reducer. This can expand the kind of patterning you can achieve.
For some types of looms (like a countermarch) the tie up can be quite cumbersome and difficult. To avoid time spent cramped on the floor inside your loom, look into options like the Top of the Lamms method. Also put a lot of thought into the type of floor loom that will work for you prior to purchasing. You may want to look at the “not time spent on the floor” looms like the Louet Megado Dobby (my dream loom!)
Download Your Free Weaving Draft!
To help you practice on either setup, I’m sharing one of my favourite weaving drafts. This is a versatile 4-shaft M & W Twill that works beautifully whether you are flipping levers or stepping on treadles.
Think about it. As weavers we often make a substantial investment in our weaving loom and tools. But there is more to just assembling a loom and then using it indefinitely.
It’s easy to forget, because our looms are such steady workhorses. For the most part hey just do their job… until suddenly something squeaks, sticks, loosens, dare I say it – breaks or behaves in a way that leaves us frustrated.
A tiny bit of regular care and thoughtful use not only helps your loom last for decades and in many cases, into the next generation, it gives you a smoother, more enjoyable weaving experience. And honestly, it feels good to honour and value the tools that help us create beauty.
This is your gentle reminder: your loom might need a little attention. Let’s walk through what that looks like.
Why Loom Care Matters
The majority of commercially available weaving looms these days are still constructed from some kind of wood. Wood responds to its environment. Metal gathers oils from our hands. Lint builds up in surprising places. Over time, even the best-made looms can show signs of wear, not because they’re poorly made, but because we use them a lot.
Regular care:
prevents small issues from becoming big ones
keeps your weaving experience smoother and more consistent
ensures your loom ages gracefully
saves you money on repairs and replacements
A Simple Frequent Care Routine (Just 5 – 10 Minutes)
You don’t need a whole afternoon. Five minutes at the end of a weaving session or at the start of the weekend makes a big difference.
Here’s a quick routine to try:
1. End of project clean routine
At the end of a project is a perfect time to do a little loom maintenance. A lot of fibres can be displaced when weaving and most of them will end up on the loom, stuck in the reed, or on the floor. Tiny pieces of cut yarn will end up in the most interesting places!
A quick vacuum goes a long way to resetting your work space and cleaning your loom. Use a soft or brush attachment to avoid any damage to your loom.
Then I like to wipe down the loom itself. A very slightly damp, clean cloth is enough for everyday care. Don’t use any cleaning chemicals on the wood of your loom, it’s not necessary and may corrupt the integrity of any finish used on the loom.
2. Clear out heddles and the reed
Lint and tiny fiber fragments love to hide in here. A quick sweep with a clean cloth or soft brush is generally enough to displace anything left behind.
3. Check for loose screws or bolts
If any loom parts have loosened, you will generally feel that when you’re actually weaving and may want to deal with it there and then. Looms naturally loosen over time with movement and vibration. A simple tighten keeps everything feeling solid – that goes for your stands too!
4. Care of metal parts
This is very loom dependent, but in thinking of my Louet David floor loom, I very frequently treat the sliding beater rods, as they become stiff with use. I use a non silicon lubricant spray and a clean cloth. Spray the cloth (not the rods) and rub the rods in a back and forth motion, all over.
You don’t even need to remove the beater to do this if you don’t want to. Just slide the beater back, rub the front parts of the rods, then slide the beater forward and rub the back parts. You will be amazed at the difference this can make.
This can be a useful tip for an overhung beater that feels a little stiff or has started to squeak. You shouldn’t need to treat them every time you weave, just occasionally and if you feel it’s needed.
Look out for rust. This is a tell tale sign that your loom room is moist and you may need to do something about it. If you have every purchased a floor or table loom used and it has a chequered past, you probably have experience with rusty reeds!
A rusty reed can be so difficult to clean that many weavers will opt to replace it with a new one. While effective, this is expensive, so it makes sense to care for your reeds!
5. Take a moment to inspect the loom components
Are cords, apron rods, ties, and brakes looking healthy? Small wear-and-tear is easier to catch early. If your loom has some plastic components, these will usually show more wear than metal.
For example, Ashford rigid heddle looms have plastic ties on the apron rods. While my 24″ Ashford rigid heddle is still going strong after 12+ years of use, I have heard of these rod ties breaking for some weavers.
Likewise, the plastic “holes and slots” component of the rigid heddle can break (this has never happened to me). Typically, you can avoid these breakages with proper use and care, some of which I will go over in a later part of this article.
Taking this time for small inspections keeps you in touch with your loom and can catch little problems before they bite.
Common Problems and What They Usually Mean
Here are a few symptoms you might recognise:
“My loom squeaks!”
This can point to dry joints or parts that needs a light oiling. Depending on where the squeaking is coming from, it may be a simple matter of loosening, then tightening some nuts and bolts – try that first!
“I can’t achieve decent tension.”
Look at your brake, apron cords, and the integrity of your rods and ties. Make sure shafts are hanging properly and not sticking on each other as they are raised and lowered. Has any of your hardware come loose? Particularly check your wheels and cogs that operate the tension on the front and back beam of the loom.
Also, ensure that your loom parts are correctly placed and that when warping you took your front and back apron rods OVER the cloth and breast beam. This is a very common error!
“My heddles/shafts feel sticky.”
Dust, oils, humidity, or the beginnings of rust can cause drag. A good clean usually fixes it.
“My reed is grabbing the threads.”
Often caused by lint build-up. Occasionally by tiny rust spots or other roughness in the metal if it’s an older reed that has not been cared for. Clean the reed (can be as simple as running a light, thin piece of clean cloth horizontally and vertically in the dents, or spaces in the reed.
Planning your loom room or creative space
If you are looking at getting a loom for the first time, you have the advantage of deciding where it will be placed and kept for you to work at.
If you have such a space available, try to ensure that the room is not moist, prone to leaks or flooding and that your loom is not going to sit in direct sunlight permanently.
All of these things will cause potential damage to a loom. I even heard a story of a weaver who kept her floor loom in an upstairs room near a large window. One day when she went into the room for a weaving session, she found that a large part of her loom had been badly scorched.
The sun through the window onto the loom was an oversight that could have caused the loss of their entire home if it had actually caught on fire, which it very nearly did!
I have also heard of weavers who have dealt with flooded studios or creative spaces, usually following an extreme weather event. This is a sad occasion, as often looms are destroyed by flood waters. When exposed to water for a period of time, wood will swell, warp and potentially crack and pry apart at the joints.
Depending on the severity, some looms can be saved and restored, others are destroyed beyond repair. So, if you’re considering making a loom room out of your basement, consider that it may not be flood proof!
Storing Your Loom Properly
There are many reasons why weavers may have to store a loom for a period of time. Good storage is part of good care. Here are a few simple tips:
Keep the loom out of direct sunlight.
Avoid highly humid or very dry environments.
Cover it with a cloth or sheet when not in use to keep dust away.
Avoid storing a warp under tension for long periods.
Don’t store in an area prone to leakages or flooding
Check your loom regularly. This is especially important to ensure there is no wood borer infestation. Wood borers love damp and dark conditions.
Different Loom Types, Different Needs
While the basics are true for all looms, here are a few quick notes:
Rigid heddle looms: Go easy on your loom! Rigid heddle looms are not designed to weave under super high tension. They typically include a number of plastic components. These pieces are strong but not invincible.
Relax the tension on your warp in between weaving sessions. This is kind to the loom and the warp.
Be careful when threading, particularly the closer sett heddles. A 15″ heddle needs more care when threading as the plastic is thinner and more vulnerable.
Don’t leave your rigid heddles in the sun or near any heat source – the heddle can melt or be compromised and become brittle.
Jack looms: Extra attention to moving parts, brake systems, and treadle cords is helpful.
Counterbalance + countermarche: More moving parts = more spots for dust. Clean regularly.
There are typically a lot of tie up cords at the top and bottom lamms that may wear over time.
Inkle looms: Check for splinters on ends of pegs and keep tensioning mechanisms smooth.
Occasionally tensioning knobs or bolts may need replacing, as they can become bent out of shape from holding the warp under high tension.
Table looms: Dust settles everywhere – keep it covered when possible. The tie up cords do a lot of work raising and lowering shafts and may need replacing occasionally.
Go easy on the levers – try not to let them drop without control, lower them gently. If you find it difficult to raise the shafts, your cord length may need adjusting.
Some table looms have a back apron rod made of wood rather than a metal rod. I have found with the Ashford table looms, this rod can bow significantly when warped and under tension. While I’ve never had a wooden rod break, a metal rod can be preferable to use.
To Finish or not to Finish?
I started to write about all the pros and cons of purchasing either a lacquered/varnished loom as opposed to an unfinished one. I realised very quickly that this article would be way too long if I included that section, so it has become it’s own independent article, which you can read here.
A Moment of Appreciation
There’s something beautiful about caring for the tools that help us create.
It’s a practice of stewardship, gratitude, and truly valuing your possessions.
A well cared for loom will not only give you many years of weaving happiness, it can even become a useful family heirloom that passes the gift of weaving onto the next generation.
I am often asked what weaving looms I use in my studio, and admittedly my collection continues to grow! From smaller and portable rigid heddle looms to larger floor looms, each one has its own role in my weaving journey.
Many looms have come into my possession through having a Youtube channel and Online Weaving School. For my students and followers I try to make resources for a wide variety of looms, skill levels and budgets.
In this post, I’ll give you a peek at my weaving loom collection, what I typically use it for, and where you can learn more about them. I’ll also include links to resources and tutorials so you can explore these looms for yourself.
Starting with the Little Guys
Some of these weaving looms are actually toy looms, but I get a real thrill out of showing people what can be done on a small, economical loom.
Finlandia Berga Savonia 10 Shaft 150cm Countermarch Floor Loom (This vintage loom is no longer manufactured but you can check out my review here).
Further Resources
As a weaver and online creator for 10 years I have a multitude of resources for anyone interested in getting started in weaving. Or perhaps you’re already weaving but looking to learn more?
This website you’re on right now is the perfect place to start. Use the toolbar in the top right corner to search what you’re looking for and be prepared to go deep down the rabbit hole! 🐰
The Online Weaving School is my best resource for weavers. I’ve put countless hours into classes for inkle, rigid heddle, table loom and floor loom weaving. No matter what skill level you are currently at, there will be a class to suit you!
But today I will list my beginner classes, as that is where most students tend to start:
If you’re shopping for a weaver this Christmas, you may be wondering what to get them. Weaving is such a creative and rewarding hobby, and there are so many tools and goodies that make thoughtful presents!
Whether you’re buying for a beginner who is interested in getting started in weaving or a seasoned weaver who seems to have everything, this guide will help you find the perfect gift.
Here are 10 Perfect Christmas Gift Ideas for Weavers that range from practical tools to fun little luxuries.
1. Beautiful Shuttles
Every weaver needs shuttles – and it’s super handy to have extras.
Stick shuttles are affordable, easy to load with yarn and effective to weave with. I recommend getting stick shuttles that are already lacquered, unless you plan to lacquer them yourself. Lacquered shuttles glide beautifully through the warp without resistance.
Handmade wooden boat shuttles are not only functional but can also be a work of art. Look for shuttles in unique woods, ergonomic design and skilled craftsmanship for a truly special gift.
Weavers love yarn (you can’t really go wrong here). Hand dyed yarn is something special, created by artisans with love and care. Perhaps the weaver in your life is interested in learning to dye yarn at home for their own unique weaving projects.
Yarn dye kits are available to enable beginners to dyeing to get started without having to source all the ingredients themselves. For those interested in natural dyeing, a gift voucher for an online class would be a perfect gift.
Pick up sticks – Pick up sticks are a low cost way for a weaver to up their weaving game. A pick up stick allows the weaver to “pick up” warp threads in order to create additional sheds and varied patterns without the additional cost of new heddles.
4. Handy Weaving Tools
Small tools make perfect stocking stuffers and are great lower cost gifts. Think: weaving combs, beaters, threading hooks, tapestry needles, or a good pair of small scissors. Tools in brass, wood, or other special finishes are extra thoughtful.
Here are some of my favourite handy tools that are in constant use in my studio:
Bent tip tapestry needle – wonderful for weaving in tails off the loom, hemstitching, hand seaming and embroidery on the loom.
Double ended threading hook– I love these hooks so much because they sit flat, they are flexible, easy to store, affordable and they are two tools in one!
Dressmakers shears– Sharp scissors are an essential for weavers. What I love about dressmakers shears is they are nice and long for cutting warps off the loom and also indispensable for weavers who love to cut and sew with their handwoven fabric.
5. Inspiring Books
There are so many wonderful weaving books available! A weaving book can spark fresh ideas, keep creativity flowing and teach brand new techniques.
Books play a huge role in my own creative life – ok, confession time, I’m a little addicted to books! They are such a wonderful way to learn and inspire, and they align perfectly with my learning style.
The gift of learning never goes out of style! An online weaving course or membership (like my Premium Level Membership) makes a thoughtful present for a weaver who loves to expand their skills.
Over at the Online Weaving School you will find a huge array of weaving classes for a variety of weaving disciplines and levels.
Students can learn in their own time and in the comfort of their own home – no commuting long distances for expensive in person classes. They also receive one on one support when needed.
Gift vouchers are available, so consider giving the precious gift of learning to a weaver today!
If you have noticed that the weaver in your life has a collection of heddles with nowhere to keep them when not in use, a heddle rack could be the perfect solution. Or, if you’re handy with woodworking, you could follow these simple plans to make one.
With trends in home organisation being a very popular topic these days, it is easy to find all kinds of storage solutions for weavers. For more ideas, check out this detailed resource.
8. Finishing and Yarn Tools
Fringe twisters, Strucket for easy wet finishing and draining, or a basic sewing machine are practical gifts that make projects look polished and professional. These are the kinds of things many weavers don’t necessarily buy for themselves but are thrilled to receive.
To help your weaver become really proficient with yarn, here are two super helpful tools that can work together or individually:
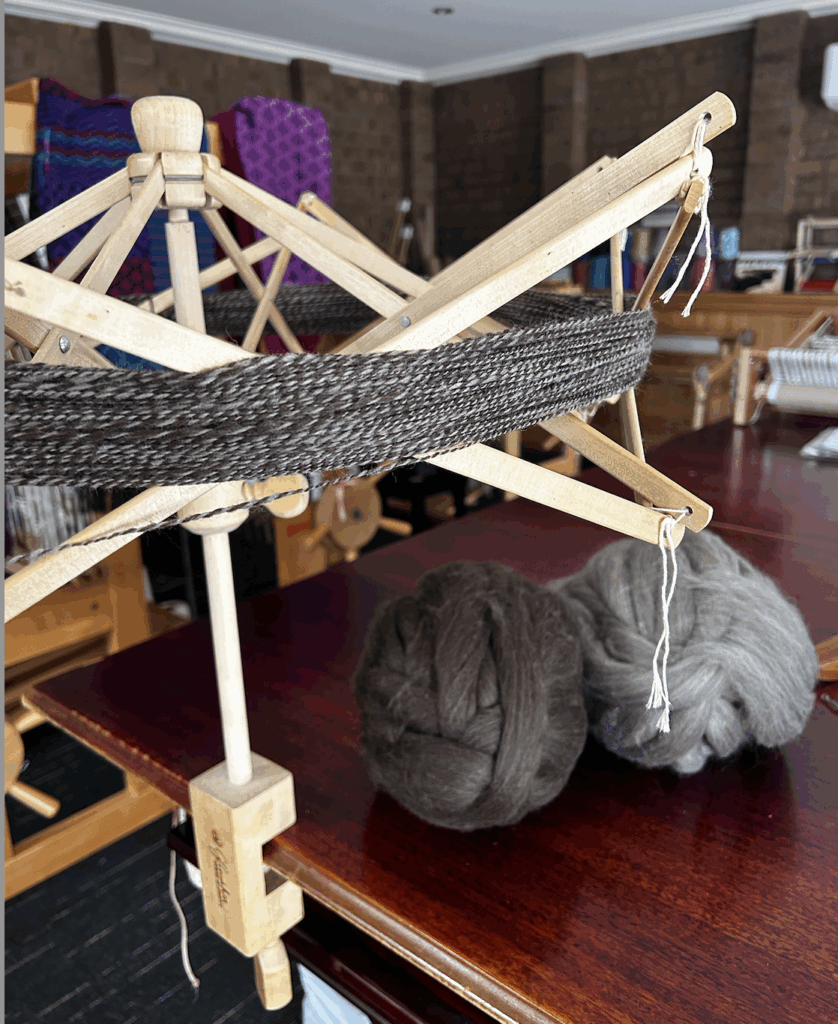
Yarn Swift – If you have hanks or skeins of yarn rather than a ball or cake you will need to prepare it before weaving with it. Placing the skein on a yarn swift holds it in place for you and turns as you wind your ball. I have a Glimakra swift but they are harder to find these days. This one looks like a good alternative.
Ball Winder– You can thread your yarn from the yarn swift directly to the ball winder to make a yarn ball or cake. As you turn the handle of the ball winder, the swift also turns, feeding the yarn off so that the two tools work together seamlessly. I use my ball winder a LOT in my studio!
Little looms provide a lot of relaxing fun for the weaver and are usually much more affordable than a larger or more complicated loom.
The Zoom Loom is a type of pin loom by the Schacht company that allows you to weave small squares. You can keep it simple with plain weave or get more invested with patterning. The squares can be used for a huge variety of projects when sewn together to create larger pieces of fabric. I actually just purchased a Zoom Loom for myself, I’m having fun weaving squares and exploring patterning possibilities 😌
If you are interested in doing some more research on weaving in small spaces, check out this resource.
10. A New Loom or Gift Card
If you’re looking for a big-ticket present, you can’t go past a new loom! A rigid heddle loom, a table loom, or even a floor loom will make their Christmas unforgettable. For those hard-to-shop-for weavers, a gift card or certificate from their favourite weaving supplier is always a safe bet.
🎁 Final Tip: If you’re a weaver yourself, don’t forget to share this list with family and friends so they know exactly what’s on your wish list this year!
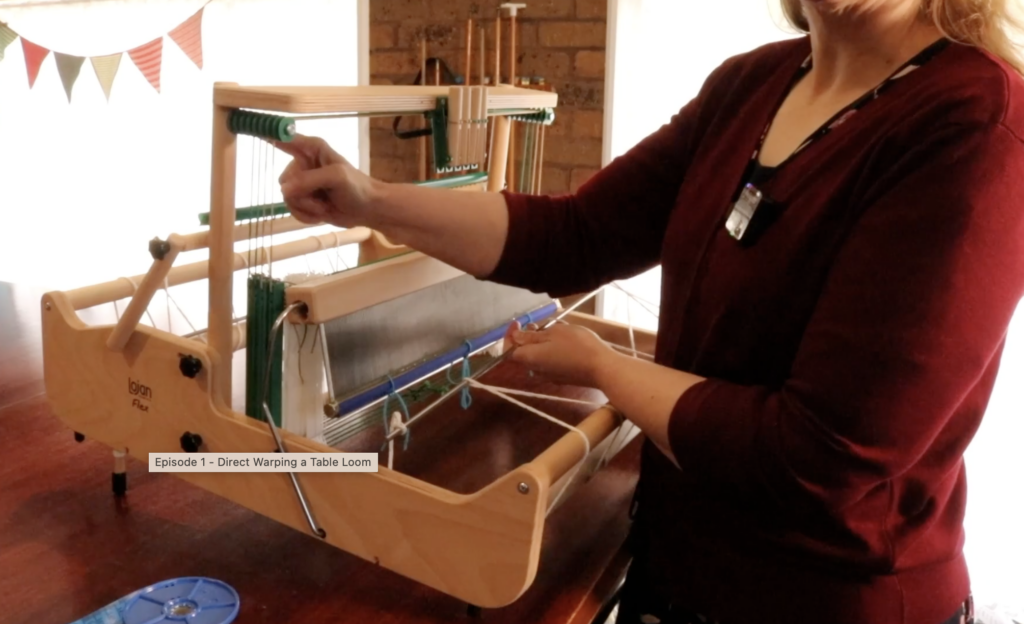
I often have students ask “can you direct warp a table loom?” and my answer was always “yes, but I haven’t tried it”. Well, that has changed because I just direct warped my table loom for the first time!
Traditional Table Loom Warping
The usual way to warp a table loom is to make your warp on a warping board, remove it and space it in a raddle and then take it to your loom and roll your warp on, then thread the heddles, sley the reed, tie on and then you finally get to weave! 😆
If you are brand new to table loom weaving, this is a more advanced method. I recommend that you start with my online course, Weaving on a Table Loom.
Direct Warping
One thing I really enjoy about rigid heddle weaving is the ability to use a warping peg/s to direct warp. This means that the warp is made on the loom without additional exterior tools or actions. It’s super fast and fairly simple once you have some practice.
So I decided it was time to experiment by trying a direct warp on a table loom for myself. I had just assembled the new Flex Conversion Kit to my Flex Rigid Heddle Loom and wanted to warp it with a project to try it out. This method will work for any table loom.
I settled on weaving a 4 shaft scarf from my Crackle Scarf Collection pattern. A scarf is such a great project when you want to get to know a new loom.
I spent a bit of time considering the best way to warp a table loom directly and decided that warping front to back would be easier than my usual back to front, for a variety of reasons. Warping from the front to back allows you to use your reed to space the warp without the need for a raddle (that’s a bonus if you don’t own a raddle!)
I filmed an in depth walk through video for the Kindred Weavers members on Youtube and this article is a brief overview of that video. If you want to see the full video, consider joining my new Kindred Creatives spacefor exclusive videos episodes, podcasts, articles, freebies, exclusive daily notes and updates and a wonderful community space.
Be Sure To Calculate and Plan
Before beginning your project, be sure to calculate and plan. Exactly how you direct warp your table loom will be dependent on your sett or ends per inch. That will determine how many threads you pull through each dent of the reed.
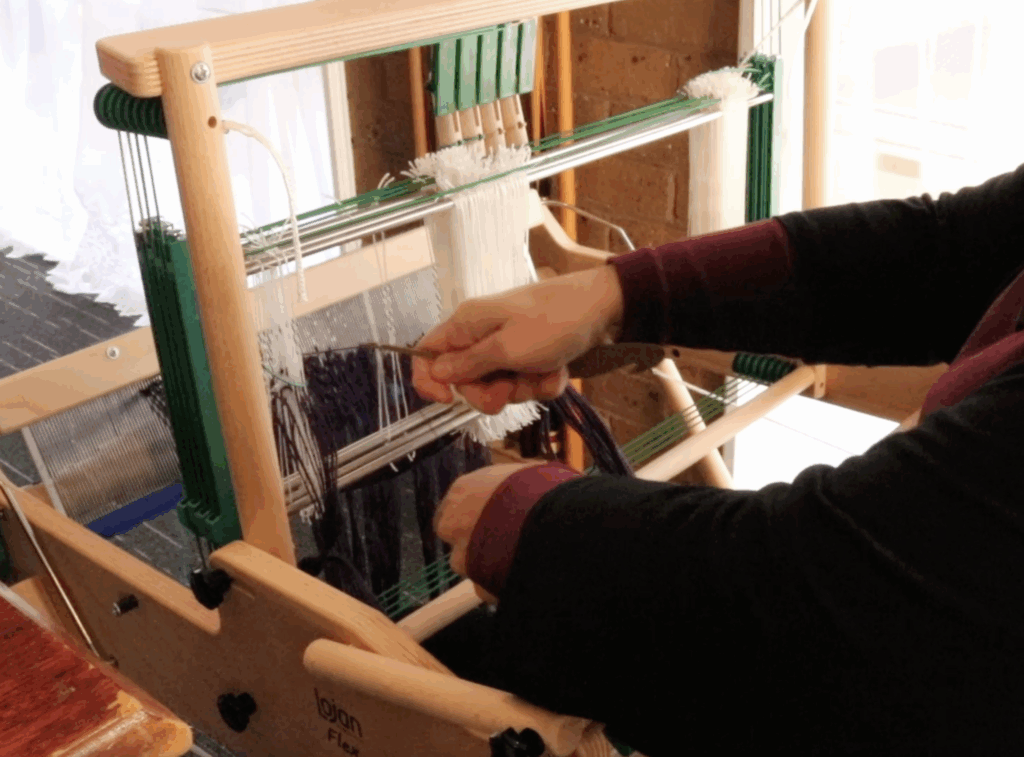
How To Direct Warp a Table Loom
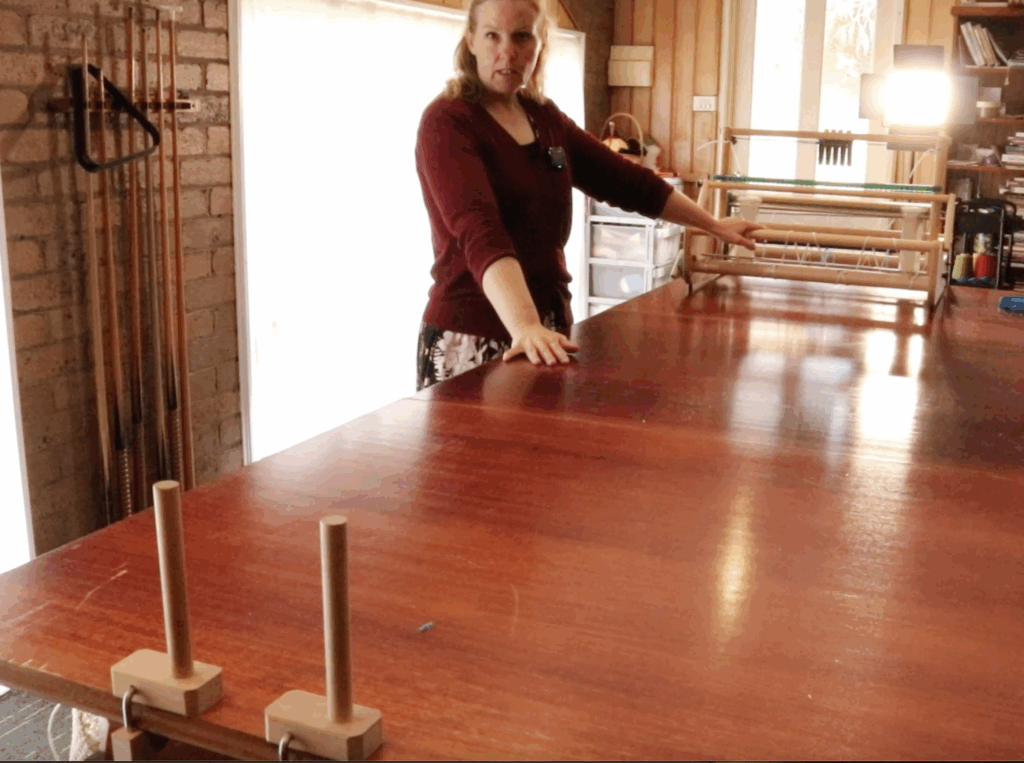
The first step is to set up your table loom ready for direct warping. The important part is to turn your loom around so that the front of the loom is facing away from the direct warping pegs.
The warping begins at the front of the loom, using the front apron rod. Tie the warp onto the front rod to begin.
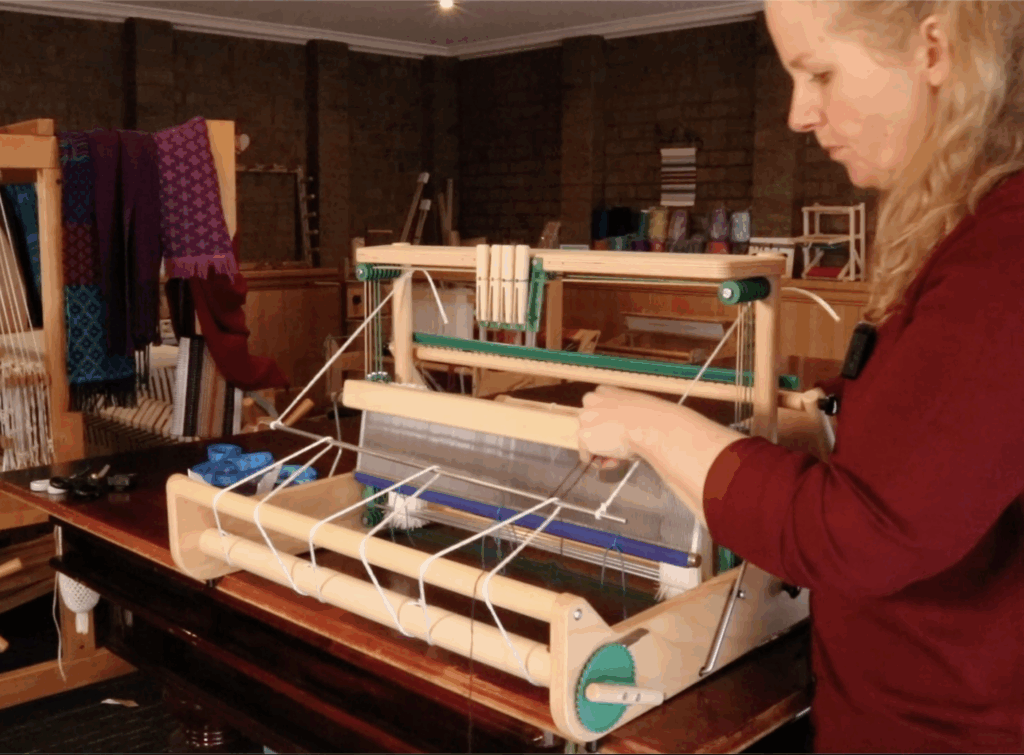
Using a threading hook, pull your attached warp thread through a dent in the reed and take it to your direct warping peg. Take the warp thread over or under the apron rod and through the next dent in the reed.
Continue warping in this way for the width of your warp. If you are familiar with warping a rigid heddle loom, this part will be quite familiar, except there are just slots in the reed as opposed to slots and holes.
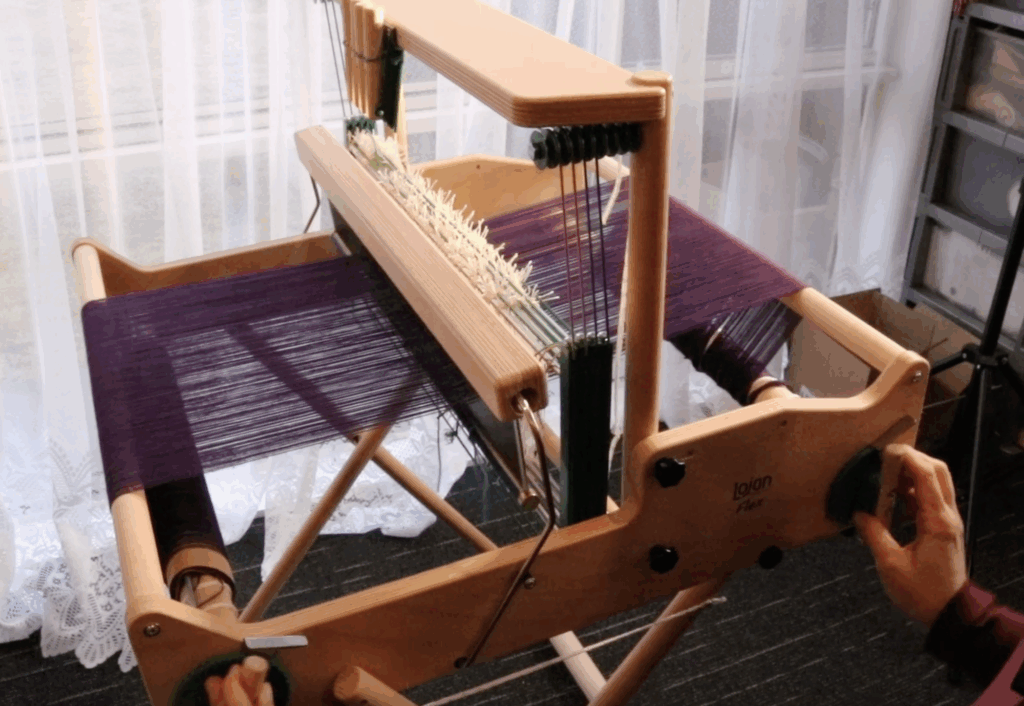
When your last thread is tied to the apron rod you can commence rolling the warp threads on to the front beam. It is helpful to use some choke ties to keep the warp length in order. You can use your own preferred method for rolling on the warp, I opted to use the yank and crank method.
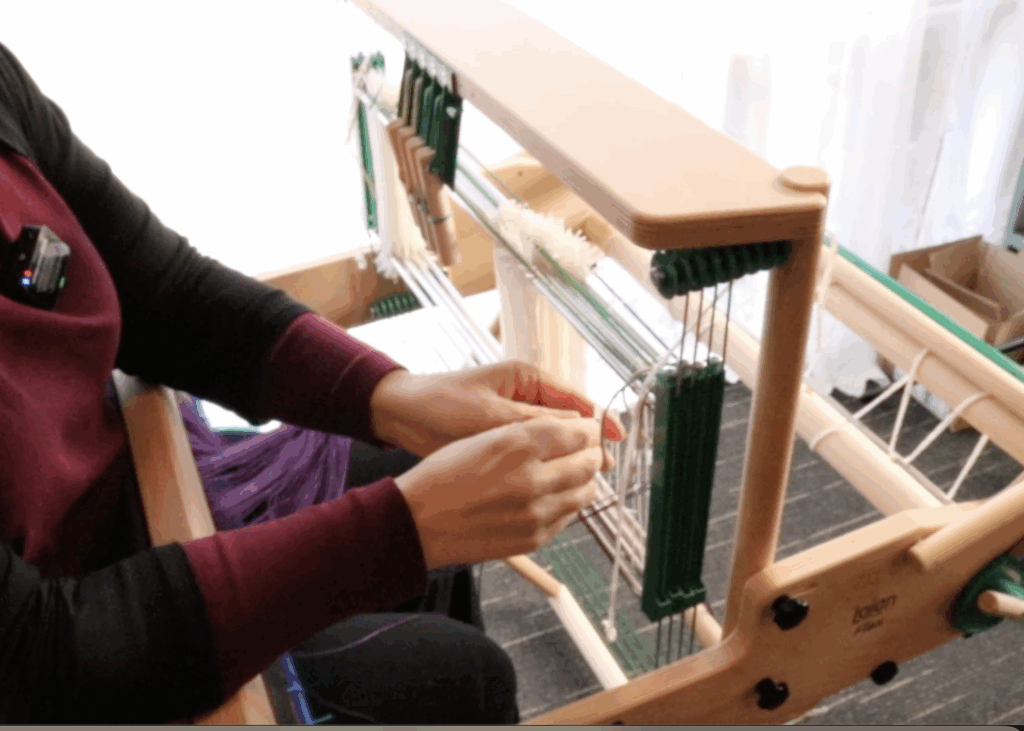
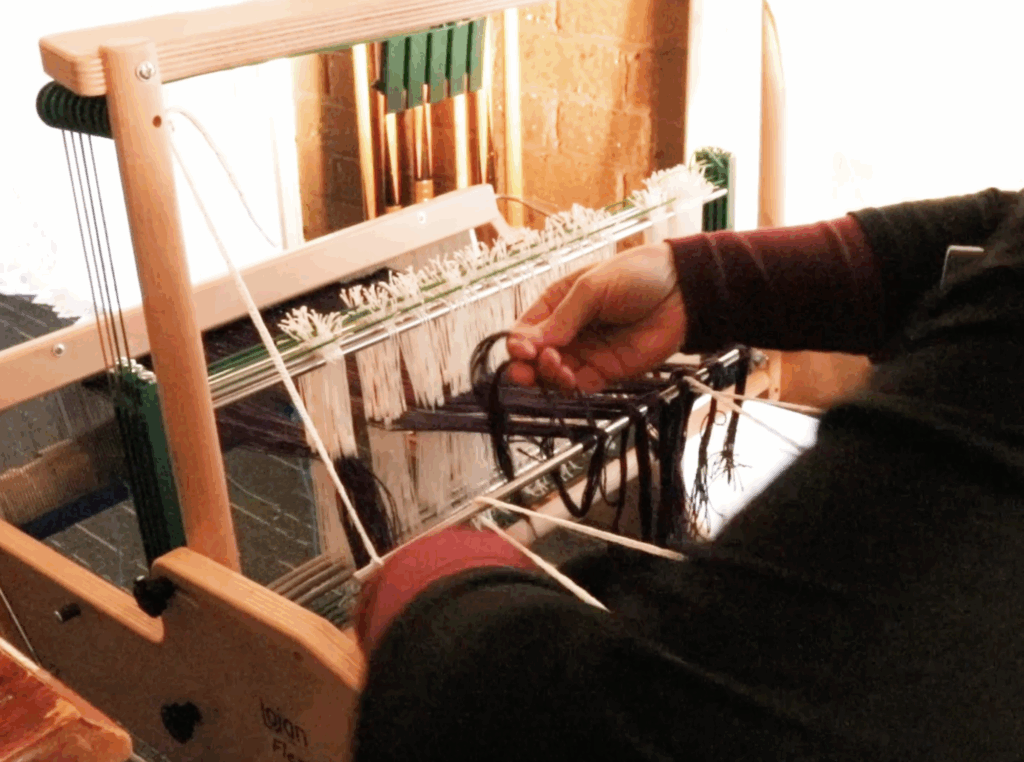
I began by threading from the front by picking up the threads in order from the reed pulled to the front. Threading from the front makes the use of a threading hook difficult, so I threaded through the heddles by hand. Some of the warp ends were slightly frayed and this interfered with the threading by hand. I also had some trouble picking up the threads in correct order from the reed, as I had to bend over to check the order, causing neck and back fatigue. So, I decided to try threading from the back.
This proved to be more simple and straightforward than I imagined! Once I got used to the idea that my shafts were backwards I found threading from the back easier without any neck or back bending.
When threading is complete it’s time to tie on to the back apron rod. I left extra warp for this step because I wanted fringes on my scarf.
*This post contains affiliate links. For more information, please see my disclosure policy.
The last step is to wind the warp from the front to the back. We can’t weave and advance the warp unless this step is completed. Just take the brake off the front (but keep some tension on it so it doesn’t unwind too fast!) and slowly and evenly wind on to the back.
I hope this overview was helpful to you! Did you know that I am a reseller for Lojan in Australia? Feel free to contact me with enquiries about Lojan products.
When you think of a weaver, what comes to mind? Someone sitting at a loom, throwing the shuttle back and forth, quietly creating cloth from yarn? That’s true—but it’s only the beginning.
After years immersed in the world of weaving—teaching, learning, and connecting with thousands of weavers—I’ve come to realize that being a weaver is as much about who you are as what you make.
I’ve been pondering the question “What is a weaver?” Does weaving shape who we are or do we shape the way we weave?
Here are my thoughts on the heart of a weaver:
A Weaver Is Generous
Weavers are givers. You’ll rarely meet a weaver who hasn’t gifted their handmade creations to friends, family, neighbors, or total strangers. Whether it’s a handwoven tea towel, a scarf, or something as intricate as a baby blanket, their joy is in the giving.
But the generosity doesn’t stop with finished pieces. Many weavers freely share their time, knowledge, and experience with others. It’s a craft rooted in community.
Many weavers are involved in charitable organisations. They may weave tiny blankets for babies born early, or weave prayer shawls as part of their church ministry. Some will weave and sell items so they can then donate to their favourite charities.
Weaving is full of possibilities, and a weaver is always asking, “What if?” “Can I bend that rule?” “What will happen if I change this?”
A Weaver Is Patient
Weaving takes time. A lot of time.
Warping the loom, threading heddles, sleying the reed, fixing mistakes—it all requires focus and patience. Many weavers spend long hours in solitude, and it shows in their calm, centered presence. The process itself often becomes a form of quiet meditation.
If you consider yourself and impatient person, does that mean that weaving won’t suit you? Of course not! Weaving will help you develop patience naturally as you work to achieve your goals.
A Weaver Is a Problem Solver
Tangled warp? Uneven tension? A threading error discovered ten inches into your cloth?
Weavers are skilled at troubleshooting and adapting. The craft naturally develops resilience and creativity. A weaver rarely gives up—they pause, reflect, and try again.
If a weaver cannot figure something out they strive to find out more. Online communities have been a wonderful support for many weavers.
A Weaver Is Willing to Share
The weaving community is one of the most open and supportive I’ve ever known.
Whether online or in person, weavers are always ready to lend a hand, offer advice, or cheer you on. Ask a question in a weaving group, and you’ll get answers, encouragement, and maybe even a photo tutorial or links to further resources!
A Weaver Is Passionate
Once weaving grabs your heart, it doesn’t let go.
Weavers are deeply connected to their craft. Yarn, texture, structure—it’s more than just a hobby. Many weavers describe it as a lifelong journey of discovery, challenge, and joy.
So… What Is a Weaver?
A weaver is someone who turns threads into cloth—but more than that, a weaver is:
A generous spirit
A curious mind
A patient soul
A creative problem solver
A passionate maker
A thoughtful giver
And a valuable part of a rich, global community
If you’re just starting your weaving journey, welcome. You’re joining a long line of extraordinary makers who don’t just weave cloth—they weave meaning, kindness, and connection into everything they create.
To put it really simply, weavers make the world a better place ❤️
Have you ever sat down at your loom and just… stared at it?
You want to weave. You love weaving. But nothing’s sparking your creativity, and everything feels like too much effort.
You’re not alone. Every weaver hits a plateau now and then. Sometimes it’s not enough time or decision fatigue. Maybe it’s a busy time in your life and the creative energy is lacking. Or maybe you just feel a little bored with the whole thing!
The good news? You don’t need to overhaul your whole setup, buy new equipment or start a huge new project to get inspired again.
Here are five quick, low-pressure ideas that take just 10 minutes—but can completely shift your mindset and help you fall back in love with weaving.
1. Switch Up Your Yarn or Color Combo
Sometimes all it takes to reignite your excitement is a little color play. Spend 10 minutes digging through your stash and pull out 3–5 yarns you wouldn’t usually use together—bold contrasts, unexpected textures, or that one skein you’ve been “saving.”
Lay them out, snap a photo, or warp up a quick sample. A fresh palette can open up a whole new direction.
Tip: Look for color inspirations – they are everywhere! In nature, manmade objects, you will even see color when you close your eyes 😀 Try taking inspiration from the color wheel and explore some basic color theory.
2. Test a New Weave Structure (On a small scale)
Trying something new doesn’t have to mean committing to a large project. Choose a weave structure or technique you’ve been curious about—like waffle weave, finger controlled techniques, or krokbragd—and do a tiny sample on a new or leftover warp.
Ten minutes of experimentation can be just the spark you need.
Give yourself permission to weave just because. A mini coaster, mug rug, or bookmark can be finished quickly and without pressure—and often leads to surprising bursts of creativity.
Don’t overthink it. Choose whatever yarns catch your eye, and just go.
Tip- If you’re time poor, check out the principles of the 10 Minute Rule and see if it’s something that could be beneficial in your life.
4. Refresh Your Creative Space
It may sound simple, but cleaning up your weaving space has a powerful mental effect. In just 10 minutes you can:
Clear away old yarn scraps and tools, sweep or vacuum the floor
Add a plant, vase of flowers, photo, or anything that makes you smile
Weaving is as much about mindset as it is about materials—and a tidy, inviting space can make all the difference. A cluttered room makes a cluttered mind!
5. Revisit a Favorite Pattern — But Change One Thing
Remember that pattern or project you loved making? Try it again—but switch up one element. Change the colors, yarn weight, or sett. Add stripes. Try a different finishing technique.
Familiar patterns offer a safe, low-stress way to explore something with a new twist.
Need inspiration? Browse my Pattern Store or check out some student work to see how they made the patterns their own.
Feeling stuck doesn’t mean you’re doing anything wrong—it just means your creative brain needs a reset. These 10-minute changes aren’t just about weaving differently; they’re about rediscovering why you love weaving in the first place.
So pick one today. Set aside a little time. And let the joy come back in!
Which fix do you plan to implement in your weaving life? Let me know down in the comments 👇
Table looms are an excellent choice for both beginner weavers and experienced fiber artists, offering versatility, portability, and efficiency in acompact design. Whether you have a small weaving space or enjoy weaving on the go, a table loom makes it easy to create beautiful woven projects.
These looms are also a great way to explore multi-shaft weaving, allowing you to experiment with patterns and techniques without the larger cost or space commitment of a floor loom.
Whether you’re looking to weave scarves, placemats, yardage or experiment with complex drafts, a table loom is a practical and rewarding choice. If you’re interested to learn more about table looms, check out this resource page.
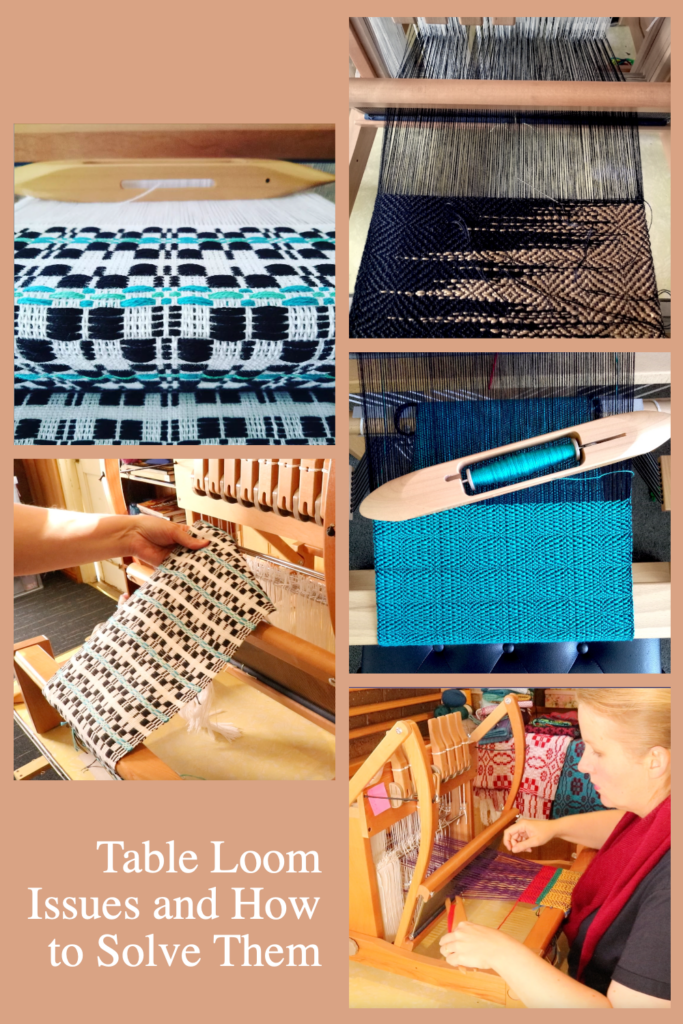
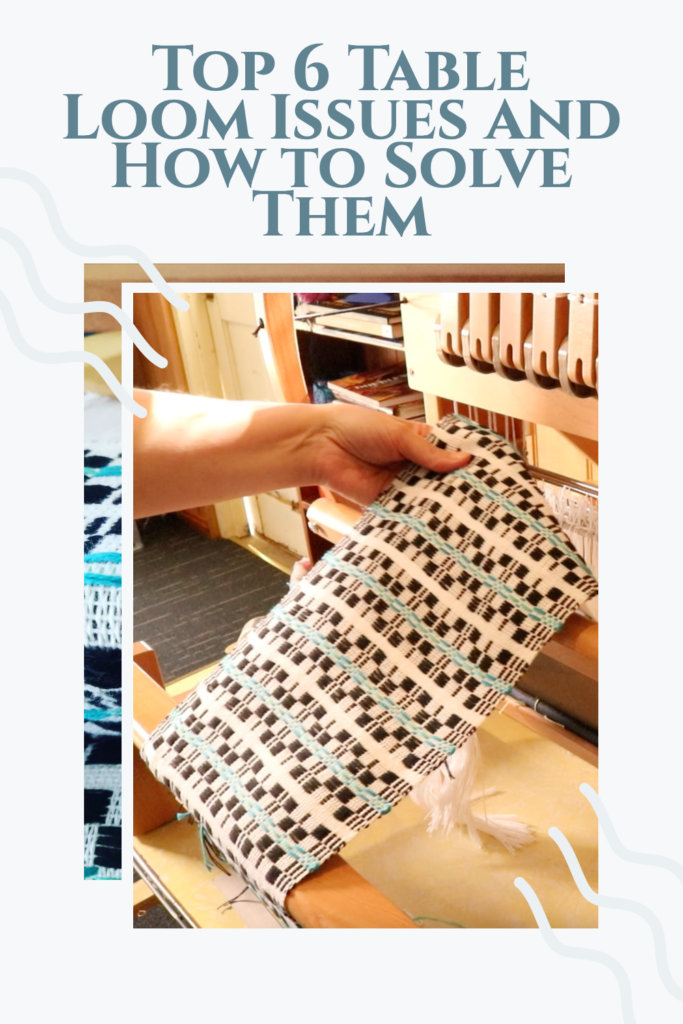
Even experienced weavers will encounter challenges on the table loom. Whether you’re a beginner or a seasoned artisan, this guide will help you identify and resolve the most common table loom weaving issues.
1. Uneven Tension in the Warp
Symptoms: Some warp threads are looser or tighter than others. Causes:
Uneven winding on the warp beam.
Inconsistent tension when tying onto the front beam.
Tie on bunches are too large
Threads are disorderly or crossed excessively at the back beam
Inappropriate warp yarn used, causing stretching or breakages
No warp separation used
Solutions:
Use a threading and raddle cross when making your warp
Use choke ties before removing your warp from the warping board
Use a raddle to warp your loom
Tie on to the apron rod in 1″ or smaller bunches
Wind on the warp as evenly as possible
Use warp separation
Retie the warp threads with equal tension across the width of the loom.
Extra tips:
Warp separation – It’s important to separate your warp when rolling on, before you start weaving and as you weave and advance the warp.
Rolling on – I like to use brown craft paper on a roll to separate my warp at I roll it on. You can also use cardboard or wooden warping sticks, but I do feel the paper roll gives a superior result.
Finger combing – I don’t like to use combs or other implements for this, I just use my fingers. This is really gentle on the yarn but also helps to sort out any little snags or unevenness in tension.
Know your yarns – There are so many wonderful yarns to explore in weaving but there are a few that just won’t do well as a warp and are better saved for wefts. Here are some recommendations for choosing appropriate yarns:
Work on your weft tensioning. It is natural and normal to have some draw in but if it’s excessive it will cause the warp threads to move inward while the warp at the reed remains a similar width. When beating this will then stress your warp threads, causing repetitive friction and eventual breakage.
4. Uneven Selvedges
Symptoms: Wavy, inconsistent or untidy edges on your weaving. Causes:
Overly tight or inconsistent weft tension.
Uneven beating with the beater.
Your weaving pattern skips outer warp threads
Uneven warp tension.
Solutions:
Practice gentle and consistent weft tension when weaving.
Beat evenly and avoid over or under packing the threads.
Symptoms: The woven design doesn’t match the weaving draft drawdown. Causes:
Mistakes in threading or treadling order.
Skipped heddles.
Crossed threads
Beat is too hard or too loose.
Sett is too close or too far apart.
Solutions:
Double-check your threading and treadling sequence.
Fix errors by re-threading the warp threads through the correct heddles.
If any threads are crossed between the reed and heddles, re-sley them to allow freedom of movement.
Work on a consistent beat.
Check your yarn using a sett test to ensure the optimal ends per inch has been chosen.
6. Loom Creaking, sticking or apron rod bowing
Symptoms: Loud creaking or resistance when operating the loom. Causes:
Lack of lubrication in moving parts.
Loose or worn parts.
Over tightened parts.
Warp under too much tension.
More apron rod support required.
Solutions:
Apply a small amount of wood-safe lubricant to the joints. I like this one.
Loosen and then re-tighten screws or bolts to ensure parts are moving effectively.
Let your warp tension back a click or two before recommencing weaving.
Order replacement parts if your loom is older or used.
Consider using a metal rod or additional wooden dowel/stick to attach your warp to the back apron rod. Ensure that your apron rod ties are strong and evenly tied on to the loom.
Preventive Maintenance Tips
Clean your loom regularly to remove dust and lint.
Check for wear on heddles, reeds, and other parts.
Store your loom in a damp free environment to avoid warping. Keep out of direct sunlight to ensure the wood is well maintained.
Lubricate when required. Use a silicone free lubricant and apply it to a cloth rather than directly to the loom.
If transporting regularly, ensure the loom is stabilised during travel to avoid unnecessary sliding or bumping!
*This post may contain affiliate links. For further information, please see my disclosure policy.
PRINTABLE TABLE LOOM SETUP CHECKLIST
Let’s make your table loom setup just that little bit easier by using a checklist. This free checklist is printable and contains empty checklist boxes that you can tick off as you complete the steps – no more mistakes! 😀