• Skip to main content
  • Skip to primary sidebar

Kelly Casanova Weaving Lessons

  • Hi! I’m Kelly!
    • Disclosure
  • Online Weaving School Class Index
    • Common account issues
    • Common technical issues
    • What do I get with a membership?
  • New to rigid heddle weaving? Start here!
    • Never heard of the rigid heddle loom?
    • How to weave neat edges on the rigid heddle loom
    • Rigid heddle weaving
    • Rigid Heddle Weaving Patterns
  • Patterns
  • Subscribe

Neat edges

How to use floating selvedges

by Kelly 2 Comments

In my last post I talked about what floating selvedges are, how they can benefit your weaving and included a photo tutorial for how to install them.

Today, we’re going to have a look at how you actually use floating selvedges in the weaving process.

It’s very simple, but there are a few little rules and things to remember:

  • “Over, under”. This is going to be on repeat in your mind as you weave with your floating selvedges in place. The photo tutorial will show you how this works.
  • You will need to adjust your weights as you weave and advance the warp. This is because your floating selvedge (FS) threads will roll on to your front cloth beam along with the warp threads as you advance.
  • The weft should always wrap around the FS on each side. This also relates to the “over, under” action and will be clear for you to see when you’re weaving.
  • The yarn that you use for your FS can be the same yarn as either the warp or weft. Most of the time, I will use the exact same yarn for the FS as I’m intending to weave with (weft). But, if I have frequent colour changes and more than a few colours in the weft, I will use the warp yarn to set up my FS.

In this tutorial, I’m imagining that you have already set up your floating selvedges and you’re ready to start weaving. If you haven’t done that yet and need a step by step tutorial, please view this post first.

*This post contains affiliate links. For further information, please see my disclosure policy.

This tutorial is specifically for rigid heddle weavers, but I also have a video tutorial for table/floor loom weavers.

I am starting with my shuttle on the left and my heddle is up. (It doesn’t matter which side your shuttle is on or which shed you’re in, but I wanted to be specific so that the photos make sense!)
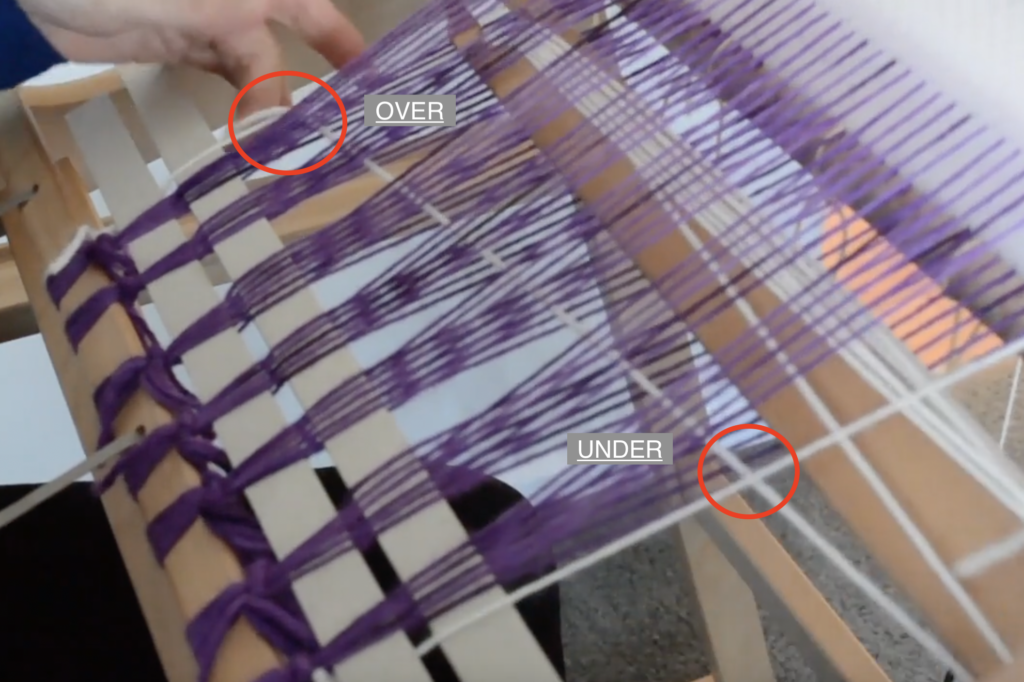
When I enter my shuttle from the left, my shuttle (and therefore my weft yarn) goes OVER the floating selvedge. As my shuttle exits the shed on the right, it goes UNDER the floating selvedge. Beat.
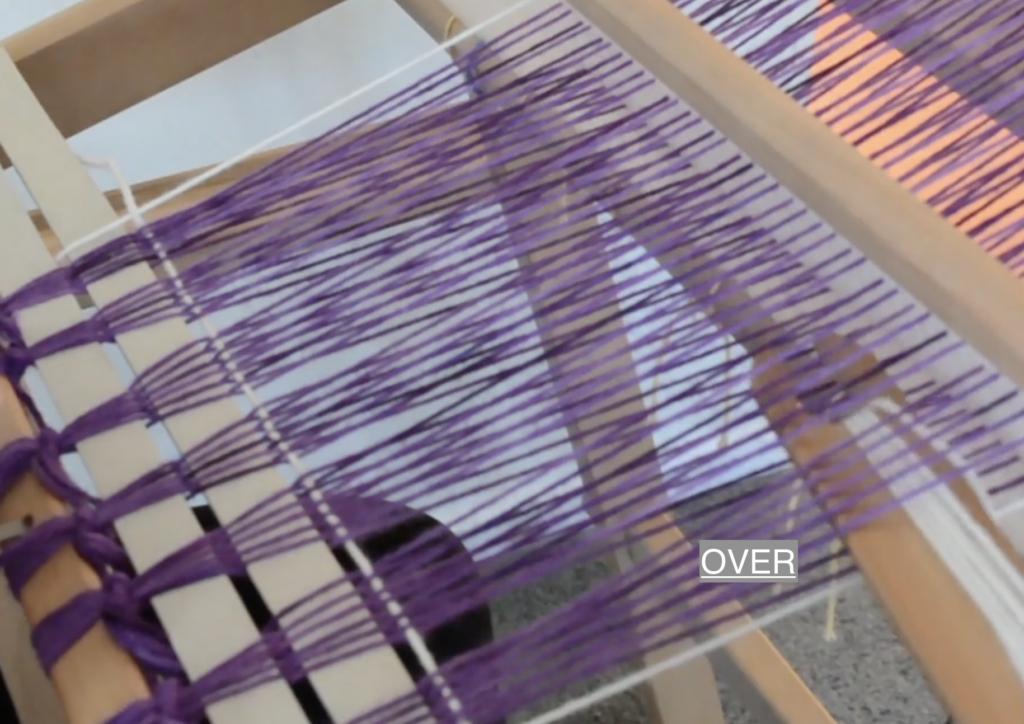
Now I change my heddle to the down position. As my shuttle enters the shed from the right, it will go OVER the floating selvedge. As it exits the shed on the left, it will go UNDER the FS. Remember, OVER, UNDER. Beat.
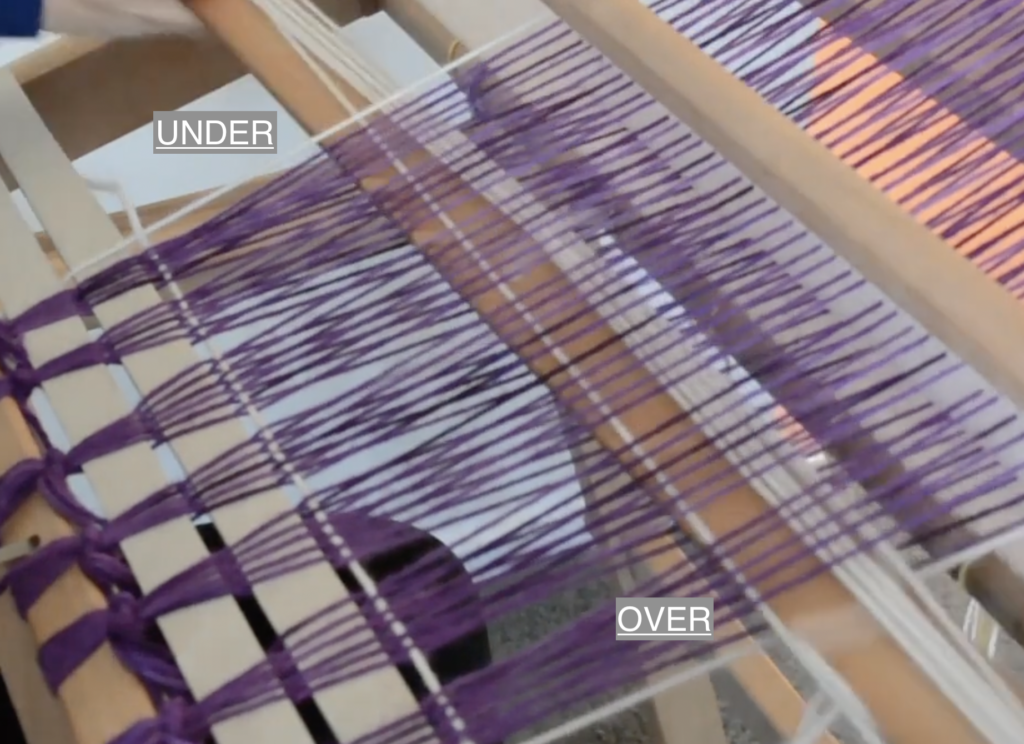
Here is how your shuttle should look for that second pick (weft row).
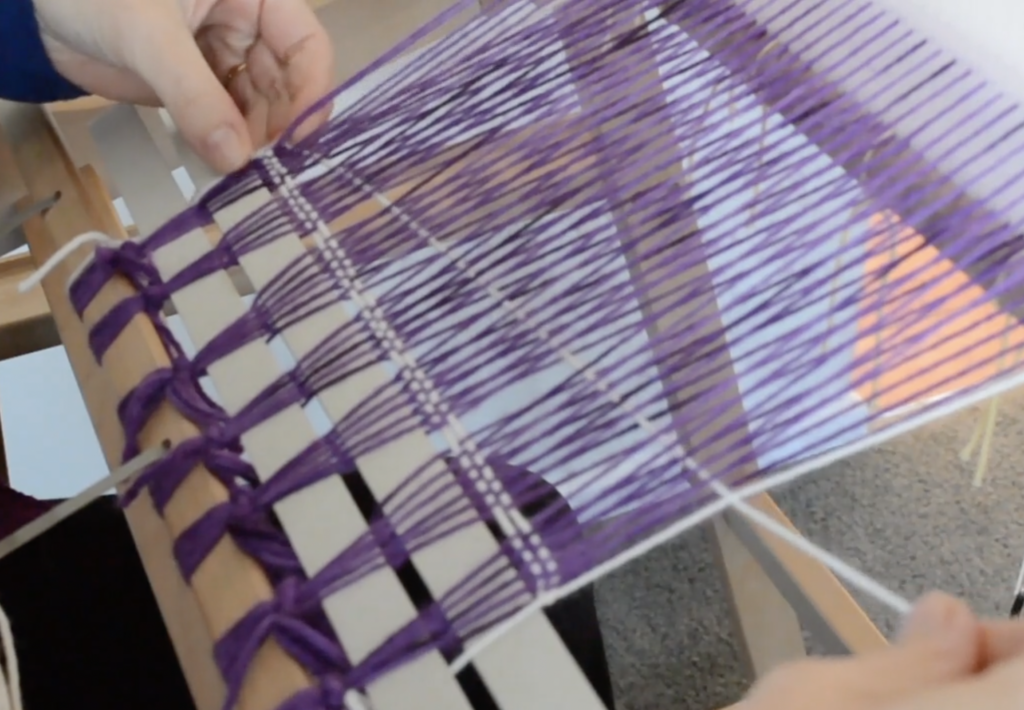
Back to the up position for the third pick. The shuttle will go OVER the FS on the left and come out UNDER on the right.

It’s important to note that using floating selvedges does not change the way we weave. We still need to arrange and tension our weft picks to ensure neat edges. If you are not familiar with my pinching technique, I have a free video tutorial that will make a huge difference to your edges:

If you are having trouble remembering whether you are supposed to be taking the shuttle over or under the FS in your next shed, you only need to look at how your last weft pick is sitting.
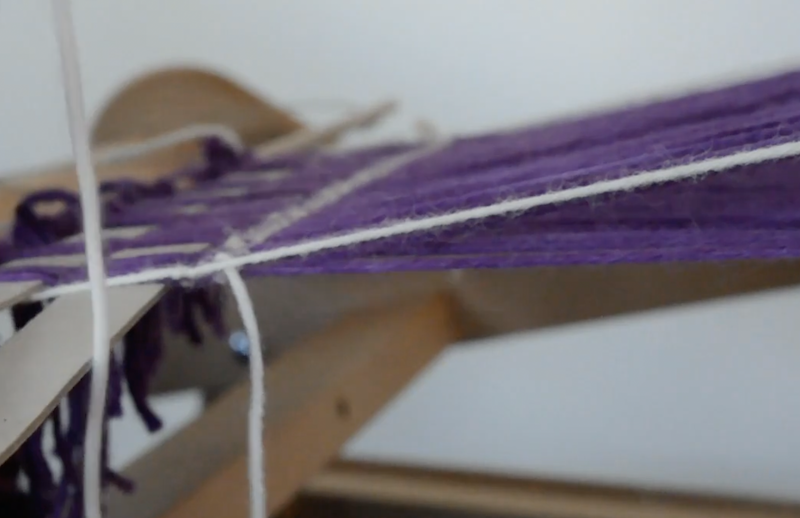
For example, you can see clearly in this photo that the last weft pick is sitting UNDER the floating selvedge. This tells me that, to ensure the weft yarn wraps around that FS edge, I will need to take it OVER the FS as the shuttle re-enters the shed.
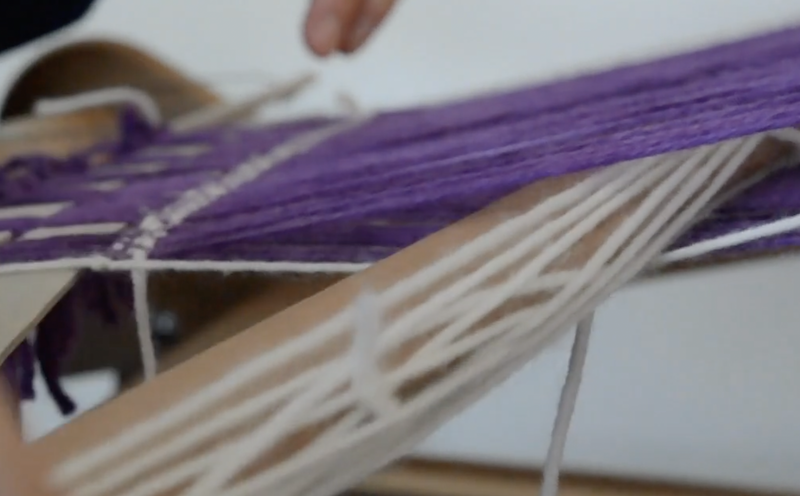
When your heddle is in the up shed, you can see that the floating selvedge also sits up a little with the warp. The easy way to weave is to just depress the FS with the tip of the shuttle as you enter the new shed.
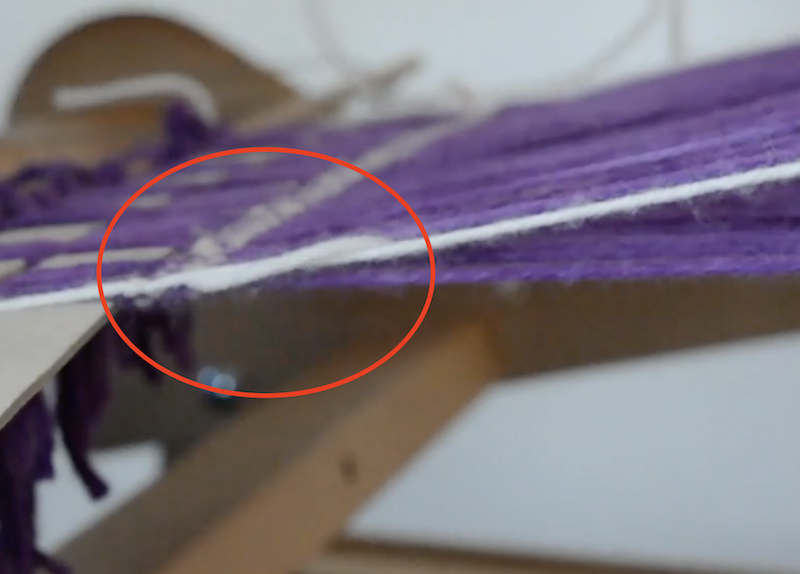
See how the weft yarn wraps around the FS as it you enter the shed?
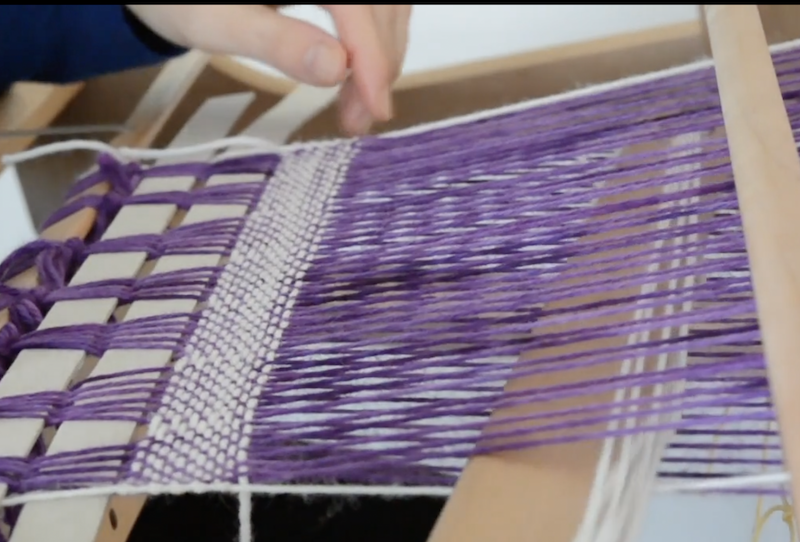
As you weave, the FS becomes a part of the fabric and provides a straight edge. The floating selvedges are not removed when you finish weaving, like you would remove fishing line if using the Lifeline Technique, they are truly a part of the piece and that is why we match the yarns when we set up our FS in the beginning.
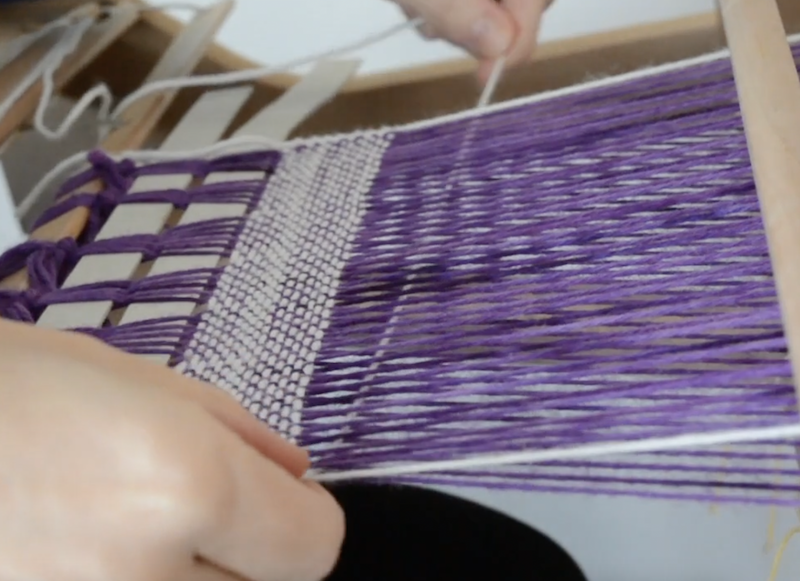
Continue to tension and angle your weft as you weave. I think you will be very pleased with the results!

If you would like to see me weaving on the table loom using floating selvedges, please view this free video tutorial:

I hope you found this tutorial valuable.

Until next time…

Happy Weaving!

Filed Under: Floating selvedges, Free tutorial, Neat edges, Rigid heddle weaving, Table loom weaving, Tutorials, Weaving Tagged With: floating selvedges, table loom weaving

What are floating selvedges?

by Kelly 17 Comments

If you’ve been weaving for a little while now it’s very likely that you’ve come across the term “floating selvedge”.

What is a floating selvedge?

Floating selvedges (FS) are used on either side of a warp and are replacement threads for the original edge warp threads. This may lead you to wonder why you would want or need to replace your edge threads?

When weaving a simple plain weave, the interlacement of weft and warp doesn’t change. You alternate between the two plain weave sheds and the weft thread always naturally wraps around the outer most warp threads.

*This post contains affiliate links. Please see my disclosure policy for more information.

But when you are weaving something other than plain weave, you will often find that the weft skips the outer warp thread – either in every shed or, more likely just in certain sheds. If you don’t do anything to combat this problem, the result will be messy edges and a cloth that lacks integrity at the selvedges.

Now, there is a manual method you can use to prevent this from happening, but I find it easy to install floating selvedges and I also love the neat edge finish this gives me.

How does the floating selvedge work?

A floating selvedge will provide you with an unchanging edge thread, unlike your natural edge thread that may change according to the pattern, or the way you have threaded your loom. The path of the weft thread is determined by your action with the shuttle when you begin weaving, ensuring that every edge warp thread (now your floating selvedge) is wrapped with weft yarn.

When we install floating selvedges, they are usually not a part of the original warp. They are always threaded into an empty slot next to the last naturally occurring warp thread. This makes them independent of your warp and pattern, and means that we can adapt them to our own purposes.

Although floating selvedges are not necessarily a part of the original warp, they do become a part of the finished woven piece – they are not removed afterwards.

For this reason, it’s important to choose a colour that will blend well with the project. If I am weaving my piece with just one, solid coloured weft, I will choose that same yarn and colour for my floating selvedges.

If I am going to be changing the weft colour multiple times within that one piece, I will choose the same yarn and colour as my warp.

The idea is that, once your piece is off the loom and finished, you won’t be able to tell that there was a floating selvedge introduced (other than the fact that your edges will look really nice!)

Can you use a floating selvedge on any loom?

Pretty much. I use them mostly on my floor loom and table loom, and on my rigid heddle loom if I’m weaving something other than plain weave.

Today’s tutorial is specifically for the rigid heddle loom. Scroll to the end of this post to find a video tutorial specifically for table loom floating selvedges.

I like to install my floating selvedges when the warp is all tied on and I’m almost ready to weave.

The photos from this tutorial are taken from my member’s only Floating Selvedges on a Rigid Heddle Loom class.

I most often use the same yarn for my floating selvedges as I use for my weft. So, in the example above, I will be using a white weft.

I don’t do this every time though. If I am weaving a project where I intend to have multiple and frequent weft colour changes, I will use the same yarn that I used for warp for my floating selvedges.

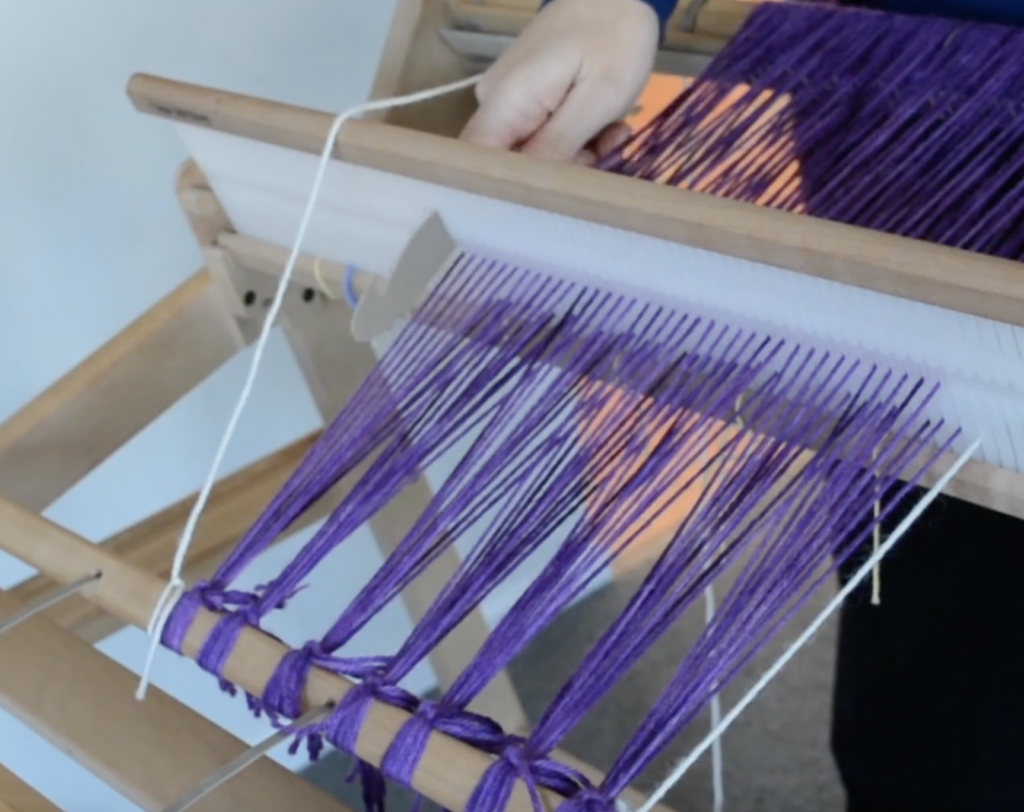
Step 1. is to measure out a length of yarn that is similar to the length of your warp. A little more is fine, a little less is not so great, as then you may have to install the floating selvedges again in the same project. It’s doable, but preferable to have a little more than you need so you don’t run out.

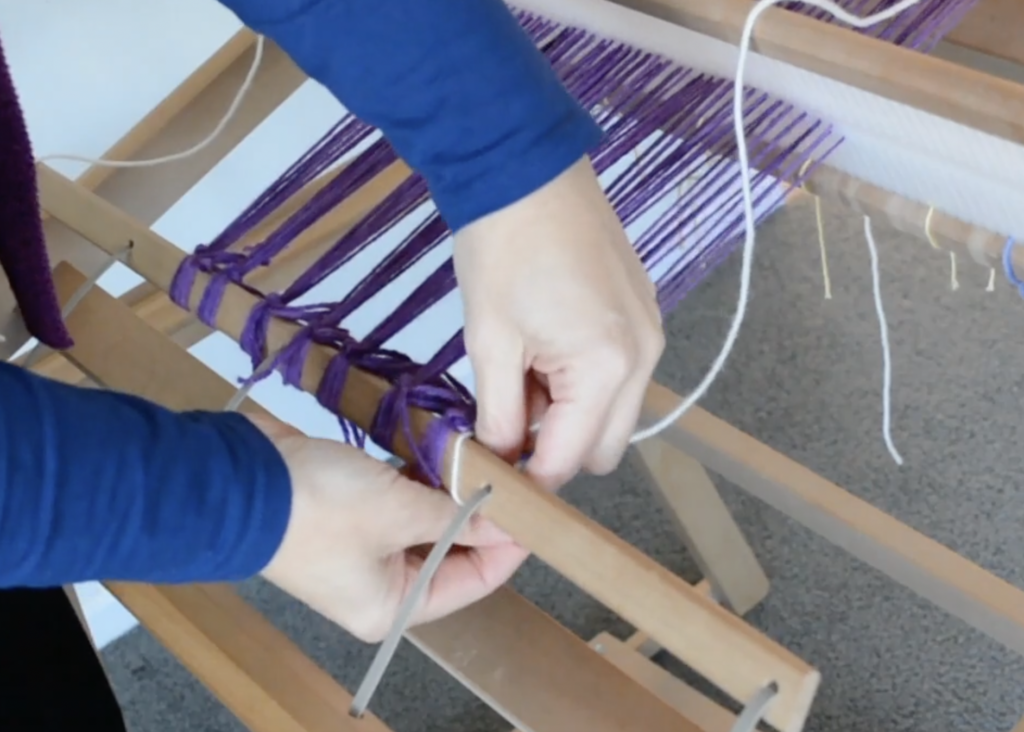
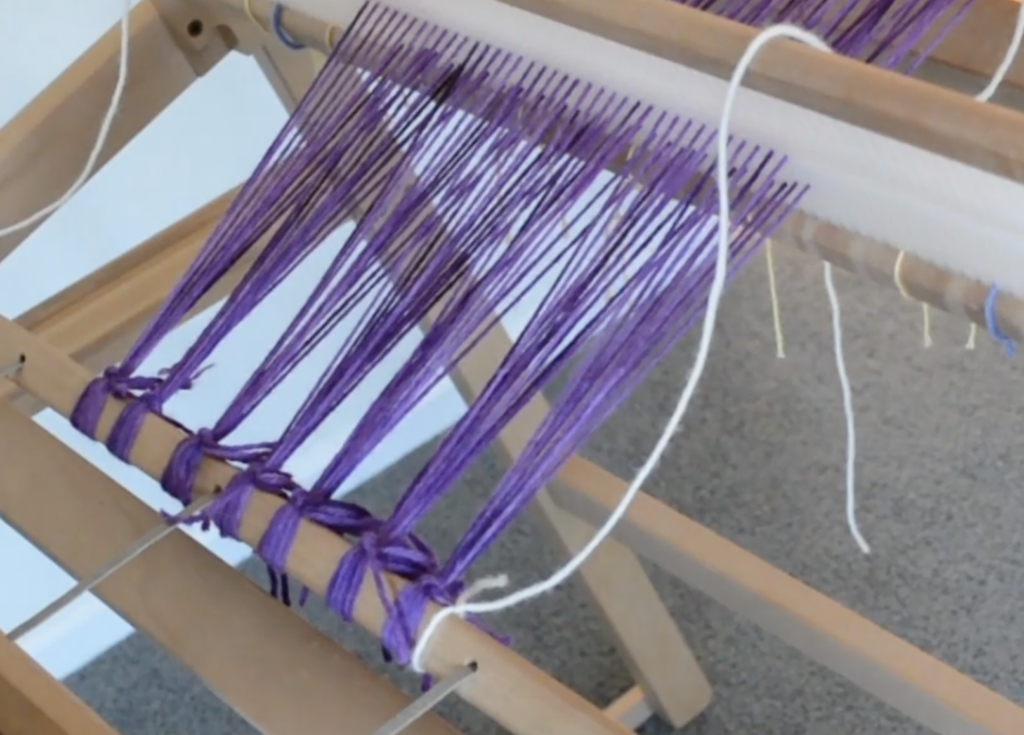
Cut your length of yarn and tie one end in a secure, double knot to the front apron rod on one side of the warp. It makes no difference whether you do the right or left side first.

Drape the tied yarn over the top of the heddle. It doesn’t really matter what position the heddle is in at this point, but it make sense to have it in the neutral or resting position.

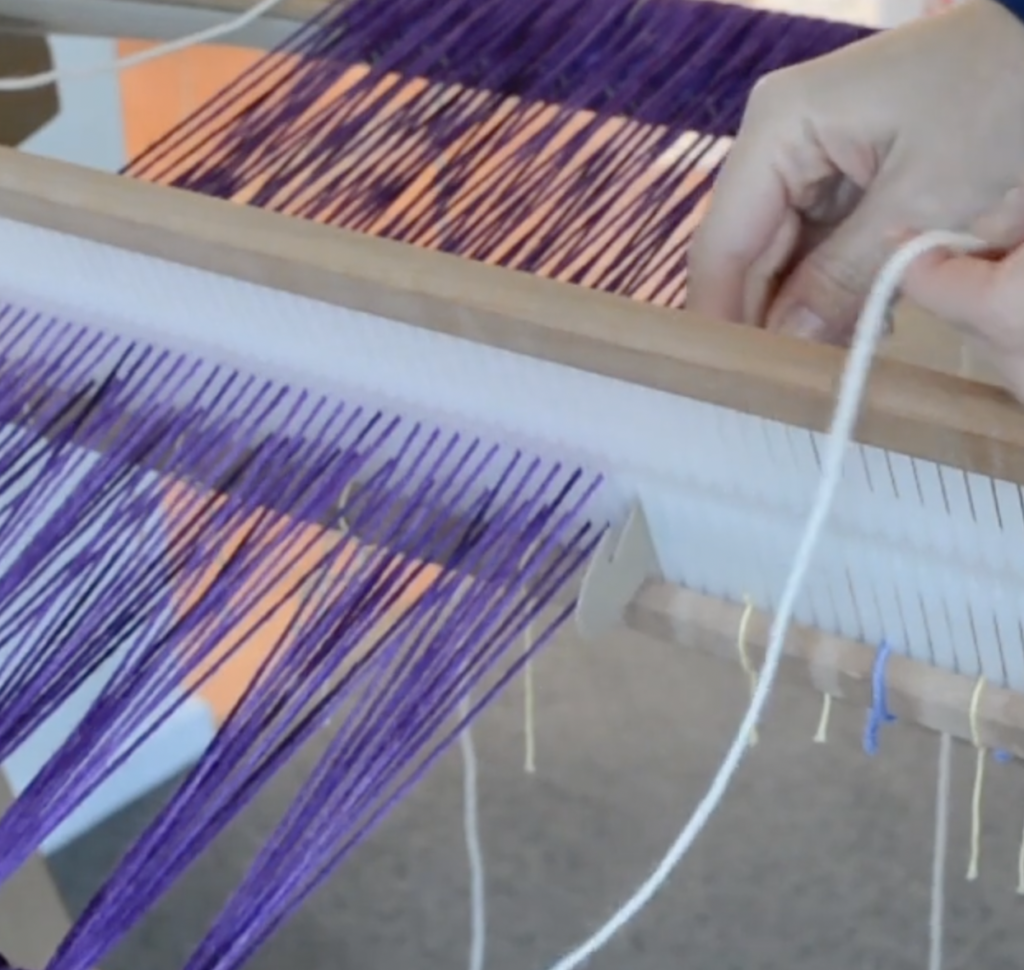
Find the next slot, next to your outer most edge warp thread that is empty. This is the slot you will thread your yarn through. Having the floating selvedges in a slot makes them a “free agent” that we can then manipulate in the weaving process to ensure that our edges are always wrapped with a weft thread.

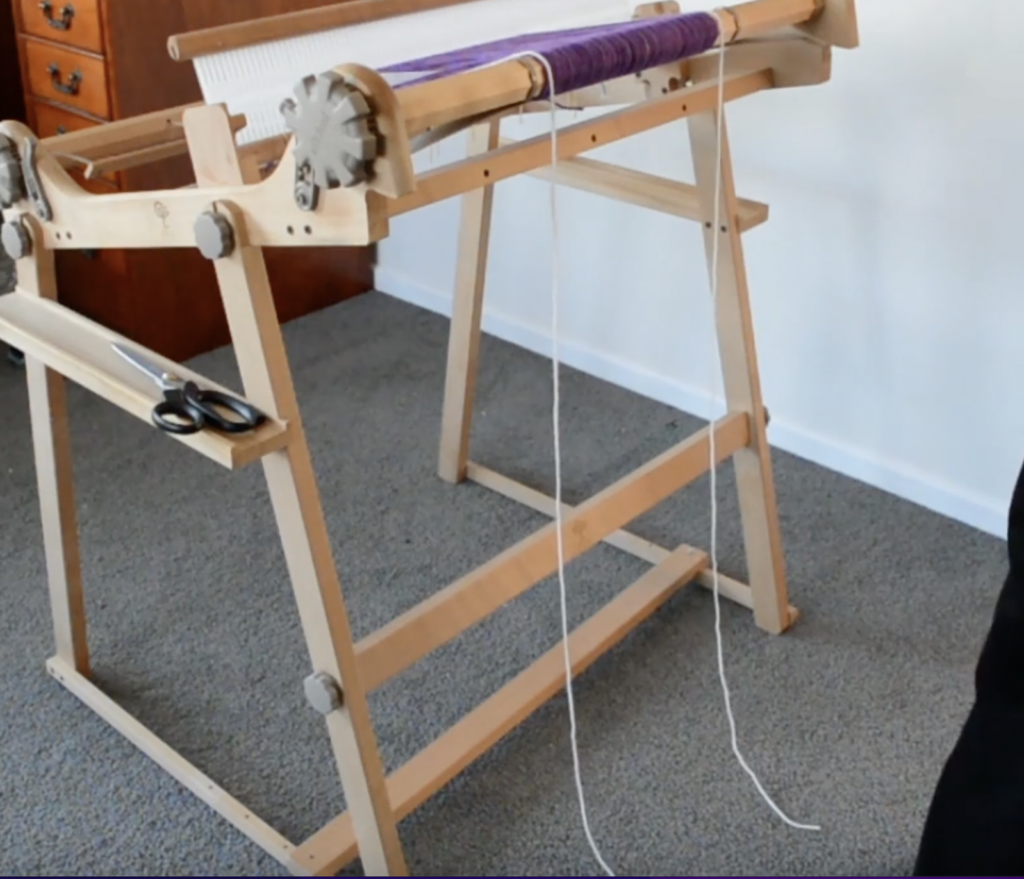
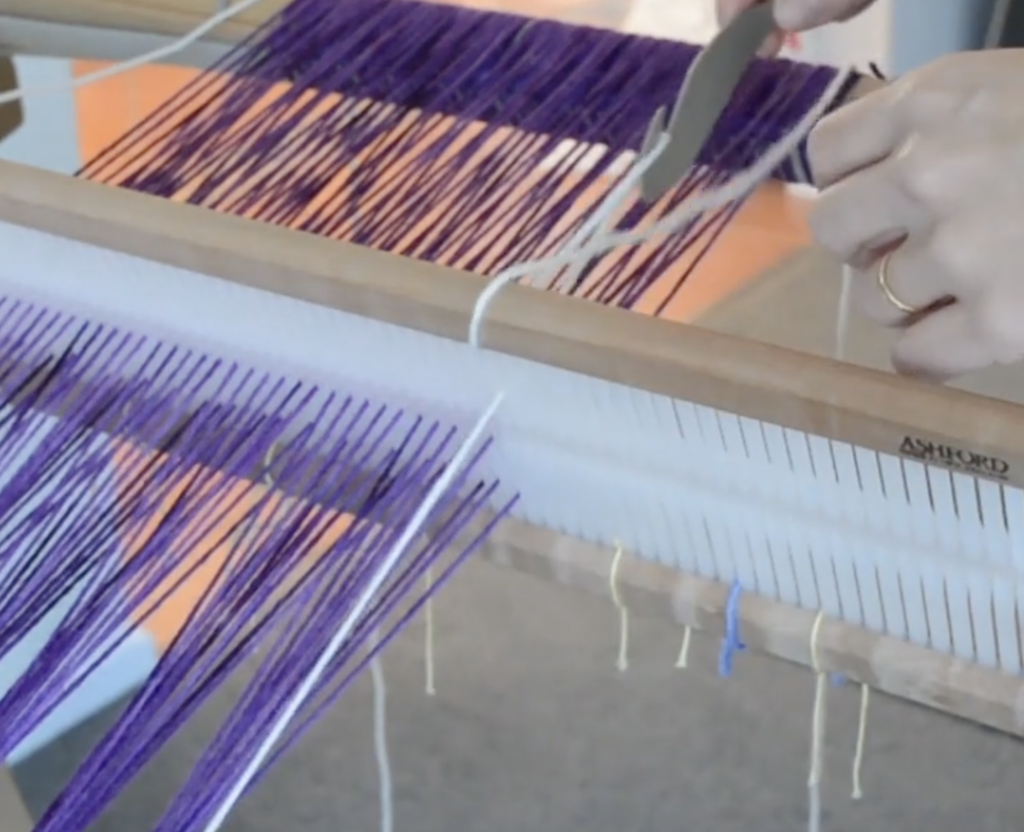
Pull the thread right through the slot and over the back beam and leave it hanging.

Now repeat the exact same steps on the opposite side of the warp.

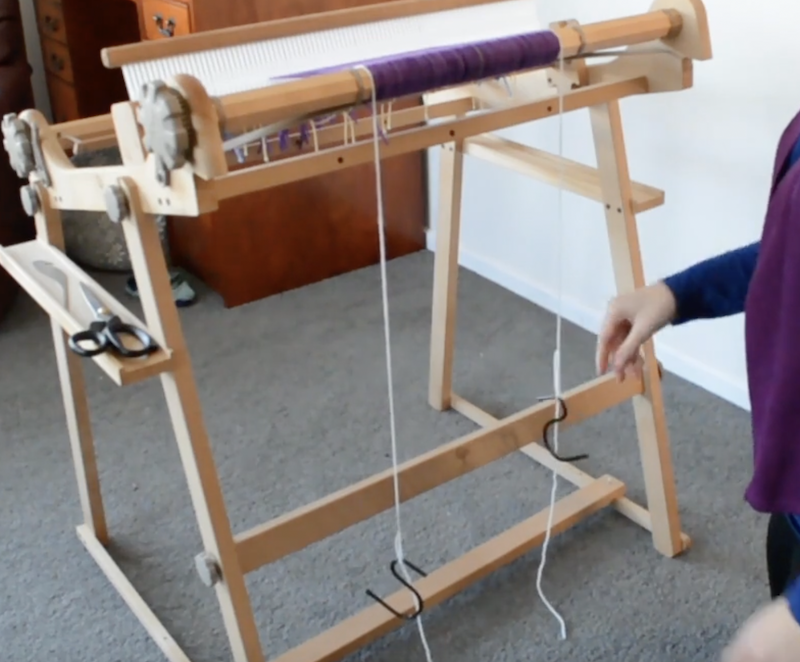
Now you have two threads in slots on either side of your warp and they are ready to be weighted. If you don’t weight them, they won’t work, they need to be under tension!

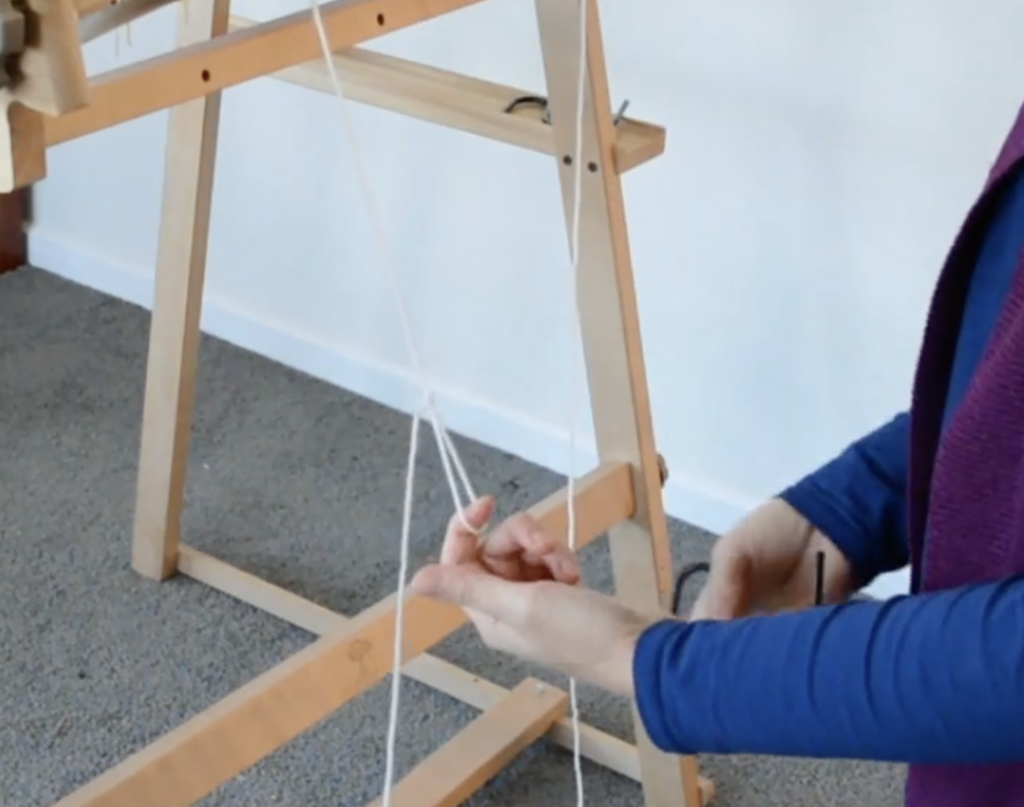
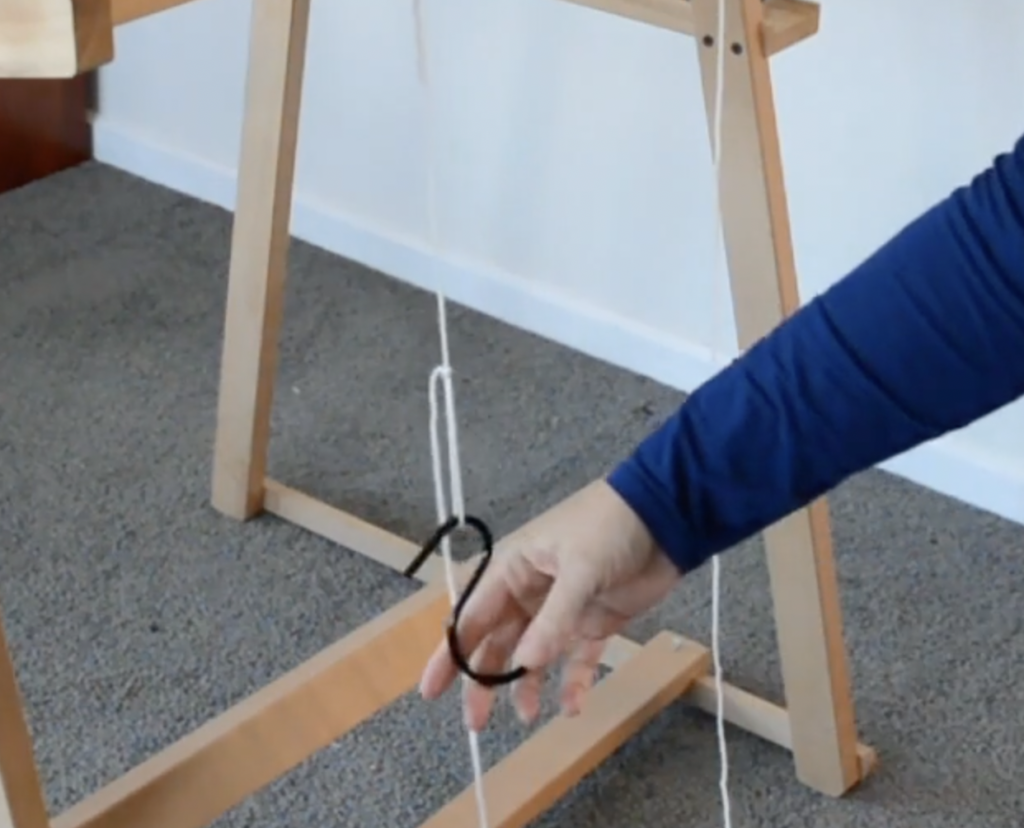
Make a slip knot in the hanging thread. You can do this half way down, or further towards the floor, the main thing is that the weights are not resting on the floor, you want them to dangle and place tension on the thread.

Place an “S” hook or something similar through the loop of the slip knot and allow it to hang. You can tighten up the slip knot to prevent your hook from jumping out of the loop. I have a bunch of S hooks, they are so handy for tensioning broken or loose threads and I always use them on my floating selvedges.

Do the same for the other floating selvedge thread, and you’re ready to start weaving!

As a side note – this method is not the only way to install floating selvedges. Some weavers prefer to allow for the additional two threads when calculating the warp, and then roll the FS on with the rest of the warp. They would then thread the FS threads through an empty slot rather than threading as part of the pattern.

If you’re interested in knowing more about floating selvedges and viewing a tutorial for installing them on a table loom, please view this video:

In the next post I will have a tutorial for how to actually use the floating selvedges when weaving, so look out for that one.

Until next time…

Happy Weaving!
Filed Under: Floating selvedges, Floor Loom Weaving, Free tutorial, Neat edges, Rigid heddle weaving, Table loom weaving, Tutorials, Weaving Tagged With: floating selvedges, rigid heddle loom

New towels for our new home!

by Kelly 19 Comments

I had two reasons for warping up my floor loom for some new towels recently.

With our house moving date looming closer, I felt the need for a “sanity project”. While all of my yarns and equipment were being packed away, I kept a few cones aside so that I would have something to weave during the in between time of packing up house and moving to the next one.

*This post contains affiliate links. Please see my disclosure policy for further details.

I also wanted to have some brand new kitchen towels to adorn our “new to us” kitchen, as all my current towels are ageing and starting to look a little shabby. I wanted special new towels for our special new place. This project turned out to be special in another way, but I’ll tell you about that shortly.

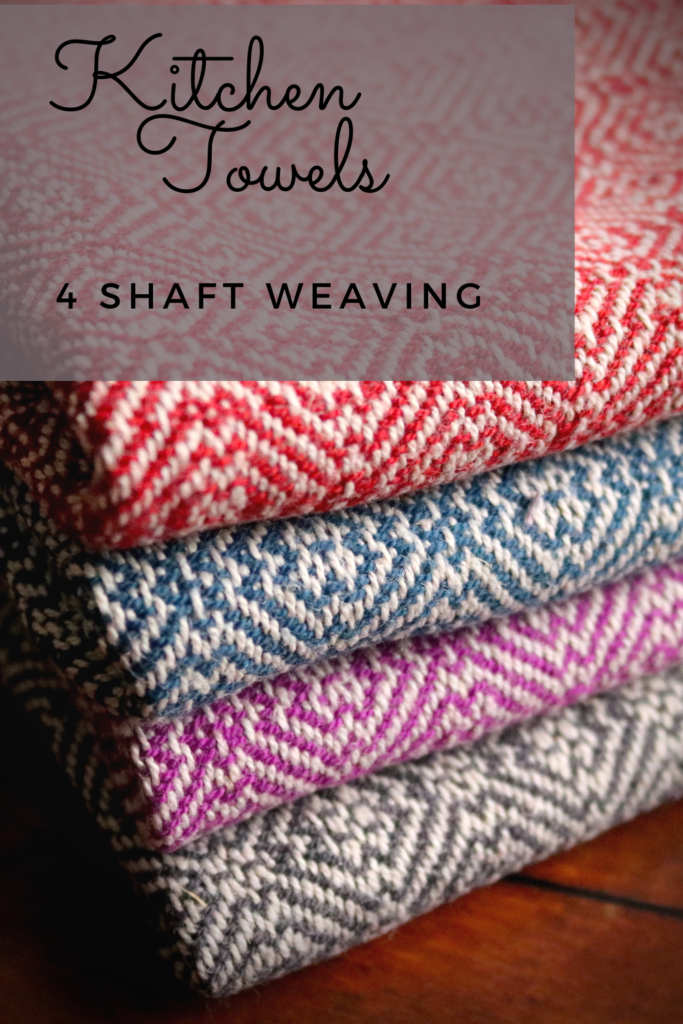
I chose one of my all time favourite drafts for kitchen towels, a 4 shaft twill on M and W threading. I love the design and I love the resulting fabric so I didn’t have to think too hard on that one!

The threading for this draft is not difficult and the tie up is a regular twill tie up – all things that I’m very familiar with and that make the process easy for me. I used my Louet David 2 Floor loom (link is for the new David 3), which has 8 shafts but for this project I wove on 4 shafts.

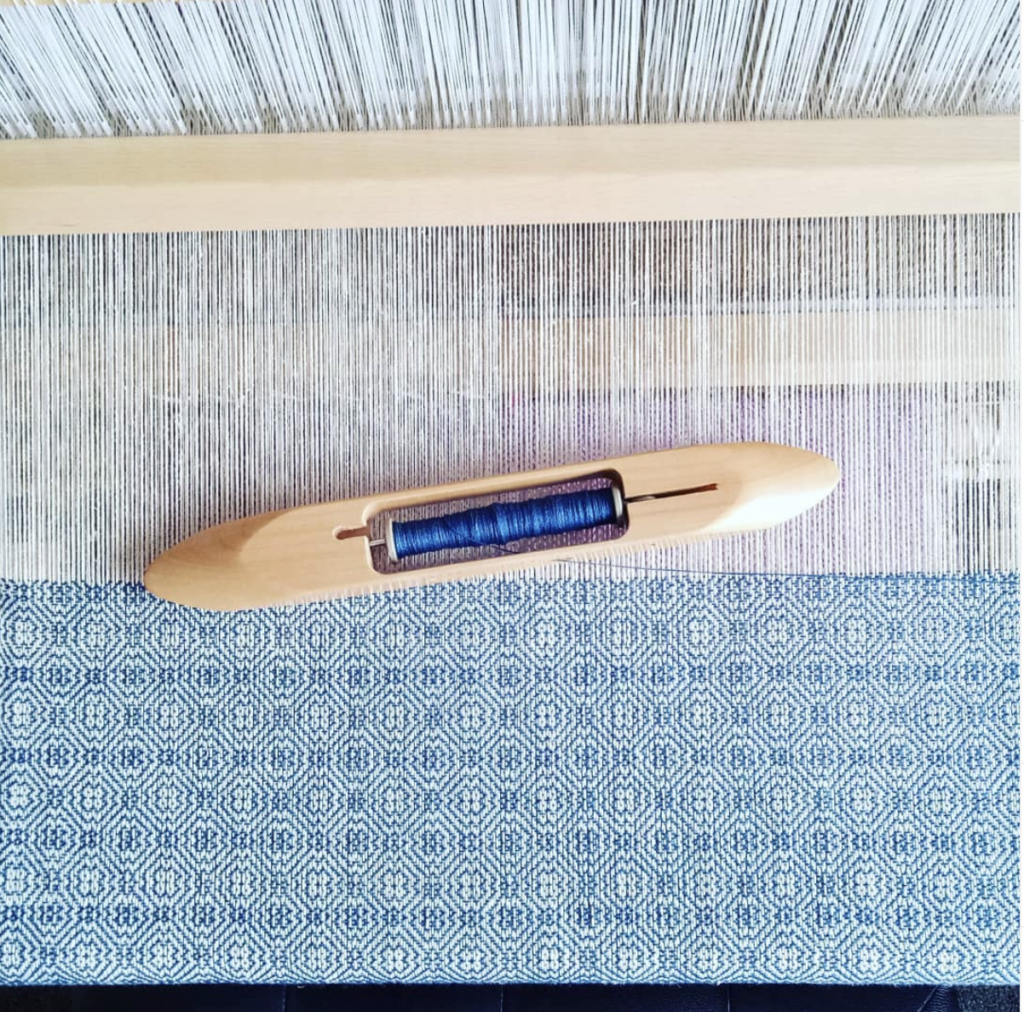
Having woven kitchen towels with this draft before, I was also sure of the yarn I wanted to choose. My favourite weaving yarn for soft and absorbent tea towels is 8/2 cottolin. The cottolin I use is 60% organic cotton and 40% linen. It’s a great yarn for those who want to incorporate a little linen but want something that is a bit easier to use than 100% linen.

For the warp I used:

Maurice Brassard 8/2 cottolin in Blanchi

For the wefts I used (one colour for each towel):

Maurice Brassard 8/2 cottolin in Charcoal

Maurice Brassard 8/2 cottolin in Magenta

Maurice Brassard 8/2 cottolin in Royal

Maurice Brassard 8/2 cottolin in Brick

…………………………………………………………………………………………………………………………………………………………..

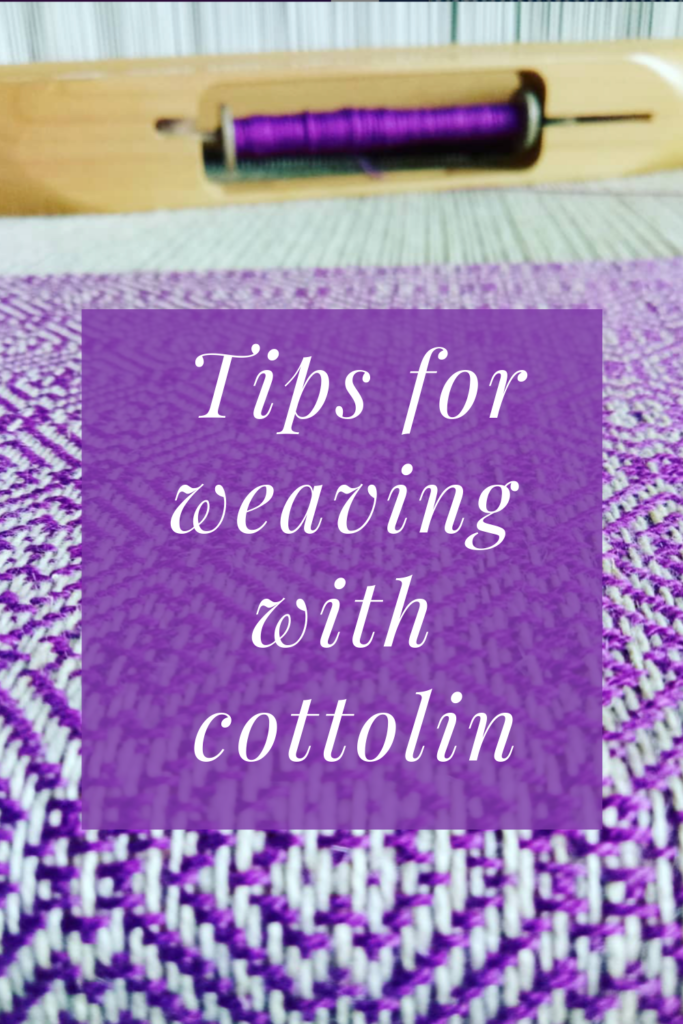
Tips for working with cottolin:

  • Cottolin sheds a lot of fibre whilst on the loom. It is a more course yarn than just cotton on it’s own, which is very smooth. I sometimes opt to wear and apron while weaving and try not to wear anything black! The shedding nature may be irritating to some who are sensitive, it’s not a big problem for me but does make me sneeze sometimes! It also means that you will want to vacuum your loom when your project is finished or even during the project if the tiny stray fibres bother you.
  • It feels quite stiff on the loom. I remember the first time I wove with cottolin, I felt disappointed that the towels felt a bit rough. A hot machine wash was like a touch of magic – the towels softened up and the pattern came together beautifully. This is another thing that I love about cottolin, it softens more with each wash.
  • Your first one or two uses of your towels to dry dishes will not be optimal. The cottolin can leave small fibres on your dishes initially, and the towels are not as absorbent as they could be. Don’t lose faith! With a bit of use and a couple of washes, they will become a huge asset to your kitchen!

…………………………………………………………………………………………………………………………………………………………………

C

I tried some different techniques in the weaving of these towels, to help counteract some of the issues arising as I wove.

Firstly, I doubled my floating selvedges – something I haven’t done before. My reasoning for this was that for the towels I’ve woven in the past, the first place they would start to wear down was at the edges. A doubled floating selvedge gave a more defined, and stronger edge to the fabric.

Secondly, I switched to beating on an open shed. It is very much my habit to beat on a closed shed, but my beats were feeling a little stiff and the weft wasn’t settling as nicely as I would like. As soon as I switched to open shed beating, everything settled down and became much more fluid. Lesson learned – Don’t be stuck in your ways, be open to experiment from project to project as needs dictate 😉

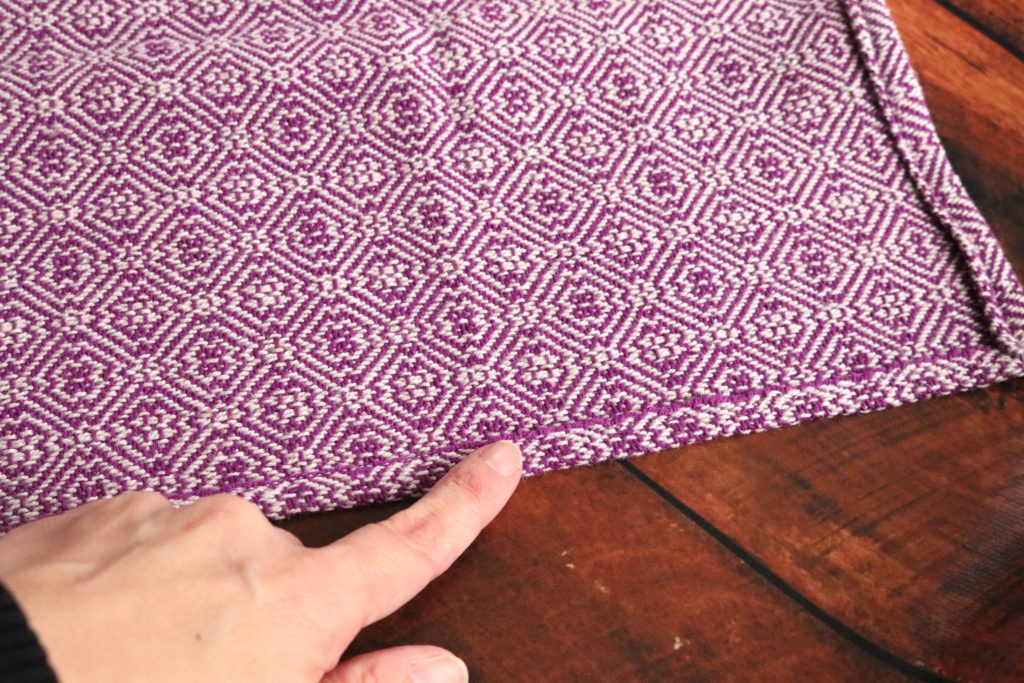
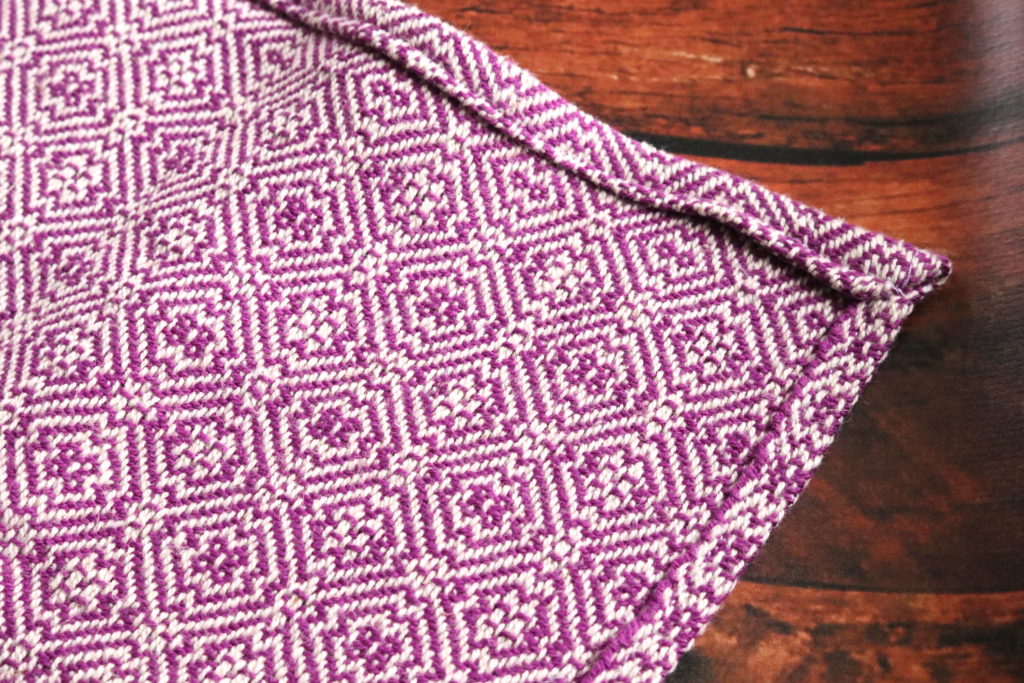
And thirdly, when hemming my towels, I decided to also hem the long edge. I have never done this before, but as I already mentioned, the edges are susceptible to wearing and I think this single turned hem will make a difference. Time will tell, but perhaps I will make this a regular technique for my towels.

Hemming the long side of the towel with a single fold hem.
Finished hems. The ends of the towel have a double fold hem.

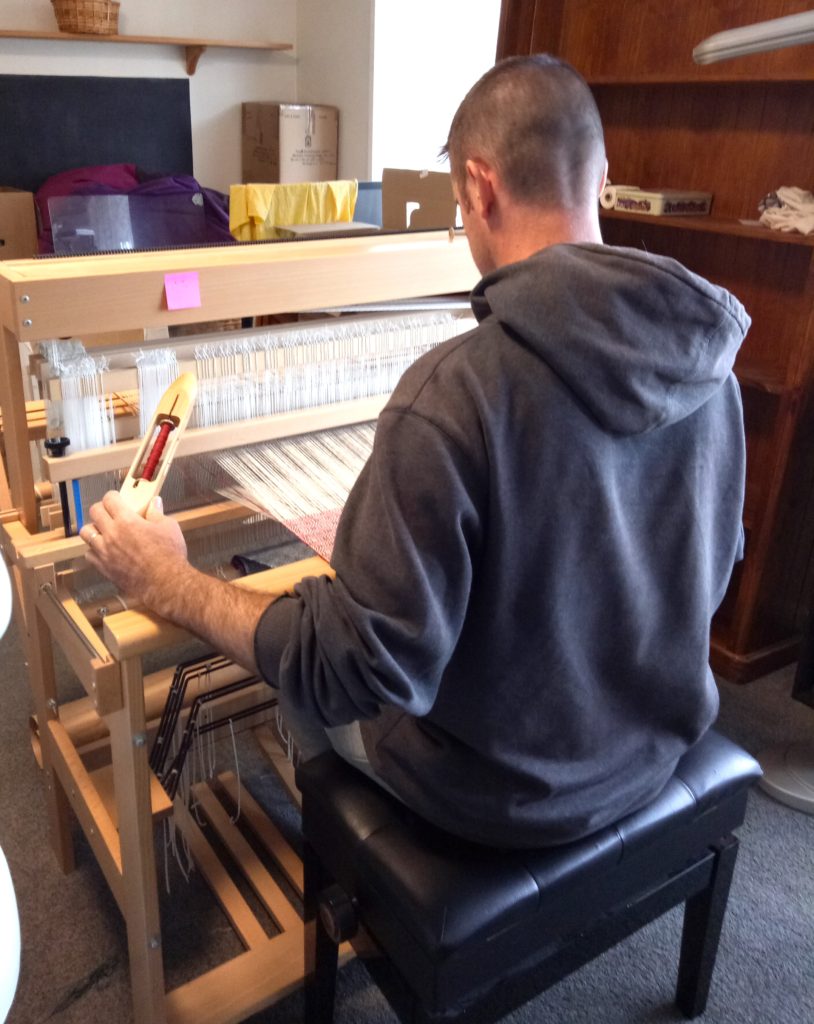
I mentioned that this project turned out to be special in another way. My husband has been interested in having a go on the floor loom for some time now, so I decided the last towel of the warp would be a good opportunity. I wasn’t too worried if it didn’t turn out well, as it was just for us.

Imagine my surprise when he took to it like a duck to water, quickly declared that it was “fun” and promptly finished off the second half of the towel I had started on! After giving him a few basic pointers, he surprised me with how quickly he picked up the steps. Now he is very interested in weaving more and even learning how to dress the loom. Victory! 😀

If you love this pattern draft as much as I do, you can find it on page 88 and 89 in Anne Dixon’s Handweaver’s Pattern Directory – a most excellent book and awesome resource for 4 shaft drafts.

I also recommend Patti Graver’s Next Steps in Weaving for weaving at this level.

If you’re interested in getting started in floor loom weaving, check out my Introduction to Floor Loom Weaving, my Follow Up Floor Loom Weaving, or save by purchasing a bundle of the two courses together.

I made a little video to compliment this blog post to help you feel confident about cutting your hand woven fabric. I explain my 3 Key Ingredients to cutting without fear:

If you have any questions about my towel project or using cottolin, let me know in the comments below!

Until next time…

Happy Weaving!

Filed Under: 4 shaft weaving, Cutting Hand Woven Cloth, Inspiration, Neat edges, Weaving, Yarn Tagged With: 4 shaft weaving, cutting cloth, cutting hand woven cloth, floor loom weaving, hand woven towels

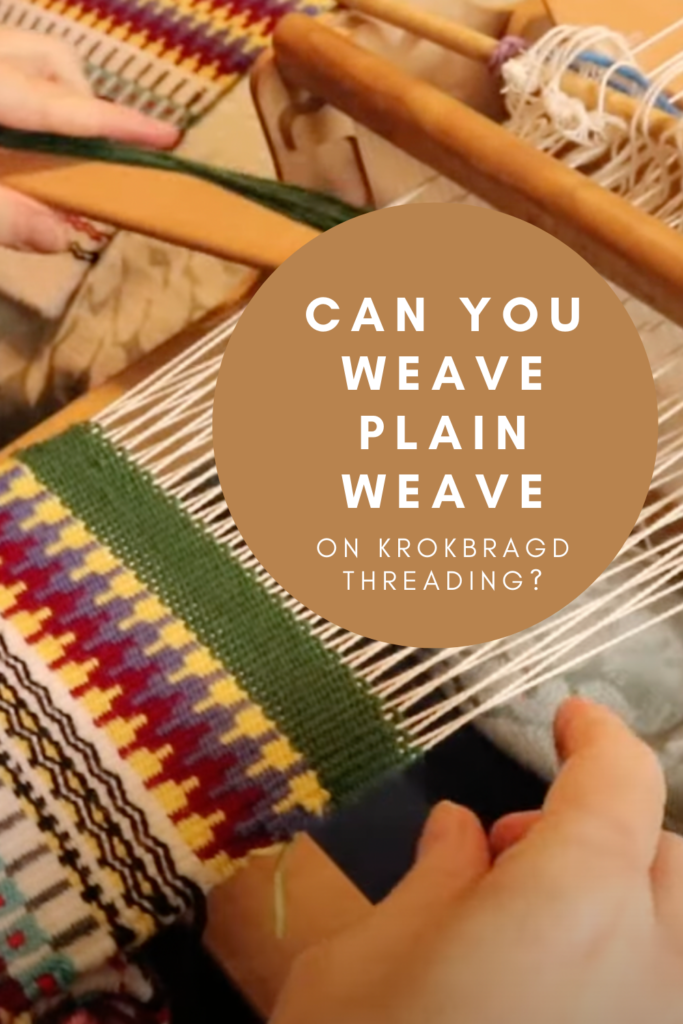
Can you weave plain weave on krokbragd threading?

by Kelly 9 Comments

My answer to this question is: “Yes… but are you sure you want to?”

There are times when you’re weaving krokbragd and you want to have a little area of just plain colour, whether it’s to break up a busy design or as a border section.

*This post contains affiliate links. For more information, please see my disclosure policy.

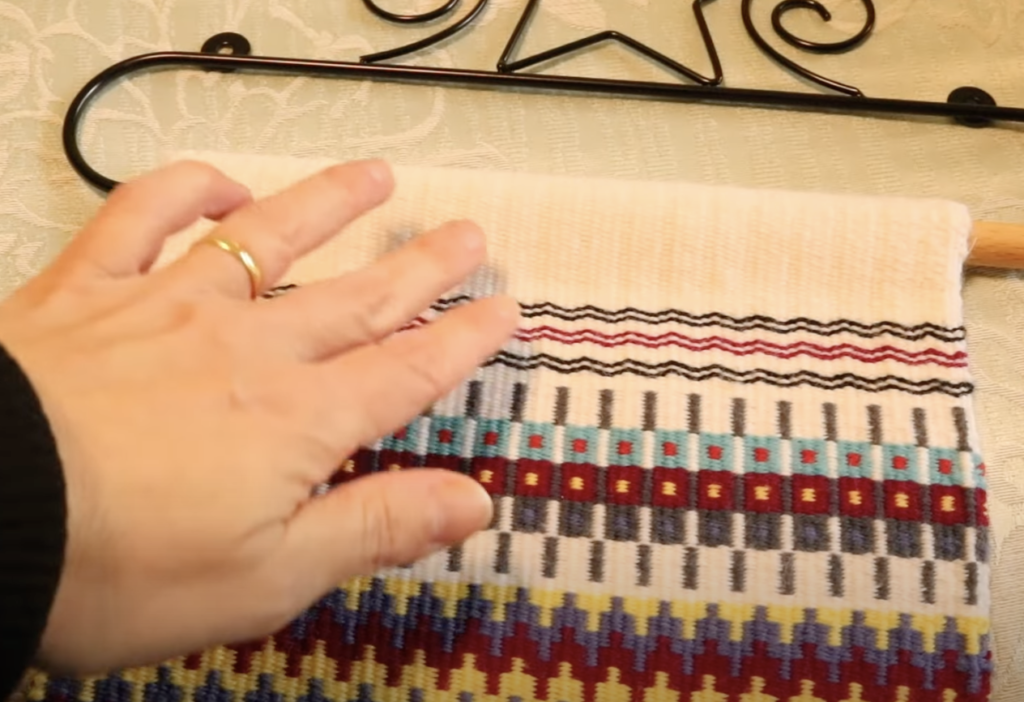
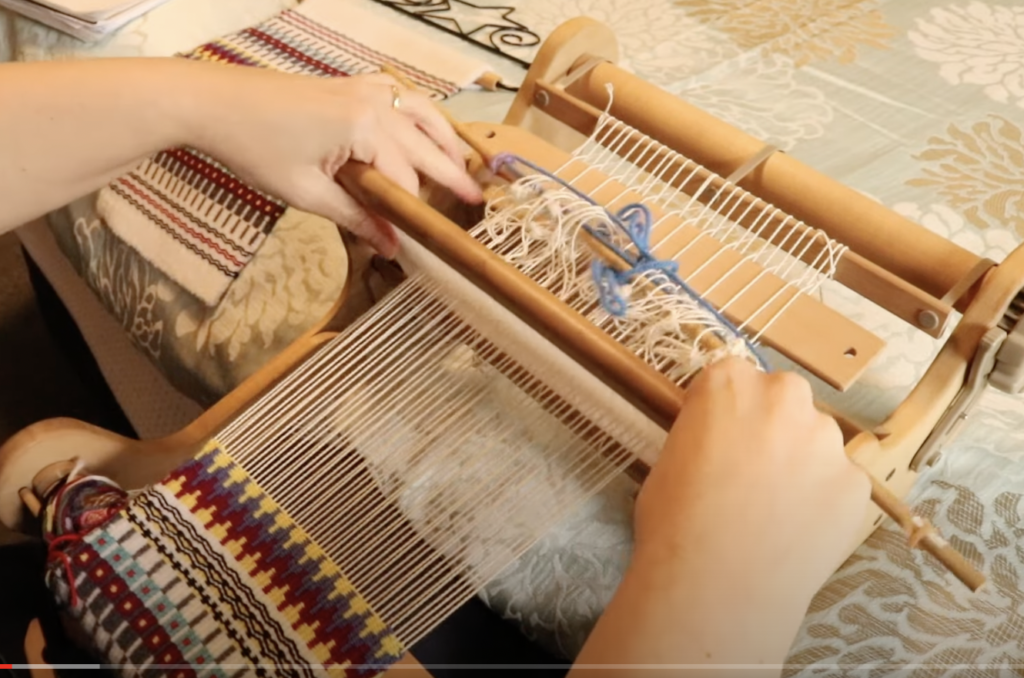
My wallhanging piece pictured above has some larger bands of solid white at the top and the bottom to act as borders. The top section was also woven in order to fold over and form the sleeve for my quilt hanger.

You might naturally think that for weaving a solid band of colour, you would choose plain weave. If you have your rigid heddle loom set up with a single heddle, heddle rod and pick up stick, plain weave is easy.

Single heddle, heddle rod and pick up stick loom setup

All you have to do to achieve plain weave on this setup is:

  1. Heddle up
  2. Heddle down

However, plain weave is definitely not the best option (in my opinion) and I’m going to tell you why.

Plain weave is a balanced weave

By it’s very nature, the amount of warp showing compared to the amount of weft showing is equal, ie. balanced! Now, consider the very weft faced krokbragd you have been weaving all this time. The weft completely covers the warp so that all you see is the colours of the weft forming patterns. If you suddenly throw a band of plain weave in there, it’s not going to match up so well with the krokbragd.

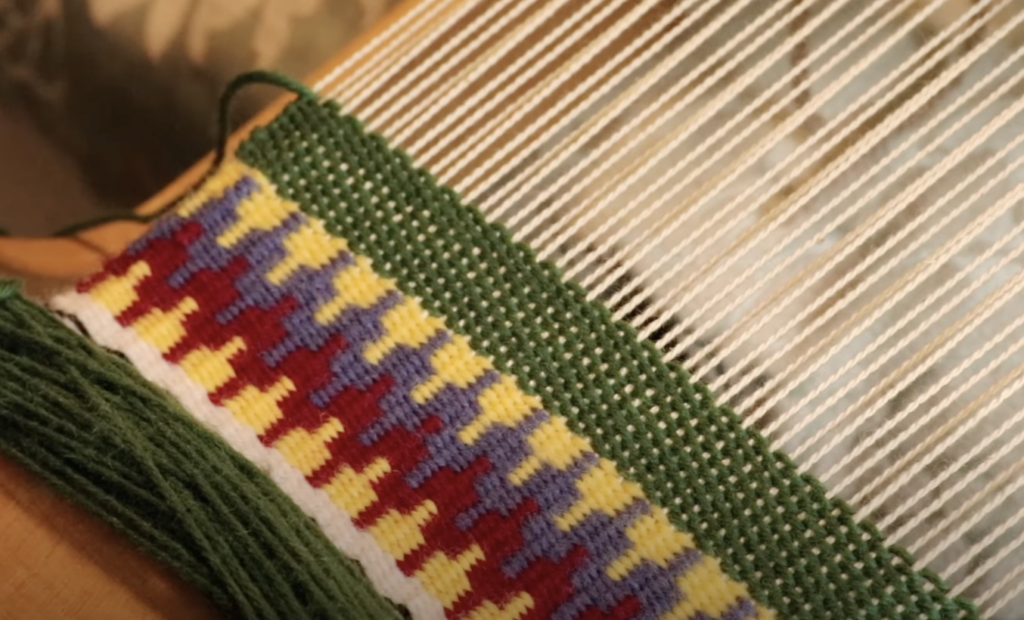
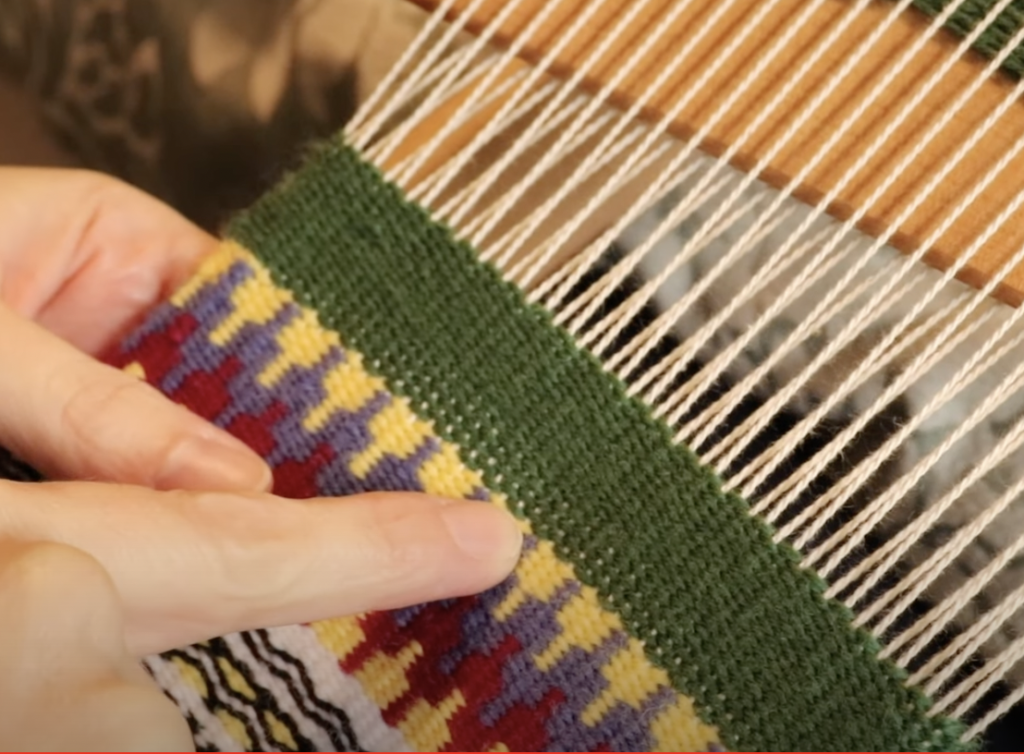
Compare the band of green plain weave just woven with the rest of the krokbragd underneath. See the problem?

The warp is showing through, and considering we have spent the rest of the piece carefully beating down the weft to cover the warp, the plain weave now sticks out like a sore thumb! If the entire piece was plain weave, it would be desired that the warp is showing through at the same rate as the weft, but not for krokbragd.

Plain weave is a lighter weave structure

It’s not only the visual aspect of the plain weave that is different to the krokbragd either. Weft faced fabrics are generally quite stiff and dense. There is a great difference in texture between the two weave structures on this piece, with the plain weave section being thin and light.

Changing the weave structures changes your edges

This difference in weight of the woven piece affects the fabric in other ways too. Krokbragd has more draw in than plain weave, so suddenly my edges are no longer consistent and look slightly bulgy in the plain weave section.

So, how do we solve this problem?

Thankfully the answer is extremely simple. All you have to do is keep weaving krokbragd!

Just use the solid colour that you want for your band of colour and move through the 3 step krokbragd weaving sequence. Don’t change your colour until you have the desired amount of weaving.

You can now compare the two sections of weaving in green – the part where the warp is showing is the plain weave and the more uniform looking part on top is the krokbragd. Also, because the green krokbragd follows the previous weave structure, it looks much more uniform and “like it belongs” there.

If you want to learn more about weaving krokbragd on your rigid heddle loom, check out my Krokbragd 101 online course.

If you would like to view this blog post in video format, please view here:

I hope you enjoyed this article! Perhaps it gave you some new ideas for krokbragd design? Or perhaps it has inspired you to give krokbragd a try? Let me know in the comments section below!

P.S. Have you seen the share buttons at the top of this post? You can easily share this article to Pinterest, Facebook or via email with one click. The more shares, the more weavers I can help! Thank you!

Until next time…

Happy Weaving!

Filed Under: Krokbragd, Neat edges, Online Weaving School, Rigid heddle weaving, Rigid Heddle Weaving Patterns, Tutorials, Weaving Tagged With: krokbragd, plainweave, rigid heddle weaving

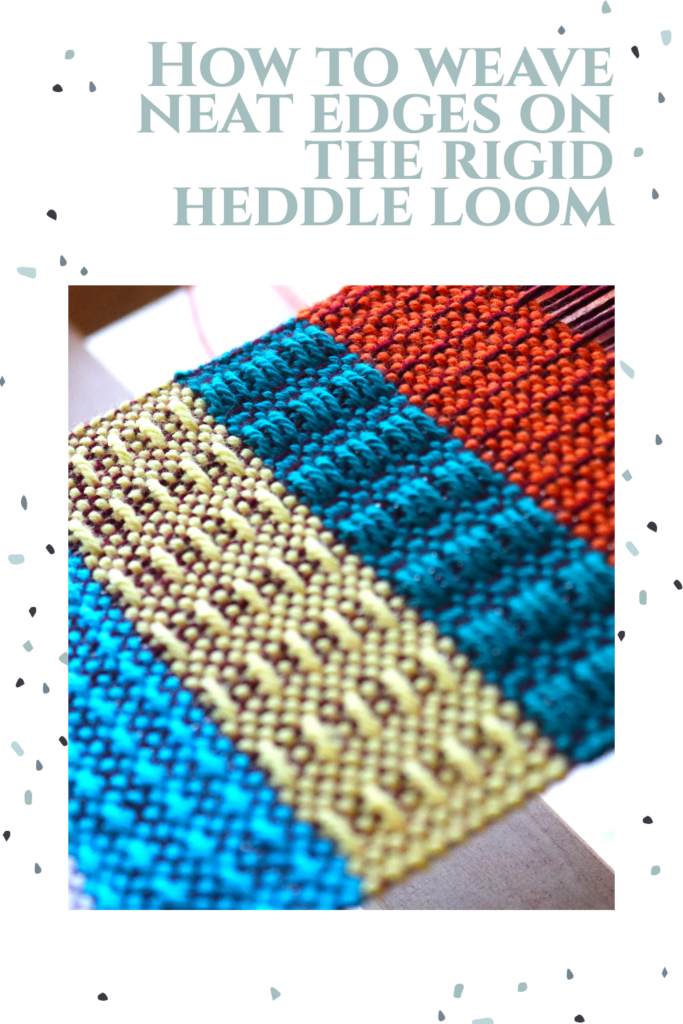
How to weave neat edges on the rigid heddle loom

by Kelly 8 Comments

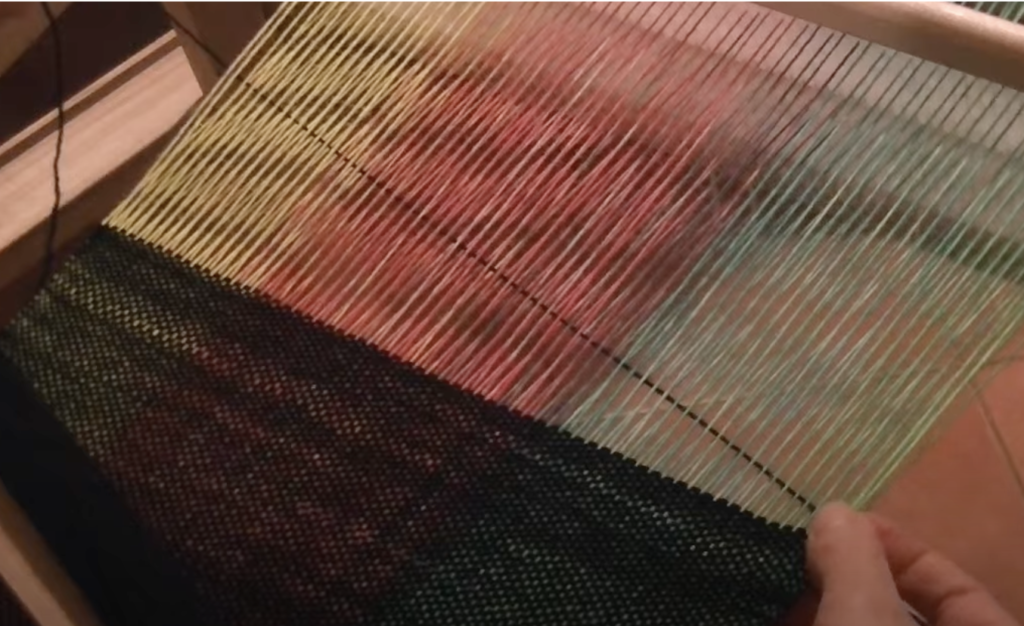
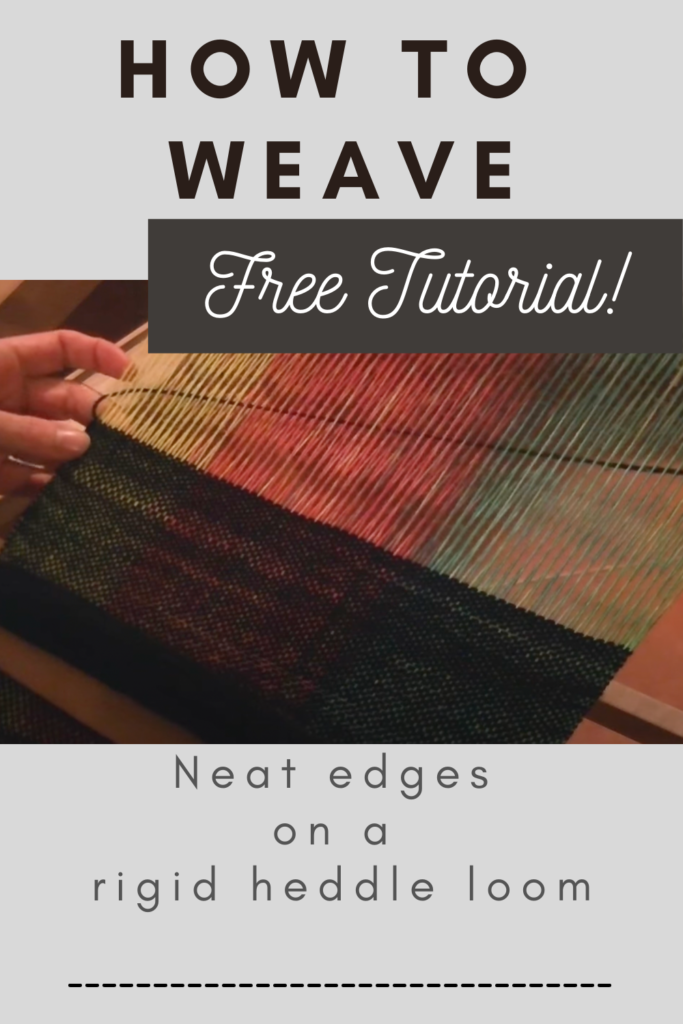
Nearly a decade ago, I took a leap and uploaded my very first YouTube video: How to Weave Neat Edges on the Rigid Heddle Loom. Using my son’s old camcorder (surprisingly, the footage still holds up!), I shared a simple yet essential weaving tip. My son even stepped in as editor, complete with some charmingly cheesy background music! 😄

*This post contains affiliate links. For more information, please see my disclosure policy.

You could say that this is the video that started it all for me. And to be really dramatic, I could say that there would be no Online Weaving School without this first video. Because, regardless of my fears and zero expectations, people actually watched the video. Then they asked for more.

I never did write a blog post to compliment that video, and there are tips and tricks that I want to point out as important, especially for beginner weavers. So here we go, one blog post, coming up!

TIP ONE – TENSION!

I do go on about this a bit, but that is only because it is SO CRUCIAL!! If your warp is either too loose or too tight, you are going to meet with trouble when you start weaving. Let’s look at too loose first.

Too loose!

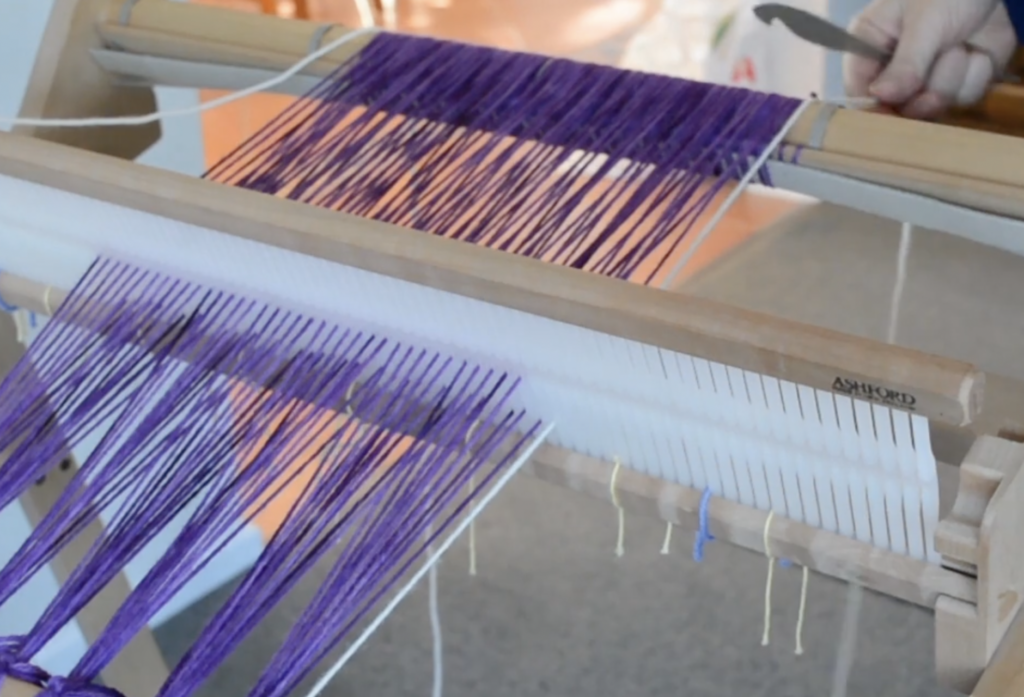
This is an example of too loose. If you push up underneath the warp or push down on top and it’s like your hands are on a trampoline that has lost it’s zing, you’re too loose. A too loose tension will result in too loose edges, and even if you employ the techniques I discuss in the video, it’s only going to help a certain amount. When your weft travels around the edge warp threads, it naturally wants to draw in that warp thread a little as it travels to the other side.

That is normal and natural as the weft takes it’s path back and forth across the warp. But, it should not be an excessive amount and it should be consistent. I’m going to talk about consistency more in a moment.

One way to know if your warp is way too loose, is your heddle won’t like to stay in position when you place it there. In the up position, it may fall, in the down position it may just hang there. Doesn’t that sound sad?

So, if your edges seem too loose, try advancing your warp a little.

Then there is the opposite problem, your tension is too tight.

An easy way to know if this is your problem is that you have to wrestle with the heddle to get it into the up position. Not good for your poor old warp which my repay you by snapping a thread. Not good for your loom either, which is only designed to hold a certain amount of tension before damage can occur.

When your tension is too tight, you will also get problems at the edges. They may start to curl upwards as you weave the weft and the warp tries to deal with all that tension. This will also cause the dreaded “smile” from your weaving. It sounds like a good thing to have your weaving smile, but trust me, it ain’t smiling because it’s happy! It will be hard to beat, so your fell line could end up uneven. I can always tell a “too tight” warp because the weft at the edges looks unsettled and unhappy. Not consistent and cruisy.

In between “too tight” and “too loose” tension is “inconsistent tension”. I feel that this is even worse than the previous two, because at least they can be remedied easily by adjusting warp tension.

Inconsistent warp tension usually occurs in the warping process. Perhaps you have warped independently, you’ve grabbed the warp with one hand to roll it on, but you haven’t paid enough attention to the middle part of the warp. It then rolls on looser than the rest. What you finish up with when you start warping is a loose middle and too tight edges. Aaaagh! Not fun. At all. And, once again, a sure recipe for whacky edges.

If you have ongoing warp tension issues and find that frustrating, I highly recommend a beginner’s class like my Woe to Go – Beginner Rigid Heddle Weaving.

TIP TWO – WINDING OF YOUR STICK SHUTTLE

The way in which you wind yarn onto your stick shuttle will affect your edges. I like to use a figure 8 to wind my shuttle yarn, as it creates a flow, meaning the yarn feeds off the shuttle without snagging or pulling unnecessarily. This, in turn, means a smoother weave and no sudden catching or pulling in of the edge threads due to yarn getting stuck on the shuttle.

If you need to see the figure 8 method of loading your stick shuttle, you can watch here:

TIP 3 – ANGLE THE WEFT

When you take your weft picks through, you want to ensure that you angle it before beating. If you’re a beginner, a 45 degree angle is good, and for more experienced weavers, around 25 – 30 degrees is fine. Doing this helps with your edges because it gives the weft room to settle into place, rather than being dragged into a tight spot that feels un-natural. And now I’m talking as though the yarn has feelings, but that is what happens to you if you work with it for long enough 😆

TIP 4 – PINCHING TECHNIQUE

I think that maybe, out of all the things I’ve shared with others about weaving, this one may have been the most helpful to the greatest number of people. It really does make that much difference.

Let’s go over the steps to my pinching technique:

I’ve taken the weft through, I’m angling it, and then I’m bringing my pointer finger into the shed to feel the weft as it travels around the edge of the warp thread.

Then, I’m placing my thumb on top so that the weft yarn, along with the warp thread are wedged or “pinched”. This gives me a really good tactile sense of how the weft is behaving at the edge warp. Perhaps it needs tightening up, or perhaps it needs loosening. I place some tension on the weft yarn with the opposite hand to help it settle in.

The last step of the process is to give that weft tail that is sitting up on the right hand side a little tug to help it settle into place before the next pick.

If you practice this technique for a while, you will learn what the yarn is telling you (oops, there I go again!) and how you should proceed.

If you enjoyed this tutorial, you may want to check out the huge variety of classes I have on offer in my Online Weaving School. There are many rigid heddle classes, from beginner to advanced. If you purchase a membership, you also gain access to the private member’s group – a fantastic community of like minded weavers and support team. I hope to see you there!

I have a bunch of other posts and videos on weaving neat edges, as it’s a problem that pops up so often. Isn’t it good to know that there is something you can do about it?

Help! My edges are wonky!

Troubleshooting loose slot threads

Going around the edges

Try this trick for neater edges

Lifeline selvedge technique

Yet another neat edges tutorial

Thank you for visiting, and be sure to leave me a comment down below.

Until next time…

Happy Weaving!
Filed Under: Neat edges, Online Weaving School, Rigid heddle weaving, Tutorials, Weaving Tagged With: neat edges, rigid heddle weaving tutorial

Primary Sidebar

Categories

Archives

Meta

  • Log in
  • Entries feed
  • Comments feed
  • WordPress.org

Copyright © 2025 Kelly Casanova Weaving Lessons on the Foodie Pro Theme