• Skip to main content
  • Skip to primary sidebar

Kelly Casanova Weaving Lessons

  • Hi! I’m Kelly!
    • Disclosure
  • Online Weaving School Class Index
    • Common account issues
    • Common technical issues
    • What do I get with a membership?
  • New to rigid heddle weaving? Start here!
    • Never heard of the rigid heddle loom?
    • How to weave neat edges on the rigid heddle loom
    • Rigid heddle weaving
    • Rigid Heddle Weaving Patterns
  • Patterns
  • Subscribe

Yarn

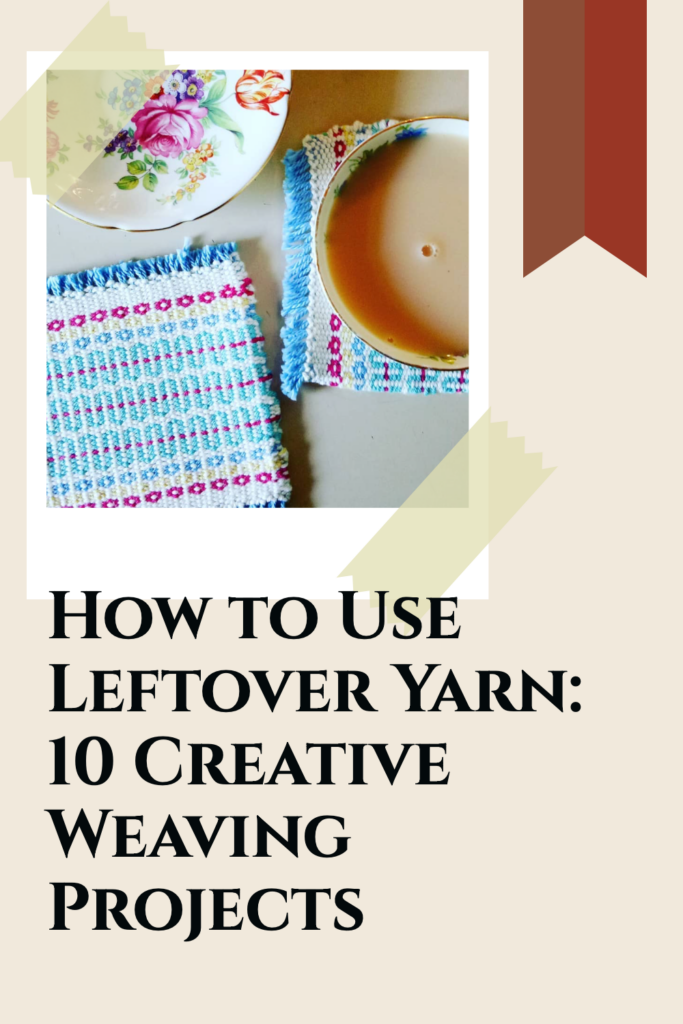
How to Use Leftover Yarn: 10 Creative Weaving Projects

by Kelly Leave a Comment

If you’re a weaver, knitter, crocheter or fiber artist, chances are you have a stash of leftover yarn—those little bits and ends that seem too small for a full project but too precious to toss. Instead of letting them pile up, why not turn them into beautiful, functional woven projects?

Yarns can be expensive and it’s just great practice to aim to minimise yarn waste from your weaving projects.

In this post, I’ll share 10 creative ways to use leftover yarn in weaving—from small home décor items to quick and easy gifts. Whether you’re passionate about reducing fiber waste or just love experimenting with colors and textures, these ideas will help you make the most of every last strand!

1. Woven Coasters (Perfect for Small Scraps!)

Why It’s Great:

Woven mug rugs and coasters are ideal for using up short lengths of yarn. They’re small, quick to make, and perfect for gift-giving.

How to Make It:

  • Use a small loom or a cardboard loom or potholder loom.
  • Mix different textures and colors for a fun, scrappy effect.
  • Finish the edges with tassels or a simple hemstitch.

👉 Bonus Tip: Group coasters into sets of four and tie them with twine for a charming handmade gift!

2. Wall Hangings and Tapestry (Mix Colors & Textures!)

Why It’s Great:

Wall hangings allow you to mix and match yarn types while embracing an eclectic, bohemian style.

How to Make It:

  • Use a branch, quilt hanger or dowel rod as the top hanger.
  • Weave different textures (chunky wool, cotton, embroidery thread) for depth.
  • Add fringe, loops, and knots for a playful, freeform look.

👉 Bonus Tips: Try an ombre effect by weaving from dark to light shades of the same color.

: Krokbragd is a wonderful weave structure for wall hangings. Check out the Krokbragd 101 Online Course to learn how to weave many krokbragd designs and a a striking wall hanging on your rigid heddle loom.

3. Bookmarks (Quick & Easy Gifts!)

Why It’s Great:

Perfect for thin yarn scraps, bookmarks make charming and practical gifts for book lovers.

How to Make It:

  • Warp a narrow warp on a small loom.
  • Use finer yarns for a lightweight feel and reduce bulk.
  • Finish with braided or beaded tassels or a short, hemstitched fringe.

👉 Bonus Tip: Personalize it with initial embroidery for a thoughtful touch!

4. Woven Bracelets, Keychains and Key Fobs

Why It’s Great:

Turn colorful yarn leftovers into fun, wearable accessories!

How to Make It:

  • Use a small loom or inkle loom for sturdy, structured pieces.
  • Experiment with geometric patterns for a modern look.
  • Attach a keyring or metal clasp for finishing. Use key fob hardware for a professional and simple finish.

👉 Bonus Tip: Sell these at craft fairs or bundle them with other handmade items!

5. Wrist Warmers

Why It’s Great:

Keep your hands and wrists warm without constricting your fingers!

How to Make It:

  • Weave individual small panels to stitch together or use a tubular method.
  • Hem any raw edges for sturdiness.

👉 Bonus Tip: Choose coordinating colors for a more cohesive design! You could even choose colors to match your favourite outfit.

: Check out the Wrist Warmers Online Class which uses a rigid heddle loom and tubular weaving to make a warm and groovy pair of wrist warmers!

6. Hat

Why It’s Great:

Hats are such a great item to make for yourself or to gift. You can customise the style to suit your own preferences. This one is also great for multi craftual people as you can incorporate techniques.

How to Make It:

  • Weave either a piece to seam or a tube (a tube only requires one seam)
  • Wool is great for snug and warm hats
  • Either weave extra fabric for a turned up brim or knit/crochet a hat band that is stretchy.

👉 Bonus Tip: Make a pom pom to add on top!

: Judith Shangold has an excellent book – Weave, Knit, Wear that provides a lot of inspiration for woven garments, including hats.

7. Weaving for Mending & Embellishment

Why It’s Great:

Use weaving to patch clothing, bags, or even furniture!

How to Do It:

  • Create woven patches to mend holes in jeans or jackets.
  • Add decorative woven accents to hats, shoes, or pillows or on the back of a denim jacket as a panel.

👉 Bonus Tip: Try visible mending techniques for an artistic, eco-friendly touch!

8. Notebook Cover

Why It’s Great:

A notebook cover makes such a thoughtful gift as it’s both useable and beautiful.

How to Make It:

  • All you need is a rectangle of woven fabric, appropriate to the size of the notebook you wish to cover.
  • You can choose to line the cover with additional fabric or not.
  • A cover can be as individualised as you like, let your imagination go wild!

👉 Bonus Tip: Use contrasting colors for a striped effect!

: This free Notebook Covers Project is the perfect place to get your started.

9. Woven Greeting Cards

Why It’s Great:

Handwoven details on cards or gift tags add a personal touch to gifts.

How to Make It:

  • Weave a tiny strip and glue it onto cardstock. Or use some woven fabric scraps you already have.
  • Cut a window from your card and stick your fabric in to look like a framed artwork.
  • You could cut your fabric into shapes to stick on to the card.

👉 Bonus Tip: Pair with handmade envelopes for a complete set and a special gift!

10. Woven Ornaments

Why It’s Great:

Ornaments make wonderful seasonal decorations and can be made from the smallest yarn scraps.

How to Make It:

  • Weave mini stars, hearts, or trees.
  • Attach an inkle loop for hanging.
  • Add gold thread or beads for extra charm.

👉 Bonus Tip: Make sets of handwoven ornaments for holiday markets or gifts!

: You can get started with this free tutorial for making Handwoven Christmas Ornaments.

*This post contains affiliate links. For more information, please see my disclosure policy.

Give Your Leftover Yarn a New Life!

By weaving with leftover yarn, you’re not only reducing waste but also creating something unique and meaningful. You made an investment when you purchased the yarn, so why not get the most out of it? Whether you turn your scraps into home décor, accessories, or gifts, these projects prove that no yarn is too small to be useful!

Pin & Save This for Later! 📌

Love these ideas? Pin this post on Pinterest so you can come back to it anytime!

Until next time…

Happy Weaving!
Filed Under: Weaving, Yarn Tagged With: 10 creative weaving projects, how to use leftover yarn, no waste weaving projects

Choosing the Perfect Cotton Yarn: A Guide for Your Weaving Projects

by Kelly Leave a Comment

Choosing the Best Cotton for Your Weaving Projects: A Guide for Beginners and Beyond

Cotton is one of the most versatile and commonly used fibers in weaving projects. Whether you’re creating hand or kitchen towels, table runners, or baby blankets, the right cotton can make a world of difference in your final result. In this guide, we’ll explore various cotton yarns, from locally sourced options to globally available alternatives, with practical tips to help you choose the best yarn for your weaving needs.

Why I Love Bendigo Woollen Mills Cotton

My go-to cotton is Bendigo Woollen Mills cotton. Here’s why it’s such a fantastic option:

  1. Locally Made: As an Australian, I love supporting local manufacturers.
  2. Economical: Bendigo cotton comes in large 200g balls, making it affordable for bigger projects.
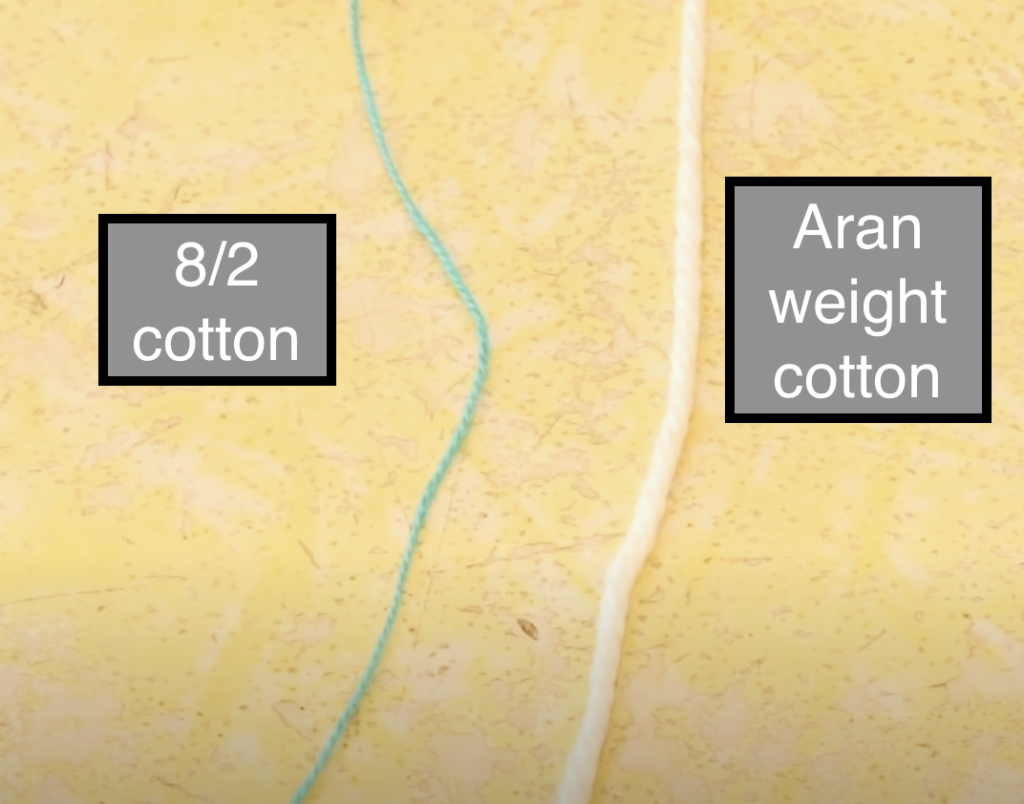
  3. Versatile Weight Options: Available in 4-ply (fingering weight), 8-ply (DK weight), and 10-ply (aran weight).
  4. Color Variety: Bendigo offers a vast range of colors, with new seasonal blends frequently added.

I’ve used Bendigo cotton in many of my weaving projects, including:

  • Log Cabin Table Runner (available as a digital download and online class).
  • Wash Your Hands Towels (a free project).
  • Pinwheel Table Topper (rigid heddle loom class).
  • Lux Hand Towels (digital download).
  • Double-Width Baby Blanket (online class).

Alternatives for Non-Australian Weavers

If you’re outside Australia, shipping Bendigo cotton may not be cost-effective. Thankfully, there are excellent alternatives:

1. I Love This Cotton (Hobby Lobby)

  • Weight: DK.
  • Pros: Affordable, widely available in the U.S., and comes in large balls with a great color selection.
  • Best For: Towels, dishcloths, and lightweight projects.

2. Sugar ‘n Cream (Lily Yarn)

  • Weight: Aran.
  • Pros: Durable yet soft, perfect for hardwearing items like placemats and hand towels.
  • Best For: Place mats (used in my Woe to Go! Beginners Class), dishcloths, and hand towels.
  • Tip: Works best with a 7.5-dent heddle.

3. Knit Picks Dishie

  • Weight: DK.
  • Pros: Hardwearing but soft, suitable for kitchen use or even baby blankets.
  • Best For: Baby blankets, dishcloths, and towels.

4. Lion Brand 24/7 Cotton

  • Weight: DK.
  • Pros: Readily available in most countries, affordable, and versatile.
  • Best For: General weaving projects.

5. Yarn and Colors Epic Cotton

  • Weight: Slightly heavier than DK.
  • Pros: Exceptionally soft, available in unique pastel shades.
  • Best For: Baby blankets, small-scale projects like dishcloths.
  • Consideration: Comes in smaller 50g balls, which can increase the cost for larger projects.

6. Maurice Brassard 8/8 Cotton

  • Weight: Thick (equivalent to aran).
  • Pros: Durable and excellent for projects requiring structure.
  • Best For: Table runners, cushion covers, or experimental projects.

Choosing the Right Cotton for Your Project

When selecting cotton for your project, consider:

  • Thickness: Thicker cottons are great for hand towels and placemats but may not be suitable for tea towels or other lightweight items.
  • Softness: Some cottons, like Bendigo and Epic, are soft and lofty, while others, like Sugar ‘n Cream, are sturdier.
  • Cost and Availability: Opt for locally available options where possible to save on shipping.

Projects That Pair Perfectly with Thicker Cotton

Thicker knitting-style cottons work well for:

  • Hand Towels: Like my Wash Your Hands Towels or Lux Hand Towels.
  • Table Runners and Placemats: Add structure and durability to your tableware.
  • Dishcloths: Try my Members-Only Dishcloth Class at the Online Weaving School.

However, these thicker yarns aren’t ideal for:

  • Tea Towels: Thicker cotton tends to leave lint on dishes and isn’t as absorbent for drying.
  • Delicate Fabrics: Consider thinner cottons like 8/2 weaving yarns for finer projects.

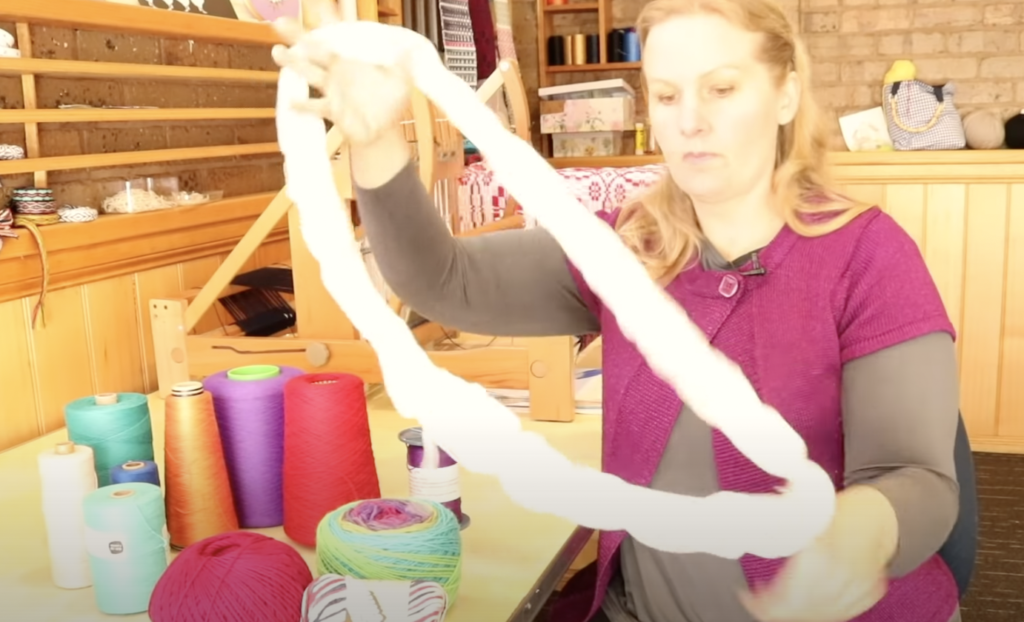
Check out this video to see some of the mentioned yarns in action ⤵️

*This post contains affiliate links. For more information please see my disclosure policy.

Exploring different cotton yarns can open up endless possibilities for your weaving. If you’re unsure, start with small samplers or projects like dishcloths to test how a particular cotton works on your loom. For more guidance, visit my Online Weaving School or check out my project downloads in my Design Store.

Until next time…

Happy weaving! 😊

Filed Under: Weaving, Yarn Tagged With: best weaving cotton, choosing cotton yarn, choosing yarn for weaving

Ask Kelly – Which cotton weight for kitchen towels?

by Kelly 5 Comments

Appropriate yarns and yarn weight for kitchen towels is a subject that pops up regularly in the weaving world. Seasoned towel weavers usually have their favourites and have good reasons for doing so, I know that I certainly do!

Today’s question is specifically about a good yarn weight for kitchen towels, but it provides a good opportunity for discussing other important aspects of yarn in general for kitchen towels.

“Hi Kelly! I have a question that I just cannot seem to get answered! 

Would it work to get a decent weight kitchen towel if I use 8/2 cotton, double weave and a 10 dent reed? I do not have another size of reed. I have an Ashford Rigid Heddle loom. 

I just worry that it won’t be a good weight…I so appreciate your help. I love your classes and have several of them! “

Hi Vicki,
I have woven a few sets of towels on my rigid heddle loom with a 10 dent reed just by doubling the warp and then using a single weft.

While I do think that a 12-12.5 dent heddle gives a slightly better result, the 10 dent towels still work out fine 😊

To elaborate on my answer to Vicki, I find that a sett that is a little closer is better than a sett that is a little too loose. A kitchen towel is a hardworking asset to your kitchen, so you want to make sure that it will not only do the job well, it will also last a long time.

An appropriate sett will also ensure suitable absorbency, which is very important for a kitchen towel!

Still addressing Vicki’s question, you have a couple of options for how to double your sett when weaving with a rigid heddle loom.

I usually go for the easiest option, which is to simply double your ends using one heddle. An example of this would be similar to what Vicki planned to do – use 1 x 10 dent heddle and double the warp. A really simple way to do this is to thread one warp loop through every hole and every slot for the width of your project. That way, when you get to the threading part you are one step ahead and can progress to the tie on without threading the holes separately.

Another option is to use two heddles of the same size for your warp. When actually weaving, you can hold the two heddles together to beat or just beat with the front heddle. This technique is outlined (along with a threading chart) in Jane Patrick’s Weaver’s Idea Book and also Syne Mitchell’s Inventive Weaving on a Little Loom.

I do have a lot of resources for which yarns are best for which projects, but I will share with you my favourite “recipe” for kitchen towels.

I love to use 8/2 cottolin which is a blend of cotton and linen. This works so well because you get the benefits of using linen without some of the difficulties. It’s just like weaving with 8/2 cotton except it can be quite hairy and shed fibres while it’s on the loom.

The cottolin softens up beautifully after a wash and is very absorbent.

My second favourite yarn for kitchen towels is the reliable 8/2 cotton. I love that it comes in such a huge range of colours. I frequently combine cottolin and cotton in one towel project and it works out great.

If you’re looking for some more resources relevant to this article, check these out:

Which cotton yarn should I use?

What yarn is best for weaving?

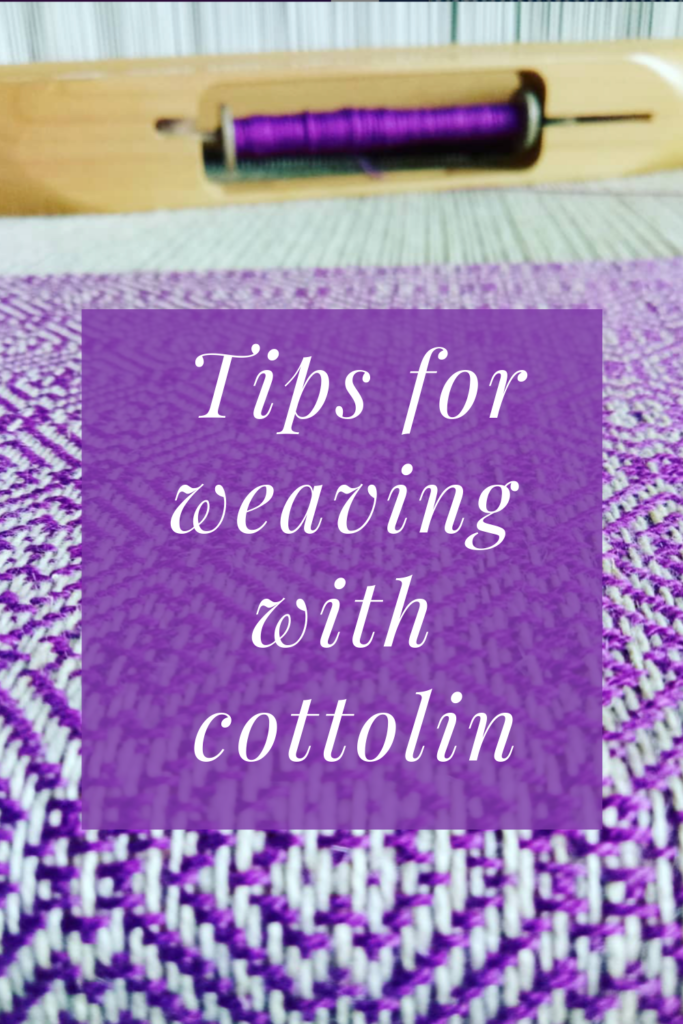
My tips for weaving with cottolin…

Or if you’re looking for some towel patterns to weave:

Bright & Beautiful Towels…

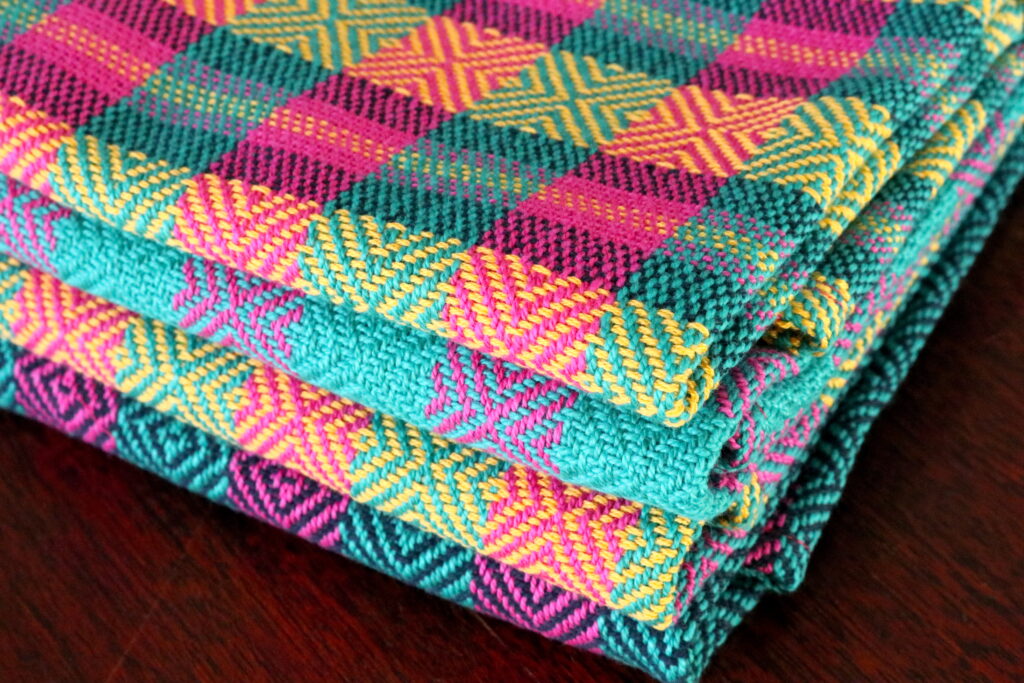
Diamond Stripe Towels…

Happy Fibonacci Towels…

I hope you have found some helpful information here today and until next time…

Happy Weaving!

*This post contains affiliate links. For more information, please see my disclosure policy.

Filed Under: Weaving, Yarn Tagged With: kitchen towels, weaving yarn

How to double your weft thread

by Kelly 14 Comments

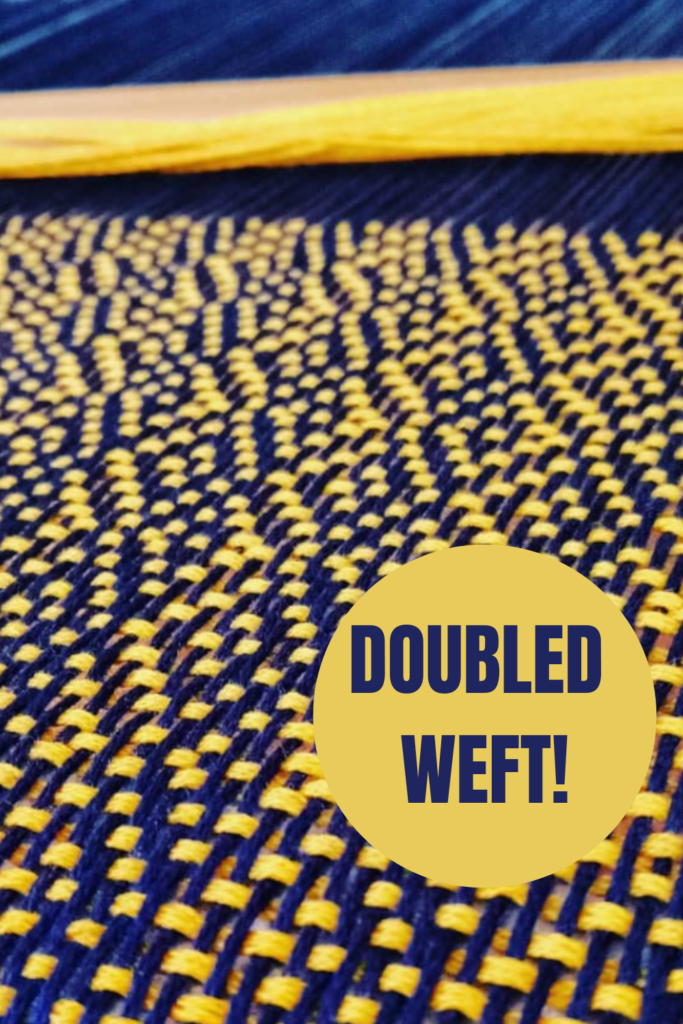
There are times that you will want to double your weft thread in order to achieve a balanced sett. Or, you may just be wanting to make the weft stand out and feature more.

If you only have one cone or ball of yarn to work from, you will need to think around how you’re going to load the shuttle to be double, rather than single stranded.

*This post contains affiliate links. For more information, please see my disclosure policy.

Today I’m going to show you how to easily double your weft when using a stick shuttle. I’ll cover a couple of different methods.

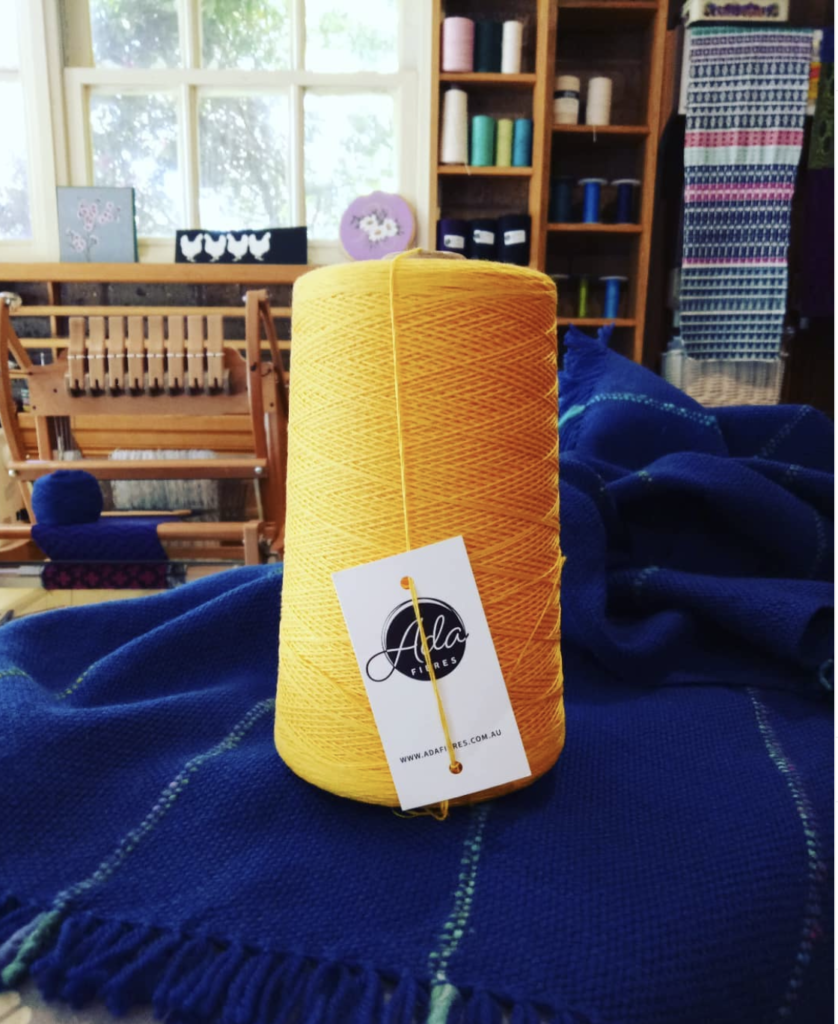
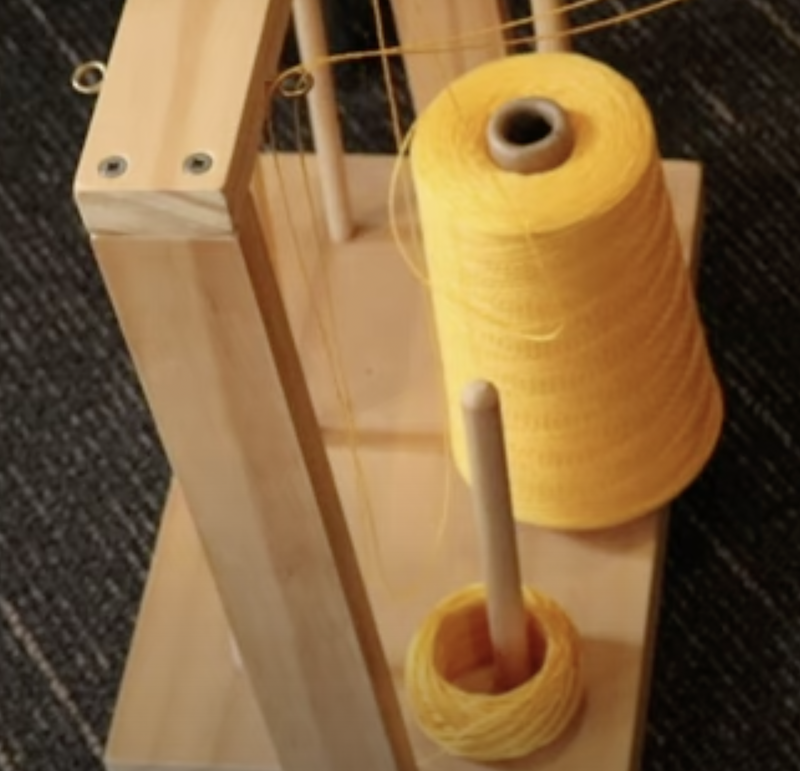
In my example piece, my warp is 8/4 cotton. For my weft, I want to use a lovely, bright yellow, I received recently from the brand new Australian cotton range from Thread Collective. This yarn however, is 8/2 cotton – quite a bit lighter than the 8/4 warp.

Considering it’s important to me that my pattern stands out and is nice and bold, the 8/2 as a single weft would not have the impact I’m wanting to achieve. I decided to double the weft.

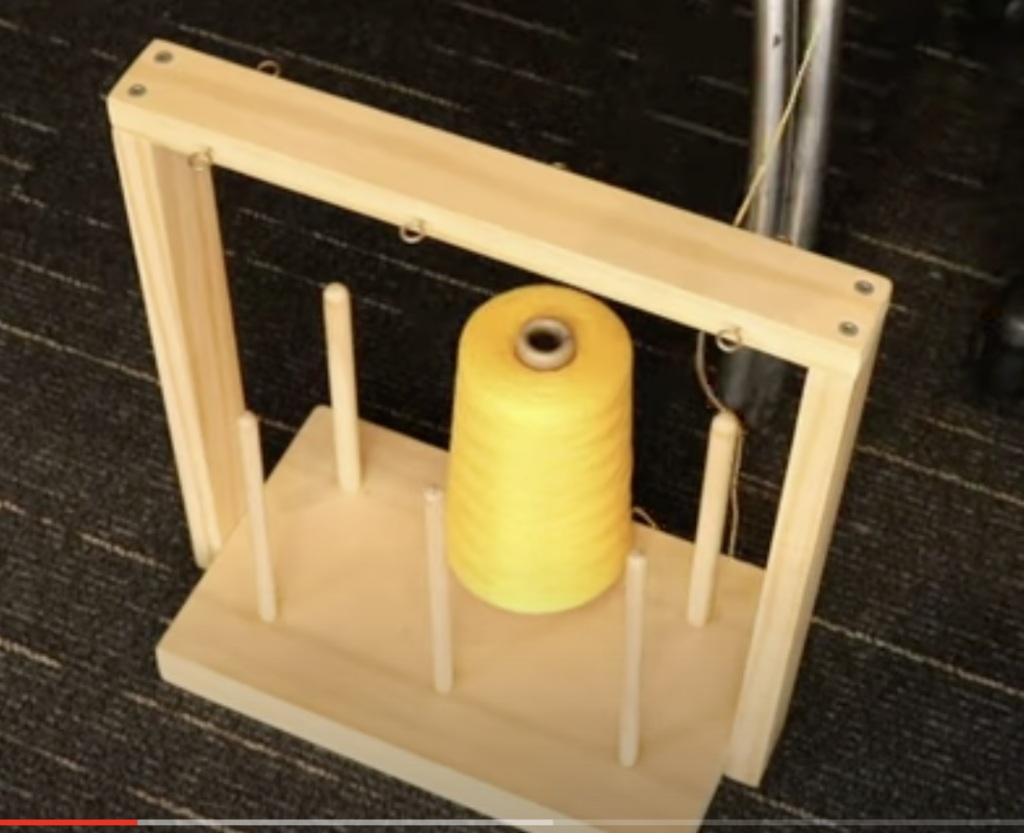
I start by placing the cone of yarn that I want to use for weft on the floor next to the table I’m sitting at. I use my cone warping stand to hold the cone steady and to feed the yarn off freely. You can also stand your cone in a box or empty cylinder of the right size – whatever stops the cone from rolling all over the floor while you’re trying to feed yarn off it!

I’m going to be using my ball winder for this tutorial, but you do not have to have one in order to successfully load your shuttle with doubled weft.

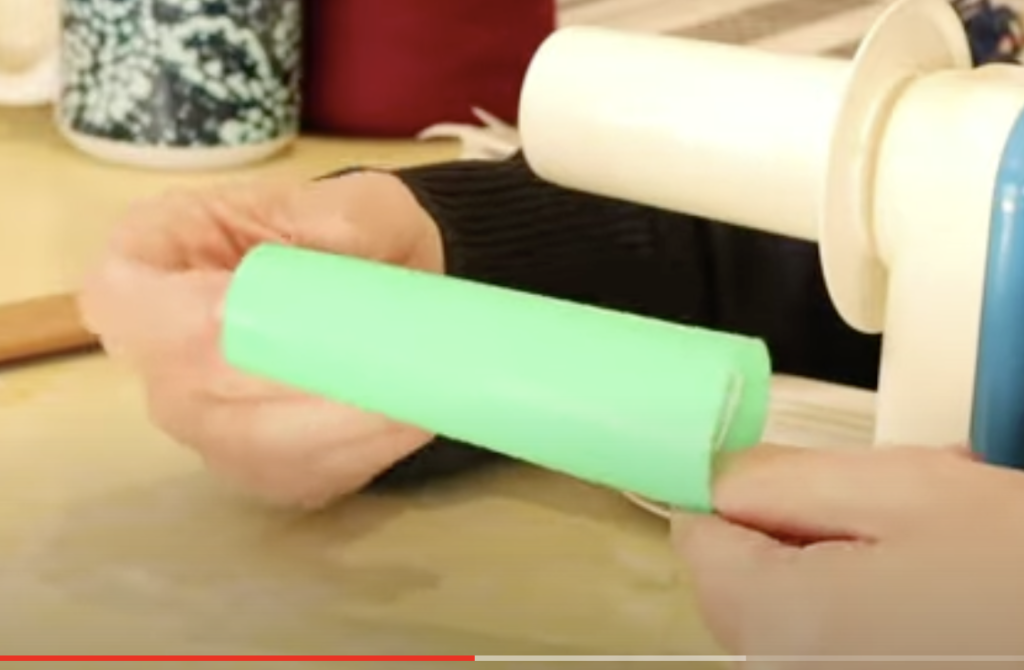
Another suggestion is to use an empty cone cylinder to wind the yarn off your full cone by hand. This plastic one is handy because it has a grip, so it’s easy to wind fast by hand, but empty toilet paper rolls are also great. You can even wind off an amount of yarn just onto your hands, though that may be a more potentially tangly method.

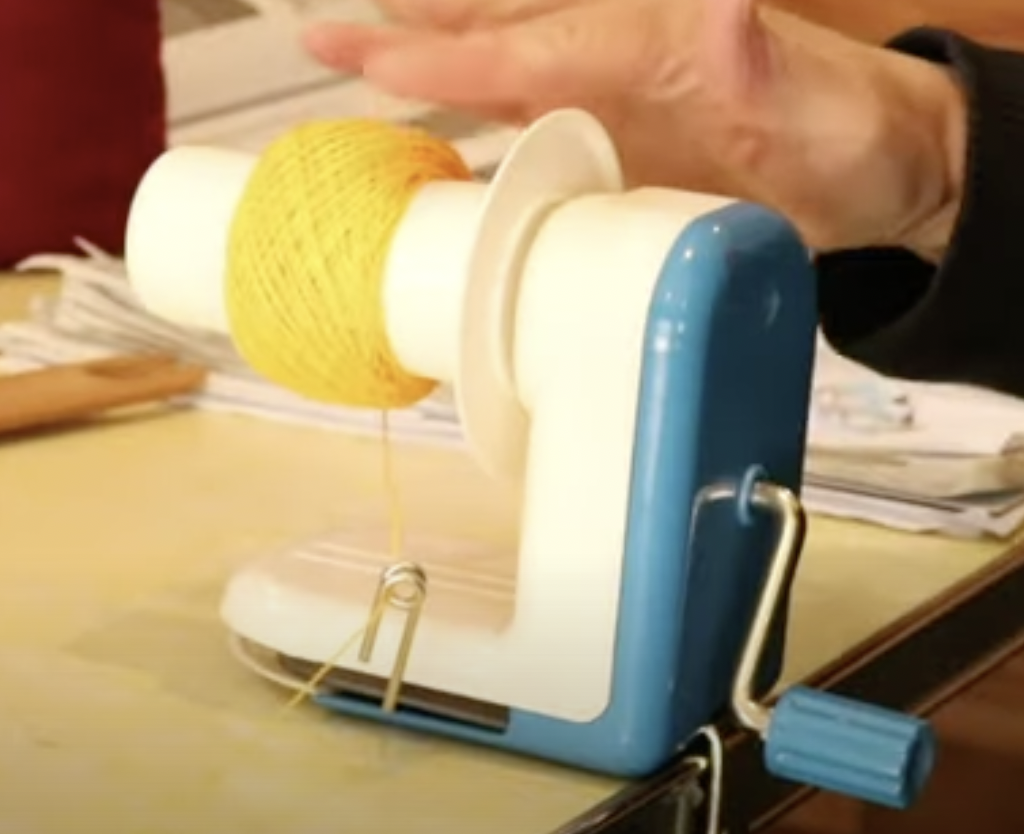
A ball winder is simple to use and does the job really quickly. I just clamp the winder to my table, thread the yarn in through the side loop, up over the central cylinder and into one of the notches, which holds the yarn in place initially and also creates a centre pull ball once you’re finished.

You then just wind manually, using the handle until you have a quantity of yarn. A couple of tips I have for successfully ball winding:

  • Keep some tension on the yarn as it’s feeding off the original cone, but don’t make it really tight. This is a mistake I made initially, and it caused problems with the yarn rotations slipping off the ball and tangling. Now I keep it a bit looser and never have that issue.
  • Hold the yarn tail for the first few rotations (particularly if you’re using a finer yarn) so that it doesn’t slip out of the notch. After the first few rotations, you can let go and it will be fine.
  • When I’m using the ball winder for doubling my weft, I usually wind off relatively small amounts at a time. I can always come back and wind off a little more if I need to.

Now you have 2 sources of yarn to feed from. I place the yarn cake on the cone stand, next to the original cone and feed it up through it’s own round hook.

Yarn Donation

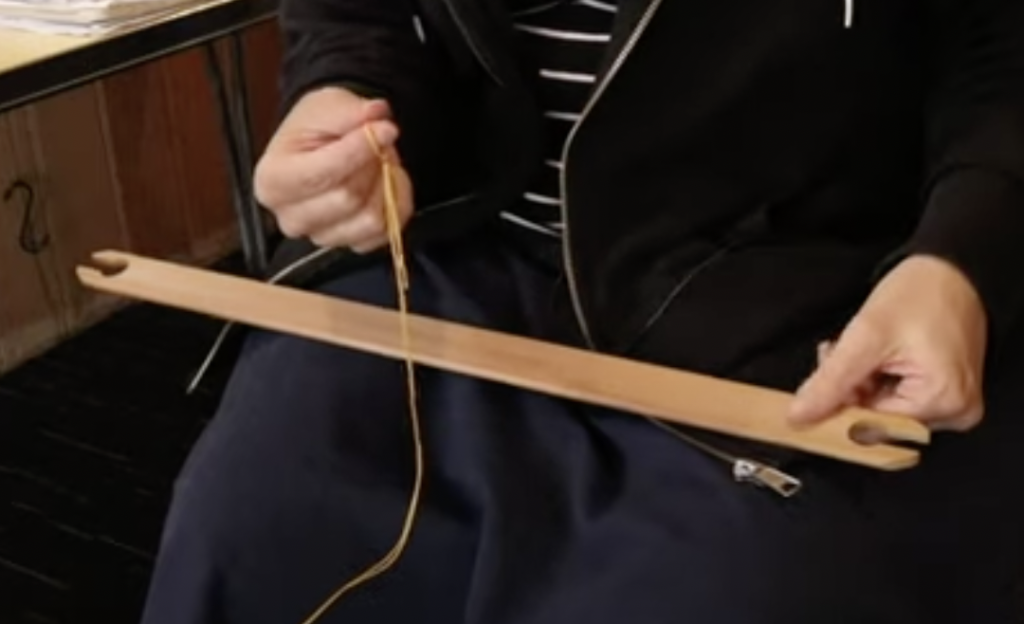
Now things get super easy! I just slip knot the two yarns together at the ends, ready to start loading onto my stick shuttle.

From this point on, you can treat the two yarns as though they are one, and simply wind them on together.

If you need help with how to wind a stick shuttle in a figure 8 (my favourite method), watch this video:

When you are ready to start weaving, you also just use the two yarns together as though they are one. So, each pick will have two threads instead of one.

This tutorial is available in video format, if you’re interested, click on the video below:

I hope this tutorial was helpful to you, leave your questions or comments down below.

Until next time…

Happy Weaving!

Filed Under: Free tutorial, Rigid heddle weaving, Weaving, Yarn Tagged With: double weft, doubling weft, weaving tutorial

What is the difference between knitting and weaving yarn?

by Kelly 2 Comments

One of the biggest challenges when starting out in weaving is determining which yarns are suitable for your project. There are is certainly a huge variety of yarn available to the modern weaver, but that can be part of the problem – how to choose?

Both knitting and weaving yarns can be used for weaving, in fact, I recommend that brand new weavers start out with knitting yarn because they are forgiving, affordable and readily available. Knowing the differences between yarns that are made specifically for knitting or for weaving will be a huge help to you when planning your next project.

*This post contains affiliate links. For further information, please see my disclosure policy.

Because choosing yarns is such an important (and sometimes puzzling aspect) of weaving, I have already made several resources on the topic, some of which you can find here:

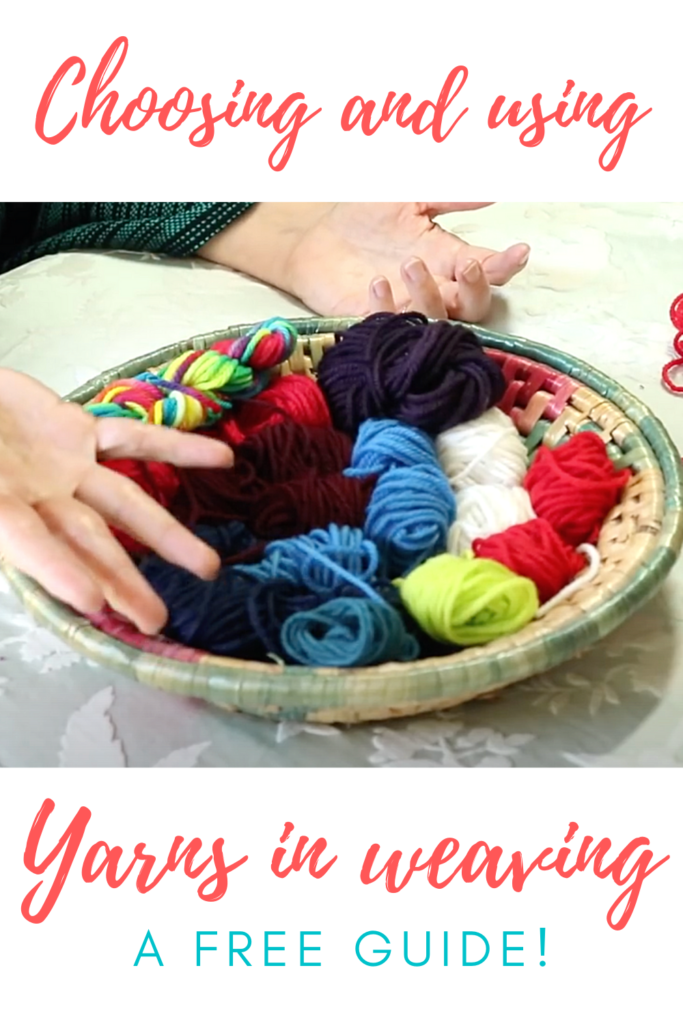
Choosing and Using Yarns in Weaving…

3 Yarns Beginners should Avoid…

What do all the Numbers Mean?…

Now let’s have a look at what I consider to be some of the main aspects that differentiate a weaving from a knitting yarn.

  1. Appearance
  • Knitting yarns are often sold in a ball, yarn cake, hank or skein. These can all vary in size and total weight. They will often be wrapped with a label that details what the yarn is made of, country of origin, knitting and crochet information (like needle or hook size), the total weight and the washing or care instructions.

Some knitting yarns will be sold on a large cone, particularly yarn that is for flatbed knitting machines, as it’s important to the machine tension that the yarn feeds off freely.

  • Weaving yarns will usually be sold on a cone of some kind. These cones can vary in shape and weight according to the type and thickness of the yarn. Spools are more uncommon, but you will sometimes see weaving yarns sold that way too.

2. Yarn Thickness

In general, knitting yarns are thicker than weaving yarns. Knitting very fine yarn on needles is not for the faint hearted and most knitters will tend to go with thicker yarns for practical reasons (and for sanity!)

A weaving loom on the other hand, and in particular, multi shaft looms are really set up to accommodate much thinner yarns. On my floor loom, I never use a yarn that is greater in size than a fingering weight, as it would be difficult to thread through my texsolv heddles, which would be wearing on the yarn. I only have a 10 dent reed on this loom too, and that is fairly standard for a multi shaft. It’s the same with my table loom. So, there is the expectation that you won’t be weaving with very thick yarns.

The rigid heddle loom is more accommodating when it comes to thicker yarns, as the dent size varies from as high as 15dpi to 2.5dpi!

3. Amount of Stretch

Knitting yarns will generally have more elasticity and stretch whereas weaving yarns are often somewhat tough and rigid.

This makes sense when you think about it – a knitting yarn usually has a pretty easy life compared to a weaving yarn. A loom puts the yarn under tension and friction – it needs to be able to stand up to the process. Weaving yarns are also used to make a woven fabric for items like towels and clothing, that requires a tough and robust yarn.

That’s not to say that you can’t weave with an elastic yarn, you absolutely can, you will just need to factor in that stretch component to your calculations so that you’re not shocked to find your piece loses a lot of length once it’s no longer under tension.

4. Amount of Twist

A knitting yarn is most often used for wearables, and therefore needs to be very comfortable against the skin. Usually, it won’t have the same level of twist as a weaving yarn. Again, the weaving yarn is strong and hardworking, so the increase in twist gives it that extra durability.

If you have a knitting yarn that seems to have a very loose twist, it is likely that it won’t be suitable for warping with. A good test to use if you’re unsure is the drift test.

5. Strength of the Yarn

This relates very much to the last point. Knitting yarns don’t need to be under a lot of tension. You hand tension a little as you knit, and the rest remains in the ball, waiting to be gently fed off and used.

A weaving warp undergoes a lot of tension, so using a weak yarn for your warp is almost a guarantee of an unhappy weaving experience!

6. Yarn Availability

There are thousands of knitting yarns available all over the world. Whatever colour, type, size you desire, you will not be too hard pressed to find it!

Weaving yarns are a bit more limited. This is improving over time as more home weavers take up the craft and weaving is seeing a bit of a resurgence in popularity (yay!)

There are also a lot more knitting yarn suppliers than weaving yarn suppliers, but again, this is on the improve. In Australia, we are blessed to have Thread Collective for a big range of weaving supplies. If you would like to find suppliers in your area, check my Weaving Suppliers List.

Available from Thread Collective

7. Measurement Systems and Terminology

This is one of the most confusing aspects for new weavers who are trying to make yarn choices.

The measurement systems for knitting and weaving yarns are different, and these differences can further change from country to country! Super confusing!

I recommend my Weaver’s Toolkit Ebooklet for charts that will help you convert yarn terms to navigate the confusion. My short class What do the Numbers Mean? will also be helpful for those of you who want to understand why certain measurement systems are used and what they mean.

The easiest way to determine whether the yarn you have is suitable for the project you want to weave is to determine the sett using an inch ruler. I have two resources that will show you how to do that:

What is sett?

How to determine sett…

I’ve made a video to compliment this post where you can see me talking about specific yarns from my personal stash and showing you what they look like:

I hope this was a super helpful post for you!

Until next time…

Happy Weaving!
Filed Under: Weaving, Yarn Tagged With: knitting yarn, weaving yarn, yarn

New towels for our new home!

by Kelly 19 Comments

I had two reasons for warping up my floor loom for some new towels recently.

With our house moving date looming closer, I felt the need for a “sanity project”. While all of my yarns and equipment were being packed away, I kept a few cones aside so that I would have something to weave during the in between time of packing up house and moving to the next one.

*This post contains affiliate links. Please see my disclosure policy for further details.

I also wanted to have some brand new kitchen towels to adorn our “new to us” kitchen, as all my current towels are ageing and starting to look a little shabby. I wanted special new towels for our special new place. This project turned out to be special in another way, but I’ll tell you about that shortly.

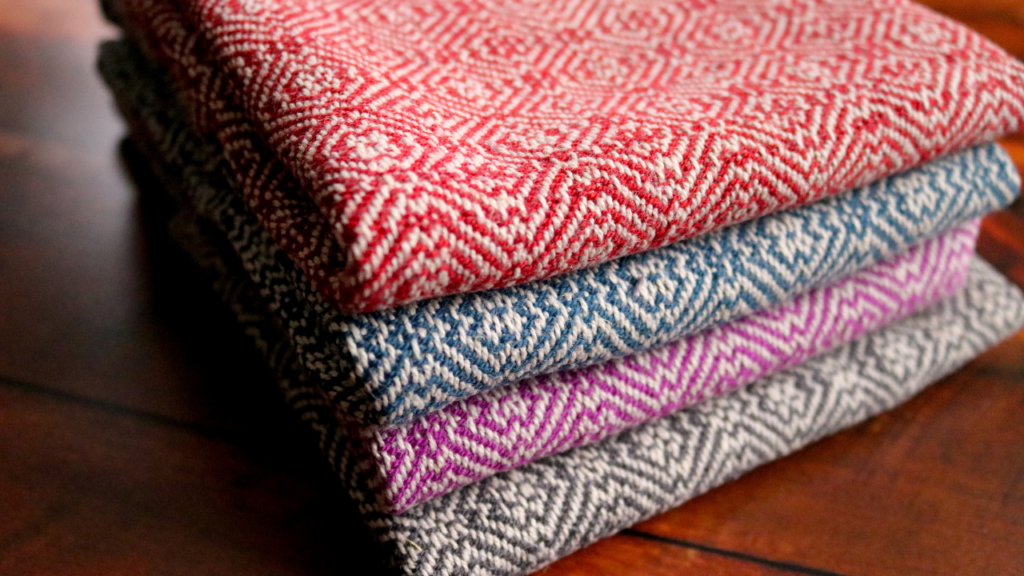
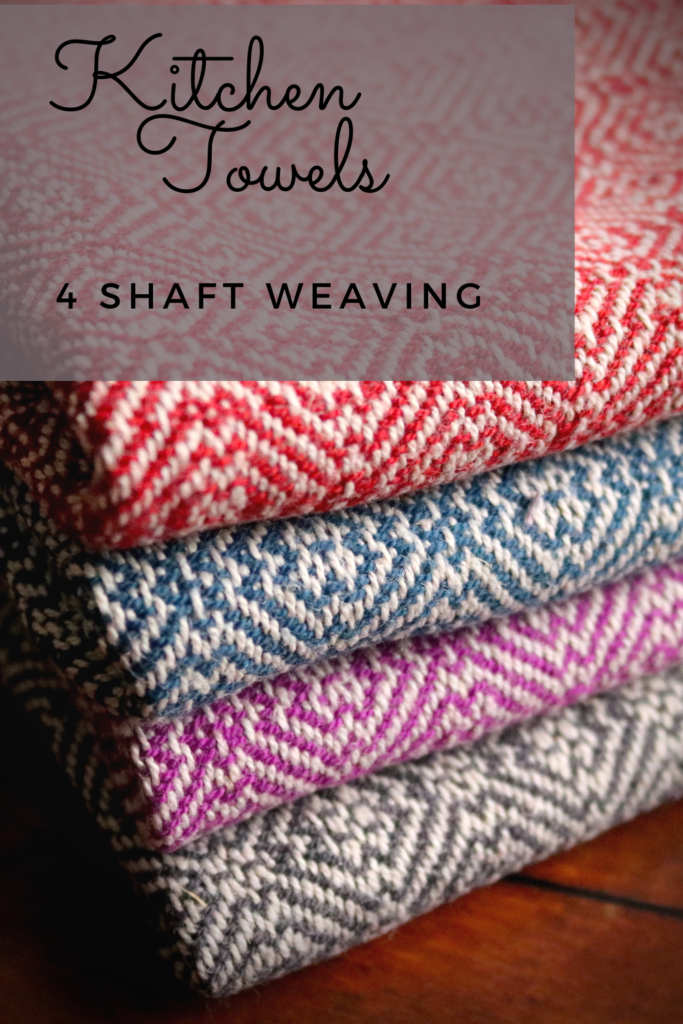
I chose one of my all time favourite drafts for kitchen towels, a 4 shaft twill on M and W threading. I love the design and I love the resulting fabric so I didn’t have to think too hard on that one!

The threading for this draft is not difficult and the tie up is a regular twill tie up – all things that I’m very familiar with and that make the process easy for me. I used my Louet David 2 Floor loom (link is for the new David 3), which has 8 shafts but for this project I wove on 4 shafts.

Having woven kitchen towels with this draft before, I was also sure of the yarn I wanted to choose. My favourite weaving yarn for soft and absorbent tea towels is 8/2 cottolin. The cottolin I use is 60% organic cotton and 40% linen. It’s a great yarn for those who want to incorporate a little linen but want something that is a bit easier to use than 100% linen.

For the warp I used:

Maurice Brassard 8/2 cottolin in Blanchi

For the wefts I used (one colour for each towel):

Maurice Brassard 8/2 cottolin in Charcoal

Maurice Brassard 8/2 cottolin in Magenta

Maurice Brassard 8/2 cottolin in Royal

Maurice Brassard 8/2 cottolin in Brick

…………………………………………………………………………………………………………………………………………………………..

Tips for working with cottolin:

  • Cottolin sheds a lot of fibre whilst on the loom. It is a more course yarn than just cotton on it’s own, which is very smooth. I sometimes opt to wear and apron while weaving and try not to wear anything black! The shedding nature may be irritating to some who are sensitive, it’s not a big problem for me but does make me sneeze sometimes! It also means that you will want to vacuum your loom when your project is finished or even during the project if the tiny stray fibres bother you.
  • It feels quite stiff on the loom. I remember the first time I wove with cottolin, I felt disappointed that the towels felt a bit rough. A hot machine wash was like a touch of magic – the towels softened up and the pattern came together beautifully. This is another thing that I love about cottolin, it softens more with each wash.
  • Your first one or two uses of your towels to dry dishes will not be optimal. The cottolin can leave small fibres on your dishes initially, and the towels are not as absorbent as they could be. Don’t lose faith! With a bit of use and a couple of washes, they will become a huge asset to your kitchen!

…………………………………………………………………………………………………………………………………………………………………

C

I tried some different techniques in the weaving of these towels, to help counteract some of the issues arising as I wove.

Firstly, I doubled my floating selvedges – something I haven’t done before. My reasoning for this was that for the towels I’ve woven in the past, the first place they would start to wear down was at the edges. A doubled floating selvedge gave a more defined, and stronger edge to the fabric.

Secondly, I switched to beating on an open shed. It is very much my habit to beat on a closed shed, but my beats were feeling a little stiff and the weft wasn’t settling as nicely as I would like. As soon as I switched to open shed beating, everything settled down and became much more fluid. Lesson learned – Don’t be stuck in your ways, be open to experiment from project to project as needs dictate 😉

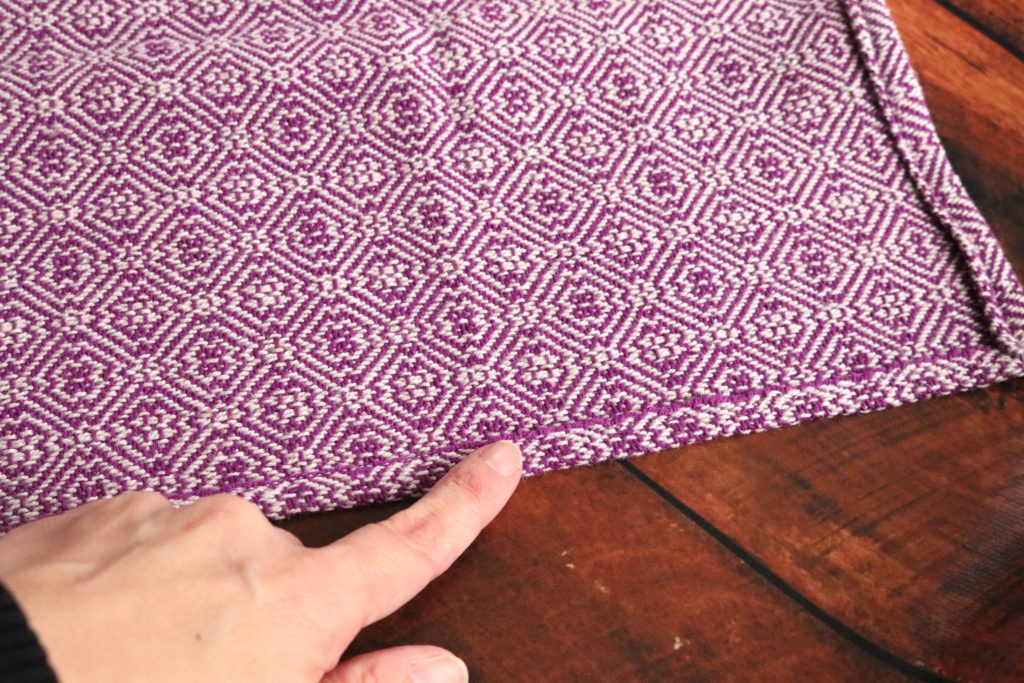
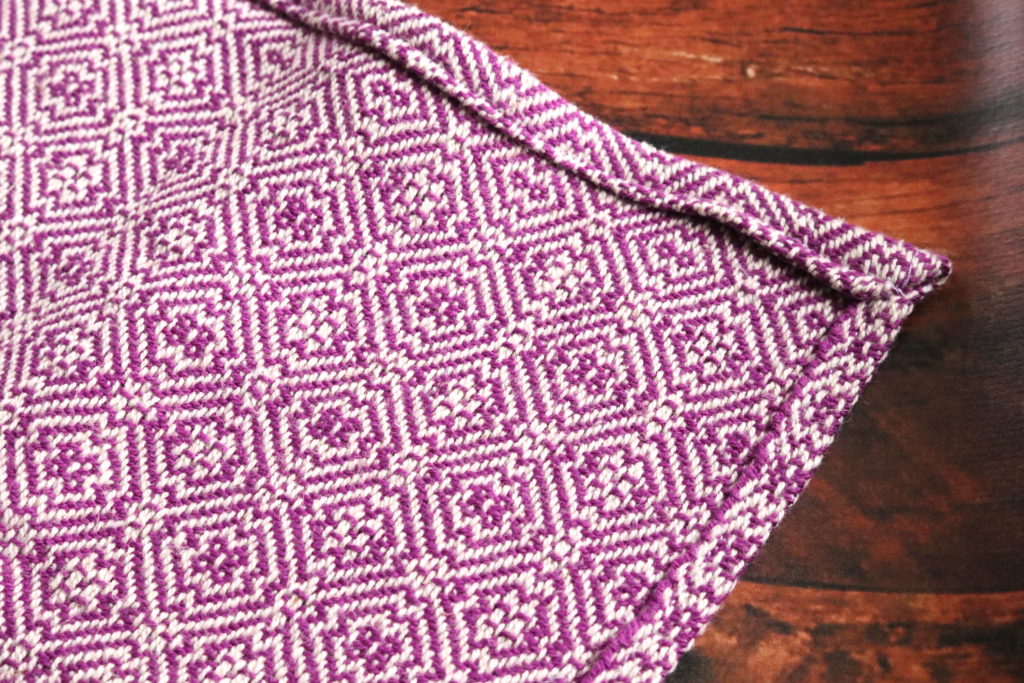
And thirdly, when hemming my towels, I decided to also hem the long edge. I have never done this before, but as I already mentioned, the edges are susceptible to wearing and I think this single turned hem will make a difference. Time will tell, but perhaps I will make this a regular technique for my towels.

Hemming the long side of the towel with a single fold hem.
Finished hems. The ends of the towel have a double fold hem.

I mentioned that this project turned out to be special in another way. My husband has been interested in having a go on the floor loom for some time now, so I decided the last towel of the warp would be a good opportunity. I wasn’t too worried if it didn’t turn out well, as it was just for us.

Imagine my surprise when he took to it like a duck to water, quickly declared that it was “fun” and promptly finished off the second half of the towel I had started on! After giving him a few basic pointers, he surprised me with how quickly he picked up the steps. Now he is very interested in weaving more and even learning how to dress the loom. Victory! 😀

If you love this pattern draft as much as I do, you can find it on page 88 and 89 in Anne Dixon’s Handweaver’s Pattern Directory – a most excellent book and awesome resource for 4 shaft drafts.

I also recommend Patti Graver’s Next Steps in Weaving for weaving at this level.

If you’re interested in getting started in floor loom weaving, check out my Introduction to Floor Loom Weaving, my Follow Up Floor Loom Weaving, or save by purchasing a bundle of the two courses together.

I made a little video to compliment this blog post to help you feel confident about cutting your hand woven fabric. I explain my 3 Key Ingredients to cutting without fear:

If you have any questions about my towel project or using cottolin, let me know in the comments below!

Until next time…

Happy Weaving!
Filed Under: 4 shaft weaving, Cutting Hand Woven Cloth, Inspiration, Neat edges, Weaving, Yarn Tagged With: 4 shaft weaving, cutting cloth, cutting hand woven cloth, floor loom weaving, hand woven towels

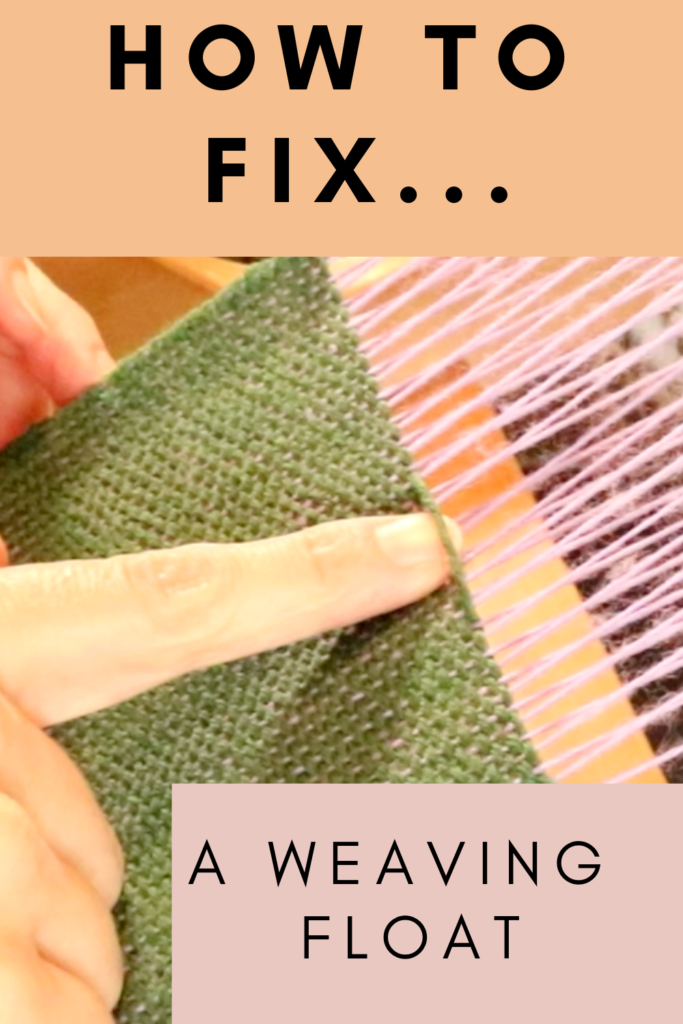
How to fix a weaving float

by Kelly 14 Comments

A “float” in weaving is a skipped thread or threads.

They usually occur at the back of the fabric and therefore are not noticed until you remove your piece from the loom.

While the discovery of a float can be disappointing for the weaver, thankfully they are fixable without too much trouble.

*This post contains affiliate links. For more information, please see my disclosure policy.

I’m using a plain weave sample, as it is the most straightforward to fix and so makes a suitable introduction to a weaver who hasn’t come across floats before. I’m weaving on my Sampleit Rigid Heddle Loom for the purposes of this tutorial, but floats can occur in any type of weaving.

We’re going to look at the three main culprits for a float happening in your weaving:

  • Loose or inconsistent warp tension
  • The angle of your shuttle as you enter the shed
  • Sticky threads

WARP TENSION

I know, I talk all the time about warp tension, but that is because it is SO important on so many levels to the success of your project. In relation to floats, a warp tension that is either too loose or has loose sections is a place for your shed to get messy. If your shed is not well tensioned and clean, that invites the potential for your shuttle to go over or under threads that it is not supposed to.

SHUTTLE ANGLE

This relates pretty closely to my first point about warp tension, because if your shuttle is at a weird angle when it enters the shed, it may either snag on a warp thread or just skip over it entirely, and then you have yourself a float. Again, we want to aim for a clean shed that leaves no guess work about the path your shuttle should be taking.

A messy shed can cause floats!

STICKY YARN

This is a bit of a pet topic for me it seems, but once again, it has a huge impact on the success of your weaving. Sticky yarn will cause all sorts of trouble and floats are definitely one of them. If you want to know more about which yarns have the potential to give you a rather large headache, check out these posts:

  • 3 YARNS BEGINNER WEAVERS SHOULD NEVER USE
  • CHOOSING AND USING YARNS IN WEAVING

Tip for dealing with sticky yarns:

Use a spare pick up stick or shuttle to “clear” each new shed as you open it. This will force any threads that are sticking to one another back into their natural positions.

Now that we know the reasons why you might see floats occurring in your work, let’s get on to how to fix them!

*Note – Any float fixing should be done prior to wet finishing. If you have already wet finished but want to fix some floats, you can, the results just may not be quite as good.

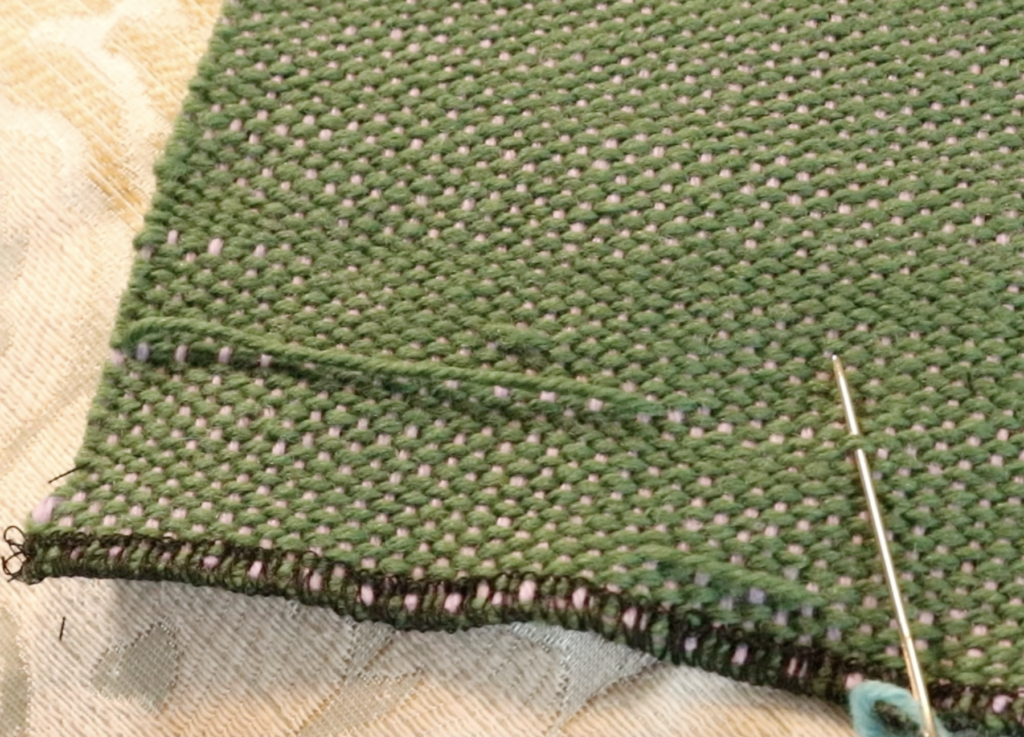
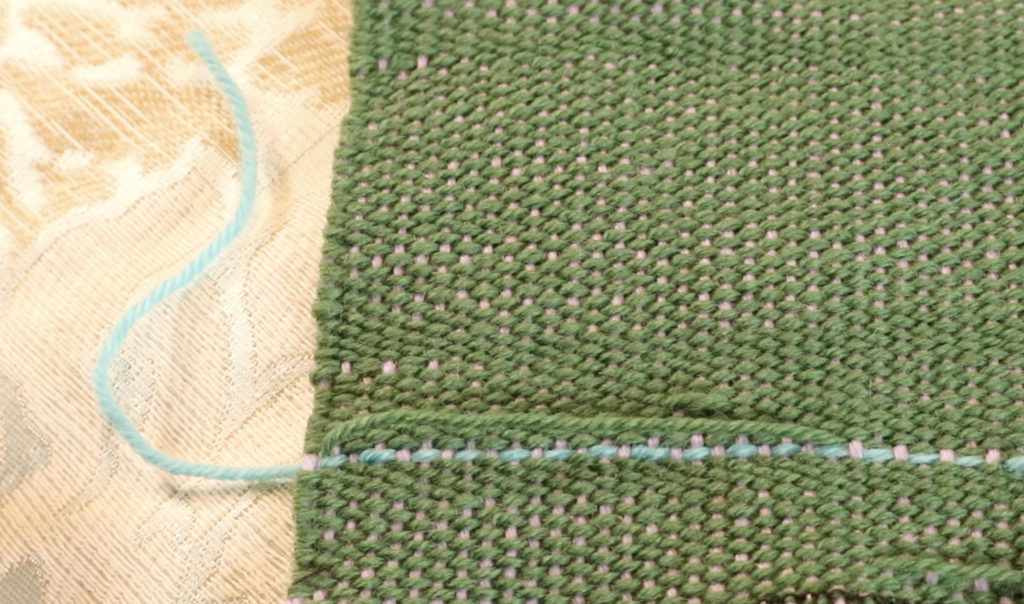
You will need a tapestry needle and a length of your weft yarn. I used a blue colour instead of my weft green, but only to make the tutorial super clear. You should use the exact same yarn in the exact same colour as your weft.

Normally, I would use my favourite tapestry needle, my Clover Bent Tip Needles, but as we are currently packing up our home to move, I couldn’t find them and just used an ordinary tapestry needle.

There is no need to knot the end of your threaded yarn.

Begin by locating the path that your float yarn is travelling, around an inch away from the actual float. You can see that initially the yarn travels on the over/under path of plain weave, and then we have all those skipped threads where the weft strayed off course. We want to replace that section with a weft thread that is on course.

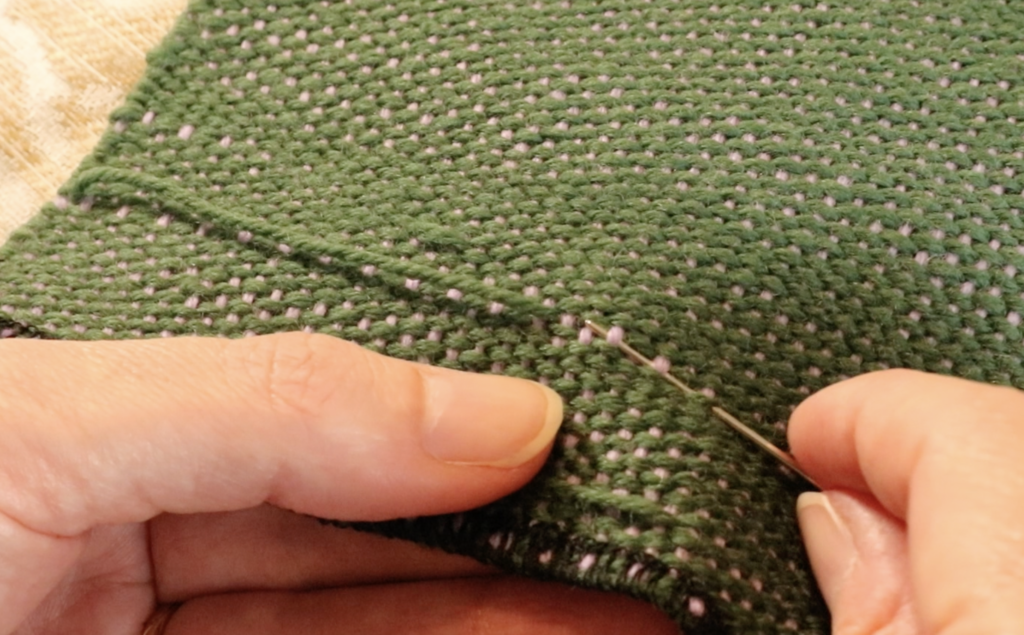
Next, we want to follow or mimic the exact same path that the weft was taking before it strayed off course. Keep your eyes on the correct weft thread and copy it exactly with your needle, right up to where the float begins.

When you run out of needle, pull your yarn through, but leave a tail of a couple of inches hanging out from where you began. Don’t cinch the thread up tightly, just pull it through so that it lays in place.

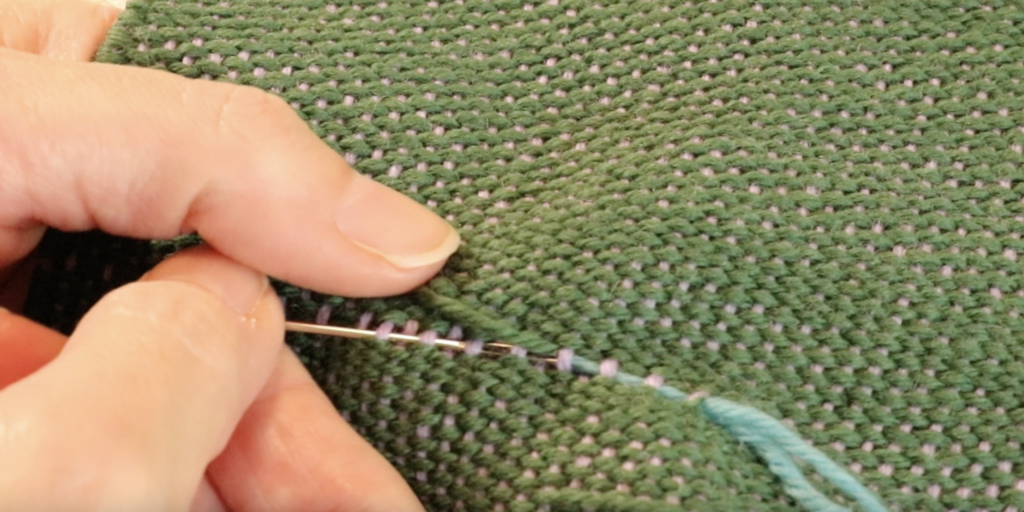
When you reach the float, push it aside so that you can see and continue following the over/under path based on where you were up to. Was your last thread under a warp thread? Then the next one should travel over – or vice versa. What you are doing now is placing the thread where it should have been in the thread, before the skipped threads happened.

When you reach the end of the float, continue to needle weave for another inch or so. This picture is not the best example of this, as my float was close to the edge of the work. Whatever the case, continue needle weaving past the end of the float, then leave a tail of a couple of inches like you did at the beginning.

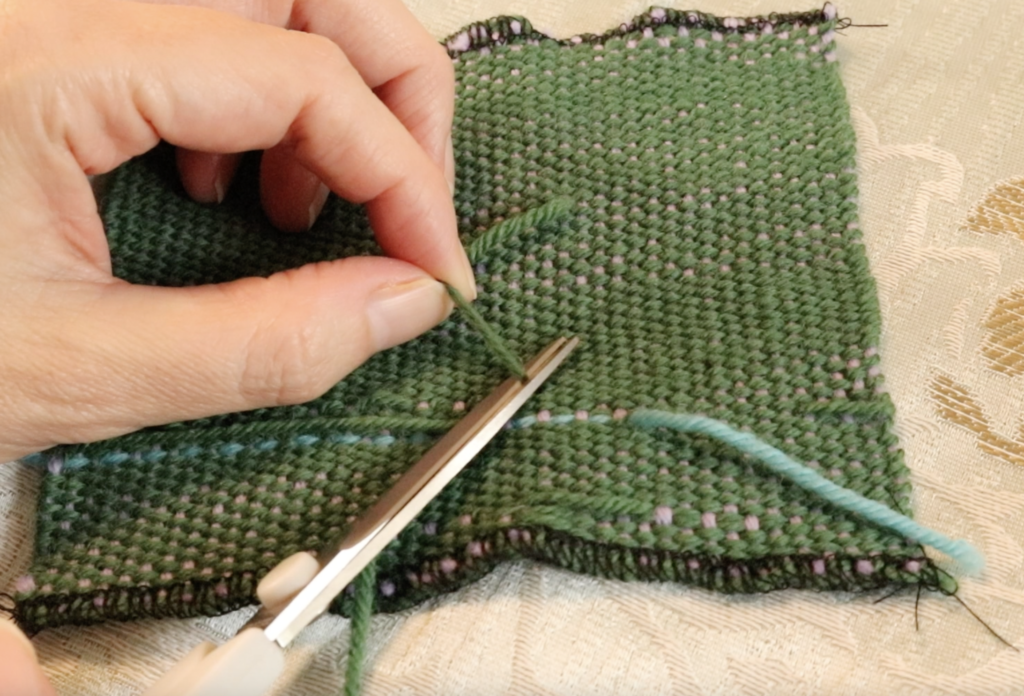
When you have repaired all your floats in this fashion, it’s time to wet finish. Do not cut your tails or floats at this point, leave it all just the way it is. Wet finish and dry completely.

When your weaving is completely dry, it’s time to cut the tails. Use a small, sharp pair of scissors and cut close to the fabric, being very careful not to cut the fabric itself! You can also cut the floats at this point, in the same way you cut the tails.

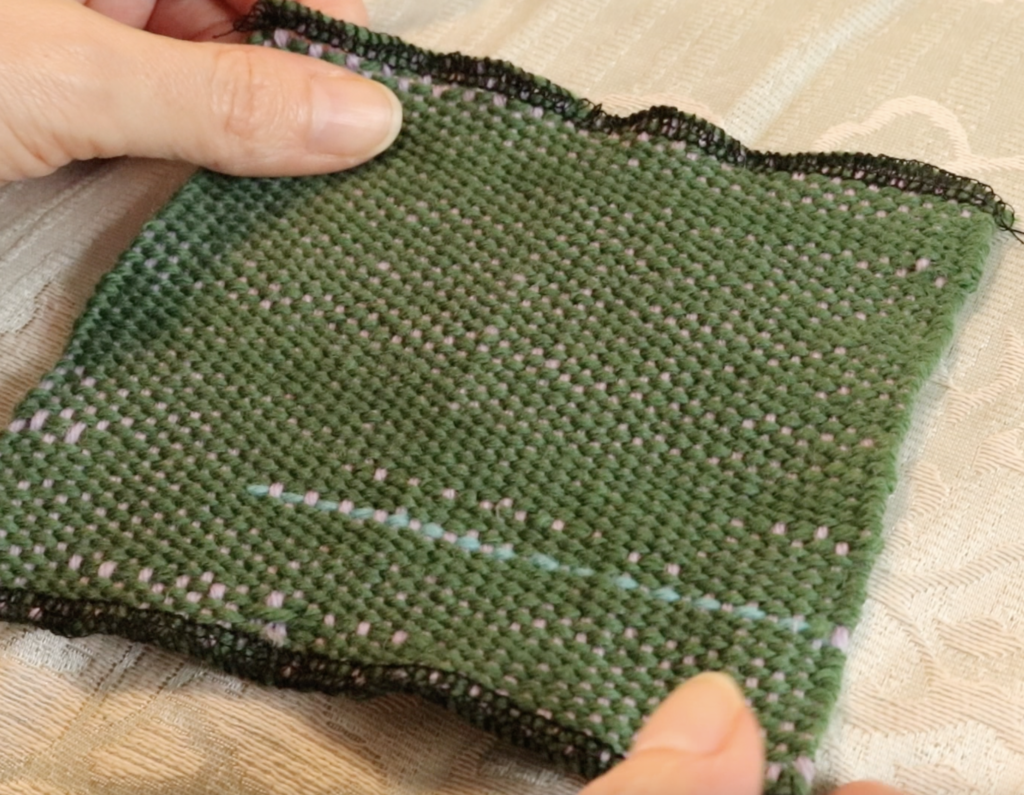
And that’s it, floats are fixed. I left one float in place over at the left edge for comparison.

If you would like to see this tutorial in a step by step video format, please visit my Youtube channel.

Until next time…

Happy Weaving!
Filed Under: Free tutorial, Online Weaving School, Rigid heddle weaving, Sewing, Tutorials, Weaving, Yarn Tagged With: fixing floats, how to fix a float in weaving, weaving floats

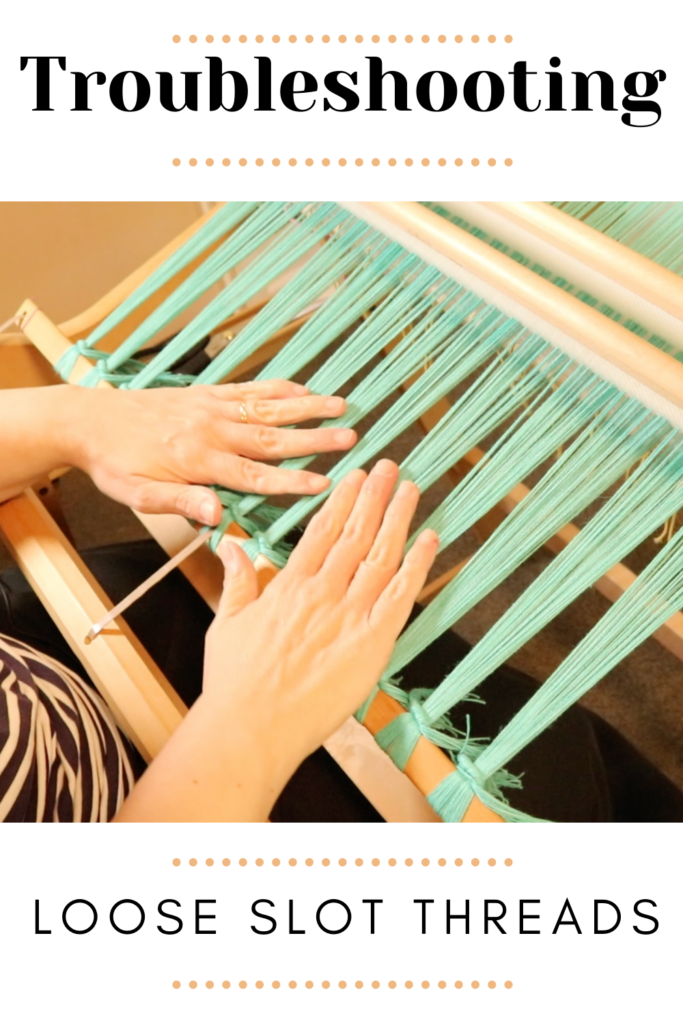
Troubleshooting loose slot threads

by Kelly 31 Comments

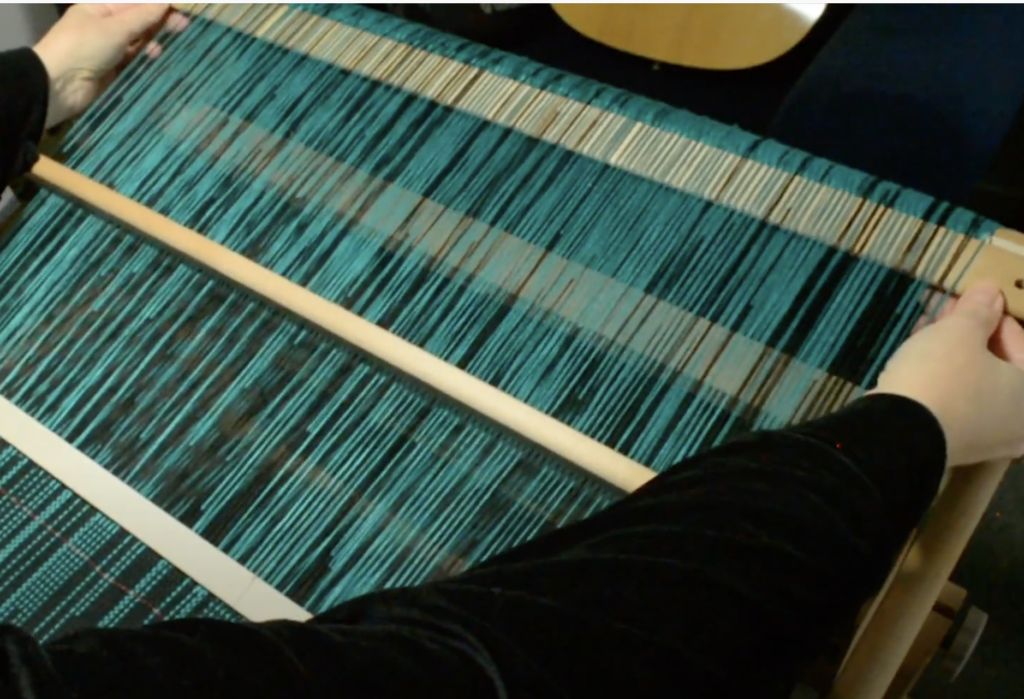
Loose slot threads when weaving on a rigid heddle loom are very common. The fact is that a rigid heddle loom just does not hold the same amount of tension as a floor or table loom.

This means that the rigid heddle weaver can run into a bit of bother when warping up with fine, rigid weaving yarns. An 8/2 cotton is a floor loom weaver’s dream but can be quite a challenge on the rigid heddle.

*This post contains affiliate links. For further information, please view my disclosure policy.

Knitting yarns or slightly thicker weaving yarns with some elasticity work beautifully on a rigid heddle loom, as they don’t need a lot of tension and are very forgiving.

How do I know if my tension is good enough?

This can be a personal preference, but there are certainly a few guidelines for knowing whether your tension is suitable or not:

Too loose

Your warp threads bunch in between weft picks (rows)

You have floats or skipped warp threads often

Your stick shuttle keeps snagging on warp threads as you enter the sheds

Your heddle doesn’t click easily into the up or down shed

Too tight

You struggle to get your heddle/s into the up position

You have warp threads breaking

You feel a lot of resistance when trying to beat

Does this mean that rigid heddle weavers should not weave with weaving yarns? Not at all! There are too many wonderful weaving yarns in a massive variety of colours out there to try! With the right approach and strategies, all yarns can be used successfully.

  1. Getting the warp right

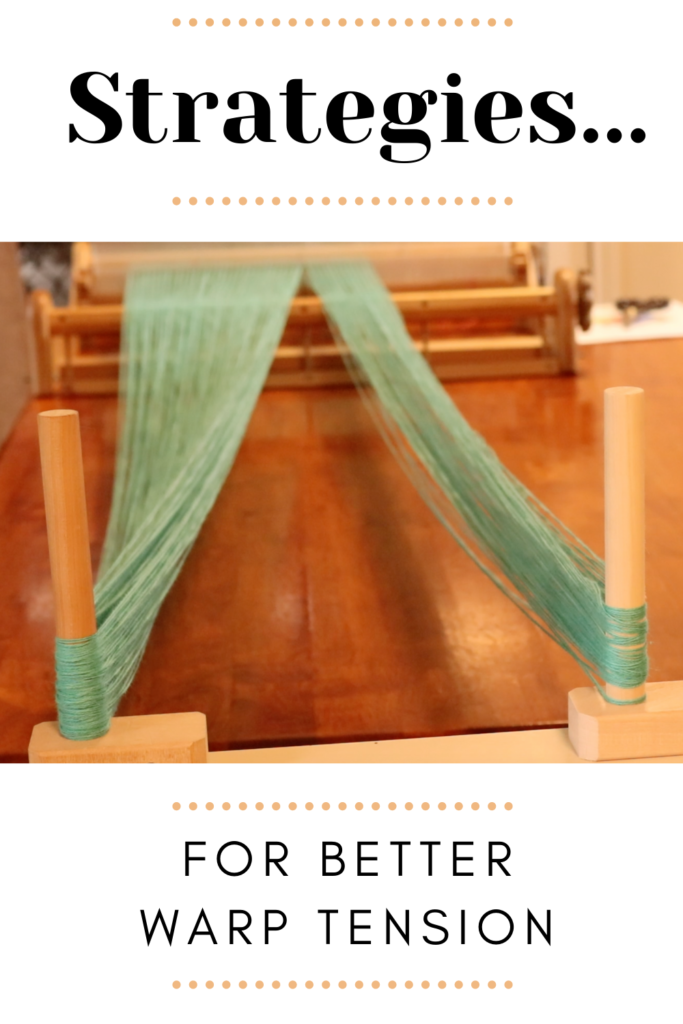
The warping the loom stage is the most crucial time to get that tension as good as you can. Not as tight as you can, necessarily, but even, consistent and firm. When I have a good warping experience, I just know that the project is going to go smoothly.

There are a few key strategies for getting good tension during the warping process. I talk about it in this webinar but I also want to mention some of them here:

  • Have someone help you. Your helper can hold on to the end of the warp, providing great tension, while you focus on standing behind the loom and winding on.
  • Pack the back beam as you roll on. You can use cardboard or wooden sticks/ separators, a roll of thick paper, a blind or a drawer liner. My personal favourite here is the roll of paper which you can cut to size if needed. 125 gsm is a good weight.
  • For a wider warp, use more than one warping peg. This helps distribute the threads over the width of the loom in a more practical way and is more economical, as threads don’t have to travel as far to loop around just one peg.
  • Take your time. Extra time spent in warping is well worth the investment. Remember – good warp = happy weaving experience 😄
  • Pay particular attention to the middle of the warp while rolling on, particularly if warping independently. The middle is the most likely place to lose tension and get saggy threads.

2. Consider a shorter warp

A rigid heddle loom can take quite a lot of length in a warp, but I haven’t found a long warp to be best practice. If I have the opportunity, I will break a warp into smaller increments where possible.

This doesn’t bother me, because the rigid heddle is so quick to warp for more simple projects, so it doesn’t take much extra time. I find that the longer my warp on the rigid heddle, the harder it is to keep a good tension for the duration of the warp.

3. The tie on

The tying on step is also important for your overall tension. Whether you tie directly on to the apron rod (as I do 99% of the time) or lash on, this step is another opportunity to “get it right” before beginning weaving.

Once again, I don’t aim for really tight tension when tying on, but I do aim for the best consistency I can manage. This means going over the tied on threads once, twice, thrice if needed so that they all feel about the same.

I gauge this tension by bouncing my hand across the warp (like a trampoline!) Any bunch of threads that feel much looser than others will get a re-tighten.

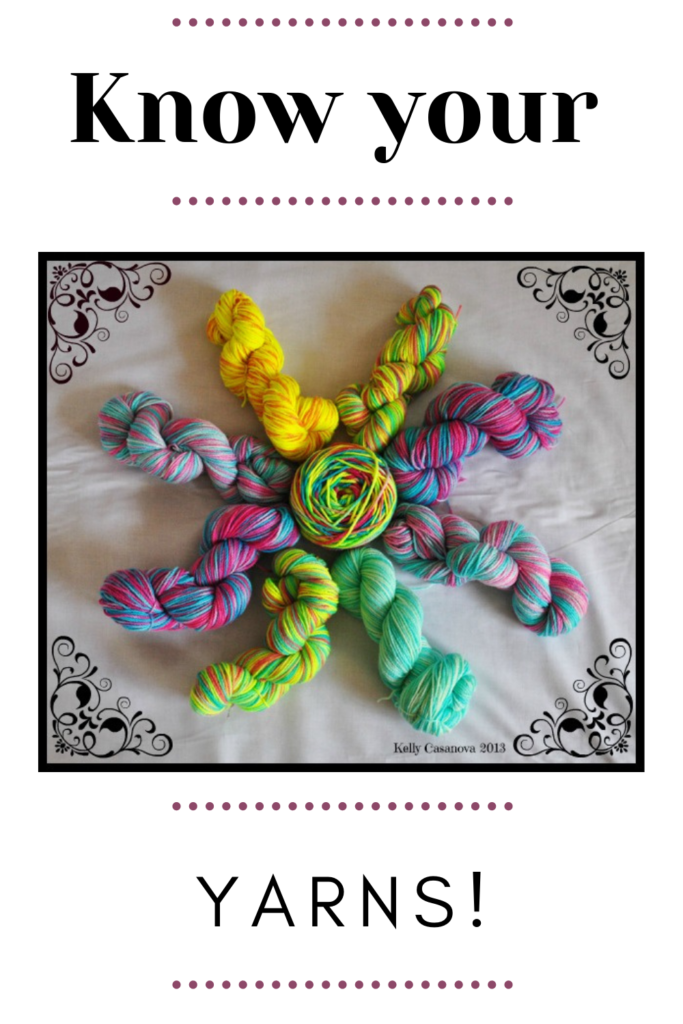
4. Know your yarns

There are certain threads that are harder to tension due to their inelastic structure. I already mentioned 8/2 cotton, but many plant based or cellulose fibres (cotton, linen, hemp, etc) are quite rigid and easier to weave with a higher level of tension. Animal fibres or protein fibres (wool, alpaca, etc) generally have a little more stretch.

There are certain threads that are harder to tension due to their inelastic structure. I already mentioned 8/2 cotton, but many plant based or cellulose fibres (cotton, linen, hemp, etc) are quite rigid and easier to weave with a higher level of tension. Animal fibres or protein fibres (wool, alpaca, etc) generally have a little more stretch.

The amount of twist, number of ply and thickness or weight can also effect how rigid a yarn is. It helps to know your yarns – to sample yarns you’r unsure of and accustom yourself to all their particulars.

If you need a little more guidance with yarns, I have some resources that will help:

Choosing and using yarns in weaving

What is a superwash wool yarn?

3 yarns beginner weavers should never use!

5. Stuff it!

Packing, stuffing and wedging your back and front beams will always help with tension. If, despite your best efforts, your warp is just not tensioned well enough then start packing! You can use stiff paper, cardboard, sticks (either separators or pick up sticks) or whatever else you can come up with that works, to wedge under or between your warp at the beams.

When advancing your warp, start packing the front beam. This will prevent the knots from the apron rod from sticking into your weaving as it rolls around them beam (which can damage or distort your weaving and mess with your tension) and provide overall better tension each time you advance.

You can insert a pick up stick or something similar into a shed that is giving you particular trouble (usually the down shed) and slide it to the back beam. Push it right back so that it becomes wedged between the thread layers and tightens that shed for you.

You can also wedge something directly under the warp at the back beam to increase overall tension. To see this in action, watch this video, which also includes additional tips for working with fine threads:

6. One sided looseness

Perhaps your loose tension problem is at the selvedge? To be more specific, one selvedge is fine while the other is loose? You end up with neat edges on one side and not so great edges on the opposite side.

If you want generally to improve the neatness of your edges, check out this post for more resources.

One thing you can try in this instance is to begin and finish threading in a hole. When we thread for plain weave, we usually thread one thread in a hole, one in a slot, and so on. Most of the time we are threading an even number of threads.

But for this technique, we thread an uneven number of ends on purpose, so that the last thread gets threaded through a hole. The reasoning behind this technique is twofold. Firstly, the threads are threaded in holes, which hold better tension than the slots. Secondly, the outermost threads will be under the same or similar tension (both being in holes) so the results of your woven edges should be more similar looking.

If that sounds confusing, check out this video where I show you how to thread both selvedge threads in holes and you will see how simple it is:

7. Warping in down shed

As a disclaimer, I have not tried this technique, I have only heard about it. The idea is that it’s the down (slot) sheds that have looser tension, so warping your loom with the heddle in the down shed potentially tightens the slot thread tension. If you decide to give this a go, I would be interested to know how it turns out for you!

I hope this article was useful to you. As always, questions and comments are welcome, please leave them down below! ⤵

Until next time…

Happy Weaving!
Filed Under: Free tutorial, Rigid heddle weaving, Tutorials, Weaving, Yarn Tagged With: better tension, loose warp threads, rigid heddle weaving, rigid heddle weaving tutorial, troubleshooting

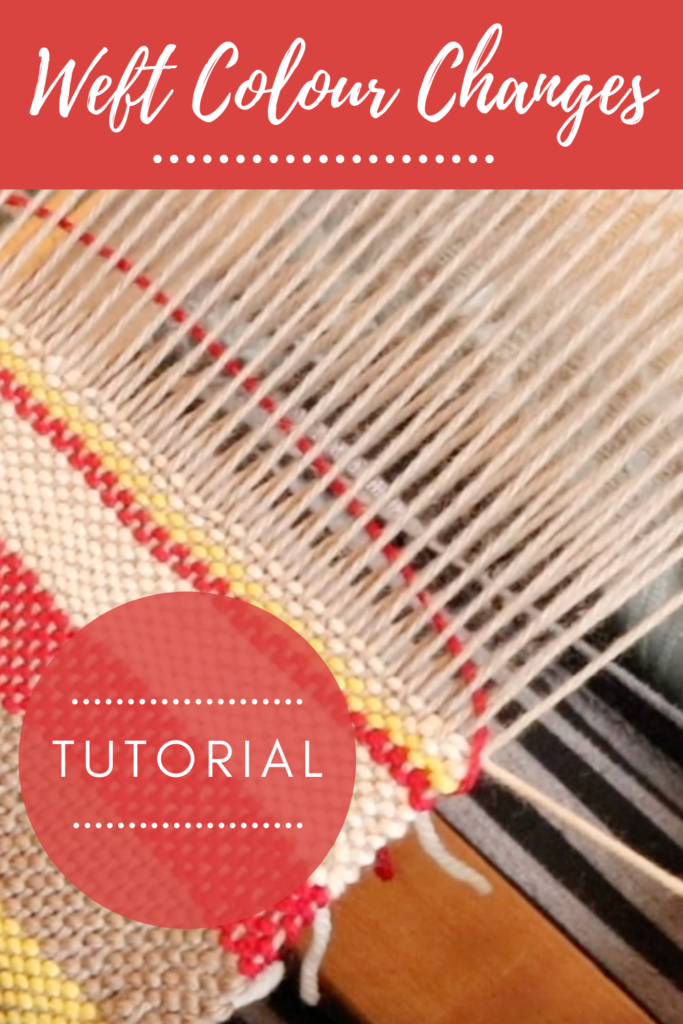
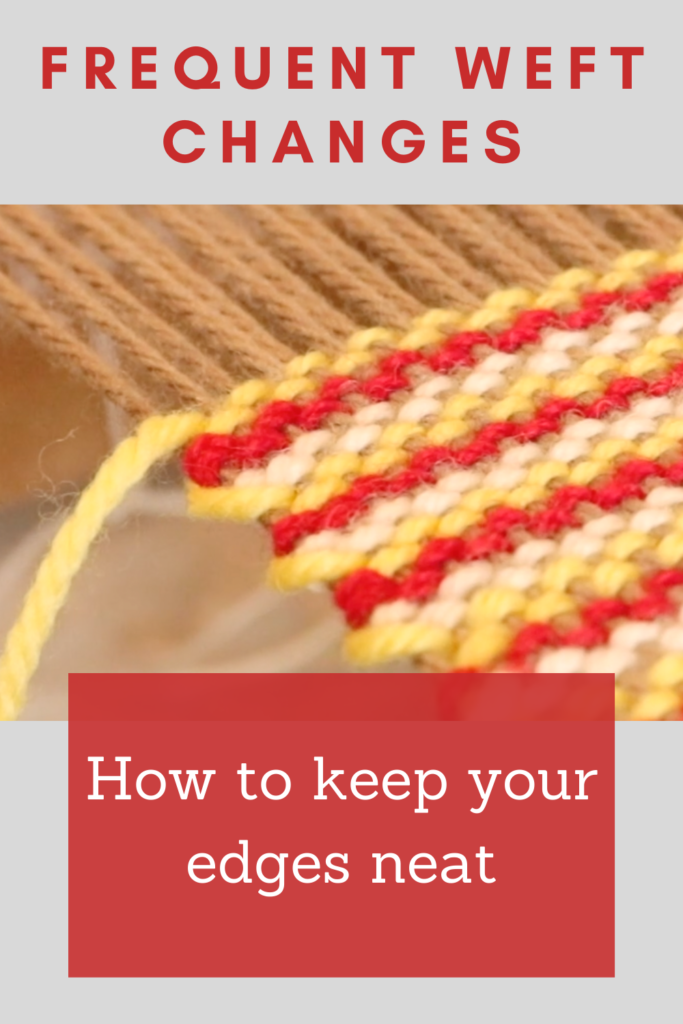
Frequent weft colour changes

by Kelly 20 Comments

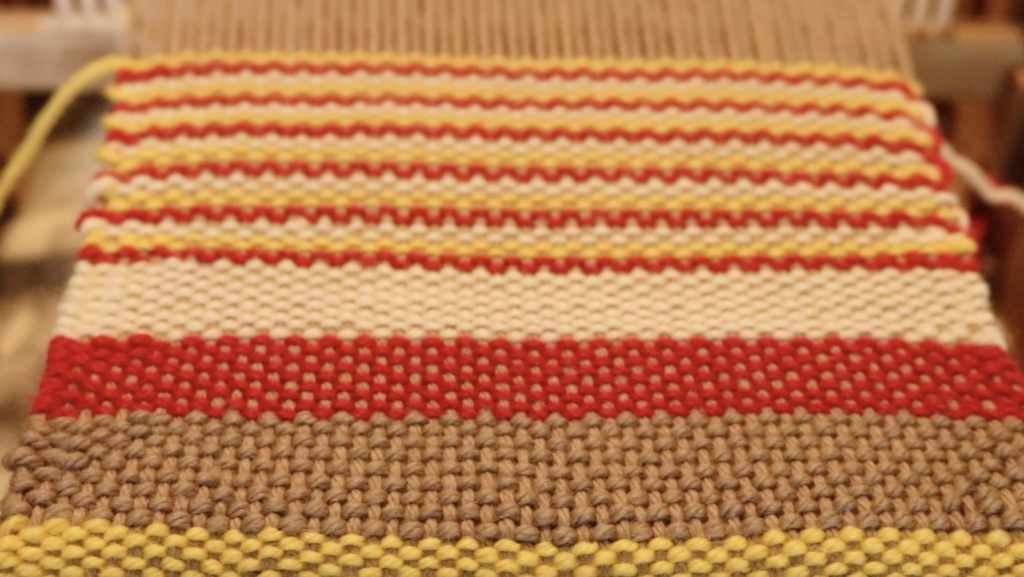
Changing weft colours frequently in one project usually occurs when you’re weaving stripes, blocks or bands of colour.

Today I’m going to talk about the problems that can spring up and show you three different options you can use when you need to change your weft colours often.

Here are some common questions and confusions surrounding weft changes:

“Should I cut the old colour when introducing a new one? If so, what do I do with the cut tails?”

“Should I not cut the colours, but weave them continuously, swapping shuttles as I go and carrying the colours up the edges?”

You may be wondering about which method is the best?

Well, that all depends on how wide the stripes or each band of colour are going to be. I’ll explain further.

If you are weaving wide bands of colour, it will likely not be practical to carry the yarns up the selvedges as you weave. This will create long floats. Now, floats at the edges can look great as a design feature, but the length does need to be practical. Floats that are too long will get caught or snagged once the woven piece is in use – they will get stretched and end up looking, well, a bit ragged!

Weft floats a design feature in the Candy Store Scarf.

There is no hard and fast rule with what length of float is too long or how wide a stripe should be before deciding on which method is best. But, one example that I use would be, if I’m weaving with light worsted weight yarn and intended to carry the yarn up the side, I wouldn’t make my stripes more than 4 picks wide.

Another example might be that I’m weaving 3 picks of a colour before changing, weaving another 3 picks in a different colour and then going back to the original colour. For this situation, I would choose to keep the yarn colours continuous and carry them up the sides.

Let’s have a look at what the basic method for thicker stripes would be:

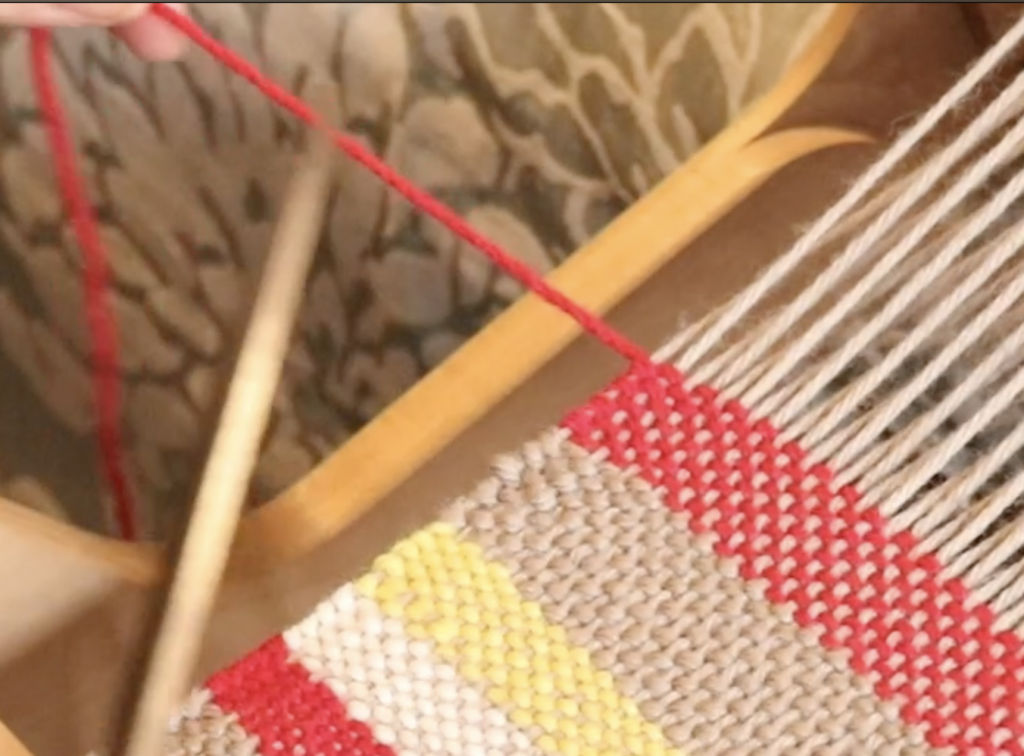
Introduce the new colour and leave a tail of a couple of inches on the cut end. Weave that pick and change to the next shed.

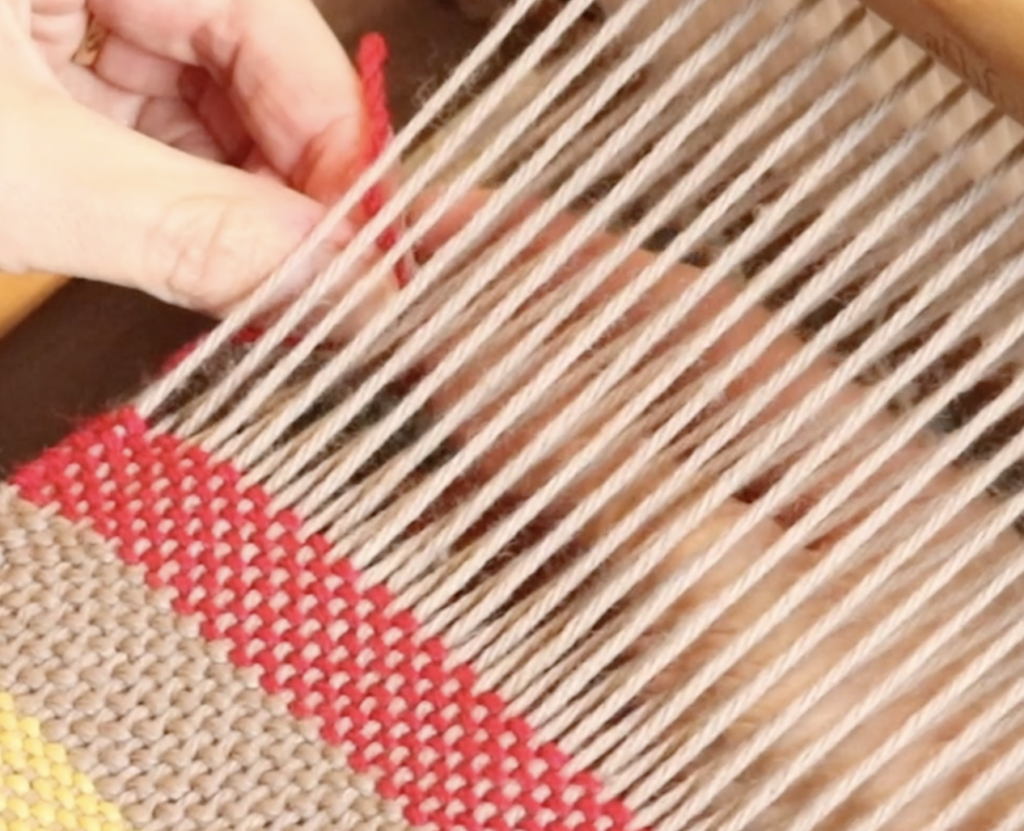
Take the cut tail around the edge warp thread and into the new shed, around 3 warp threads deep. Pull down to the back of the warp, making sure that it is nicely arranged at the edge warp thread.

Weave the new pick, and continue to weave until your stripe or band of colour is as thick as you want it to be. Finish the pick on the opposite side to the one you introduced it on.

Cut the yarn, again leaving a tail of a couple of inches. Change to the next shed.

Tuck the tail into the new shed as before.

Bring the new colour in, ensuring the tail is on the opposite side to where you finished the last colour. Continue with the initial steps for each colour change.

Pretty straightforward?

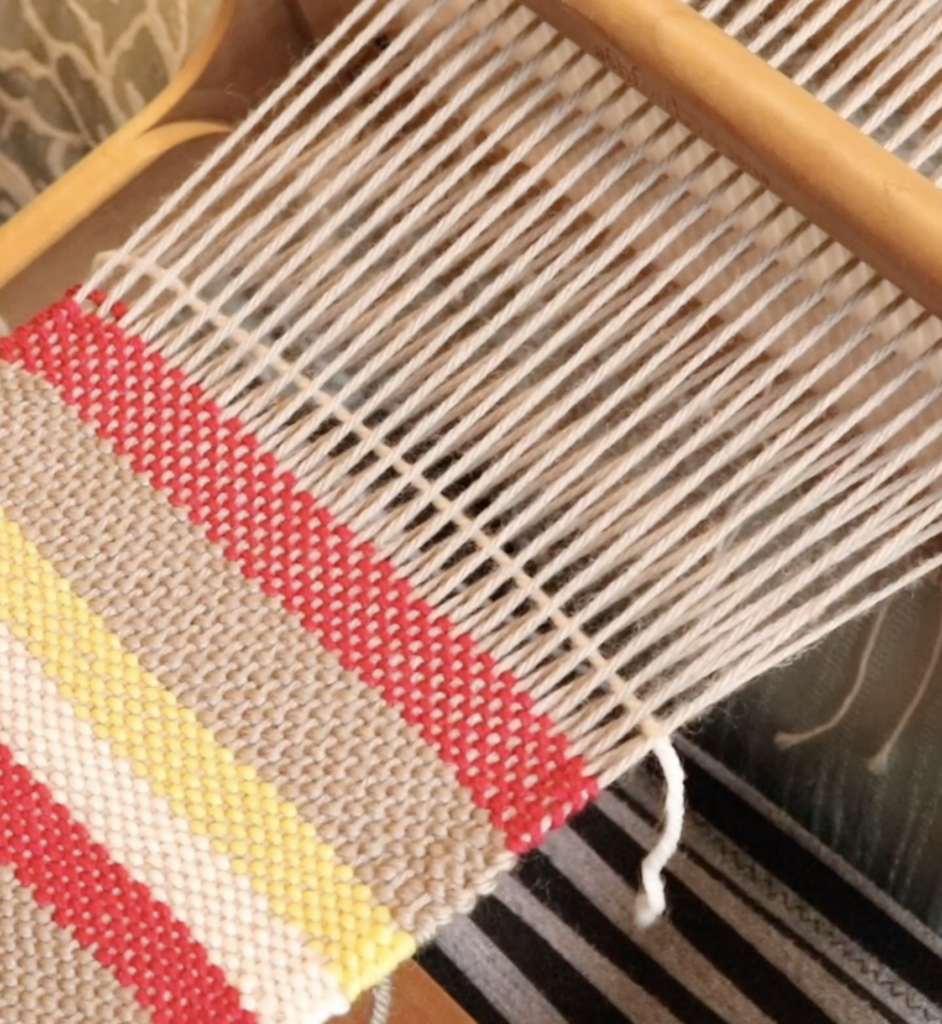
The only thing you need to pay particular attention to here is to alternate the sides that the tails are on to prevent a build up on one side. Leave the excess parts of the tails hanging from the back as you weave (they don’t get in the way) and when your piece is wet finished and dried, cut them close to the fabric, being careful not to cut the fabric itself.

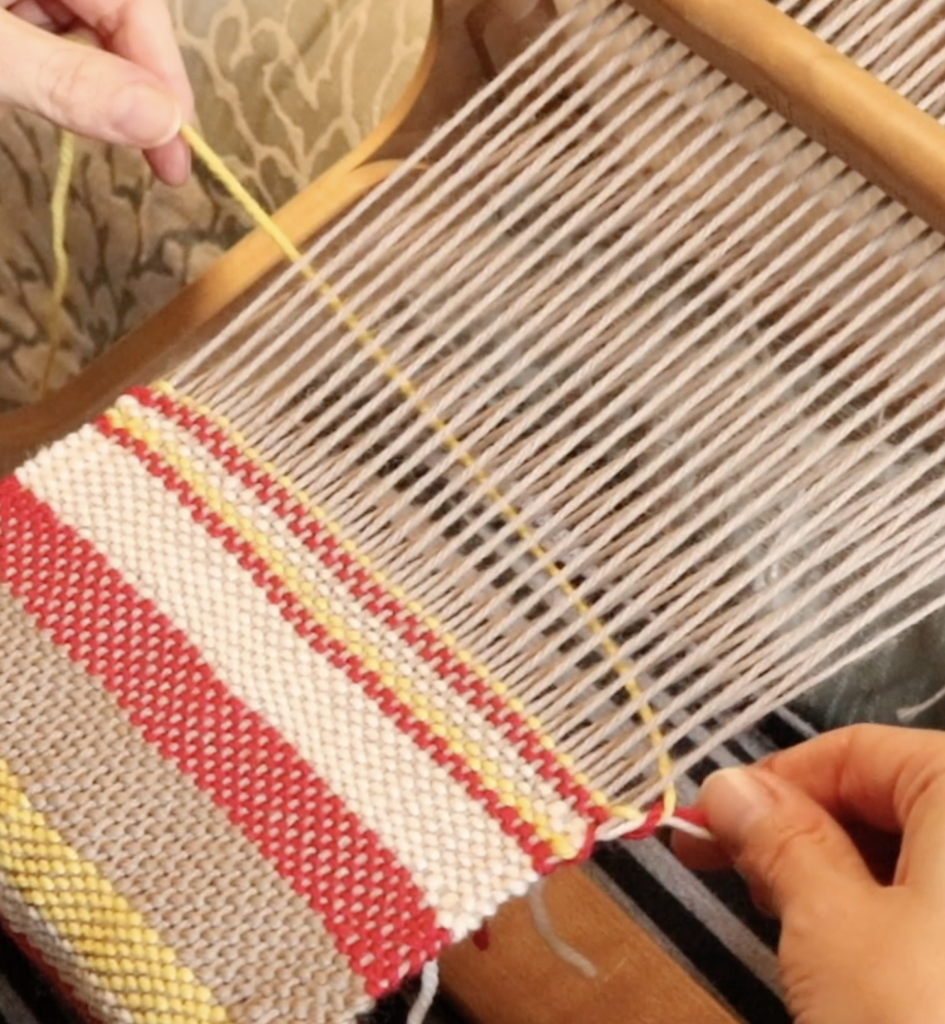
Now let’s go over the two methods you can use when your stripes and thinner or colour changes are more frequent:

In my demonstration I’m using 3 different colours and weaving 2 picks of each colour.

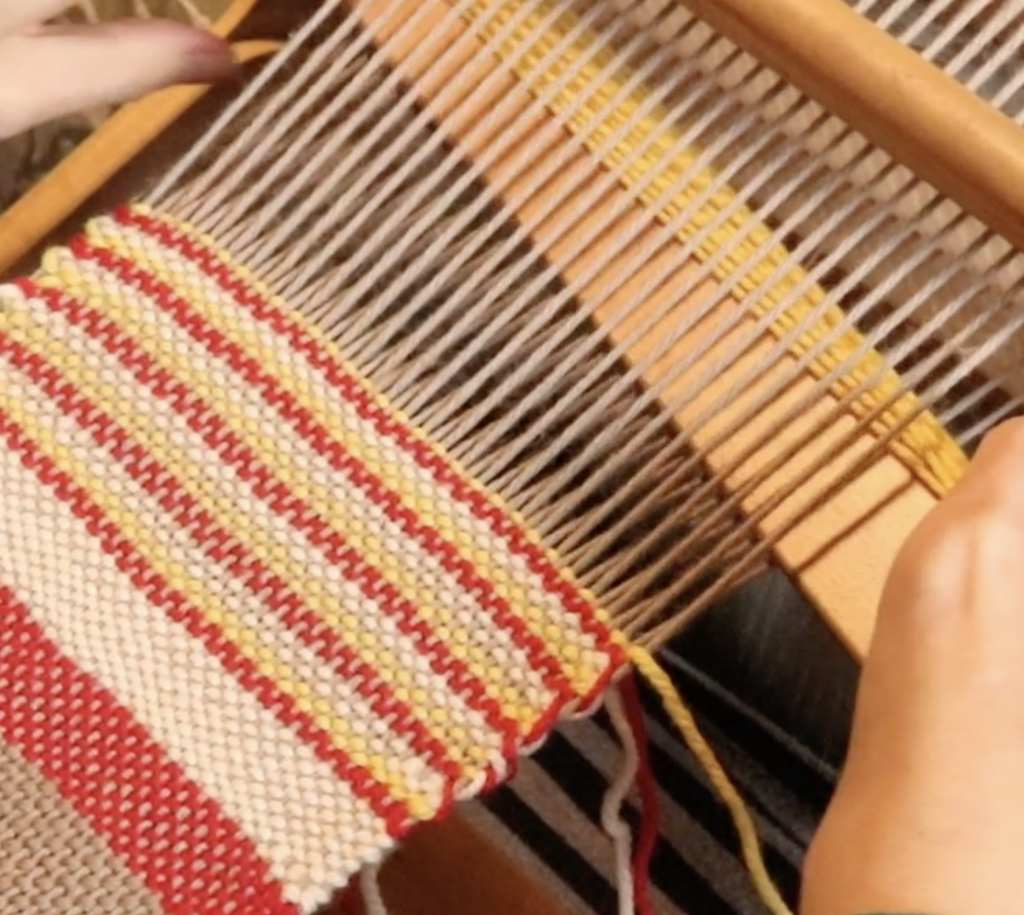
The first technique is to make the colours go around each other at the edges. This ensures that every colour is carried up the edges while it’s not actively in use.

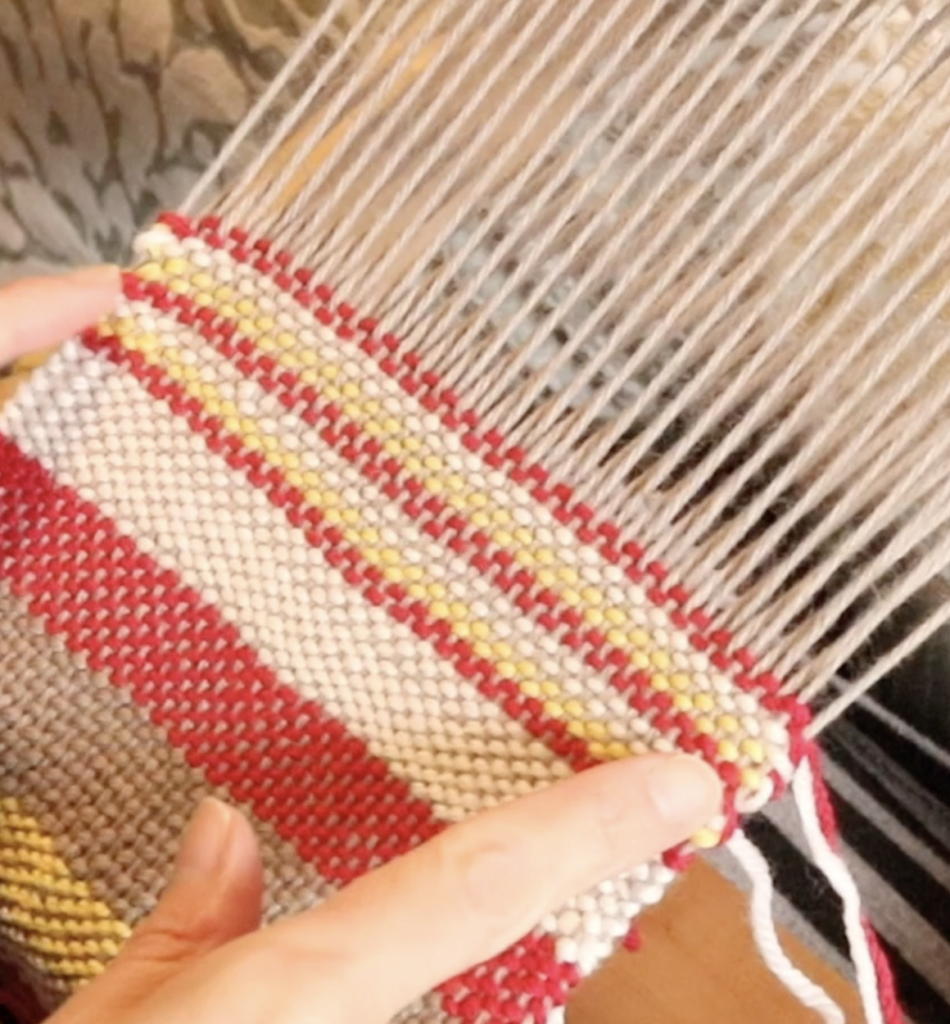
This method does have its drawbacks. I was using 3 weft colours for my stripes and found that, for the picks where all 3 colours were on one side, carrying up the side created bulkiness in the form of a noticeable bump where all the colours meet.

While this method would work well for 2 weft colours, for 3 it is not the method I would naturally choose. I can’t live with those bumps – to me they just stick out like a sore thumb!

So, for my 3 weft colours, this is my preferred method:

Weave the weft colours in the same way but don’t make them go around each other at the edges. Just weave them independently of each other and ignore the colour that you’re not using at the time, let it just sit where it finished off and wait.

When you’re ready to weave a new colour, you can just pick up the colour you want and continue weaving. Obviously, this works best for repetitive colour patterns so that your edge floats look harmonious and continuous.

I find this method gives a very neat and pleasing finish to the edges.

To the left you can see the first method I used of taking the colours around each other. On the right is how the second method looks – much neater, I think!

When you are using a thinner yarn (say an 8/2 or 10/2 cotton) it is much easier to hide what you’re doing at the edges and it won’t be very noticeable in your finished piece. But for thicker yarns, like the light worsted I’ve used here, these techniques are a “must know”.

If you’re interested in exploring these techniques further, I have a detailed video demonstration available in the Weaver’s Knowledge Library. I have put this library of “bite sized” classes together for members of my Online Weaving School. It is a great new space where members can learn new techniques quickly and effectively – and of course, refer back to them over and over. I intend to build up a lot of classes in this library in the coming years.

As an additional resource, you may find this video helpful. It shows how I weave the wefts for log cabin:

Have you tried any of these techniques? Which one do you prefer and why? Let me know in the comments, I love to hear from you!

Until next time…

Happy Weaving!
Filed Under: Colour and Weave, Free tutorial, Online Weaving School, Rigid heddle weaving, Tutorials, Weaving, Yarn Tagged With: colour changes, weaving techniques, weft

What is a superwash wool yarn?

by Kelly 20 Comments

I have talked quite a bit about yarns in weaving recently, but now I would like to get a little more into the specifics of individual yarns. Superwash wool yarn is a somewhat controversial yarn for fibre artists. In this article, I’m going to attempt to outline what superwash woollen yarn is in a factual manner.

I contacted my local, much loved woollen mills (Bendigo Woollen Mills) where I buy a lot of knitting yarn to use in my weaving projects. They were very helpful in explaining how their superwash yarns are treated and in pointing me towards further information to aid my own research. Interestingly, they said that although they offer both treated and untreated yarns, due to customer demand, 80% of their yarns are superwash.

I want to start by pointing out that I think it is very important for each weaver to decide whether they want to use a particular yarn or not, based on their own personal preferences. I have a huge number of students from all over the world and all different backgrounds. I pass no judgement on a weaver’s personal choice and I do not support yarn shaming in any shape or form.

If you’re in the beginner phase, and your head is swimming with confusion in regards to yarn choices, I have some helpful and free resources for you. You can begin by eliminating possibly troublesome yarns, at least for your first few projects, by reading 3 Yarns Beginner Weavers should Never Use! Then move on to the in depth Choosing and Using Yarns in Weaving.

If you’re really baffled about yarn sizes, I have two other resources that will really help you out. The Weaver’s Toolkit is an e-booklet that provides you with yarn conversion charts, recommended heddle sizes and a bunch of other quick reference information. I also have a short class What Do All the Numbers Mean? that will take your through an explanation of what all those numbers on your weaving yarn cone mean and various measuring systems that are industry standards.

Alright, let’s have this superwash discussion.

When you purchase woollen (usually a knitting yarn), if you read the care label instructions, it will either say “hand wash” or “machine washable”. This is how you know whether it’s a superwash yarn or not – machine washable means that it is superwash. And that means that the yarn is treated. Let’s investigate the treatment process further and why the wool is treated in the first place.

We all know that wool is quite hairy and clingy. Woollen yarn just loves to grab onto itself – the surface is scaly and these scales want to be joined as one! This is accentuated in the washing process. If you wash a non superwash wool yarn in hot, soapy water and create some friction, you will end up with felted fabric.

The superwash process removes these outer scales of the yarn with chemicals. The yarn is then coated with a synthetic coating (Hercosett is the industry standard) which smooths the exterior of the yarn. Because the scales are no longer present to interlock with one another, and the additional synthetic coating has been used, it becomes impossible for the yarn to felt in the washing process. It also means that, under the right conditions, a finished woollen piece can be washed in a washing machine (always follow care instructions for temperature specifics and correct steps). The superwash process generally leaves a yarn with a soft, smooth feel.

So, what is all the controversy about? There are a few main issues that some people have with superwash wool.

  1. Environmental impact
  2. Is the treated product still “natural?”
  3. Economic impact

*I need to put in a disclaimer here. This information has been collated from my own internet research. I have tried to only include facts without opinions. Some of the things I’m going to mention here are difficult to talk about with a lot of accuracy as it may not be measurable and also I only have access to information I can find on the internet. If, for example, I mention potentially toxic waste water, I have no way of quantifying what level of toxicity or if the toxicity is actually present. I don’t work in the industry, I don’t have inside information. The intention of this article is just to share information so that weavers can make informed choices when purchasing yarn and do some further research if it’s a concern for you.

Environmental impact:

The superwash process uses large amounts of water. In addition to the quantity of water used, some consumers are concerned that the waste water leaving the yarn processing plants could be toxic.

Then there are the chemicals themselves. Hercosett is a polyamide-epichlorohydrin polymer and some argue that it is a highly dangerous substance, while other sources will state that the chemicals used to create the polymer are toxic, but this doesn’t mean that the end product (the polymer itself) going through the correct chemical process is not safe.

Is the end product still natural?

The end product, in its basic form, is a woollen yarn that has a very fine exterior coating of polymer. As polymers are a type of plastic, some will argue that the yarn itself, following superwash treatment is now a plastic product and no longer natural. I have also seen some insistence that this type of polymer is not a type of plastic. You begin to see what I mean about conflicting information and opinions!

Others will hold the view that the product is still very much wool, it just has an artificial coating that is not actual detectable. This could be seen in the same light as many commercially available textiles in which “sizing” is used. This involves the application of resins (these can come from various sources, including petroleum) to fabric or clothing prior to retailing. Sizing is used to make clothes or fabric hold their shape and look good prior to purchase. This may be a poor example on my part though, because as far as I know, the sizing can be removed when you wash the fabric or clothing prior to use.

Economic impact:

Many woollen yarns are processed off shore for superwash processing. The country of choice in which to have yarn processed is often China as it is cheaper for businesses to send they yarn, have it processed, then have it sent back again. Many countries just don’t have the facilities for this type of processing.

I know that I’ve only covered the basics in this article, and given the differing information and opinions on the use of superwash wool, I’m going to provide a varied list of links from other people’s websites here in case you want to do some further research of your own:

Superwash and its alternatives

What’s Wrong with Washable Wool

The Truth about Superwash Wool

About Superwash Treatment

In Support of our Australian Wool Industry

Is Superwash Yarn Environmentally Sustainable

And of course, if you want to find even more information, then google is your friend.

Thank you for joining me today! I invite comments on this topic, but as it can be a sensitive one, I ask you to keep it a respectful and helpful discussion. Thank you for keeping this a happy and informative space 😊

Until next time…

Happy Weaving!
Filed Under: Weaving, Yarn Tagged With: superwash yarn, yarn, yarn choices

  • Page 1
  • Page 2
  • Go to Next Page »

Primary Sidebar

Categories

Archives

Meta

  • Log in
  • Entries feed
  • Comments feed
  • WordPress.org

Copyright © 2025 Kelly Casanova Weaving Lessons on the Foodie Pro Theme