• Skip to main content
  • Skip to primary sidebar

Kelly Casanova Weaving Lessons

  • Hi! I’m Kelly!
    • Disclosure
  • Online Weaving School Class Index
    • Common account issues
    • Common technical issues
    • What do I get with a membership?
  • New to rigid heddle weaving? Start here!
    • Never heard of the rigid heddle loom?
    • How to weave neat edges on the rigid heddle loom
    • Rigid heddle weaving
    • Rigid Heddle Weaving Patterns
  • Patterns
  • Subscribe

inkle loom

Lojan Inkle Loom Review plus a free inkle pattern!

by Kelly 12 Comments

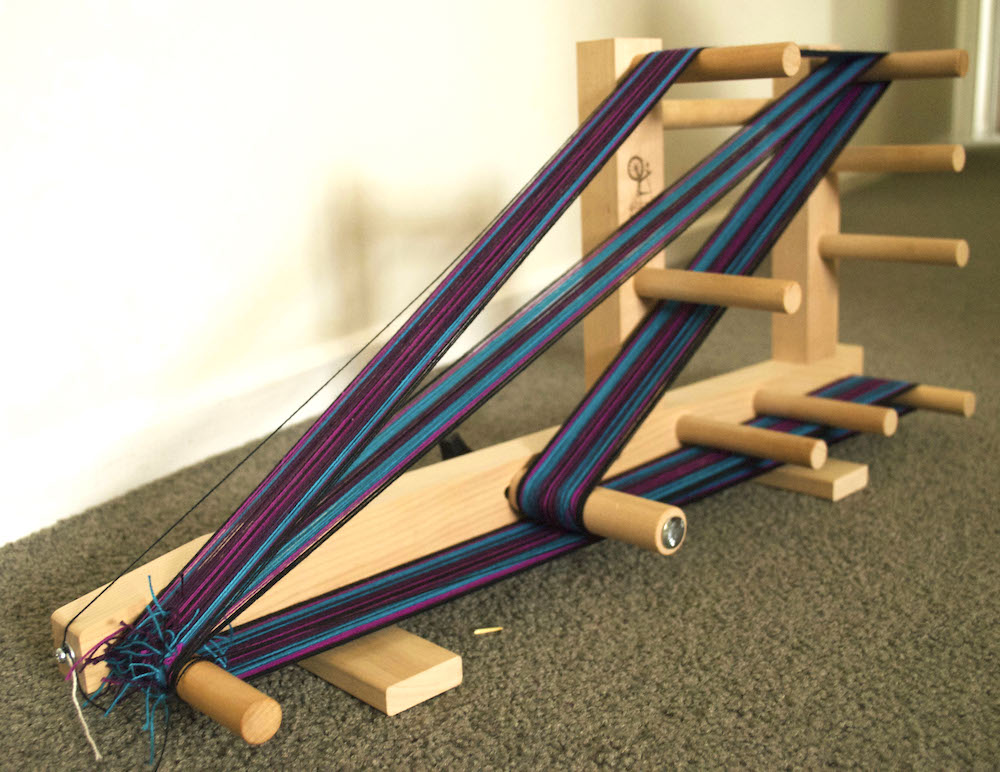
If you’ve been on the hunt for a reliable and well-designed inkle loom, let me introduce you to the Lojan Inkle Loom—a game-changer for weaving inkle bands! I’ve had the pleasure of weaving on this loom for a while now, and I have to say, it’s my new favourite Inkle Loom.

Let’s dive into what makes this loom so great!

What I Love About the Lojan Inkle Loom:
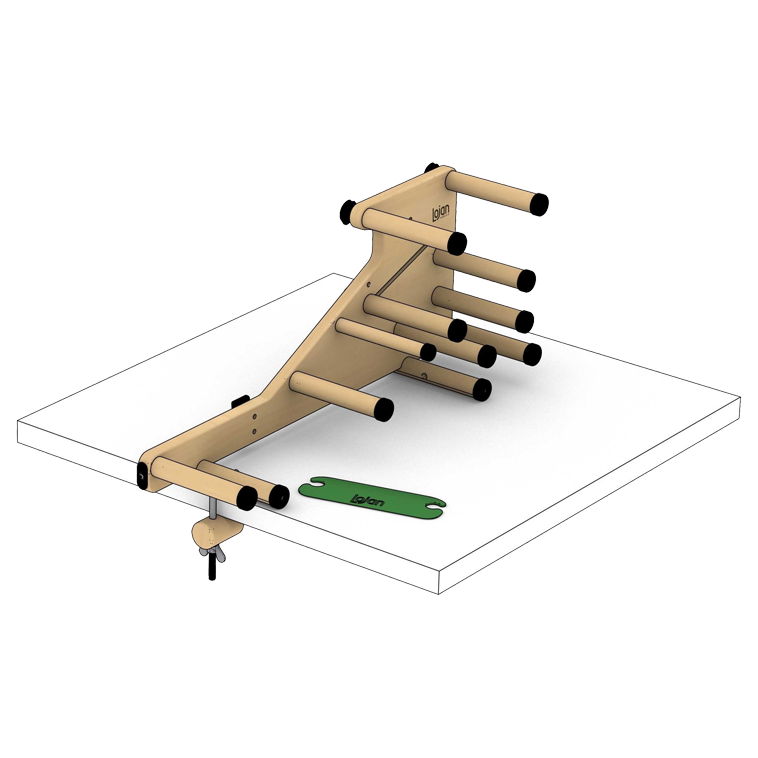
Sturdy Construction

One of the first things I noticed about this loom is just how well-built it is. The solid construction means I don’t have to worry about it wobbling or shifting while I warp or weave. The stabilising legs of the loom have rubber stoppers on each end, meaning the loom doesn’t slip when sitting on a table.

A clamp is included with the Inkle Loom but I have not found it necessary to use it.

Easy to put together

It’s no secret that I’m no genius when it comes to assembly. Let’s just say I’ve never shopped at Ikea and don’t intend to! 😆 Most of the time I need loom or weaving tool assembly work done, I get my husband onto the job, he is so methodical!

But I decided to have a go at putting together the Lojan Inkle Loom myself. Not only was it simple and straightforward, using the instruction book provided, but I even filmed an assembly video to make it easier for you. You can check that video out here:

Longer Pegs

This loom features longer pegs, which is fantastic for those who like to weave wider bands or use tablet weaving cards. You get more weaving space width-wise, which means less crowding of warp threads and more freedom with the size of your band.

The pegs all screw in, rather than glue in. This is brilliant for a couple of reasons:

  1. You can adjust the tension of the screws over time. This means you will never have loose or wobbly pegs.
  2. You can change the peg configuration of the loom. Remove pegs or add them where you want them and as you need them.
  3. The top peg is completely removed for tablet weaving, giving you more space to manipulate the tablets. Very smart!

Rubber Stoppers

It’s a small detail, but a really thoughtful one. The rubber stoppers on the pegs keep the warp threads secure, preventing any accidental slipping of the warp off the ends of the pegs. This is especially useful when warping and when weaving a wider band. The stoppers are removable if you need to do that.

Moveable Pegs for Different Configurations

As I mentioned, one of the standout features of this loom is its adjustable pegs. You can move them around to create different warping configurations, which gives you more flexibility in your projects. This is perfect for customizing your warp length and experimenting with different weaving setups.

Effortless Tensioning—Great for Those with Fine Motor Challenges

Tensioning the warp on this loom is almost effortless, making it a fantastic choice for weavers with arthritis or fine motor challenges. Personally, I love a drum tight tension for weaving inkle bands. Adjusting tension can sometimes be a struggle on other looms, but Lojan has designed this one to be smooth and easy to work with.
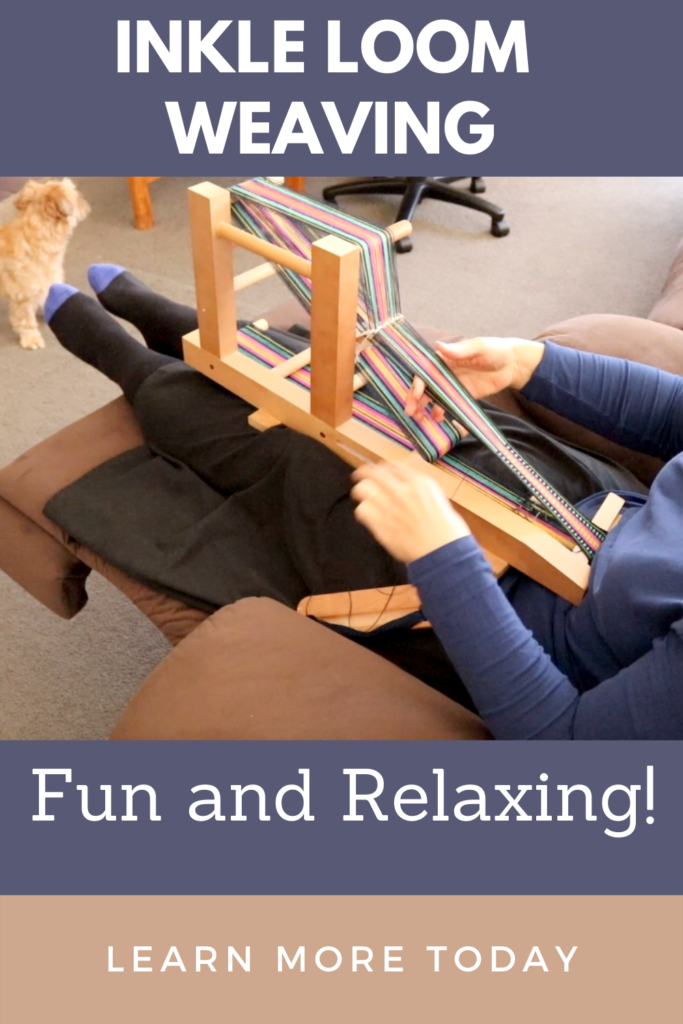
Great as a Lap Loom

If you prefer to weave on your lap instead of a table, you’ll love this loom! The Lojan Inkle Loom is lightweight yet sturdy, making it comfortable to hold on your lap while weaving. This is especially handy if you like to weave while sitting in a cozy chair.

I love to inkle weave in the evenings while seated in my comfy recliner. I place the loom between my legs and use the recliner part of the chair to prop the end of the loom on – it works beautifully.

If you would like to see me actually warping and weaving on this loom while reviewing it, check out this video:

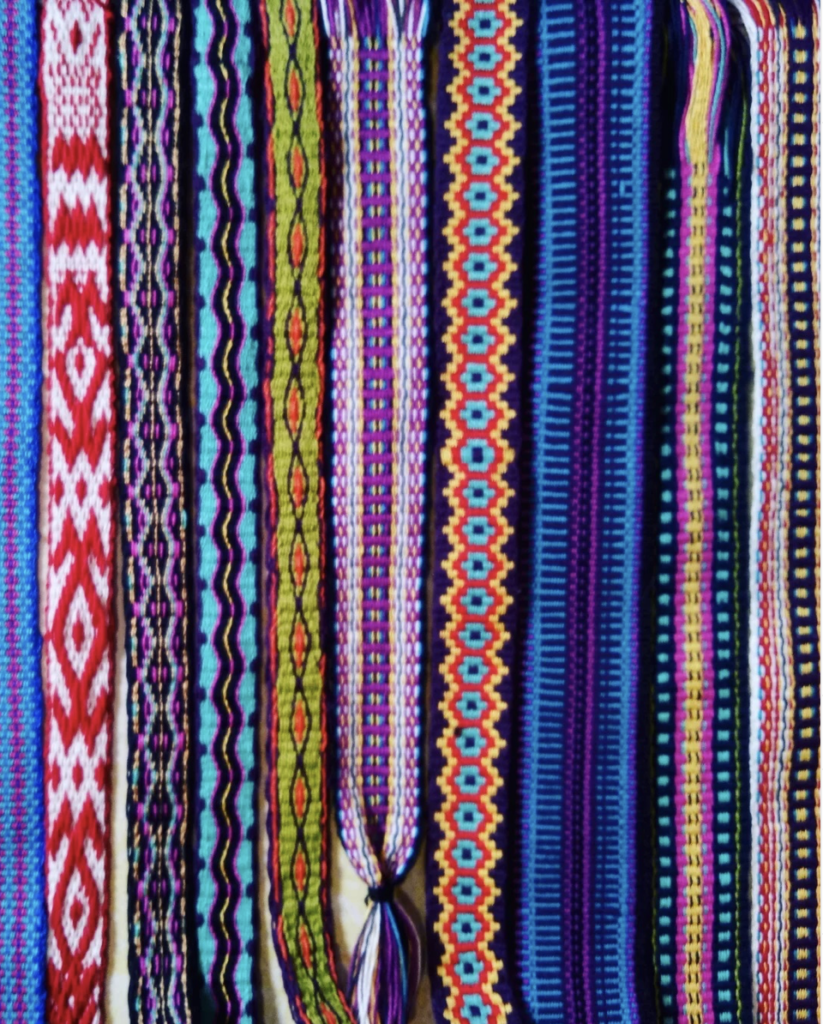
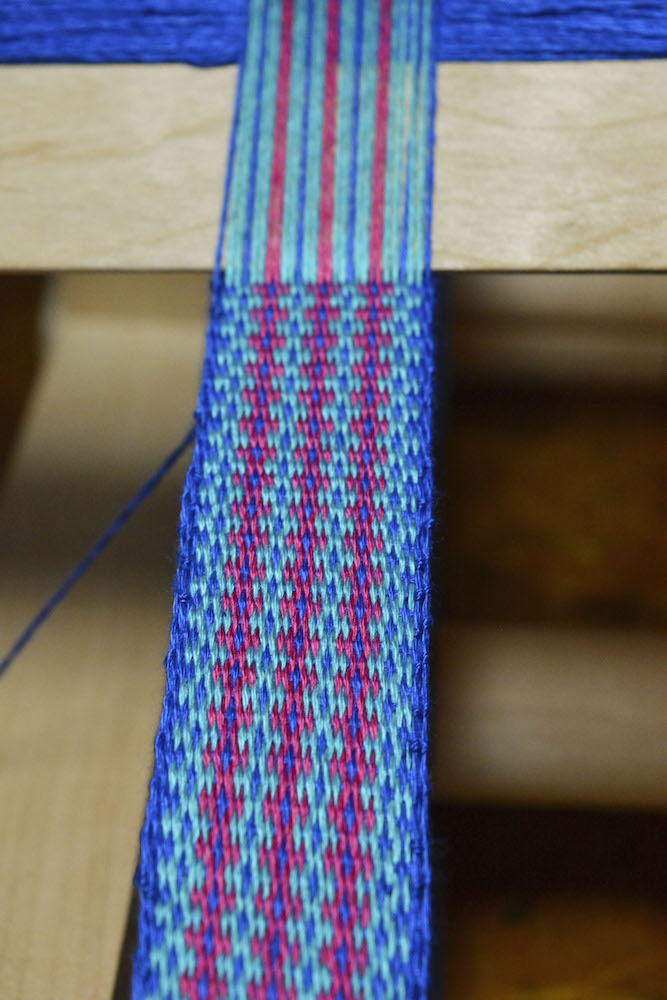
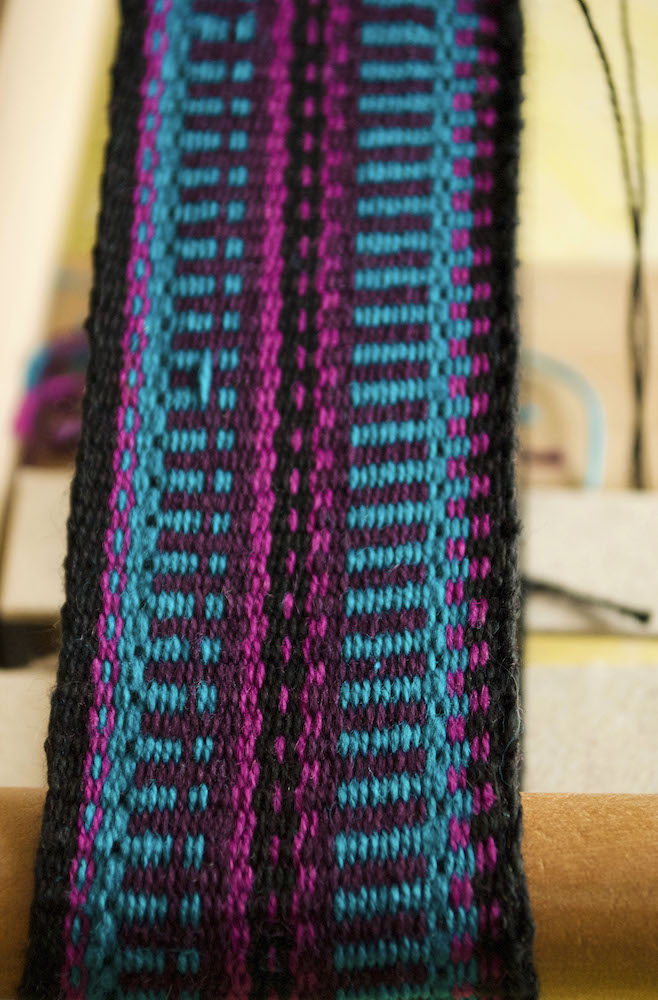
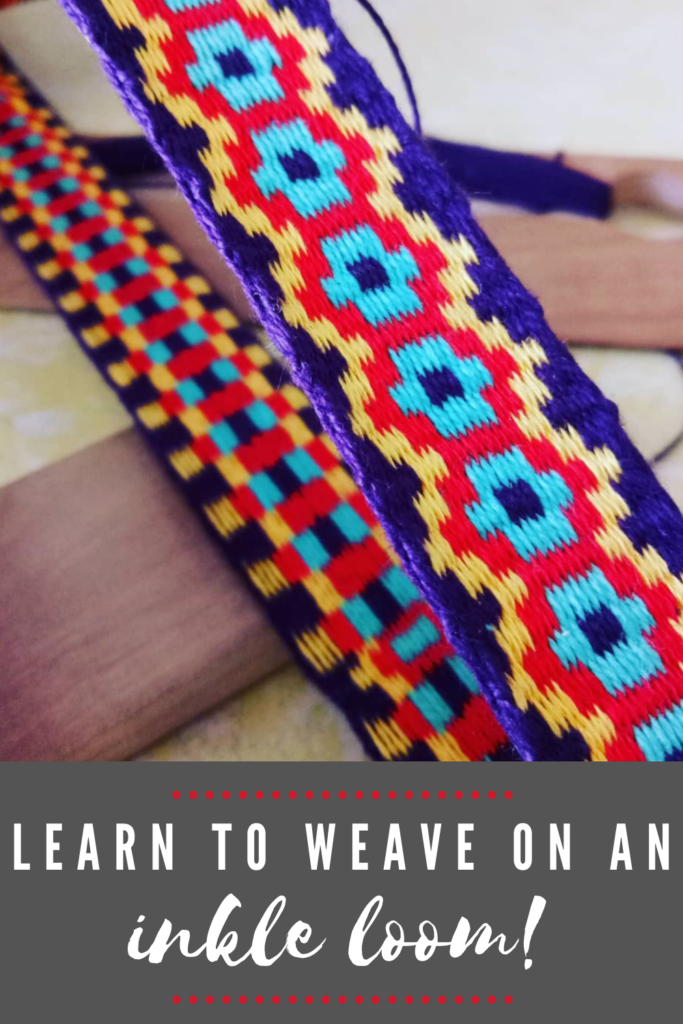
If you like the look of the inkle band I’m weaving in the video, I’m offering a free download so that you can weave it too!

FREE INKLE BAND PATTERN CLICK HERE ⬇️

Free Inkle Band PatternDownload

The Lojan Inkle Loom has quickly become one of my favorite weaving tools. From its sturdy build to the thoughtful design details, this loom makes inkle weaving both fun and effortless. Whether you’re new to inkle weaving or an experienced weaver looking for a reliable loom, the Lojan inkle is absolutely worth considering!

Interested in owning a Lojan Inkle Loom? I am an authorised reseller for Australia, so please feel free to get in touch for more information. If you are in the US, you can purchase from The Woolery and also Revolution Fibers carry some Lojan products.

If you are located in another region, check the Lojan website for your nearest stockist 😉

Have you tried the Lojan Inkle Loom? Let me know your thoughts in the comments—I’d love to hear about your experience!

Until next time…

Happy Weaving!

*This post contains affiliate links. For more information, please see my disclosure policy.

Filed Under: Inkle Weaving, Weaving Tagged With: inkle loom, inkle weaving, lojan inkle loom

Which size inkle loom?

by Kelly 2 Comments

Inkle loom weaving has really taken off recently, and it’s not hard to understand why.

An inkle loom is portable, affordable and fun. Some weavers start their weaving journey on an inkle loom, others discover it and use it to compliment their other weaving skills and projects.

As with a rigid heddle loom, on an inkle you can start with the basics and weave just on two shafts, or plain weave. In fact, because the bands you weave are warped faced and all the colour is in the warp, you could weave plain weave bands for a very long time without tiring of the simplicity.

*This post contains affiliate links. For more information, see my disclosure policy.

If you’re new to the world of inkle weaving, you might be wondering about size. Not all inkle looms are the same size. You may wonder which one is best suited to your needs.

As I own and use an Ashford inkle loom, it makes sense for me to compare the two sizes Ashford have available.

The Ashford Inkle Loom is the largest of the two.

Image from Ashford

This loom is capable of a 110″ warp length and width of 3″. Bear in mind that your warp width is usually reduced by around half for the woven band.

The Ashford Inklette is the smaller size.

Image from Ashford

You can warp the Inklette with 70″ in length and 2″ in width.

So, the main differences between the two?

  1. Size
  2. Price

The Inklette is much more petite than the regular size. Here is a photo comparison of the two:

Image from Ashford

The inklette is extremely portable (you can throw it in a bag and take it with you). It is affordable ($60USD cheaper than the regular size).

But the trade off is the amount of warping space. The smaller size of the Inklette means a smaller band.

The questions you might ask yourself are:

  • What sized bands do I want to weave? Do I want the flexibility of being able to weave a wider, longer band or am I happy to weave narrower, shorter bands?
  • How much do I want to spend to start out in inkle weaving?
  • Do I want a loom that I can easily take with me to weave on the go?

If you are interested in learning more about inkle weaving before you decide whether it is something you want to pursue, I have some helpful resources:

7 tips for inkle weaving plus a free pattern

How to weave on an inkle loom

I have just completed a new, comprehensive Inkle Course. The course covers everything you need to know to weave a plain weave band, tubular weaving and baltic weaving.

To find out more about the Inkle Weaving Course, click here!

If you’re looking for stockists of inkle looms in Australia, I recommend The Thread Collective or Knit, Spin, Weave.

I hope this post helps you to decide on the inkle loom that is right for you!

Until next time…

Happy Weaving!

Filed Under: Inkle Weaving, Weaving Tagged With: inkle loom, inkle weaving

My loom just arrived. Now what?

by Kelly 5 Comments

You have made the big leap and purchased your very first loom! You can hardly contain your excitement and you start to wonder whether it’s normal to have been stalking the delivery guy like you have been!

You are well prepared, you’ve done your research, watched a ton of Youtube videos and read a heap of weaving related articles. You just cannot wait to get your hands on that loom!

*This post contains affiliate links. Please see my disclosure policy for further information.

Am I over exaggerating here? Well, this was me waiting for my first loom to arrive so I’m sure many of you have felt the same.

Depending on the loom that you purchase, it can arrive to your door in any number of ways. I’ll discuss each of the main loom categories so that you know what to expect when your order arrives.

Inkle Loom

My Ashford Inkle Loom arrived with some assembly required. The assembly was very basic and did not require complicated tools to put together.

You need to glue and tap the pegs into place. That glue then needs to be left for 24 hours to completely dry, which is an important step in the future stability of your loom.

Then it’s a simple matter of installing the small pieces of hardware provided (the rubber feet, the tension peg etc).

Ashford do recommend to use a wax or other sealant on the wood of the loom once you have assembled to protect the wood from sun and moisture damage or other stains.

Rigid Heddle Loom

A rigid heddle loom will arrive flat packed in a box. Depending on the company, the loom pieces that are wood may or may not be finished. Ashford rigid heddle looms are not finished, so if you want to wax or lacquer your loom you will need to do that, then let the pieces dry before beginning to assemble.

The knitter’s loom, which I wrote about here, comes with the wood finished and ready to assemble, so that is something to bear in mind.

The length of time to assemble will vary and may depend on your aptitude to follow written instructions. I noticed that Ashford did recently upload this rigid heddle assembly video, which should be a good help to many.

A rigid heddle loom is not too difficult to put together and depending on the size you have purchased, should take 1 – 3 hours (not allowing for glue drying times where applicable).

Tapestry Loom

It’s more difficult to talk about a tapestry loom as there are many different types – some are made of wood and some of metal.

The assembly of my Mirrix Big Sister was a very simple affair as there really are not that many parts. There was no screwing wooden sections together, it was more just placing pipes within other parts and tightening up. So, even if you were challenged by written instructions, you could easily have this type of loom put together in under an hour.

If you are interested in this type of loom, I’ve written a review here.

Table Loom

Table looms will also mostly come flat packed in boxes and the pieces are all finished and ready to assemble. There are a lot more parts to a table loom than a rigid heddle. I remember the first time I bought a table loom, those boxes were very exciting but quite confronting as well!

Luckily for you, if you have purchased or intend to purchase an Ashford table loom, my husband and I have put together two detailed videos that take you step by step through the assembly process.

I have loved to have a video like this for my first table loom assembly, but I’m very happy to think so many new weavers don’t have that same headache and can instead follow our instructions to get it done.

You can watch the first video here:

I recommend that if your table loom has just arrived, set aside a day where you don’t have much happening to put it together. With drying times, you may find it easier to work on it over several days, getting a few steps done on each day.

That makes the process not too overwhelming and tiring. Don’t worry if it takes you a bit of extra time to put together, you will get it done and it will be worth it.

Floor Loom

This is a biggie. Literally! The size of a floor loom means that the pieces are plentiful and large. Floor loom pieces should come finished and ready to assemble. Most of the time they will be flat packed, but not always.

Of course, if you purchase second hand, or are lucky enough to get a floor stock loom from a shop, it will be either fully or partly assembled.

If your floor loom is new and in pieces, it is super helpful to lay out all the pieces in the approximate correct shape of the frame of the loom on the floor. This helps you get a good look at how and where the pieces will go.

Don’t expect to get assembly done quickly, it can easy take several days and you will need a good amount of space where you can leave partly assembled parts and non assembled parts laid out where they won’t be disturbed.

My Louet David was laid out on a carpeted floor in a non foot traffic area of our home, which made it all so much easier and meant that none of that beautiful, smooth wood got scratched or damaged in any way.

General Assembly Tips

  • When your loom arrives and you unbox it, keep all like pieces together (screws of a certain size etc).
  • Using the instructions provided, go through every piece to ensure it is there. Factories can make mistakes, it happens occasionally that a piece will be missing. If that happens, you want to know about it before you begin assembly rather than half way through.

It also means you can contact the company right away and tell them a piece was missing in the beginning. If you find a piece is missing part way through assembly, you can’t be absolutely sure whether you may have lost a small piece yourself. Trust me, it’s worth checking!

  • Lay all the pieces out in a space, if you have the space. This helps you to visualise how the loom will look and gain an understanding of what the parts do.
  • Teamwork is awesome! If you have a spouse or someone else who can assemble the loom with you, that is very helpful. Not only are four hands better than two, two brains are much better than one! It can make all the difference to have another mind at work beside you, to see things from a different angle to you.
  • Take your time. You will only need to put the loom together once, so it’s worth doing it properly and not to rush. You will get to weave on it, you just have to be patient!

Are there any other tips you would add to these? Please share them in the comments for the benefit of other readers. Thank you for your contribution!

Until next time…

Happy Weaving!

Filed Under: All about looms, Inkle Weaving, Rigid heddle weaving, Table loom weaving, Tapestry Weaving, Weaving Tagged With: inkle loom, loom assembly, rigid heddle loom, table loom weaving, tapestry loom, weaving

How to weave on an inkle loom

by Kelly 33 Comments

Have you ever wondered how to weave on an inkle loom—what it is, how it works, and what kinds of beautiful bands you can create with it? You’re in the right place!

An inkle loom is a simple, portable loom that’s perfect for beginners and experienced weavers alike. It’s designed for weaving strong, narrow bands that can be used for everything from belts and bag straps to decorative trims. In this post, I’ll walk you through what an inkle loom is, how to set it up, and what you can weave on it—so you can start your own inkle weaving journey with confidence!

An inkle loom is basically a wooden frame with pegs for your warp to wind around and be tensioned on. There is also an adjustable tensioning peg to release or increase tension.

*This post contains affiliate links. For more information please see my disclosure policy.

Once you’ve wound on your warp, you create an extra shed for plain weave by using heddles to pick up threads. By the time you’re ready to weave, you will have shed 1 and shed 2 or heddled and unheddled threads. Pretty simple!

The weave structure that you use on an inkle loom is warp faced plain weave. This means that, although you are weaving plain weave, you place your warp under very tight tension and beat each pick down hard with a belt shuttle so that the warp colours remain visible but the weft threads do not. The warp threads become very condensed together, forming a thick, tight fabric, or band.

Now I’m going to address some commonly asked questions about inkle loom weaving:

What do I get when I purchase an inkle loom?

Whichever brand of inkle you choose, it should come standard with certain pieces. Firstly, the loom itself, commonly made of strong wood and usually requiring some basic assembly, comes with a built in tensioning peg.

You should also receive a belt shuttle, a clamp (this gives you the option of clamping the loom to a table or similar) and an instruction booklet.

You may or may not receive some string heddles, but you will need these, so check before purchasing if they are included. Of course, you an always make your own with some tapestry warping thread or seine twine.

What can I make on an inkle loom?

An inkle loom is for weaving bands. What you can then use the bands for is up to your own imagination!

Some ideas are: key fobs, dog leads, shoelaces, bag handles, decorative trim for other craft or sewing projects, tabs to sew onto your handwoven towels to hang them, stitched together to make a larger project like a bag or purse, bracelets, lanyards, belts, guitar straps… lots of possibilities!

What width and length can I weave on an inkle loom?

I will talk about Ashford inkle looms, as that is what I own and know best. There are 2 sizes available:

Ashford Inkle loom. (just over $100USD)

This is the inkle loom that I have. You can warp it to a length of 110″ and achieve a weaving width of up to 3″.

Ashford Inklette loom (under $100USD)

This is a smaller alternative. You can warp up to a length of 72″ and a weaving width of 2″.

Why is an inkle loom a good option?

You may find the thought of an inkle loom limiting because you can only weave bands on it. However, there are so many variations for the actual bands possible that inkle weaving can keep you very busy for a very long time.

I’ve had my inkle for a few years and feel like I’ve only just scratched the surface. For example, last year I experimented with krokbragd on my inkle. I hear you saying “but you said an inkle is a 2 shaft loom!”

Indeed, it is, just like a rigid heddle loom is, but by doing pick up and adding extra heddles, we can make those extra shafts we need for more intricate patterns.

Weaving this krokbragd band was a fascinating exercise in taking a normally weft faced pattern draft and turning it to produce a warp faced pattern draft. And look at how gorgeous it is! If you want to know more about this project, I wrote a blog post about it here.

It is also such a light and portable loom. I like to sit in a recliner and weave on the inkle in the evenings while watching a movie with my family or chatting with someone. It’s small enough to take just about anywhere.

And of course, in the world of looms, this has to be one of the most affordable. Some weavers make their own, so make friends with google if that idea interests you.

Which yarns are best for inkle weaving?

I have mostly used 8/2 cotton. If you are familiar with me, you will know that I’m not a huge fan of mercerised cotton, aka Perle cotton, but for inkle weaving I have used it many times. It gives a lovely sheen to the bands.

I have also used unmercerised cotton a lot on my inkle. Both are perfect for the task. The colours of your band are all made in the warping process (remember, it’s a warp faced weave).

Here is a little tip – choose your weft colour according the colour of the edges of your warp, that way when you take the weft around the selvedges at the shed change, it will blend in nicely.

Where should I start?

The instruction booklet that comes with your inkle loom should help you a lot to get set up for your first project, however it won’t be long before you want to branch out and learn more. The best book that I have found on inkle weaving is Anne Dixon’s The Weaver’s Inkle Pattern Directory, which is extremely comprehensive and useful for both beginners and experienced levels.

Anne has over 400 patterns to try in all different styles and variations of difficulty. It’s quite an amazing book!

You will also find my Youtube series on weaving a floral inkle band invaluable, as it takes you right through from how to set up your loom to finishing your band after weaving. You will definitely want to check it out and be sure to watch all the videos so that you don’t miss any crucial steps:

You can download and print out this free floral pattern here:

Floral-band-inkle-patternDownload

Also, be sure to check out my article 7 Tips For Weaving on an Inkle Loom which includes yet another gorgeous and free downloadable pattern for you to weave on your inkle loom.

If you’re ready to get more serious about learning to weave on your inkle loom and also delve into tubular weaving, baltic pick up and all the tips and tricks, check out my online Inkle Weaving Course.

Product image

Inkle Weaving

Learn the fun and fascinating art of band weaving on your inkle loom!

3641 students enrolled

Last updated Apr 28th, 2025

Select a Pricing Plan
Buy now

I hope this article has peaked your interest in inkle weaving and helped you to see the many benefits of this little loom.

I love to weave on my Lojan Inkle Loom! I am a reseller for Lojan products in Australia, if you are interested in ordering please get in touch.

If you have any questions or comments, please leave them below, I love to hear from you (and it helps me to not feel like I’m talking to myself here 😆)

Until next time…

Happy Weaving!

Filed Under: Inkle Weaving, Tutorials, Weaving Tagged With: how to weave on an inkle loom, inkle loom, inkle weaving tutorial

I deleted my last post and wrote about krokbragd instead!

by Kelly 13 Comments

I had a long post, all ready to go. It was a little bit of weaving and a LOT of life. I’m glad I didn’t hit “publish” on that post right away. I’ll explain…


The post was written at the end of a really busy week. I had launched a new class for my Online Weaving School, I had made a Youtube video, I had promoted the new class everywhere I could think of to promote it, I had homeschooled the kids and cared for my family, we had been on educational outings, appointments and activities. Yeh, I was pretty tired at the end of that week. And then I sat down to write a blog post.


A little bit of advice to you all – don’t write blog posts when you’re over tired. And if you do write them, don’t publish them! That’s all I’ll say on the subject for now, except to add that I have now caught up on some much needed sleep and rest and am thankful that, not only did I get over my little self pity party, but also that I decided not to inflict my Whingefest upon your eyes and minds!


Now, let’s get to the fun stuff.


I had been wanting to warp up my inkle loom for quite some time, as it has been sadly neglected and I do so enjoy weaving on it, just for something a bit different. My loom is the Ashford Inkle, which is the larger version, they also make the Inklette, which is more petite for smaller and narrower bands.


I didn’t know what to warp up, so I took a flick through my go – to Inkle book, The Weaver’s Pattern Directory by Anne Dixon. I often recommend Anne’s Handweaver’s Pattern Directory  for 4 shafts, as it is so packed with drafts and quality information and her inkle book is no exception. 


I started by picking out some colours from my stash that I love (always a good way to start a project, even if you’re not that confident with colour choices). I ended up with a mixture of mercerised and unmercerised 8/2 cottons. If you’re unfamiliar with 8/2 cottons I often use Maurice Brassard as they are great quality and come in heaps of colours. Here is an example of MB 8/2 unmercerised. A comment from Gai has just reminded me of something I wanted to add about mercerised cotton. In general, I don’t like to use it on a larger loom, it twists up on itself and is a general pain in the neck. However, on the Inkle loom it’s different. Because you warp directly on to the pegs without having to do extra threading or moving of the warp, it behaves itself very well. It is constantly under high tension, so is easy to use and does add a lovely “gleam” to the project.

Being the lover of the weave structure Krokbragd that I am, it was a natural choice. Did you know you can weave krokbragd on an inkle loom? Yes, you totally can!


And, did you know that a krokbragd band is as equally gorgeous as a larger loom project? Yes, it totally is!  

So now I’m really excited about the design possibilities for this, though I admit that the design aspect is different to what I’m accustomed to –  it’s proving quite a challenge for me and is a bit to get my head around. I’ll keep plugging away at it though, and I’m sure I’ll get there.

I love that the reverse side is just as striking as the front.

As soon as I posted these on social media, people were asking me for a class, which I would love to do once I have some of my own designs up and running. In the meantime, if you have Anne’s book or are interested in purchasing (perhaps your library might have it?) this krokbragd design is from page 107.

And, if krokbragd band weaving is of interest to you, there will definitely be more to come!

Thanks for reading, until next time…

Happy Weaving!

*Please note – this post contains affiliate links, meaning that if you click and purchase, I will receive a small percentage of the sale. I only recommend products that I own and love.


Filed Under: Weaving Tagged With: inkle loom, krokbragd, weaving, weaving books

Which looms do you have and what is on your Wishlist?

by Kelly 24 Comments

This post contains affiliate links. I only recommend products that I own, use and love.
Ashford 60cm (24″) rigid heddle loom 

This is my most used loom at this point and most of the classes I teach are on this loom. Initially, I chose it because the price point fitted my budget at the time, and I had the right amount of space for it. I’ve never regretted the purchase. I think of it as my little workhorse! You can check out the same loom by following this link.


Ashford Sampleit


I bought this one for my girls, who often complained that they never got to weave because my loom was always full. I think I have used it more than they have though! It is so good for sampling new ideas and designs, enabling me to have a couple of rigid heddle projects going at once. It also takes up hardly any space at all.


Ashford Inkle

I love inkle weaving, but unfortunately have not had the time to indulge and explore as much as I would like. Once again, it’s not space hungry and allows me to weave a different kind of project while other larger projects are going on. This loom is for bands, but that doesn’t mean that only band projects are possible, you can sew bands together to make all kinds of cool things. I have a beginner series on Youtube for using an inkle.
 David 2 Louet
 

Aka the love of my life! Alright, that’s taking it a bit far but I do really love this loom. 8 shafts, 10 treadles, made in the Netherlands. Compact, easy to operate, beautiful to look at, and so much more. I review it here if you’re interested. I have the second instalment of my Floor Loom Series coming up soon, so watch out for that one!

Previously owned – Ashford 8 shaft 80cm (30″) table loom  (the loom available in this listing is a 24″)

I ran out of space when I bought my floor loom, so had to sell my table loom. You can see a demonstration of me using it here and an overview of the loom here. To be honest, I really do miss this loom and often recommend them to others. I can envision myself once again investing in a table loom “one day” but in a smaller format so that it is portable for teaching. The Katie, with it’s light weight and 8 shaft capability would be just the ticket.

Wishlist


Mirrix Little Guy or Big Sister

I have been doing a lot of tapestry work on my rigid heddle loom recently, which has highlighted a couple of things for me.
1. The rigid heddle loom is a good loom for playing around with tapestry, but not the best.
2. I love tapestry!
3. As tapestries are a time investment, it would be ideal for me to have a separate loom for this.
 
So, why would I choose a Mirrix?
Well, their looms are simple and compact but still a complete tapestry loom. It wouldn’t take up a lot of space that I no longer have the luxury of! I love their sturdy and attractive design, and the shedding devices that many of the loom have is a huge bonus. I have done quite a bit of research and I feel that these are really quality looms, made by weavers for weavers. 


There is a video version of this blog post on my Youtube channel if you’re a visual kinda person.


Until next time…


Happy Weaving!

Filed Under: Weaving Tagged With: floor loom, inkle loom, rigid heddle loom, table loom, weaving

Primary Sidebar

Categories

Archives

Meta

  • Log in
  • Entries feed
  • Comments feed
  • WordPress.org

Copyright © 2025 Kelly Casanova Weaving Lessons on the Foodie Pro Theme