• Skip to main content
  • Skip to primary sidebar

Kelly Casanova Weaving Lessons

  • Hi! I’m Kelly!
    • Disclosure
  • Online Weaving School Class Index
    • Common account issues
    • Common technical issues
    • What do I get with a membership?
  • New to rigid heddle weaving? Start here!
    • Never heard of the rigid heddle loom?
    • How to weave neat edges on the rigid heddle loom
    • Rigid heddle weaving
    • Rigid Heddle Weaving Patterns
  • Patterns
  • Subscribe

inkle weaving

Lojan Inkle Loom Review plus a free inkle pattern!

by Kelly 12 Comments

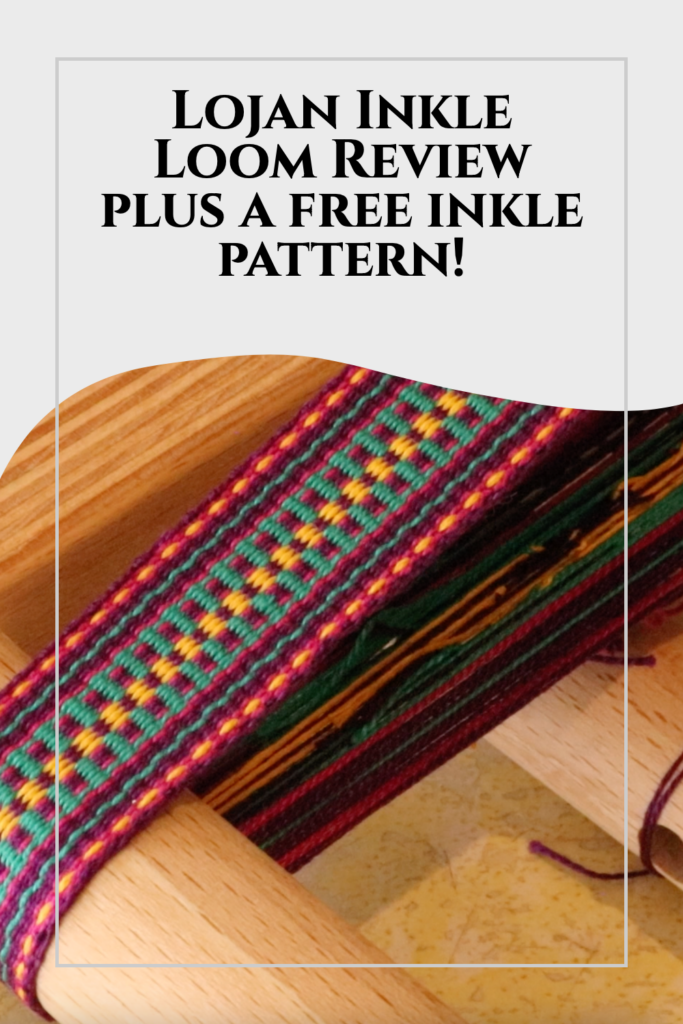
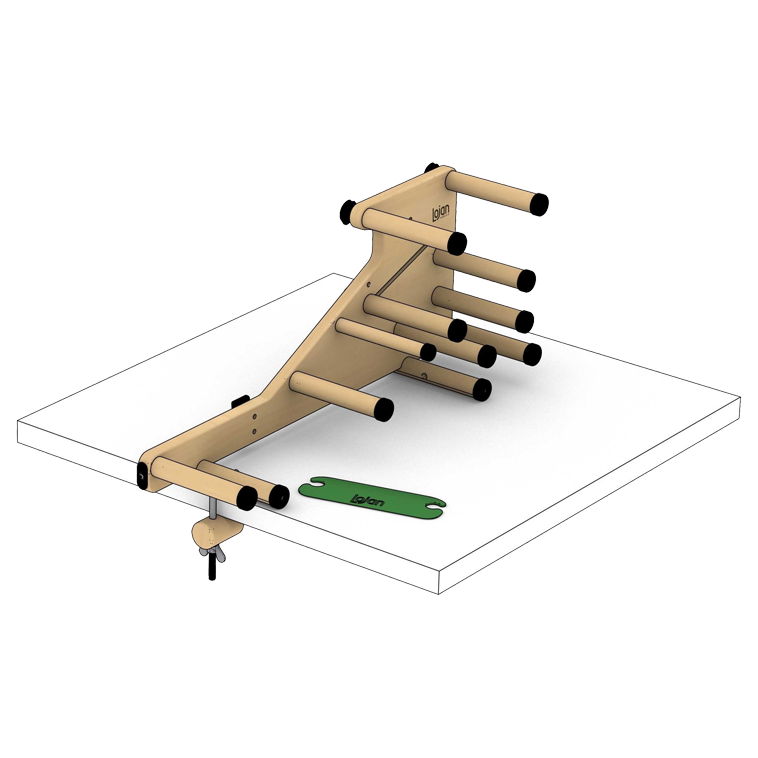
If you’ve been on the hunt for a reliable and well-designed inkle loom, let me introduce you to the Lojan Inkle Loom—a game-changer for weaving inkle bands! I’ve had the pleasure of weaving on this loom for a while now, and I have to say, it’s my new favourite Inkle Loom.

Let’s dive into what makes this loom so great!

What I Love About the Lojan Inkle Loom:

Sturdy Construction

One of the first things I noticed about this loom is just how well-built it is. The solid construction means I don’t have to worry about it wobbling or shifting while I warp or weave. The stabilising legs of the loom have rubber stoppers on each end, meaning the loom doesn’t slip when sitting on a table.

A clamp is included with the Inkle Loom but I have not found it necessary to use it.

Easy to put together

It’s no secret that I’m no genius when it comes to assembly. Let’s just say I’ve never shopped at Ikea and don’t intend to! 😆 Most of the time I need loom or weaving tool assembly work done, I get my husband onto the job, he is so methodical!

But I decided to have a go at putting together the Lojan Inkle Loom myself. Not only was it simple and straightforward, using the instruction book provided, but I even filmed an assembly video to make it easier for you. You can check that video out here:

Longer Pegs

This loom features longer pegs, which is fantastic for those who like to weave wider bands or use tablet weaving cards. You get more weaving space width-wise, which means less crowding of warp threads and more freedom with the size of your band.

The pegs all screw in, rather than glue in. This is brilliant for a couple of reasons:

  1. You can adjust the tension of the screws over time. This means you will never have loose or wobbly pegs.
  2. You can change the peg configuration of the loom. Remove pegs or add them where you want them and as you need them.
  3. The top peg is completely removed for tablet weaving, giving you more space to manipulate the tablets. Very smart!

Rubber Stoppers

It’s a small detail, but a really thoughtful one. The rubber stoppers on the pegs keep the warp threads secure, preventing any accidental slipping of the warp off the ends of the pegs. This is especially useful when warping and when weaving a wider band. The stoppers are removable if you need to do that.

Moveable Pegs for Different Configurations

As I mentioned, one of the standout features of this loom is its adjustable pegs. You can move them around to create different warping configurations, which gives you more flexibility in your projects. This is perfect for customizing your warp length and experimenting with different weaving setups.

Effortless Tensioning—Great for Those with Fine Motor Challenges

Tensioning the warp on this loom is almost effortless, making it a fantastic choice for weavers with arthritis or fine motor challenges. Personally, I love a drum tight tension for weaving inkle bands. Adjusting tension can sometimes be a struggle on other looms, but Lojan has designed this one to be smooth and easy to work with.

Great as a Lap Loom

If you prefer to weave on your lap instead of a table, you’ll love this loom! The Lojan Inkle Loom is lightweight yet sturdy, making it comfortable to hold on your lap while weaving. This is especially handy if you like to weave while sitting in a cozy chair.

I love to inkle weave in the evenings while seated in my comfy recliner. I place the loom between my legs and use the recliner part of the chair to prop the end of the loom on – it works beautifully.

If you would like to see me actually warping and weaving on this loom while reviewing it, check out this video:

If you like the look of the inkle band I’m weaving in the video, I’m offering a free download so that you can weave it too!

FREE INKLE BAND PATTERN CLICK HERE ⬇️

Free Inkle Band PatternDownload

The Lojan Inkle Loom has quickly become one of my favorite weaving tools. From its sturdy build to the thoughtful design details, this loom makes inkle weaving both fun and effortless. Whether you’re new to inkle weaving or an experienced weaver looking for a reliable loom, the Lojan inkle is absolutely worth considering!

Interested in owning a Lojan Inkle Loom? I am an authorised reseller for Australia, so please feel free to get in touch for more information. If you are in the US, you can purchase from The Woolery and also Revolution Fibers carry some Lojan products.

If you are located in another region, check the Lojan website for your nearest stockist 😉

Have you tried the Lojan Inkle Loom? Let me know your thoughts in the comments—I’d love to hear about your experience!

Until next time…

Happy Weaving!

*This post contains affiliate links. For more information, please see my disclosure policy.
Filed Under: Inkle Weaving, Weaving Tagged With: inkle loom, inkle weaving, lojan inkle loom

October Inkle Challenge Gallery

by Kelly 3 Comments

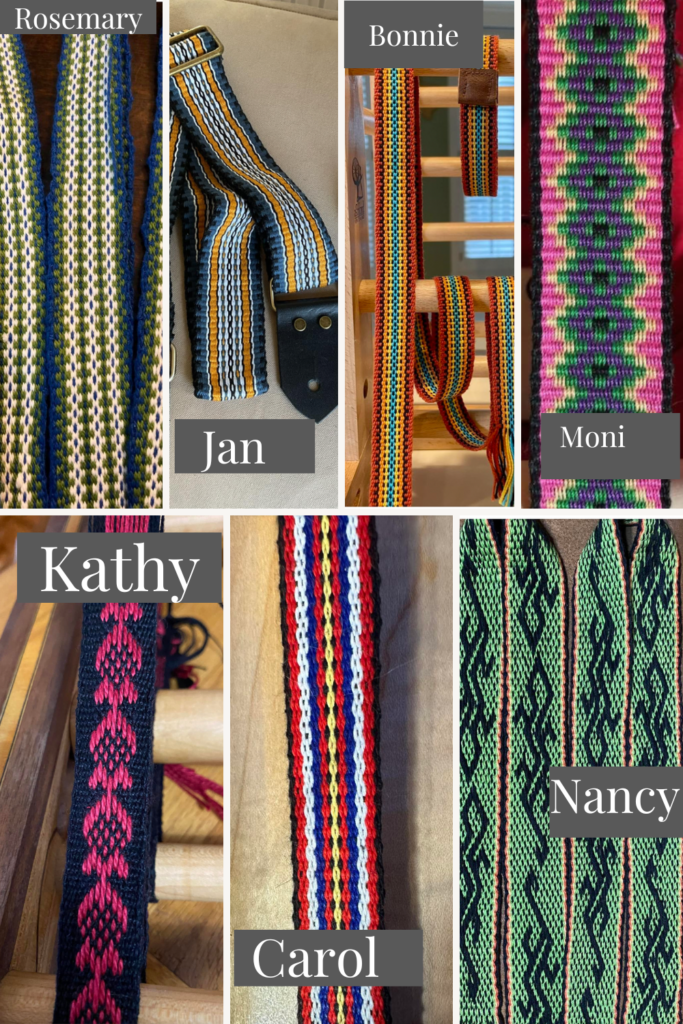
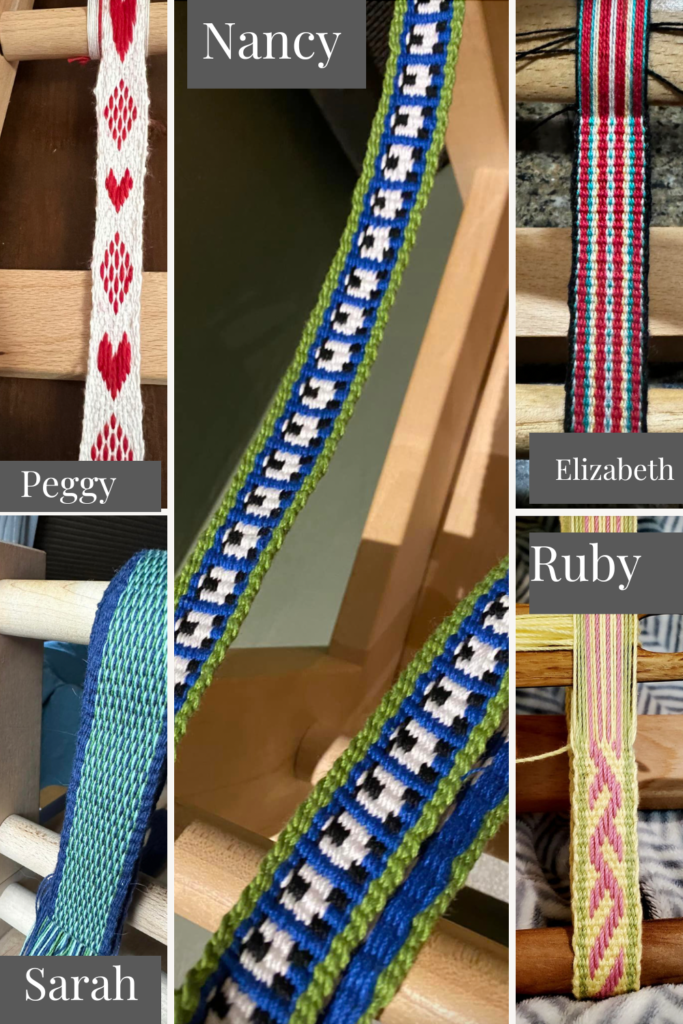
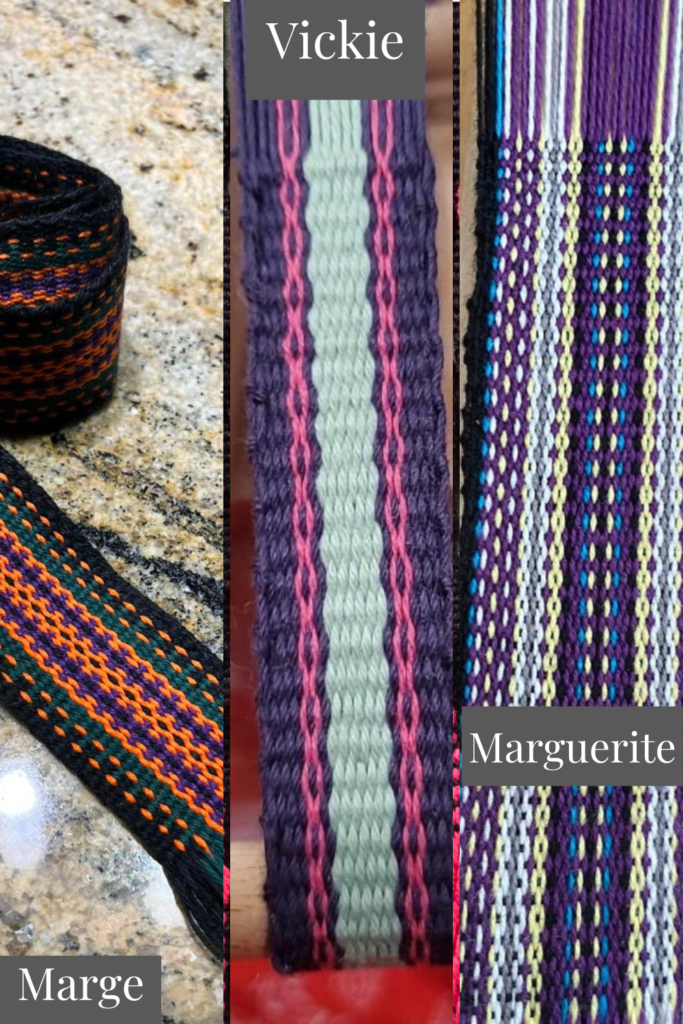
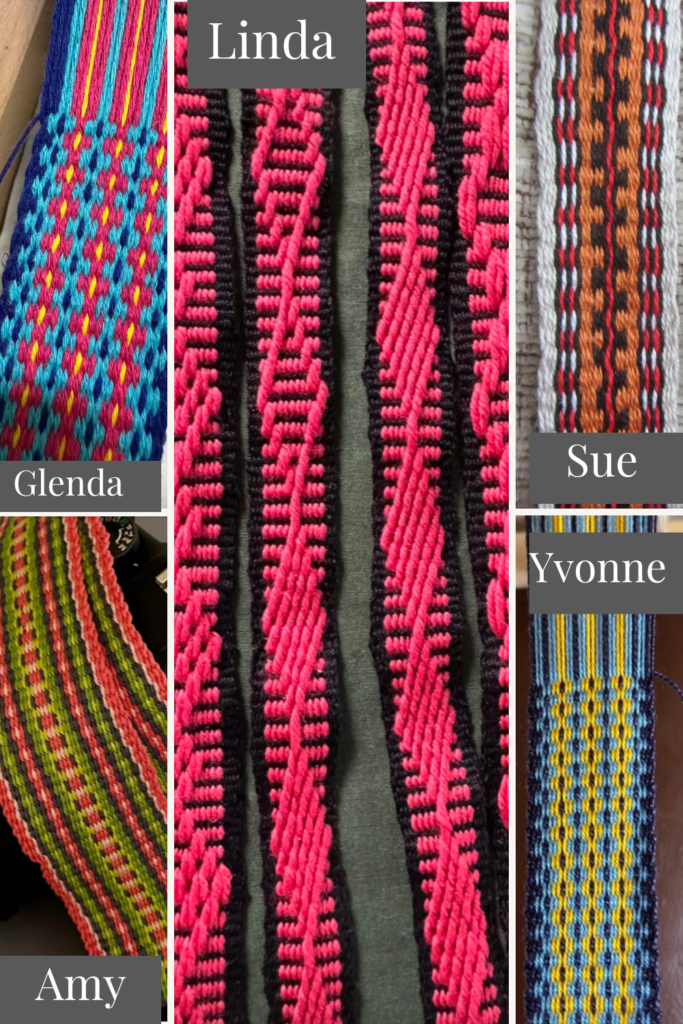
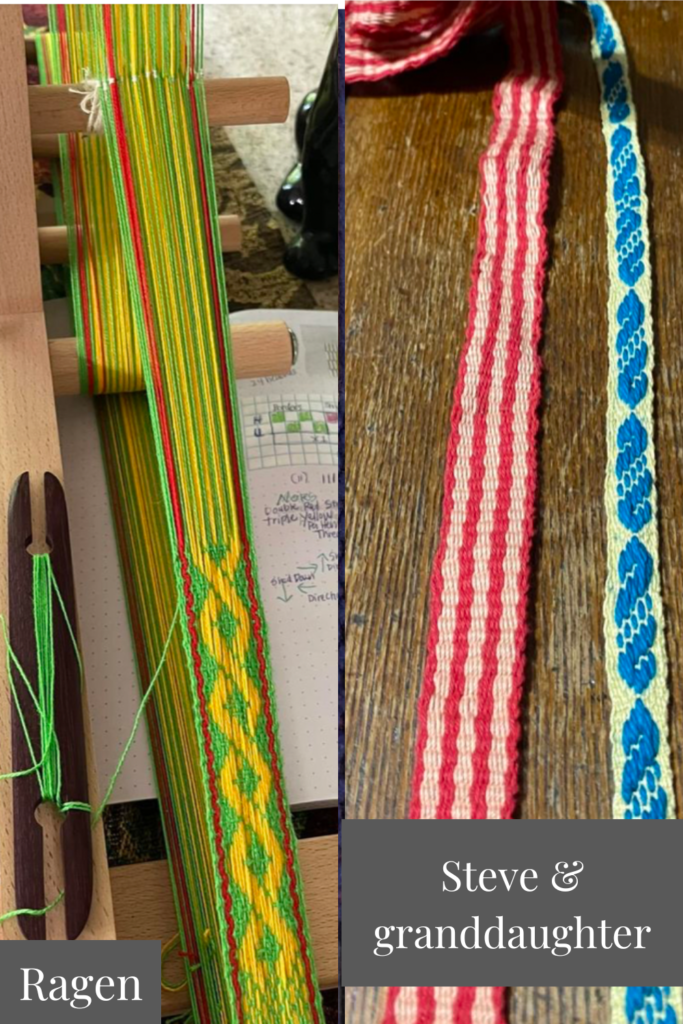
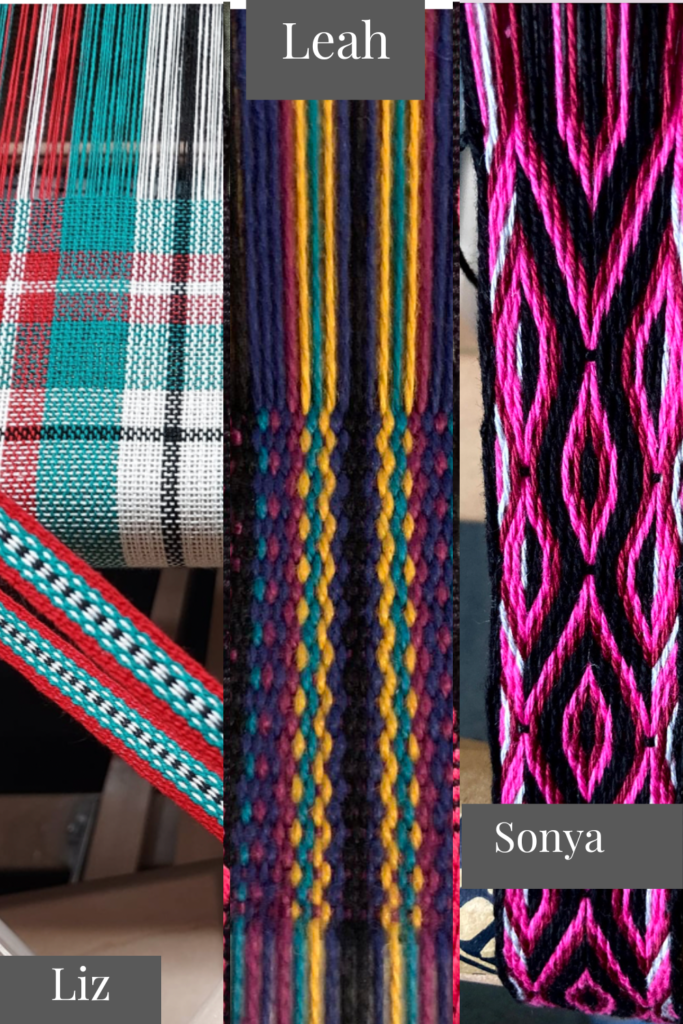
The October Inkle Challenge was a huge success with many participants weaving bands in a variety of styles and methods.

Some chose to follow my Inkle Weaving class patterns exactly, some used one of my free inkle patterns and others either designed their own or used other existing patterns. Several weavers used the Weaver’s Inkle Pattern Directory.

Each week of the challenge included a live video and a giveaway. In the first week, Annie Machale generously offered a copy of her book “In Celebration of Plain Weave”, the second week was a copy of my Inkle Bag Ebook and Pattern, and the third week was a free inkle pattern I designed just for the challenge group participants.

In the live videos I discussed a variety of inkle related topics, including tension, dealing with selvedge threads, and ways to use your finished bands.

I was so thrilled with the challenge participants, their enthusiasm and their wonderful bands. Most participants woven on their Inkle Loom while one or two chose to weave bands on a rigid heddle loom.

Everyone was able to work to their own level. Many were beginners, others had woven a couple of bands already and then there were some who chose to use additional techniques like tablet weaving, pick up and turned krokbragd.

It was also extremely rewarding to see newbie inkle weavers gain confidence and dramatically improve their woven bands by seeking feedback through the group and implementing suggestions. That is what it’s all about!

The bands you see in this gallery are only some of the beautiful bands that were woven during the challenge. Many members (myself included!) wove multiple bands over the space of the month.

*This post may contain affiliate links. For further information, please see my disclosure policy.

A huge thank you to all participants for making this challenge such an exciting success.

Now that the October Inkle Challenge has finished, I have been challenged to create another challenge! 😆

What a great idea, I’ll have to get my thinking cap on and see what happens!

Until next time…

Happy Weaving!

Filed Under: Inkle Weaving, Inspiration, Weaving Tagged With: inkle challenge, inkle weaving

Tablet Weaving for Beginners: Essential Tools and Set Up Guide

by Kelly 12 Comments

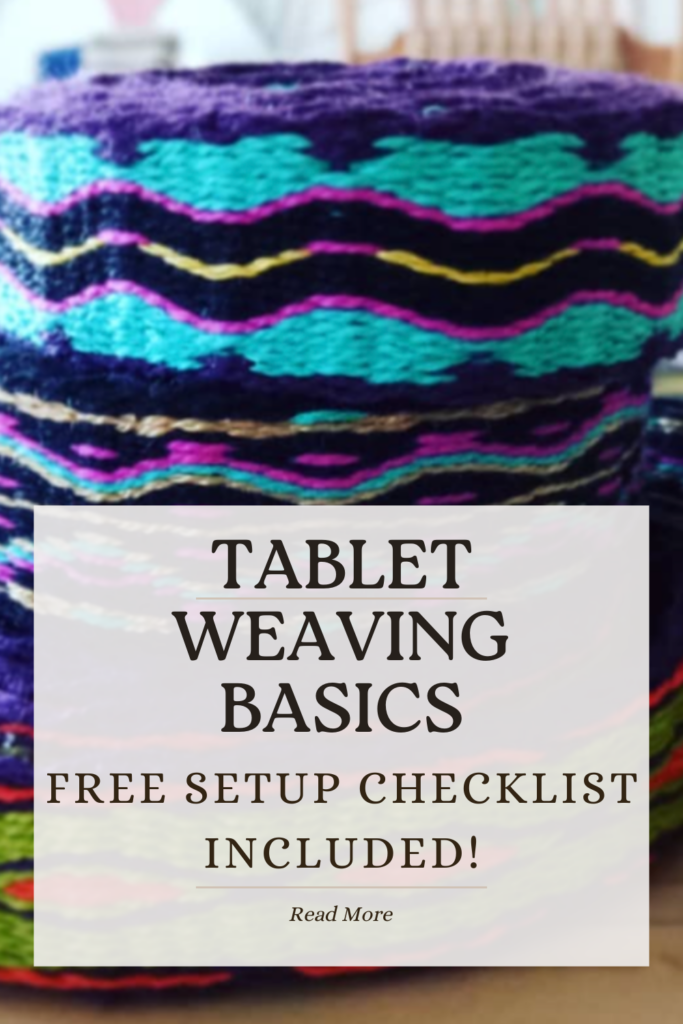
Tablet weaving is a fascinating and versatile technique that lets you create strong, decorative bands with intricate patterns. Whether you’re a complete beginner or transitioning from another type of weaving, this guide will walk you through everything you need to start tablet weaving—including must-have tools, setup tips, and beginner-friendly advice!

What is Tablet Weaving?

Tablet weaving (also called card weaving) is an ancient technique that produces narrow, sturdy bands with often complex and intricate patterns. Unlike rigid heddle or frame looms, it uses typically square tablets or cards (other shapes are also sometimes used) with holes to manipulate warp threads, creating unique designs.

This method has been used for centuries across different cultures, and it remains a favorite among modern weavers for its portability and creative potential.

Let’s go through what you need to get started with tablet weaving.

Essential Supplies for Tablet Weaving

To get started with tablet weaving, you need just a few tools and materials:

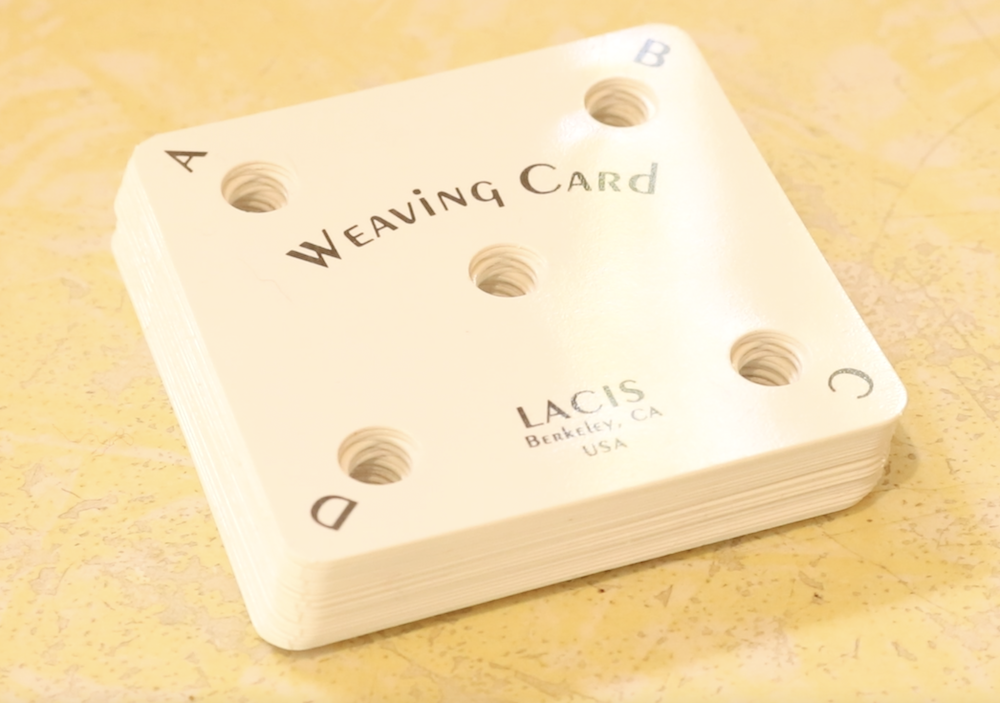
1. Weaving Cards (Tablets)

  • You can buy commercially made weaving cards or create your own from playing cards or cardboard.
  • Most tablets are square with four holes, however different shapes and hole arrangements may be used for various techniques.

2. Warp Yarn

  • Choose strong, smooth yarn that resists fraying—cotton, wool, or linen are excellent options. 8/2 cotton is one of my go to yarns for tablet weaving.
  • A contrasting color pattern helps make designs more visible for beginners.

3. Weaving Surface or Loom

  • Tablet weaving can be done without a loom by anchoring warp threads to a stable object, such as a table leg or belt.
  • However, using an inkle loom or backstrap setup can make the process more controlled and ergonomic.

4. Shuttle

  • A small, flat belt shuttle with a bevelled edge is used to pass the weft thread through the warp and help maintain even tension. If you have an Inkle Loom, normally you will receive a belt shuttle with the loom purchase.

5. Tensioning System

  • Good tension control is crucial! Again, the Inkle Loom is an excellent tool for weaving bands and can achieve a high tension.

How to Set Up for Tablet Weaving

  1. Prepare Your Warp Threads – Cut yarn to the desired length, ensuring even tension.
  2. Thread the Tablets – Pass warp threads through the holes in each card according to your pattern.
  3. Arrange the Tablets – Stack them in the correct order with an even distribution of tension.
  4. Anchor the Warp – Secure one end to a fixed object and the other to a belt or loom.
  5. Start Weaving! – Rotate the tablets in a sequence to create your pattern, passing the shuttle through after each turn.

For more detailed instructions specific to an Inkle Loom, keep reading ⤵️

I have a free printable checklist for you to download and use. You can tick the set up steps as you go, ensuring you don’t miss anything important!

Checklist for setting up your inkle loom for tablet weavingDownload

Tips for Beginner Tablet Weavers

Find The Warping Style that Best Suits You – Yes, there is more than one way to warp and thread your tablets. My online tablet weaving course shows you two methods that work really well.

Practice Turning Direction – Some patterns require alternating forward and backward turns to achieve the correct design.

Start with a Simple Pattern – A basic forward-turning design helps you learn the technique without frustration. There are many exciting options for weaving with cards, but starting simply is the way to go.

Maintain Even Tension – This prevents distortions and ensures a uniform band width.

Use High-Contrast Colors – They make it easier to see how the pattern is forming.

TABLET WEAVING FURTHER RESOURCES

My Tablet Weaving on an Inkle Loom course is the perfect learning tool. With step by step instructions and over 4.3 hours of video content, multiple printable PDF’s and links to additional resources, you will be weaving beautiful bands in no time.

I also recommend the book Card Weaving by Candace Crockett if you’re just starting out.

If you’re looking for an Inkle Loom to purchase, I recommend the Lojan Inkle Loom. Not only is it easy to use, it also has extra options for tablet weaving, like a tablet weaving board, cardboard tablets and the ability to re-configure pegs specifically for card weaving!

If you are in Australia I am a reseller for Lojan products here. Please contact me with enquiries. If you’re in the US, you can find Lojan inkle looms and tools here. Find locations for other resellers on the Lojan website.

You can check out my assembly video and Lojan Inkle Loom review here (as well as nab yourself a free inkle pattern! 😉)

Only just starting out on an Inkle Loom? It’s best to get to know your loom by completing some plain weave bands before attempting tablet weaving. Check out my Inkle Resources Page for heaps of free and some paid resources.

I hope this post was helpful to you, if you have any comments or questions, I would love to hear from you in the comments section below.

Until next time…

Happy Weaving!

*This post contains affiliate links. For more information, please see my disclosure policy.

*Updated 3/4/2025

Filed Under: Inkle Weaving, Tablet Weaving, Weaving Tagged With: card weaving, inkle weaving, tablet weaving

Which size inkle loom?

by Kelly 2 Comments

Inkle loom weaving has really taken off recently, and it’s not hard to understand why.

An inkle loom is portable, affordable and fun. Some weavers start their weaving journey on an inkle loom, others discover it and use it to compliment their other weaving skills and projects.

As with a rigid heddle loom, on an inkle you can start with the basics and weave just on two shafts, or plain weave. In fact, because the bands you weave are warped faced and all the colour is in the warp, you could weave plain weave bands for a very long time without tiring of the simplicity.

*This post contains affiliate links. For more information, see my disclosure policy.
If you’re new to the world of inkle weaving, you might be wondering about size. Not all inkle looms are the same size. You may wonder which one is best suited to your needs.

As I own and use an Ashford inkle loom, it makes sense for me to compare the two sizes Ashford have available.

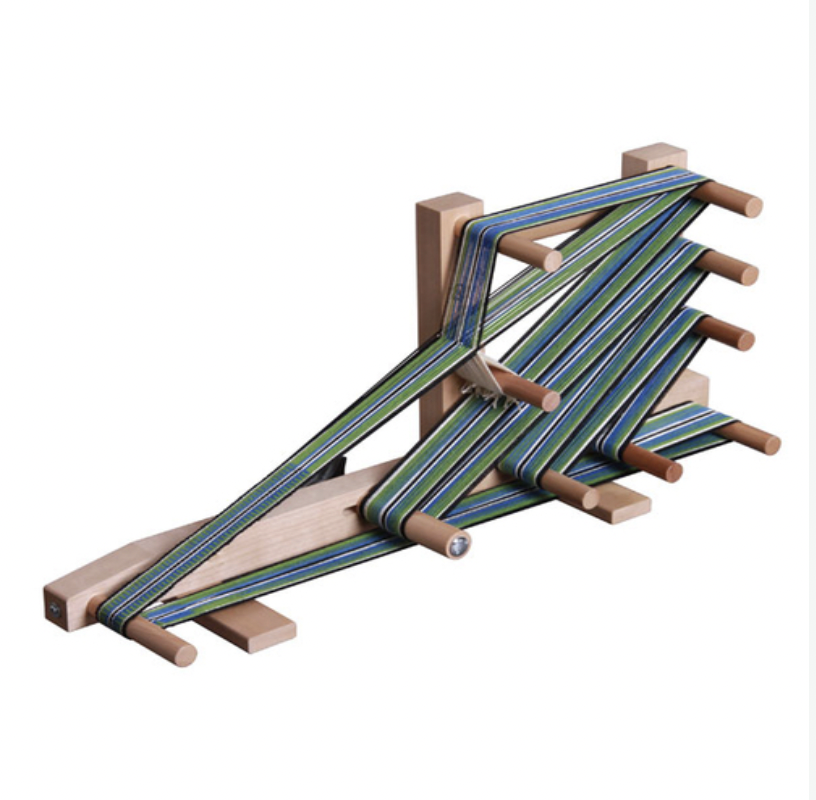
The Ashford Inkle Loom is the largest of the two.

Image from Ashford

This loom is capable of a 110″ warp length and width of 3″. Bear in mind that your warp width is usually reduced by around half for the woven band.

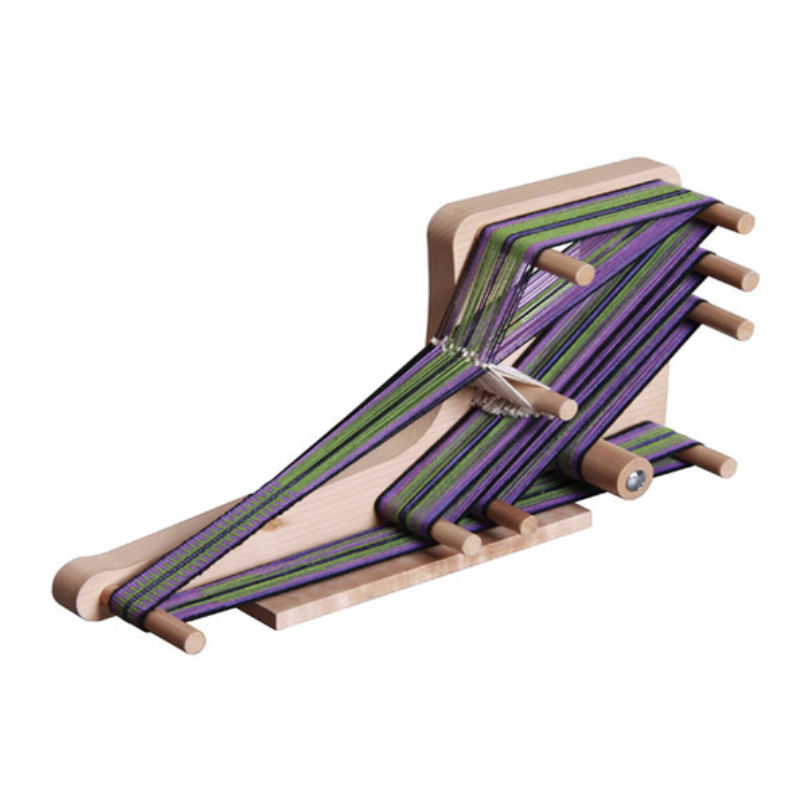
The Ashford Inklette is the smaller size.

Image from Ashford

You can warp the Inklette with 70″ in length and 2″ in width.

So, the main differences between the two?

  1. Size
  2. Price

The Inklette is much more petite than the regular size. Here is a photo comparison of the two:

Image from Ashford

The inklette is extremely portable (you can throw it in a bag and take it with you). It is affordable ($60USD cheaper than the regular size).

But the trade off is the amount of warping space. The smaller size of the Inklette means a smaller band.

The questions you might ask yourself are:

  • What sized bands do I want to weave? Do I want the flexibility of being able to weave a wider, longer band or am I happy to weave narrower, shorter bands?
  • How much do I want to spend to start out in inkle weaving?
  • Do I want a loom that I can easily take with me to weave on the go?

If you are interested in learning more about inkle weaving before you decide whether it is something you want to pursue, I have some helpful resources:

7 tips for inkle weaving plus a free pattern

How to weave on an inkle loom

I have just completed a new, comprehensive Inkle Course. The course covers everything you need to know to weave a plain weave band, tubular weaving and baltic weaving.

To find out more about the Inkle Weaving Course, click here!

If you’re looking for stockists of inkle looms in Australia, I recommend The Thread Collective or Knit, Spin, Weave.

I hope this post helps you to decide on the inkle loom that is right for you!

Until next time…

Happy Weaving!

Filed Under: Inkle Weaving, Weaving Tagged With: inkle loom, inkle weaving

Primary Sidebar

Categories

Archives

Meta

  • Log in
  • Entries feed
  • Comments feed
  • WordPress.org

Copyright © 2025 Kelly Casanova Weaving Lessons on the Foodie Pro Theme