• Skip to main content
  • Skip to primary sidebar

Kelly Casanova Weaving Lessons

  • Hi! I’m Kelly!
    • Disclosure
  • Online Weaving School Class Index
    • Common account issues
    • Common technical issues
    • What do I get with a membership?
  • New to rigid heddle weaving? Start here!
    • Never heard of the rigid heddle loom?
    • How to weave neat edges on the rigid heddle loom
    • Rigid heddle weaving
    • Rigid Heddle Weaving Patterns
  • Patterns
  • Subscribe

rigidheddleweaving

How to weave krokbragd crosses

by Kelly Leave a Comment

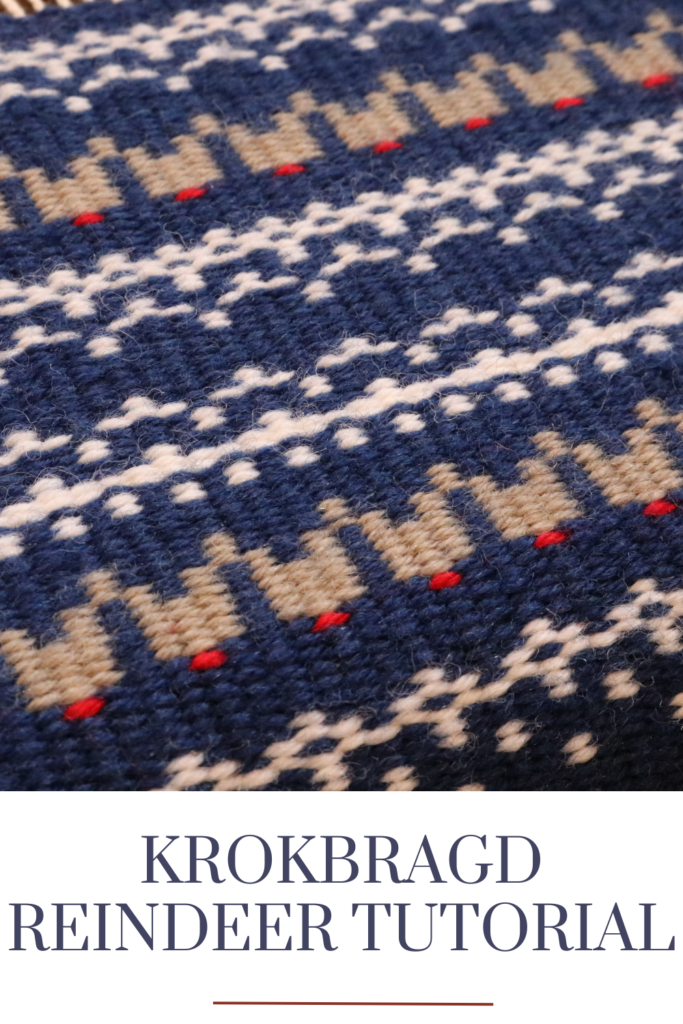
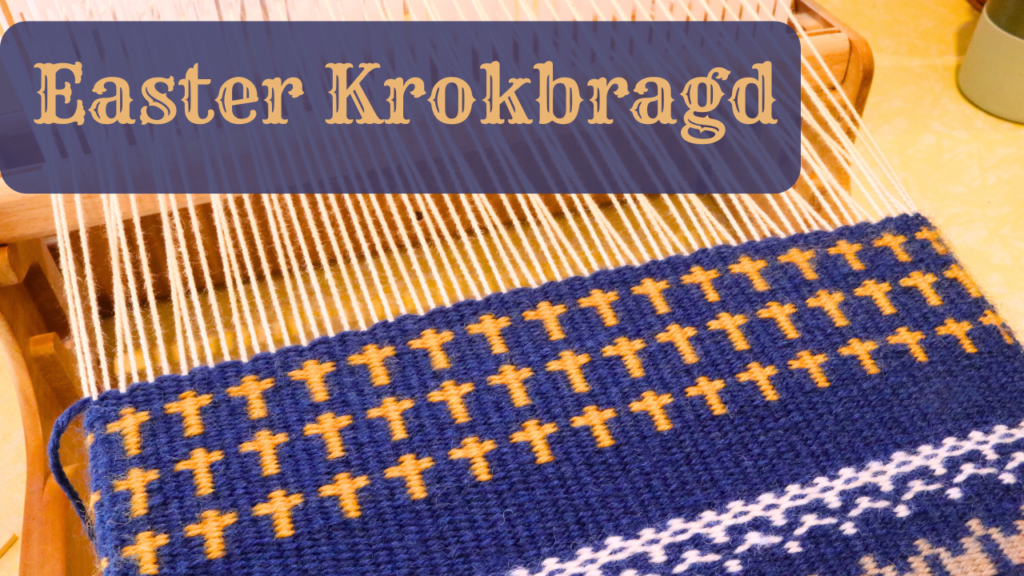
Here we are with yet another krokbragd weaving tutorial! It is close to Easter and so the design I chose to weave is in honour of our Lord Jesus Christ ❤️

I won’t explain what krokbragd is, because I have done that already, many times! Instead, if you want to know more, check out some of these links below:

How to weave krokbragd…

Krokbragd 101 Online Course…

Krokbragd Youtube Playlist…

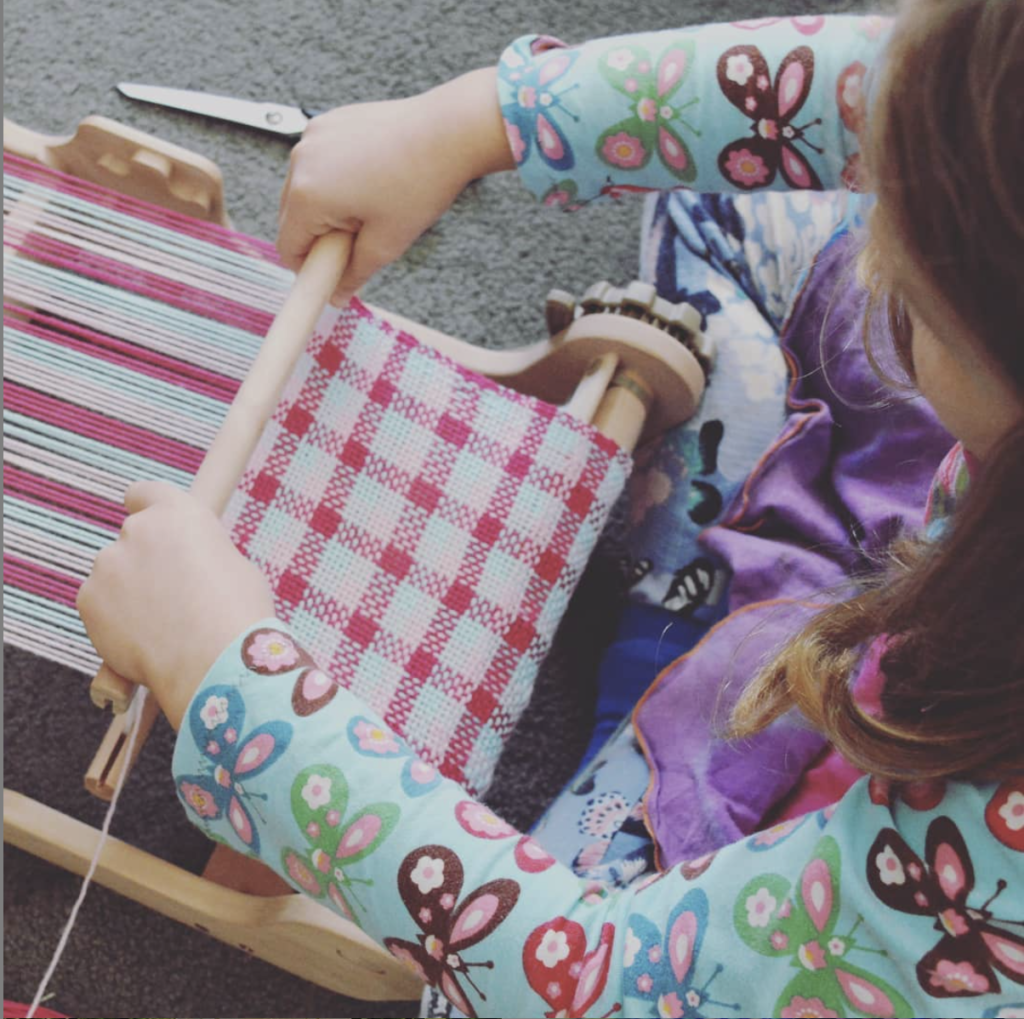
In this tutorial I am weaving krokbragd with two heddles, but you can absolutely use another setup such as a single heddle, pick up stick and heddle rod. Both of these methods are outlined in detail in my Krokbragd 101 course.

What you need for this tutorial

  • A rigid heddle loom (I’m using my Ashford Sampleit)
  • Two heddles of the same size
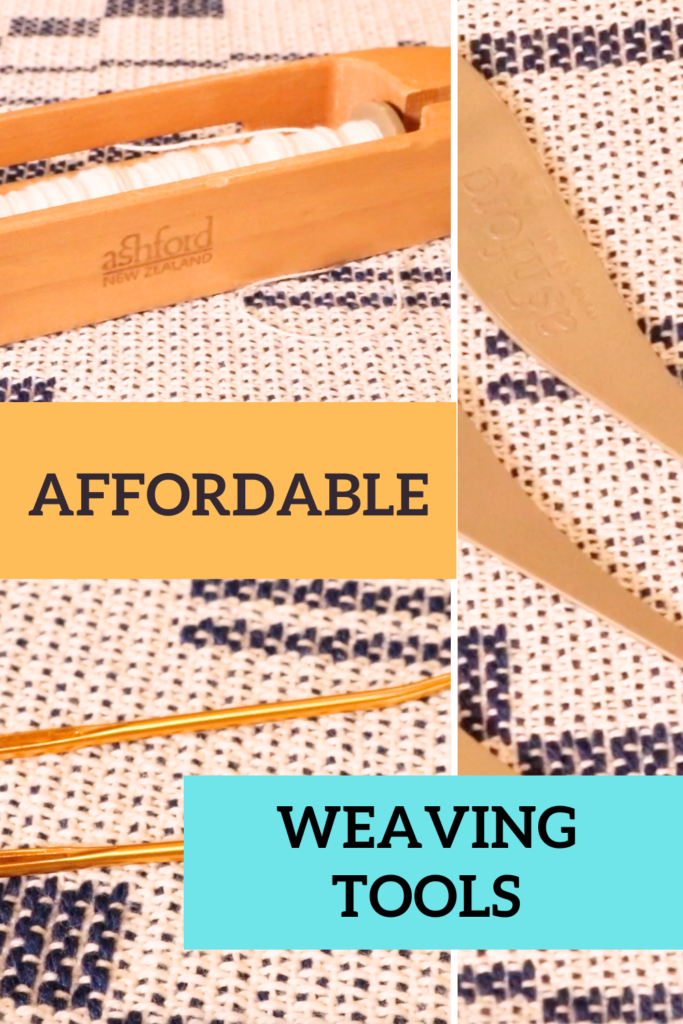
  • Additional beater, such as a tapestry beater or fork
  • Two shuttles (or use little yarn balls or butterflies if you prefer)
  • Two contrasting weft yarns

There are all kinds of tapestry or additional beaters, and yes, a household fork works just fine. An additional beater is really essential for krokbragd though, as it is a weft faced weave structure and a regular rigid heddle/reed is not sufficient to beat the weft right down.

I beat the weft down every 3 weft rows – it saves time and is just as effective. Use your heddle to “place” the weft but use the additional beater to pack it down.

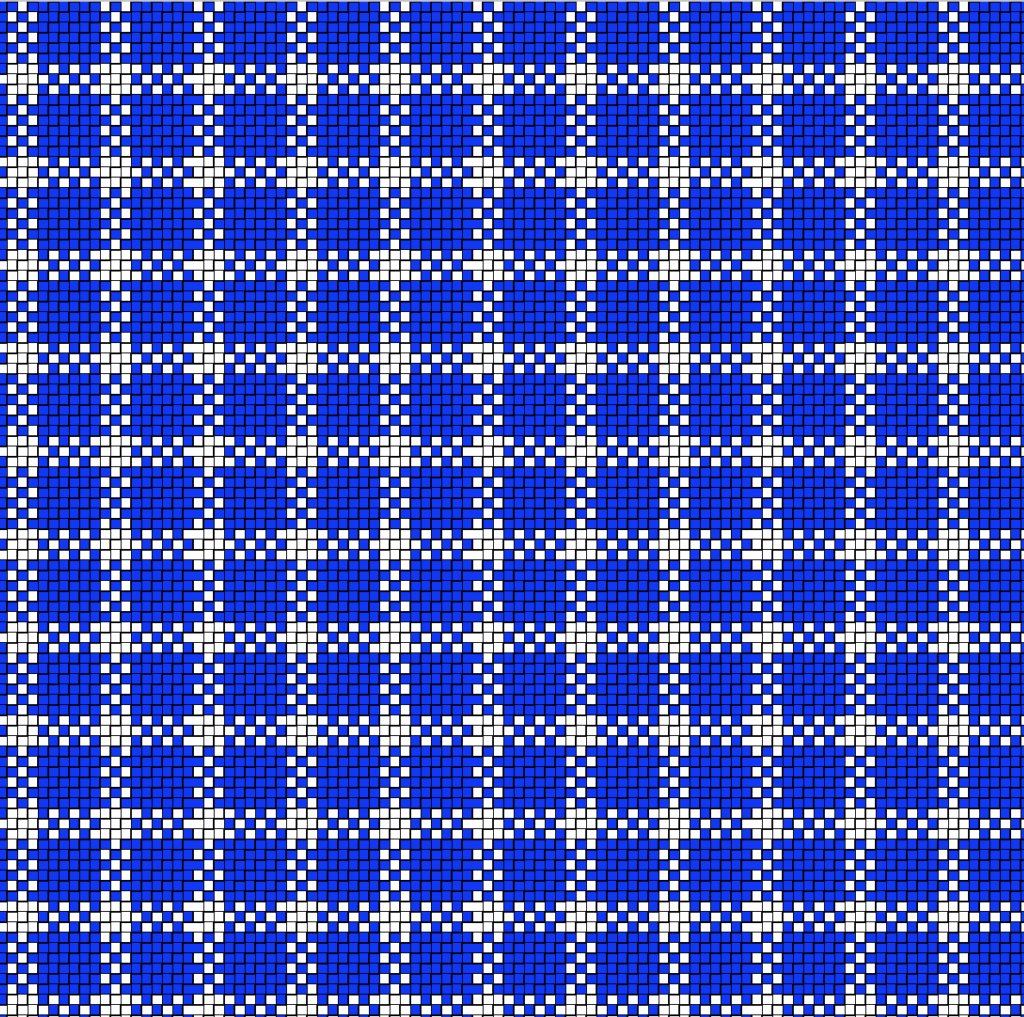
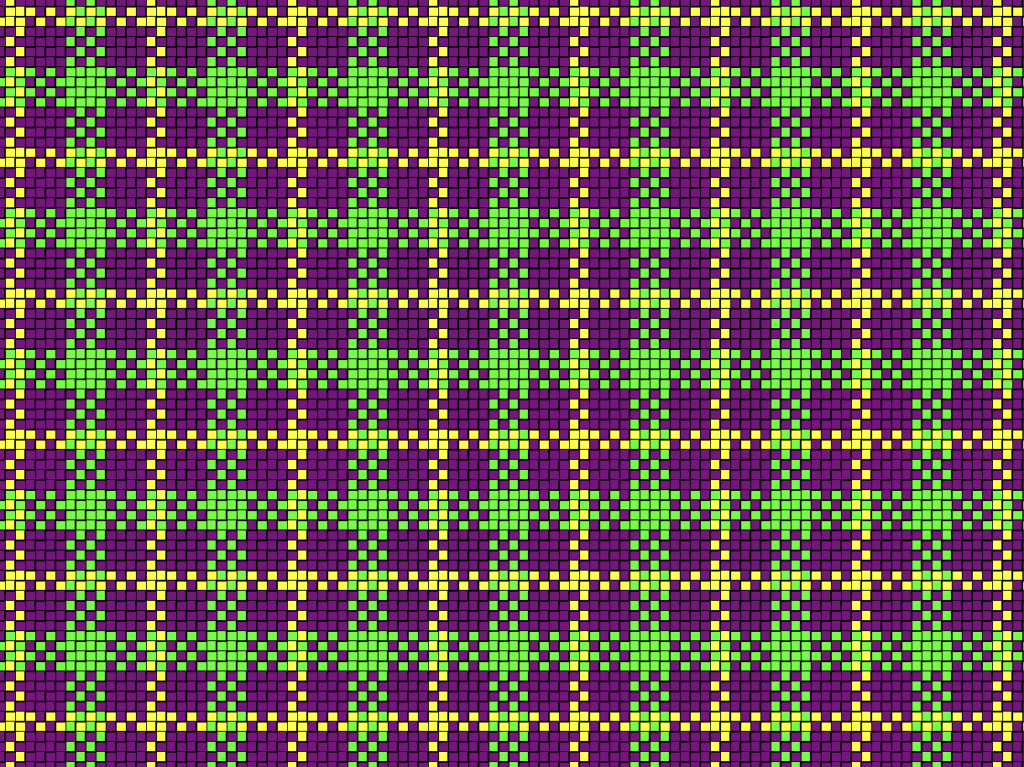
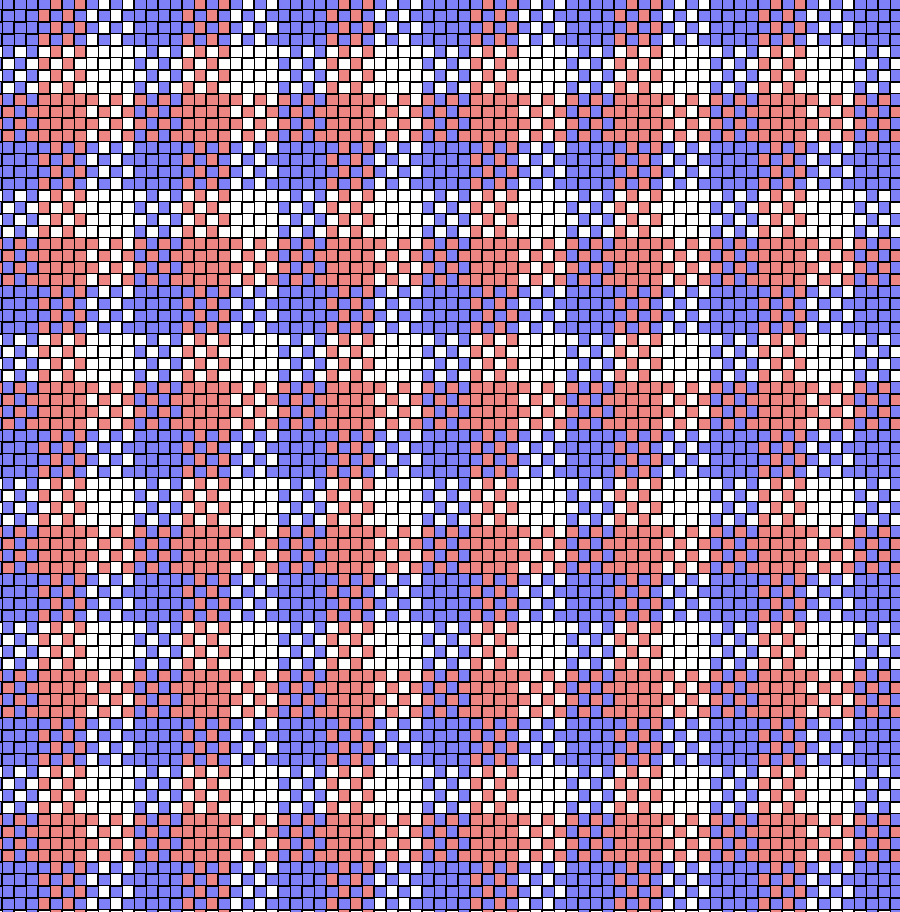
We only need 2 weft colours for weaving, so choose one colour that you would like your crosses to be and the other as the background. Make sure your colours have enough contrast to ensure boldness of the design.

You can place your weft yarns on stick shuttles, roll little balls or use yarn butterflies – all these methods work just fine.

Here is how the weft looks after weaving 3 weft rows and prior to packing the weft down.

And here is how it looks once packed down. You want to aim to cover the warp completely.

Now, how to weave.

If using two heddles, your heddle positions will be:

  1. Heddles 1 & 2 up
  2. Heddle 1 down
  3. Heddle 2 down

The colour sequences will be as follows (check colour key for abbreviations):

Colour key: Yellow (Y), Navy (N)

  1. Y,N,N x 5
  2. Y,N,Y x 2
  3. Y,N,N x 2
  4. N,N,N x 3

Exactly how you use the design is up to you – You can weave bands of crosses or repeats of crosses or a row of crosses embedded in strategically, there are so many options!

If you would like to see this sequence in action, check out the following video on Youtube:

I hope you enjoy weaving this design, if you have any questions or comments please leave them down below ⬇️

Until next time…

Happy Weaving!

Filed Under: Krokbragd, Rigid heddle weaving, Rigid Heddle Weaving Patterns, Weaving Tagged With: easter, krokbragd, rigidheddleweaving, rigidheddleweavingtutorial

Essential tools for rigid heddle weaving

by Kelly Leave a Comment

When you buy a rigid heddle loom, it will come with a few standard tools to get you started. Exactly what you get will depend on the manufacturer of your loom, but here are a few of the basics:

*A heddle/reed (usually 7.5 or 8 dent)
* A warping peg and clamp for direct warping
* A clamp for holding the loom to a table while warping
* A stick shuttle
* It may include a threading and reed hook
* Cardboard warp separators (may not come with all looms)
** Some looms now come with a double heddle block built in

Apart from the standard tools, there are extra things that are either essential or come in handy.

Other essentials:

*Scissors – A good pair of dressmaking shears will save you a lot of frustration

*Tape measure

*Something to separate your warp when rolling on (I like to use brown craft paper on a roll and cut it to size)

*Yarn

*Inch ruler (for figuring out the sett of your yarn)

*Project journal for recording all your project information

*A big mug of tea or coffee (hey, I don’t judge!)

   Handy optional extras:

* Tapestry needle
* Extra heddles
* Fringe twister
* Sewing machine 
* Serger
* Loom stand
* Tapestry beater, comb or household fork
* “S” hooks or other weights
* Calculator
*Instructional books –  this post will help you to determine which book/s might be right for you).
*Online lessons are an awesome tool to get started. You can check out my Youtube channel and my Online Weaving School for further help. 

Check out the video below where I discuss these tools in depth:

I also have an additional video that talks about affordable tools here:


Something to remember when you’re just starting out with rigid heddle weaving is that you don’t need All.The.Things right away! The tools that come with a newly purchased loom are sufficient to get you started, and you can gradually build from there as you begin to explore the wonderful world of rigid heddle weaving.

*This post contains affiliate links. Please see my disclosure policy for further information.

Until next time…

Happy Weaving!

Filed Under: Rigid heddle weaving, Weaving, Weaving Tools Tagged With: rigid heddle weaving tools, rigidheddleweaving, weaving tools

Krokbragd Reindeer Tutorial

by Kelly 2 Comments

It’s that wonderful time of year again, when thoughts start turning to festive project and gift ideas.

A number of years ago I released a How to weave Reindeer on a rigid heddle loom on Youtube and it has proved to be very popular! In that video we use pick up sticks in front of the heddle to achieve the shapes we need to build some little reindeer.

For my Christmas video this year, I decided to again weave reindeer but use a different weave structure for a different look. I already had my Sampleit loom warped for a krokbragd sampler so I set about designing some cute reindeer ensconced in a lovely Fair Isle inspired border.

This tutorial uses 4 colours for the weft – navy, white, red and beige. I used Bendigo Woollen Mills Luxury 4 play, which is a fingering weight wool. The warp should be a strong and thinner than the weft, I use a #12 seine twine.

Krokbragd-Reindeer-tutorial-PDFDownload

Be sure to watch the free Youtube tutorial so that you can follow the weaving sequence along with the printable PDF.

If you’re looking for further krokbragd learning resources, check these out:

Krokbragd 101 Online Course…

Krokbragd Youtube Playlist…

All About Krokbragd…

*This post contains affiliate links. For further information, please see my disclosure policy

Until next time…

Happy Weaving!

Filed Under: Krokbragd, Rigid heddle weaving, Rigid Heddle Weaving Patterns, Weaving Tagged With: Celebrations, christmas, krokbragd, reindeer, rigidheddleweaving, tutorial

The Weaver’s Toolkit for rigid heddle weaving

by Kelly 2 Comments

There is a lot of information available for newer rigid heddle weavers nowadays, not like when I started and almost felt that I was on my own. But the problem that arises when there are so many resources is trying to make sense of them and put them all together. I thought it was time for me to do something about that!

I created the Weaver’s Toolkit e-booklet as a quick reference guide and go – to resource. It is invaluable to newer weavers, but also to seasoned rigid heddle weavers as a way of having important and useful information all together in one place. As with all my content, I’ve packed in as much information as I could for a really affordable price.

Oh, and it’s pretty too! ❤️

The thing that I really love about teaching weaving and having a large online audience is that my people tell me what they need. I hear about the most common weaving difficulties and the problems that plague them the most. And then I get to help by offering advice, links and resources like the Weaver’s Toolkit!

*This post contains an affiliate link

So, let’s have a look at what is actually in this e-booklet.

Available as a digital download from my Etsy shop, the Weaver’s Toolkit is a 22 page e-booklet that covers some really important information and guides.

I wrote the e-booklet for rigid heddle weavers, so all of the information applies to the rigid heddle loom.

I started out with calculation sheets. These are just so important when you’re starting to weave, the mathematics takes a little getting used to, but once you are, you can plan to weave anything. I use these sheets with every single project I weave. Not only for planning purposes, but also as an important record of the project specifics once I’ve finished.

The calculations sheets included in the e-booklet are similar to the free sheets you can find here, but are more detailed and much more attractive to look at!

There is a record sheet aside from the calculations sheet that will help you to properly record all the details from your project to prevent “project amnesia” (it’s not just me that suffers from this condition, right?)

The yarn conversion charts are so useful. Something I’ve found a difficulty as a weaver (and I know many of you do too!) is trying to decipher different yarn names from country to country. The names, the thicknesses, the appropriate uses of the yarn, it can be so confusing! The quick reference sheets in the Weaver’s Toolkit makes it easy.

I have a section on sett, which I thought was really essential to include in the booklet. One you understand how to properly measure your yarn for an appropriate sett, you will completely take the guess work and anxiety out of any project. The yarn will tell you what to do, you just have to know how to listen, and I explain it and give links for additional resources. It’s easy once you know how!

I also have information on tools you need for rigid heddle weaving, what you don’t need, and what could be handy for you to own down the track.

The measurement conversion sheets are another handy guide included, to help you quickly and easily translate patterns or projects into the terms that you personally know and use.

The glossary of weaving terms demystifies common terms used in rigid heddle weaving so that you can look them up whenever you need to and begin to memorise them over time.

Finally, there is a sizing chart for typical projects or items you might want to weave. Things like baby blankets, household linens, and bedding. This will help you to plan for the dimensions needed for many items you will be weaving.

To recap what exactly you get when you purchase the Weaver’s Toolkit, here is a list of topics covered:

*Detailed calculating warp and weft sheets

*Project record sheet

*Knitting yarn conversion chart

*Knitting yarns and the rigid heddle loom chart

*Weaving yarns size and recommendations charts

*Sett explanation and instruction pages

*Rigid Heddle Weaving tools pages

*Measurement conversions sheets

*Glossary of common weaving terms sheets

*Typical project sizing charts

All of this is collated into a digital file which, once downloaded, you can print out and keep as a quick reference guide.

The calculations and record sheets can be printed and used over and over for every weaving project you undertake. I’ve provided calculations sheets with and without artwork, for those who may wish to economise on ink.

The Weaver’s Toolkit is available to purchase, download and print right now by clicking on the link below.

Yes, please take me to the Weaver’s Toolkit…

If you have any questions about the booklet, please leave them in the comments below, I love to hear from you!

Until next time…

Happy Weaving!

Filed Under: Rigid heddle weaving, Weaving Tagged With: ebook, ebooklet, rigidheddleweaving, weavers toolkit, weaving, weaving guide

What is plaid? How can it be woven on the rigid heddle loom?

by Kelly 20 Comments

Recently on the private member’s group on Facebook, we were discussing plaid and how it might look as a weaving draft. A very interesting topic!

So, first of all, what is plaid?

Quite simply, it is stripes of specific colours in the warp that are then repeated in the weft. A proper plaid will have the exact same treadling order as the warp, otherwise known as “tromp as writ” or “as drawn in” and is a balanced weave.

As the weft stripes cross the warp stripes, squares are formed.

There can be some heated discussions and disagreements about what makes a plaid and what makes a tartan. If you’re interested in researching tartan, this PDF is a detailed and interesting document.

For our member’s discussion, I made an example plaid draft based on a student’s desire to see what her colour ideas would look like. This is the fabric view of the draft.

It is a simple warp of 6 blue, 3 white repeated. The weaving sequence will also be 6 picks of blue, 3 picks of white.

*This post contains some affiliate links. This means that if you click on the link and buy, I receive a small commission at no extra cost to you.

Let’s have a look at what can happen if we vary colour arrangement and number.

This draft uses 3 colours instead of 2 and the warp colour repeats are 4 purple, 4 green and 2 yellow. I used a bold and modern colour scheme to illustrate how different a simple plaid draft can look. I quite like this one!

If you like this draft and want to try it out, I’ve made a printable PDF for your personal use.

Plaid-bright PDFDownload

Lastly, I made this very balanced draft in more muted colours. This draft uses 4 ends of each colour (purple, white, peach) and then repeats the same in the weaving.

You can grab a PDF of the draft for your personal use for the muted version too.

Plaid-muted PDFDownload

If you want to have a bit of fun making your own plaid designs, PlaidMaker is an excellent, free resource.

Regarding yarns that you might use to weave a plaid, there are so many choices! One of my personal favourites though (and I have one of my daughters to thank for this, as she designed and wove her own plaid piece) is a light worsted to worsted weight cotton with a 7.5 or 8 dent heddle.

Here are some possible cotton suggestions:

Bendigo Woollen Mills 8ply cotton

Sugar n Cream, pastel colours

Sugar n Cream, bright colours

Lion Brand Cotton

Babytoly Organic Cotton

I strongly recommend that, whichever yarn you choose, go with a solid and not variegated colour. Plaids are “busy” to look at and using a variegated could change it from busy to messy!

I hope you learned a lot from this post. I would love to hear from you if it was helpful, and if you decide to use one of my drafts. Let me know by leaving a comment below!

Until next time…

Happy Weaving!

Filed Under: Rigid heddle weaving, Weaving Tagged With: cotton yarn, plaid, rigidheddleweaving

Pinwheels on a rigid heddle loom!

by Kelly 15 Comments

Pinwheels are a bit of an ultimate goal for some of us rigid heddle weavers. I’ve often heard it said that it was a picture of another weaver’s pinwheel project that first excited the interest of some to the rigid heddle loom.

I’ve had many requests for a pinwheels class over the past couple of years, so I finally knuckled down, and as a result “Pinwheels for the Rigid Heddle Loom” is now available.

*This post contains an affiliate link. For further information, please view my disclosure policy.

I really enjoyed making this class, as it’s always a thrill to introduce my students to a project that I know just naturally has the “WOW!” factor in abundance.

Pinwheels can be woven on either 8 or 4 shafts, and are essentially a twill draft combined with colour and weave to produce something really impressive, but not all that difficult. You have to love that!

For this class, I chose to weave on 4 shafts (for obvious reasons – 4 shafts is way more achievable on a rigid heddle loom than 8!) using a single heddle/reed and 3 heddle rods. The set up is a little time intensive, but very comparative to the time it would take to set up on a multi shaft loom. And once you start weaving, you are more than rewarded for your efforts.

The class demonstrates a Table Topper project (rather like a table centrepiece) but also provides all the calculations for a table runner, if that is your preference. I chose my colours (Latte and Peacock) to co-ordinate with my dining room curtains, which are a greyish coffee colour.

It is important with pinwheels to choose colours that are harmonious yet have enough contrast – you want those pinwheels to pop out at you!

Before undertaking this class, I highly suggest that you complete the “Converting Pattern Drafts to the Rigid Heddle Loom” to gain a good understanding of setting up your loom according to traditional pattern drafts. The Pinwheels class would then build on that knowledge and demonstrate that there are several ways to achieve the same result.

This class is available as a part of any membership to my Online Weaving School, or can be purchased as a single class.

Until next time….

Happy Pinwheel Weaving!

Filed Under: Online Weaving School, Pinwheels, Rigid heddle weaving, Weaving Tagged With: newclass, onlinelearning, pinwheels, rigidheddleweaving

Primary Sidebar

Hand crafted boat shuttles

Categories

Archives

Meta

  • Log in
  • Entries feed
  • Comments feed
  • WordPress.org

Copyright © 2025 Kelly Casanova Weaving Lessons on the Foodie Pro Theme