• Skip to main content
  • Skip to primary sidebar

Kelly Casanova Weaving Lessons

  • Hi! I’m Kelly!
    • Disclosure
  • Online Weaving School Class Index
    • Common account issues
    • Common technical issues
    • What do I get with a membership?
  • New to rigid heddle weaving? Start here!
    • Never heard of the rigid heddle loom?
    • How to weave neat edges on the rigid heddle loom
    • Rigid heddle weaving
    • Rigid Heddle Weaving Patterns
  • Patterns
  • Subscribe

Free tutorial

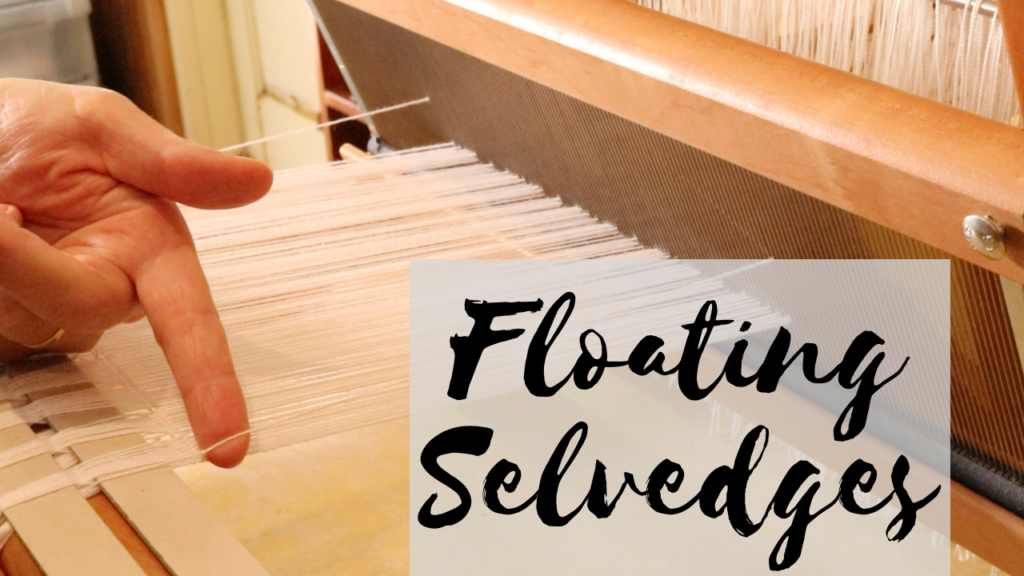
How to use floating selvedges

by Kelly 2 Comments

In my last post I talked about what floating selvedges are, how they can benefit your weaving and included a photo tutorial for how to install them.

Today, we’re going to have a look at how you actually use floating selvedges in the weaving process.

It’s very simple, but there are a few little rules and things to remember:

  • “Over, under”. This is going to be on repeat in your mind as you weave with your floating selvedges in place. The photo tutorial will show you how this works.
  • You will need to adjust your weights as you weave and advance the warp. This is because your floating selvedge (FS) threads will roll on to your front cloth beam along with the warp threads as you advance.
  • The weft should always wrap around the FS on each side. This also relates to the “over, under” action and will be clear for you to see when you’re weaving.
  • The yarn that you use for your FS can be the same yarn as either the warp or weft. Most of the time, I will use the exact same yarn for the FS as I’m intending to weave with (weft). But, if I have frequent colour changes and more than a few colours in the weft, I will use the warp yarn to set up my FS.

In this tutorial, I’m imagining that you have already set up your floating selvedges and you’re ready to start weaving. If you haven’t done that yet and need a step by step tutorial, please view this post first.

*This post contains affiliate links. For further information, please see my disclosure policy.

This tutorial is specifically for rigid heddle weavers, but I also have a video tutorial for table/floor loom weavers.

I am starting with my shuttle on the left and my heddle is up. (It doesn’t matter which side your shuttle is on or which shed you’re in, but I wanted to be specific so that the photos make sense!)
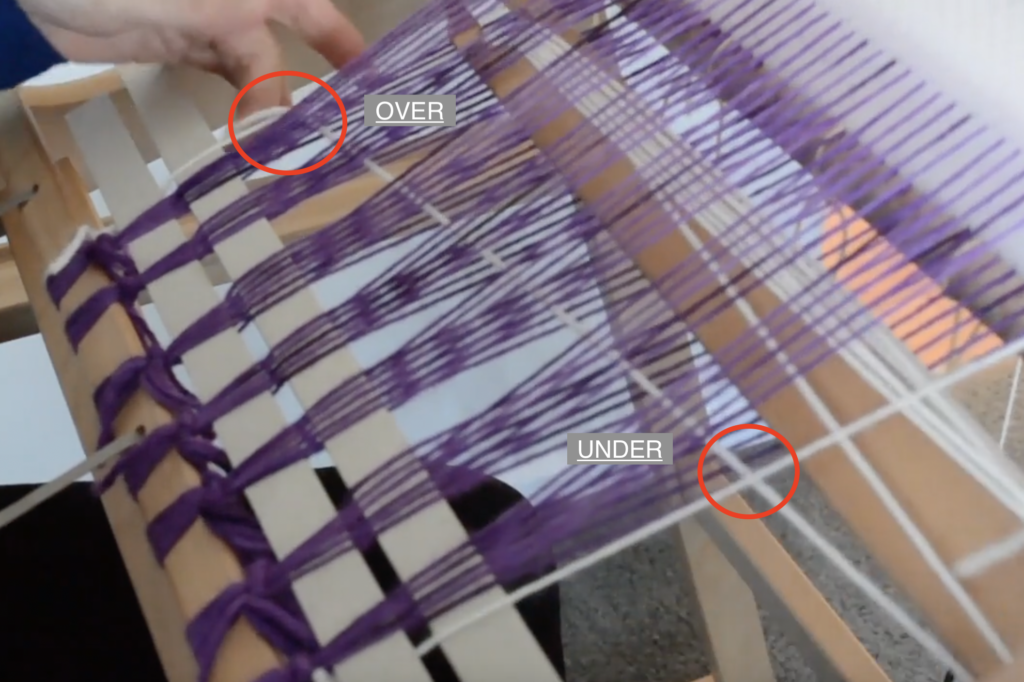
When I enter my shuttle from the left, my shuttle (and therefore my weft yarn) goes OVER the floating selvedge. As my shuttle exits the shed on the right, it goes UNDER the floating selvedge. Beat.
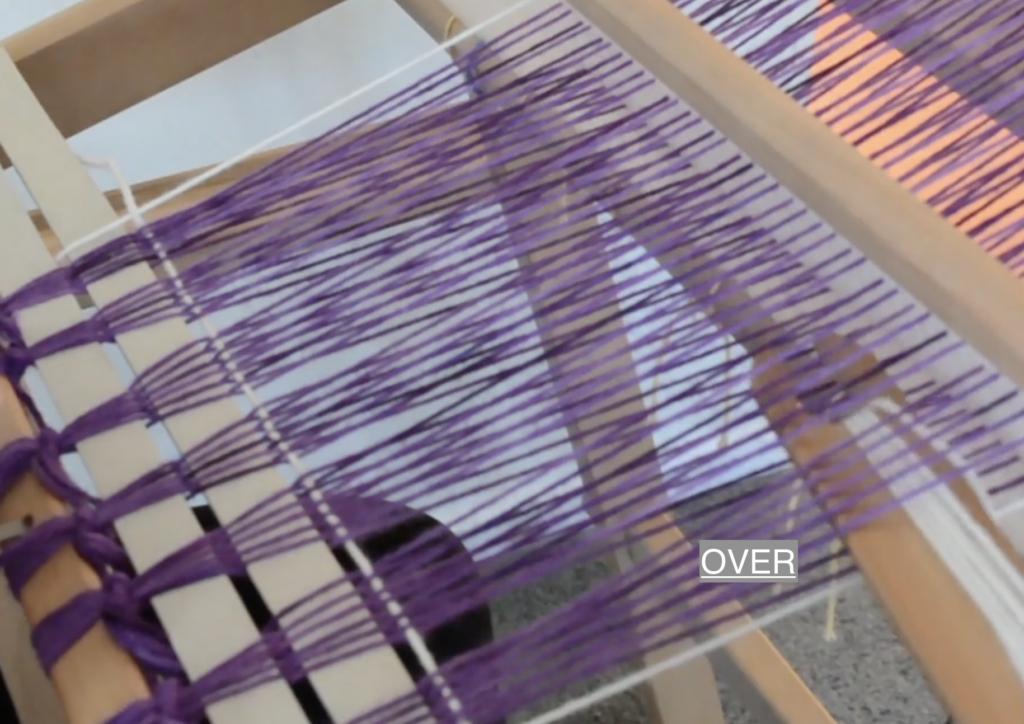
Now I change my heddle to the down position. As my shuttle enters the shed from the right, it will go OVER the floating selvedge. As it exits the shed on the left, it will go UNDER the FS. Remember, OVER, UNDER. Beat.
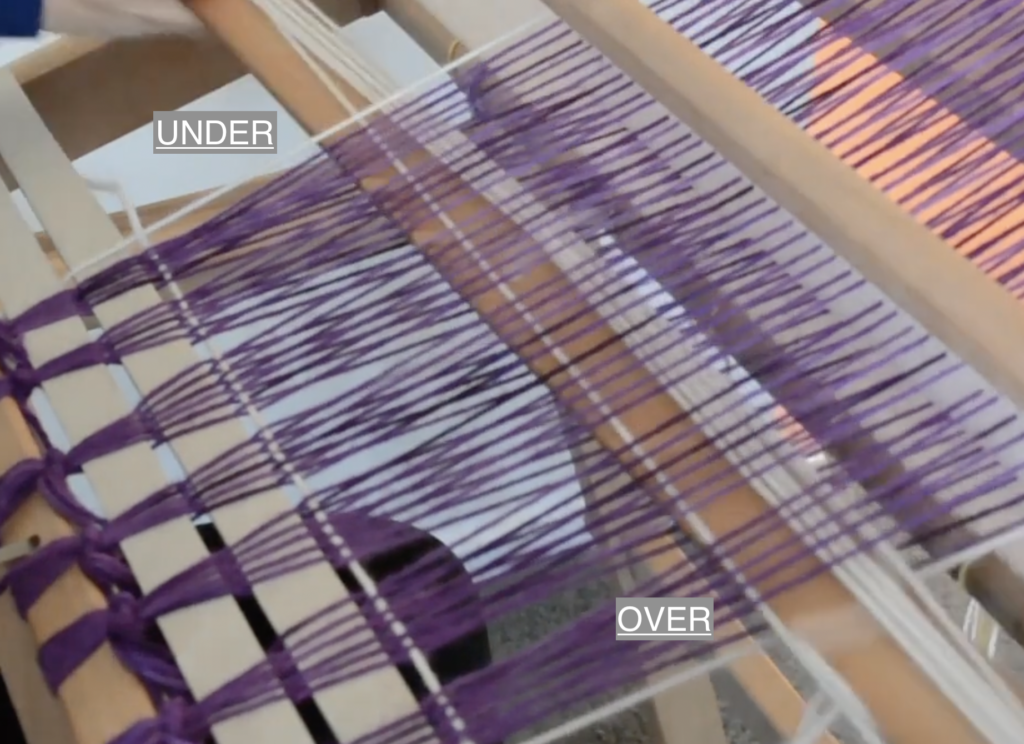
Here is how your shuttle should look for that second pick (weft row).
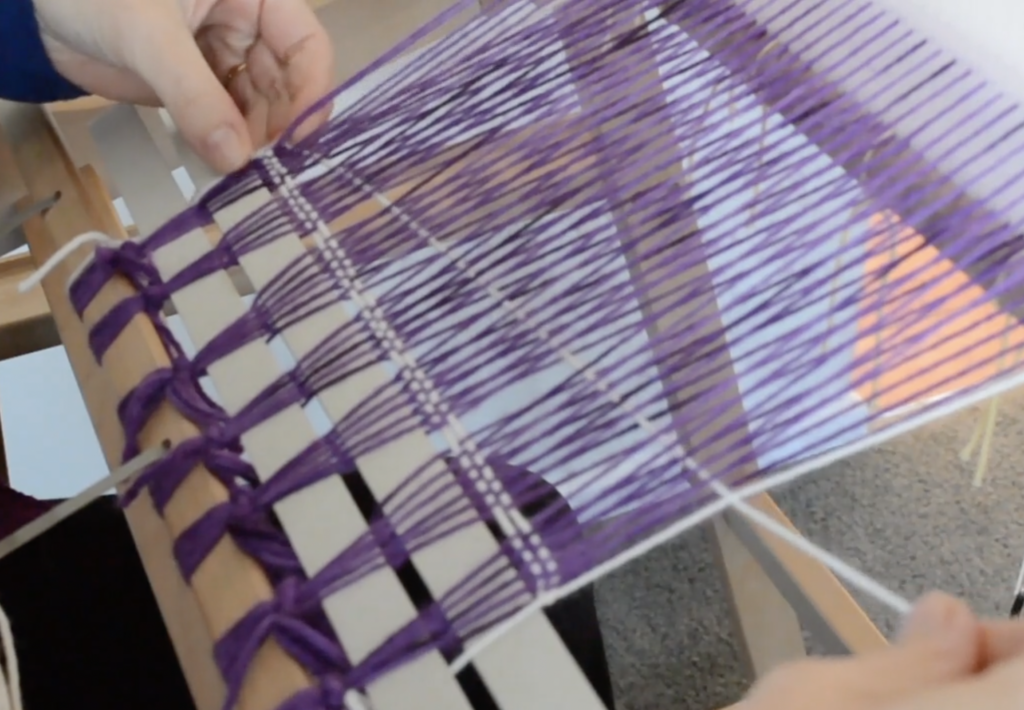
Back to the up position for the third pick. The shuttle will go OVER the FS on the left and come out UNDER on the right.

It’s important to note that using floating selvedges does not change the way we weave. We still need to arrange and tension our weft picks to ensure neat edges. If you are not familiar with my pinching technique, I have a free video tutorial that will make a huge difference to your edges:

If you are having trouble remembering whether you are supposed to be taking the shuttle over or under the FS in your next shed, you only need to look at how your last weft pick is sitting.
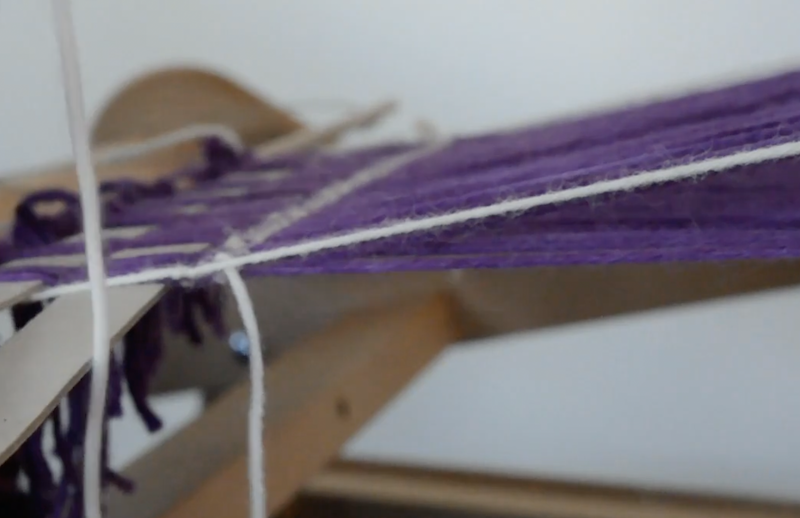
For example, you can see clearly in this photo that the last weft pick is sitting UNDER the floating selvedge. This tells me that, to ensure the weft yarn wraps around that FS edge, I will need to take it OVER the FS as the shuttle re-enters the shed.
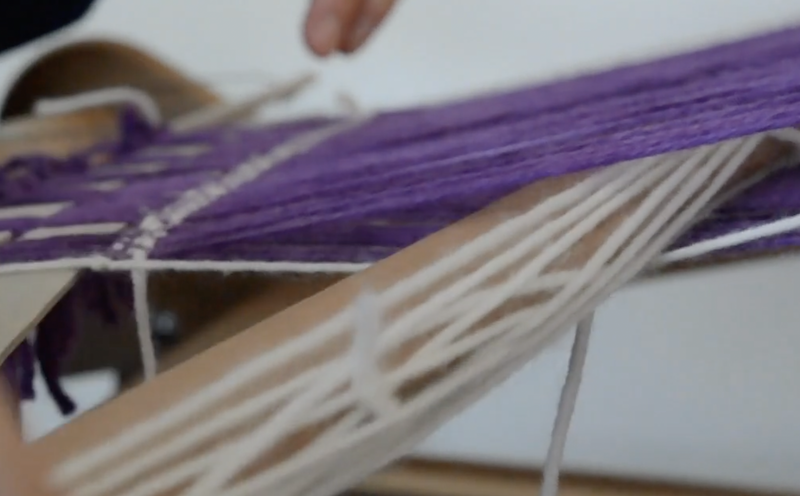
When your heddle is in the up shed, you can see that the floating selvedge also sits up a little with the warp. The easy way to weave is to just depress the FS with the tip of the shuttle as you enter the new shed.
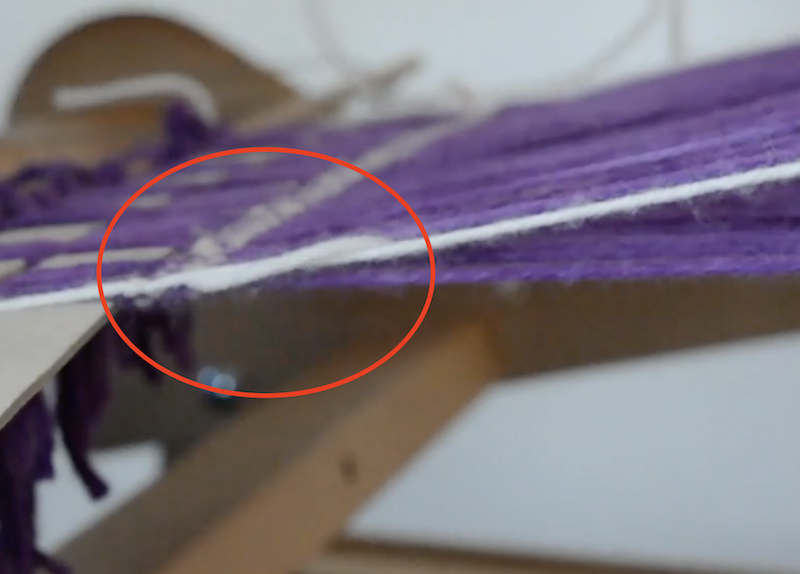
See how the weft yarn wraps around the FS as it you enter the shed?
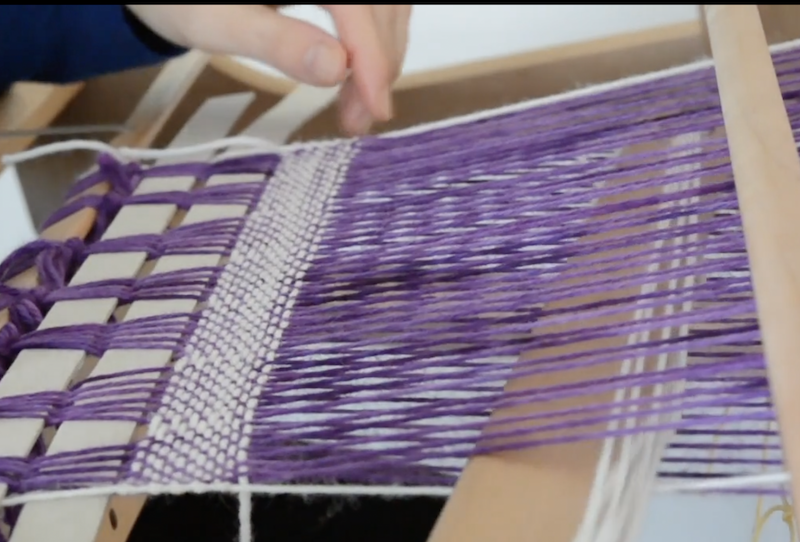
As you weave, the FS becomes a part of the fabric and provides a straight edge. The floating selvedges are not removed when you finish weaving, like you would remove fishing line if using the Lifeline Technique, they are truly a part of the piece and that is why we match the yarns when we set up our FS in the beginning.
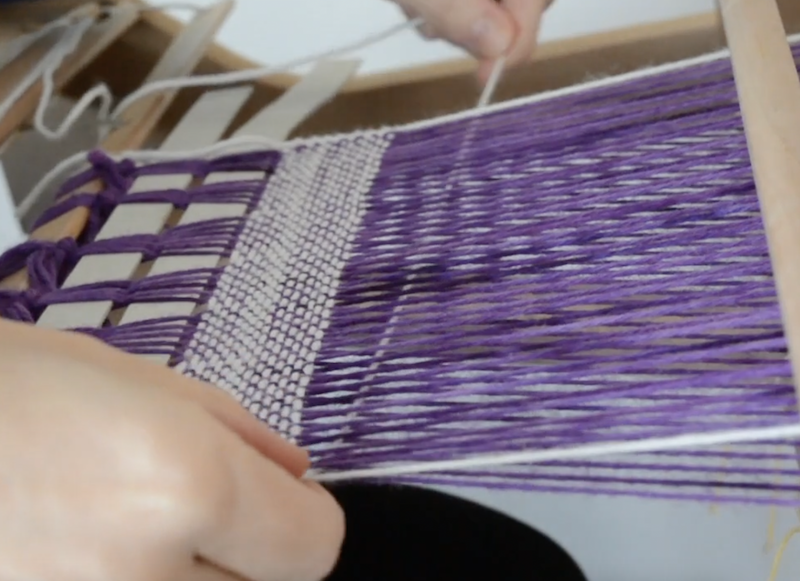
Continue to tension and angle your weft as you weave. I think you will be very pleased with the results!

If you would like to see me weaving on the table loom using floating selvedges, please view this free video tutorial:

I hope you found this tutorial valuable.

Until next time…

Happy Weaving!

Filed Under: Floating selvedges, Free tutorial, Neat edges, Rigid heddle weaving, Table loom weaving, Tutorials, Weaving Tagged With: floating selvedges, table loom weaving

What are floating selvedges?

by Kelly 17 Comments

If you’ve been weaving for a little while now it’s very likely that you’ve come across the term “floating selvedge”.

What is a floating selvedge?

Floating selvedges (FS) are used on either side of a warp and are replacement threads for the original edge warp threads. This may lead you to wonder why you would want or need to replace your edge threads?

When weaving a simple plain weave, the interlacement of weft and warp doesn’t change. You alternate between the two plain weave sheds and the weft thread always naturally wraps around the outer most warp threads.

*This post contains affiliate links. Please see my disclosure policy for more information.

But when you are weaving something other than plain weave, you will often find that the weft skips the outer warp thread – either in every shed or, more likely just in certain sheds. If you don’t do anything to combat this problem, the result will be messy edges and a cloth that lacks integrity at the selvedges.

Now, there is a manual method you can use to prevent this from happening, but I find it easy to install floating selvedges and I also love the neat edge finish this gives me.

How does the floating selvedge work?

A floating selvedge will provide you with an unchanging edge thread, unlike your natural edge thread that may change according to the pattern, or the way you have threaded your loom. The path of the weft thread is determined by your action with the shuttle when you begin weaving, ensuring that every edge warp thread (now your floating selvedge) is wrapped with weft yarn.

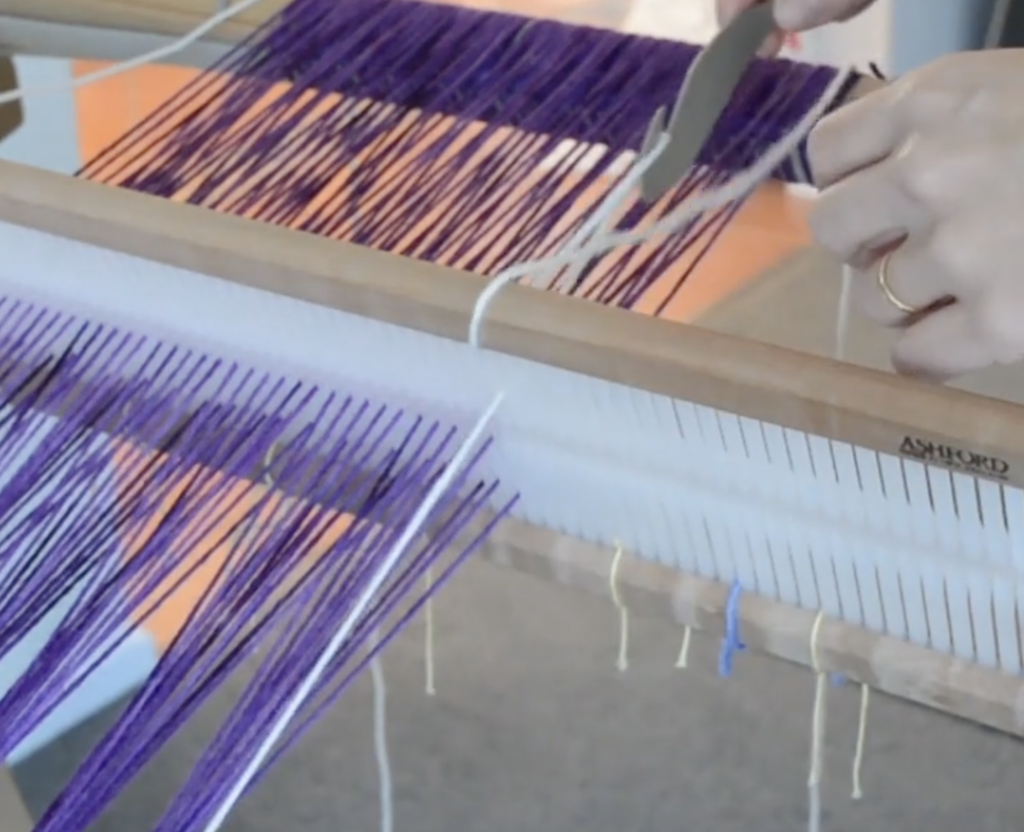
When we install floating selvedges, they are usually not a part of the original warp. They are always threaded into an empty slot next to the last naturally occurring warp thread. This makes them independent of your warp and pattern, and means that we can adapt them to our own purposes.

Although floating selvedges are not necessarily a part of the original warp, they do become a part of the finished woven piece – they are not removed afterwards.

For this reason, it’s important to choose a colour that will blend well with the project. If I am weaving my piece with just one, solid coloured weft, I will choose that same yarn and colour for my floating selvedges.

If I am going to be changing the weft colour multiple times within that one piece, I will choose the same yarn and colour as my warp.

The idea is that, once your piece is off the loom and finished, you won’t be able to tell that there was a floating selvedge introduced (other than the fact that your edges will look really nice!)

Can you use a floating selvedge on any loom?

Pretty much. I use them mostly on my floor loom and table loom, and on my rigid heddle loom if I’m weaving something other than plain weave.

Today’s tutorial is specifically for the rigid heddle loom. Scroll to the end of this post to find a video tutorial specifically for table loom floating selvedges.

I like to install my floating selvedges when the warp is all tied on and I’m almost ready to weave.

The photos from this tutorial are taken from my member’s only Floating Selvedges on a Rigid Heddle Loom class.

I most often use the same yarn for my floating selvedges as I use for my weft. So, in the example above, I will be using a white weft.

I don’t do this every time though. If I am weaving a project where I intend to have multiple and frequent weft colour changes, I will use the same yarn that I used for warp for my floating selvedges.

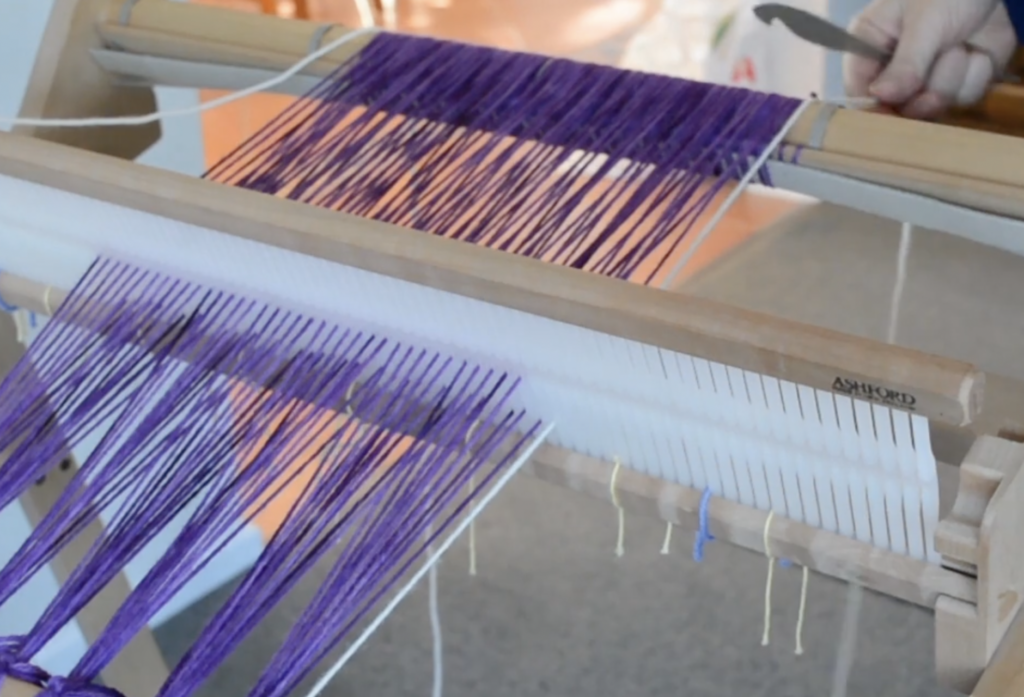
Step 1. is to measure out a length of yarn that is similar to the length of your warp. A little more is fine, a little less is not so great, as then you may have to install the floating selvedges again in the same project. It’s doable, but preferable to have a little more than you need so you don’t run out.

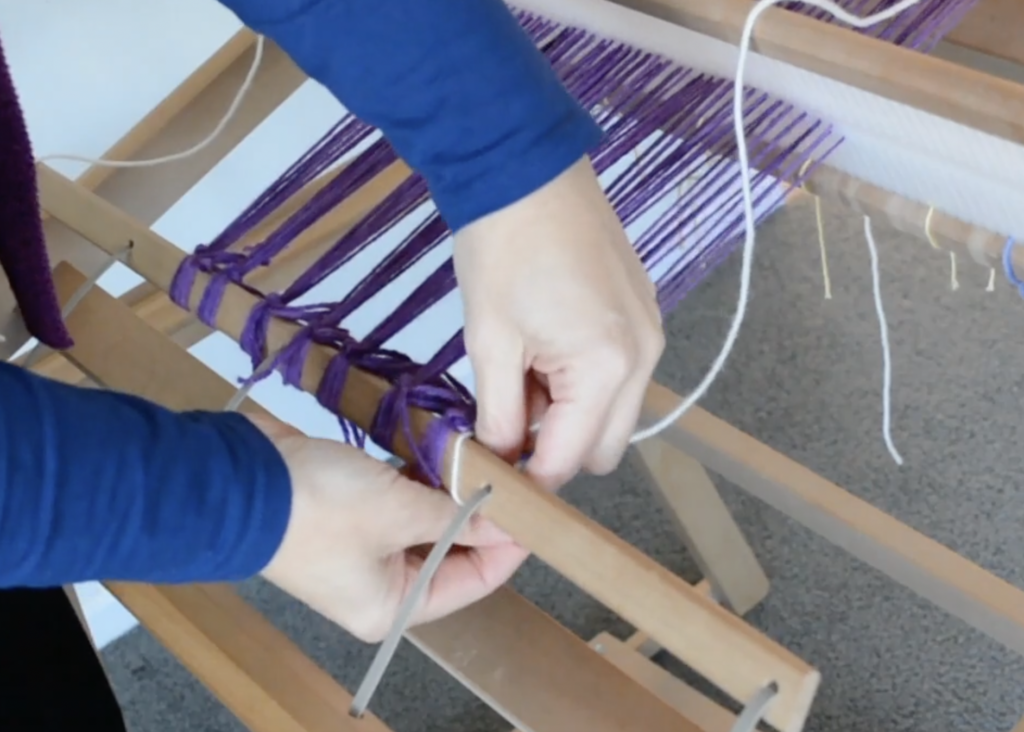
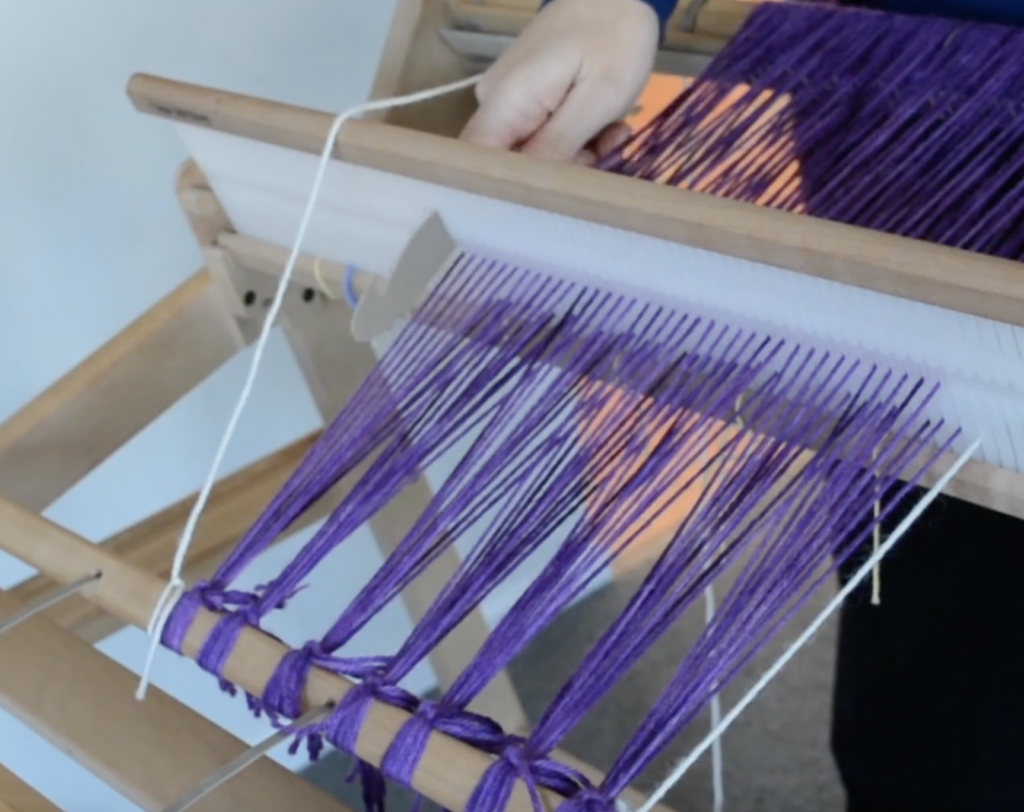
Cut your length of yarn and tie one end in a secure, double knot to the front apron rod on one side of the warp. It makes no difference whether you do the right or left side first.

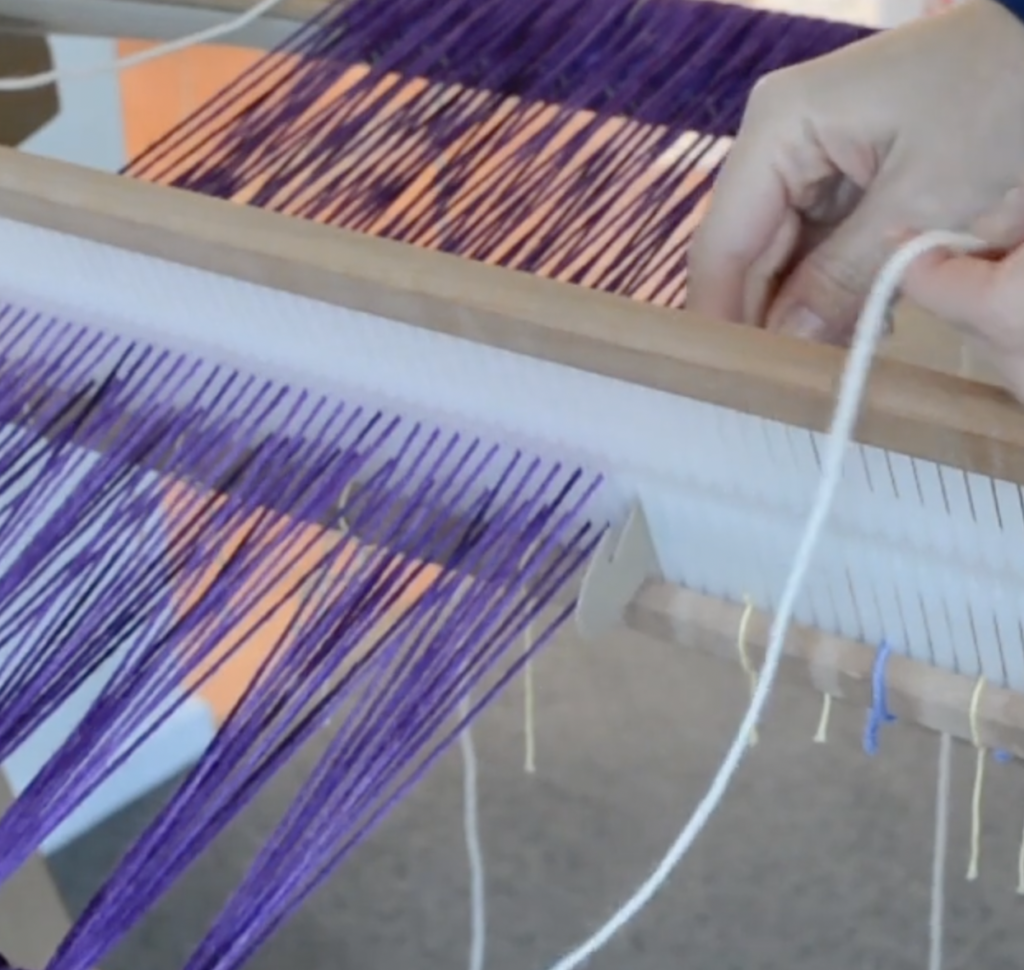
Drape the tied yarn over the top of the heddle. It doesn’t really matter what position the heddle is in at this point, but it make sense to have it in the neutral or resting position.

Find the next slot, next to your outer most edge warp thread that is empty. This is the slot you will thread your yarn through. Having the floating selvedges in a slot makes them a “free agent” that we can then manipulate in the weaving process to ensure that our edges are always wrapped with a weft thread.

Pull the thread right through the slot and over the back beam and leave it hanging.

Now repeat the exact same steps on the opposite side of the warp.

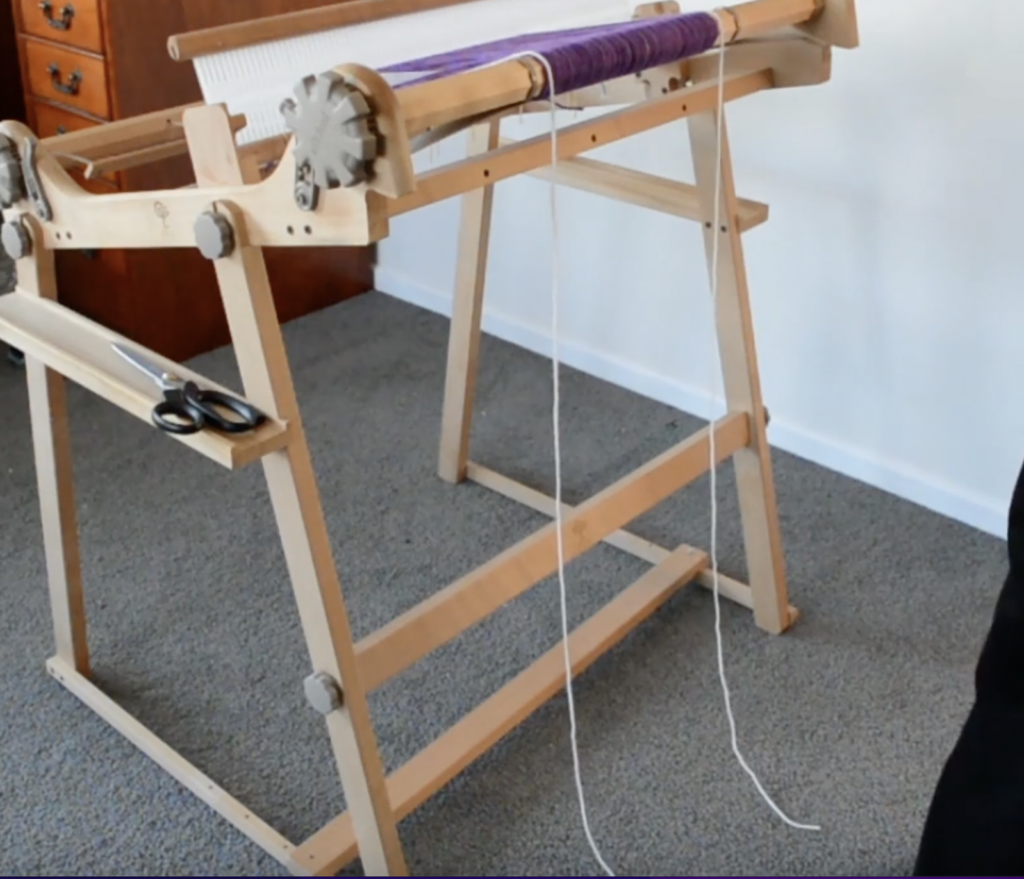
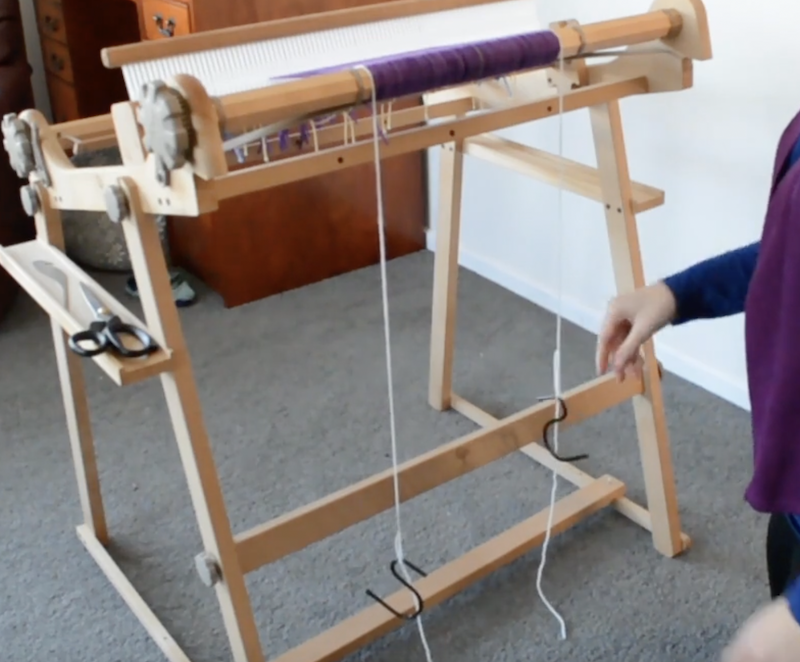
Now you have two threads in slots on either side of your warp and they are ready to be weighted. If you don’t weight them, they won’t work, they need to be under tension!

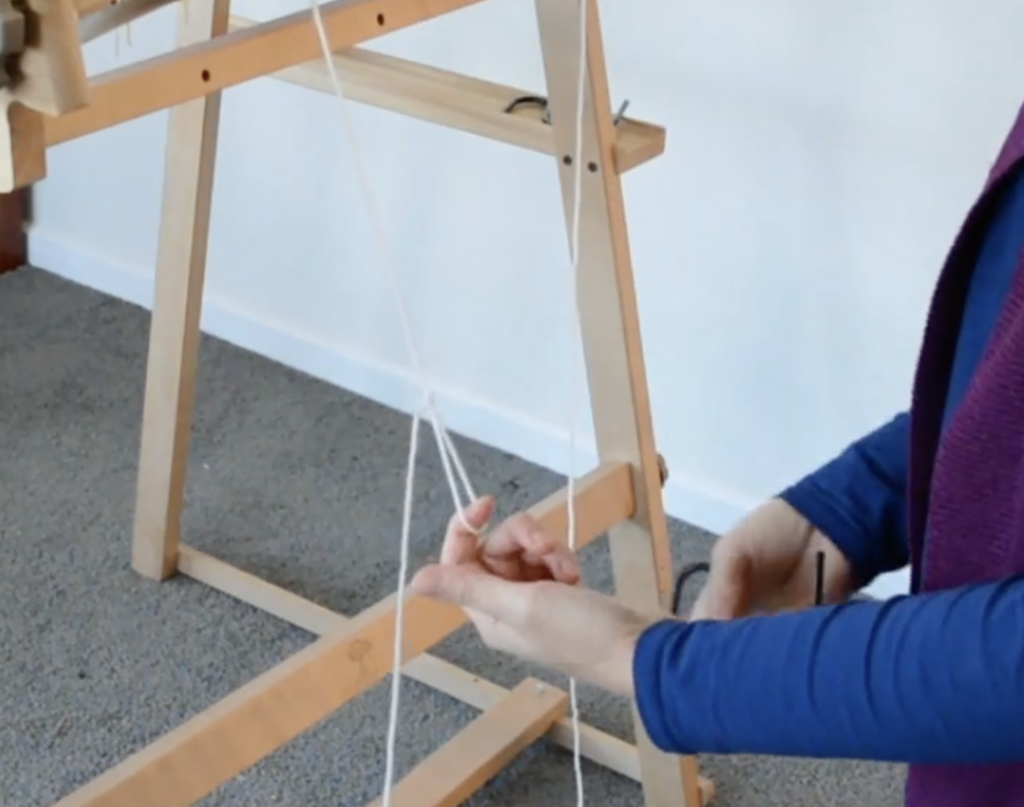
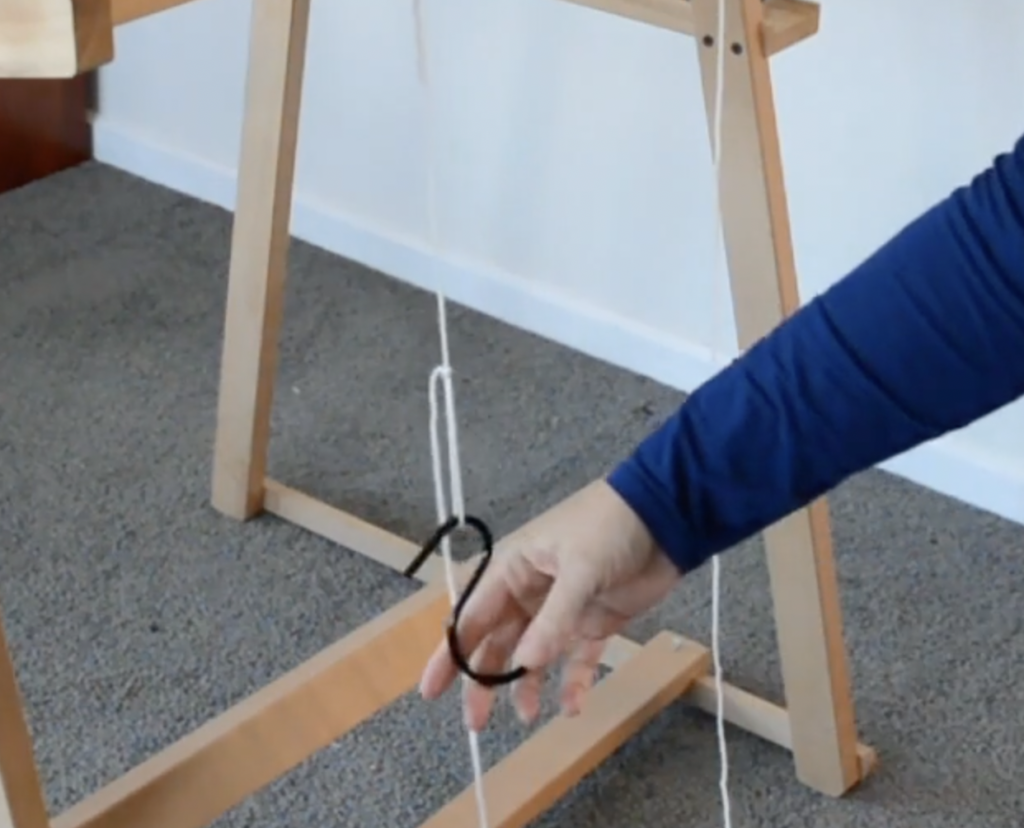
Make a slip knot in the hanging thread. You can do this half way down, or further towards the floor, the main thing is that the weights are not resting on the floor, you want them to dangle and place tension on the thread.

Place an “S” hook or something similar through the loop of the slip knot and allow it to hang. You can tighten up the slip knot to prevent your hook from jumping out of the loop. I have a bunch of S hooks, they are so handy for tensioning broken or loose threads and I always use them on my floating selvedges.

Do the same for the other floating selvedge thread, and you’re ready to start weaving!

As a side note – this method is not the only way to install floating selvedges. Some weavers prefer to allow for the additional two threads when calculating the warp, and then roll the FS on with the rest of the warp. They would then thread the FS threads through an empty slot rather than threading as part of the pattern.

If you’re interested in knowing more about floating selvedges and viewing a tutorial for installing them on a table loom, please view this video:

In the next post I will have a tutorial for how to actually use the floating selvedges when weaving, so look out for that one.

Until next time…

Happy Weaving!
Filed Under: Floating selvedges, Floor Loom Weaving, Free tutorial, Neat edges, Rigid heddle weaving, Table loom weaving, Tutorials, Weaving Tagged With: floating selvedges, rigid heddle loom

How to double your weft thread

by Kelly 14 Comments

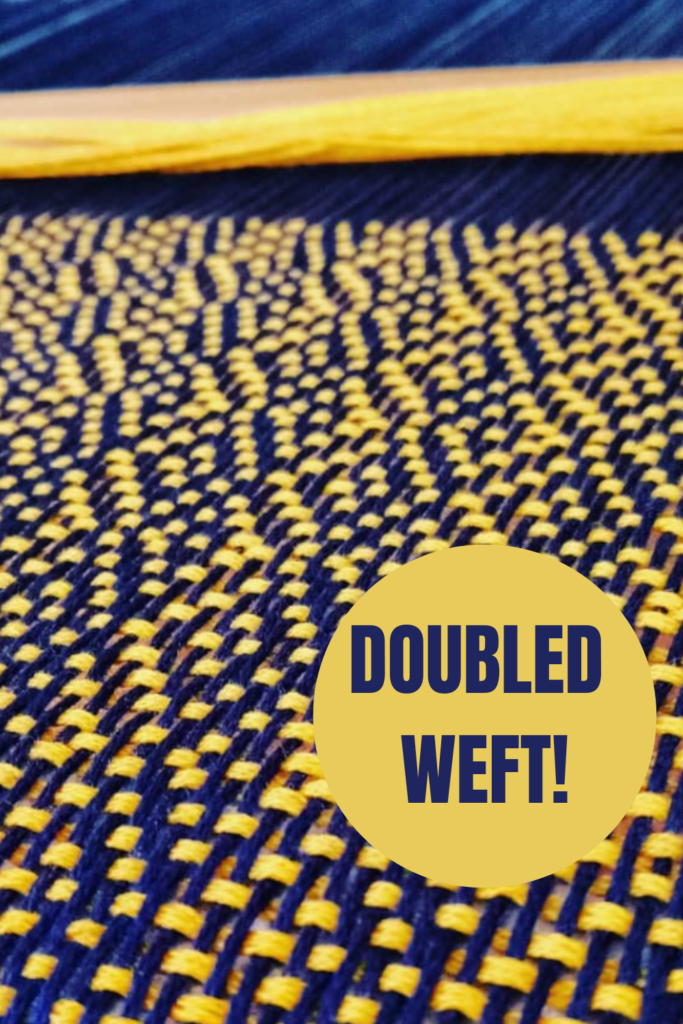
There are times that you will want to double your weft thread in order to achieve a balanced sett. Or, you may just be wanting to make the weft stand out and feature more.

If you only have one cone or ball of yarn to work from, you will need to think around how you’re going to load the shuttle to be double, rather than single stranded.

*This post contains affiliate links. For more information, please see my disclosure policy.

Today I’m going to show you how to easily double your weft when using a stick shuttle. I’ll cover a couple of different methods.

In my example piece, my warp is 8/4 cotton. For my weft, I want to use a lovely, bright yellow, I received recently from the brand new Australian cotton range from Thread Collective. This yarn however, is 8/2 cotton – quite a bit lighter than the 8/4 warp.

Considering it’s important to me that my pattern stands out and is nice and bold, the 8/2 as a single weft would not have the impact I’m wanting to achieve. I decided to double the weft.

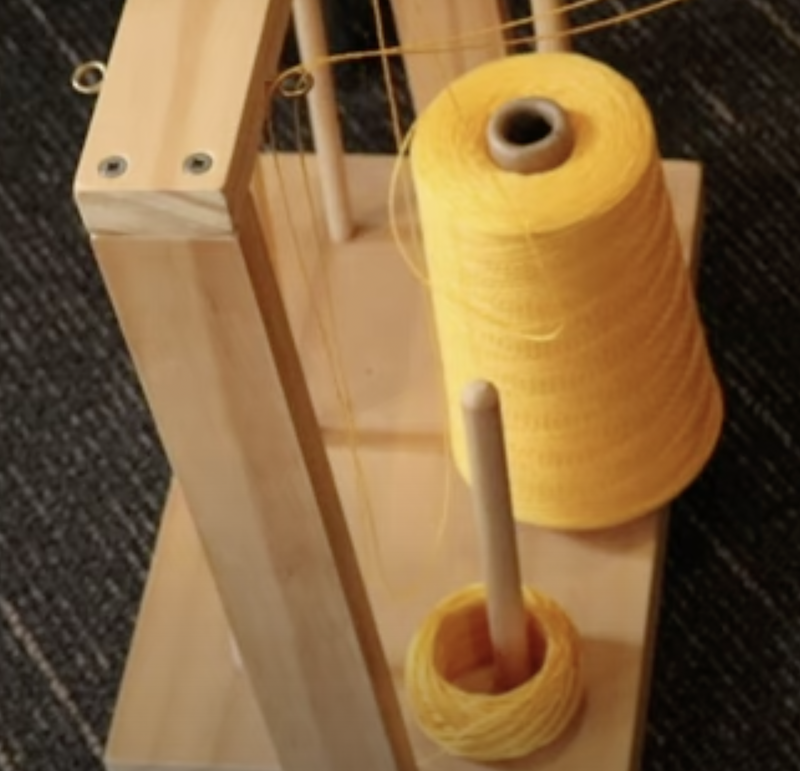
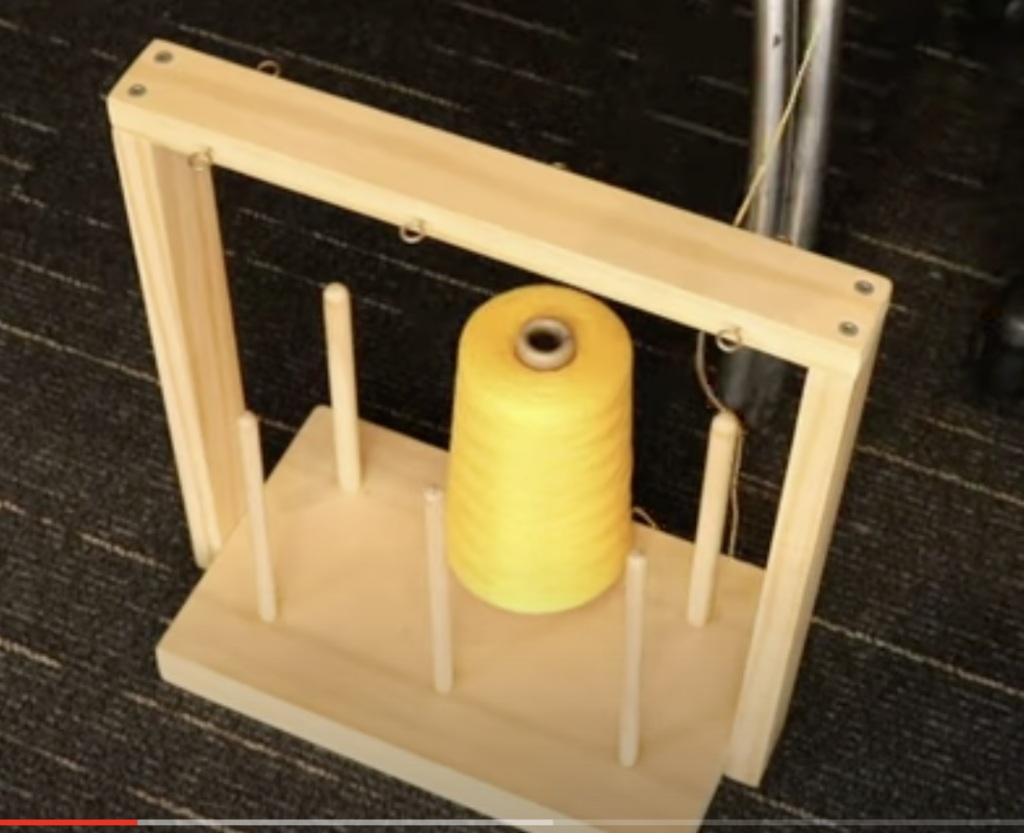
I start by placing the cone of yarn that I want to use for weft on the floor next to the table I’m sitting at. I use my cone warping stand to hold the cone steady and to feed the yarn off freely. You can also stand your cone in a box or empty cylinder of the right size – whatever stops the cone from rolling all over the floor while you’re trying to feed yarn off it!

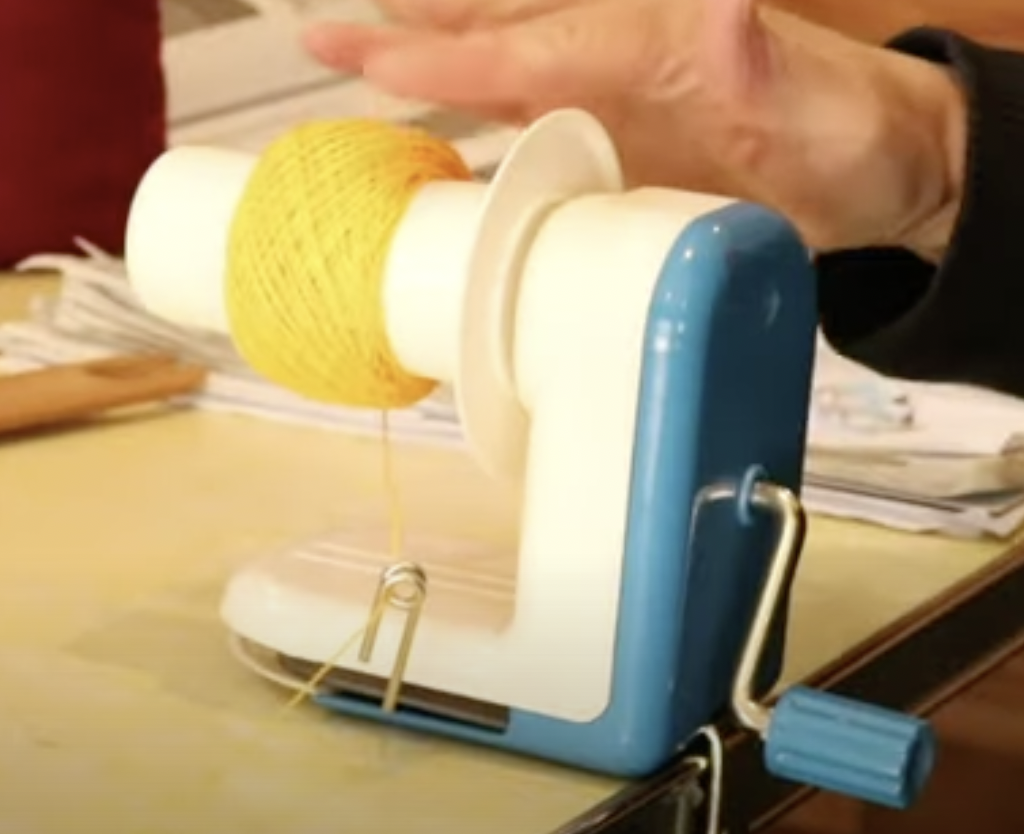
I’m going to be using my ball winder for this tutorial, but you do not have to have one in order to successfully load your shuttle with doubled weft.

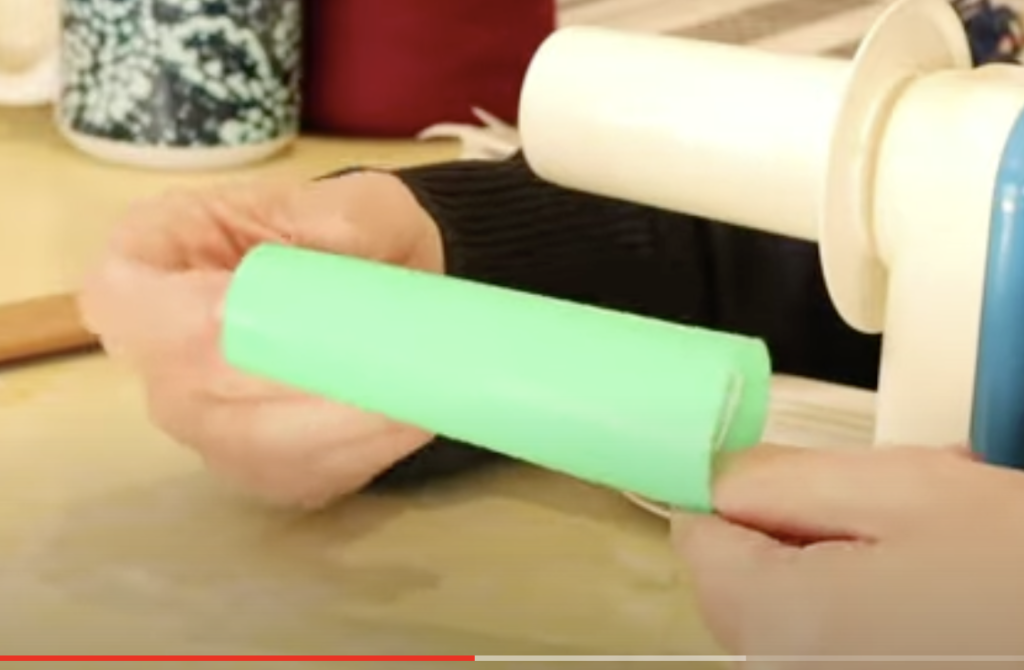
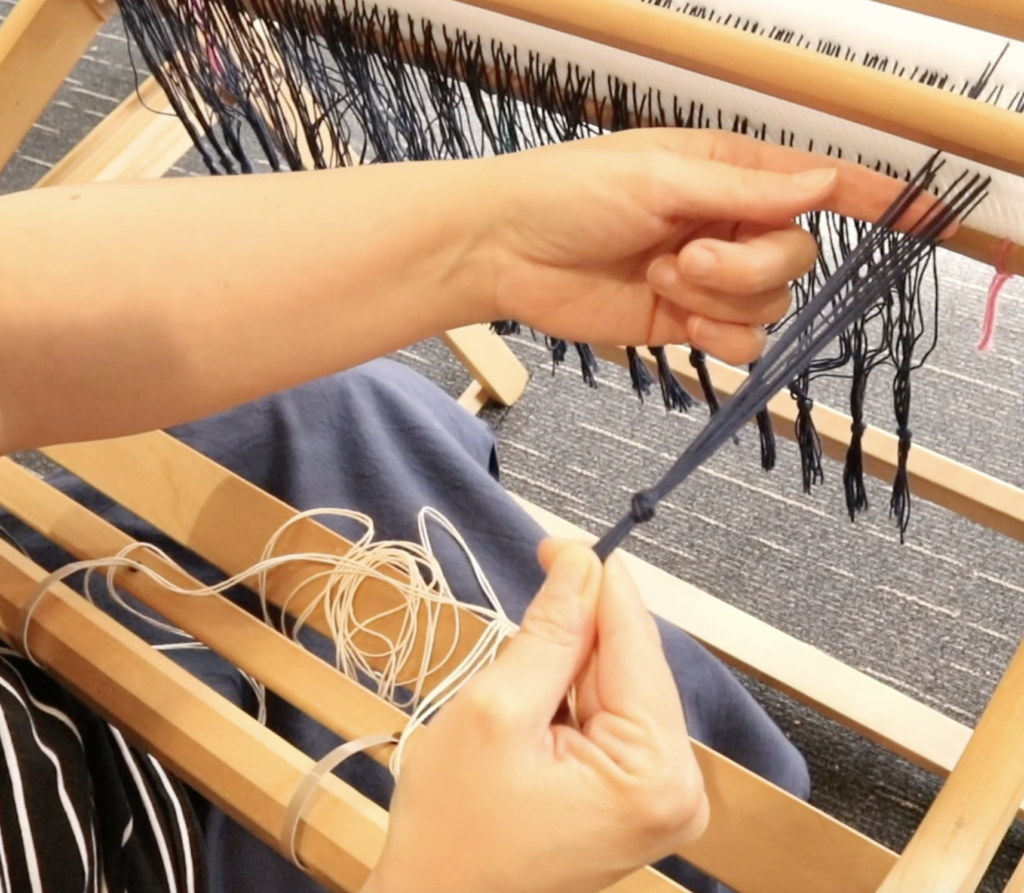
Another suggestion is to use an empty cone cylinder to wind the yarn off your full cone by hand. This plastic one is handy because it has a grip, so it’s easy to wind fast by hand, but empty toilet paper rolls are also great. You can even wind off an amount of yarn just onto your hands, though that may be a more potentially tangly method.

A ball winder is simple to use and does the job really quickly. I just clamp the winder to my table, thread the yarn in through the side loop, up over the central cylinder and into one of the notches, which holds the yarn in place initially and also creates a centre pull ball once you’re finished.

You then just wind manually, using the handle until you have a quantity of yarn. A couple of tips I have for successfully ball winding:

  • Keep some tension on the yarn as it’s feeding off the original cone, but don’t make it really tight. This is a mistake I made initially, and it caused problems with the yarn rotations slipping off the ball and tangling. Now I keep it a bit looser and never have that issue.
  • Hold the yarn tail for the first few rotations (particularly if you’re using a finer yarn) so that it doesn’t slip out of the notch. After the first few rotations, you can let go and it will be fine.
  • When I’m using the ball winder for doubling my weft, I usually wind off relatively small amounts at a time. I can always come back and wind off a little more if I need to.

Now you have 2 sources of yarn to feed from. I place the yarn cake on the cone stand, next to the original cone and feed it up through it’s own round hook.

Yarn Donation

Now things get super easy! I just slip knot the two yarns together at the ends, ready to start loading onto my stick shuttle.

From this point on, you can treat the two yarns as though they are one, and simply wind them on together.

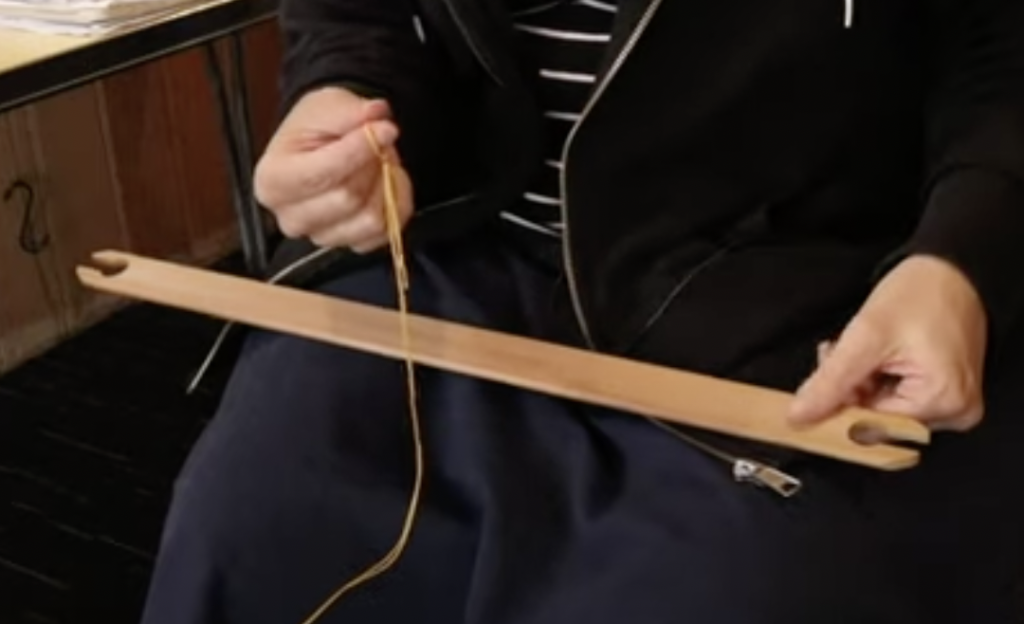
If you need help with how to wind a stick shuttle in a figure 8 (my favourite method), watch this video:

When you are ready to start weaving, you also just use the two yarns together as though they are one. So, each pick will have two threads instead of one.

This tutorial is available in video format, if you’re interested, click on the video below:

I hope this tutorial was helpful to you, leave your questions or comments down below.

Until next time…

Happy Weaving!
Filed Under: Free tutorial, Rigid heddle weaving, Weaving, Yarn Tagged With: double weft, doubling weft, weaving tutorial

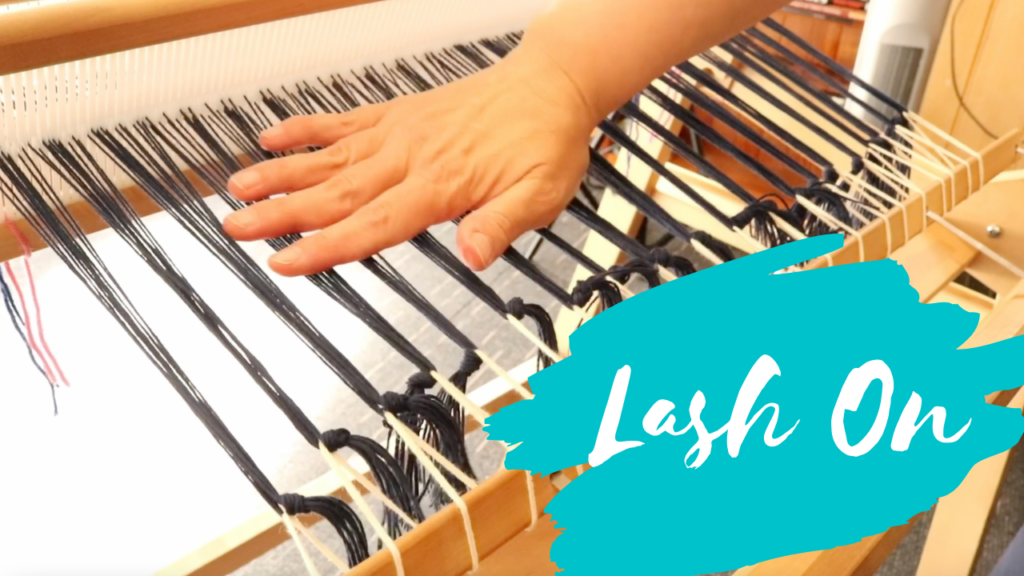
How to lash on your warp to your loom

by Kelly 14 Comments

Lashing on your warp to the loom is an alternative method to a direct tie on.

I’m going to show you exactly how to do that in a moment, but first I want to talk about why you would choose to lash on rather than tie the warp directly to the front apron rod.

There are certainly advantages and disadvantages to both methods and usually it comes down to a matter of personal preference.

  • This post contains affiliate links. For further information, please see my disclosure policy.

Firstly, let’s go over the pros and cons of each method.

Lashing on pros:

  • You can achieve excellent, consistent tension across you warp, regardless of the warp width.
  • The tension is very adjustable and simple to tweak
  • It’s the perfect method for dealing with slippery warp threads that don’t want to hold their direct tie on knots
  • It is very yarn efficient

Lashing on cons:

  • It takes additional time before you can begin weaving
  • You need a long length of strong cotton as the “lash on” yarn. This long length can be a bit of a handful when you’re threading it through your knotted bunches.

Direct tie on pros:

  • It’s fast and easy
  • If you tie on with surgeon’s knots, these will be adjustable
  • Works very well for most yarns

Direct tie on cons:

  • Slippery yarns (like silk or tencel) may not hold their knots. They can slip on the apron rod and come undone.
  • You have more warp waste because you need that extra length of warp to go around the apron rod and tie on. This is not a problem if you are planning to have fringes, as the tie on knots can be included in fringe allowance.
Yarn Donation

Now let’s have a look at the steps involved in lashing on.

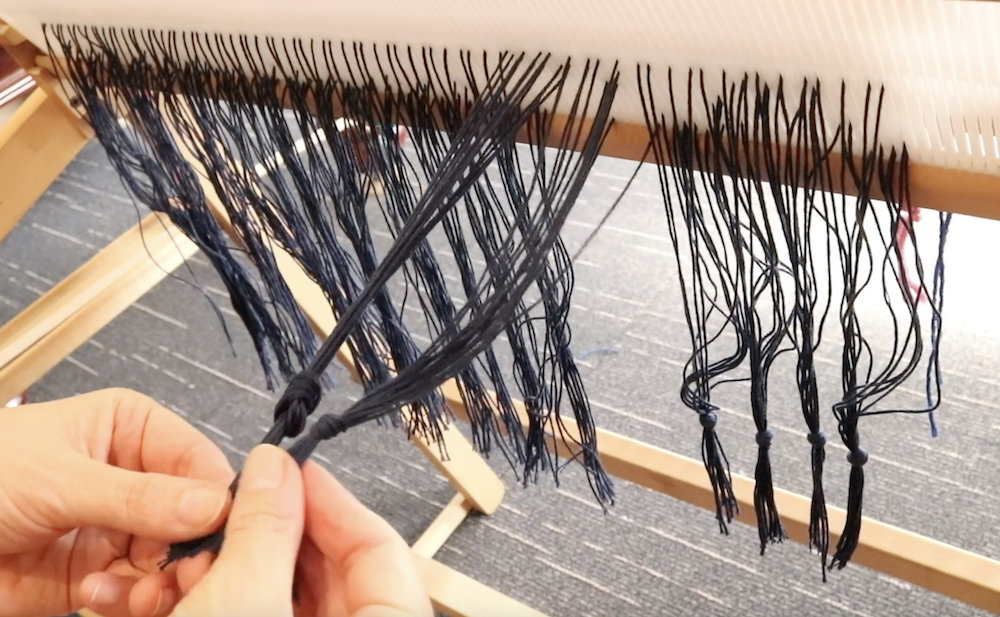
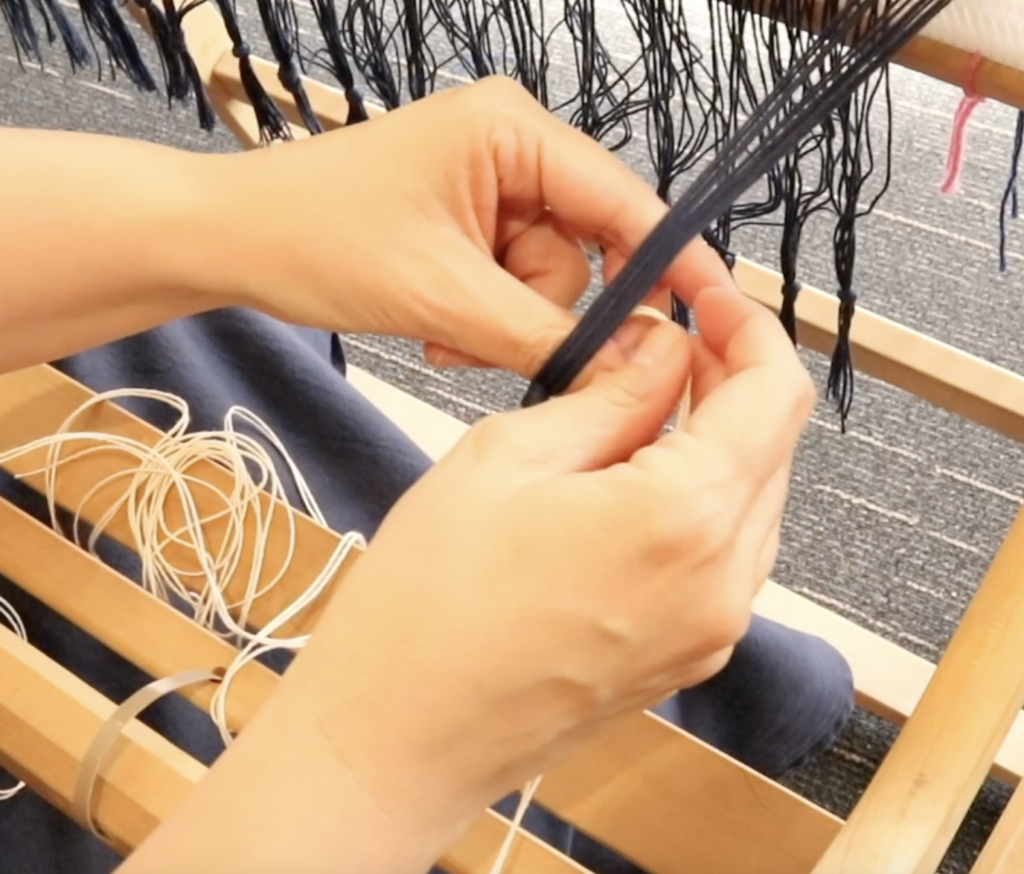
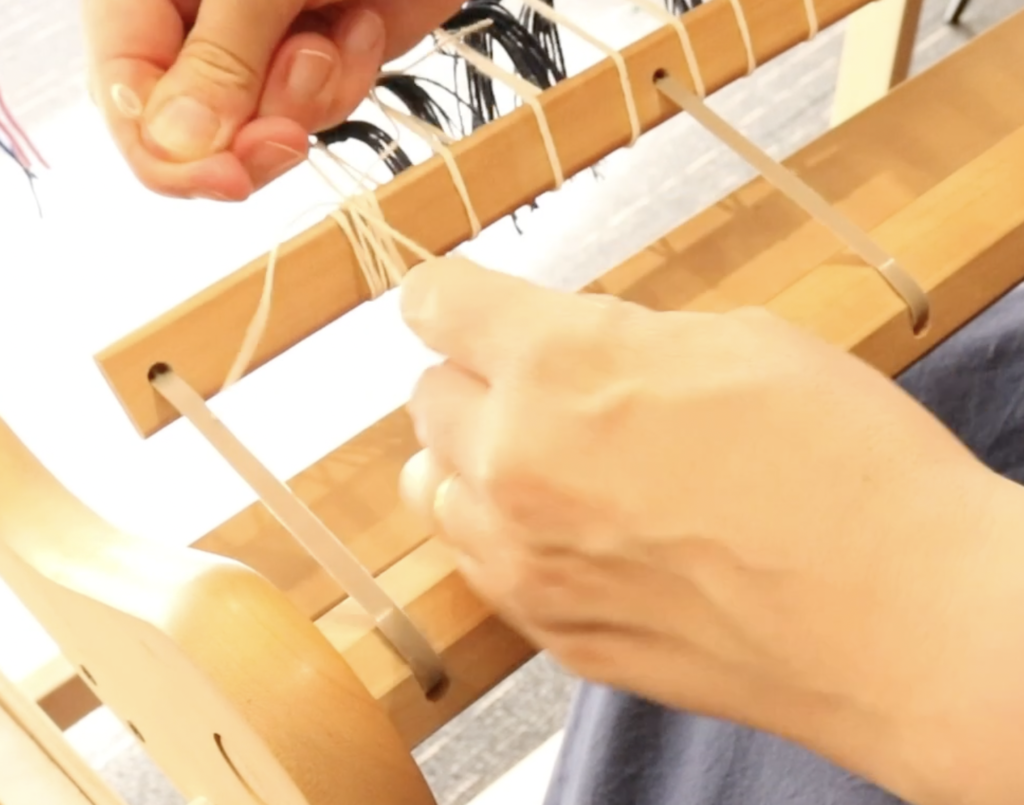
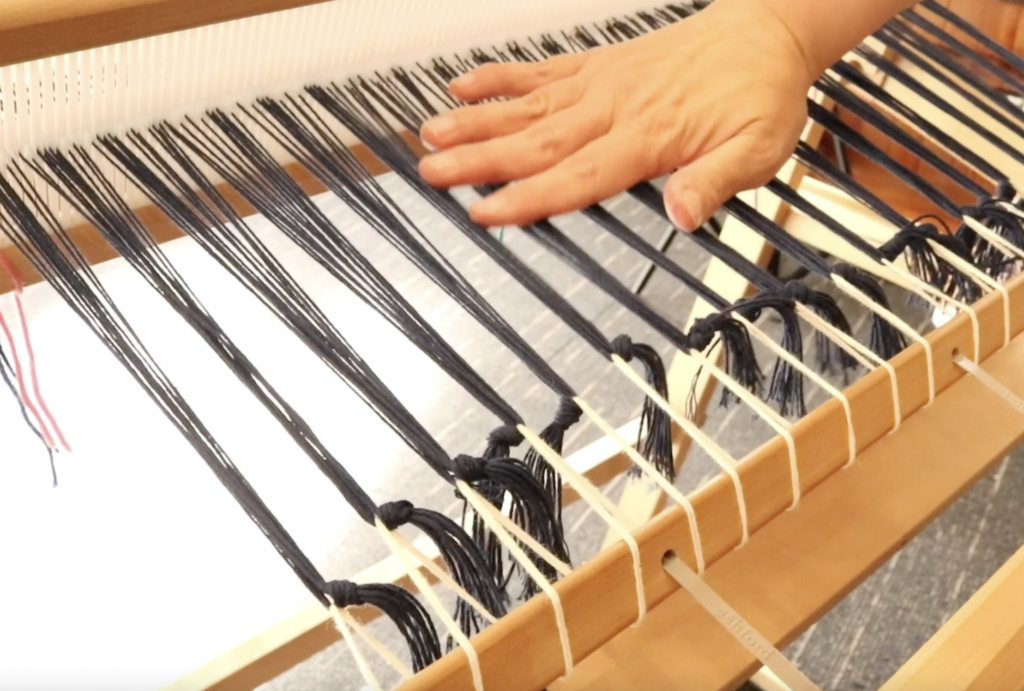
Working from one side to the other, take approximately one inch sections fo warp and make an overhand knot, leaving a couple of inches of tail.

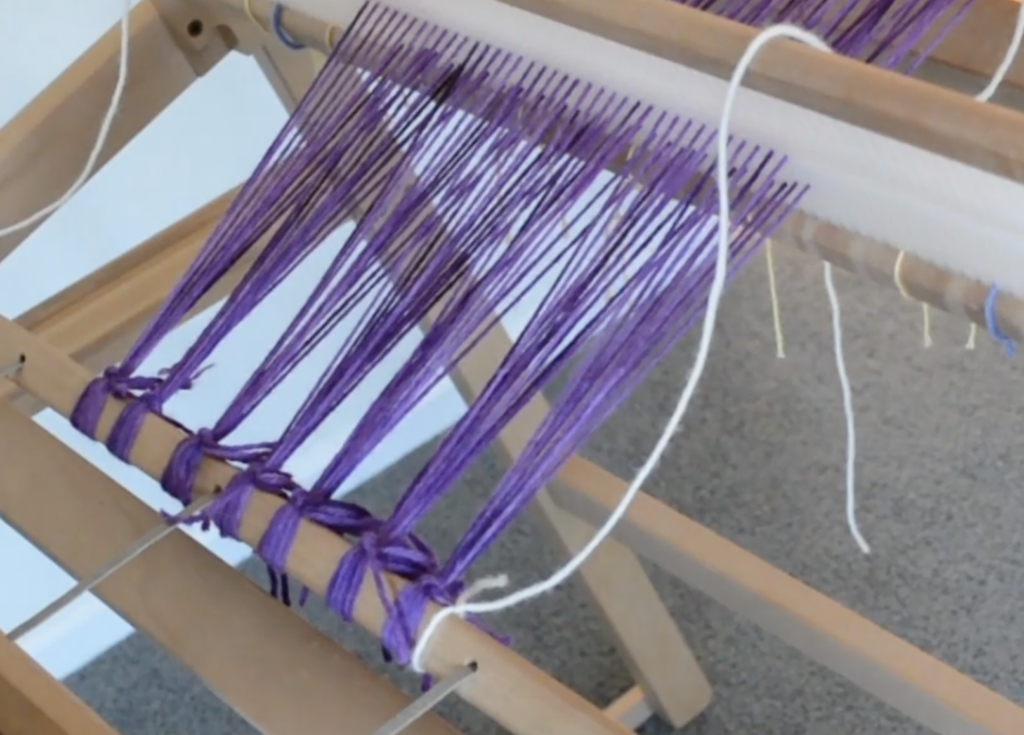
When you full extend your front apron rod, you don’t want the ends of the knotted bunches to touch it, as you need a bit of distance between the bunch and the rod for effective tensioning.

Try to make your knots at about the same place on the bunch each time, it’s helpful to compare the new bunch with the last knotted bunch to try to match up your knots.

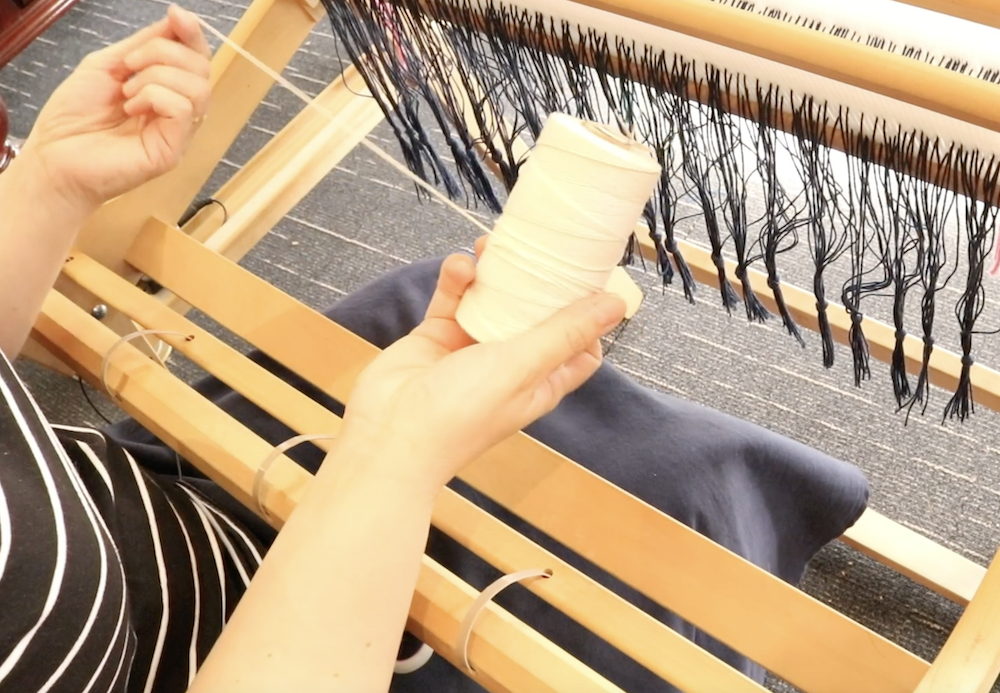
Wind off some tapestry cotton or similar yarn to use as your lashing on yarn. You want this yarn to be strong and not elastic.

Measure around 6 times the width of your warp, and then double that over.

Place the fold of the doubled up yarn on the apron rod. Make sure your front brake is on!

Lift up your first knotted bunch. As you do, you will notice that some threads separate from others, giving you an opening. Insert your index finger into this opening to hold the place.

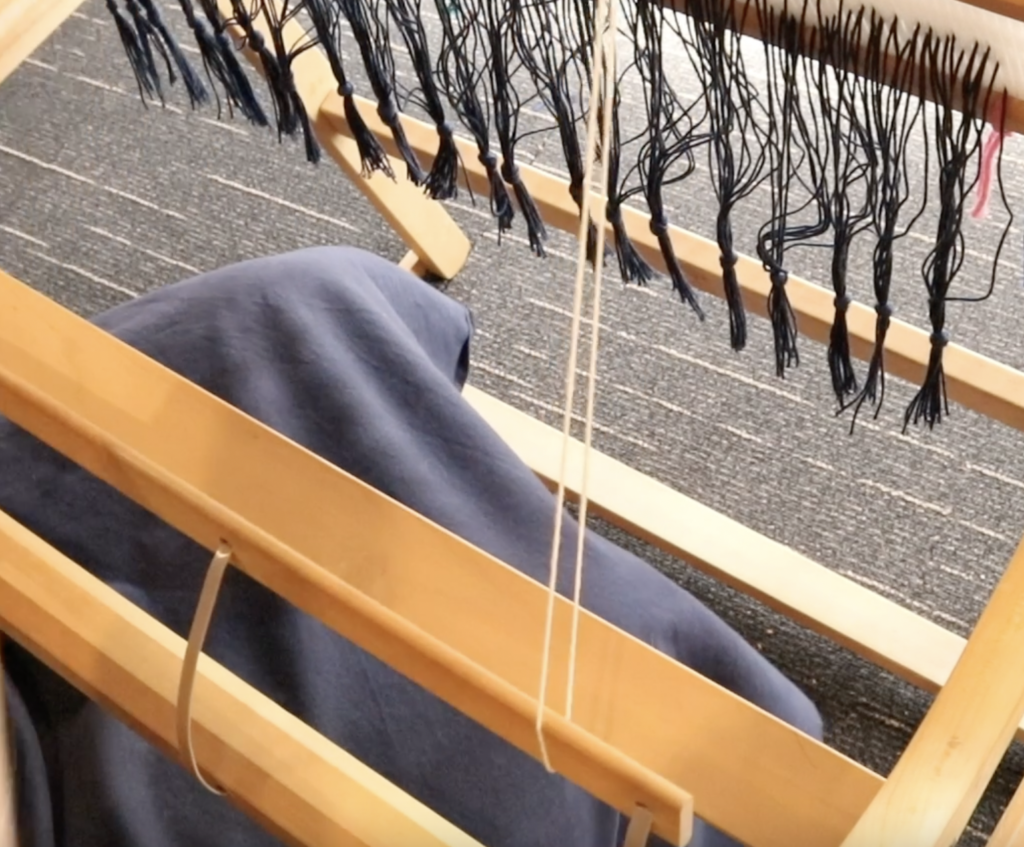
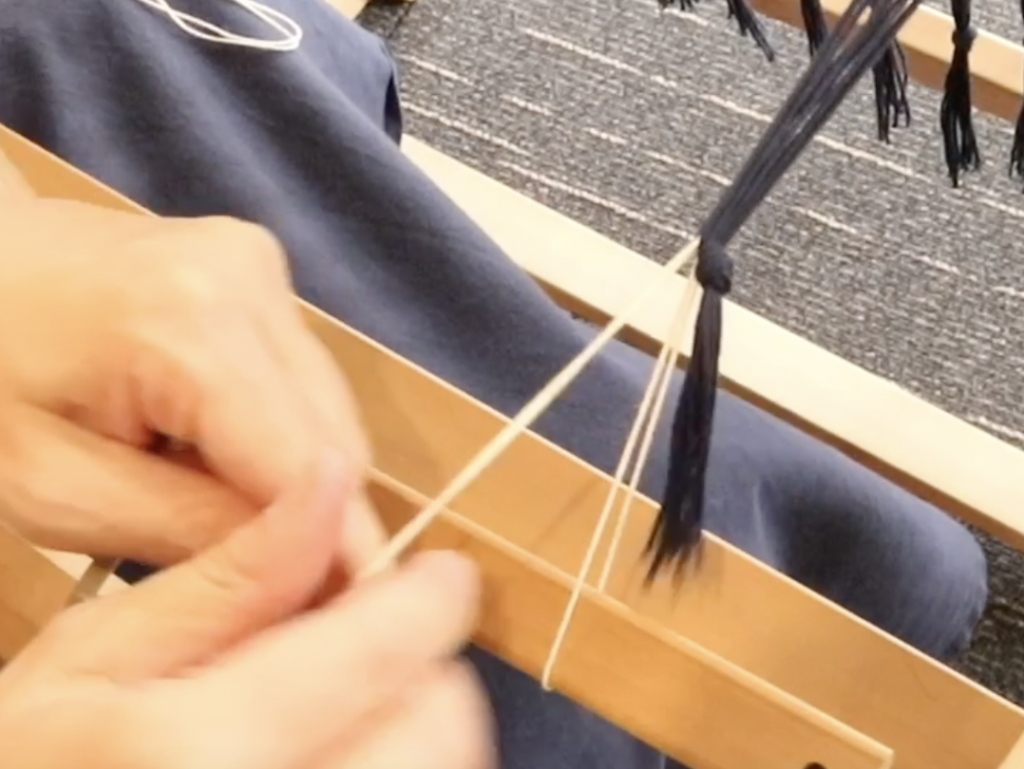
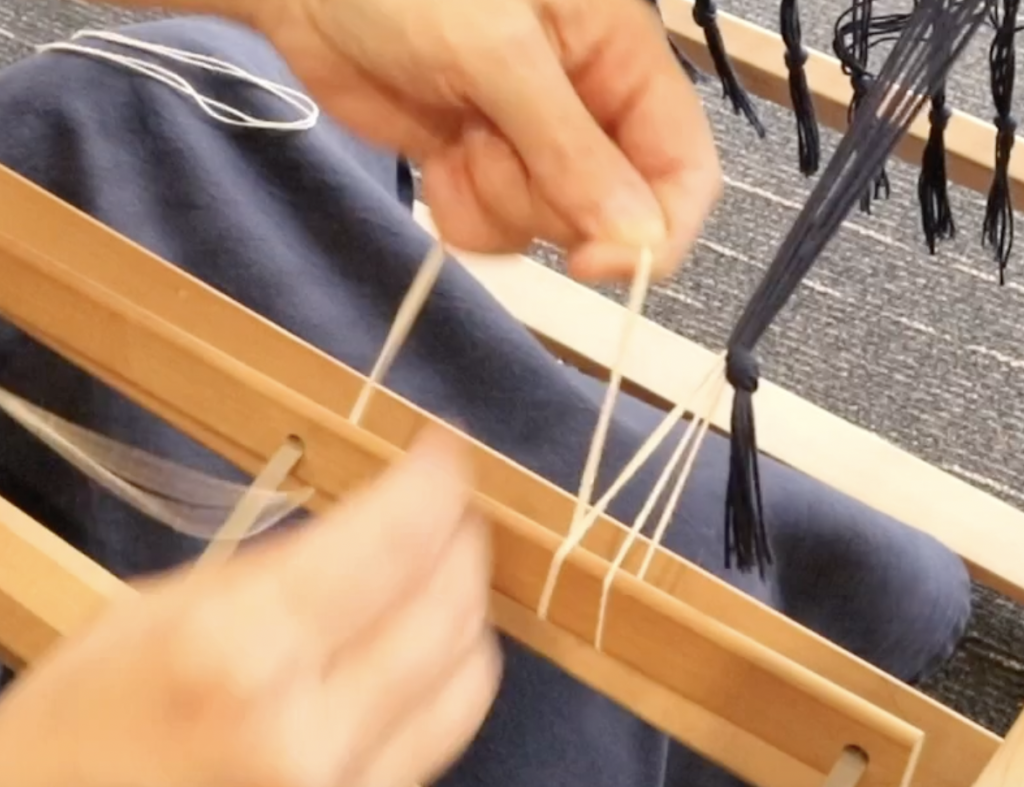
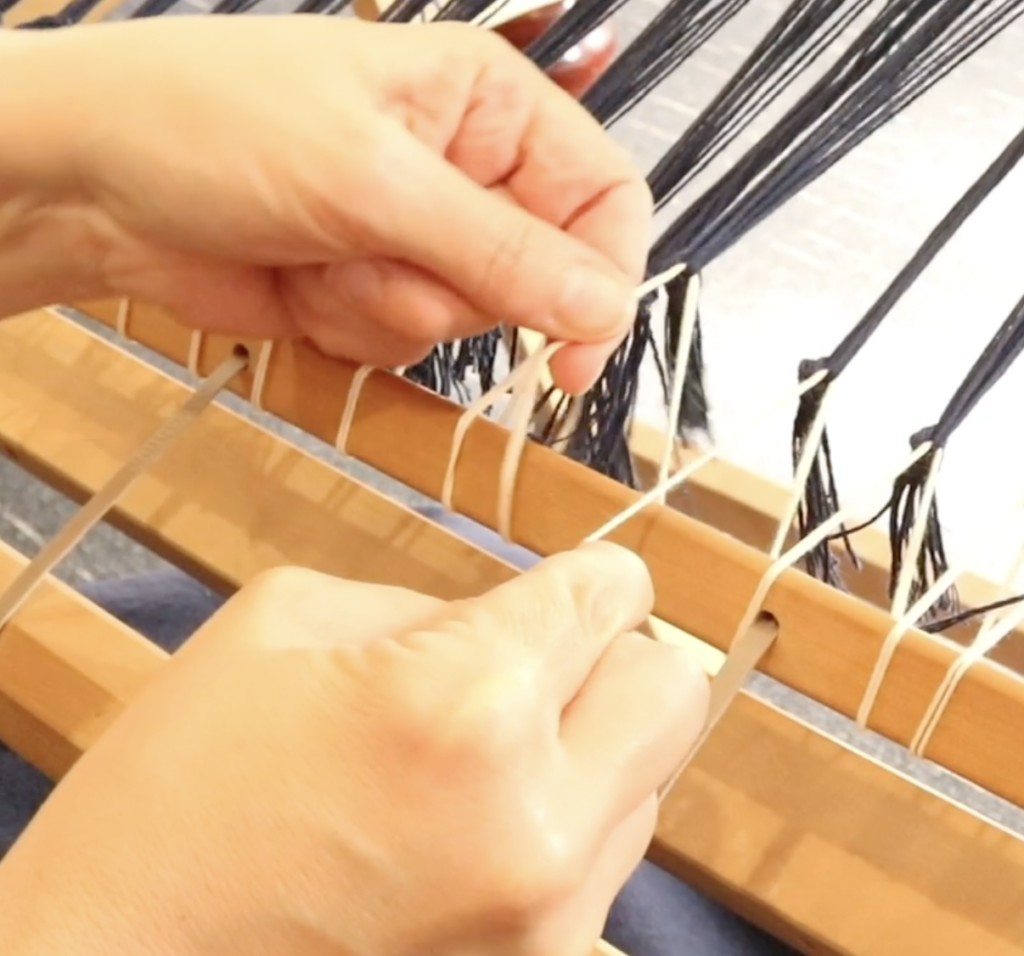
Take the cut ends of your lashing on yarn through the space and pull all the way through.

Take the waste yarn over the top and then underneath the apron rod, ready for the next bunch.

The lashing on yarn goes underneath the apron rod each time.

Continue going though your bunches and under the apron rod all the way to the other side of the warp.

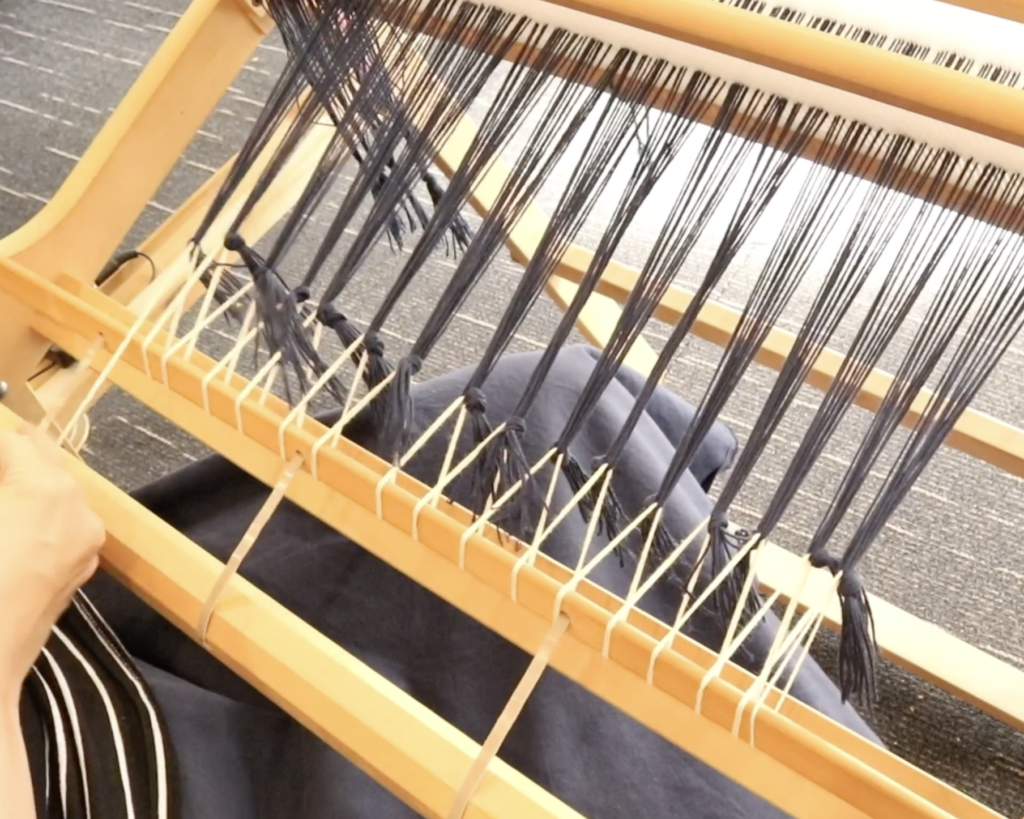
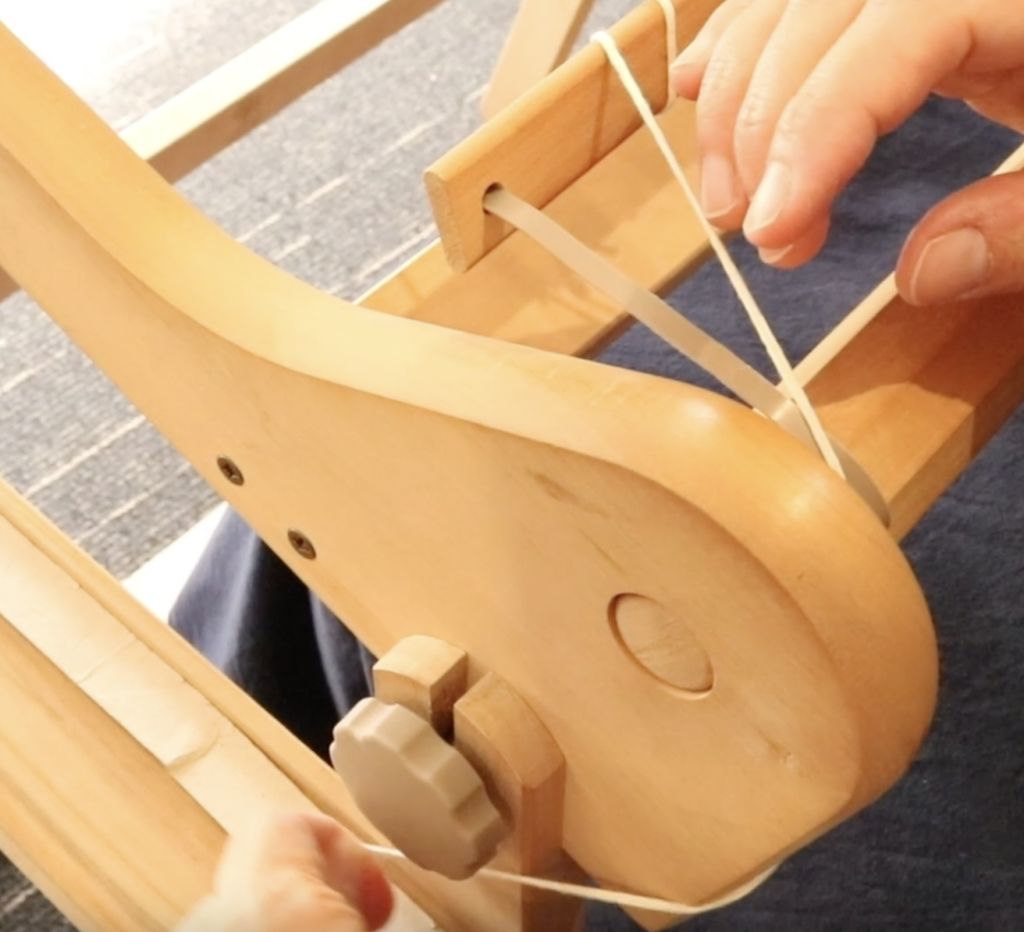
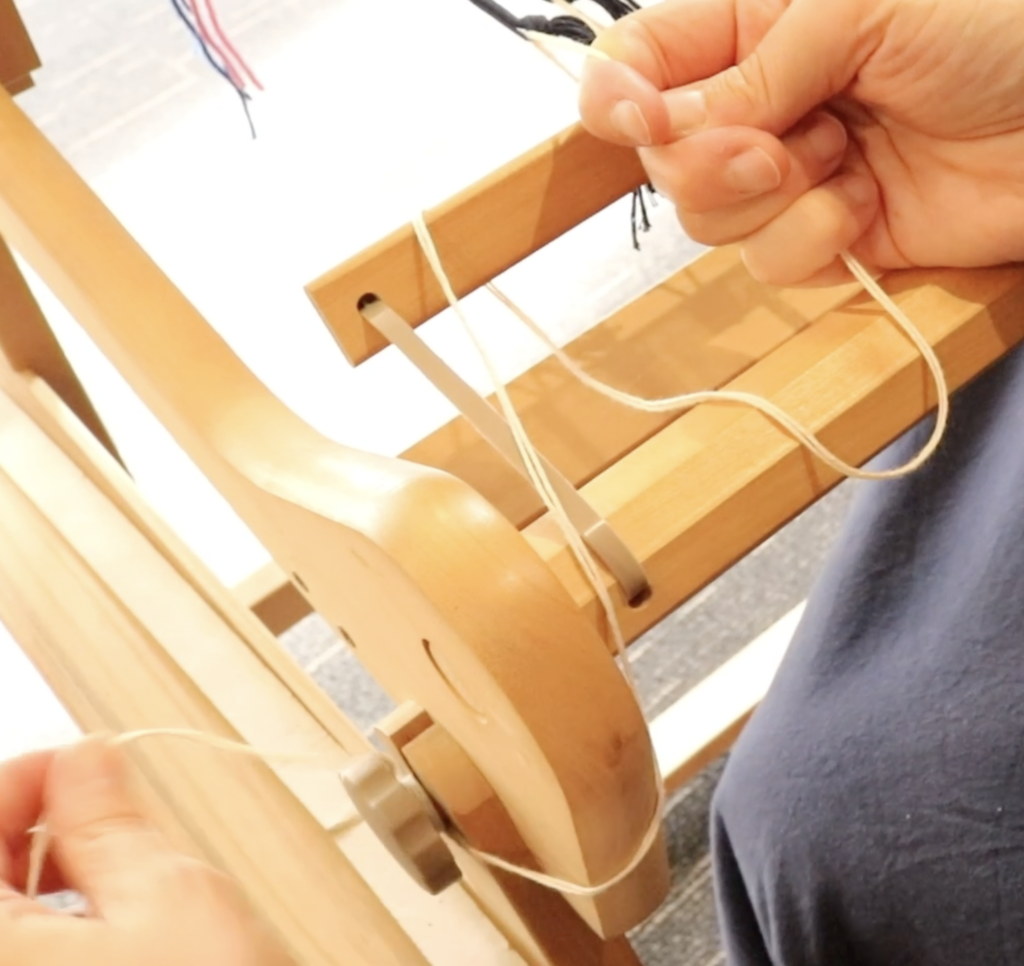
To temporarily secure your lashing yarn, if you have a stand, you can take the yarn under the edge of the loom then around the side knob a couple of times.

Now is the time to perfect that tension! Starting at the right (or which ever side you made your first bunch) pull down on the lashing yarn firmly, the slack will transfer to the next bunch. Still holding the lashing yarn at the first bunch (to prevent losing that great tension), pull down on the yarn at the second bunch. Hold the tension there, while you go on to the next bunch and work your way across.

When you reach the other side, you should have a good bit of slack on the lashing yarn, and your tension should be nice and uniform across the warp. Don’t let go of the yarn at the end here until you have it fully secured.

This part is much easier to show than to explain, so definitely check out the video below. Basically, you are knotting and securing the end of the yarn to the apron rod in a way that is a very firm hold, but is undoable in case you need to adjust your tension again.

When you bounce your hand from one side of the warp across to the other, all the bunches should feel like they are under the same amount of tension. It feels like a nice light, bouncy trampoline. If you have any loose parts, adjust the tension again by pulling the lashing yarn at the loose section, and transferring the slack as before.

If you would like to see all this in action, check out the video I made for you:

Equipment used in the making of this tutorial:

Ashford Rigid Heddle Loom 24″

Ashford Tapestry Cotton

For detailed weaving lessons, check out my Online Weaving School.

I hope this is helpful to you, leave your questions or comments below.

Until next time…

Happy Weaving!
Filed Under: Free tutorial, Rigid heddle weaving, Weaving Tagged With: how to lash on, lash on, lashing on

Studio Sign with Cricut Maker 3 Tutorial

by Kelly 5 Comments

Ever since I moved into my very first studio this year, I’ve wanted to put up an official studio sign. I thought about purchasing one online, but couldn’t decide on one that I liked.

So when Cricut Australia contacted me recently and asked me to partner with them, my first thought was “Awesome! I can make a studio sign!”

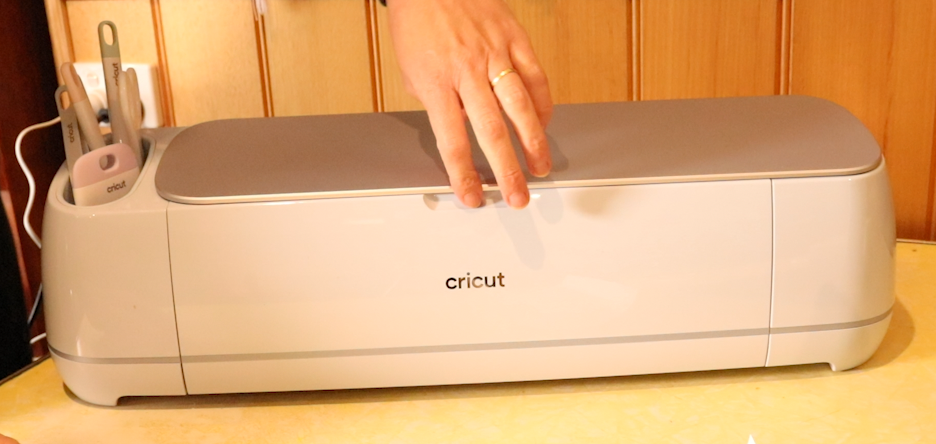
If you have never heard of Cricut before, (pronounced “cricket”) you are missing out! I admit that I wasn’t sure exactly what to expect when my Cricut Maker 3 arrived and even felt a bit intimidated by the thought of learning new technology, but I have been very pleasantly surprised.

*This post contains affiliate links. For further information, please see my disclosure policy.

The machine has been very easy to learn and I’m excited by how much more I can explore. Cricut also included a rotary cutting tool that fits into the machine so that I can experiment with cutting out shapes with my hand woven fabric. I can’t wait to do that!

Here are some of the things I’m loving about this machine:

  • The design possibilities are awesome. In addition to the availability of the app, Design Space, which has hundreds of images and fonts, you can also upload your own designs.
  • The Cricut Maker 3 doesn’t just cut paper and vinyl. It can cut fabric, leather, balsa wood – a total of over 300 materials can be used.
  • The Adaptive Tool System matches the cutting direction and pressure to match the material you’re cutting. Tools can be changed according to what you want to do.
  • Design Space is compatible with iOS, Android, Windows and Mac (I use it with my MacBook Pro).

My husband and I worked together on this project so it was double the fun – I love any excuse to work together!

My idea for the studio sign was to repurpose everything to make it a low to no cost project. Thanks to finding materials around our property and of course to Cricut for sending me the Maker 3 plus tools and materials, I am happy to report that the final result was a NO cost project!

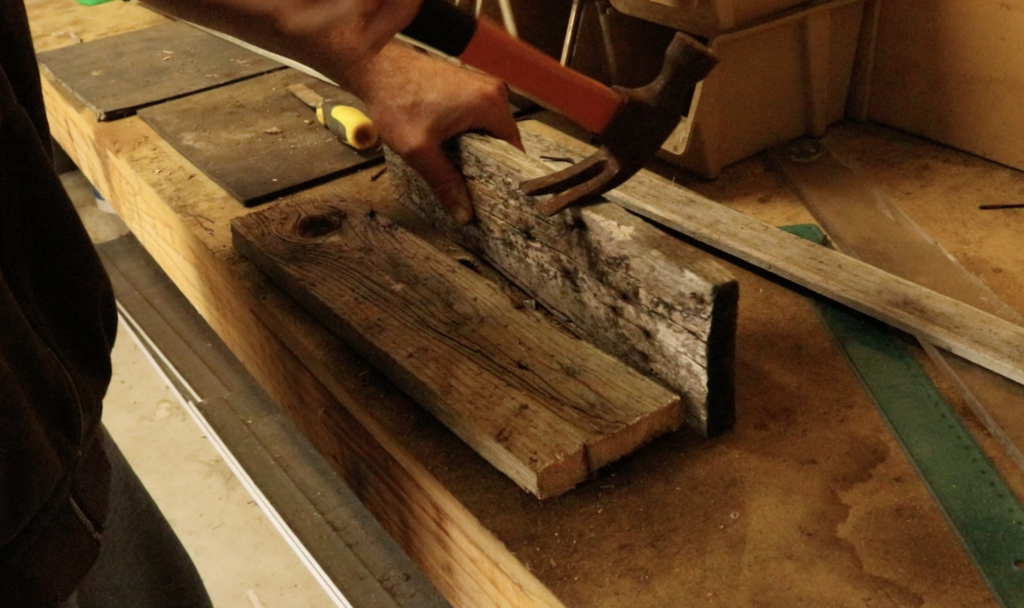
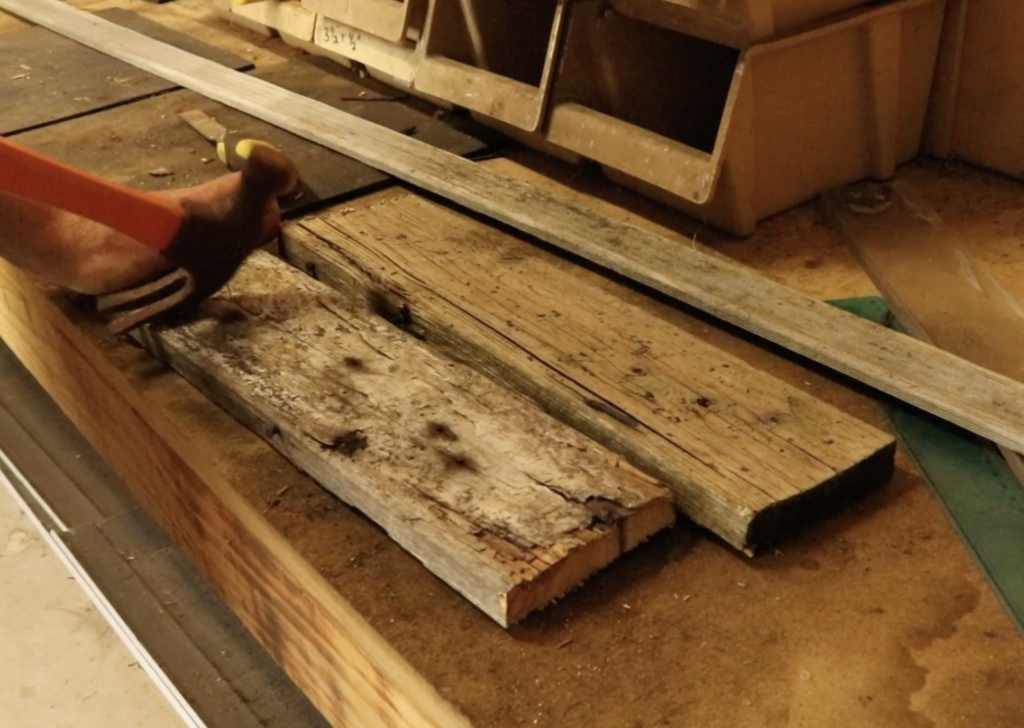
We found some planks of wood that had been stacked on top of a low shed. Absolutely perfect, as I wanted to use naturally distressed wood and these planks fit the bill perfectly. We also used some waste wood as the braces at the back of the sign. My husband already had an old sheet of MDF (medium density fibre board), and that was used for the front of the sign.

The cut pieces of distressed wood measured around 18 x 4″ each, with a depth of just over 1.5″.

We loved the rustic look of the timber, so we left it rough without sanding, but we did need to remove the rusty nails!

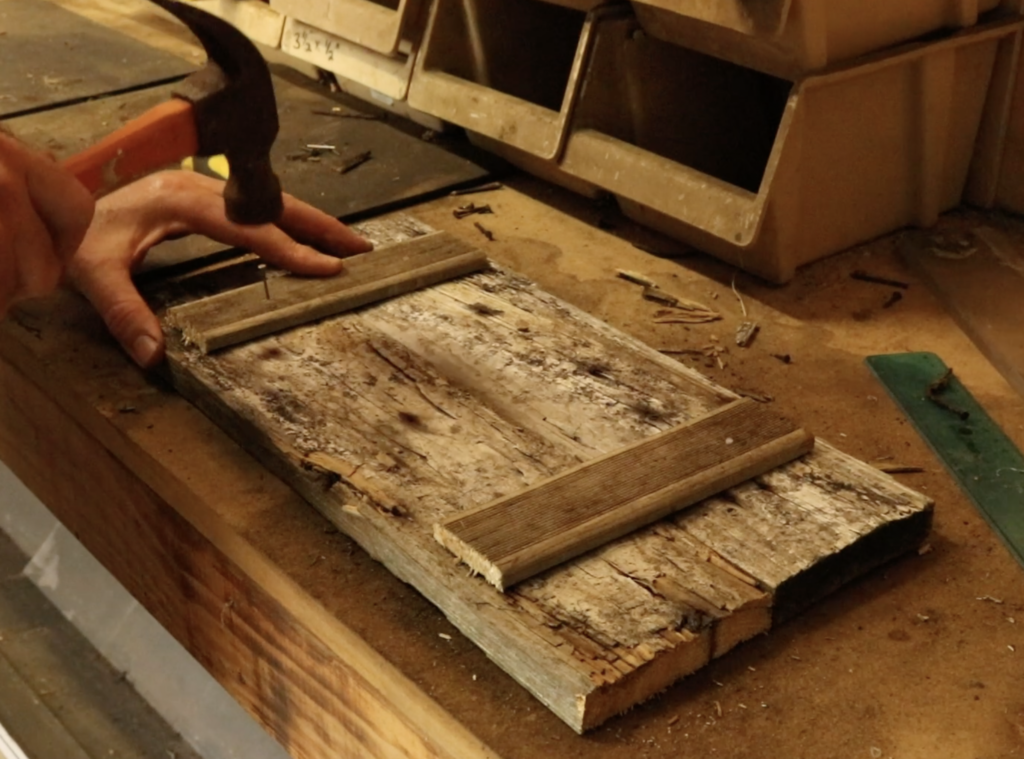
My husband nailed on two short and narrow pieces of wood (also found on our property) as a brace to hold the two main pieces together. These measure about 7.5 x 1.5″ with a depth of around 1.25″.

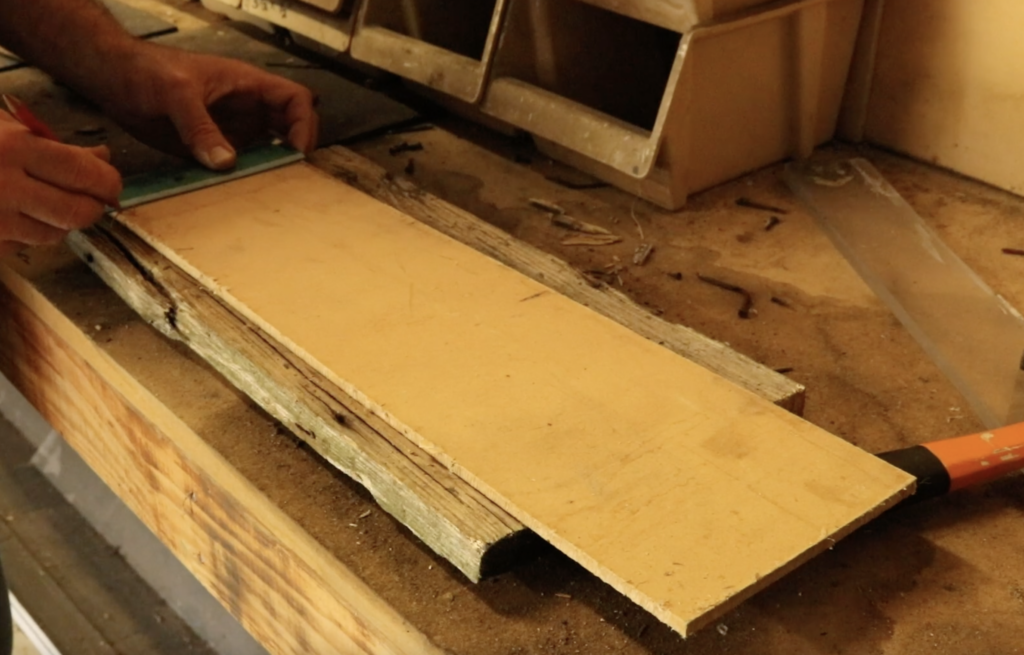
Then we took some MDF (plywood would also work) that we had lying around to use as a front plaque on the wood frame. This was an important step, as the Cricut vinyl I wanted to apply to the front of the sign needed a smooth surface to adhere to.

My husband eyeballed the MDF to match the size of the wooden backing. He drew up some quick measurements, then cut the piece, which ended up measuring around 13.5 x 5.5″. He also cut the corners off using our scrollsaw. Then he gave it a good sand with a fine sandpaper to smooth rough edges.

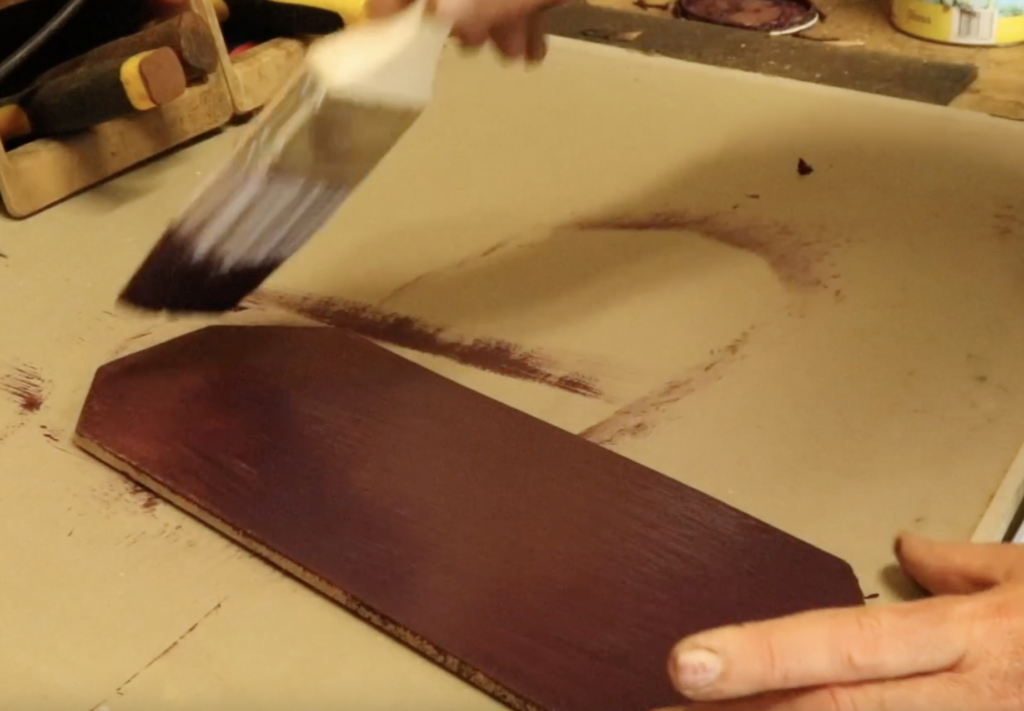
We painted the MDF plaque with some old paint we found in one of our sheds. It just happened to be a great colour that would set off the gold vinyl lettering perfectly! We let this paint dry completely before the next step.

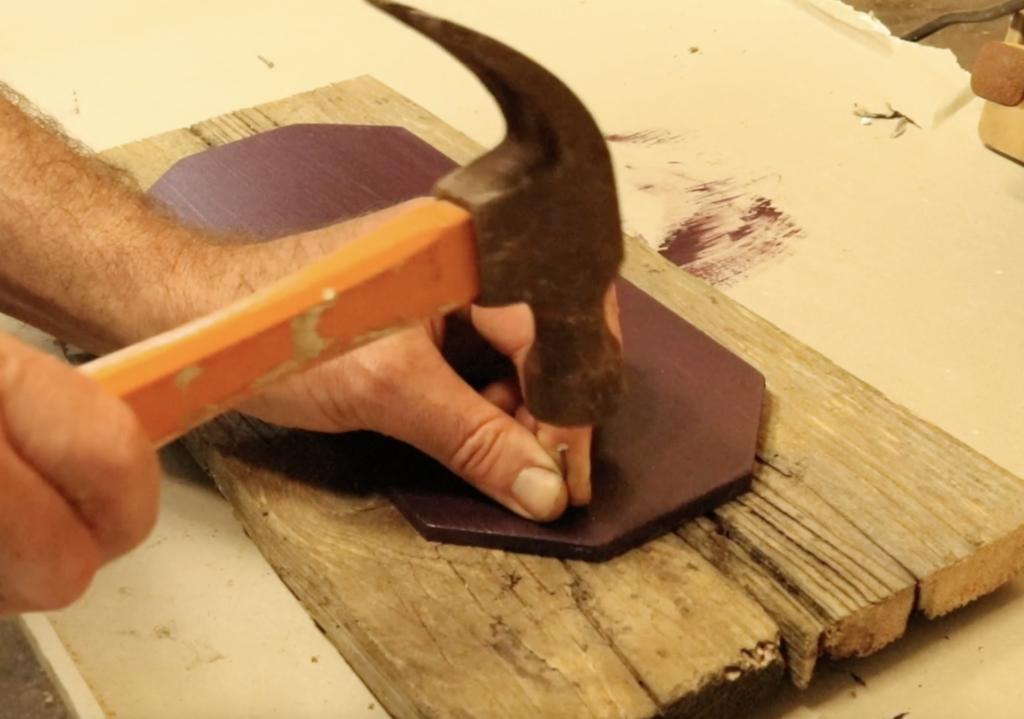
The plaque was then nailed to the wooden backing.

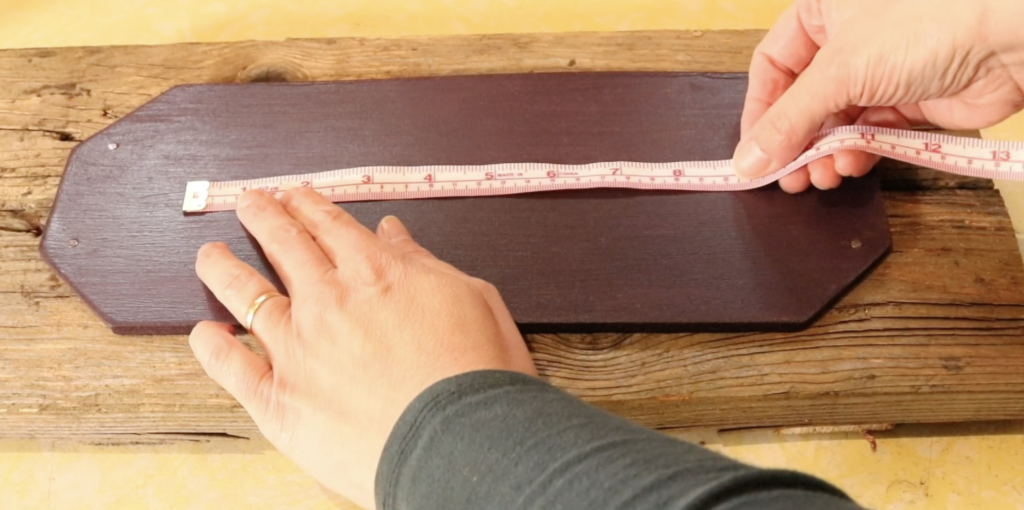
The rest was up to me! I measured the plaque in order to get accurate measurements for my vinyl lettering.

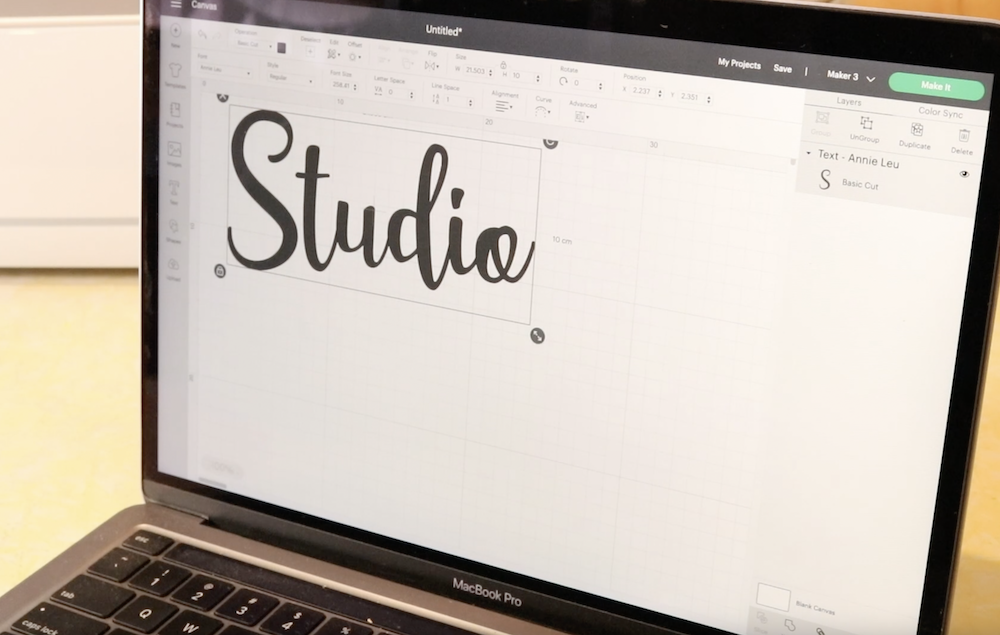
I went into the Cricut Design Space to get my text organised. This is really simple to do using the Design Space app. I simply typed in the text (“Studio”), chose the font, then adjusted the measurements to suit my plaque.😊

My laptop is paired with the Cricut Maker 3 using Bluetooth, which works really well with no need for cables.

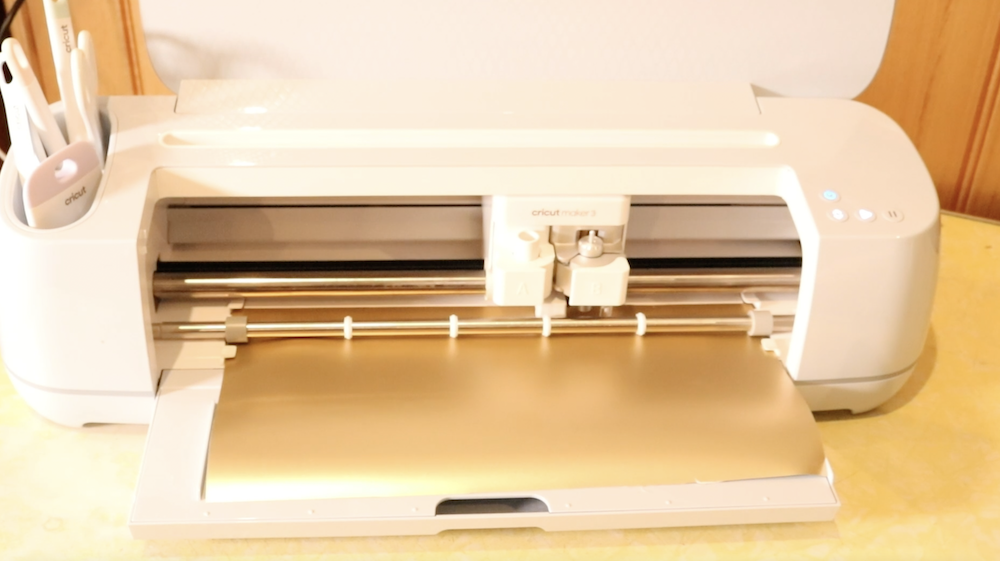
Following the prompts from the Design Space app, I lay in the material I’m wanting to cut, in this case Smart vinyl in Champagne. The Smart materials from Cricut don’t require a cutting mat, it simply feeds into the machine, cuts out the design, then feeds out again.

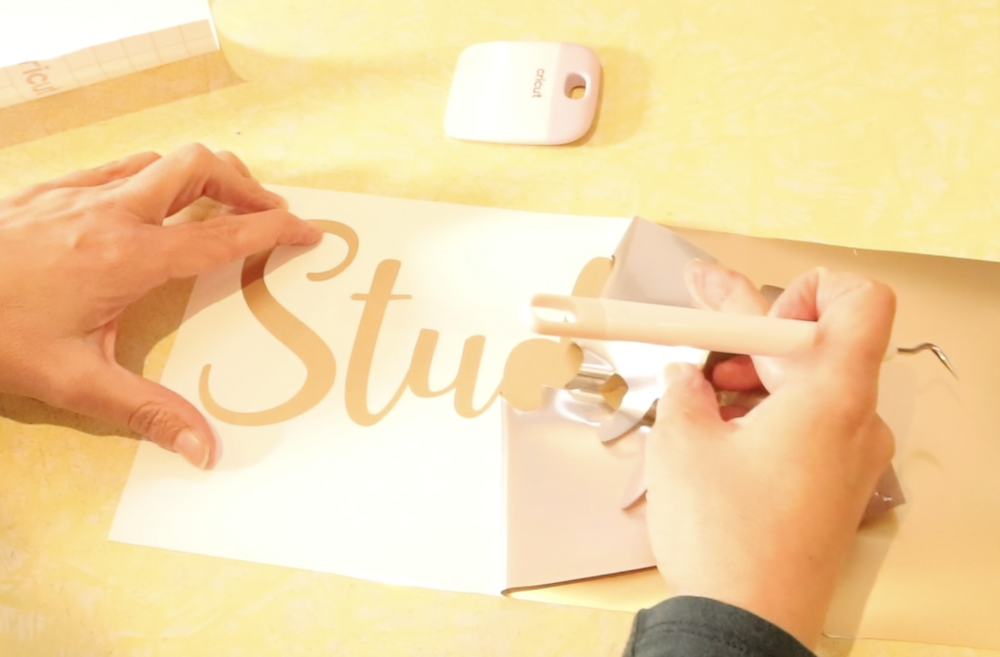
The next step is to peel away the excess vinyl from the design using the handy weeding tool (the hook) to pull up any vinyl still stuck to the backing.

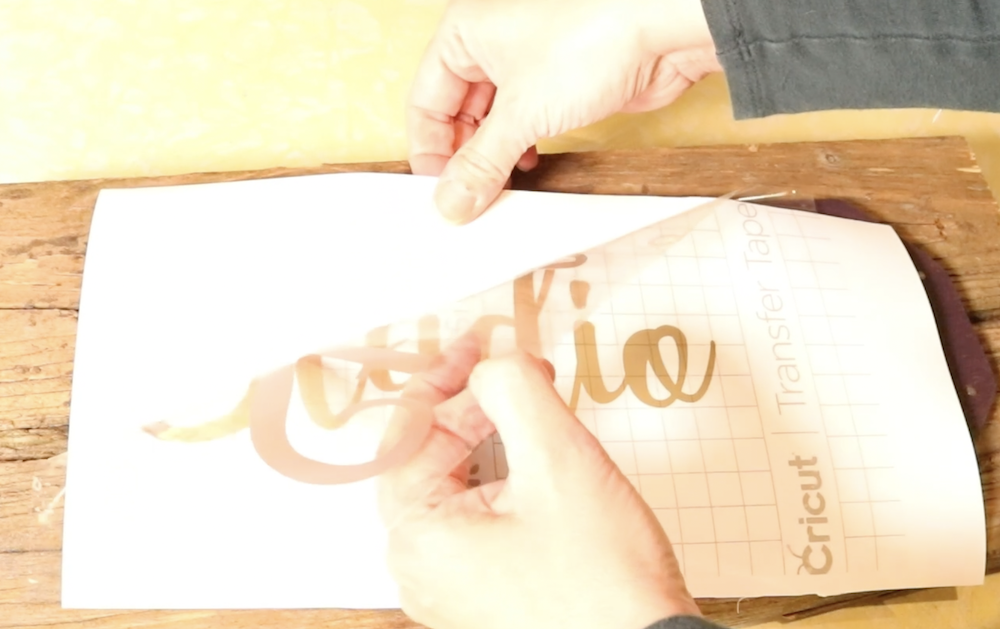
The Transfer Tape is placed over the top of the design. This allows you to peel up your design and place it precisely where you want it to go.

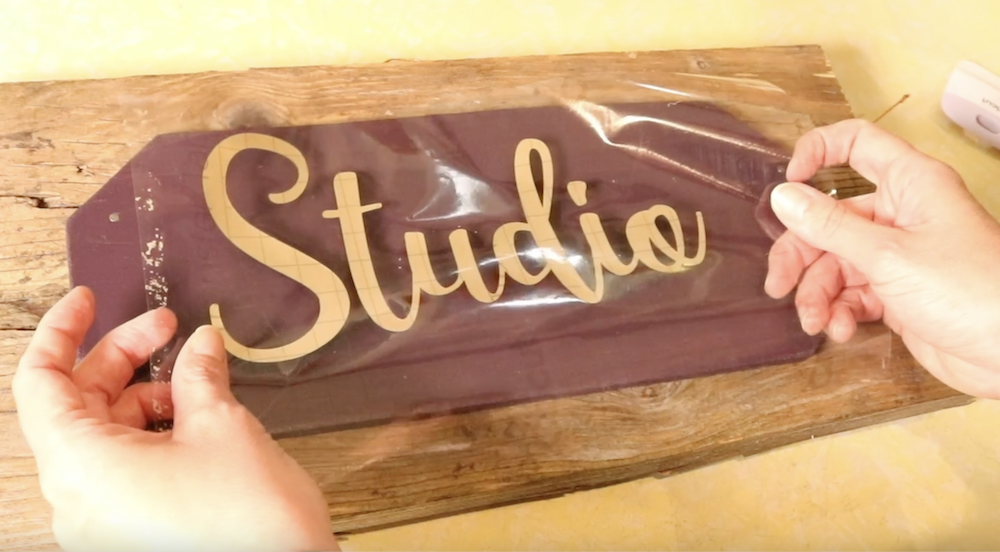
I positioned the design onto the plaque, smoothed it down and removed the transfer tape. All that was left to do was to hang my beautiful new sign outside my studio. I love the way it looks, and it makes my studio feel really official.

I had so much fun making this sign that I couldn’t stop at just one! In Design Space there are so many great images to choose from, so I wanted to take advantage of some of those.

I got my girls involved so that we could work together to make some signs relevant to their own hobbies and spaces.

For my 14 year old horse lover, it was a no brainer to make a sign for her tack room.

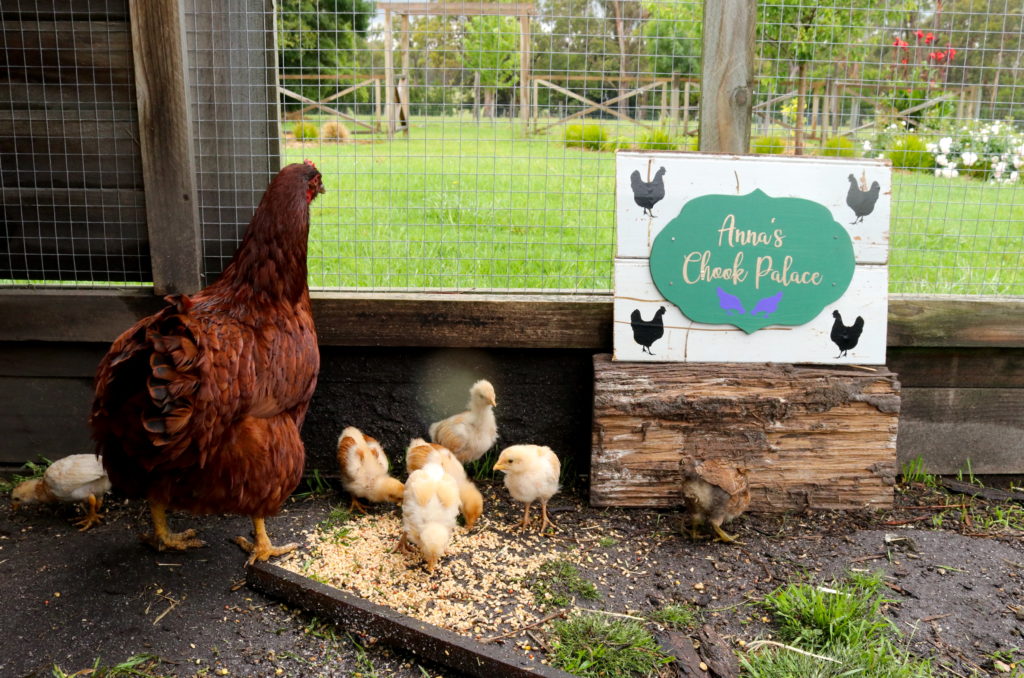
My youngest daughter is chicken crazy and the caretaker of our chicken coops.

These signs were all no cost projects for us, thanks to Cricut Australia and New Zealand, and thanks to repurposed materials.

What I’m really looking forward to now is checking out the Cricut rotary cutter tool with some of my handwoven fabric. Stay tuned for that!

If you would like to see the full free video tutorial for how I made the studio sign, click on the video below:

The Cricut Maker 3 can be found at Spotlight or Harvey Norman in Australia. In New Zealand, suppliers are Spotlight and Warehouse Stationary.

You can also find Cricut here-

Instagram: https://www.instagram.com/cricut_anz/

Facebook: https://www.facebook.com/cricutanz/

YouTube: https://www.youtube.com/channel/UCffy4UQ9lfgQPDlyEUCgWPA

Until next time…

Happy Weaving!
Filed Under: Free tutorial, Inspiration, Tutorials, Weaving, Woodworking Tagged With: studio sign, tutorial, woodworking

The Heart Scarf Free Project

by Kelly 12 Comments

The Heart Scarf is my free project for the year of 2021. Let me give you a little bit of background as to why I’m doing this and how I came about designing this project.

Last year, when the pandemic hit, I released the Wash Your Hands Towels project, which was a hugely popular project. I know that all of you appreciated so much, having something concrete, beautiful and creative to be able to fix your minds on in a time where there was such uncertainty.

I loved doing that project so much for you that I wanted to do something similar this year. And something that has really been on my heart and in my mind for most of this year in particular, is that I know there are so many people out there that as a result of everything that’s been happening in the world are chronically lonely.

*This post contains affiliate links. For further information, please see my disclosure policy.

So I wanted to create a project whereby you as the weaver would be weaving this beautiful scarf called The Heart Scarf. And you’d be weaving it with someone in particular in mind, someone who may be struggling with loneliness, perhaps they’re not able to get out and see their family and friends like they normally would.

Or you might know someone who’s struggling, feeling down, perhaps they live alone, or they have some other difficulties that cause them to feel that loneliness, really, that’s one of the most heartbreaking things for me to think of is that there are people out there who are just desperately lonely.

If we, as the makers of beautiful things, can do anything to make someone’s day a little bit brighter, then that’s definitely something that I want to be a part of. And I know that many of you would want to as well.

I’ve written a short poem from my heart. This poem is available to print out in either cursive or print, along with the free pattern. Once you’ve finished your scarf, you can package it up with the poem if you so choose, or perhaps with something that you want to write yourself and send it off to the recipient.

Perhaps you’re feeling really lonely yourself, perhaps it’s been an awful year for you, perhaps you’re having a hard time for other reasons. If that’s the case, I would love for you to weave this scarf for yourself and you can consider the words of the poem from me to you.

Let’s get down to the nitty gritty and go over the project details, starting with what you need to complete this project:

A rigid heddle loom.

Now, the width of my scarf on the loom is 11″ and I used my 24″ rigid heddle loom. BUT, if you have a smaller loom, you can absolutely weave this scarf. If you have a 10″ Sampleit or a Cricket, just warp the full width of the loom for a slightly narrower, but equally lovely scarf.

A 7.5 dent heddle/reed.

Again, this doesn’t have to be sett in stone. (Get it? Sett in stone?) If you don’t have a 7.5 dent heddle, you can use your 8 dent. If you want to change the heddle size completely, yes, you can – but you would also need to change to a more appropriate yarn size, so just bear that in mind.

Pick up stick

We use a single pick up stick to create the beautiful, textural scarf pattern. The pattern is simple to pick up with your stick and also simple to weave with a 4 step repeating weaving sequence.

Stick shuttle

You only need one stick shuttle for this project, as we use the same weft yarn and colour throughout the project. As long as it’s wider than the width of the piece on the loom (11″), you’re good to go.

Tapestry needle

This is an essential for hemstitching. My favourite tapestry needle of all time is the Clover Gold Bent Tip Needle. I’ve talked about these needles before, but I love them for several reasons:

  • They slide through hand woven fabric beautifully
  • The bent tip makes it really easy to dive down and come up through the fabric without having to perform hand contortions!
  • They are affordable
  • They are gold! Who wouldn’t love that?! (And if you’re prone to, ahem… losing things, the gleam of the gold is quite helpful!)

Fringe Twister

Whether you twist your fringe or not is optional, but it is a beautiful way to finish your scarf. I talk about some other options for fringes in the finishing video if you want to choose a different way. There are many brands of fringe twisters available, I have had a LeCLerc Fringe Twister for many years and have been very happy with it.

Reed and threading hook

Most rigid heddle looms will come with one or both of these, but I would like to recommend the Ashford Doubled Ended Hook for it’s durability, ease of use and affordability. I have a whole bunch of these little hooks around my studio and my old metal threading hook that used to split all my threads doesn’t get a look in anymore.

Yarn

To see all the yarn details, please download the pattern. For the warp, I used Lion Brand Mandala yarn in Gnome, dk weight. This yarn is an acrylic, but I have some other suggestions in the pattern if you prefer to look at other options. My weft yarn was a super wash wool in dark grey in a fingering weight.

Weaving level

I designed this project to be achievable for beginners but interesting enough for more experienced weavers. If you are an absolute beginner, I recommend that you take my Woe to GO! Beginner’s class before attempting a project like this.

How to get the pattern

The file underneath has a “download” button at the bottom. Click on that to download, then choose either to print the file or view it on your screen. The pattern PDF includes all the details you need for the project, including yarn amounts, materials, pick and weaving sequences plus the poem in either cursive or print – your choice!

The-Heart-Scarf-Free-Pattern-1Download

You can view the first of 6 videos on Youtube –

The full video lessons and printable pattern are also available all in one spot at the Online Weaving School if you would prefer to watch there.

I hope you love this project and bring joy to someone’s life (or to your own!) by taking part.

Until next time…

Happy Weaving!
Filed Under: Free Pattern, Free tutorial, Online Weaving School, Rigid heddle weaving, Weaving Tagged With: free project, freeweavingproject, rigid heddle weaving patterns, rigid heddle weaving tutorial, the heart scarf

Targeted wedging for better tension

by Kelly 17 Comments

In an ideal world we would have perfect tension every time we warp our looms, but that is just not realistic!

There are many challenges to achieving great warp tension, but the good news is that practice helps a lot and this is something you will improve on over time.

But, even for the seasoned weaver, there can be the occasional curve ball just to keep us humble 😆 For me, that was a recent double width project on my rigid heddle loom.

*This post contains affiliate links. For further information, see my disclosure policy.

I warped independently, which is do-able but not 100% ideal when you’re using thicker threads and those threads are doubled. When I started weaving, I found that my tension was firmer in the middle than on either side.

This began interfering with the “cleanness” of my sheds, meaning that not all my warp threads were settling into position well when I changes sheds. And for double width weaving, that can be a huge headache!

I’ve covered wedging before, as you can see in this video:

But I also wanted to get a bit more specific about wedging problem areas in your warp. This is very quick and easy to do and can make a big difference to your tension.

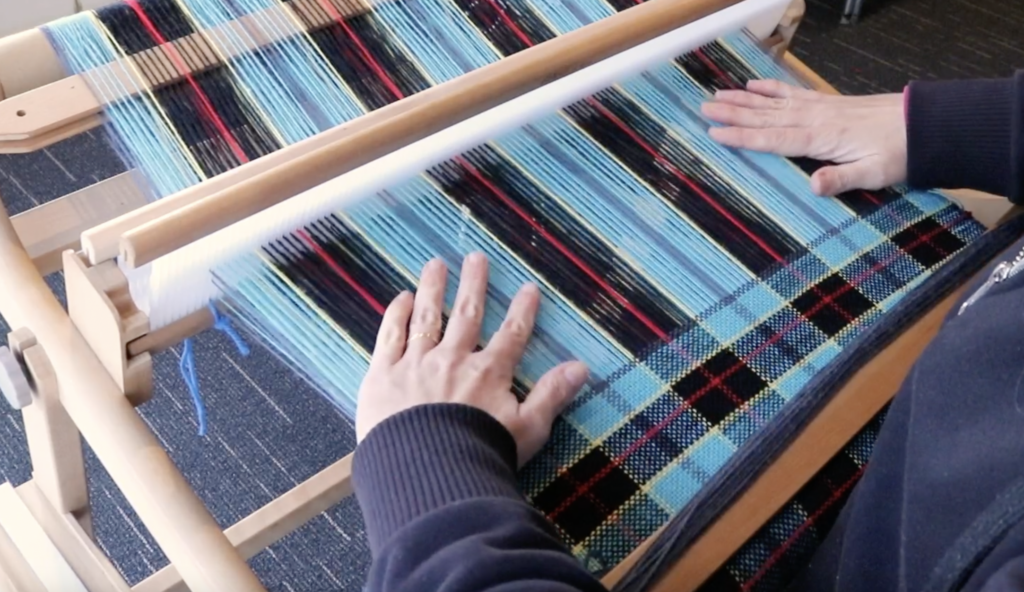
I start out by identifying the areas that need help. For me, that was either side of the middle section, towards the edges. If I wedges all the way across the warp at this point, that would also increase the tension in the mid section, where it is not needed.

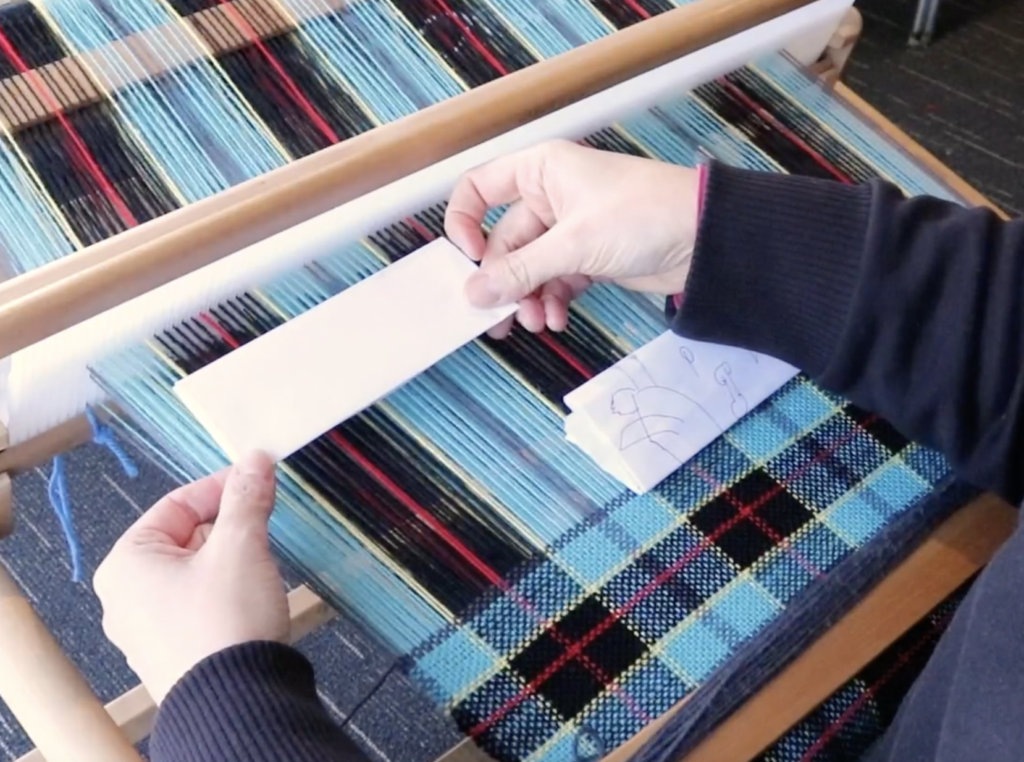
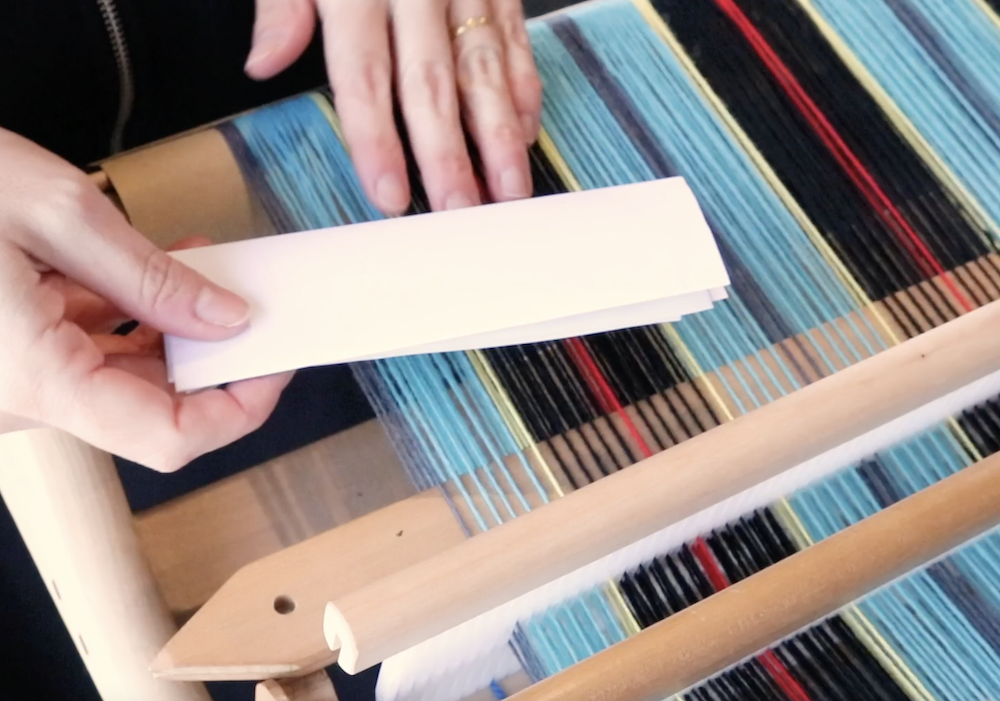
There are several materials you can use for wedging (like cardboard separators, cut to size) but I chose to use everyday A4 printing paper. I folded the paper to the approximate width of the loose warp section so that the paper had been folded about 4 times. This provided me with a bit of thickness, but not too much.

It may be easiest for you to pop around the back of your loom with the paper to get close to the warp.

Take the paper underneath the entire warp (both heddles are in neutral at this point) and start to wiggle and jam it into place.

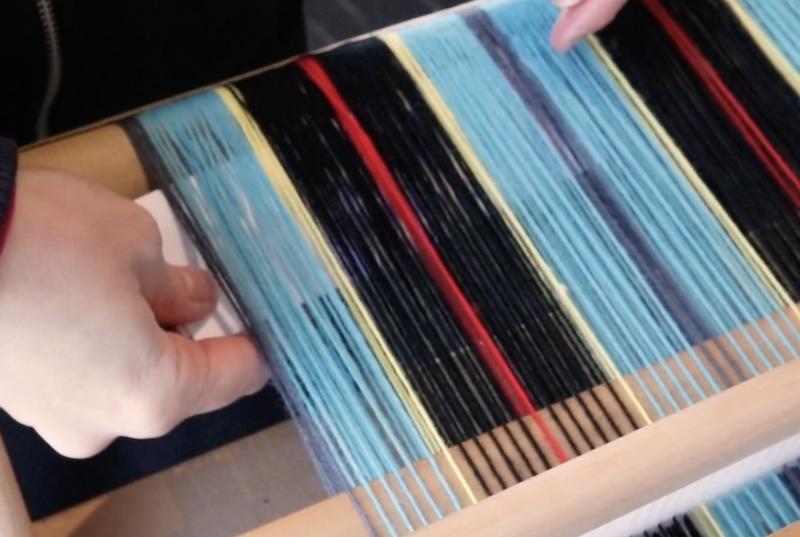
Push the paper in towards the back of the loom. You will feel resistance from the threads and this is good, because you are tightening everything up. There is no set amount for how far back the wedge should be pushed, just until you can feel that the threads have increased in tension in that section.

As you weave and advance your warp, your wedges will move out of place and you will need to reposition them at each advance. This is actually a good thing, because it ensures that your looser threads are constantly being re-tensioned!

If you would like to see the way I place the wedges, please check out this video:

I hope this short tutorial was useful to you! Have you used targeted wedging before? Has it made all the difference to your project? Let me know in the comments, I would love to hear from you!

Do you love the look of the project I’m working on in this tutorial? This is from my Plaid Double Width Blanket Ebooklet, which is available now.

Until next time…

Happy Weaving!
Filed Under: Free tutorial, Rigid heddle weaving, Tutorials, Weaving Tagged With: free tutorial, improve tension, rigid heddle weaving, targeted wedging, wedging

Surface embroidery on weft floats

by Kelly 12 Comments

Embroidery was one of my first crafty loves and I still have a very soft spot for this beautiful art.

When my children were young I was very immersed in the world of embroidery. I loved it for several reasons:

  1. It costs next to nothing to get started, and at that time of life we had no extra money!
  2. It is incredibly portable and you don’t need a specific space to set up.
  3. I could easily pick it up and put it down, very important when you have little kids around.
  4. There are many styles of embroidery to explore.
  5. With a bit of practice, you can improve very quickly (like some other fibre arts I may have mentioned previously, wink wink 😉)

Besides the fact that that weaving kind of took over my life, I’ve also not spent much time doing embroidery in recent years due to the deterioration of my eyesight. I definitely took that for granted when I was younger and even though I now have reading glasses to wear, the clarity is not the same.

Like many of the arts and crafts I’ve enjoyed over my life, I’ve found that embroidery can be married beautifully with weaving, and in many different ways.

One example is my bread towel project from a couple of years ago. I wove the towels and then embroidered some “bread themed” text on them.

But if you feel that you can’t embroider a straight line to save yourself, that doesn’t mean you have to strike embroidery off your list completely.

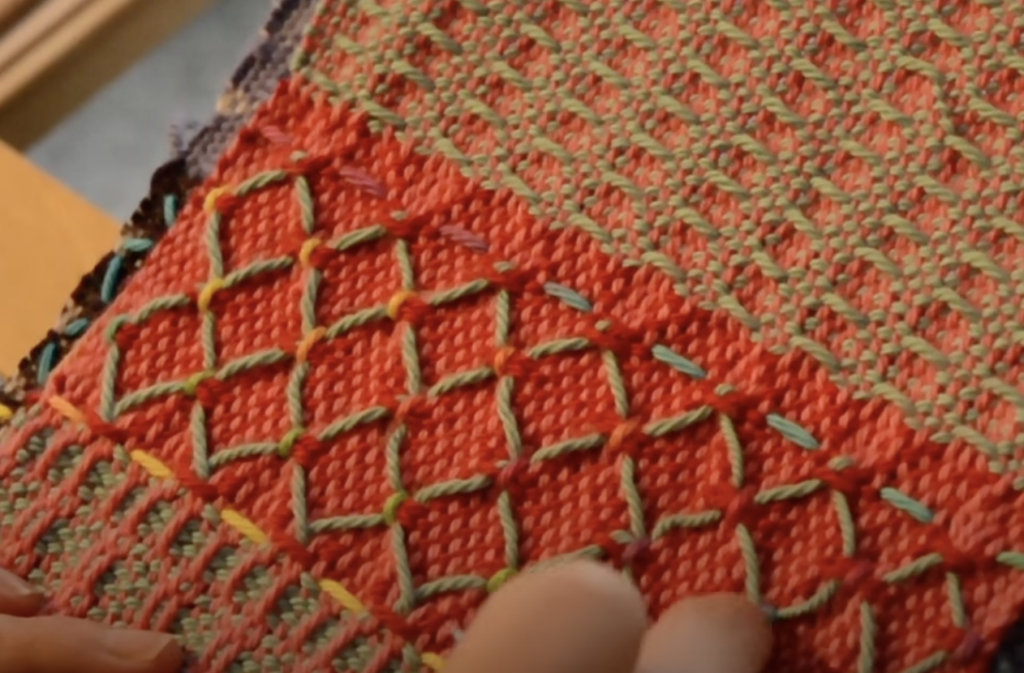
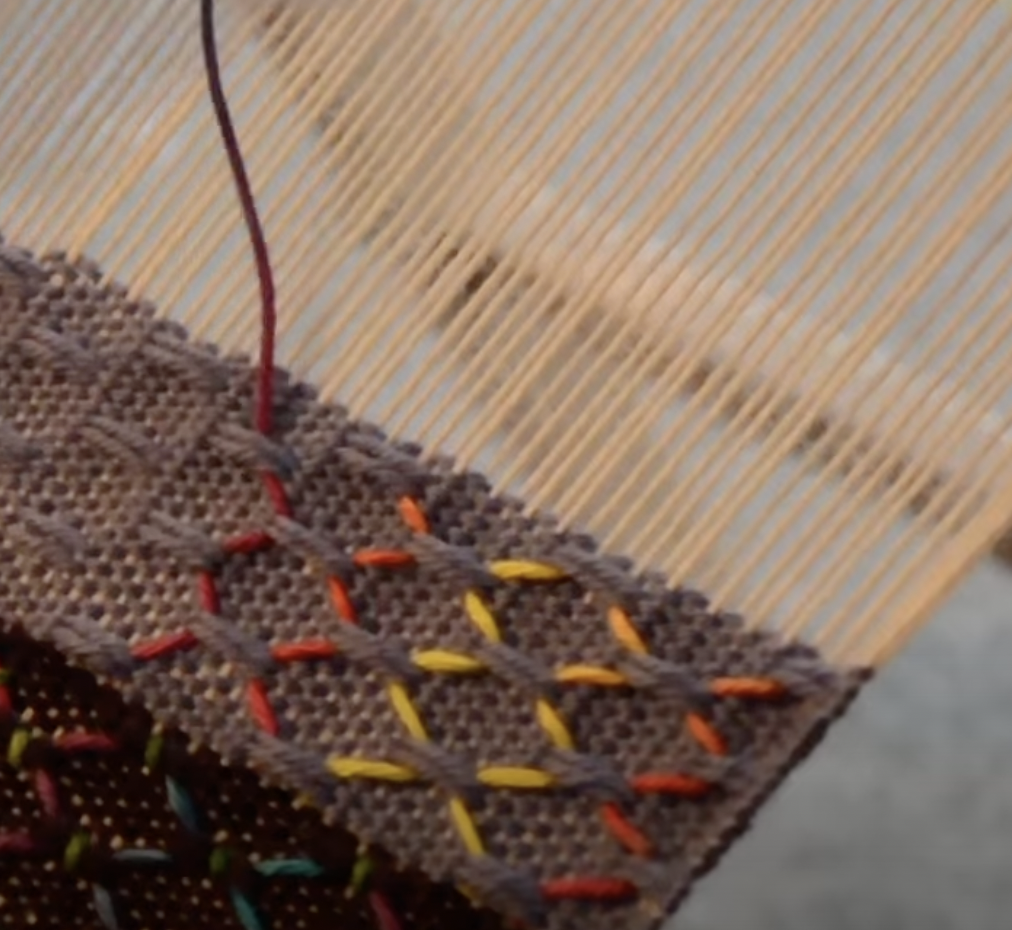
One time I was experimenting with some weft floats on my rigid heddle loom and thought to myself “these look nice, but if feels like something is missing” 🤔 I felt that I needed to introduce some more colour, and I just happened to have some lovely hand dyed rainbow yarn handy. A little while later, I had some gorgeous diamond shapes happening!

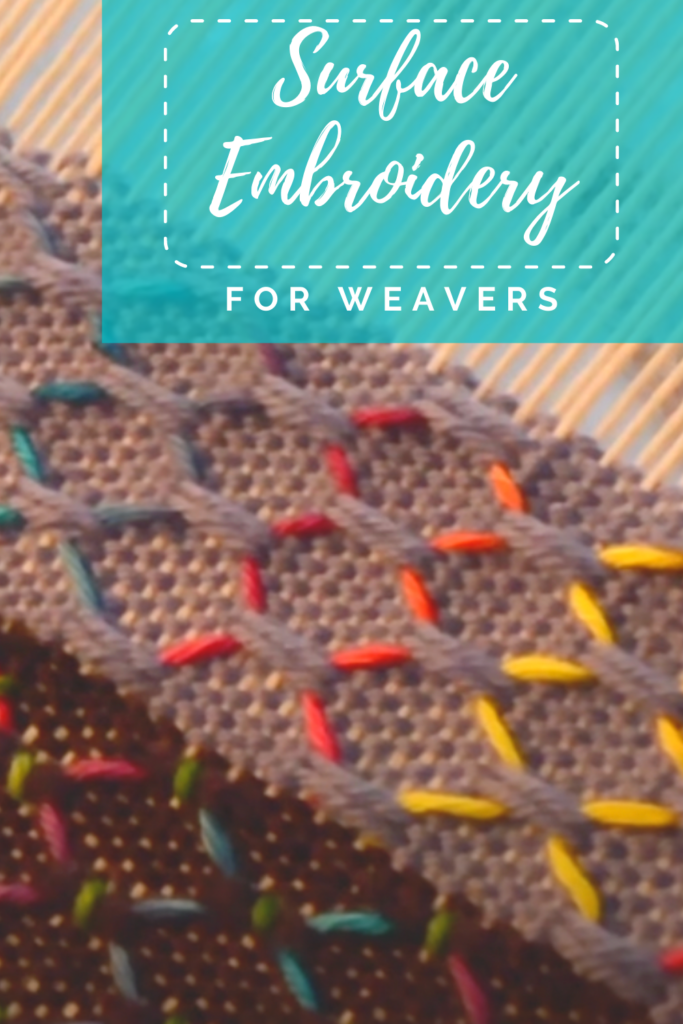
Surface Embroidery example

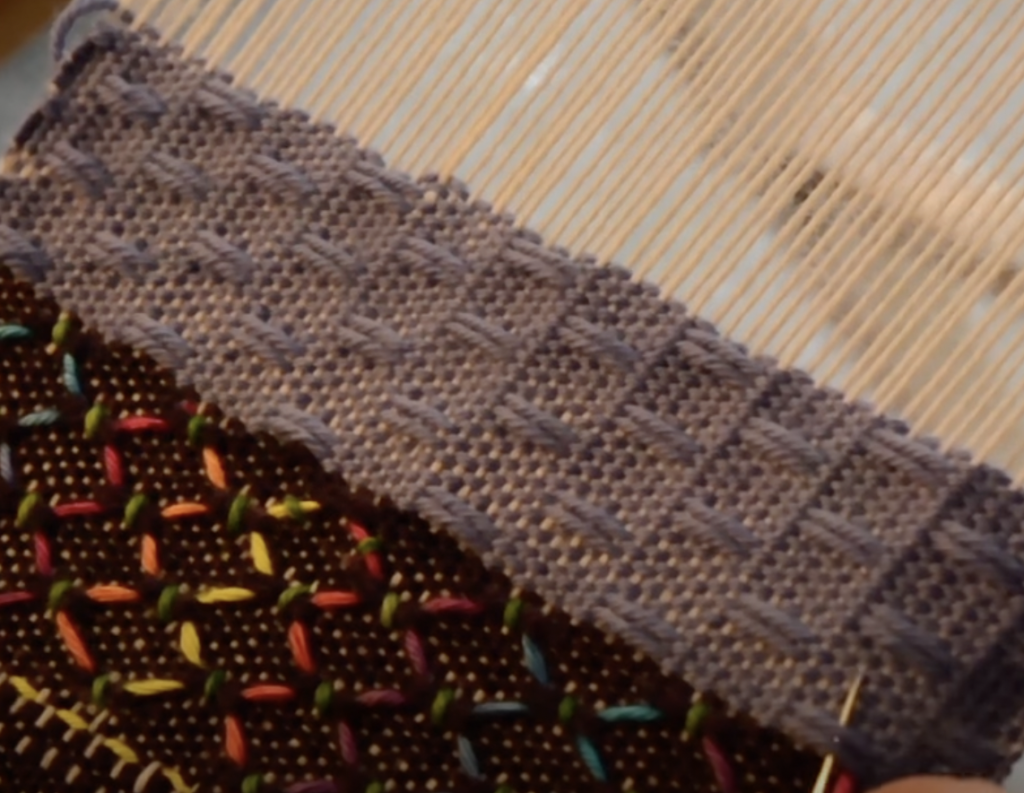
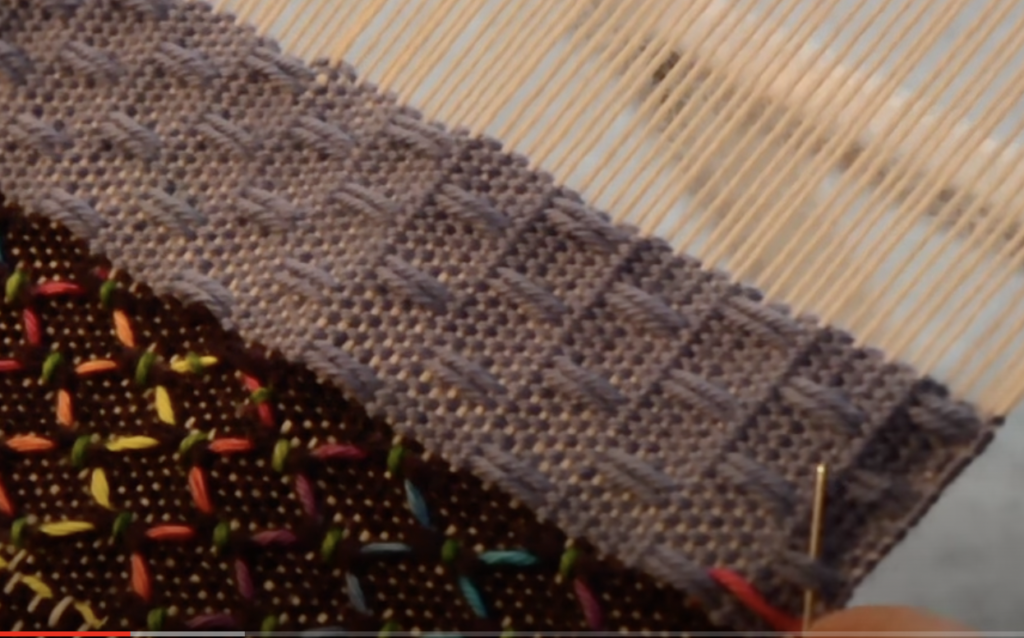
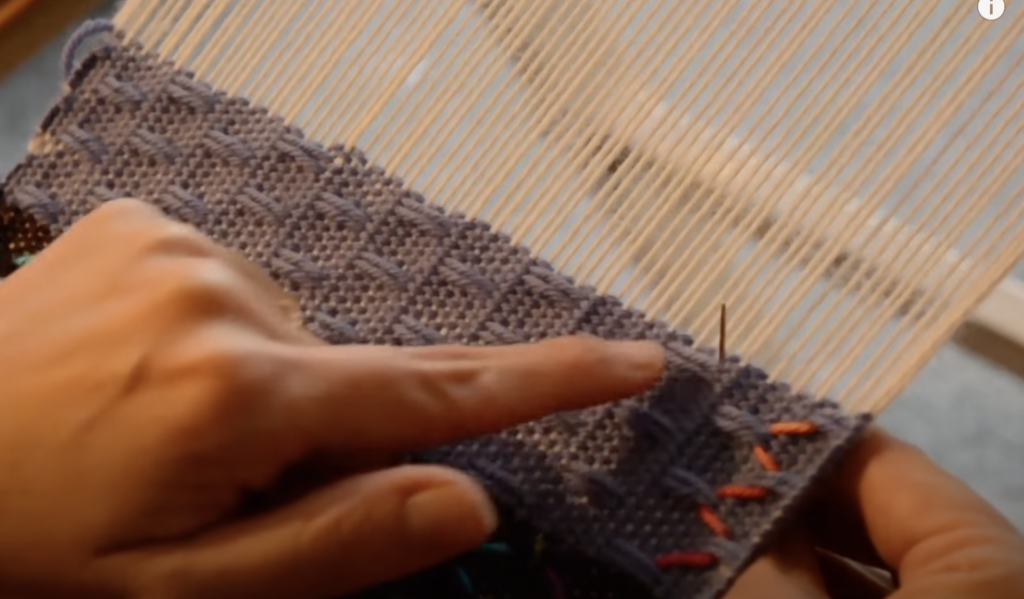
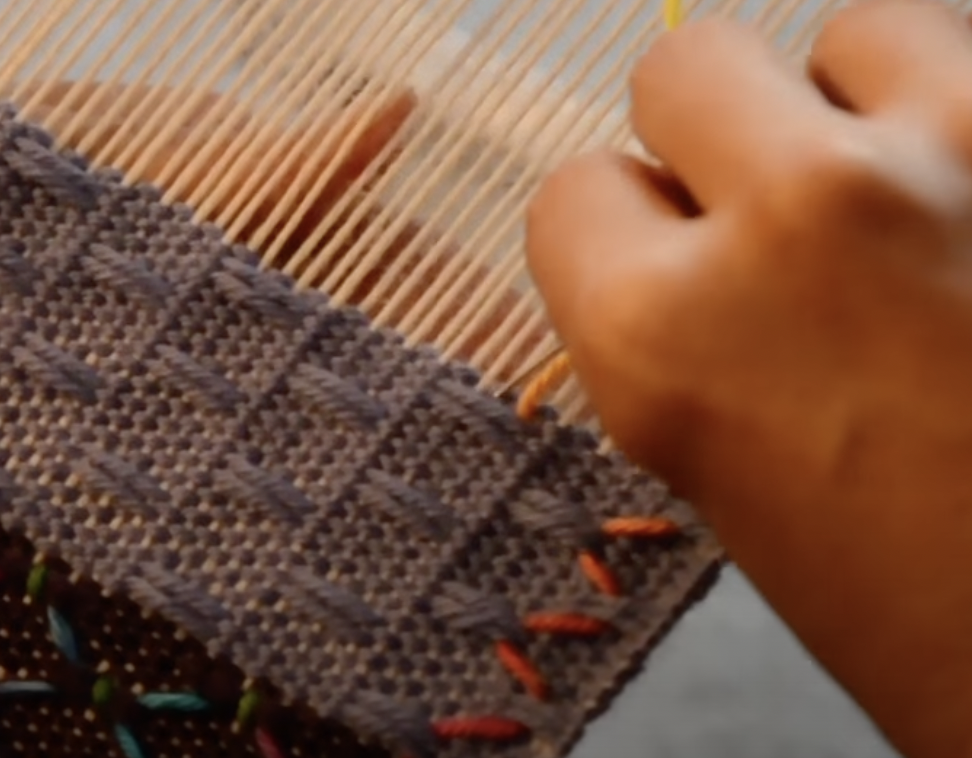
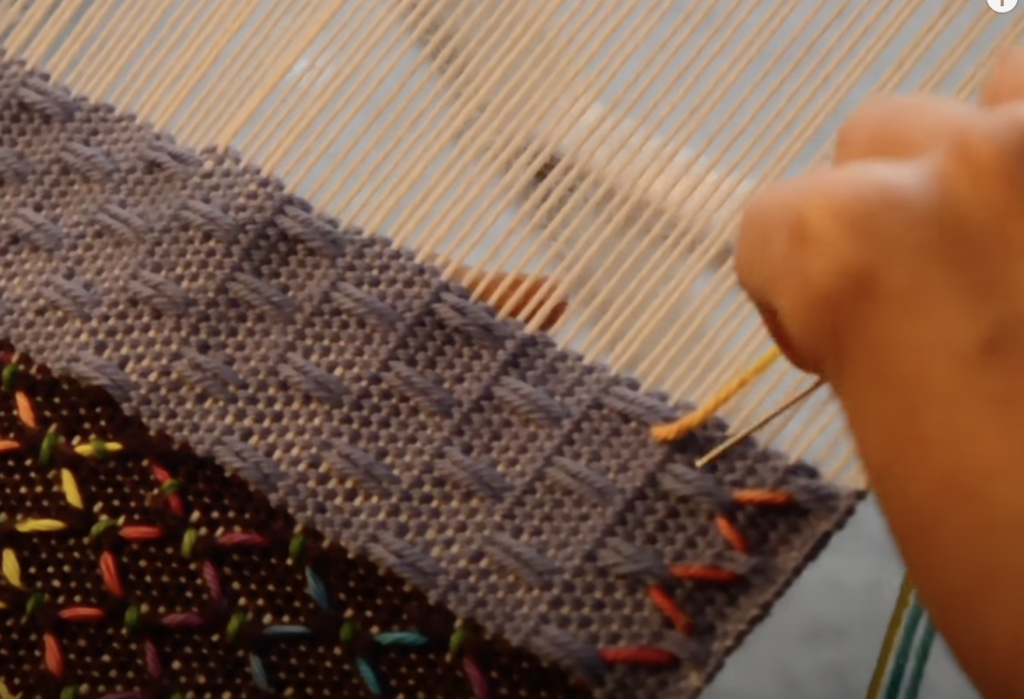
This technique is a surface embroidery, meaning that unlike the usual needle in and out from front through to back of the fabric, the embroidery yarn sits on top of the fabric and is incorporated by “tie downs” or anchors.

Today, I would love to show you how you can achieve this patterning with just a tapestry needle and some contrasting yarn.

Firstly, you will need to work some weft floats. These form the basis for your embroidery thread and gives it a path to travel. The weft float sequencing that I’m using for this tutorial is detailed in this video:

Start by threading your tapestry needle with a good, long length of your embroidery thread. You don’t need to specifically use embroidery floss (though that certainly looks lovely!) I used some light worsted/dk weight wool that was hand dyed and my warp was the same weight of wool, commercially dyed. I think ribbon would look lovely too.

Knot the end of your yarn so it doesn’t pull through. Starting on the first horizontal row of weft floats,(the second row of floats from a vertical perspective) bring your needle through from the back, at the bottom right hand corner of the pair of floats.

Now, take the needle underneath the float pair but not into the fabric itself. Pull the yarn through.

Now take the needle to the pair of floats on the right, they are in a diagonal position from where we just were. Take the needle underneath this pair and pull through.

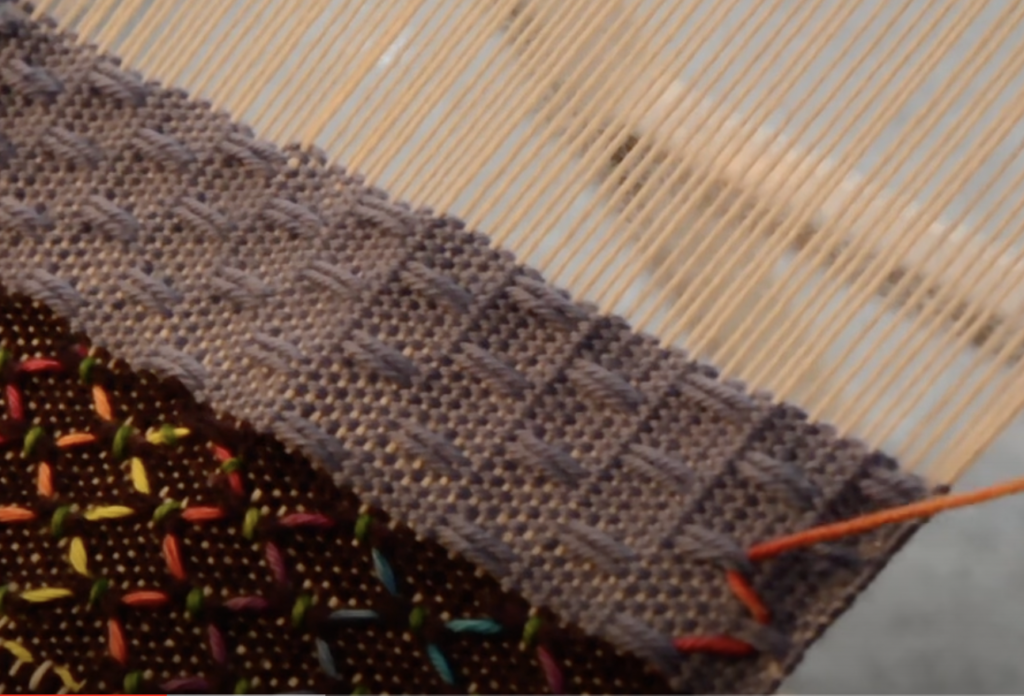
Now take the needle to the pair on the left diagonal, go underneath the floats and pull through. Starting to see a simple pattern here? We’re basically zig zagging the embroidery yarn back and forth between the weft floats. Pretty simple, huh? 😉

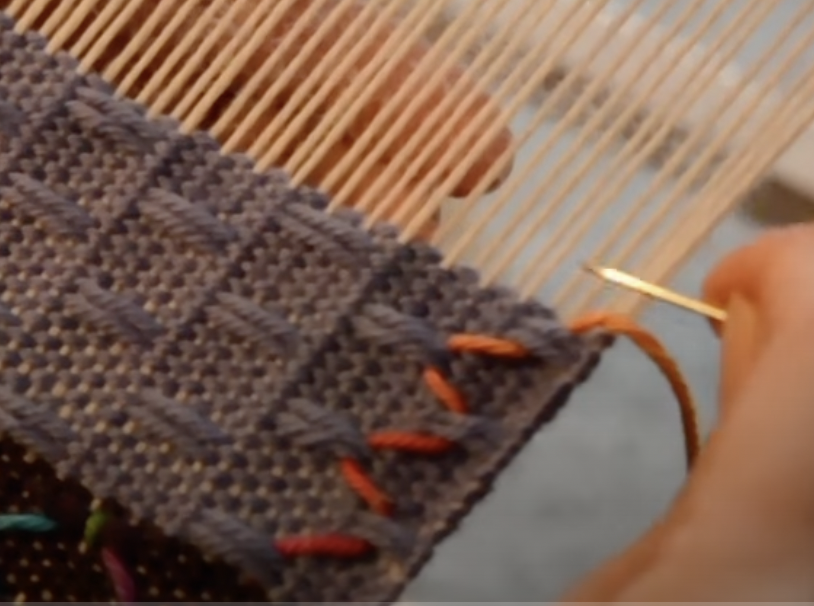
When you get to the top of the row and have no more weft floats to go to diagonally, take the needle down through the fabric to the back. Do this just underneath the top of the last floats you went through, so that it’s not visible. This is to help anchor and secure the row of stitching you’ve just completed.

At the top of the next vertical row of weft floats, bring your needle up through the fabric from the back. The needle should be positioned to the top right of the pair of floats, as shown in the photo above.

Instead of travelling upwards through the weft floats, the time we’re travelling down the vertical row. Take the needle underneath the top floats and pull through.

You may start to guess what comes next. Take the needle underneath the weft floats to the right, on the diagonal. Pull the yarn through. Continue in this fashion, zigzagging downwards until you reach the bottom. Remember to take the needle down through the fabric each time your finish a row, in order to anchor the thread and prepare for the next row.

Once you’ve practiced a couple of rows, you can speed up the process by taking the needle under 2 pairs at the same time. This makes it go much faster and is a natural progression from embroidering under one pair.

There are further variations on this theme that are possible. Experiment and see what you can come up with!

Would you like a free video tutorial so that you can see this surface embroidery in action? I already have that covered, check out my video on Youtube:

Don’t forget to like and subscribe, thank you!

I hope you enjoyed this tutorial. Let me know if you love this technique and intend to give it a try by leaving a comment below, I love to hear from you.

Other resources you may be interested in:

Troubleshooting loose slot threads

All about finger controlled techniques

Weave neat edges on the rigid heddle loom

How to weave clasped weft

Until next time…

Happy Weaving!
Filed Under: Free tutorial, Rigid heddle weaving, Rigid Heddle Weaving Patterns, Tutorials, Weaving Tagged With: embroidery for weavers, free tutorial, surface embroidery

Photography for Weavers

by Kelly 8 Comments

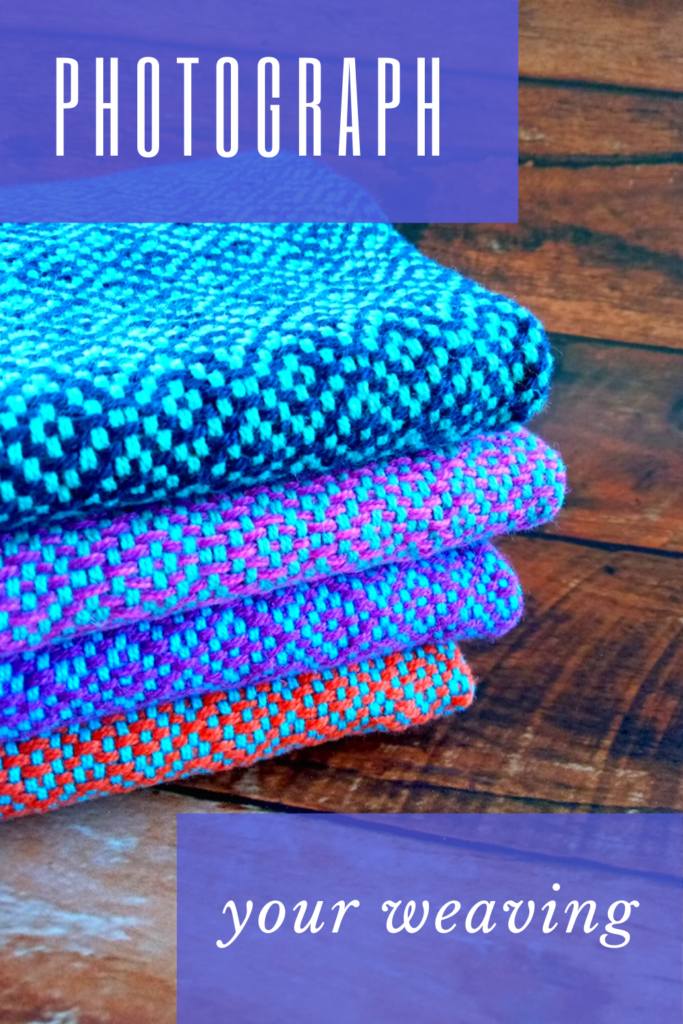
You spend countless hours warping, weaving and finishing your unique hand woven pieces. It only seems right that you honour that process with some photos that show how beautiful your finished products really are.

Whether you want to take photos to share on social media, with friends and family or whether you sell your weaving online and want to present your pieces in their best possible light, it is well worth taking a bit of time to learn a few basic photographic principles that will help you level up with your photos.

*This post contains affiliate links. For further information, please see my disclosure policy.

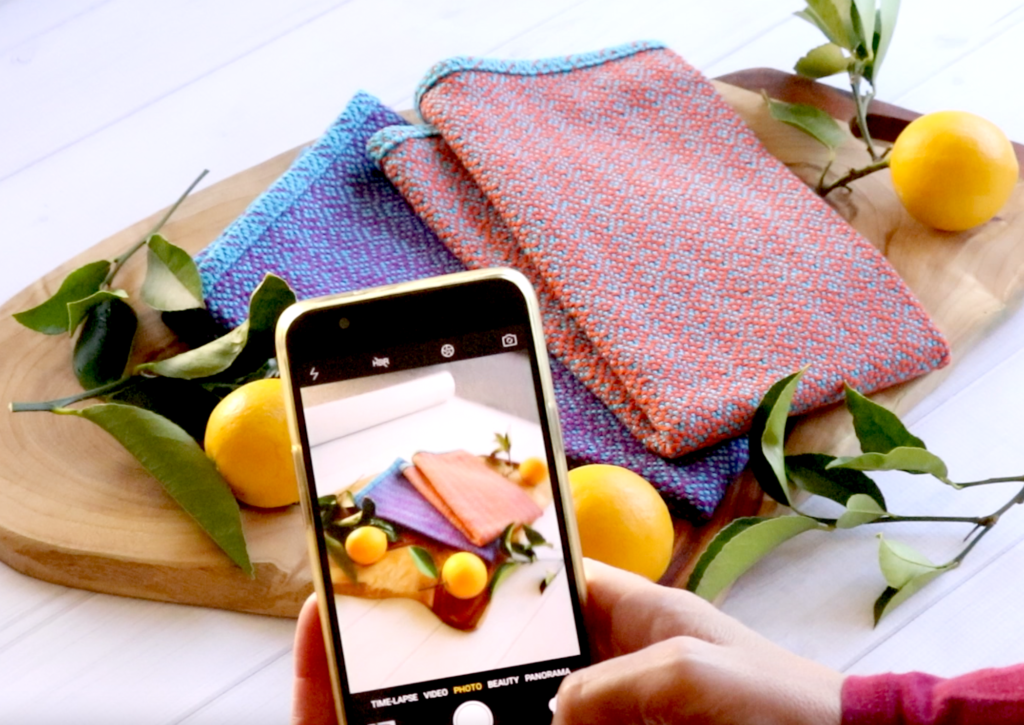
The good news is that, these days you don’t need a super duper fancy camera to take good photos. I do use my DSLR camera when I want to take photographs for classes and my patterns, however for everyday use and social media, I always use my phone.

Phone cameras are now way more advanced than they used to be and can make your “photo to platform” experience really quick and seamless. Considering most of us possess a fairly modern phone, (though at nearly 5 years old, I’m not sure my phone could be considered modern any more!) it makes sense to be familiar with your phone camera and make the most of it.

I’ll start with what I consider 3 essentials to taking a good photograph:

Light

Clarity

Composition

We’ll begin with light. If you’re taking photos indoors, try to choose a sunny rather than dark or overcast day. Set up close to a window at a time of day where the sun is not shining directly onto the area you want to photograph. This will avoid too much shadow and the possibility of patches of light and dark.

I often use my studio lights for filming classes but rarely for photography. This is because natural light will always trump artificial, and give lovely tones to your photo without harshness of light and shadow.

Next is clarity. This is so important! No one wants to look at a blurry photo. Hold your phone or camera still or, if this is a challenge for you, use a tripod to unsure stillness. Also, if you have enough light, this greatly decreases the chances of your photo lacking sharpness.

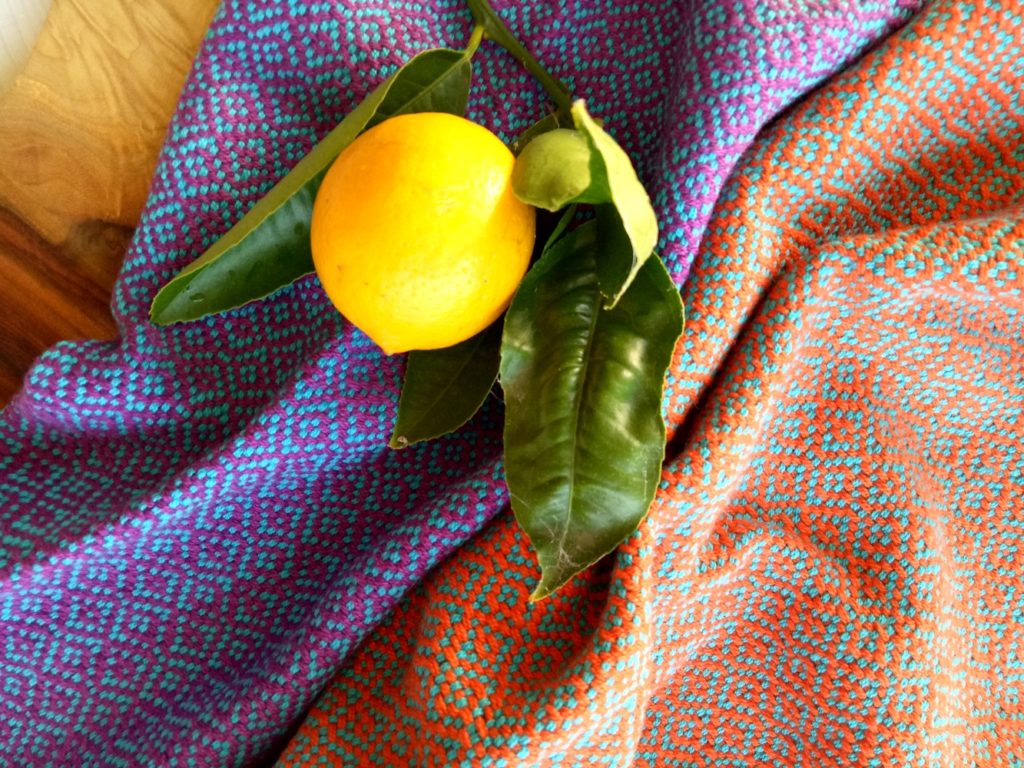
Composition is something you can practice to improve on if it doesn’t come naturally. It’s basically about arranging and framing your “scene” so that it is visually pleasing and balanced. Try out lots of arrangements. Introduce some props to add interest and relevance to your photos eg. lemons with kitchen towels. Try folding, draping, scrunching your hand wovens. Have fun and don’t worry if some of your photos don’t look so great, that’s the point of experimenting – to find out what you like.

A word about editing.

Editing is a great photography tool and an excellent way to finish off and give that final polish to your photos. But it should never be relied upon to “fix” a photo. The aim is to get the best photo that can, in camera, so that when it comes to editing time you hardly have any work to do.

Photography for sellers.

If you are selling your hand woven pieces, good photography is really crucial. Remember that your potential customer can’t see and touch the items the way you can. You want to be able to bring them as close to “knowing” the piece as possible. Provide as many photos as you can from different angles. Include close ups with detail as well as distance shots.

Ensure you have an appropriate backdrop. Carpet and tiles are not a good look. If you think about it, if you were buying some beautiful hand woven towels, would you find them as appealing if they were photographed on a bare floor? I use professional vinyl photography backdrops for many of my photos. These are expensive, but well worth the investment if you are taking a lot of product photographs. I bought mine from Oz Backdrops and Props in Australia, but these backdrops are very similar.

If you are interested in learning more about photographing your hand wovens using your phone, check out my 49 minute Photography for Weavers Workshop. In this workshop, I take you through exactly how I set up product photos for my Diamond Stripe Towels and show you other arrangement possibilities to inspire you. I also take you into the free weaving software Canva, and show you how it can be used for basic editing.

Did you enjoy this post? Let me know in the comments below, I would love to hear from you!

Until next time…

Happy Weaving!
Filed Under: Free tutorial, Inspiration, Online Weaving School, Photography, Tutorials, Weaving Tagged With: photography, photography for weavers

How to fix a weaving float

by Kelly 14 Comments

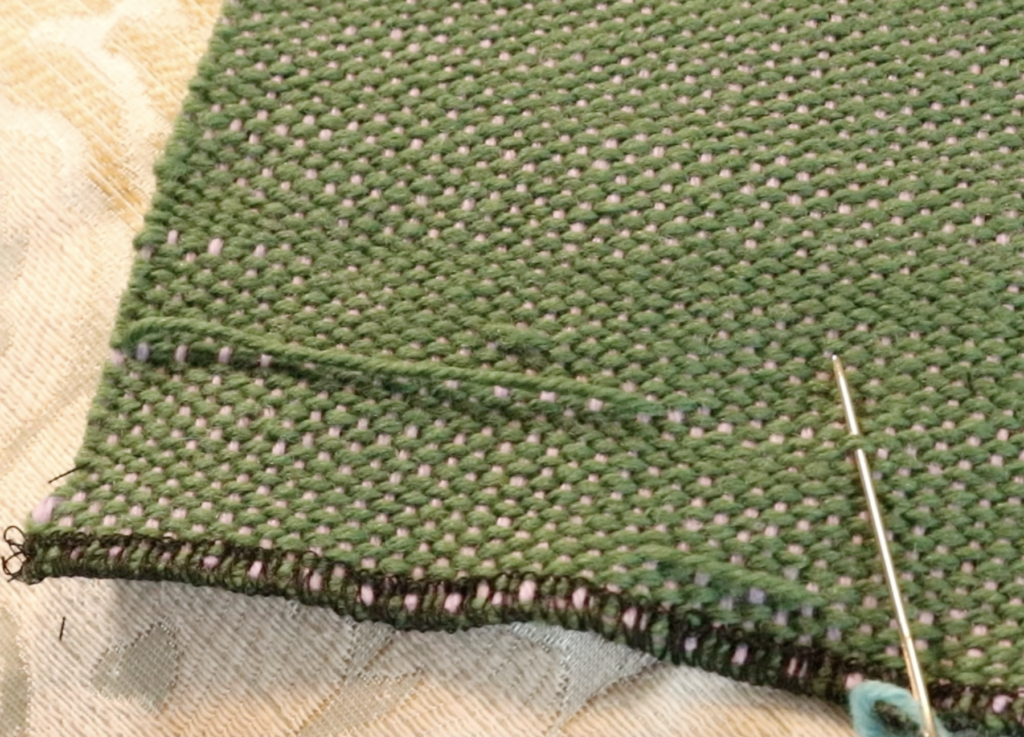
A “float” in weaving is a skipped thread or threads.

They usually occur at the back of the fabric and therefore are not noticed until you remove your piece from the loom.

While the discovery of a float can be disappointing for the weaver, thankfully they are fixable without too much trouble.

*This post contains affiliate links. For more information, please see my disclosure policy.

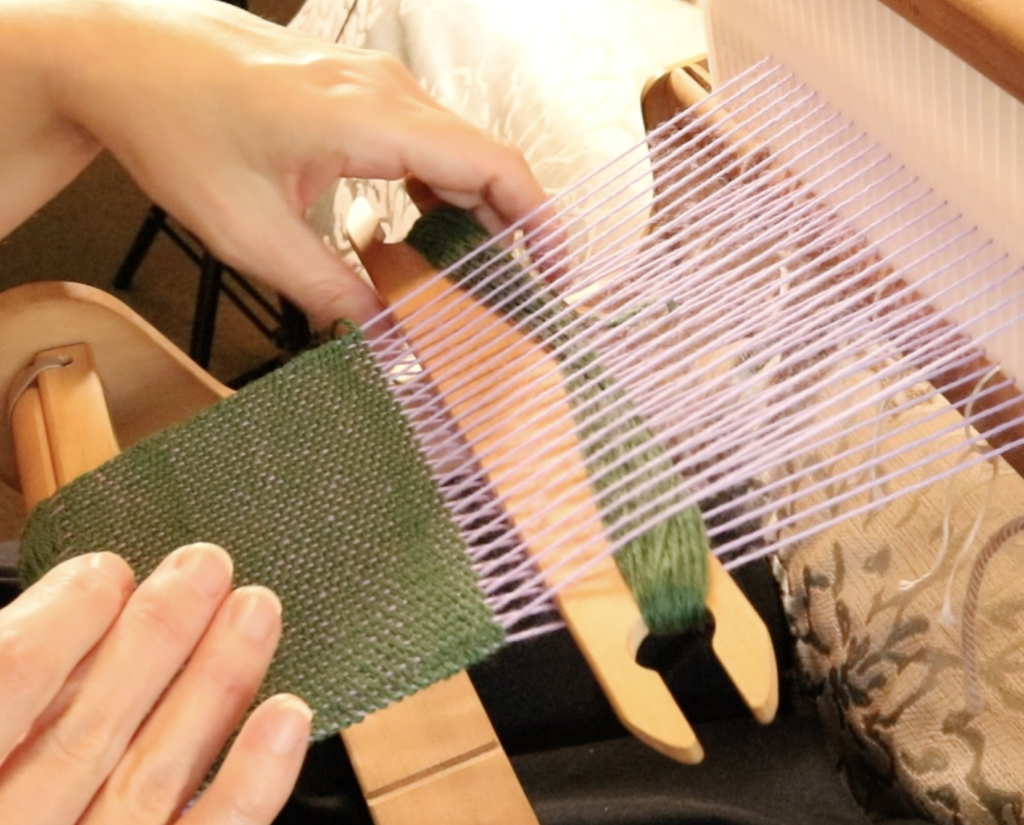
I’m using a plain weave sample, as it is the most straightforward to fix and so makes a suitable introduction to a weaver who hasn’t come across floats before. I’m weaving on my Sampleit Rigid Heddle Loom for the purposes of this tutorial, but floats can occur in any type of weaving.

We’re going to look at the three main culprits for a float happening in your weaving:

  • Loose or inconsistent warp tension
  • The angle of your shuttle as you enter the shed
  • Sticky threads

WARP TENSION

I know, I talk all the time about warp tension, but that is because it is SO important on so many levels to the success of your project. In relation to floats, a warp tension that is either too loose or has loose sections is a place for your shed to get messy. If your shed is not well tensioned and clean, that invites the potential for your shuttle to go over or under threads that it is not supposed to.

SHUTTLE ANGLE

This relates pretty closely to my first point about warp tension, because if your shuttle is at a weird angle when it enters the shed, it may either snag on a warp thread or just skip over it entirely, and then you have yourself a float. Again, we want to aim for a clean shed that leaves no guess work about the path your shuttle should be taking.

A messy shed can cause floats!

STICKY YARN

This is a bit of a pet topic for me it seems, but once again, it has a huge impact on the success of your weaving. Sticky yarn will cause all sorts of trouble and floats are definitely one of them. If you want to know more about which yarns have the potential to give you a rather large headache, check out these posts:

  • 3 YARNS BEGINNER WEAVERS SHOULD NEVER USE
  • CHOOSING AND USING YARNS IN WEAVING

Tip for dealing with sticky yarns:

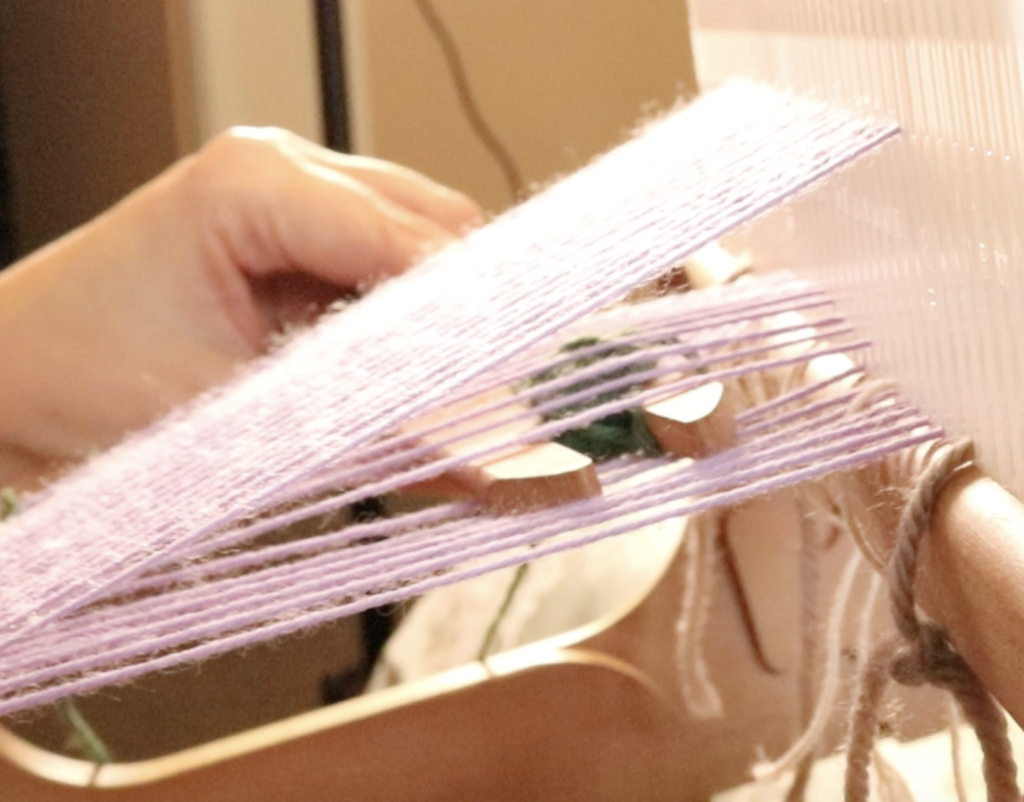
Use a spare pick up stick or shuttle to “clear” each new shed as you open it. This will force any threads that are sticking to one another back into their natural positions.

Now that we know the reasons why you might see floats occurring in your work, let’s get on to how to fix them!

*Note – Any float fixing should be done prior to wet finishing. If you have already wet finished but want to fix some floats, you can, the results just may not be quite as good.

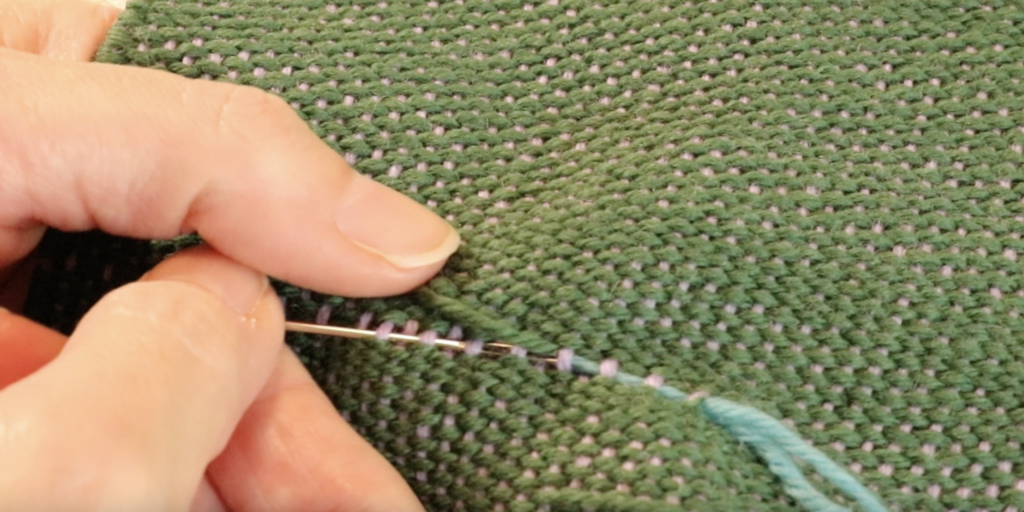
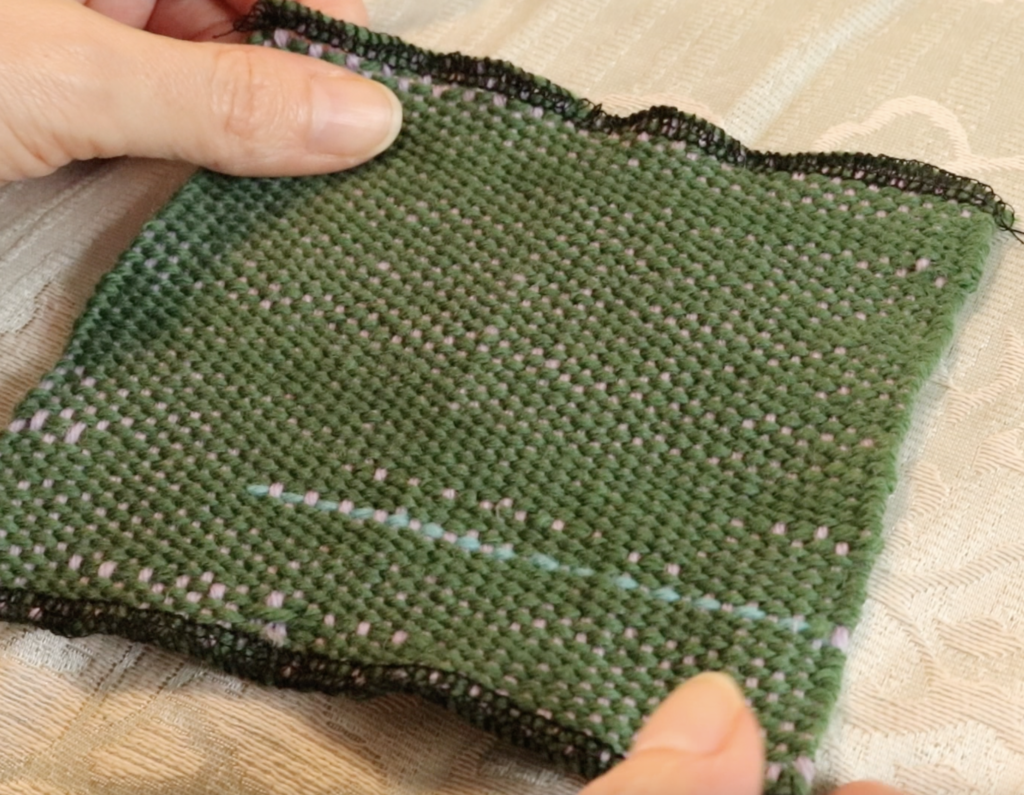
You will need a tapestry needle and a length of your weft yarn. I used a blue colour instead of my weft green, but only to make the tutorial super clear. You should use the exact same yarn in the exact same colour as your weft.

Normally, I would use my favourite tapestry needle, my Clover Bent Tip Needles, but as we are currently packing up our home to move, I couldn’t find them and just used an ordinary tapestry needle.

There is no need to knot the end of your threaded yarn.

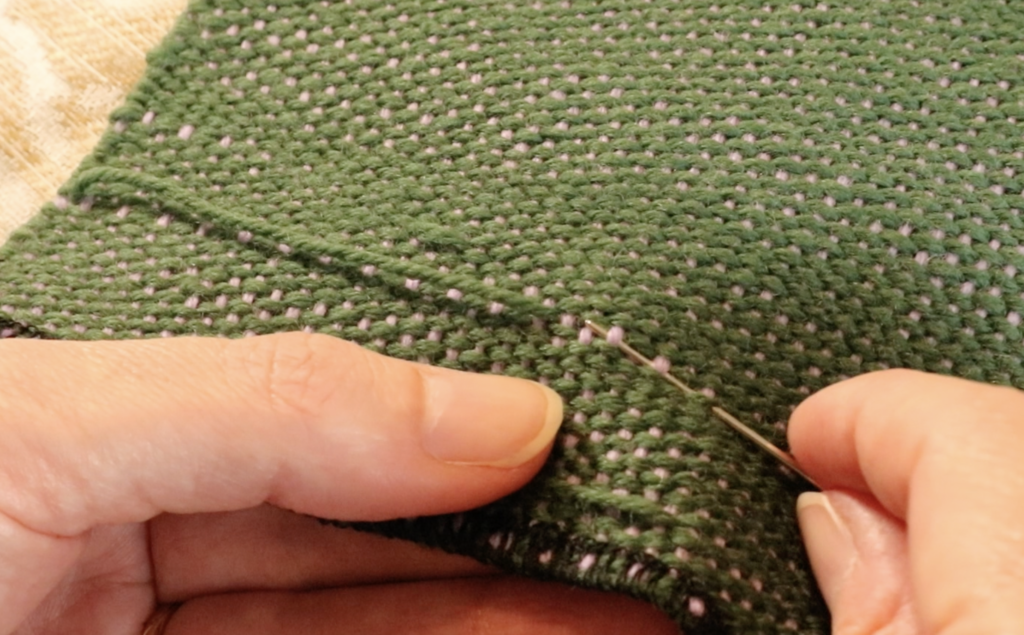
Begin by locating the path that your float yarn is travelling, around an inch away from the actual float. You can see that initially the yarn travels on the over/under path of plain weave, and then we have all those skipped threads where the weft strayed off course. We want to replace that section with a weft thread that is on course.

Next, we want to follow or mimic the exact same path that the weft was taking before it strayed off course. Keep your eyes on the correct weft thread and copy it exactly with your needle, right up to where the float begins.

When you run out of needle, pull your yarn through, but leave a tail of a couple of inches hanging out from where you began. Don’t cinch the thread up tightly, just pull it through so that it lays in place.

When you reach the float, push it aside so that you can see and continue following the over/under path based on where you were up to. Was your last thread under a warp thread? Then the next one should travel over – or vice versa. What you are doing now is placing the thread where it should have been in the thread, before the skipped threads happened.

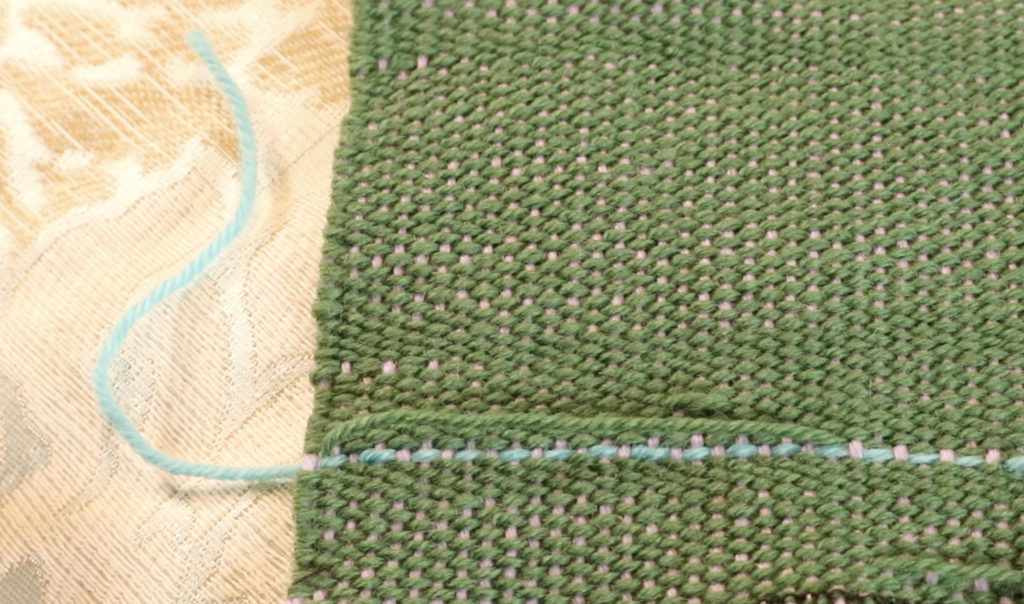
When you reach the end of the float, continue to needle weave for another inch or so. This picture is not the best example of this, as my float was close to the edge of the work. Whatever the case, continue needle weaving past the end of the float, then leave a tail of a couple of inches like you did at the beginning.

When you have repaired all your floats in this fashion, it’s time to wet finish. Do not cut your tails or floats at this point, leave it all just the way it is. Wet finish and dry completely.

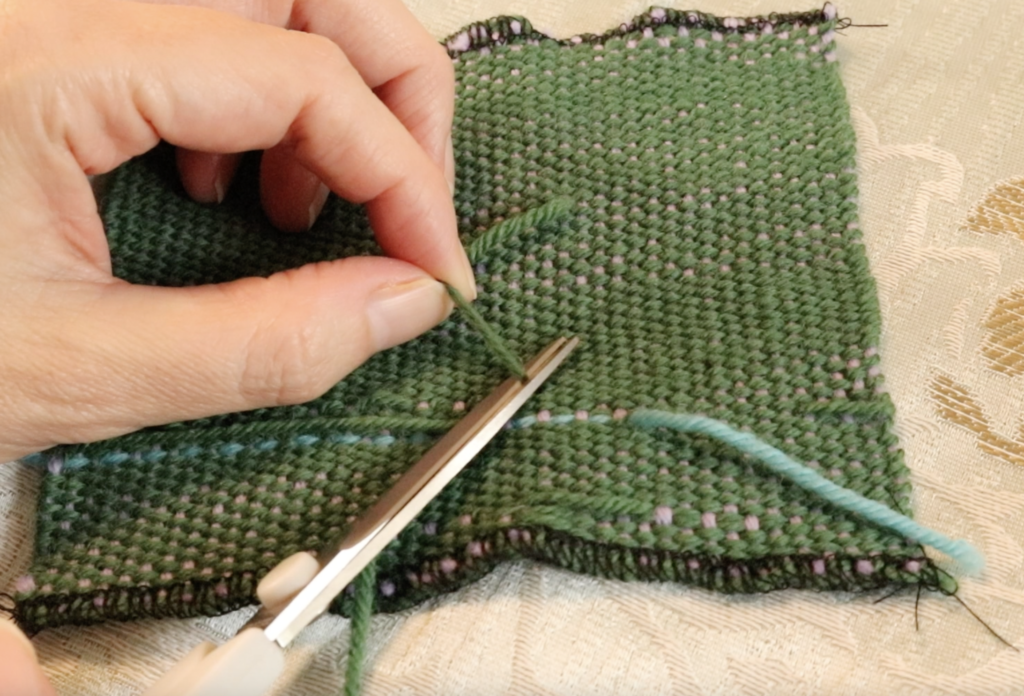
When your weaving is completely dry, it’s time to cut the tails. Use a small, sharp pair of scissors and cut close to the fabric, being very careful not to cut the fabric itself! You can also cut the floats at this point, in the same way you cut the tails.

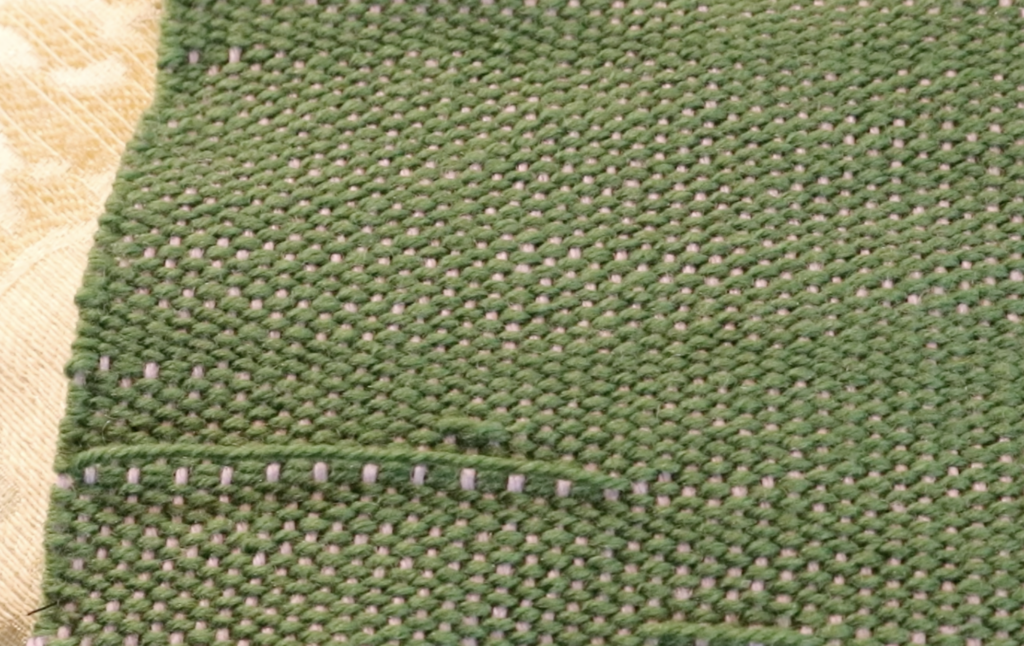
And that’s it, floats are fixed. I left one float in place over at the left edge for comparison.

If you would like to see this tutorial in a step by step video format, please visit my Youtube channel.

Until next time…

Happy Weaving!
Filed Under: Free tutorial, Online Weaving School, Rigid heddle weaving, Sewing, Tutorials, Weaving, Yarn Tagged With: fixing floats, how to fix a float in weaving, weaving floats

  • « Go to Previous Page
  • Page 1
  • Page 2
  • Page 3
  • Page 4
  • Interim pages omitted …
  • Page 6
  • Go to Next Page »

Primary Sidebar

Categories

Archives

Meta

  • Log in
  • Entries feed
  • Comments feed
  • WordPress.org

Copyright © 2025 Kelly Casanova Weaving Lessons on the Foodie Pro Theme