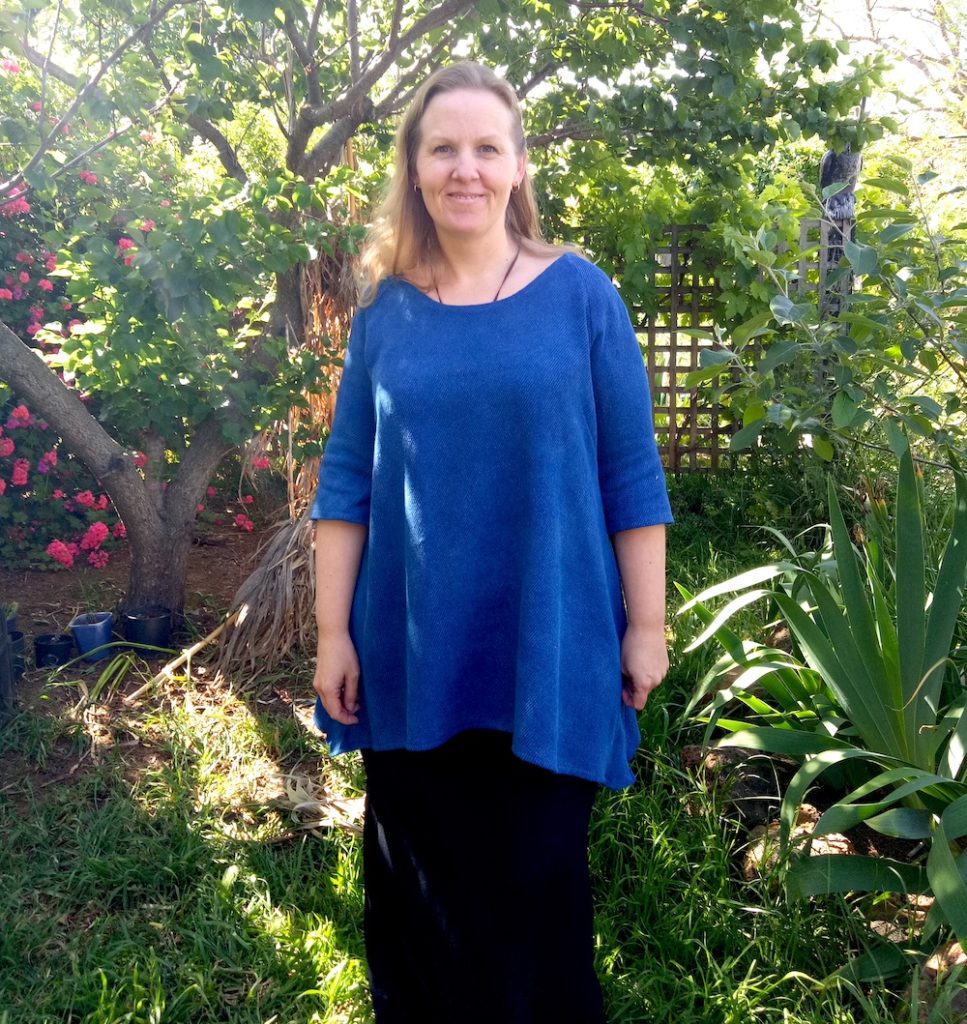
I’m so excited to be finished! A little overdue perhaps, but isn’t the nature of slow cloth?
I went through quite a few of the weaving details like yarns and weave structure in last week’s post, so please check that out if you’re interested (and read of my nightmare-ish warp!)
*This post contains an affiliate link
I’m happy to say that the actual weaving was fairly plain sailing and enjoyable with the simple 1&2, 2&3, 3&4, 4&1 order of treadling.
So, once removed from the loom I had a lovely long length of delightful cloth without serious errors (I’m happy to say that the double threading error referred to in the last post does not even show in the finished garment!)
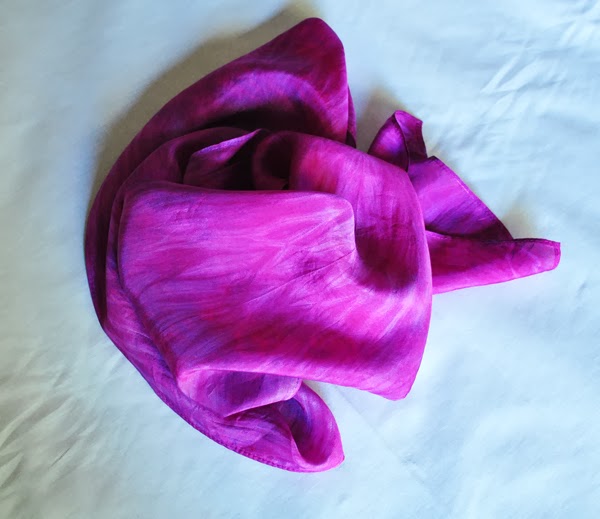
I made a lovely big vat of indigo and tested it with the neck facing pieces I had cut out of a light commercial cotton. The colour was even better than expected, so I felt very good about submitting my long piece of cloth to the vat.
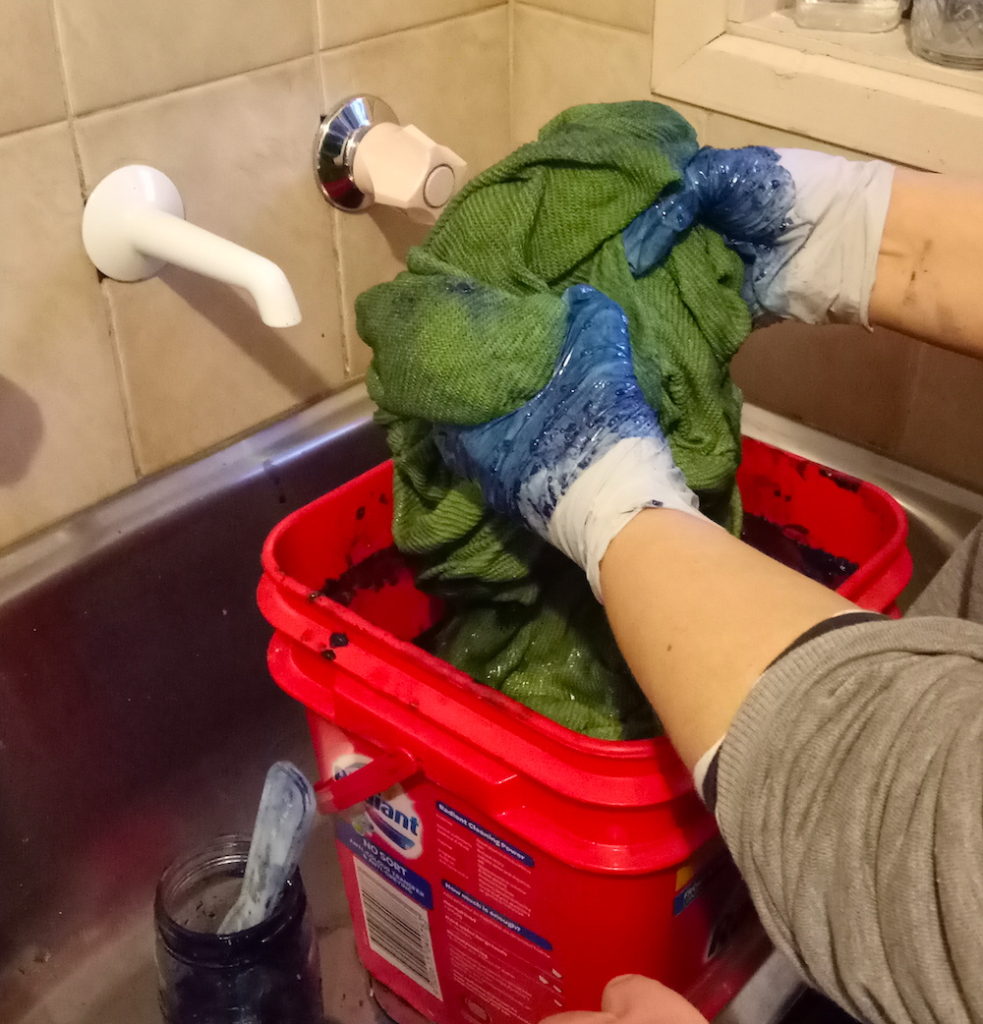
Have you ever dyed with indigo? It is a wonderful, peaceful and relaxing process. While I was standing at my laundry sink, I had the door next to me wide open and a blackbird hopped right up beside me. He didn’t even notice I was there! I thought to myself “perhaps this is the very best way to live. Quietly, slowly, making beautiful things”. It certainly struck me as a beautiful moment in time.
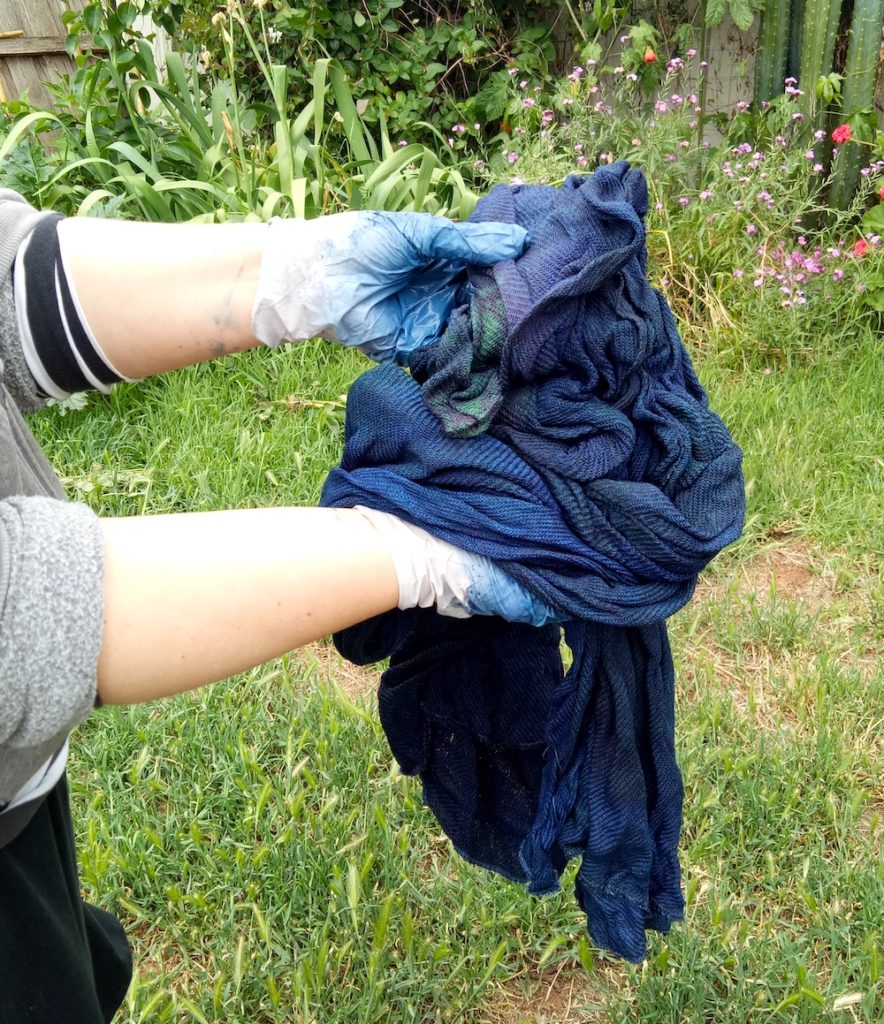
I took my cloth outside (indigo is very messy!) to let the magic happen. As oxygen hits the cloth, it turns from a glorious green to a wonderful blue. The blue is much darker when wet, so I took that into account. I wanted a dark blue. So, I went back to the vat for a total of 3 dippings. On the last dip, I left the cloth sitting in the vat for at least half an hour.
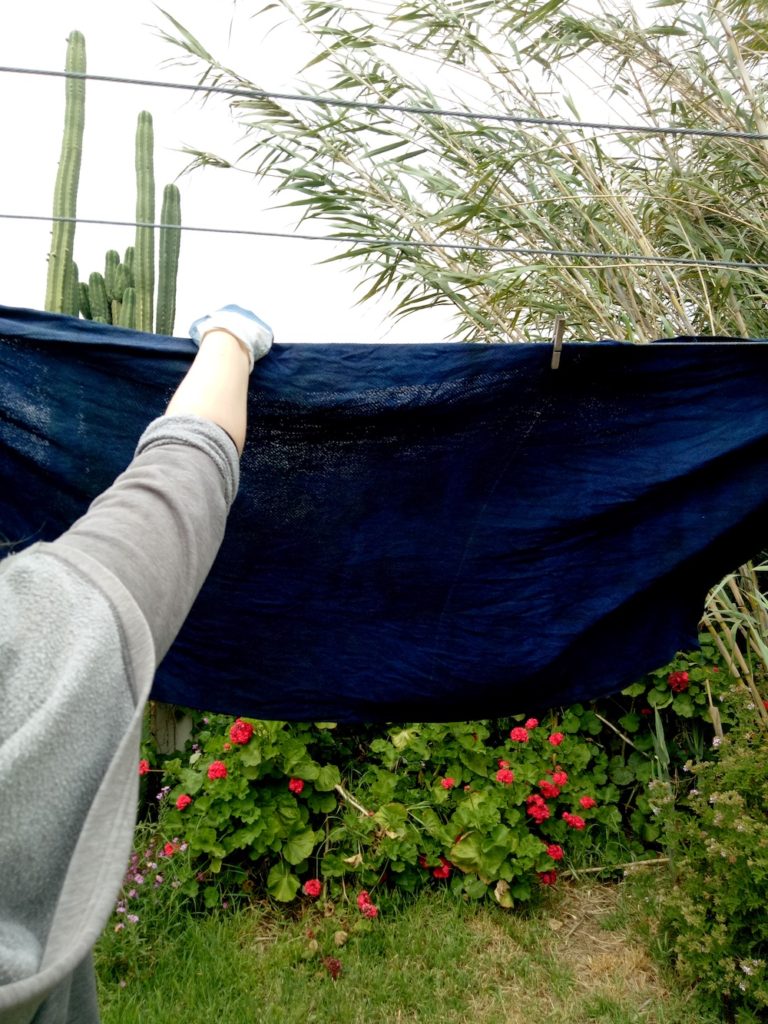
I absolutely love the colour in this shot. I would have preferred that it stay this dark and rich as it dried, but alas that was not the case. I still think it came out a beautiful colour anyway. That is another of the charms of indigo, even if you obtain a very light colour it is bound to be a really beautiful blue – I don’t think an indigo vat can produce anything ugly!
As an aside, I have just begun work on my Journey to Japan course. One of the focuses of the course will be learning to dye with indigo, so if that interests you, be on the lookout for that.
The next step once my fabric was dry was to cut out the pattern. I’m not scared of cutting my handwoven fabric as it all turns out well as long as you take the right precautions. For this project I cut the pieces as I would for commercial fabric but got them quickly to the serger without disturbing the fabric too much, and it was fine. If you’re worried about cutting your handwovens, you may want to check out this video:
There was a hitch with cutting out the pattern though. The fabric had shrunk more than I calculated for. My front and back pattern pieces didn’t fit the folded fabric! Aaaaagh!!
These are the things that feel horrible at the time, but later I am really grateful for. Why? Because I learn! Not only do I learn what to do by thinking about all the possibilities, I also learn that I might be more capable than I thought, which is a great confidence booster! So, I ended up with some odd little shapes and pieces that I tacked on here and there to make up for the lack of width. And it worked!
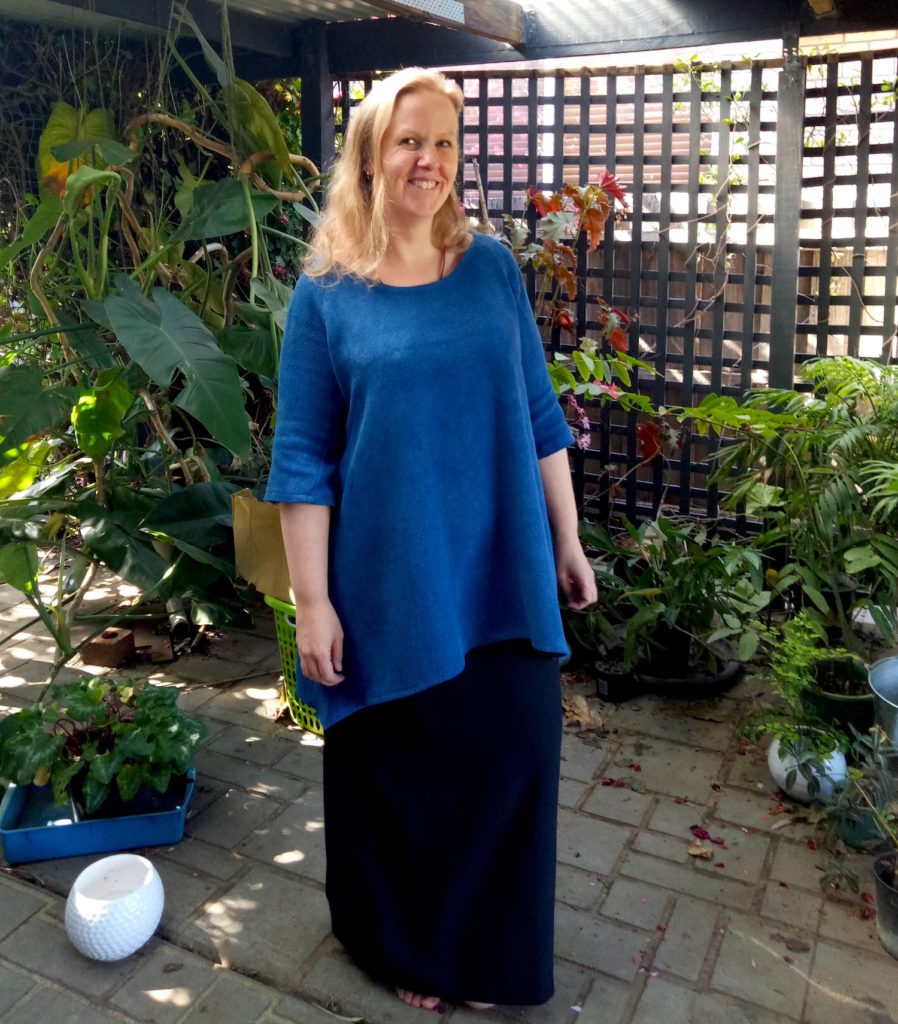
I now have a comfortable, special garment that fits really well. Unfortunately we are coming into warmer weather here in Australia, so I won’t get much wear out of it this year, but I expect it to last many, many years. If the indigo fades at all, I’ll do as the Japanese do and re-dip it. Only I know the work that went into making this, but that makes it all the more rewarding.
The little voice in me says that the neckline is too wide and so are my hips. But I told the little voice to shut up please, I want to bask in the joy of having woven, dyed and sewn a garment from scratch just for me.
I don’t know if any of you decided to make your own garment for Clothtober, but I’m thinking I need to make this an annual thing, even if it’s just to push myself to do something just for me again.
Until next time…
Happy Weaving!