
I’ve been weaving on my toy loom for some time now and thought it was a good time to challenge myself (and the loom!) to see what we could do together.
I love to encourage weavers of all levels and circumstances to think outside the box when it comes to weaving and to make the most of what you have, what is available to you or what you can afford.
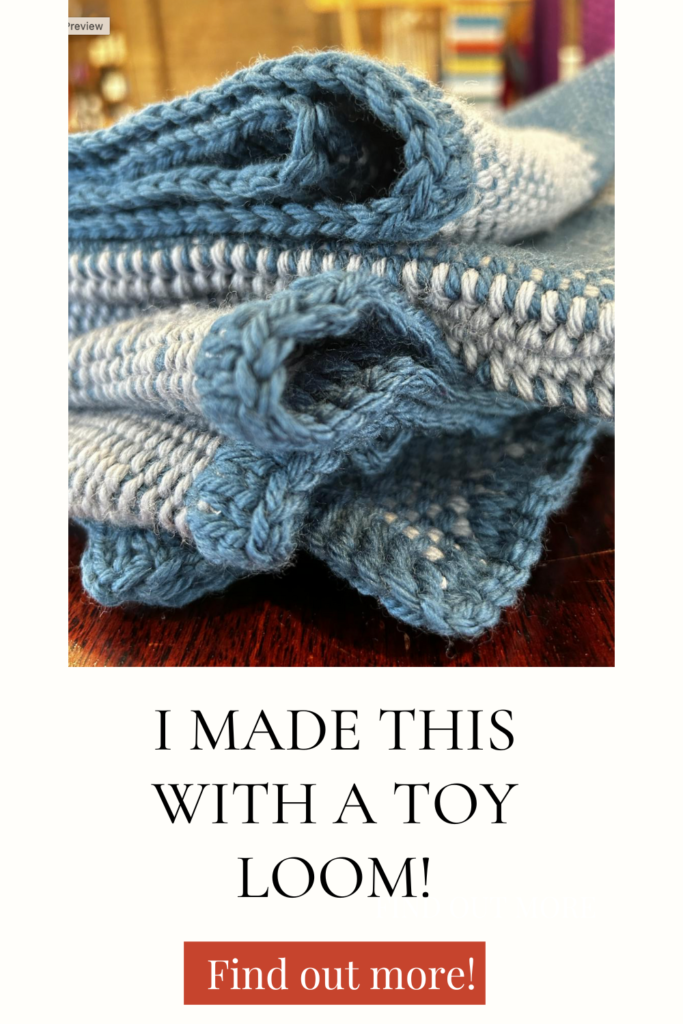
But It’s Only a Toy Loom!
I also wanted to prove to those who might say “you can’t really weave fabric on a toy loom” that you definitely can! And what better way to do that than to show you how to produce something rather large from something rather small.
I have more resources available on this toy loom. In this article and videos I unbox and set up the loom, give my first impressions and then do some replacements to improve it. Then I warp it myself rather than using the pre-made warp plus show you some things you can do with the loom, including pick up.
Weaving the Blanket
Now, onto the lap blanket project!
My idea was to weave strips of fabric to join together later. The weaving width for the toy loom is around 6″. Once you allow for draw in and shrinkage, the actual panel width is even less than that.
I wasn’t sure what length of warp this little loom could handle, so that part was a bit experimental. I’m pleased to say that it handled the 83″ of warp length very nicely.
My plan was to direct warp the loom by clamping the loom to one end of the table with spring clamps and achieving the length of warp I desired by using the pegs on my warping board (also known as hybrid warping).

I used an Aran weight (Australian 10 ply) wool and doubled it. The heddles that are built into the toy loom are sett at about 5 ends per inch – that is quite an open sett.
I used Bendigo Woollen Mills luxury 10 ply in Coastal Blue and Shadow. I used 2 balls in each colour (they are large, 200gram balls).
For and quick and easy doubling of the warp I simply took one loop through every hole and every slot. I used my double ended threading hook so that the loom width was fully warped.
The Blanket Design
For the blanket, I did a total of 4 separate warps for 4 panel pieces. Each panel piece would then be divided in half to make a total of 8 panel pieces.
I wanted to have stripes on my blanket, so for warps 1 and 3 I warped with the lighter coloured wool and used the darker colour for weft. For warps 2 and 4 I warped with the darker colour and used the lighter colour for weft.

You might think it fairly time consuming to work with 4 separate warps. But with the small size of the loom and the ability to direct warp, it did not take long each time. I also skipped the threading step by warping in every hole and slot. That was a definite time saver too!
Finishing the Blanket
Once I had all of my panels woven I wet finished them. I secured the raw ends first by serging then allowed it to dry completely. Finally, I pressed on the wool setting.
When I laid the panels out in order to check the look and sizing, some of the panels were shorter, some were longer so I had to cut and serge to ensure the sides would be uniform.
My next job was to stitch the panels together. I decided to do this by hand using mattress stitch. I know not everyone has a sewing machine and so I wanted to show an alternative. I have a video tutorial on how to do mattress stitch here.
I used my much loved bent tip tapestry needle, which makes this type of stitching so much easier. The stitching by hand does take extra time. But I wanted to ensure that my stitching was very neat and a bit of a feature on the blanket.

To finish off I could have hemmed the serged sides of the blanket by hand or on my sewing machine. But I wanted to give it just that little extra bit of oomph to make it special.
Adding a Crochet Border
I decided on a single crochet border all the way around the edges of the blanket. I used the darker yarn to complete this and won a game (only just!) of yarn chicken with the very last of my dark blue wool.
The total blanket used almost 600 metres of each yarn colour for a total of 1200 metres of yarn.
I hope that by sharing this project I have inspired you to consider what you might be able to do in the wonderful world of weaving!
If you would like to see the video that goes with this article, please visit my Youtube channel:
*This post contains affiliate links. Please see my disclosure policy for more information.
Until next time…
Happy Weaving!
What a fun video Kelly. Your blanket came out beautiful. It will be a very nice and cozy lap blanket!
Thanks Lisa, yes, it will be lovely and cosy 🥰
HI Kelly –
This looks FAB!
I still have mine that my friend found in a garage sale. I started the little mug rug tapestries when we first
brainstormed how to warp the loom. You’ve inspired me to finish them while I’m watching football and start weaving stash panels.
Yay, that’s great! 👏👏👏
Amazing!
Thank you! ❤️
Kelly,
After following you on you tube and being a member of your online weaving school for a few years now, I can honestly say that this is now probably my most favorite video you have ever produced, I loved every minute! It completely proves that the most simple tools can and do produce wonderful material. (Take that loom snobs.😉)
All your videos are wonderful and teach so much, but this toy loom really drives home that simple plain weave can be beautiful, durable and relaxing to make. Thank you so much for making this video, I know it took ages to do, well done you!
(Also thank you for speaking to our online weaving guild!♥️)
Warmest wishes,
Cyndi Paola
Thanks so much Cyndi, it was lovely to speak with you face to face 🥰