• Skip to main content
  • Skip to primary sidebar

Kelly Casanova Weaving Lessons

  • Hi! I’m Kelly!
    • Disclosure
  • Online Weaving School Class Index
    • Common account issues
    • Common technical issues
    • What do I get with a membership?
  • New to rigid heddle weaving? Start here!
    • Never heard of the rigid heddle loom?
    • How to weave neat edges on the rigid heddle loom
    • Rigid heddle weaving
    • Rigid Heddle Weaving Patterns
  • Patterns
  • Subscribe

warping tips

Direct Warping a Rigid Heddle Loom the Wrong Way (And How to Fix It!)

by Kelly 4 Comments

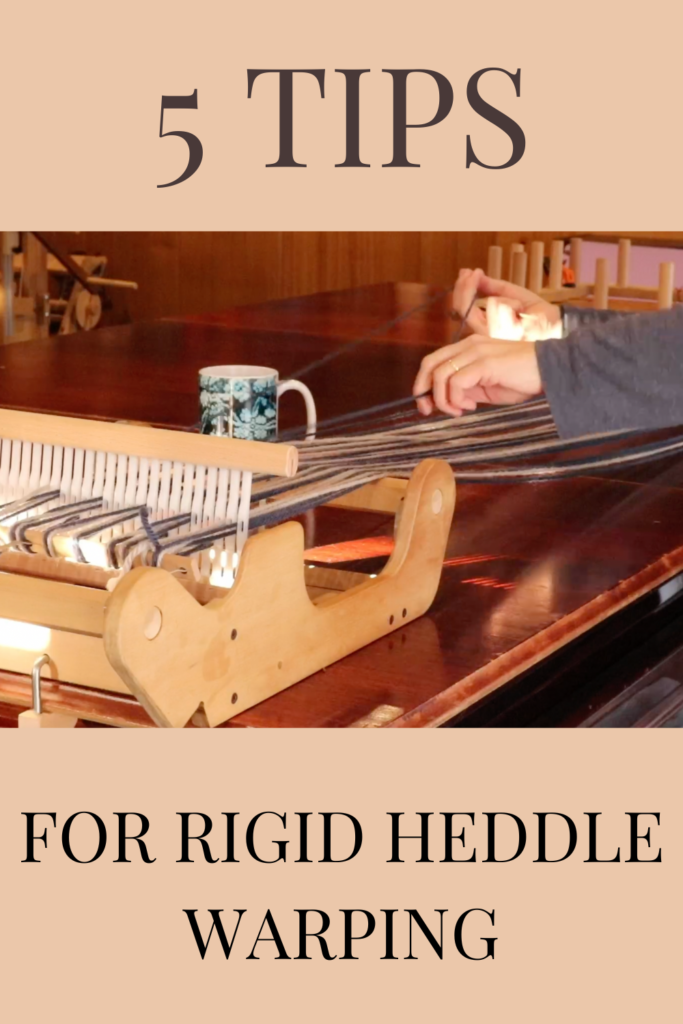
My 6 Best Tips for Rigid Heddle Warping Success!
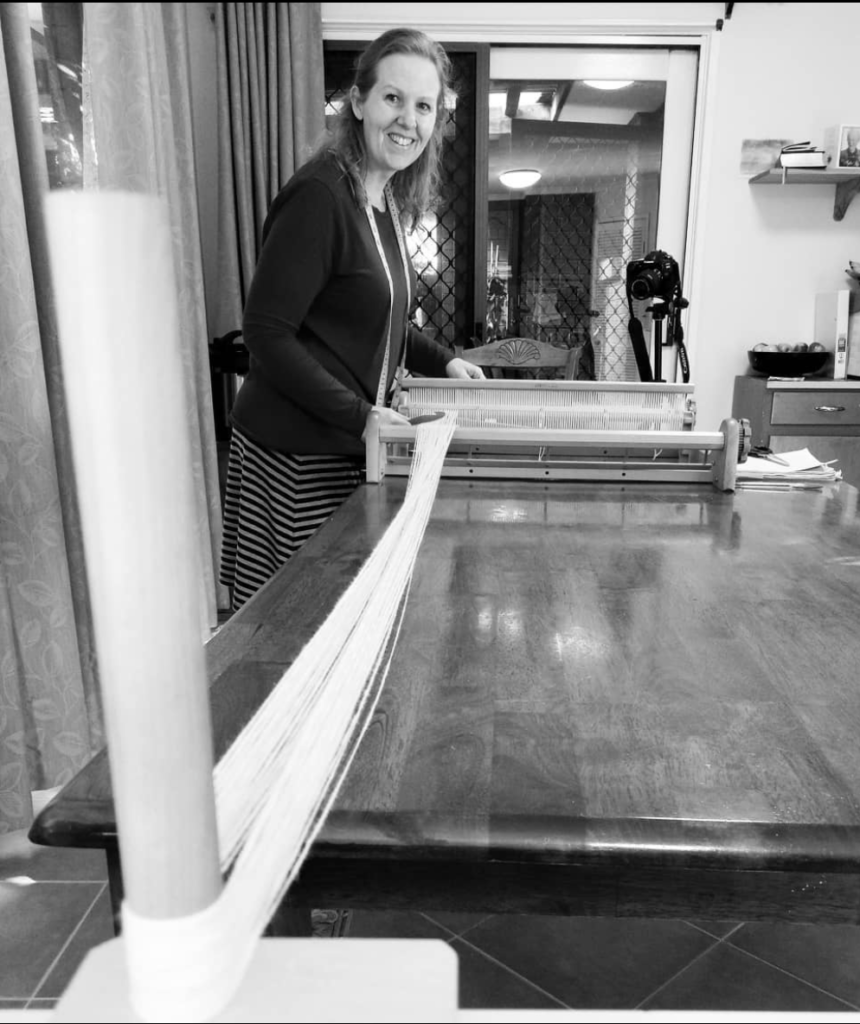
I absolutely love direct warping my rigid heddle looms! It’s one of the fastest and easiest ways to get started on a new weaving project, and I find the process simple and satisfying. There’s nothing better than going from an idea to a fully warped loom in hardly any time at all.

But let’s be honest—direct warping isn’t foolproof. If you’ve ever ended up with a tangled mess, uneven tension, or felt completely frustrated before you even started weaving, you’re not alone! I’ve made plenty of mistakes over the years, but the good news is that most warping issues have quick and easy fixes. In this post, I’ll walk you through some of the most common direct warping mistakes and how to solve them so you can begin to enjoy the warping process as much as the weaving!

So, What is So Great About Direct Warping?

When you begin to make the warp for a table loom or floor loom, you traditionally do so with a warping board, or with a sectional beam setup. These methods are terrific as they allow the weaver to be precise about the warp making process, but I’m not kidding when I say they take time!

Direct warping a rigid heddle loom though, allows us to side step other processes, to start and finish our warp at the loom and sometime to even skip the threading afterwards by doing it during the warping!

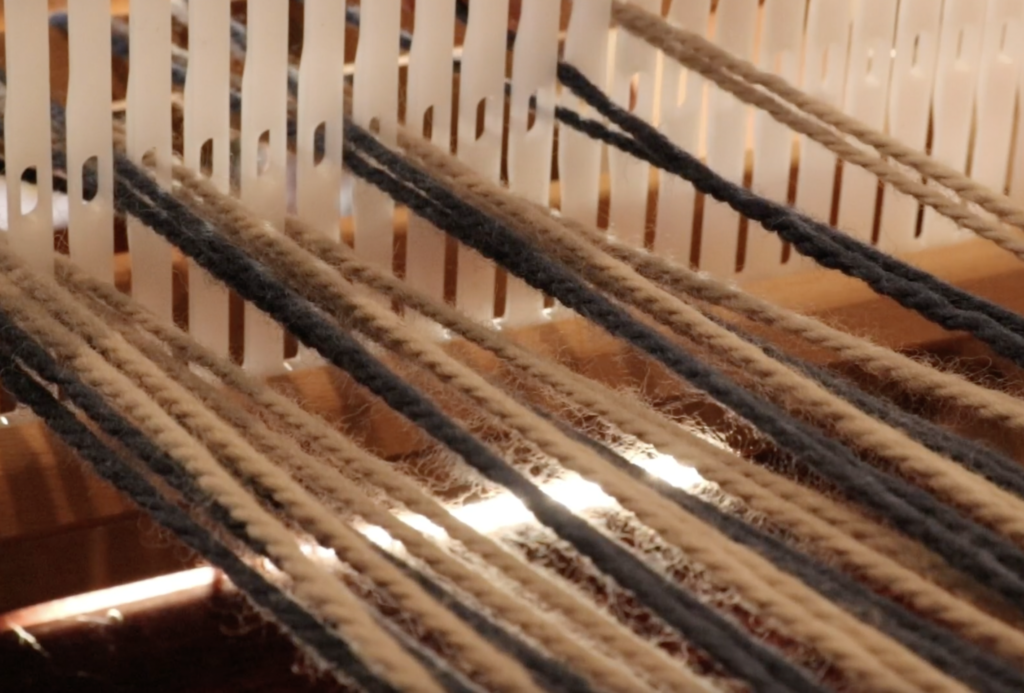
We use a direct warping peg, clamped at a suitable distance away from the loom (the distance will depend on your warp calculations so be sure to do that first). We tie the yarn onto the back apron rod of the RH loom, take a loop through the heddle/reed and then drop the loop onto the peg. Back to the loom and repeat.

This makes the process really fast and hey, you even get some exercise thrown into the deal as you go from the loom to the peg and back again! 💃

6 Common Warping Mistakes & How to Fix Them

  1. Forgetting to Take the Warp Over the Front & Back Beams

This is a very common rookie weaver error, so don’t worry if you have fallen victim to it, we’ve all been there!

  • Why it’s a problem: Most of the time you will be unable to make a shed. You put your heddle up, you put it down, nothing happens!
  • How to fix: This depends on your particular rigid heddle loom. Some have beams that are removable while you have a warp on – if this is the case with your loom, remove whichever beam you have warped under, slacken your warp tension and place the beam back so that it is underneath the warp.
  • If you can’t remove your beam/s you will need to un-warp and re-warp correctly over both beams.

2. Using the Wrong Yarn (Stretchy Acrylic, etc.)

This can be a bit of a weaving nightmare because you don’t always know just how the yarn will perform under tension if you haven’t used it before. Once stretched, you can’t “unstretch” the yarn.

  • Why it’s a problem: Stretchy yarns make it hard to maintain even tension. They will frequently stretch more and more as you advance your warp and try to weave, no matter what you do.
  • How to fix: You can try using wedging and tension improving techniques. I once wove with an acrylic yarn that began to stretch and by using these techniques I was able to finish the project, but I can tell you, it wasn’t fun! The only other alternative is to (and I don’t say this lightly, it’s not my usual recommendation!) bin the warp and start over with a different yarn. I hate having to tell someone to do that, but it’s a good lesson in what is an inappropriate yarn for warping.

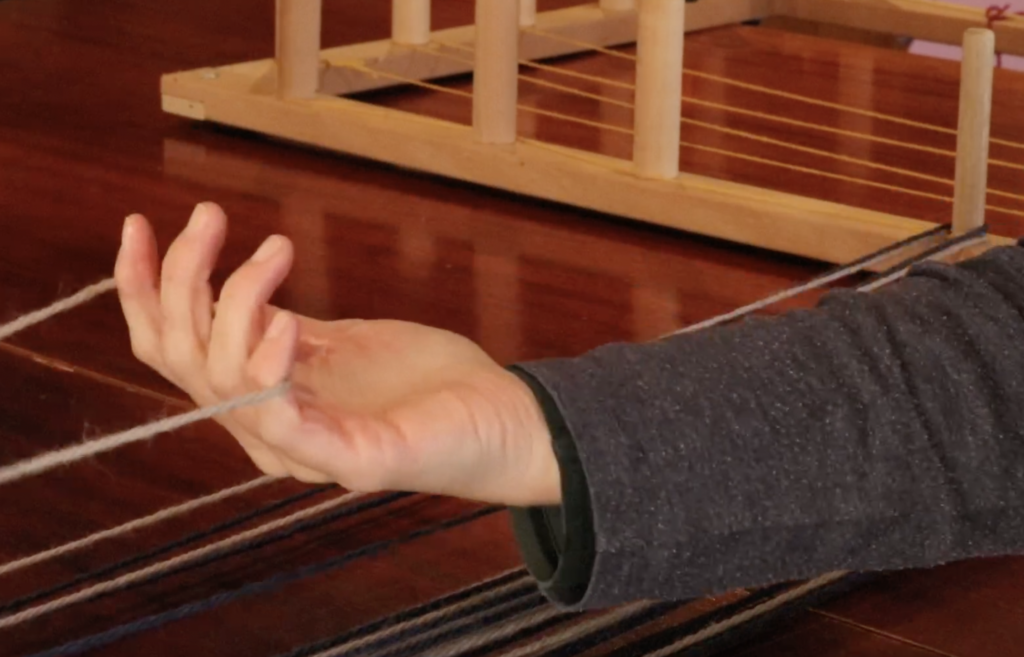
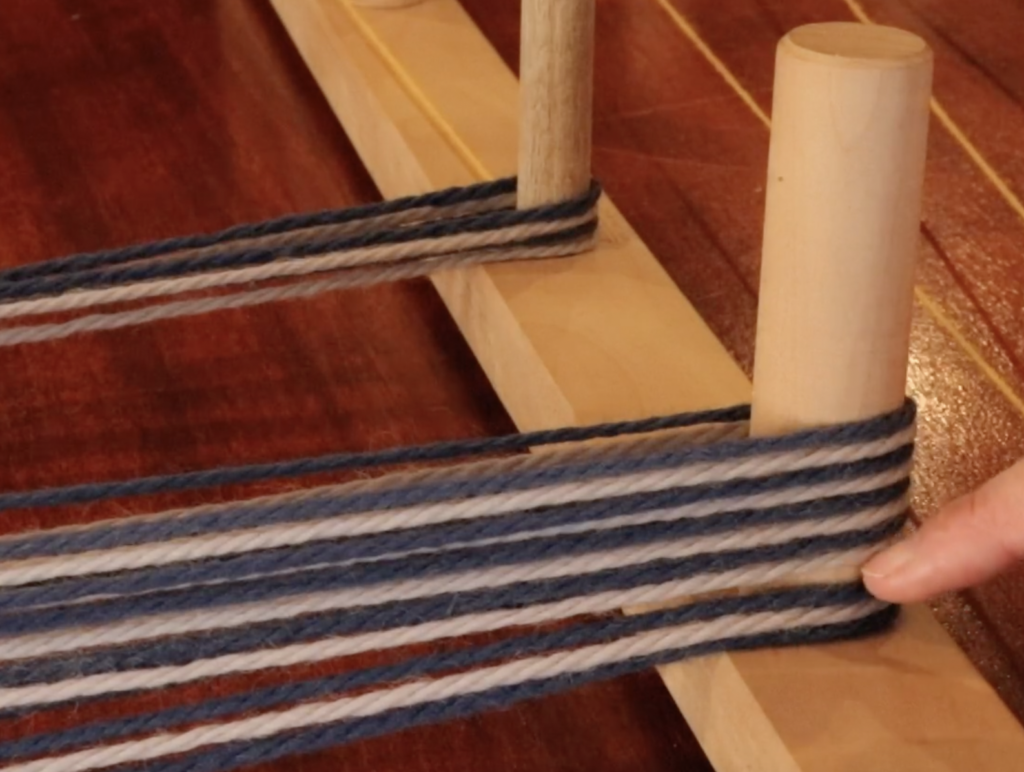
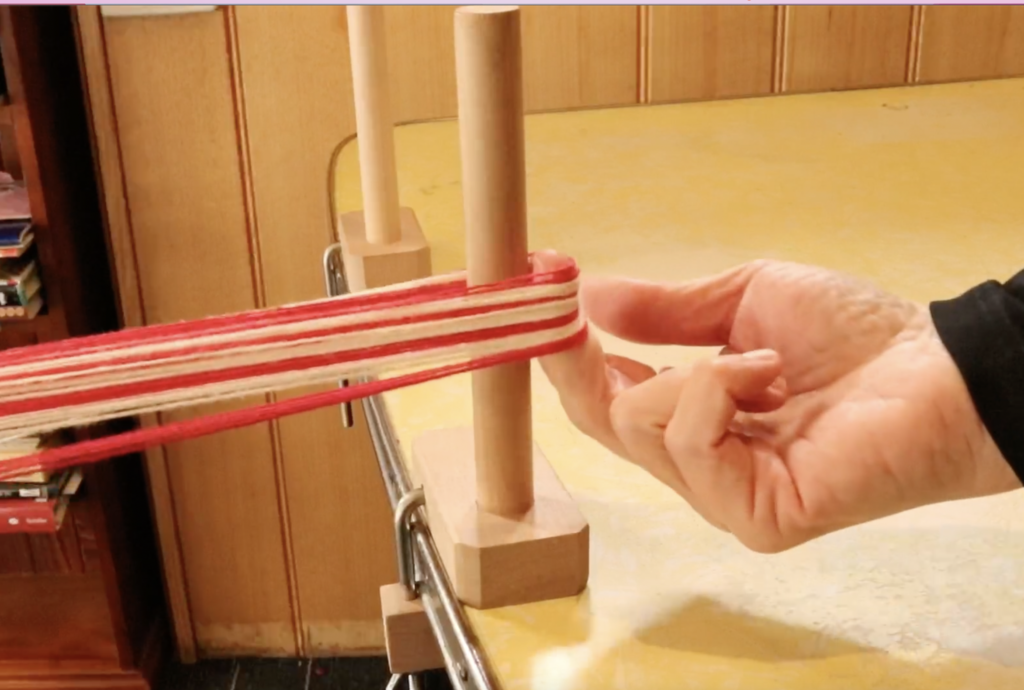
3. Too Many Warp Ends on One Peg

Bunching up too much warp on one peg when direct warping is less than ideal for a couple of reasons.

  • Why it’s a problem:
  • Your warp should be well ordered on the peg, each warp loop being placed above the last one to keep the threads in good order.
  • If you don’t distribute the warp among more than one peg (especially if its a wider warp) you will have more wasted yarn as it has to travel further to go to a central point (the peg).
  • Your warping peg can lose tension. Too much warp on a single peg can cause too much pressure, causing the peg to go pinging across the table and messing up the lovely order of your warp!
  • How to fix: Distribute warp ends across more than one peg. Don’t place too much tension on the warp as you take the loops around the peg. Aim for consistency, not tightness.

4. The Wrong Attitude: Warping Frustration

I don’t know about you, but when I’m frustrated I don’t think clearly! Usually, the way you think about your warping before commencing is how it will be. For example, I think of warping as simple and easy, so when I go through the warping process, guess what? It’s simple and easy!

  • Why it’s a problem: Leads to mistakes and makes the process feel stressful. Clouds judgment and clarity of thought.
  • How to fix: Take breaks, set up in a calm environment, and remember that practice makes perfect! Give yourself plenty of grace, you’re not expected to know everything, it’s a journey! If you have a recurrent frustration, perhaps it’s time to do some more research or take a step by step class to help you get over the hurdle.

5. Warping the loom or heddle backwards

  • Why it’s a problem: You won’t be able to advance your warp forwards if it’s warped on the front beam instead of the back. Warping the heddle backwards is not as big of a deal – you can actually weave that way but it may be less comfortable to use. If you have warped your heddle backwards and want to repair it, this video will show you how.
  • How to fix: You can fix a backwards warped loom by cutting your yarn loops at the peg and securing with a choke tie. Wind this warp onto your front apron rod (if you haven’t done so already). Leave enough length at the other end to tie on the cut ends to the back apron rod securely. You can then release the tension at the front apron rod and begin to roll onto the back beam, using warp separation as you go. Once you have the warp rolled on to where it’s supposed to be, you can progress as normal!

6. Trying to hurry the process

  • Why it’s a problem: Trying to speed through the warping process when you’re not all that familiar with it could be a recipe for disaster. You may skip steps, you may make mistakes, you may get tangles, things may go wrong and you don’t notice. Rolling on a warp with good, consistent tension is not a step to be hurried over, it takes a little time and patience.
  • How to fix: Warp your rigid heddle loom when you actually have time to do so. If you can’t get it done in one session (and it’s absolutely fine not to!) ensure that you have set up in a location where you can leave the warp partly done to come back to. If you’re warping at the dining room table at 5pm and your family needs to sit down to eat at 7pm, you may have a problem.

Final Tips for Direct Warping Success

  • Slow down and check your work as you go. Time is never wasted in weaving, it is only invested 😉
  • Use a checklist to tick off as you go (I have a free printable one here) to ensure you don’t miss any steps in setting up your loom.
  • If you make a mistake, don’t panic—ALL issues can be fixed!

Want to learn more about warping successfully? Check out this list:

Independent warp issues

5 Tips for Rigid Heddle Warping

2 Tips for Easier Warping

Setting Up for Success Online Workshop

Did you know that I’m a reseller for Lojan Wheels and Looms in Australia? If you are interested in knowing more, please feel free to contact me.

Until next time…

Happy Weaving!

*This post contains affiliate links. For further information, please see my disclosure policy.

Filed Under: Rigid heddle weaving, Warping, Weaving Tagged With: direct warping, rigid heddle loom, rigid heddle weaving, warping tips

Rigid heddle warping tips

by Kelly 2 Comments

  1. Don’t over complicate it

Warping a rigid heddle loom using the direct warping method is really very simple. Yes, it will take you a couple of warps to start to feel more comfortable with the “newness” of it all (like anything!).

But something I’ve realised, especially after using the more complicated and time consuming table and floor looms, is that direct warping a rigid heddle loom is fast and easy.

Get the key ingredients for warping right and you will be well on your way to being a happy warper (if that’s a thing!)

Over complicating the warping process will lead to frustration, it is so much better to narrow it down and take baby steps without the worry.

2. Use a calculations sheet

A calculations sheet will take all the guess work out of the project for you. It will give you a step by step process to follow and prevent you from accidentally forgetting an important step in the warp.

If you struggle with the mathematical side of weaving, you don’t have to worry, as I think you only need a fairly basic maths level for weaving (hello calculator!) but the sheet will also help with ordering the numbers so that they make sense to you.

I have a free rigid heddle calculations sheet for you to download and use, plus a free video on how to use it available here.

3. Taking threads to the warping peg

When you bring your threads through the slots in the warping process, keep everything straight and open. Keep the loop open and don’t twist your loop as you place it on the peg.

4. Keep threads in order on the warping peg

Place your loops on the warping peg one at a time and in order. Don’t just shove them on there willy nilly – there is a benefit to preserving order as when you come to rolling on the warp you will find a lovely, laid out warp that is well behaved!

Each loop sits just above the last one on the peg, there is no need for bunching. Keep the loops loose enough that you have space to get a finger in behind them, this will make lifting the warp off the peg easy and trouble free.

5. If you’re not enjoying warping, look at the reasons why

This will help you to determine steps to take to make it better and easier.

Try to make it a relaxing process, have a hot beverage or put on some music. If you make a mistake, it’s ok, mistakes are fixable! Take your time, no need to rush.

Perhaps you need some help in the form of an online class? My best selling class is my Woe to Go Beginner’s Rigid Heddle course. This class will take the mystery out of the rigid heddle loom with simple and achievable steps.

If you would like to view this post in video format, please watch here:

The photos you can see in this post are from The Weekend Scarf project. This is a great beginner’s or newer weaver’s project and is also great for anyone who wants a fast and fun project.

If you’re new to rigid heddle weaving, check out my free list of resources here.

I hope this article was helpful to you and until next time…

Happy Weaving!

*This post contains affiliate links. For further information, please see my disclosure policy.

Filed Under: Rigid heddle weaving, Warping, Weaving Tagged With: rigid heddle weaving, warping, warping tips

2 Tips for Rigid Heddle Warping

by Kelly 6 Comments

Warping a rigid heddle loom can be quite daunting when you’re just starting out, but with a little bit of practice and some simple tips to follow, it doesn’t need to be a headache!

I actually love direct warping my rigid heddle loom, I find it so quick and easy compared with indirect warping.

*This post contains affiliate links. For more information, please see my disclosure policy.

What is direct warping?

When you purchase a rigid heddle loom, it should come with a warping peg and clamp. This peg will allow you to start making your warp directly on your RH loom, rather than having to make the warp on a warping board or mill first and then transferring to the loom.

You use the peg to measure out and hold your warp, while the other end is tied on or looped to the back apron rod of the loom. The added bonus here is that you save time by doing part, or all (depending on your yarn and project) of your threading at the same time as the warping. Efficiency at it’s best!

While warping a rigid heddle loom is fairly straightforward, like anything new, it will take some getting used to. Today I have 2 tips to share that are easy to learn but will help you to have a more positive warping experience.

Tip 1 : Use more than one peg

Although your loom will only come with one peg and clamp, you can purchase more separately.

Doing this has a couple of benefits.

  • Waste efficiency – If all of your warp threads are travelling to just one central point, some threads will travel further than others. You will find that, when you take all your warp threads off the peg, ready to thread, you will need to cut them all to an equal length for ease of threading and tying on, which creates more waste.
  • Overloaded peg – If your entire warp is on one peg, the peg can get overloaded. This does depend on the width of your warp (number of warp threads) and the thickness of your yarn.

If you don’t want to purchase an additional peg, there are other options. Coat racks can be a perfect solution, and some weavers prefer to use more than 2 pegs, which also works great. If you opt for a coat rack, just ensure that it has straight, smooth pegs, like this one does – otherwise it could be hard to remove your warp from it.

Tip 2 : Be gentle!

This stage of the warping process is not the time to tensioning your warp, ready for weaving. Yes, you want to maintain a consistent tension whilst warping, so that your threads stay fairly even and everything is nice and neat, but the proper warp tensioning will occur in the winding on of the warp.

Winding your warp around the peg/s too tightly can actually be detrimental to the process. This is because the pegs are holding a lot of tension. If the tension increases too much, that carefully clamped peg can come loose, and if you have any experience with this, you know what happens next! 😆

The peg can come loose with a “ping” and make spaghetti out of your carefully wound warp in a second flat!

Even if your peg manages to stay in place with your warp threads too tightly wound around it, once you are ready to take the warp off to start threading, you may find it difficult to remove from the peg.

Ideally, you should be able to get a couple of fingers inside the warp at all times, this ensures that you’re not winding too tightly around the peg.

An easy way to ensure that you’re warping around the peg with a loose enough tension is to have your yarn feeding off the cone or ball adequately. A cone/warping stand is ideal for cones of yarn, as it allows the yarn to wind off freely.

I also like to use 2 fingers inserted into the loop after pulling it through the slot with the reed hook. Then I simply walk towards the peg, keeping my fingers in the same place. I don’t pull on the warp, but just walk with it, then drop the loop gently over the peg.

I hope these tips make a difference to your warping experience! If you would like to see this post in video format, please view that here-

Until next time…

Happy Weaving!

Filed Under: Warping, Weaving Tagged With: warping, warping tips

Primary Sidebar

Categories

Archives

Meta

  • Log in
  • Entries feed
  • Comments feed
  • WordPress.org

Copyright © 2025 Kelly Casanova Weaving Lessons on the Foodie Pro Theme