
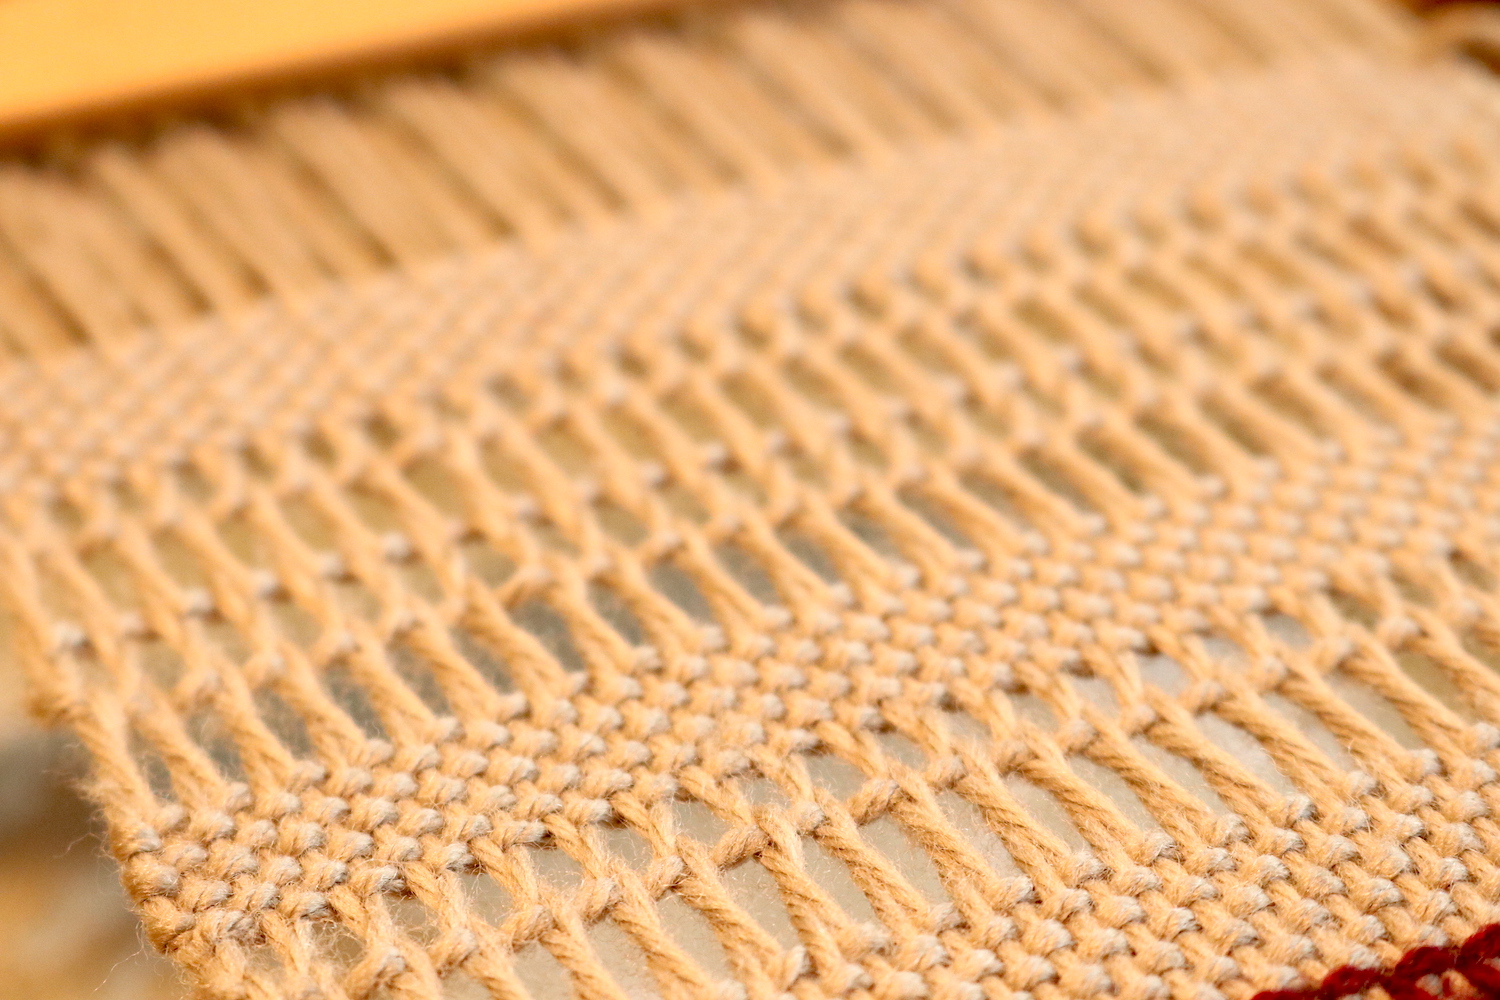
Leno is a finger controlled weave that gives a lovely airy and lacey look to your weaving.
You can set up Leno on a plain weave threading, as all of the pick up is done at the front of the heddle with a pick up stick and your fingers.
I love that this is a fancy looking but easy to implement technique. Yes, it’s a little slow, but there ain’t nothin’ wrong with that! It can be worked either on an open or closed shed. Today’s tutorial shows you how to work Leno on an open shed.
*This post contains affiliate links. For more information, please read my disclosure policy.
Grab my FREE Finger Controlled Weaving Ebooklet to help get you started ⬇
Leno can be used for any project you want an open weave for, but some suggestions are:
Curtains
As a border on a table runner, coupled with plain weave
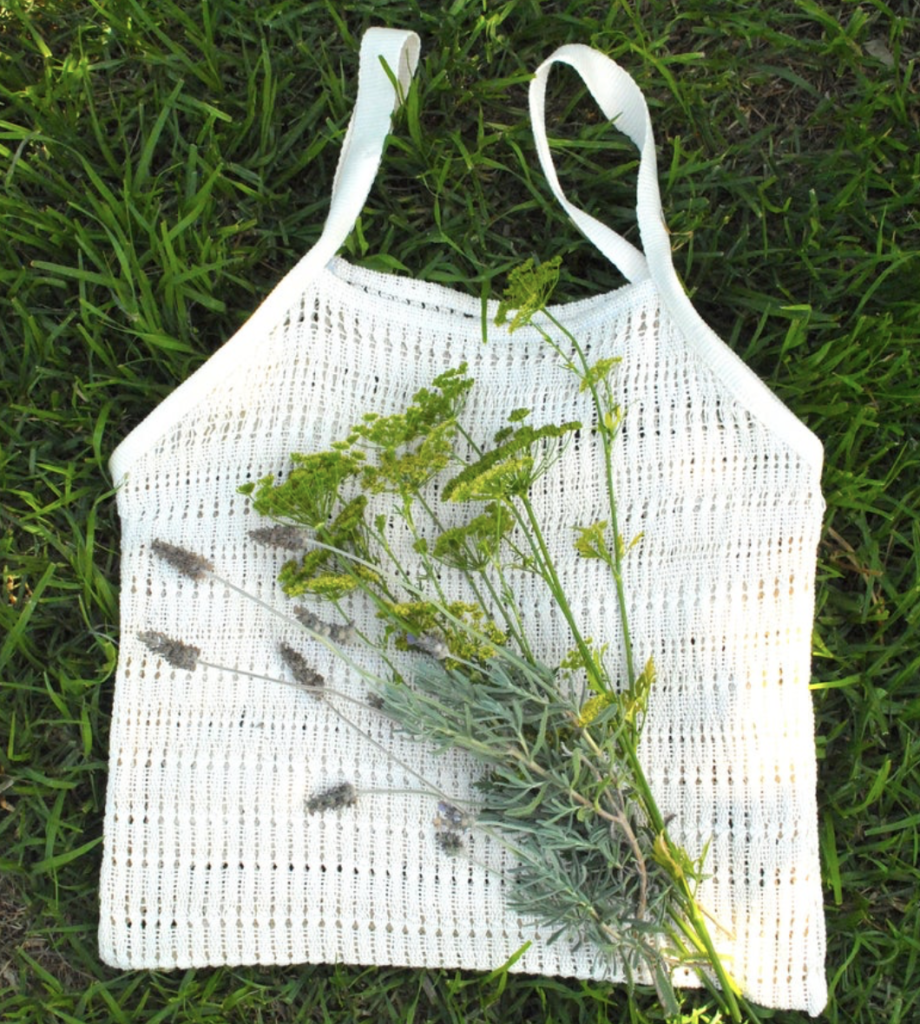
A bag (my Farmer’s Market Bag pattern is available in my Etsy shop).

For my Leno sample I’m using my Sampleit loom with a 7.5 dent heddle, a worsted weight wool, a stick shuttle and a pick up stick. I didn’t use the full width of my loom, I just wanted a smaller sample.
Leno and plain weave are great friends and I like to combine them for aesthetics. If you don’t plan on using plain weave bands within your Leno, at least start with a few picks of plain weave to begin with as a base.
*Handy Tips:
- You will want to advance your warp forward a little more than usual. This is because we are going to be building up warp twist and then making a shed with the pick up stick to pass the shuttle through. If your last row of weaving is too close to the heddle/reed, it will be difficult to find the space to pass the shuttle through.
2. You will want your shuttle to enter from your dominant side. I’m right handed, so I have woven my last pick of plain weave so that the shuttle is on the right of the warp.
3. Your outer most warp thread on the side you’re starting from (in my case, the right) should be in an up position. That doesn’t necessarily mean that your heddle will be in your up position – you will need to try the up and down heddle positions to see which is suitable for that outside warp thread to be up. I placed my heddle in the down position to ensure my outside thread (a slot thread) was up.
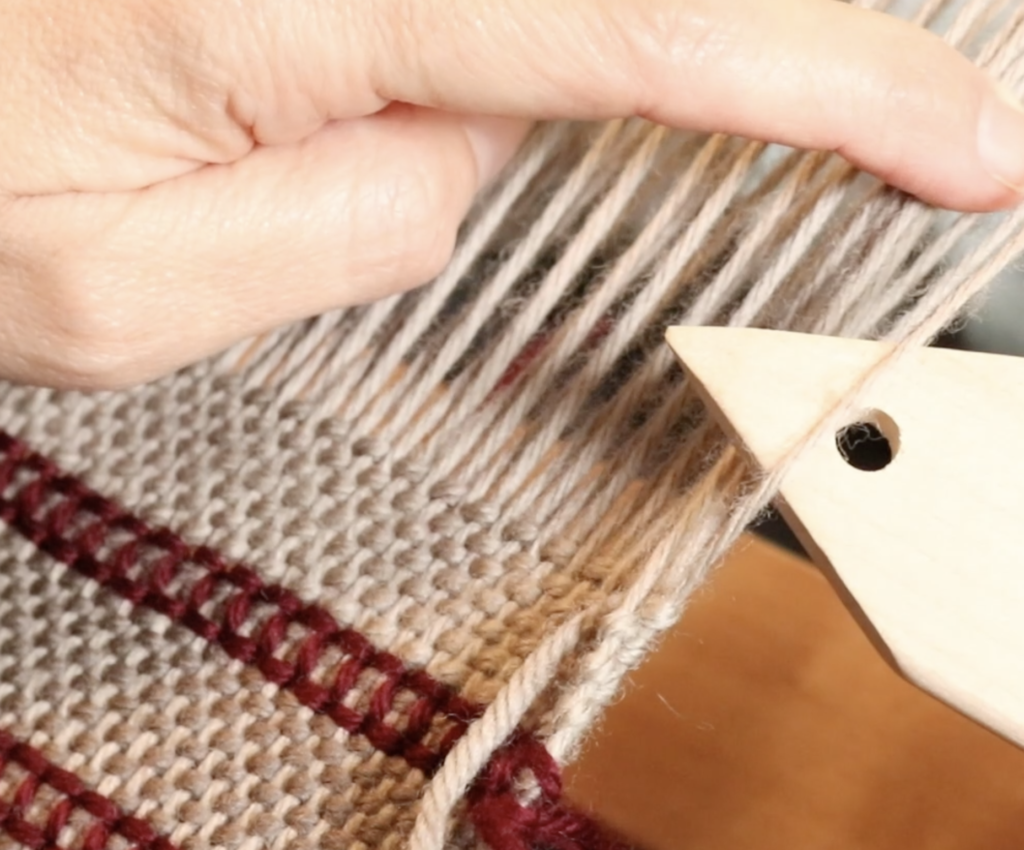
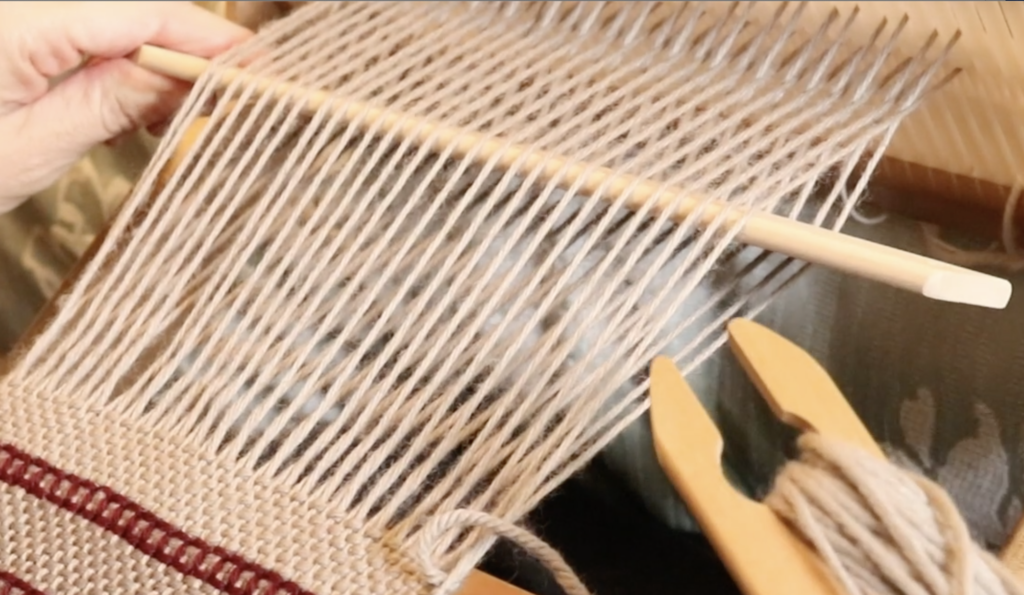
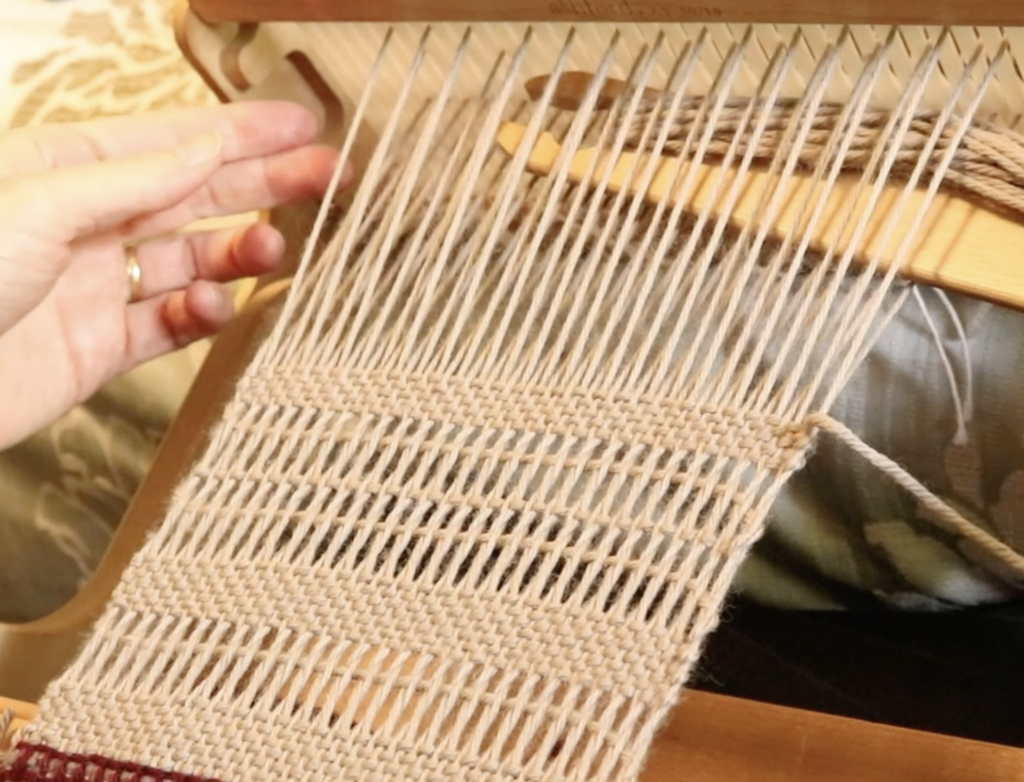
Begin by holding the top warp threads aside so that you can see the down shed threads underneath. Take your pick up stick underneath the first thread in the down shed so that sits on top of the stick.
Now release the next warp thread along, which is a top or “up” thread. It will naturally go underneath the pick up stick, which is just what you want.
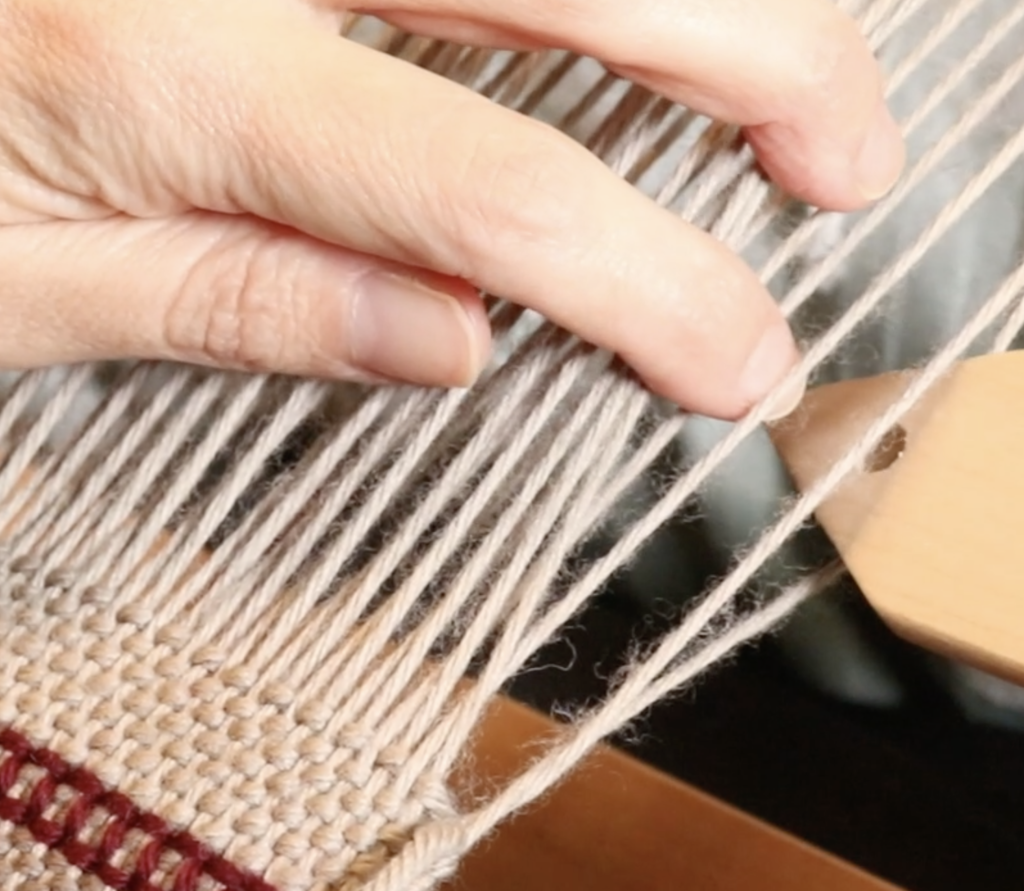
You now have 2 threads picked up and you may notice that they twist around each other. Dive the pick up stick back down into the warp, holding those top threads out of the way still. Take the point of the stick underneath the next down shed thread so that it sits on top of the stick.
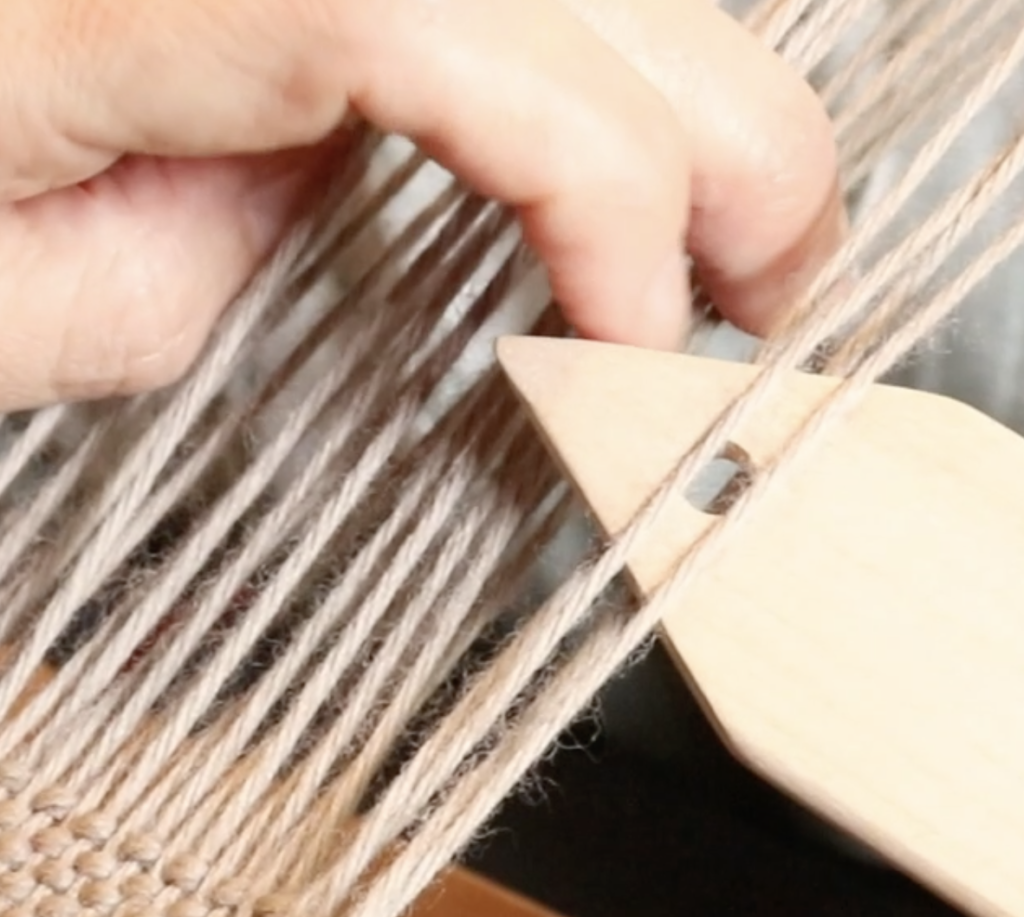
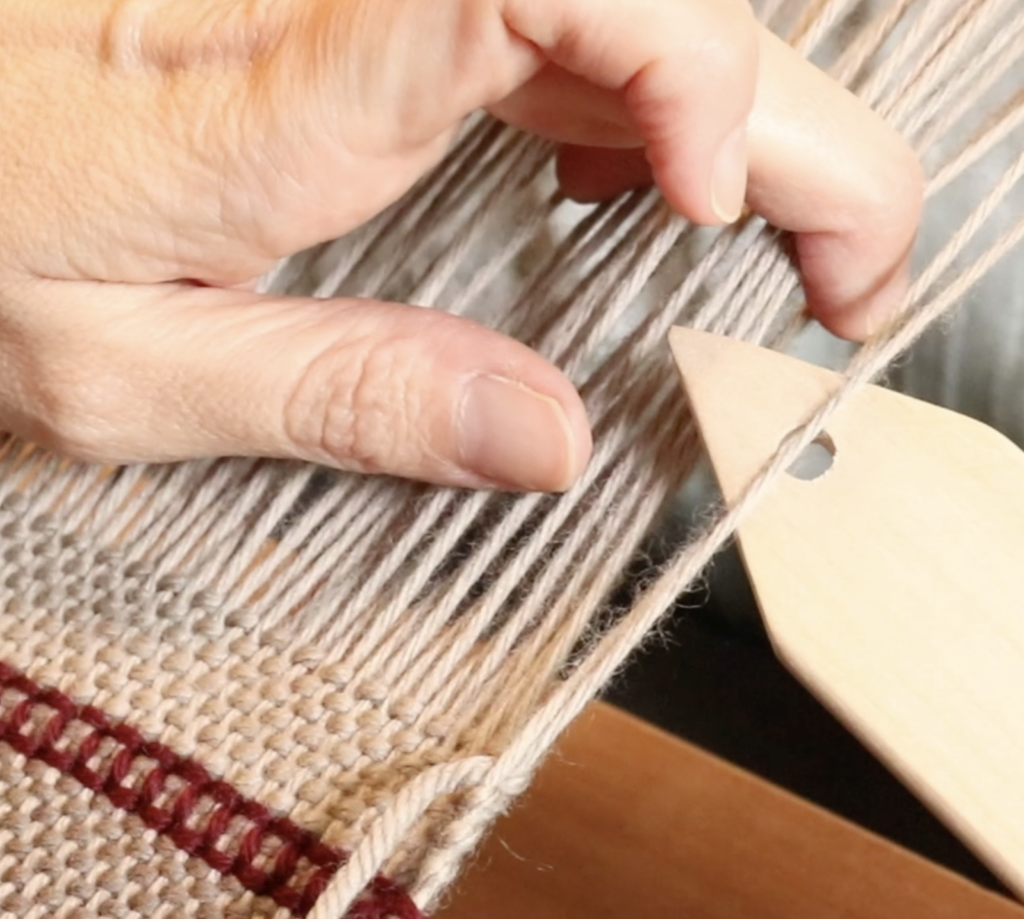
Release the next top thread along, and as before, it naturally springs underneath the stick. At this point you have 2 warp threads on top of the stick and 2 underneath. Dive the stick back down into the warp and repeat the steps, right to the other side.
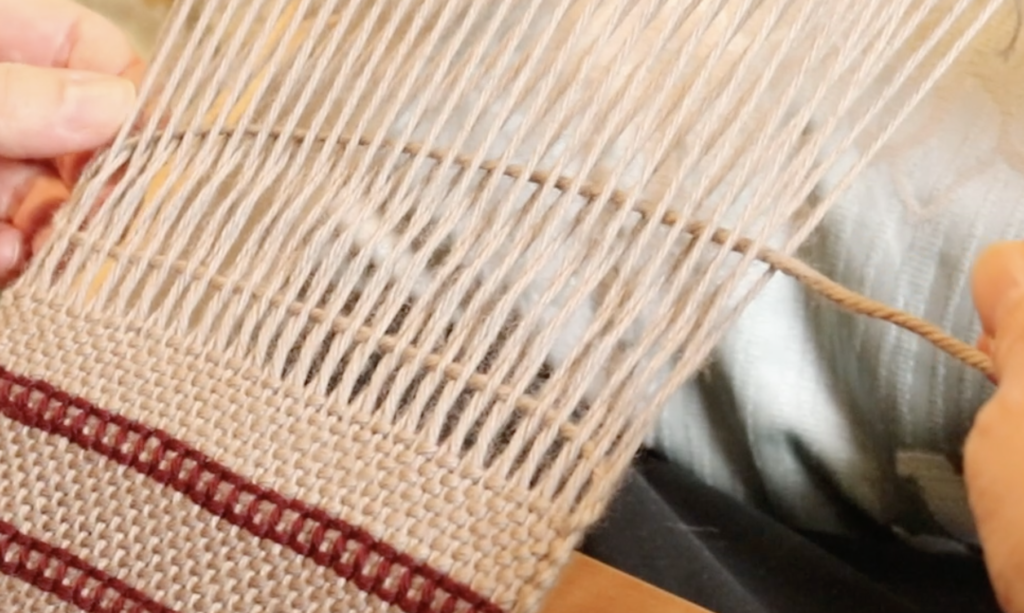
As you continue your pick up across the warp you should notice that the warp threads are twisted in pairs both below and above the stick. This is how you know that you’re picking up correctly.
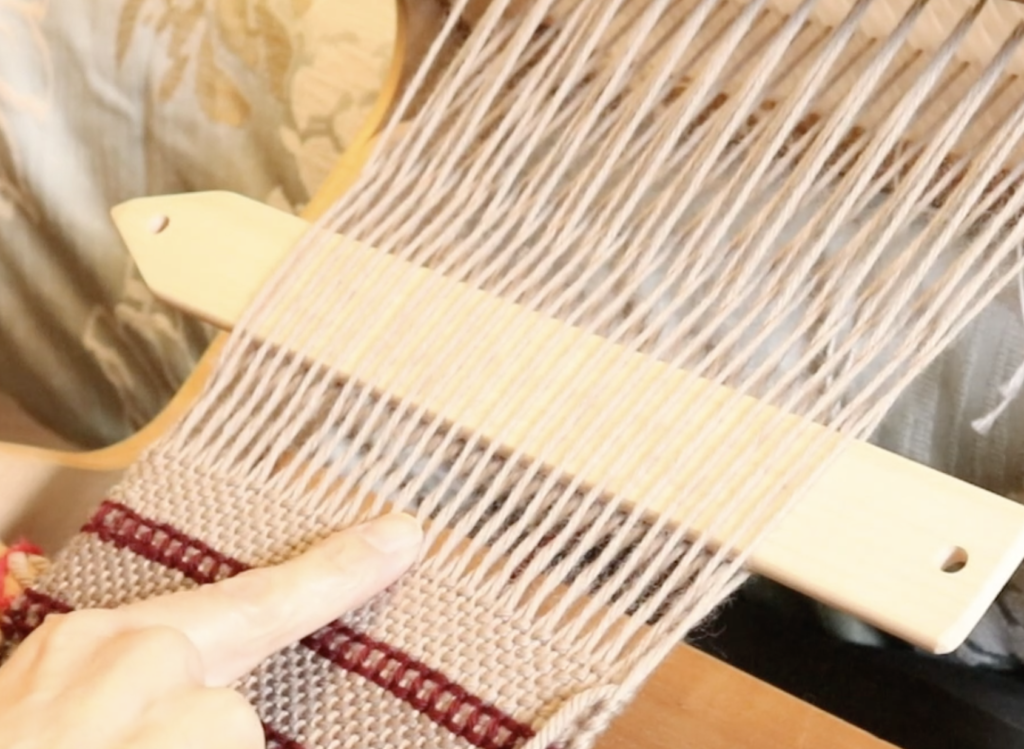
When you’ve completed your row of pick up, slide your pick up stick back towards the heddle and leave in place.
Turn the pick up stick on edge and pass your stick shuttle through the shed.
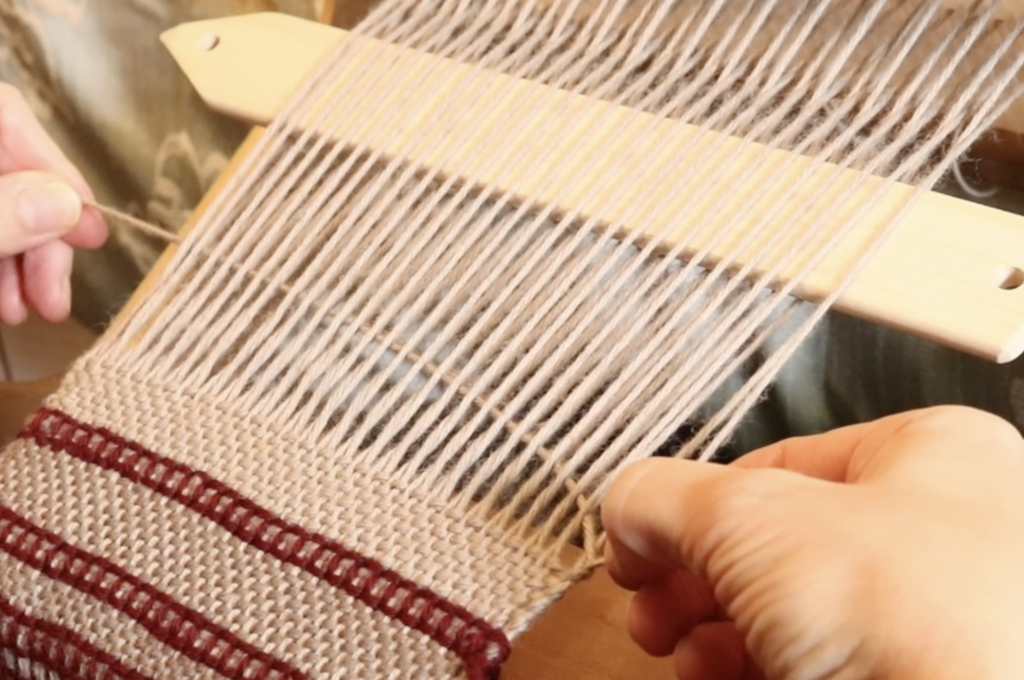
Be sure to fix up and pay attention to your edges, just like you would for straight plain weave. If you need to know more about techniques for weaving neat edges, please watch this video:

Remove the pick up stick and beat. You will feel resistance as a result of the twists being in place, so be gentle and try to beat straight. Remember, this is an airy fabric, we’re not going for densely woven fabric here!
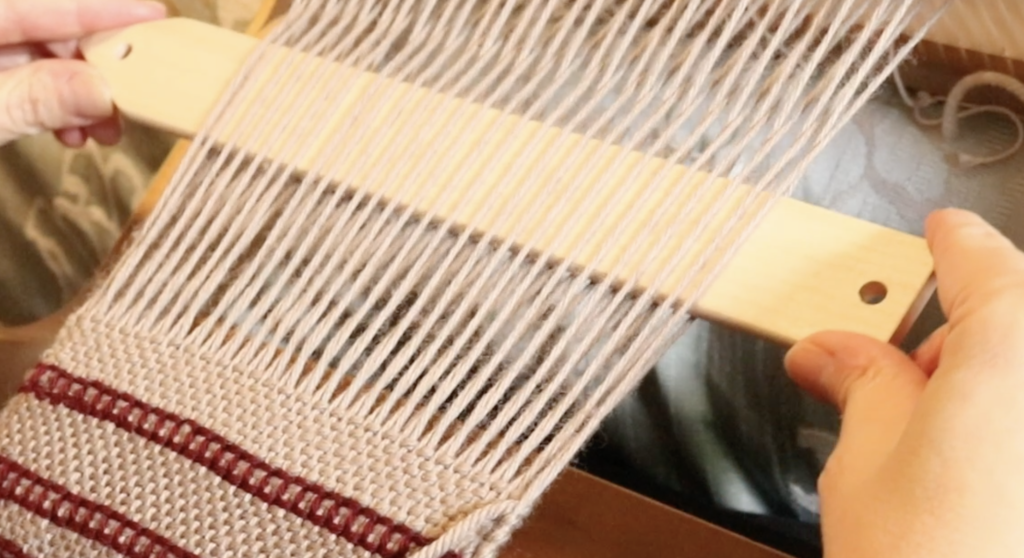
Change to the next shed. I was in the down shed, so now I change to the up shed. Enter the shuttle from the left and pass through the shed, fixing up your edge to weave neatly as before. You will note that the second row of twists that was above your pick up stick when working your pick up has now transferred underneath your new pick.
Beat the new pick, remembering to be gentle and not too firm with your beat. You now have two rows of Leno.
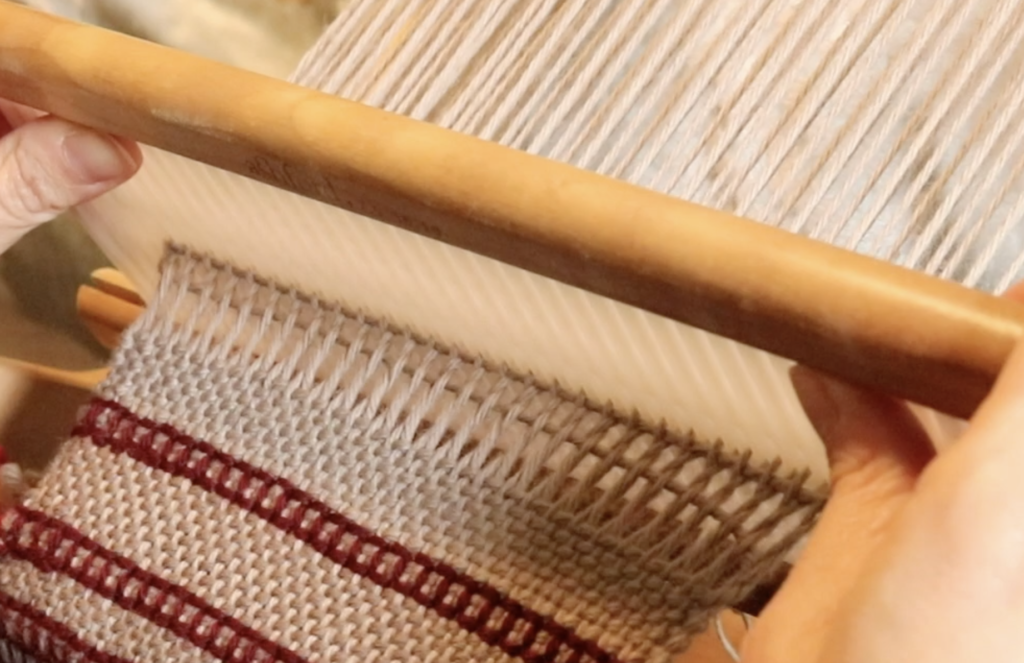
Now you can choose whether you go back and repeat more rows of Leno, or you can do what I’ve done in this photo – alternated bands of plain weave with bands of Leno. Both are very effective, it just depends on the look you’re going for.
If you would like to see a video version of this tutorial, you will find that here:
I hope you enjoyed this tutorial, and if so, please leave me comment to let me know. Also feel free to ask any questions you may have down below, I’m happy to help.
Until next time…
Happy Weaving
Hi Kelly, This is just what i needed. I recently wove a scarf as a gift and my first leno section was fine but at the finished end of the scarf it wasn’t open enough and i’m still not sure what i did wrong. Also, my edges were wonky… Is this going to be on your teaching website as a free class? If so, I’ll watch it again and again until I get it. I’m definitely a visual learner, not a written word learner. Thanks
Hi Cheryl,
You can watch the video on Youtube as much as you like. I do cover Leno in the Lovely and Lacey workshop that you may find helpful. Consistency is key really. Consistent warp tension for good edges, consistent weft tension, consistent beat. Find what works and keep repeating so it all looks uniform 😊
Another great tutorial
I finished the October inkle challenge, and now was looking for a little bit larger project for the holidays. I’m going to make a light, and airy shawl to take with me on a trip to Egypt in February. Thanks for the tutorial, it’s going to really help me with this next project.
Sounds wonderful!
Great tutorial Kelly (as always)! Congratulations on your many successes on subscribers and members of the School! Well deserved!!!!
Thank you Debby! ❤️
Very Good. I will try. Thanks love this weaving school.
😄
Thank you, Kelly! You are an excellent teacher and made Leno easy to understand. I’ve tried Leno before and could not keep the threads twisted. I think I can do this and cannot wait to try Leno on my next project!
It’s really not as complicated as it looks. Once you have that rhythm going you will fly through it!
Dear Kelly,
This video is just what I needed to push me back into weaving as hopefully I will soon warp up my rigid heddle loom.
It is too long since i subscribed to your site, and I have so much enjoyed the inspiration on your blogs – for life in general as much as weaving.
Many years ago I lived in Melbourne and have felt for you through the dreadful fires and now the Covid virus.
I pray that you and your family will come through safely.
Away to your Etsy shop to look at your Market Bag.
Thank you for everything – I loved those beach photos way back too,
God bless,
Milly
Thanks Milly!
Kelly,
Thank you for another lesson. I get so excited when I see the many things we are capable of creating. This is so pretty I want to try it as soon as possible!
Wonderful Loretta, I hope you do!