• Skip to main content
  • Skip to primary sidebar

Kelly Casanova Weaving Lessons

  • Hi! I’m Kelly!
    • Affiliates Disclosure
  • Online Weaving School Class Index
    • Common account issues
    • Common technical issues
    • What do I get with a membership?
  • New to rigid heddle weaving? Start here!
    • Never heard of the rigid heddle loom?
    • How to weave neat edges on the rigid heddle loom
    • Rigid heddle weaving
    • Rigid Heddle Weaving Patterns
  • Patterns
  • Subscribe

Rigid heddle weaving

10 Perfect Christmas Gift Ideas for Weavers 🎄

by Kelly 5 Comments

If you’re shopping for a weaver this Christmas, you may be wondering what to get them. Weaving is such a creative and rewarding hobby, and there are so many tools and goodies that make thoughtful presents!

Whether you’re buying for a beginner who is interested in getting started in weaving or a seasoned weaver who seems to have everything, this guide will help you find the perfect gift.

Here are 10 Perfect Christmas Gift Ideas for Weavers that range from practical tools to fun little luxuries.

1. Beautiful Shuttles

Every weaver needs shuttles – and it’s super handy to have extras.

Stick shuttles are affordable, easy to load with yarn and effective to weave with. I recommend getting stick shuttles that are already lacquered, unless you plan to lacquer them yourself. Lacquered shuttles glide beautifully through the warp without resistance.

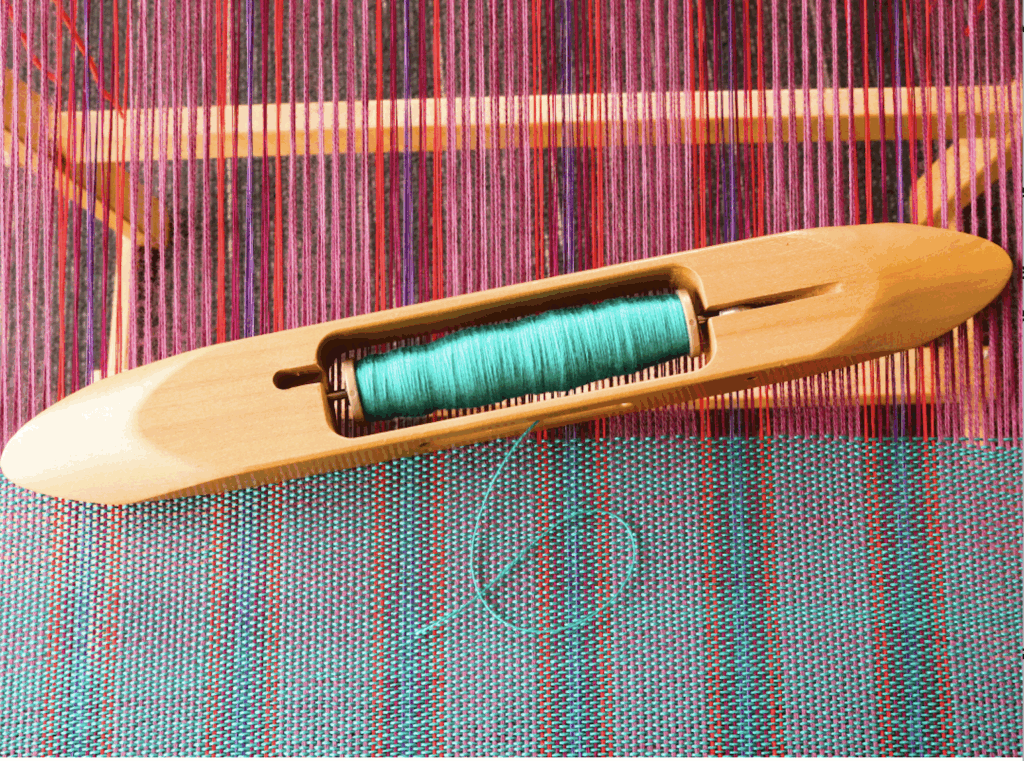
Handmade wooden boat shuttles are not only functional but can also be a work of art. Look for shuttles in unique woods, ergonomic design and skilled craftsmanship for a truly special gift.

I love my personal collection of hand crafted boat shuttles from Pickers Ridge. They are carefully crafted in Australia from sustainably sourced wood and are a delight to use.

2. Hand-Dyed Yarn or Dyers Kit

Weavers love yarn (you can’t really go wrong here). Hand dyed yarn is something special, created by artisans with love and care. Perhaps the weaver in your life is interested in learning to dye yarn at home for their own unique weaving projects.

Yarn dye kits are available to enable beginners to dyeing to get started without having to source all the ingredients themselves. For those interested in natural dyeing, a gift voucher for an online class would be a perfect gift.

3. Rigid Heddle Loom or Heddle Upgrades

If your weaver has a rigid heddle loom, an extra heddle/ reed in a different size will expand their possibilities. Or if you know that they are wanting to level up to weaving with more than one heddle of the same size, that is also an excellent option.

Pick up sticks – Pick up sticks are a low cost way for a weaver to up their weaving game. A pick up stick allows the weaver to “pick up” warp threads in order to create additional sheds and varied patterns without the additional cost of new heddles.

4. Handy Weaving Tools

Small tools make perfect stocking stuffers and are great lower cost gifts. Think: weaving combs, beaters, threading hooks, tapestry needles, or a good pair of small scissors. Tools in brass, wood, or other special finishes are extra thoughtful.

Here are some of my favourite handy tools that are in constant use in my studio:

Bent tip tapestry needle – wonderful for weaving in tails off the loom, hemstitching, hand seaming and embroidery on the loom.

Double ended threading hook – I love these hooks so much because they sit flat, they are flexible, easy to store, affordable and they are two tools in one!

Dressmakers shears – Sharp scissors are an essential for weavers. What I love about dressmakers shears is they are nice and long for cutting warps off the loom and also indispensable for weavers who love to cut and sew with their handwoven fabric.

5. Inspiring Books

There are so many wonderful weaving books available! A weaving book can spark fresh ideas, keep creativity flowing and teach brand new techniques.

Books play a huge role in my own creative life – ok, confession time, I’m a little addicted to books! They are such a wonderful way to learn and inspire, and they align perfectly with my learning style.

Here are some of my personal favourites:

Rigid Heddle Weaving

The Weaver’s Idea Book – Jane Patrick

Inventive Weaving on a Little Loom – Syne Mitchell

Multi Shaft Weaving

The Handweaver’s Pattern Directory – Anne Dixon

Next Steps in Weaving – Patty Graver

Inkle Weaving

The Weaver’s Inkle Pattern Directory – Anne Dixon

In Celebration of Plain Weave – Annie Machale

6. Online Classes or Memberships

The gift of learning never goes out of style! An online weaving course or membership (like my Premium Level Membership) makes a thoughtful present for a weaver who loves to expand their skills.

Over at the Online Weaving School you will find a huge array of weaving classes for a variety of weaving disciplines and levels.

Students can learn in their own time and in the comfort of their own home – no commuting long distances for expensive in person classes. They also receive one on one support when needed.

Gift vouchers are available, so consider giving the precious gift of learning to a weaver today!

7. Yarn Storage & Organization

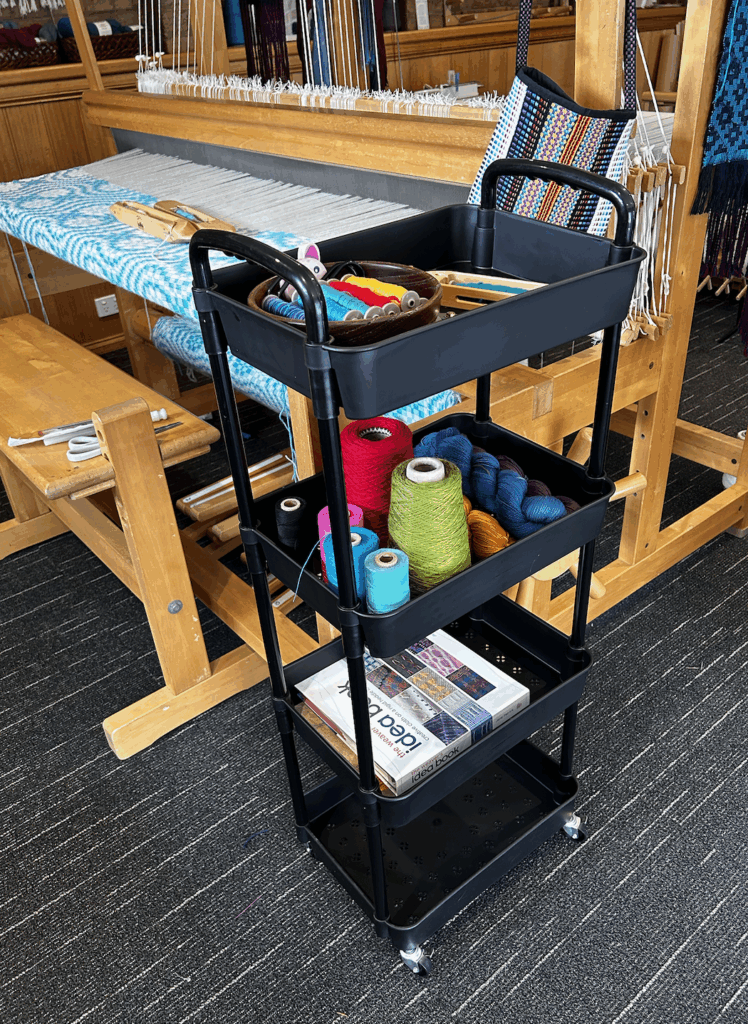
Yarn has a way of multiplying! Help your favourite weaver stay organised with a yarn bowl, project or rigid heddle loom bag, or beautiful storage basket.

If you have noticed that the weaver in your life has a collection of heddles with nowhere to keep them when not in use, a heddle rack could be the perfect solution. Or, if you’re handy with woodworking, you could follow these simple plans to make one.

With trends in home organisation being a very popular topic these days, it is easy to find all kinds of storage solutions for weavers. For more ideas, check out this detailed resource.

8. Finishing and Yarn Tools

Fringe twisters, Strucket for easy wet finishing and draining, or a basic sewing machine are practical gifts that make projects look polished and professional. These are the kinds of things many weavers don’t necessarily buy for themselves but are thrilled to receive.

To help your weaver become really proficient with yarn, here are two super helpful tools that can work together or individually:

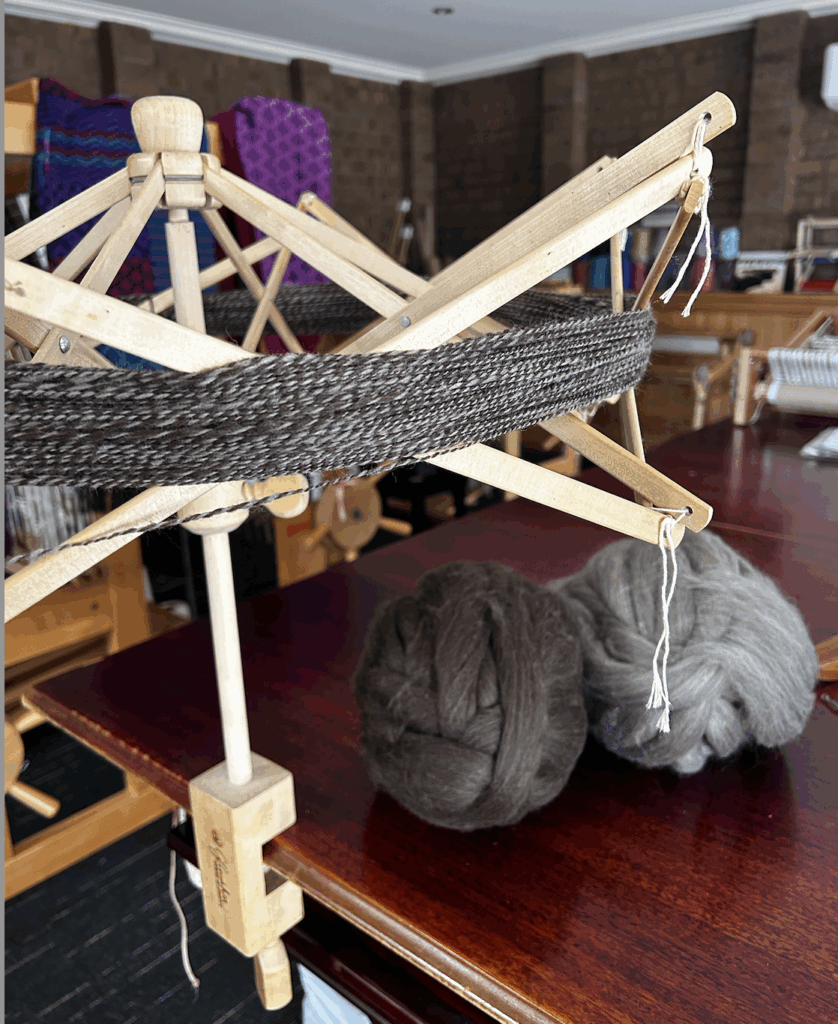
  • Yarn Swift – If you have hanks or skeins of yarn rather than a ball or cake you will need to prepare it before weaving with it. Placing the skein on a yarn swift holds it in place for you and turns as you wind your ball. I have a Glimakra swift but they are harder to find these days. This one looks like a good alternative.
  • Ball Winder – You can thread your yarn from the yarn swift directly to the ball winder to make a yarn ball or cake. As you turn the handle of the ball winder, the swift also turns, feeding the yarn off so that the two tools work together seamlessly. I use my ball winder a LOT in my studio!

You can also find a swift and ball winder combo package.

9. Little Loom Fun

Little looms provide a lot of relaxing fun for the weaver and are usually much more affordable than a larger or more complicated loom.

The Zoom Loom is a type of pin loom by the Schacht company that allows you to weave small squares. You can keep it simple with plain weave or get more invested with patterning. The squares can be used for a huge variety of projects when sewn together to create larger pieces of fabric. I actually just purchased a Zoom Loom for myself, I’m having fun weaving squares and exploring patterning possibilities 😌

There are also pin loom weaving books available for extra learning and inspiration.

If you are interested in doing some more research on weaving in small spaces, check out this resource.

10. A New Loom or Gift Card

If you’re looking for a big-ticket present, you can’t go past a new loom! A rigid heddle loom, a table loom, or even a floor loom will make their Christmas unforgettable. For those hard-to-shop-for weavers, a gift card or certificate from their favourite weaving supplier is always a safe bet.

*This article contains affiliate links. For further information, please see my disclosure policy.

🎁 Final Tip: If you’re a weaver yourself, don’t forget to share this list with family and friends so they know exactly what’s on your wish list this year!

I hope you find this list helpful and valuable.

Until next time…

Happy Weaving!

Filed Under: 4 shaft weaving, 8 shaft weaving, All about looms, Books, Floor Loom Weaving, Gift Guide, Rigid heddle weaving, Table loom weaving, Weaving, Yarn Tagged With: gift guide, gift guide for weavers, perfect weaving gifts, rigid heddle weaving

Waffle Weave Made Easy: Step by Step Guide for Rigid Heddle Looms

by Kelly 3 Comments

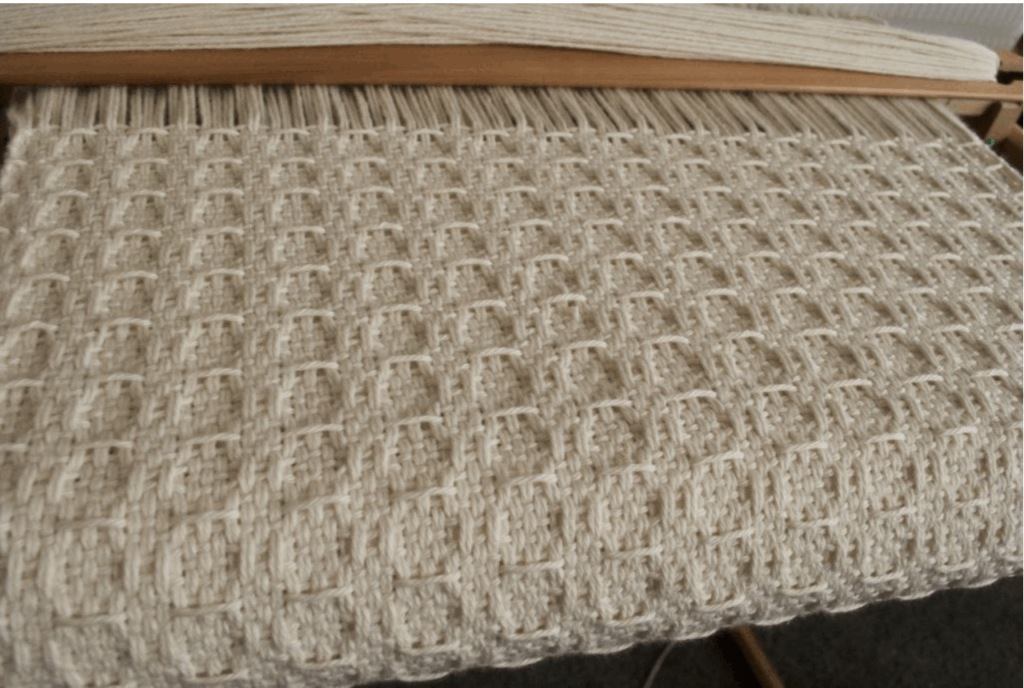
Waffle weave is a beautiful structure that adds texture and softness to your handwoven projects. In this step-by-step photo tutorial, I’ll show you exactly how to create waffle weave using your rigid heddle loom and a pick up stick.

Waffle weave is fun for beginners or any rigid heddle weaver looking to expand their rigid heddle skills. This guide will walk you through the setup and the weaving process so that you can incorporate waffle weave into your repertoire in no time at all.

If you would like to see a video tutorial with closed captions and a free printable PDF that includes the pick up, weaving sequence and yarn details, head over to the Online Weaving School to enrol in the free class.

The Pick Up

The first thing we need to do is insert our pick up stick to create the additional shed we need to weave our waffle weave. Make sure your pick up stick is wider than your warp.

For this particular pattern we’re doing a 2/2 pick up, which means 2 warp threads will be on top of your stick and 2 will be underneath, alternating across the warp.

Ensure that your heddle is in the DOWN position to begin your pick up.

When your pick up stick is in place you can place the heddle back in neutral. Feel free to secure your pick up stick with some waste yarn if you feel concerned that it might slip out of place.

The Weaving Sequence

Load your stick shuttle with yarn. Waffle weave looks great with both contrasting or muted colours, because the texture still makes it pop.

Place your heddle in the DOWN position and weave one pick (row). Beat.

Place the heddle into the UP position. Bring your pick up stick forward to behind the heddle but leave it laying flat. Weave one pick and beat.

* HANDY TIP –

You may need to take the shuttle manually around the edge of your outermost warp thread to prevent it drawing in too far and skipping an edge thread. I have an article that explains this method here.

Place the heddle in the DOWN position once more. Weave one pick and beat.

Place the heddle in UP. Weave one pick and beat.

This step is a bit different. We leave the heddle in the neutral position, slide the pick up stick forward until it sits behind the heddle, then turn the pick up stick on edge to create the shed.

Weave one pick, then beat.

HANDY TIP –

Your pick up stick, once turned on edge may, or may not stay in place. If it keeps wanting to flip down rather than stay on edge, simply hold it with one hand while the other hand holds the pick up stick on edge.

The last shed in the weaving sequence is – heddle UP. Weave one pick, beat.

That is one complete weaving sequence. To continue, you just head back to step 1 and start all over again. Don’t forget that there is a free printable for the pick up sequence, weaving sequence and some yarn details plus a free, closed captioned video tutorial available here.

Ways to use Waffle Weave

Waffle weave has such a lovely texture and can be either eye catching or understated, depending on the aesthetic you’re going for.

The appearance can also be altered according to your chosen yarns. With a thicker yarn (like the DK weight wool I use in this tutorial) your pattern will be bold and spacious. With a lighter weight yarn (like an 8/2 cotton) the pattern will be fine and detailed.

Waffle weave is terrific for utilitarian items, as the texture creates absorbent cloth. Think dish cloths, kitchen towels and hand towels.

A baby blanket (or even burp cloths!) would also be a beautiful item to utilise the loftiness of waffle weave. I’m thinking of a very soft fingering weight or DK knitting cotton to weave a sumptuous fabric fit to be close to delicate baby skin.

*This post contains affiliate links. For further information, please see my disclosure policy.

You can check out a free video tutorial for this technique here –

I hope you can now see the potential and versatility that waffle weave could bring to your rigid heddle weaving projects! For more ideas on how to use pick up sticks in rigid heddle weaving, you won’t want to miss this resource!

Exclusive Printable!

Would you love this tutorial in a printable PDF format? I have a 6 page printable PDF available so that all the steps are at your fingertips. This is an exclusive printable and only available right here ⬇️

Grab the low cost printable here!

Until next time…

Happy Weaving!

Filed Under: Free tutorial, Rigid heddle weaving, Rigid Heddle Weaving Patterns, Tutorials, Weaving Tagged With: rigid heddle weaving tutorial, waffle weave, waffle weaving tutorial

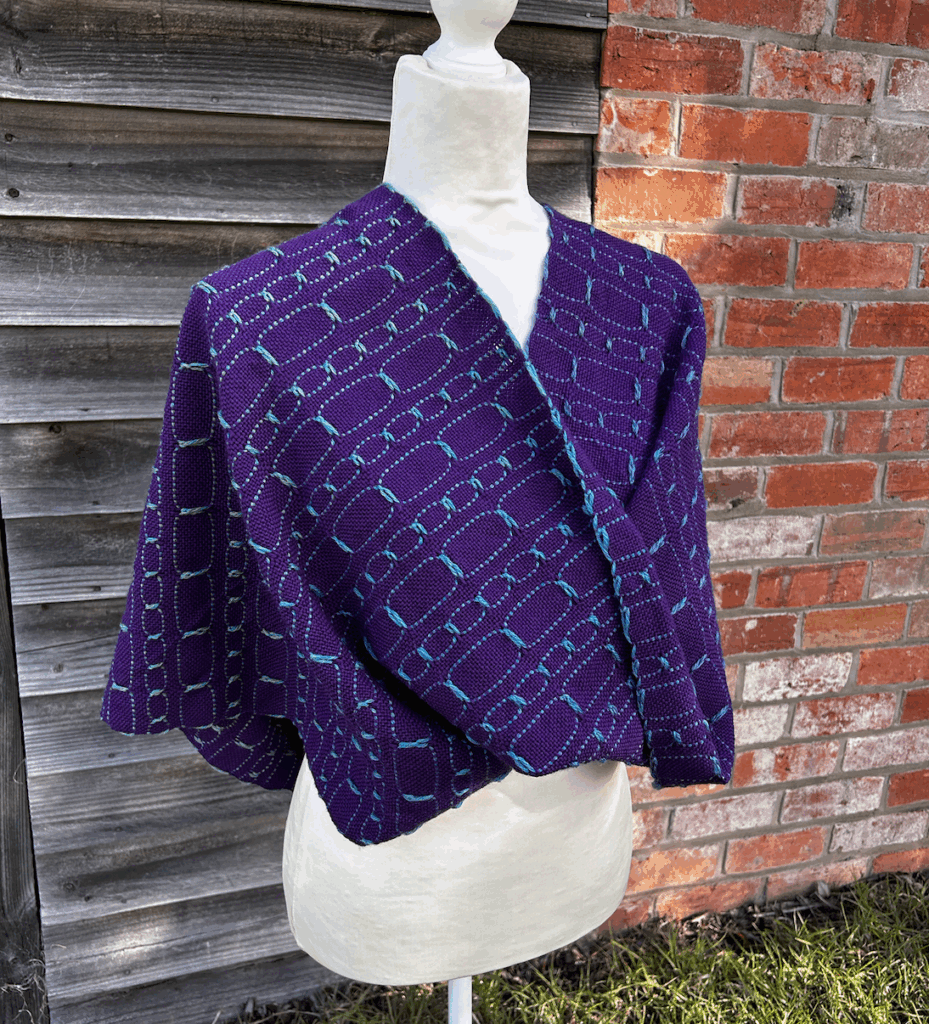
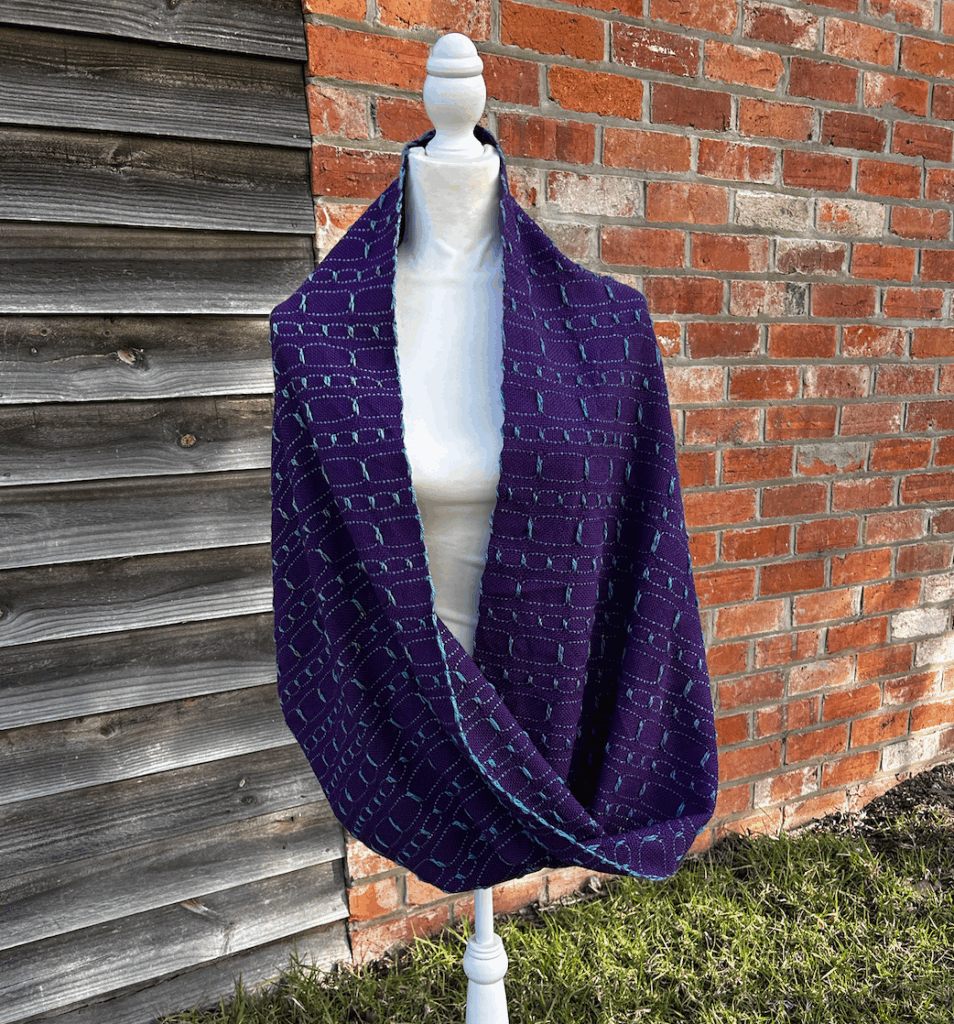
Mobius Shawl 10 Year Celebration Project

by Kelly Leave a Comment

This project is designed for the adventurous beginner up to the more advanced weaver.

In this article you will see the basic calculations for the Mobius Shawl Project. There is a Deluxe Printable Version of the pattern available here which includes full calculations, step by step instructions with colour photos and also gives the option of calculations for a full shawl or scarf project to give you more choices and options.

Rigid Heddle Loom Project

To complete this project you do need to know how to warp and weave on your rigid heddle loom, and have ideally completed a project or two (or at least a sample or two).

If you want to learn more about rigid heddle weaving or gain more confidence with your loom before attempting this project, I recommend my online course, Woe to Go Beginner Rigid Heddle Weaving.

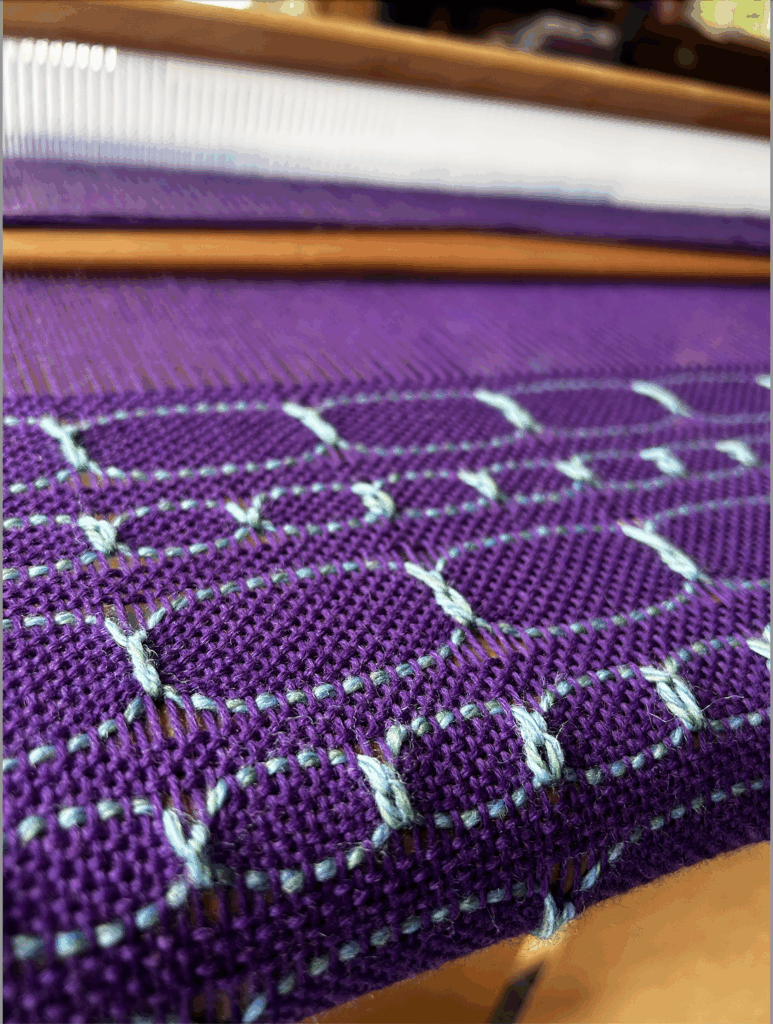
You have a lot of yarn choices for a project like this, but when choosing colours I recommend that your warp/ plain weave weft contrasts well with your pattern weft to make your Danish Medallions pop.

For my shawl I used a fingering weight wool for the warp and plain weave weft and a dk weight wool for the pattern weft.

Be sure to follow along with the video for more specific instructions, and grab the printable 15 page Deluxe pattern if you feel you need step by step instructions.

What you need to complete this project:

* Rigid heddle loom 24” weaving width or wider

* 1 x 10 dent heddle

* 2 stick shuttles longer than the width of the project

* Crochet hook or threading hook

* Direct warping peg or warping board

* Reed and threading hook

  • Scissors
  • Sewing machine (or sew by hand)

MOBIUS SHAWL PROJECT INFORMATION

Sett – 10

Number of ends – 238

Number of slots – 119

Width on the loom – 23”

Total warp length – 88”

Weave structure – plain weave with Danish Medallions

Shawl length off the loom – 75”

Wet finishing – Soak garment in warm, mildly soapy water (don’t agitate) for at least 1 hour. Warm rinse, press out excess water between clean, dry towels, gently pull into shape and dry flat in the shade. Dry completely and cut off tails. Press on appropriate iron setting if needed.

Sewing – Flat felled seam, use sewing machine or hand sew

YARNS:

I chose to use Bendigo Woollen Mills 4 ply Luxury (fingering weight) for warp and plain weave.

I used Bendigo Woollen Mills Prism Mystic 8 ply (DK weight) for the pattern weft.

For the warp-

  • Fingering weight (navy) – 145 grams

For the plain weave weft-

  • Fingering weight (navy) – 109 grams

For the pattern weft-

* DK weight (variegated) –   49 grams

The wraps per inch for the fingering weight yarn: 20 wpi

The wraps per inch for the DK weight yarn:  15 wpi

Possible Yarn Substitutes-

Fingering weight-

Jubilee Yarn Merino Fingering weight

Cascade Heritage Sock Yarn

Berroco Ultra Wool Fine fingering

DK weight-

Wool Weave Hand Dyed Merino dk

Nice Wool Gradient

Be sure to watch the video tutorial on Youtube to follow along with:

This post contains affiliate links. For further information, please see my disclosure policy.

I hope you really enjoy weaving this Danish Medallion Mobius Shawl. Thank you for all your support over the last 10 years, I’m looking forward to the next 10 💕

Until next time…

Happy Weaving!

Filed Under: Free Pattern, Rigid heddle weaving, Rigid Heddle Weaving Patterns, Weaving Tagged With: free weaving project, mobius shawl, rigid heddle weaving project

How Many Projects Is Too Many?

by Kelly 11 Comments

How many projects is too many? 🤔 If you’re anything like me, you’ve probably got more than one project on the go at any given time. Maybe it’s a rigid heddle scarf on the loom, a tapestry sampler, some floor loom experiments, or even a non-weaving project like knitting or sewing. And maybe—just maybe—some of those projects have been “in progress” for quite a while.

Is that a problem? Not necessarily.

In fact, I’ve found that having multiple creative projects on the go can actually be a good thing—for creativity, productivity, and even self-care. But I’ve also learned that this approach doesn’t work for everyone, and even for those of us who love variety, there are a few important things to consider.

Let’s take a look at the pros and cons of juggling multiple projects at once, and how to make it work for you (rather than against you).

The Upside: Why More Than One Project Can Be a Great Thing

There are several reasons why I personally enjoy and benefit from having multiple projects in motion.

💡 It keeps me creatively inspired

When I switch between different techniques, fibres, or project types, I find it actually fuels my motivation. If I feel a bit stuck or bored with one thing, I can take a break and pick up something else that excites me.

🧘‍♀️ It gives my body a break

Different projects involve different movements and muscle groups. For example, weaving at a floor loom can be demanding on the legs and back, while spinning or hand-sewing is more gentle and seated. Rotating between them helps avoid repetitive strain and gives parts of my body a rest.

🎯 It helps me be more productive overall

This might sound counterintuitive, but I often finish more projects when I allow myself to work on a few at once. Why? Because I stay in the flow of creativity rather than getting bogged down in frustration or boredom with a single task.

Turned Tacquete on my Louet David 8 Shaft Floor Loom

The Downside: What to Watch Out For

Of course, having too many projects can come with its own set of challenges.

🕳️ The danger of the “unfinished” pile

Longer-term or more difficult projects can easily end up languishing while I focus on newer, shinier things. Sometimes, they’re forgotten entirely—or feel like a burden when I do remember them.

🏠 The clutter adds up

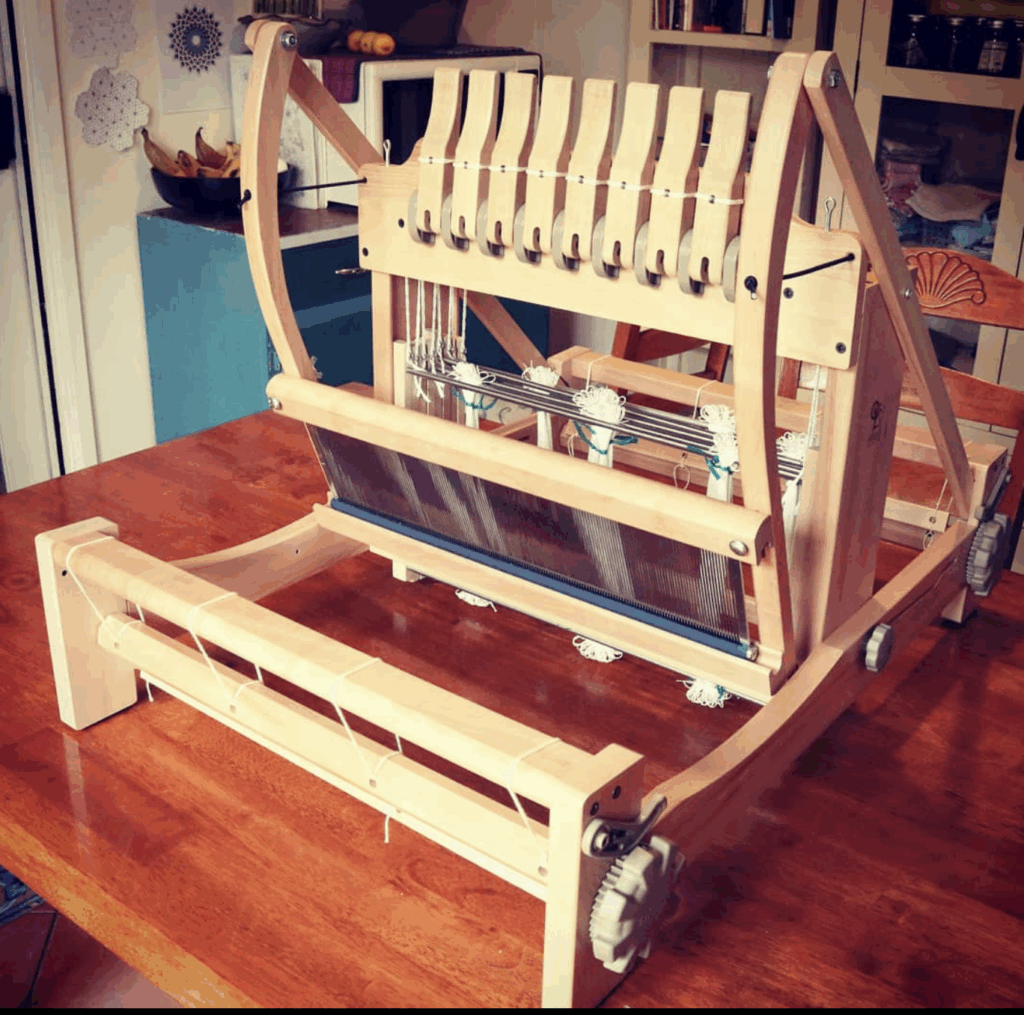
Let’s be honest—every project takes up space. If you don’t have dedicated storage, and adequate space, things can get messy fast. (Ask me how I know, I have my own studio and things still get out of hand!)

🤹 It can feel mentally overwhelming

Even when projects are tucked away, they take up mental space. That little voice saying “You really should finish that…” can start to sound pretty loud when it’s multiplied by five or six projects.

Are You a One-Thing-at-a-Time or Many-Things-at-Once Kind of Person?

This is the key question. Some people feel scattered and anxious when they have too many projects on the go. Others (like me!) thrive on at least some measure of variety.

Ask yourself:

  • Do you feel inspired or overwhelmed by multiple projects?
  • Are you good at coming back to things, or do you tend to move on permanently?
  • Does your environment support multiple projects, or is it stressing you out?

Being honest about your tendencies, preferences and living situation can help you make better decisions for your creativity and well-being.

Bright & Beautiful Towels PDF Pattern

A Few Things to Consider Before Starting “Just One More”

Before you jump into another project, it’s worth asking:

💰 Can I afford it right now?

Some projects require buying new tools, yarns, or supplies. Do you have the budget to support more than one at a time?

📦 Do I have the space to store it?

Even small projects take up room. Is there somewhere safe and organised you can keep your work-in-progress?

📅 Am I likely to finish it—or will it join the WIP graveyard?

You know yourself best. If you’ve started five projects in the past month and finished none, it might be time to pause and focus. Be honest and know yourself for the best outcome.

What Works for Me

Over time, I’ve found a rhythm that suits both my creative energy and my practical limits.

  • I usually have one main weaving project on the loom, plus one or two side weaving projects plus some other activities like dyeing, sewing, spinning, knitting or crochet.
  • I use small baskets, zip pouches and tote bags (handwoven of course!) to keep WIPs organised and tidy.
  • I allow myself to start something new only if it serves a creative need or solves a problem (not just to avoid a tricky bit on something else!). If there is something I’m feeling super passionate about, I will allow myself to go with that motivation and ride the wave at least some of the time.
  • I keep a simple notebook list of active projects so I can easily jump back in when I have time or energy. I also add future desired projects to this list.

And most importantly—I try not to beat myself up if something takes a long time. Creativity isn’t always linear, and that’s okay.

Theo Moorman Technique Online Course

Final Thoughts: It’s Not About the Number, It’s About the Balance

There’s no magic number of “allowed” projects. What matters is whether your projects are serving you—your creativity, your energy, your enjoyment.

If you’re the kind of person who thrives with multiple projects, embrace it (with some boundaries if needed). If you prefer one at a time, that’s great too. Either way, tune into what works for YOU in this season, and don’t be afraid to change your approach if needed.

*This post may contain affiliate links. For more information, please see my disclosure policy.

If you’re challenged by availability of space, consider whether small loom weaving would be well suited to your situation.

If you find it hard to focus or get anything done with the time that you have, check out the 10 Minute Rule to increase productivity.

I hope you enjoyed this post and feel free to share with us your own thoughts and experiences in the comments below ⬇️

Until next time…

Happy Weaving!
Filed Under: Free Pattern, Rigid heddle weaving, Rigid Heddle Weaving Patterns, Weaving Tagged With: too many projects, weaving projects

Boat Shuttle vs Stick Shuttle: Which Should You Use on a Rigid Heddle Loom?

by Kelly 7 Comments

If you’re a rigid heddle weaver and you’ve ever looked at a boat shuttle and wondered, “Can I use that on my loom?” — this post is for you!

When you first purchase a rigid heddle loom, it almost always comes with a stick shuttle to get you started. But then, you might notice other weavers using a boat shuttle instead and wonder why.

Today I’m going to walk you through the key differences between these two types of weaving shuttles, how I decide which one to use, and whether a boat shuttle is worth the investment for your weaving journey.

Can You Use a Boat Shuttle on a Rigid Heddle Loom?

Yes, absolutely! While a stick shuttle is what most rigid heddle looms come with, a boat shuttle is a wonderful tool that can be used on these looms — you just need to know when and why it might be helpful.

Let’s look at the differences so you can decide which shuttle is right for your projects.

Boat Shuttle vs Stick Shuttle: What’s the Difference?

Here’s a quick comparison of the two:

1. Cost

  • Stick Shuttle: Usually inexpensive — you can even make your own or improvise with a paint stirring stick or similar.
  • Boat Shuttle: Although prices vary significantly, a boat shuttle is more of an investment — In addition to the shuttle, you’ll likely want extra bobbins, which are an additional cost.

💡 Tip: Some weavers make their own bobbins from cardboard or stiff paper!

2. Ease of Use

  • Stick shuttles are quick and simple for thicker yarns. I like to use mine when I’m weaving with anything thicker than fingering weight.
  • A stick shuttle involves passing the shuttle through the shed.
  • Boat shuttles shine when working with finer yarns (like Tencel, lace weight or 8/2 cotton). They feed yarn more smoothly and save a lot of time.
  • A boat shuttle (depending on the width of the warp) involves throwing the shuttle through the shed.

One of my favorite things? I can pre-wind multiple bobbins and just swap them out quickly mid-project. So satisfying and keeps you in “the zone”!

3. Efficiency

With a boat shuttle:

  • Winding yarn is fast — especially if you use a hand bobbin winder or electric bobbin winder.
  • Weaving is smoother. No need to stop and unwind yarn manually like with a stick shuttle.
  • It glides beautifully through the shed, especially when you’re working with fine, smooth yarns. You do need to ensure that you have good warp tension, especially on a wider warp where you might need to throw your boat shuttle further.

💡 Tip: You can even use a hand drill to wind bobbins!

A stick shuttle:

  • It’s fairly quick to wind a thicker yarn onto a stick shuttle
  • Once you’ve had some practice, you can kind of “shoot” the shuttle from one side of the warp to the other, making the transfer quicker. You will need a good firm tension and straight angle to ensure the “prongs” of the shuttle don’t catch on any warp threads.

Does a Boat Shuttle Fit Through the Shed on a Rigid Heddle Loom?

Great question — and yes, it absolutely does!

I often hear weavers worry that the shed (the opening between raised and lowered threads) won’t be large enough for a boat shuttle. But on my rigid heddle looms, I’ve had no issues at all. The boat shuttle fits through easily, and its smooth design helps it glide through like a dream.

If you were using a boat shuttle with a higher profile, you may run into issues. For that reason, I recommend a low profile boat shuttle (about an inch high is perfect).

💡 Tip: Just make sure you’re advancing your warp often so your shed stays nice and open!

Which Boat Shuttle Should You Buy?

There are so many boat shuttles out there, it can feel a bit like picking your first loom all over again!

A great entry level shuttle is the Ashford 13 or 15 inch open boat shuttle:

  • Lightweight but sturdy
  • Tapered ends for easy gliding
  • Works beautifully for both narrow and slightly wider projects
  • Affordable

It comes with one plastic bobbin, but I definitely recommend grabbing a few extras if you can.

A mid range shuttle would be this 13″ open boat shuttle from Pickers Ridge.

  • Handcrafted in Australia but affordable
  • Quality, sustainable New Guinea Rosewood
  • Light and lovely to hold
  • Magnetic spindle
  • Regular sized Ashford bobbin fits this shuttle

And for a high end, one of a kind shuttle check out the 13″ open boat shuttle from Pickers Ridge.

  • Handcrafted in Australia
  • Stunning appearance
  • Quality, sustainable Figured Silkwood maple
  • Magnetic spindle
  • A special piece for your weaving studio
  • Regular sized Ashford bobbin fits this shuttle
Image from Pickers Ridge Online Store

So… Do You Need a Boat Shuttle?

Nope — but you might really enjoy having one in your weaving toolbox.

If you mostly work with thicker yarns, don’t mind winding by hand and need to be budget conscious, your stick shuttle might be all you ever need. But if you’re venturing into finer yarns, love having pre-wound weft ready to go, or just want to make your weaving more efficient — the boat shuttle is a game-changer.

I love having both shuttle options available — and using them based on the yarn and project I’m working on. Like most weaving tools, it’s all about finding what works best for you.

If you’re interested in learning more about different types of boat shuttles, check out this article I wrote on open boat shuttles v’s closed boat shuttles.

*This post contains affiliate links. For more information, please see my disclosure policy.

Let me know in the comments below:
Do you use a boat shuttle on your rigid heddle loom? Or are you tempted to give one a try?

If you found this post helpful, feel free to share it or subscribe to my YouTube channel for more weaving tips and tutorials.

Check out the video below to see the boat shuttle in action with a rigid heddle loom:

Until next time…

Happy weaving!
— Kelly 💛

Filed Under: Rigid heddle weaving, Weaving Tagged With: boat shuttle, rigid heddle weaving

Open vs Closed Boat Shuttle: What’s the Difference & Which Should You Use?

by Kelly Leave a Comment

If you’re new to weaving or upgrading your toolkit, you might be wondering: What’s the difference between an open and closed boat shuttle—and does it really matter which one I choose? In this post, I’ll walk you through the key differences, the pros and cons of each style, and tips on choosing the best shuttle for your weaving projects.

🧵 What Is a Boat Shuttle?

A boat shuttle is a weaving tool used to pass weft yarn through the shed (the opening created when you raise or lower the warp threads). It typically holds a bobbin or quill on a metal spindle that allows the yarn to feed off smoothly as you weave.

Boat shuttles are most commonly used with floor looms or table looms, but can also be advantageous for rigid heddle weaving.

There are many types of boat shuttle but today we’re going to discuss open and closed boat shuttles with a side feed.

What is warp diving?

I have to explain what I mean by “warp diving” as I’m going to use the term a number of times! It sounds like a whole lot of fun but it’s really not! 😆 So, a warp dive is when your shuttle angles downward at some point during it’s transition from your hand to the opposite side of the loom.

This causes the tip of the shuttle to break through the bottom shed of the weaving and, well, you can probably imagine the outcome.

Warp dives range from minor (phew, the cloth beam fabric caught it in mid dive) to spectacular (picture yourself, or me if you like, crawling around under the loom trying to locate the exact landing position of the shuttle).

OK, that should be crystal clear to everyone now? 😆

What Is an Open Boat Shuttle?

An open boat shuttle is open on the top and the bottom, allowing the bobbin to be visible and easily accessible. You can pop the bobbin in and out quickly, because you can push on it from underneath, which makes unloading and reloading a breeze.

✅ Pros of an Open Boat Shuttle:

  • Easy bobbin changes – slide one out and another in with minimal fuss.
  • Good visibility – see how much weft yarn you have left at a glance.
  • Lightweight shuttle – Without the additional wood to enclose the bottom of the shuttle, an open boat shuttle will usually weigh less and be light to handle.
  • Finger control – Some weavers (I don’t use this technique myself, but many do) like an open shuttle for it’s tactile aspect. They like to have more of a feel for how the thread is feeding off the shuttle.
  • Slimline design – The height of an open shuttle is usually lower, making it great for a small shed.

⚠️ Cons:

  • Slightly more exposed, so the bobbin can jump around a little if the shuttle isn’t smooth-running. It’s important not to overload your bobbin so that it ends up protruding beyond the bottom of the shuttle and rubbing up against your warp threads.
  • May not be as suitable for wider warps – Due to the light weight of the shuttle, some weavers may find it difficult to throw far enough when weaving on a wide warp. This can depend on the length of the shuttle too. A longer shuttle is more appropriate for a wider warp.
  • More likely to warp dive – This can depend on the design of the shuttle, but my experience has been that warp diving is more common with an open shuttle.

What Is a Closed Boat Shuttle?

A closed boat shuttle has a more enclosed body with smaller slots or holes where the yarn exits. The bobbin is housed inside, which can give a smoother glide through the shed in some setups.

✅ Pros of a Closed Boat Shuttle:

  • Smooth and solid – glides easily over the warp, especially on high-tension looms.
  • Protects the bobbin – less chance of yarn catching or bobbin misalignment.
  • Prevents warp diving! – A nicely shaped closed shuttle can glide so straight and smooth that you will never have to experience the pain of a warp dive!
  • Heavier construction – Due to being enclosed, the closed shuttle will be slightly weighted than an open shuttle.

⚠️ Cons:

  • Can be slightly slower to change bobbins – If there is no finger hole, changing a bobbin can be fiddly as you can’t adjust from underneath.
  • Heavier – this is not necessarily a con, just something to point out for consideration!
This closed shuttle by Pickers Ridge has a super handy finger hole for pushing the spindle up to load a new bobbin.

Size and Weight Comparison

Here are a few examples from boat shuttles I personally own:

Ashford 11″ open boat shuttle – 71 grams

Ashford 13″ open boat shuttle – 113 grams

Ashford 15″ open boat shuttle – 181 grams

Pickers Ridge hand crafted 13″ closed boat shuttle – 117 grams

Pickers Ridge hand crafted 13″ open boat shuttle – 105 grams

Leclerc 15″ flying shuttle – 494 grams

Schacht 15″ end feed shuttle – 189 grams

Which Shuttle Should You Choose?

Here are a few quick tips to help you decide. Take these with a grain of salt because at the end of the day, shuttle choice is heavily influenced by personal preference and specific project needs:

SituationBest Shuttle
You are challenged by warp divesClosed boat shuttle
Your loom has a smallish shedOpen boat shuttle (lower profile)
You like to see and feel how much yarn is leftOpen boat shuttle
You use a high-tension floor loom with a wider weaving widthClosed boat shuttle
You want a quick and convenient workflow for narrower warpsOpen boat shuttle

Of course, many weavers like to own both types and switch depending on the project.

Bonus Tip: Choose Quality

Whether you choose open or closed, make sure your shuttle is:

  • Well-balanced and glides easily across the warp.
  • Made of smooth, durable wood to be long-lasting.
  • Compatible with your loom’s shed height.
  • Not just pretty to look at but also comfortable and practical to use.

A good-quality shuttle can make a big difference in your weaving speed and enjoyment.

*This post contains affiliate links. For further information, please see my disclosure policy.

Make the choice that fits you best!

There’s no one-size-fits-all answer—but understanding the pros and cons of open vs closed boat shuttles helps you make an informed decision that suits your weaving style. If you’ve never used a boat shuttle before, see if you can try one out at a weaving supplier, guild or with a friend.

If you are a rigid heddle weaver you might be wondering if boat shuttles are a tool that you could use? Well, head on over to this article next to find out all about using a boat shuttle with a rigid heddle loom!

👉 Have a favorite shuttle? Let me know in the comments! Share the details so other readers can learn and make informed choices 😊

Until next time…

Happy Weaving!

Filed Under: 4 shaft weaving, 8 shaft weaving, Floor Loom Weaving, Rigid heddle weaving, Weaving Tagged With: boat shuttle, boat shuttle comparison, closed boat shuttle, open boat shuttle

What is a weaver? (Hint: It’s About More Than Making Cloth)

by Kelly 7 Comments

When you think of a weaver, what comes to mind? Someone sitting at a loom, throwing the shuttle back and forth, quietly creating cloth from yarn? That’s true—but it’s only the beginning.

After years immersed in the world of weaving—teaching, learning, and connecting with thousands of weavers—I’ve come to realize that being a weaver is as much about who you are as what you make.

I’ve been pondering the question “What is a weaver?” Does weaving shape who we are or do we shape the way we weave?

Here are my thoughts on the heart of a weaver:

A Weaver Is Generous

Weavers are givers. You’ll rarely meet a weaver who hasn’t gifted their handmade creations to friends, family, neighbors, or total strangers. Whether it’s a handwoven tea towel, a scarf, or something as intricate as a baby blanket, their joy is in the giving.

But the generosity doesn’t stop with finished pieces. Many weavers freely share their time, knowledge, and experience with others. It’s a craft rooted in community.

Many weavers are involved in charitable organisations. They may weave tiny blankets for babies born early, or weave prayer shawls as part of their church ministry. Some will weave and sell items so they can then donate to their favourite charities.

A Weaver Is Curious

Weavers love to learn. Whether it’s trying a new technique, exploring color combinations, or diving into historical weave structures, curiosity is a common thread.

Weaving is full of possibilities, and a weaver is always asking, “What if?” “Can I bend that rule?” “What will happen if I change this?”

A Weaver Is Patient

Weaving takes time. A lot of time.

Warping the loom, threading heddles, sleying the reed, fixing mistakes—it all requires focus and patience. Many weavers spend long hours in solitude, and it shows in their calm, centered presence. The process itself often becomes a form of quiet meditation.

If you consider yourself and impatient person, does that mean that weaving won’t suit you? Of course not! Weaving will help you develop patience naturally as you work to achieve your goals.

A Weaver Is a Problem Solver

Tangled warp? Uneven tension? A threading error discovered ten inches into your cloth?

Weavers are skilled at troubleshooting and adapting. The craft naturally develops resilience and creativity. A weaver rarely gives up—they pause, reflect, and try again.

If a weaver cannot figure something out they strive to find out more. Online communities have been a wonderful support for many weavers.

A Weaver Is Willing to Share

The weaving community is one of the most open and supportive I’ve ever known.

Whether online or in person, weavers are always ready to lend a hand, offer advice, or cheer you on. Ask a question in a weaving group, and you’ll get answers, encouragement, and maybe even a photo tutorial or links to further resources!

A Weaver Is Passionate

Once weaving grabs your heart, it doesn’t let go.

Weavers are deeply connected to their craft. Yarn, texture, structure—it’s more than just a hobby. Many weavers describe it as a lifelong journey of discovery, challenge, and joy.

So… What Is a Weaver?

A weaver is someone who turns threads into cloth—but more than that, a weaver is:

  • A generous spirit
  • A curious mind
  • A patient soul
  • A creative problem solver
  • A passionate maker
  • A thoughtful giver
  • And a valuable part of a rich, global community

If you’re just starting your weaving journey, welcome. You’re joining a long line of extraordinary makers who don’t just weave cloth—they weave meaning, kindness, and connection into everything they create.

To put it really simply, weavers make the world a better place ❤️

Want to Join the Weaving Community?

If this post resonates with you, you might already be a weaver at heart. Browse my Youtube channel, sign up for a class, or subscribe to my newsletter for inspiration, patterns, and tips sent straight to your inbox.

Until next time…

Happy Weaving!

Filed Under: Inspiration, Personal development, Rigid heddle weaving, Table loom weaving, Weaving Tagged With: encouragement, gratitude, inspiration, what is a weaver

Feeling Stuck? 5 Quick 10-Minute Fixes to Break Through Your Weaving Plateau

by Kelly 2 Comments

Have you ever sat down at your loom and just… stared at it?

You want to weave. You love weaving. But nothing’s sparking your creativity, and everything feels like too much effort.

You’re not alone. Every weaver hits a plateau now and then. Sometimes it’s not enough time or decision fatigue. Maybe it’s a busy time in your life and the creative energy is lacking. Or maybe you just feel a little bored with the whole thing!

The good news? You don’t need to overhaul your whole setup, buy new equipment or start a huge new project to get inspired again.

Here are five quick, low-pressure ideas that take just 10 minutes—but can completely shift your mindset and help you fall back in love with weaving.

1. Switch Up Your Yarn or Color Combo

Sometimes all it takes to reignite your excitement is a little color play. Spend 10 minutes digging through your stash and pull out 3–5 yarns you wouldn’t usually use together—bold contrasts, unexpected textures, or that one skein you’ve been “saving.”

Lay them out, snap a photo, or warp up a quick sample. A fresh palette can open up a whole new direction.

Tip: Look for color inspirations – they are everywhere! In nature, manmade objects, you will even see color when you close your eyes 😀 Try taking inspiration from the color wheel and explore some basic color theory.

2. Test a New Weave Structure (On a small scale)

Trying something new doesn’t have to mean committing to a large project. Choose a weave structure or technique you’ve been curious about—like waffle weave, finger controlled techniques, or krokbragd—and do a tiny sample on a new or leftover warp.

Ten minutes of experimentation can be just the spark you need.

Tip-  For small project ideas, check out this list.

3. Weave a Just-for-Fun Project

Give yourself permission to weave just because. A mini coaster, mug rug, or bookmark can be finished quickly and without pressure—and often leads to surprising bursts of creativity.

Don’t overthink it. Choose whatever yarns catch your eye, and just go.

Tip- If you’re time poor, check out the principles of the 10 Minute Rule and see if it’s something that could be beneficial in your life.

4. Refresh Your Creative Space

It may sound simple, but cleaning up your weaving space has a powerful mental effect. In just 10 minutes you can:

  • Clear away old yarn scraps and tools, sweep or vacuum the floor
  • Do a brief declutter or put things away to create a sense of space
  • Add a plant, vase of flowers, photo, or anything that makes you smile

Weaving is as much about mindset as it is about materials—and a tidy, inviting space can make all the difference. A cluttered room makes a cluttered mind!

5. Revisit a Favorite Pattern — But Change One Thing

Remember that pattern or project you loved making? Try it again—but switch up one element. Change the colors, yarn weight, or sett. Add stripes. Try a different finishing technique.

Familiar patterns offer a safe, low-stress way to explore something with a new twist.

Need inspiration? Browse my Pattern Store or check out some student work to see how they made the patterns their own.

The Stepping Up Scarf PDF Pattern for rigid heddle weavers

Feeling stuck doesn’t mean you’re doing anything wrong—it just means your creative brain needs a reset. These 10-minute changes aren’t just about weaving differently; they’re about rediscovering why you love weaving in the first place.

So pick one today. Set aside a little time. And let the joy come back in!

Which fix do you plan to implement in your weaving life? Let me know down in the comments 👇

Until next time…

Happy Weaving!

Filed Under: Floor Loom Weaving, Inspiration, Rigid heddle weaving, Rigid Heddle Weaving Patterns, Table loom weaving, Weaving Tagged With: 10 minute fixes, inspiration, weaving plateau, weaving project ideas

How to Warp a Rigid Heddle Loom: Beginners Step-by-Step Guide (+ Free Checklist!)

by Kelly 4 Comments

Warping a rigid heddle loom might seem a little overwhelming when you’re first starting out, but once you learn the process, it becomes second nature!

In this step-by-step guide, I’ll show you exactly how to warp your rigid heddle loom using the direct warping method, with clear instructions and photos from my beginner rigid heddle weaving course (spoiler alert – there is a discount link at the end of this article 😉)

Whether you’re preparing for your very first rigid heddle project or just need a refresher, this simple method will have you ready to weave in no time. Don’t forget to grab your free warping checklist at the ends. Let’s get started!

Step 1: Calculate Your Warp

Calculating for your next project may not feel like the most fun and glamorous part of weaving, but trust me, it can make or break your success!

I hear a lot of new weavers say “I was never any good at math” or “numbers are confusing to me”. Well, you’re in good company because mathematics was my worst subject at school and oh, how I loathed it!

But the interesting thing is that numbers can become interesting when they have a specific purpose. And it also helps when somebody else lays out a plan for you to follow 🙋‍♀️

I have a completely free printable PDF calculations sheet for rigid heddle weaving for you. In addition, I’ve also added a mini class to show you how to use the calculations sheet. Still for free!

Now, you technically can weave a project without calculating first, I even have a member’s only class showing how to do that, but I highly recommend making a habit of getting comfortable with calculations for predictable and repeatable outcomes.

  • Tip: Make the math easy by using a calculations sheet or online calculator.

Step 2: Set Up Your Rigid Heddle Loom for Direct Warping

  • Place your loom on a sturdy surface (or loom stand) with the front of the loom facing your warping peg. If using a table, clamp the loom (unless you’re weaving with a Lojan Flex – no need to clamp).
  • Secure your warping peg at the right distance for your total warp length (Use a measuring tape for correct distancing).
  • Get your warp yarn, scissors, and threading hook ready.
  • Tip: Try to set up your loom in a place that you can leave and take a break if needed. Time pressure is reduced if your loom setup is not in the way of other home activities.

Step 3: Prepare to Warp your Rigid Heddle Loom

  • Mark the width of your project on the heddle with waste yarn.
  • Ensure you have everything you need and your project calculation information is nearby to refer to.
  • Tie on your warp yarn to the apron rod in line with one of your heddle markers.
  • The back apron rod should be fully extended and the brake on.
  • Try to have your direct warping peg or pegs set up at a fairly similar height to your loom.

Step 4: Warp the Loom

  • Using the “reed hook” end of your threading hook, take a loop of yarn through the slot. Place the loop gently over your direct warping peg.
  • Walk to the back of the loom, take the warp yarn around the apron rod (either under or over, alternating), through a slot and to the warping peg once more.
  • Continue threading through slots and repeating the process until the correct width of warp is complete.
  • Tip: Now is not the time to focus on keeping the warp tight. Keep it light, gentle and consistent. The proper tensioning comes a little later.

Step 5: Roll the Warp Onto the Loom

  • Place a choke tie near the end of the warp (close to the warping peg) to keep the warp threads together.
  • Lift the warp off the peg. It can be helpful to make a warp chain and rest this on the table to keep threads tidy.
  • Head to the back of the loom and begin to roll the warp onto the back beam, keeping it under tension.
  • After one warp rotation begin to use separators at the back beam. In this class I use cardboard warp separators but my main preference nowadays is to use brown craft paper on a roll.

  • After each rotation, come to the front of the loom and pull on the warp. You should feel it give and then tighten up a little.
  • Head back behind the loom and repeat.
  • Tip: Take your time! If you need a break, go ahead. Warping doesn’t need to be completed in one session.
  • When the end of the warp is approximately equal with the front beam, finish rolling on.
  • Cut the warp loops and remove the choke tie.

Step 6: Thread your Rigid Heddle Loom for Plain Weave

  • Take one warp thread (end) from each slot and thread in a hole to the left.
  • Repeat for the rest of the threads.
  • You should have a thread in every hole and every slot for the width of your project.
  • Tip: Sit nice and close to your heddle while threading to avoid any back strain. I have my loom situated on the stand and bring my office chair on wheels in close so that I feel “tucked in”.

Step 7: Tie On and Adjust Tension

  • Tie small groups of warp threads around 1″ wide to the front apron rod, starting in the middle and alternating sides. I use a surgeon’s knot so I can adjust my groups for final tensioning.
  • Adjust until all groups are even and firm. Consistency is important at this step!
  • Tip: Test by pressing across the thread groups with the palm of your hand – this will show you if any groups are looser than others.

Step 8: Insert a Header

  • Weave scrap yarn (or thicker yarn) back and forth a few times then beat down.
  • OR
  • Use cardboard separators in alternating sheds and beat down.
  • This spreads out the warp evenly and helps prevents gaps.

Step 9: You’re Ready to Weave!

  • Celebrate! Your rigid heddle loom is now set up and you’re ready to start your first project.
  • Each time you warp, it gets easier and faster, trust me!

And that’s it – your rigid heddle loom is warped and ready for weaving! Fun times ahead 🥳

The more you practice, the more familiar warping will become. I hope this beginner rigid heddle weaving step-by-step guide helped make the process simple and stress-free for you.

If you’d like even more help, I walk you through the entire process inside my best selling Rigid Heddle Weaving for Beginners course. This course covers everything you need to know to get weaving on your rigid heddle loom, including yarn choices, sett, loom overview and a beautiful placemats project.

Click on the link below to unlock a special course discount, just for you!

Beginner Rigid Heddle Weaving Course Special Offer…

Would you like a free Rigid Heddle Warping Setup printable checklist to help you move through these steps? You can download, print and then check off the boxes as you go, ensuring that nothing is missed.

Yes please, I would love a FREE CHECKLIST!

Until next time…

Happy Weaving!

*This post contains affiliate links. For further information, please see my disclosure policy.

Filed Under: Rigid heddle weaving, Warping, Weaving Tagged With: rigid heddle weaving, rigid heddle weaving tutorial, warping

Direct Warping a Rigid Heddle Loom the Wrong Way (And How to Fix It!)

by Kelly 4 Comments

My 6 Best Tips for Rigid Heddle Warping Success!

Direct warping a rigid heddle loom is something I love to do! It’s one of the fastest and easiest ways to get started on a new weaving project, and I find the process simple and satisfying. There’s nothing better than going from an idea to a fully warped loom in hardly any time at all.

But let’s be honest—direct warping isn’t foolproof. If you’ve ever ended up with a tangled mess, uneven tension, or felt completely frustrated before you even started weaving, you’re not alone! I’ve made plenty of mistakes over the years, but the good news is that most warping issues have quick and easy fixes.

In this post, I’ll walk you through some of the most common direct warping mistakes and how to solve them so you can begin to enjoy the warping process as much as the weaving!

So, What is So Great About Direct Warping?

When you begin to make the warp for a table loom or floor loom, you traditionally do so with a warping board, or with a sectional beam setup. These methods are terrific as they allow the weaver to be precise about the warp making process, but I’m not kidding when I say they take time!

Direct warping a rigid heddle loom though, allows us to side step other processes, to start and finish our warp at the loom and sometime to even skip the threading afterwards by doing it during the warping!

We use a direct warping peg, clamped at a suitable distance away from the loom (the distance will depend on your warp calculations so be sure to do that first). We tie the yarn onto the back apron rod of the RH loom, take a loop through the heddle/reed and then drop the loop onto the peg. Back to the loom and repeat.

This makes the process really fast and hey, you even get some exercise thrown into the deal as you go from the loom to the peg and back again! 💃

6 Common Warping Mistakes & How to Fix Them

  1. Forgetting to Take the Warp Over the Front & Back Beams

This is a very common rookie weaver error, so don’t worry if you have fallen victim to it, we’ve all been there!

  • Why it’s a problem: Most of the time you will be unable to make a shed. You put your heddle up, you put it down, nothing happens!
  • How to fix: This depends on your particular rigid heddle loom. Some have beams that are removable while you have a warp on – if this is the case with your loom, remove whichever beam you have warped under, slacken your warp tension and place the beam back so that it is underneath the warp.
  • If you can’t remove your beam/s you will need to un-warp and re-warp correctly over both beams.

2. Using the Wrong Yarn (Stretchy Acrylic, etc.)

This can be a bit of a weaving nightmare because you don’t always know just how the yarn will perform under tension if you haven’t used it before. Once stretched, you can’t “unstretch” the yarn.

  • Why it’s a problem: Stretchy yarns make it hard to maintain even tension. They will frequently stretch more and more as you advance your warp and try to weave, no matter what you do.
  • How to fix: You can try using wedging and tension improving techniques. I once wove with an acrylic yarn that began to stretch and by using these techniques I was able to finish the project, but I can tell you, it wasn’t fun! The only other alternative is to (and I don’t say this lightly, it’s not my usual recommendation!) bin the warp and start over with a different yarn. I hate having to tell someone to do that, but it’s a good lesson in what is an inappropriate yarn for warping.

3. Too Many Warp Ends on One Peg

Bunching up too much warp on one peg when direct warping is less than ideal for a couple of reasons.

  • Why it’s a problem:
  • Your warp should be well ordered on the peg, each warp loop being placed above the last one to keep the threads in good order.
  • If you don’t distribute the warp among more than one peg (especially if its a wider warp) you will have more wasted yarn as it has to travel further to go to a central point (the peg).
  • Your warping peg can lose tension. Too much warp on a single peg can cause too much pressure, causing the peg to go pinging across the table and messing up the lovely order of your warp!
  • How to fix: Distribute warp ends across more than one peg. Don’t place too much tension on the warp as you take the loops around the peg. Aim for consistency, not tightness.

4. The Wrong Attitude: Warping Frustration

I don’t know about you, but when I’m frustrated I don’t think clearly! Usually, the way you think about your warping before commencing is how it will be. For example, I think of warping as simple and easy, so when I go through the warping process, guess what? It’s simple and easy!

  • Why it’s a problem: Leads to mistakes and makes the process feel stressful. Clouds judgment and clarity of thought.
  • How to fix: Take breaks, set up in a calm environment, and remember that practice makes perfect! Give yourself plenty of grace, you’re not expected to know everything, it’s a journey! If you have a recurrent frustration, perhaps it’s time to do some more research or take a step by step class to help you get over the hurdle.

5. Warping the loom or heddle backwards

  • Why it’s a problem: You won’t be able to advance your warp forwards if it’s warped on the front beam instead of the back. Warping the heddle backwards is not as big of a deal – you can actually weave that way but it may be less comfortable to use. If you have warped your heddle backwards and want to repair it, this video will show you how.
  • How to fix: You can fix a backwards warped loom by cutting your yarn loops at the peg and securing with a choke tie. Wind this warp onto your front apron rod (if you haven’t done so already). Leave enough length at the other end to tie on the cut ends to the back apron rod securely. You can then release the tension at the front apron rod and begin to roll onto the back beam, using warp separation as you go. Once you have the warp rolled on to where it’s supposed to be, you can progress as normal!

6. Trying to hurry the process

  • Why it’s a problem: Trying to speed through the warping process when you’re not all that familiar with it could be a recipe for disaster. You may skip steps, you may make mistakes, you may get tangles, things may go wrong and you don’t notice. Rolling on a warp with good, consistent tension is not a step to be hurried over, it takes a little time and patience.
  • How to fix: Warp your rigid heddle loom when you actually have time to do so. If you can’t get it done in one session (and it’s absolutely fine not to!) ensure that you have set up in a location where you can leave the warp partly done to come back to. If you’re warping at the dining room table at 5pm and your family needs to sit down to eat at 7pm, you may have a problem.

Final Tips for Direct Warping Success

  • Slow down and check your work as you go. Time is never wasted in weaving, it is only invested 😉
  • Use a checklist to tick off as you go (I have a free printable one here). This helps to ensure you don’t miss any steps in setting up your loom.
  • If you make a mistake, don’t panic—ALL issues can be fixed!

Want to learn more about warping successfully?

Check out this list:

Independent warp issues

5 Tips for Rigid Heddle Warping

2 Tips for Easier Warping

Setting Up for Success Online Workshop

Did you know that I’m a reseller for Lojan Wheels and Looms in Australia? If you are interested in knowing more, please feel free to contact me.

Until next time…

Happy Weaving!

*This post contains affiliate links. For further information, please see my disclosure policy.

Thank you for supporting my work! 😀

Filed Under: Rigid heddle weaving, Warping, Weaving Tagged With: direct warping, rigid heddle loom, rigid heddle weaving, warping tips

  • « Go to Previous Page
  • Page 1
  • Page 2
  • Page 3
  • Page 4
  • Interim pages omitted …
  • Page 16
  • Go to Next Page »

Primary Sidebar

About Kelly Casanova

Join Kindred Creatives!

Hand crafted boat shuttles

Categories

Archives

Meta

  • Log in
  • Entries feed
  • Comments feed
  • WordPress.org

Copyright © 2026 Kelly Casanova Weaving Lessons on the Foodie Pro Theme