• Skip to main content
  • Skip to primary sidebar

Kelly Casanova Weaving Lessons

  • Hi! I’m Kelly!
    • Disclosure
  • Online Weaving School Class Index
    • Common account issues
    • Common technical issues
    • What do I get with a membership?
  • New to rigid heddle weaving? Start here!
    • Never heard of the rigid heddle loom?
    • How to weave neat edges on the rigid heddle loom
    • Rigid heddle weaving
    • Rigid Heddle Weaving Patterns
  • Patterns
  • Subscribe

4 shaft weaving

4 shaft weaving and sampling

by Kelly Leave a Comment

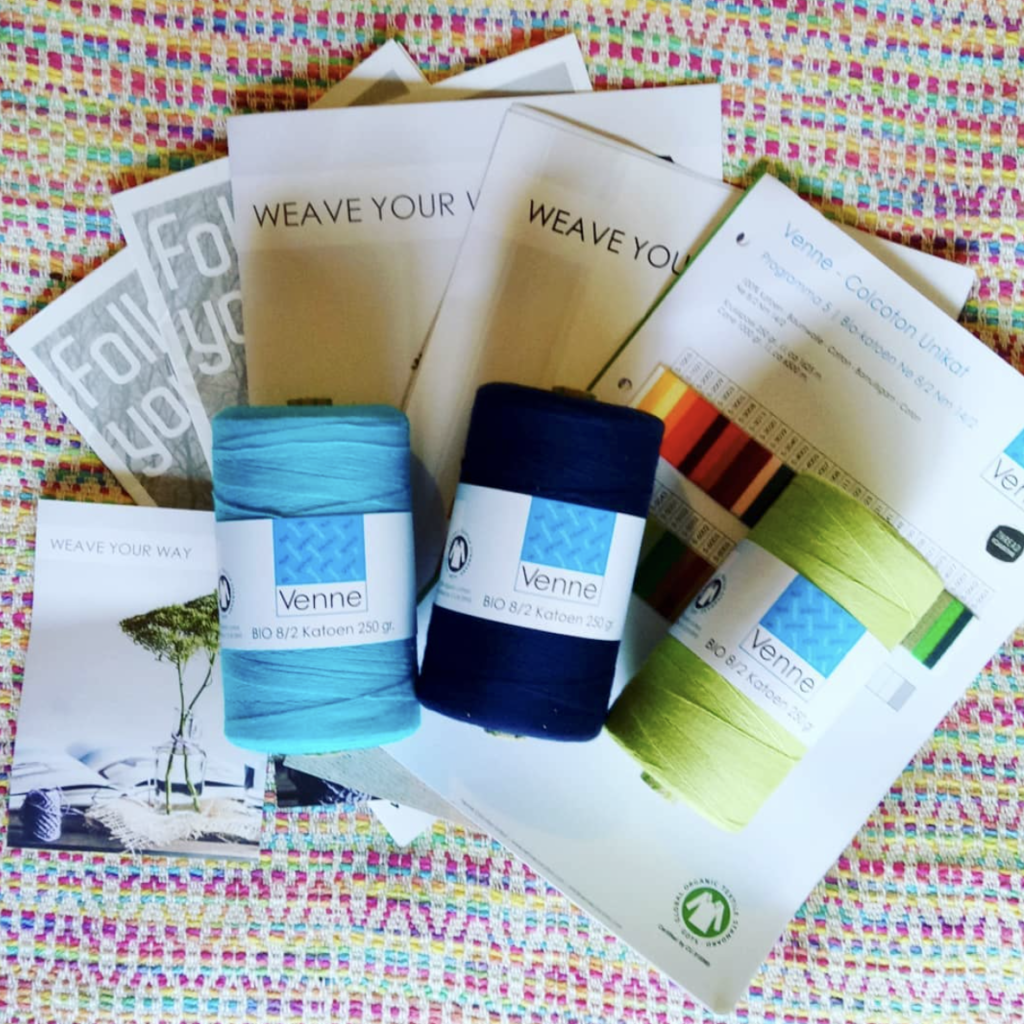
This week I’ve been working on the sequel to my Introduction to Floor Loom weaving class.


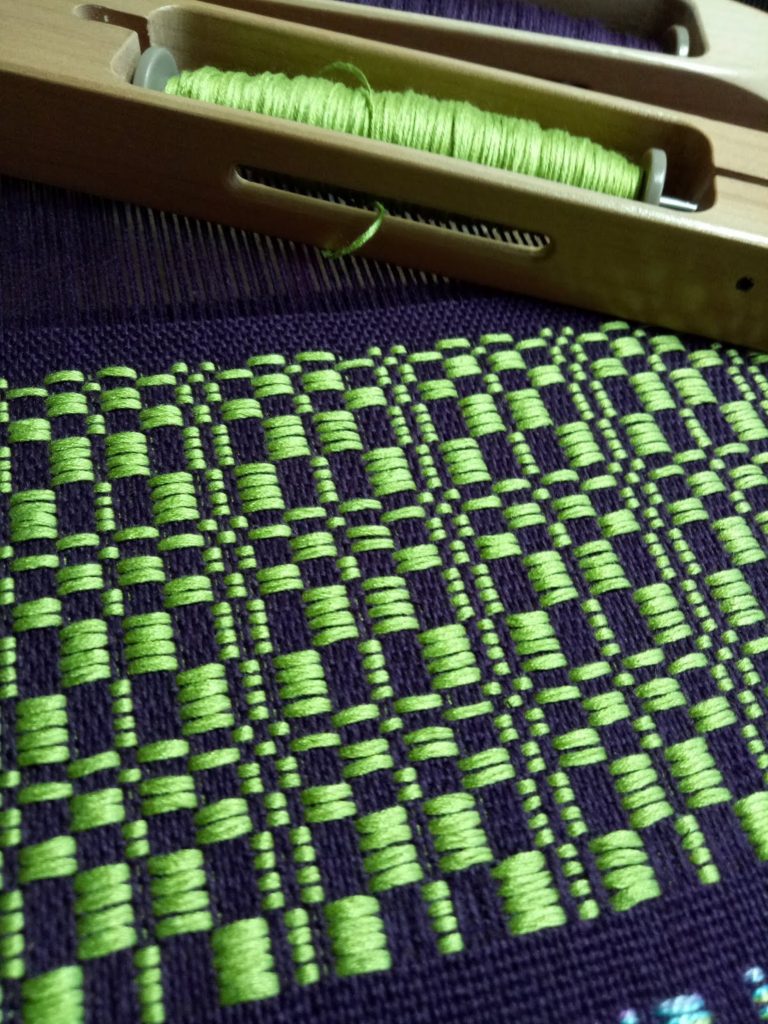
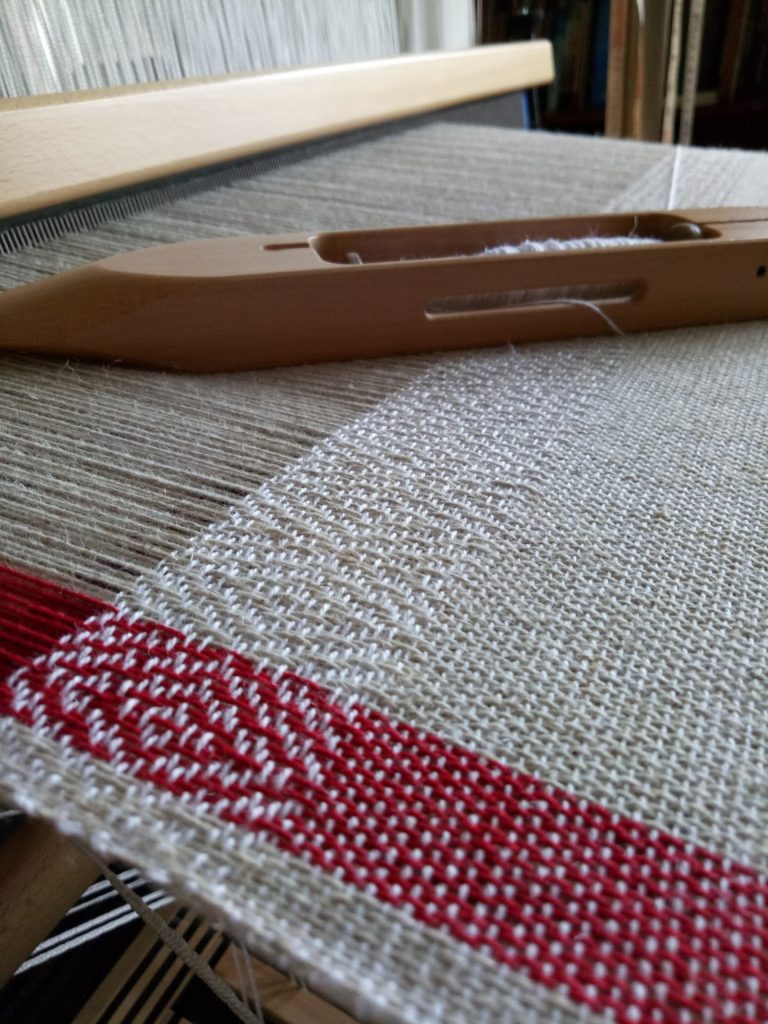
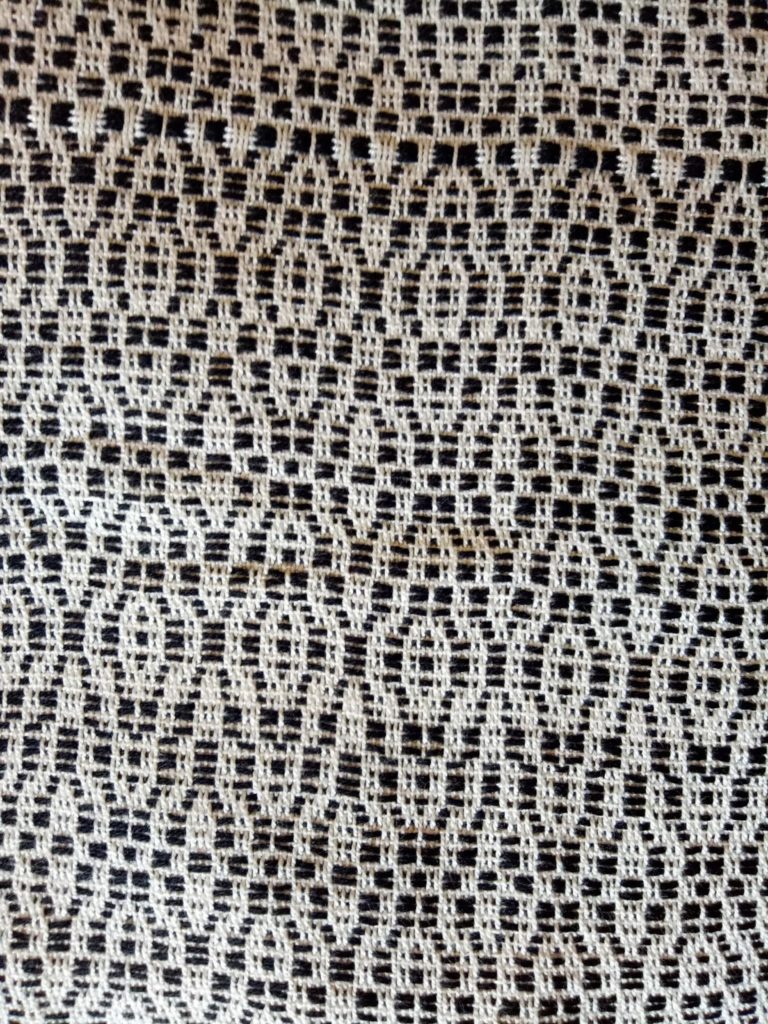
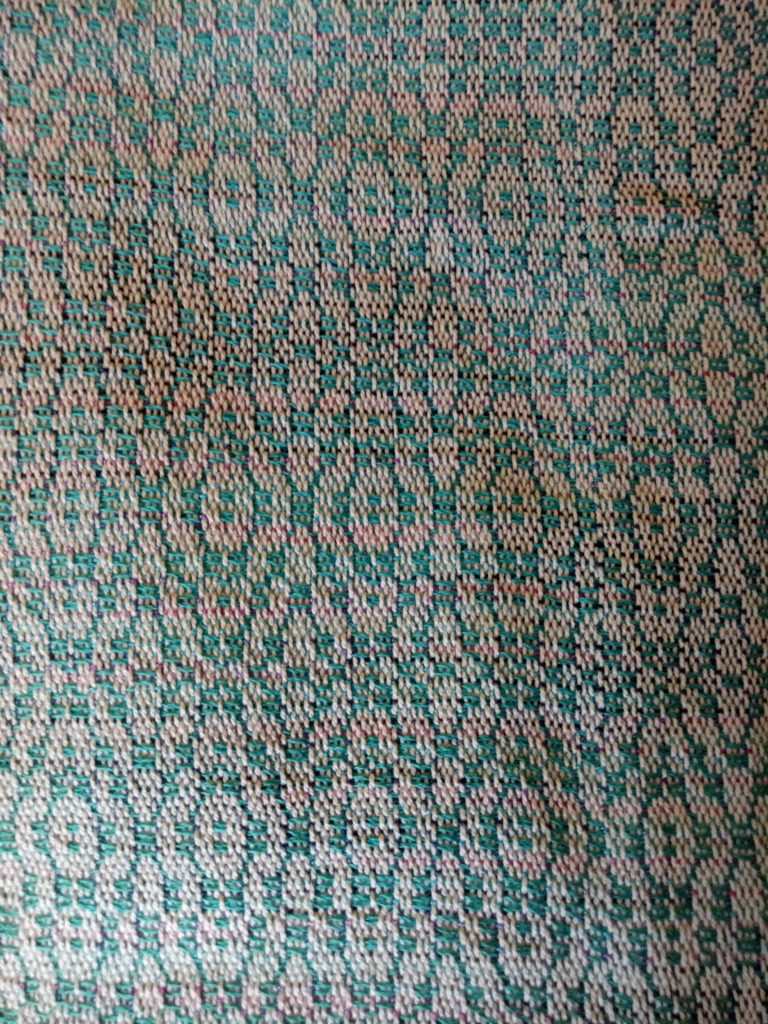
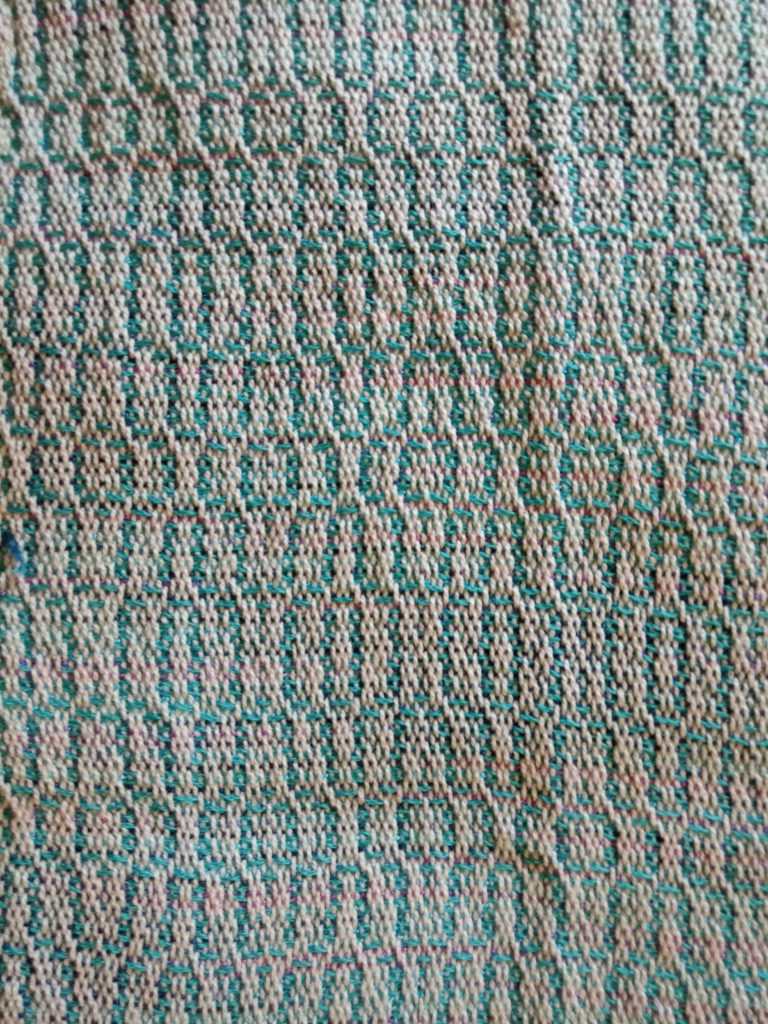
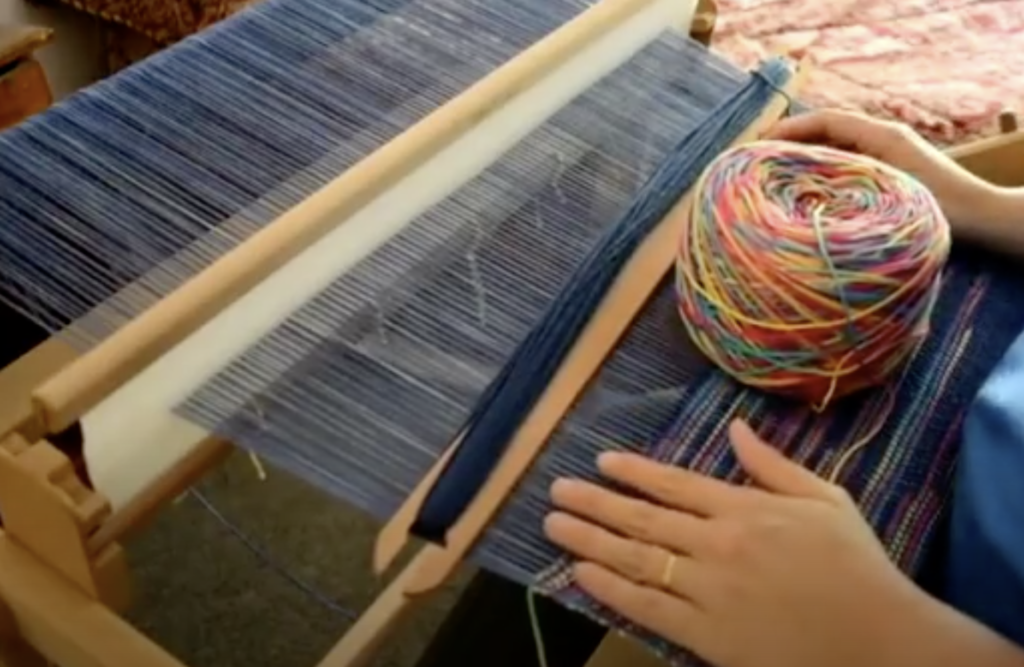
This class will focus on 4 shaft weaving and begins with an optional sampler. I always felt that a sampler was a waste of time and effort, but I have definitely changed my ways! I do a lot of sampling, particularly now that I use a lot of my own designs and need to see and feel how the fabric is going to be before I put it out there to my students. Since I realised what a fantastic learning tool sampling can be, I always recommend it to my students. It can pretty much make or break a project!


Plus, when you’re finished with a sample, you can either cut it up and use it for small project, or keep it to refer back to. Either way, it’s useful!

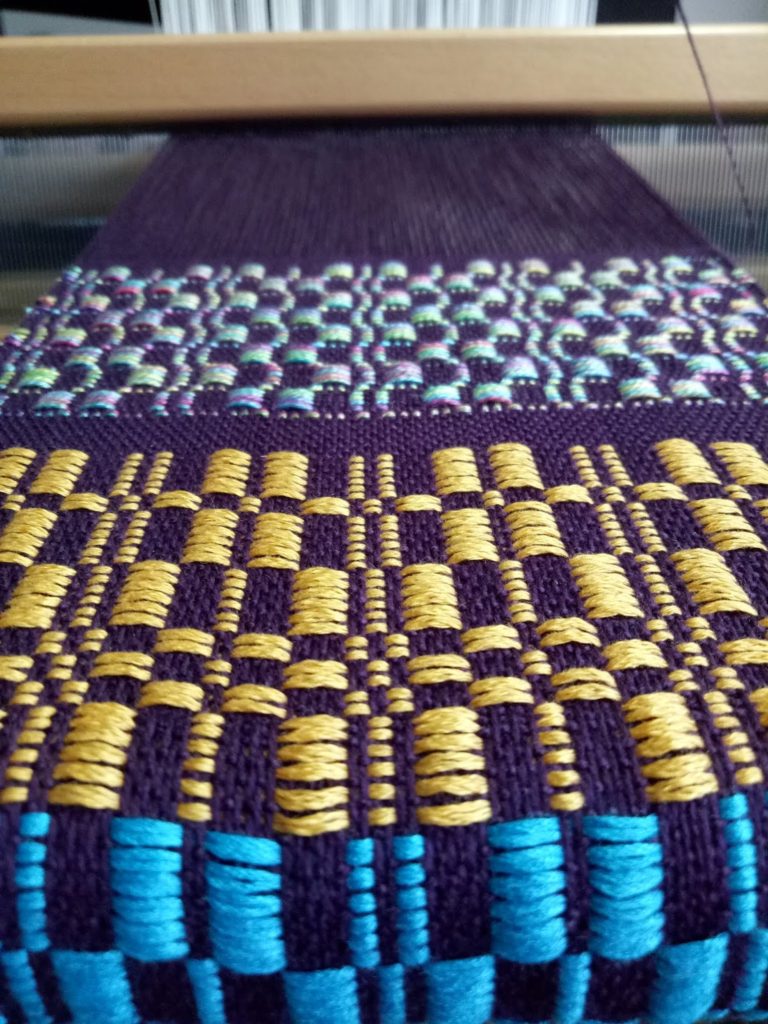
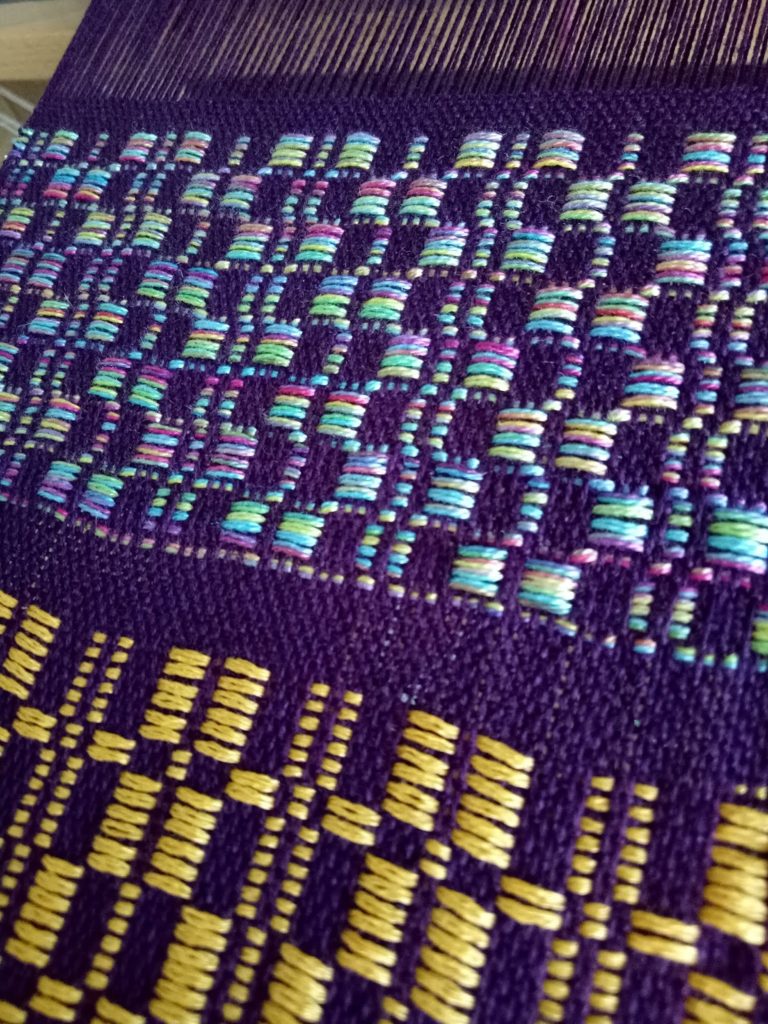
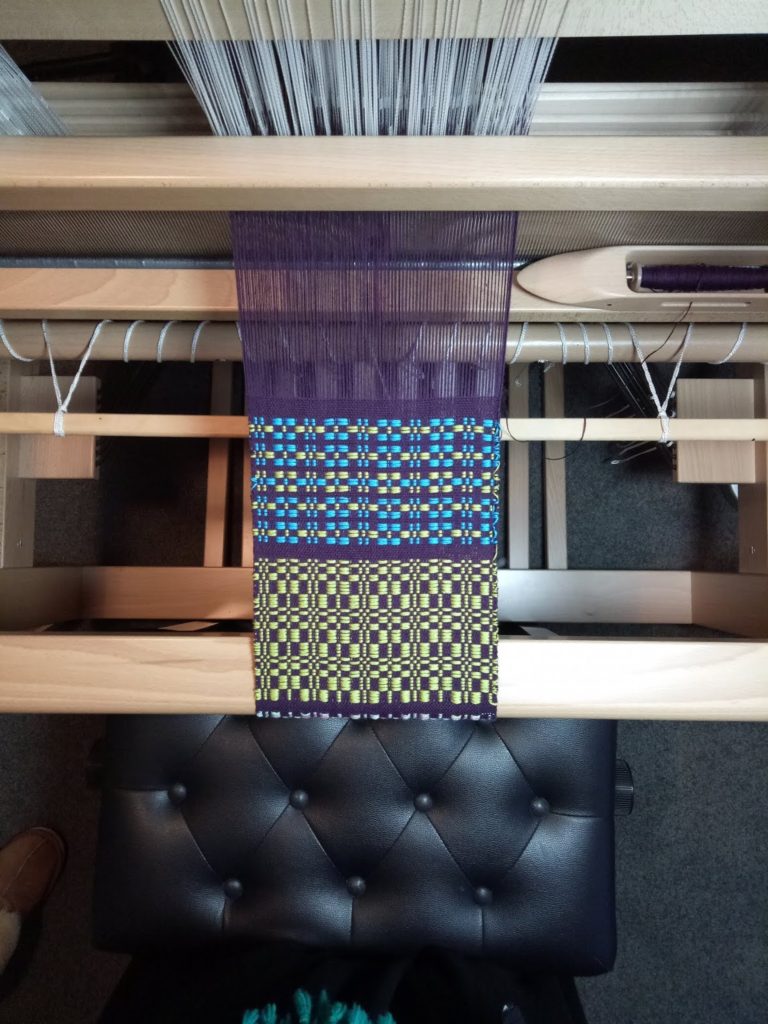
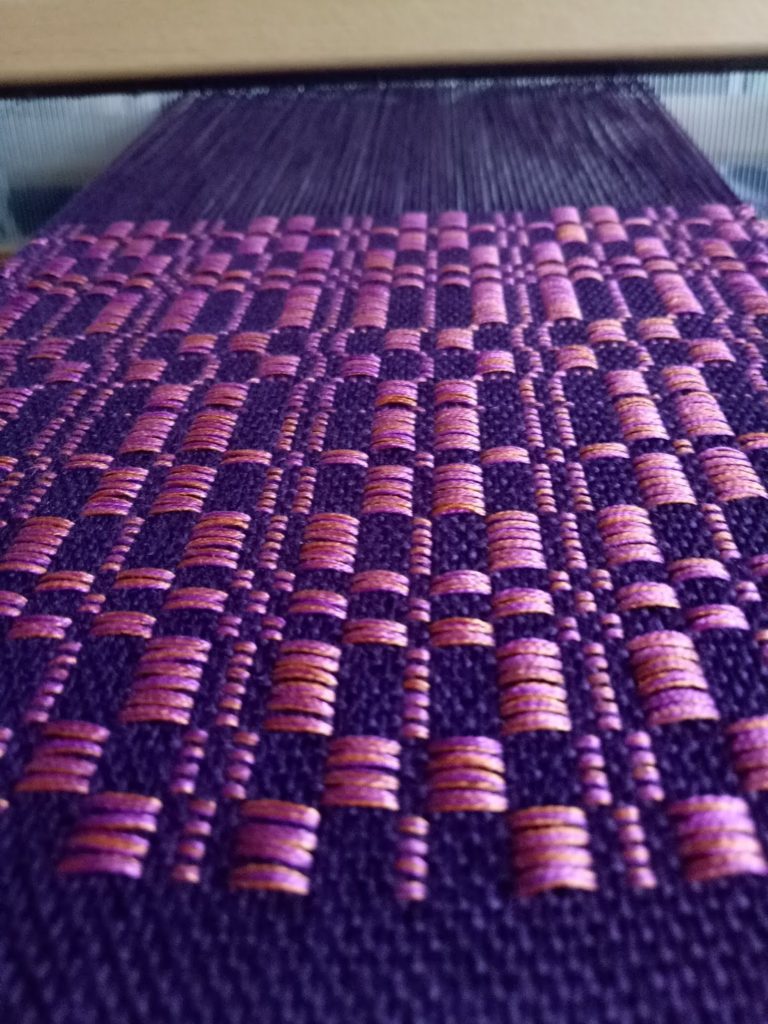
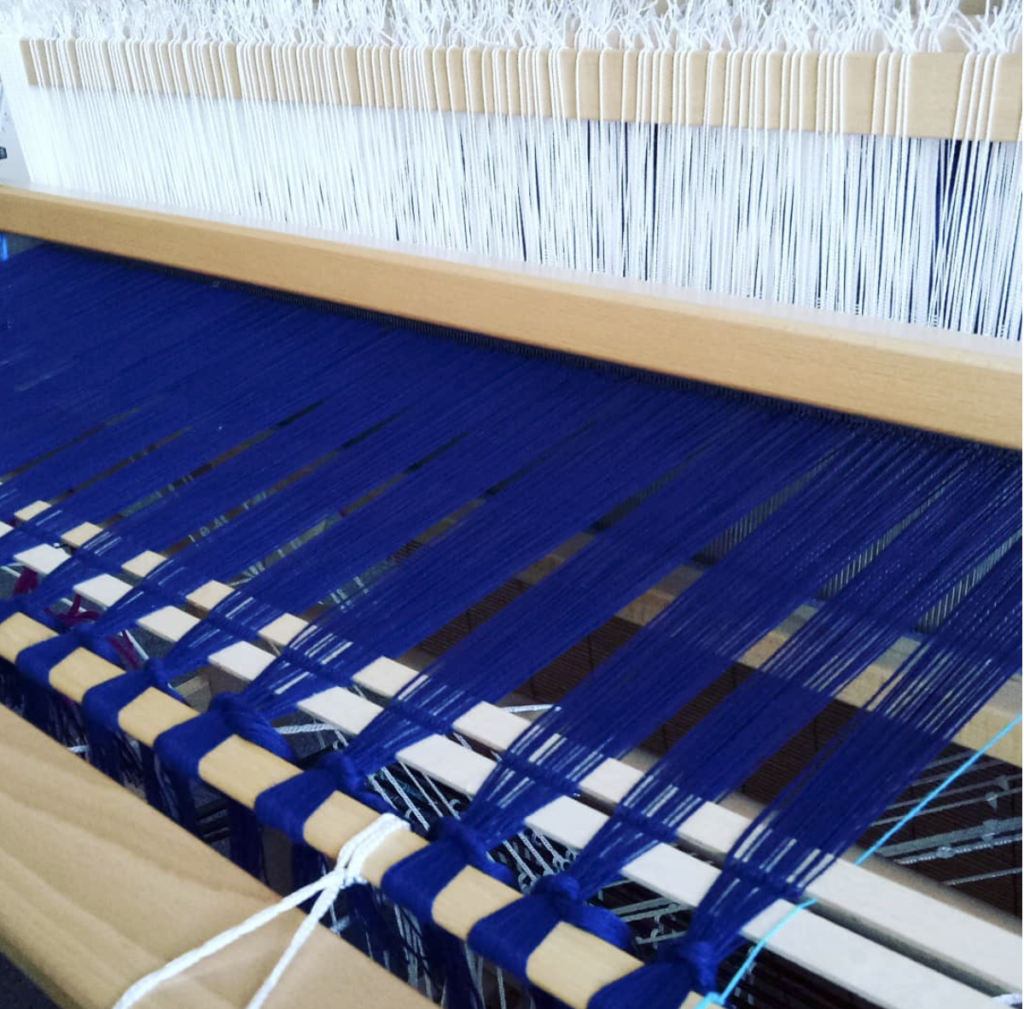
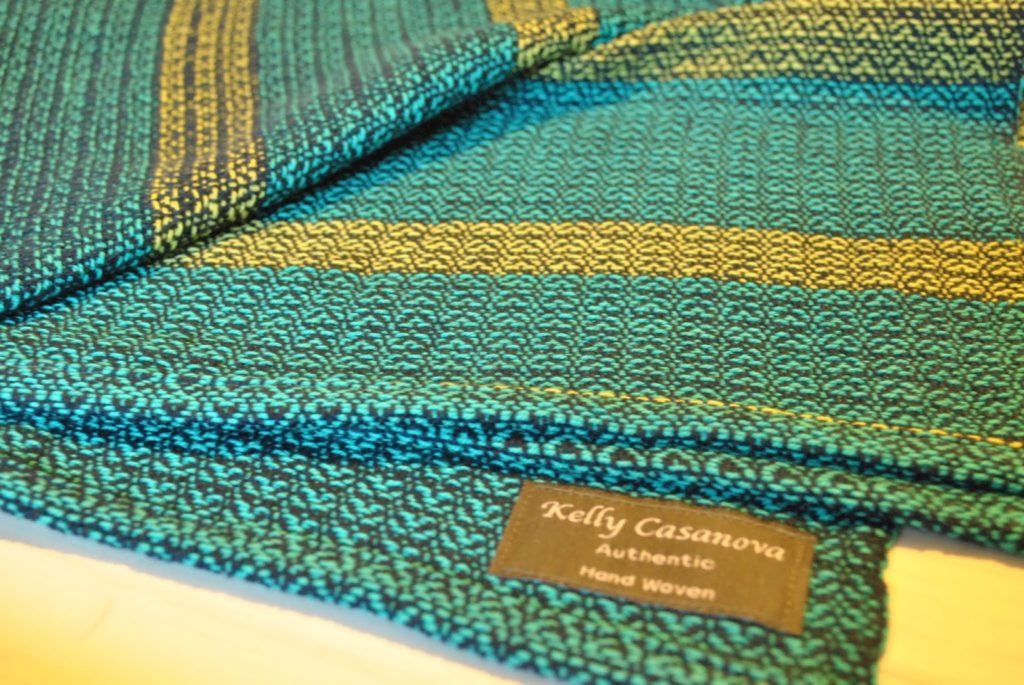
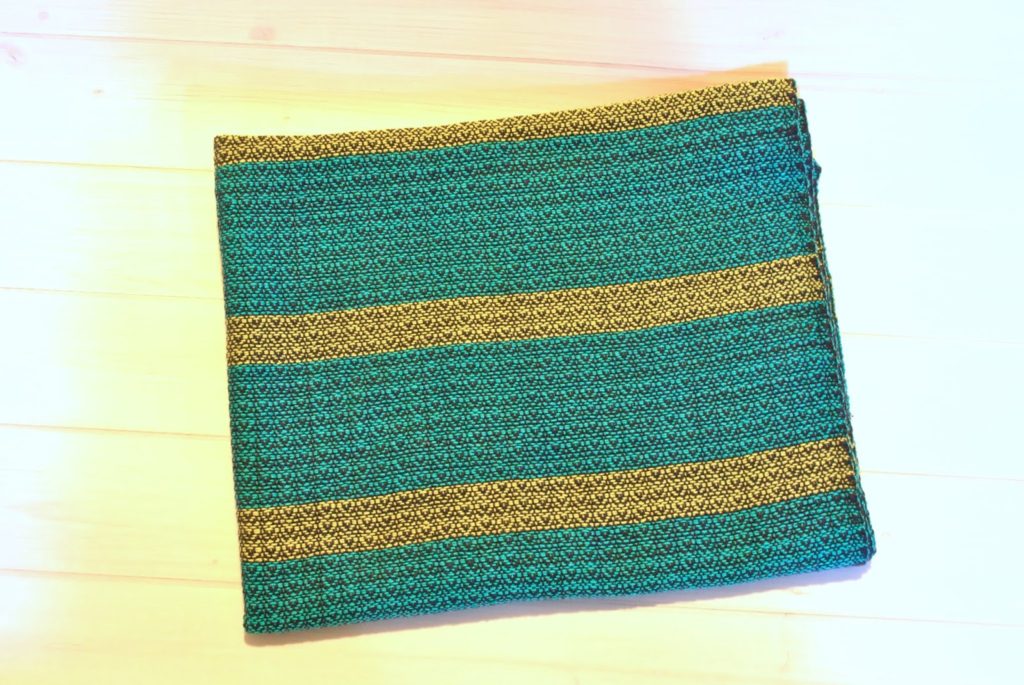
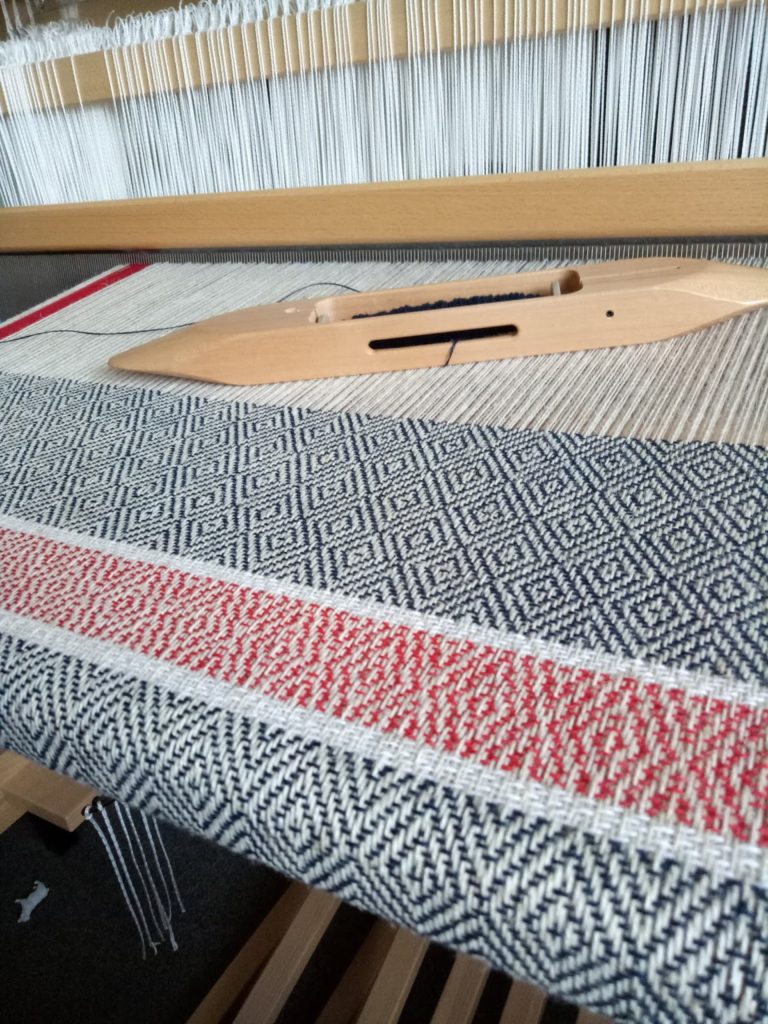
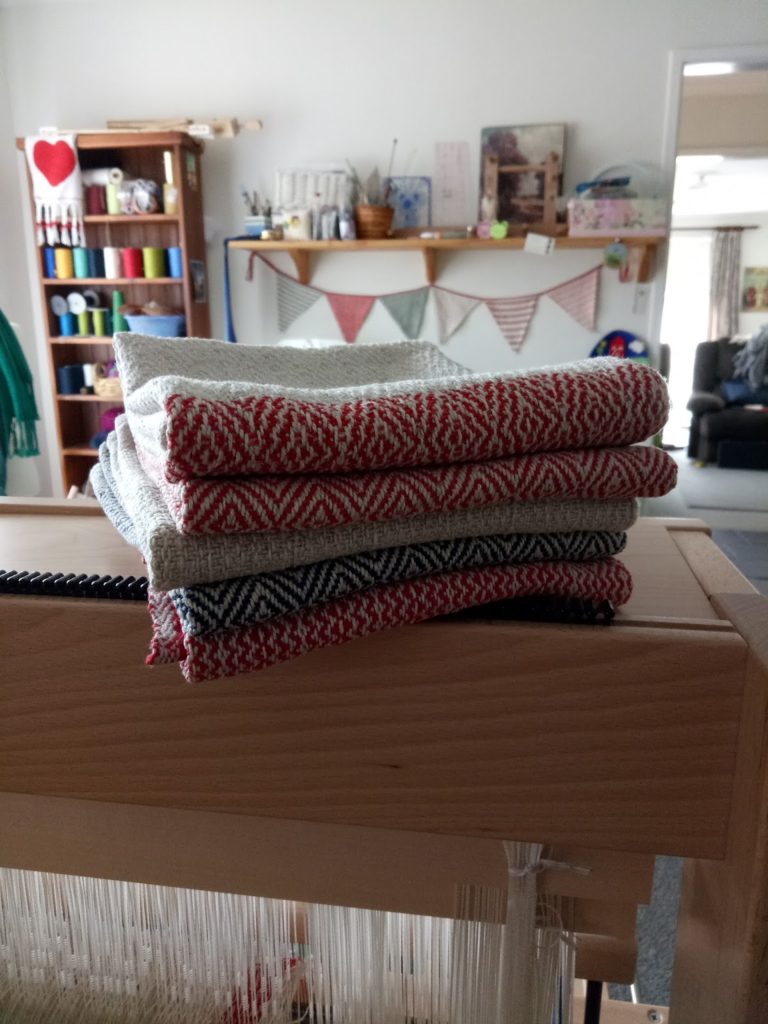
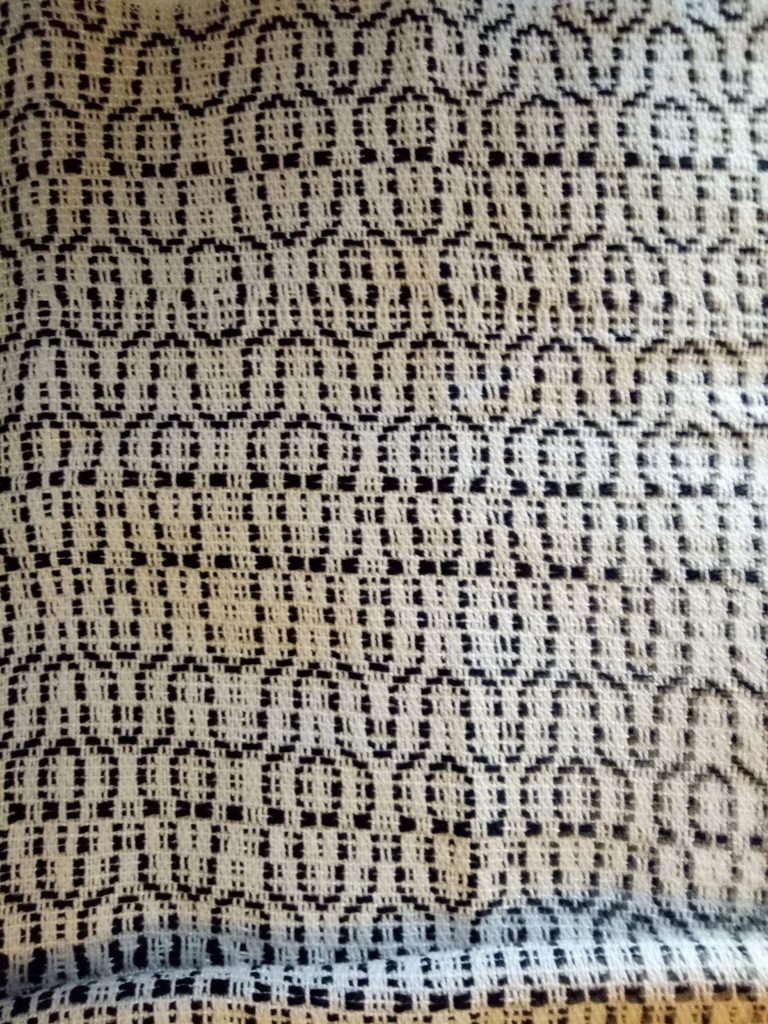
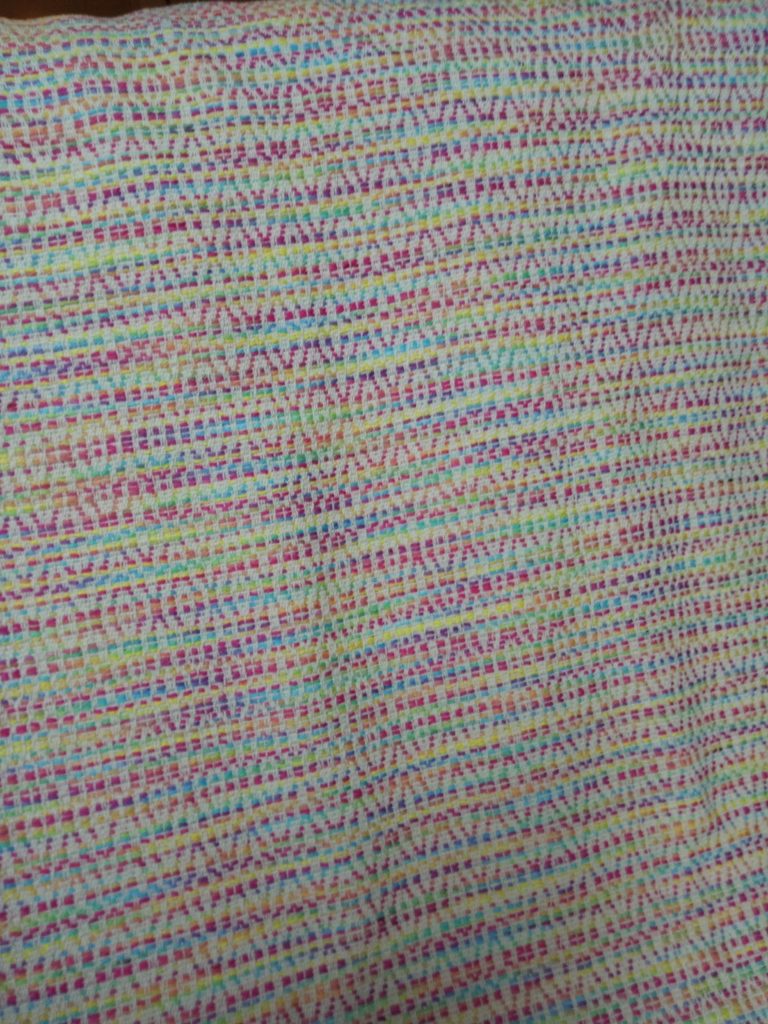
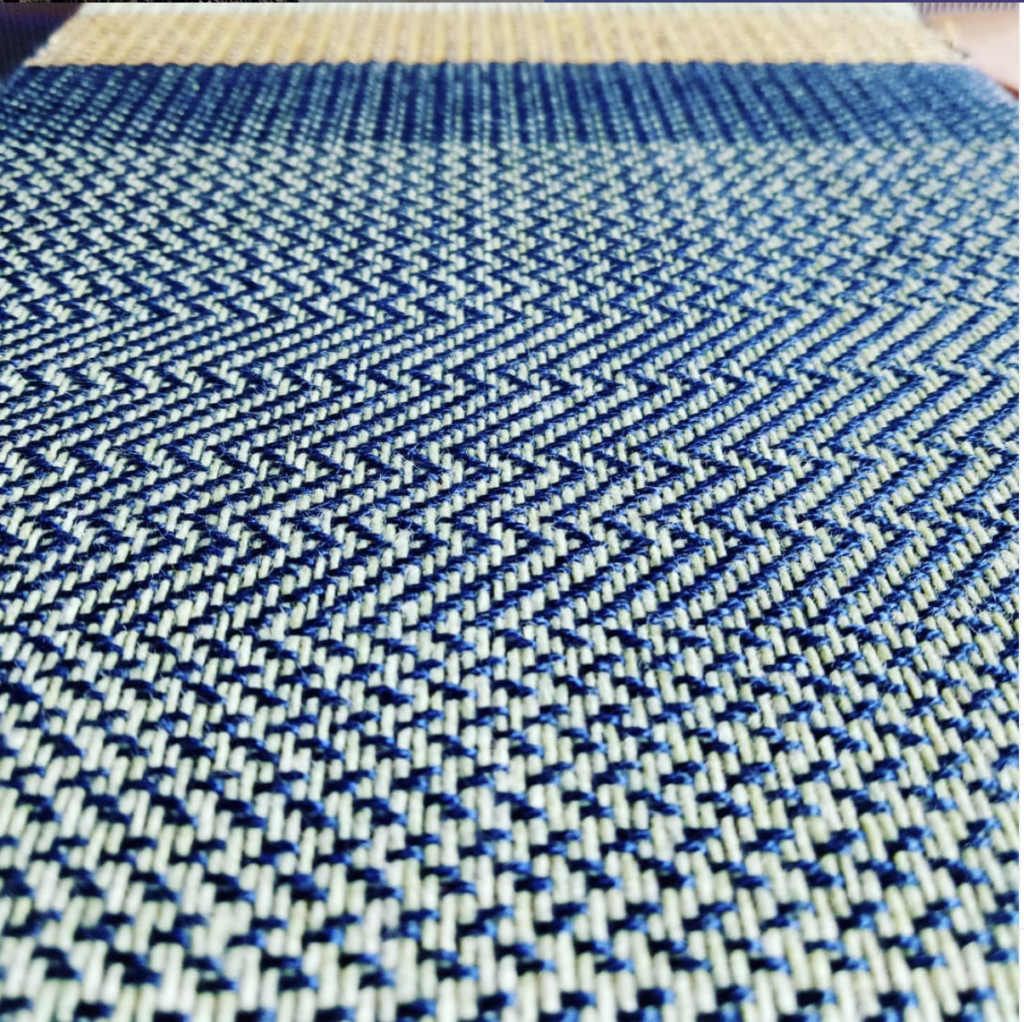
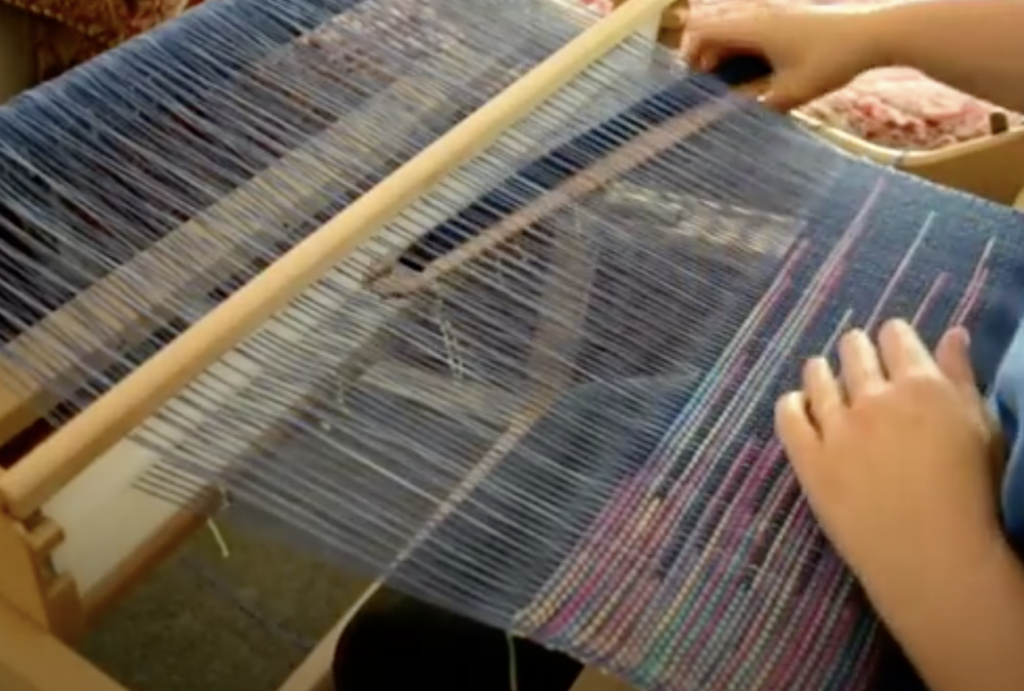
The next part of the class will move onto 4 shaft kitchen towels,  which I designed. Each towel is a little different but equally lovely. 
We will weave 4 towels all together.


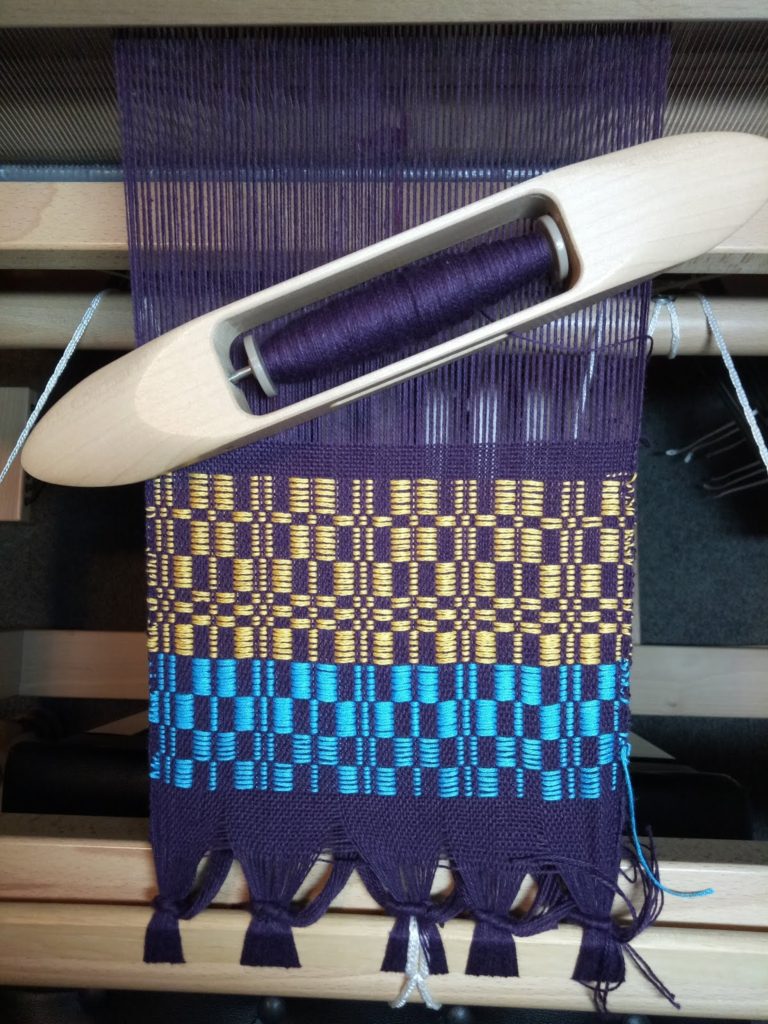
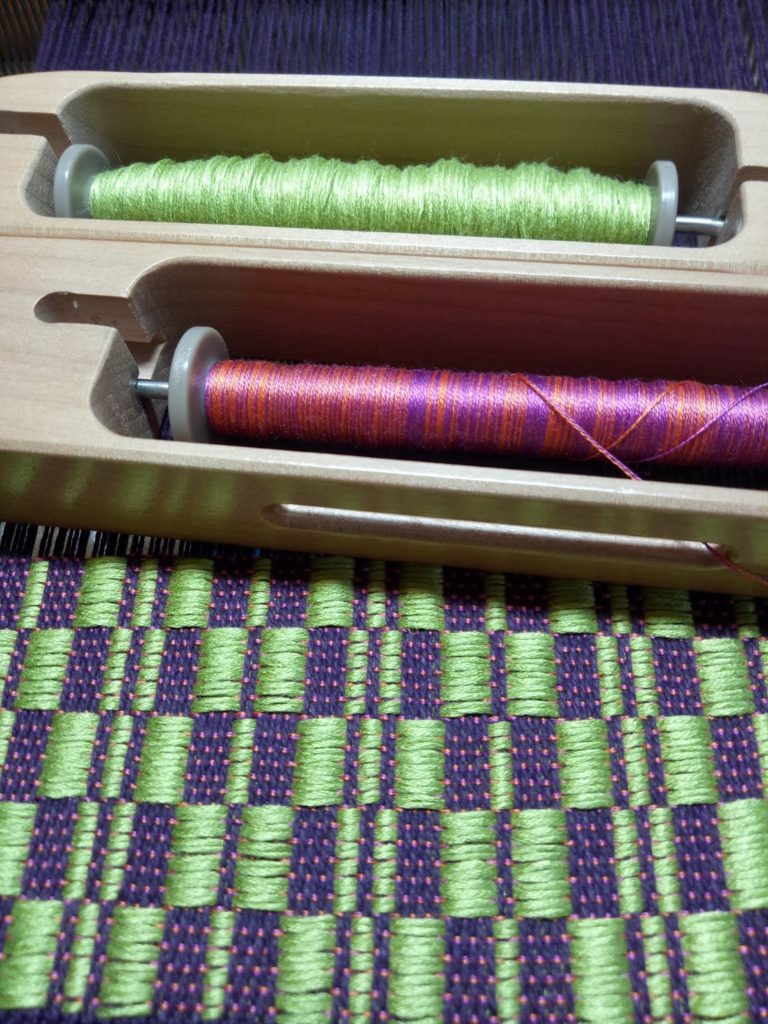
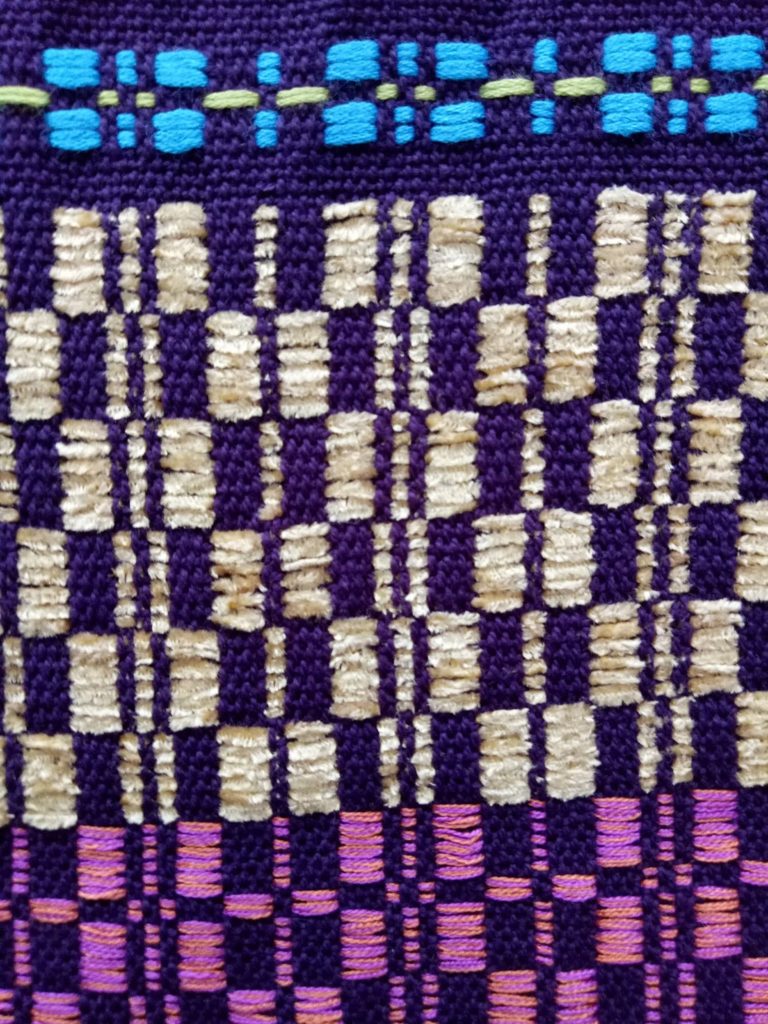
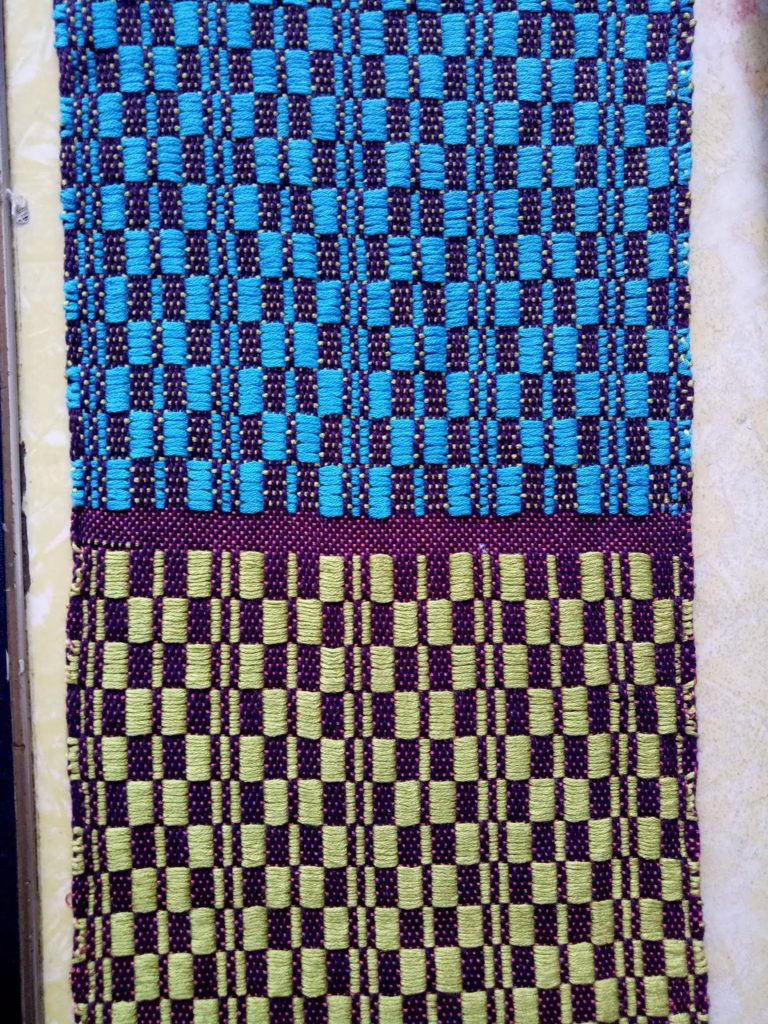
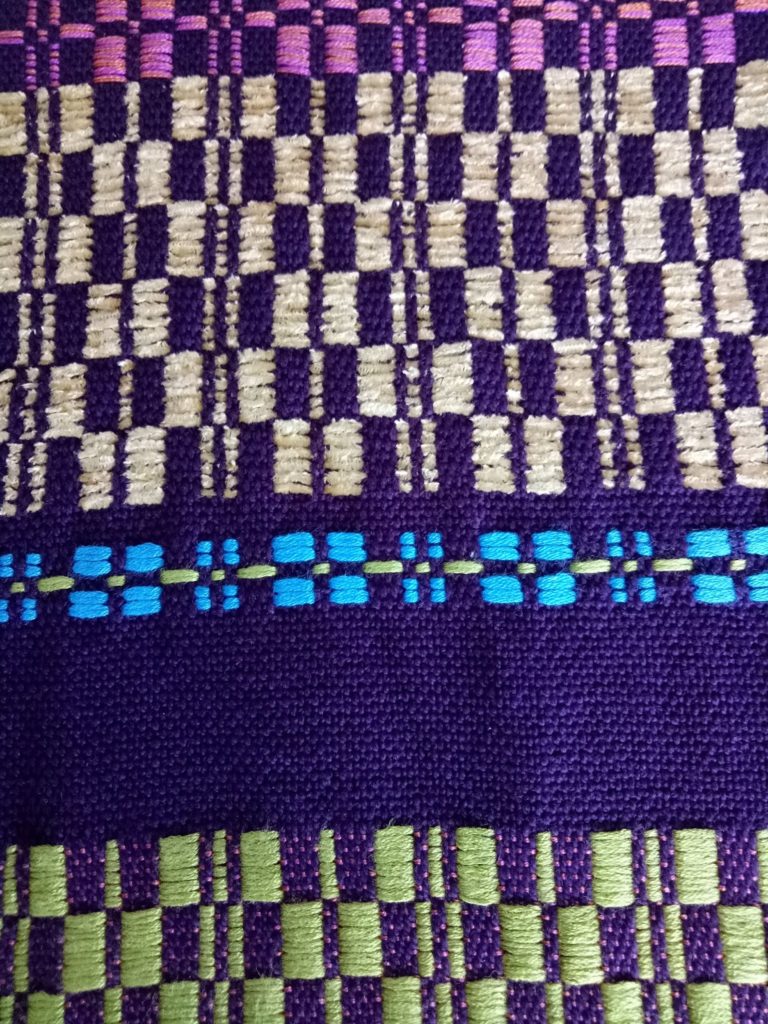
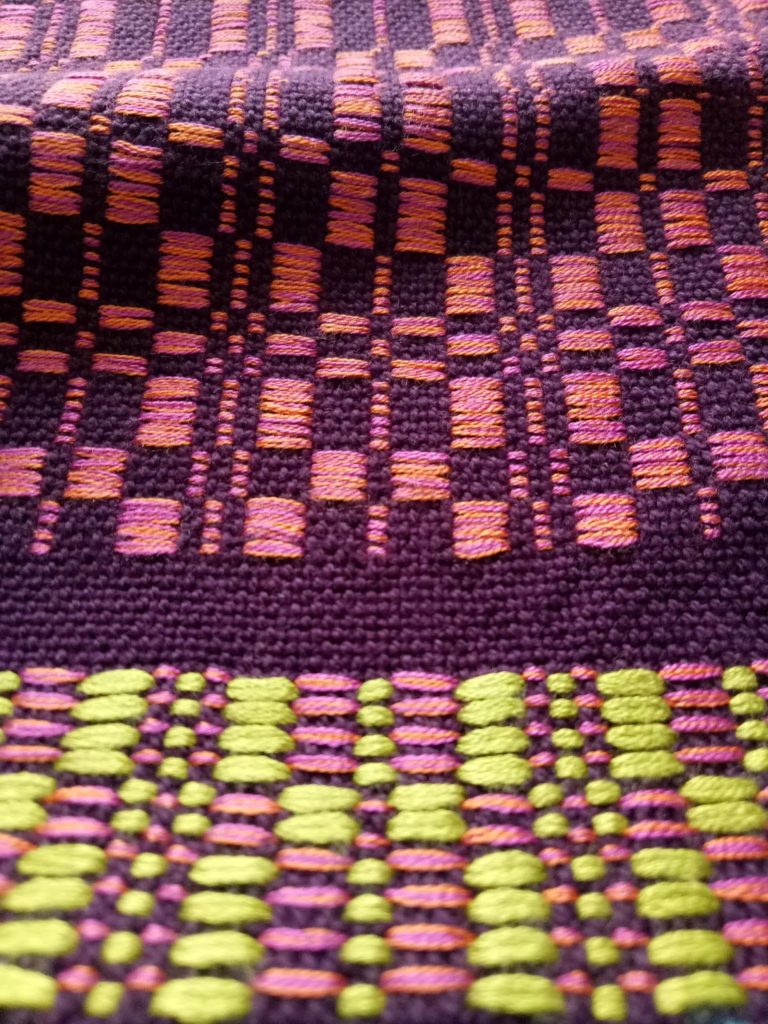
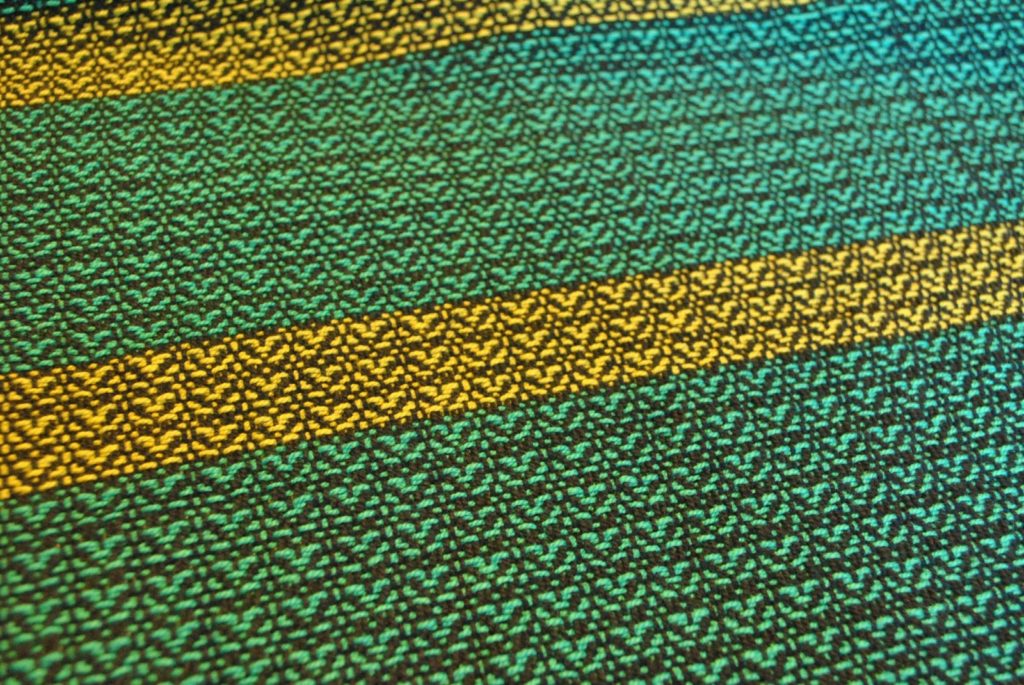
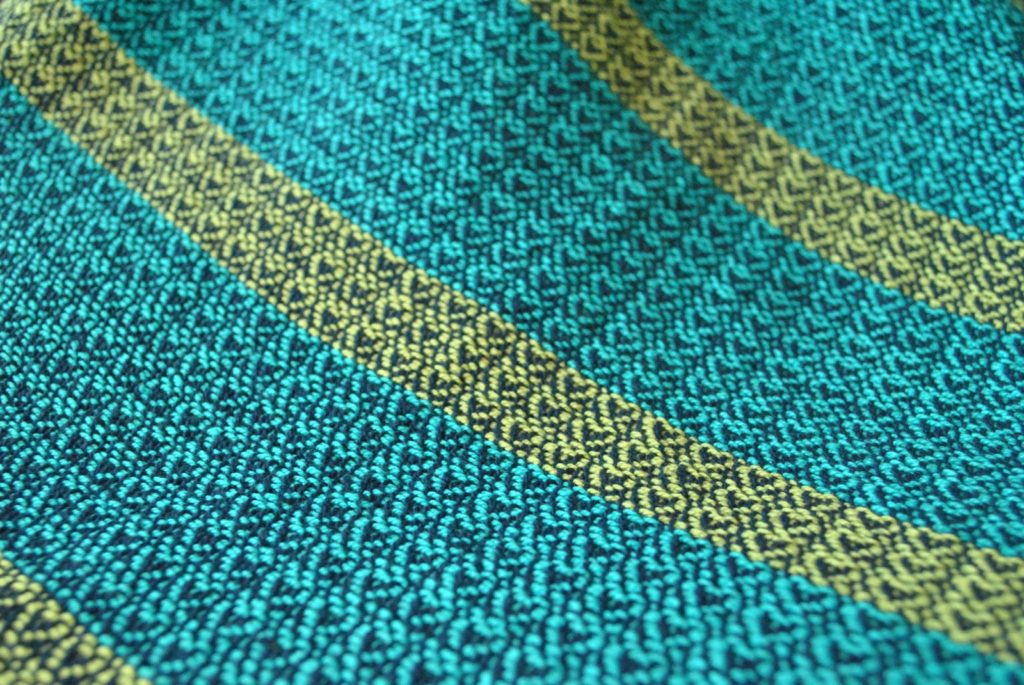
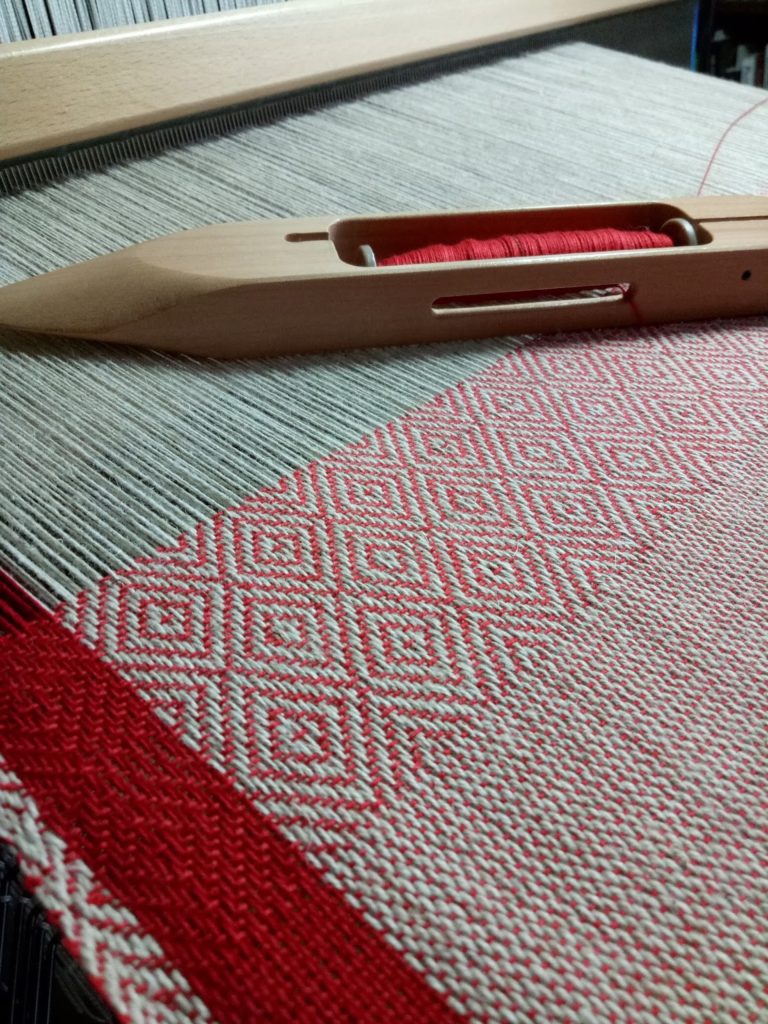
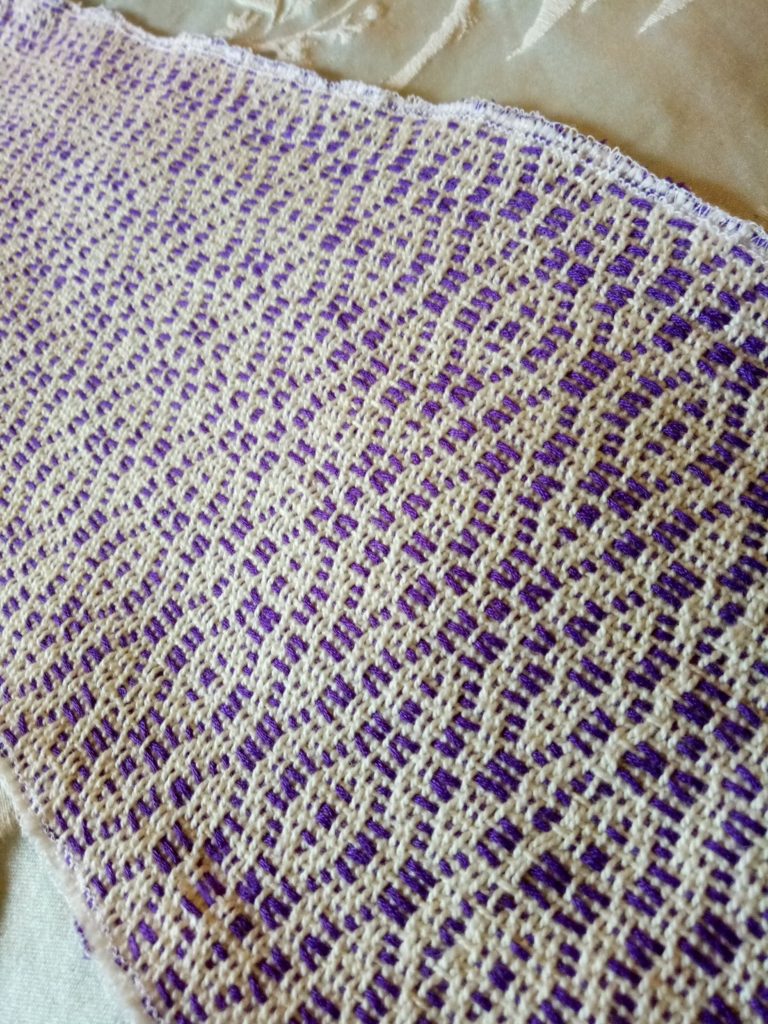
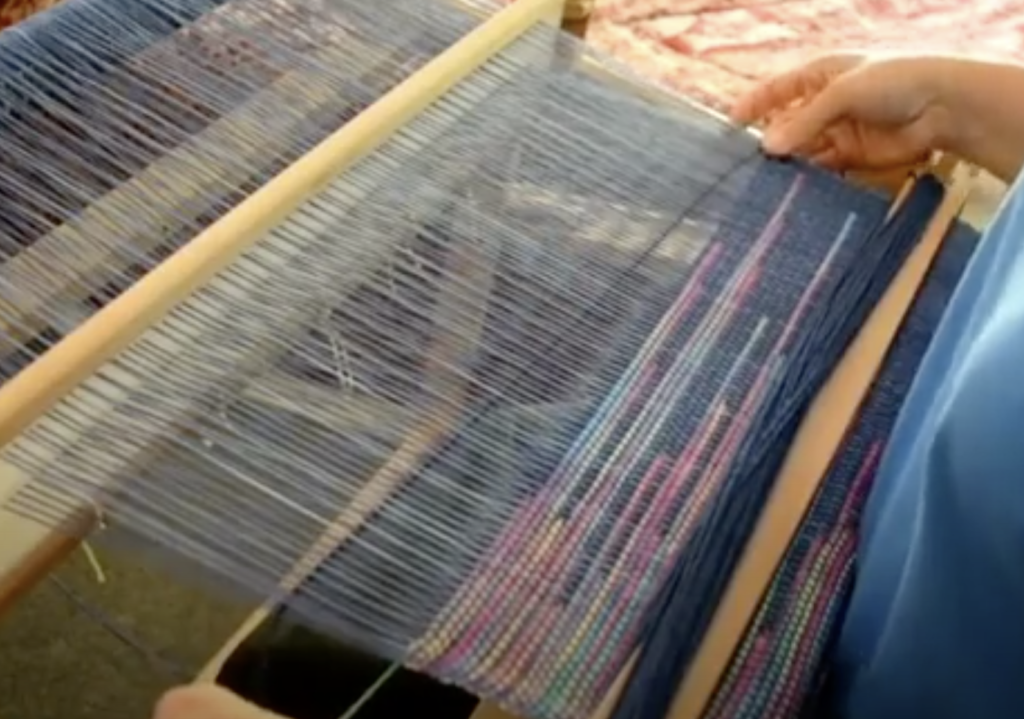
Here is a sample of the first towel, isn’t it gorgeous? 
The towels tie in happily with my #weaveforme plans for April,  as I will be keeping them for my kitchen 😊

If you’re interested in the next floor loom weaving class, make sure you are signed up to my email list for announcements and special offers. Instagram is also a great place to keep up with what I’m doing.

Do you have plans for your #weaveforme project yet? I’d love to hear about it!


Filed Under: 4 shaft weaving, Weaving Tagged With: #weaveforme, floor loom weaving, Kelly casanova weaving lessons, sampling, weaving

My Favourite Books for Multi Shaft Weaving

by Kelly 9 Comments

I love books, so it makes sense that I am a huge lover of good weaving books. It can be hard to know which books are worth buying, especially if you’re buying online and can’t view the book before purchase.


I have already made a video on my favourite rigid heddle weaving books, but haven’t talked about my floor loom or multi shaft books.


This is certainly not an exhaustive list, and I definitely plan on increasing my collection over the years, but these are a few that I have found particularly good.

*This post contains affiliate links


I will start with my absolute favourite. If, in some terrible circumstance, I had to choose just one of the following books to keep, this one would be it!

The Handweaver’s Pattern Directory by Anne Dixon only covers 4 shaft weaves, and yet, with the number of pattern drafts you could feasibly use this book for years before even considering buying an 8 shaft book. There is nothing I do not love about this book! Yes, it is a little expensive, but I consider  it my “go to” for any 4 shaft weaving. It’s a hardcover book with spiral binding. This is awesome because you can lay the book flat to follow a threading or treadling pattern, and the hard cover prevents any damage to the pages. I’ve had mine for many years and it still looks as good as new. The layout shows you exactly what you can expect from each draft by providing colour pictures and yarns used to achieve each one – great for those just starting out.

Once again, not a cheap book, but this one is an absolute classic!  Carol Strickler’s A Weaver’s Book of 8 Shaft Patterns has plenty of information on 8 shaft weaves, explanations of tie ups and treadlings, and black and white pictoral representations of each weave (there are almost 900 photos). Individual yarn suggestions are not given, but in each new chapter, suggestions are made for particular weave structures. Many of the drafts have historical information – where the draft came from (if known) or where it is adapted from, which provides the keen weaver the opportunity for further research if desired. 
Next Steps in Weaving by Patty Graver has been a great one to add to my library. Published in 2015, it has a more modern and fresh feel. The layout is uncluttered but still contains a lot of information. I admit that I read this book when it first came out and I was in the infancy of my multi shaft journey. I felt like some of it was a bit beyond me at the time. However, when I cam back to it later (after a lot of research and practice) I found that the language now made sense and it was in fact a very helpful book! 
The beginning of the book goes over understanding terminology and drafts (something that many new weavers struggle with!) She explains twills and twill orders and then launches straight into the projects. This is my style of learning and teaching – project based! To get stuck in and actually learn something as you do it, rather than be stuck at the starting line with a lot of theory and fear of how to put it into practice. Patty starts with some basic twill projects, then shows more advanced versions to expose the reader to what is possible with variations and colour. The threading charts for the projects are all colour coded, which I think is a really great visual learning cue for newer weavers, and even for more seasoned weavers who just want to follow a threading chart in a simple format.
There is a lot more I could say about this book, but then this post may turn into a book itself! So, I’ll finish up with this. It’s a great book, the projects and samples are beautiful and inspiring, and even if, like me, you find it a little overwhelming to begin with, it is a book you can keep going back to over and over.
A Handweaver’s Pattern Book by Marguerite P Davison is another well know weaver’s classic. It was first published in 1944 as a green book, the orange one being a more recent and publication. Thanks to the generosity of a student, I now own the green book as well. This book has 200 pattern drafts and has 4, 6 and 8 shaft weaves. The layout is a little more old fashioned (though there are black and white photo representations of most drafts) and some may find it difficult to decipher the way in which the drafts are drawn. That should not put off the adventurous weaver though, as it is very beneficial to be able to read all styles of drafts so that you can decipher them, no matter what country or time period they are from. 
This is one of those books that you read and just think, “that is a lovely little book”. Simple, lovely big photos, nice colour. Tom Knisely’s Handwoven Baby Blankets starts out with a useful section on the basics of baby blanket weaving, such as sizes, colours and materials. 
There are over 30 projects and it includes both 4 and 8 shaft. Every project has specific yarn and colour descriptions. If you’re interested in weaving baby blankets, I highly recommend this delightful book!
Probably my most asked question from multi shaft weavers is “how do I read a draft?” The next step on from understanding how to read and use a weaving draft is to begin drafting them yourself. This is something that is of huge interest to me, but something I have not devoted enough time to as yet and still have much to learn. If you are interested in drafting for yourself, Madelyn van der Hoogt’s The Complete Book of Drafting for Handweavers is going to help a lot! While I confess that I have not made my way through the entirety of the book yet (it is in a workbook style with drafting exercises for you to follow), I intend to do so as it contains such valuable information. This book is available from The Woolery.
If you’re as interested in coverlets as I am, these are my most loved coverlet books I own:
Carol Strickler’s American Woven Coverlets
Keep me Warm one Night, Burham and Burnham 
(This one is also in my possession thanks to the generosity of a student and it is now one of my most treasured books!)
A Book of Patterns for Hand-Weaving, Mary Meigs Atwater
Weaving a Traditional Coverlet, Helen Jarvis
My last recommendation is for those who are keen to branch out into double weave on your floor loom or table loom.
Doubleweave by Jennifer Moore. Whether you are wanting to explore weaving double cloth or double (even triple) width, this popular book will be a very valuable addition to your collection.
I do have more weaving books in my collection, but these books I’ve listed and described are the ones that I am most happy to recommend and really feel that they would benefit your weaving library too.
I hope you have found this post helpful, please let me know if you have any questions. Do you own any of these books? Which is your most used?
Until next time…
Happy Weaving!


Filed Under: 4 shaft weaving, 8 shaft weaving, Books, Floor Loom Weaving, Weaving Tagged With: books, recommended books, weaving, weaving books

What is Clasped Weft? A step by step tutorial.

by Kelly 23 Comments

Just when you think you’ve tried everything in weaving, you come across something different, like Clasped Weft.
Clasped weft can be a great “next step” for newer weavers with a few plain weave projects completed and who are ready for something a bit more adventurous.
The cool thing about weaving clasped weft is that, similar to Colour and Weave, most of the work is in using colours to make your weaving look fancy, when in actual fact it is quite simple.
The clasped weft technique uses 2, 3 or 4 interlocking weft colours. Using 2 colours to begin with is the easiest and least complicated approach. If you have done any tapestry, you may already be familiar with the interlocking technique.
*This post contains affiliate links. for more information, see my disclosure policy.

We mainly use a plain weave structure (though clasped weft can actually be used in other structures, such as twill). It is a perfect technique for a rigid heddle loom, because, although it’s simple, it looks special and has big impact.


Before we go through the tutorial steps, let’s look at some (rather poorly drawn, sorry about that!) diagrams to get a clearer idea of how this works. The drawings are over simplified, as I haven’t drawn in the warp and weft interlacement, but I have drawn in the edge warp threads:

Clasped weft with 2 weft colours.

Clasped weft with 3 colours.

Clasped weft with 4 colours.

Now let’s go through the tutorial steps so that you can get clear on how clasped weft is actually woven. Today, we are just focusing on working the two weft colour technique, as I believe this is the best place to begin if you’re not familiar with clasped weft or haven’t attempted it before.
Begin with two contrasting weft yarns of the same weight. I have used one with a dark navy colour and another that is variegated with bright colours.
See the tips section below for more on why variegated works perfectly.
My warp and weft yarns were all light worsted/dk/ Australian 8 ply weight. Wool, acrylic or cotton are all fine.
One weft yarn is loaded onto a stick shuttle, in my case this was the dark navy. The other colour is left in a ball or on the cone. My variegated colour was in a skein and so I wound it into a yarn cake with my ball winder.
A yarn cake (also known as a centre pull ball) is particularly good to work with for clasped weft, because it sits nice and flat on the floor and won’t roll away. The yarn also feeds off the yarn cake seamlessly, which makes the whole process that little bit easier. If you have a ball, you may want to sit it in a box or basket on the floor to contain it.
Place the ball of yarn on the floor at your left. It doesn’t matter if you place it on the right or left, but for the purpose of this tutorial it’s on the left.
Because the ball (let’s call it the contrast yarn) is on the left, we enter the shed with the stick shuttle on the right. Again, it doesn’t matter whether you are in the up or down shed, but I am beginning in the down shed.
Take your stick shuttle across from the right hand side to the left as though you’re going to weave a regular plain weave pick.
When your shuttle reaches the left hand side, pick up the contrast yarn and place it over the top of the stick shuttle.

Take the shuttle the rest of the way through the shed at the left – as you would for your normal plain weave pick.

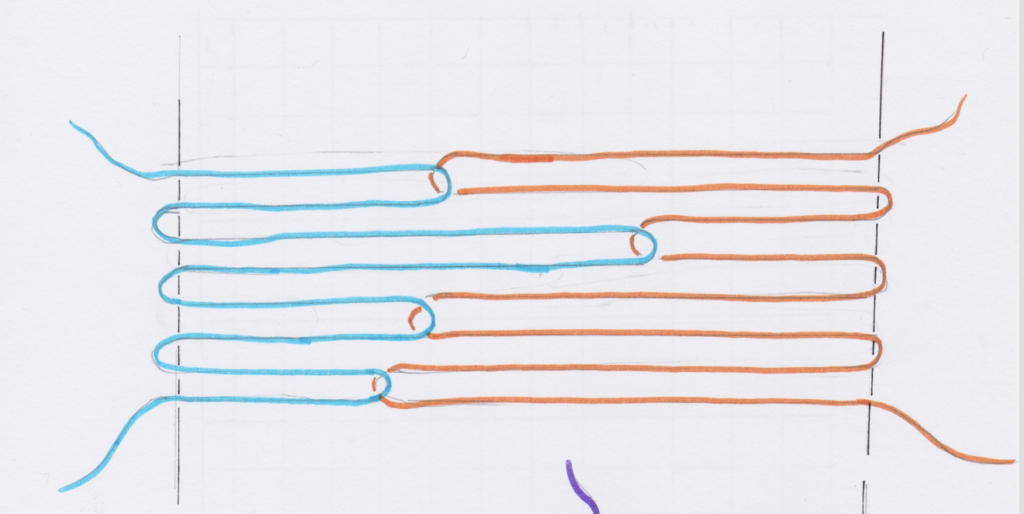
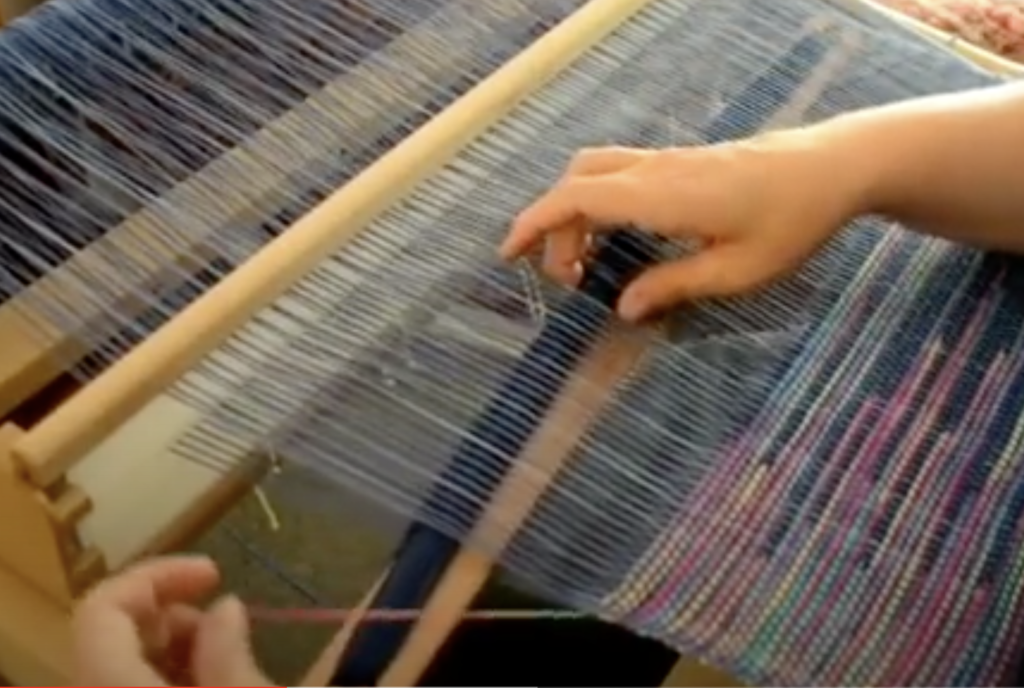
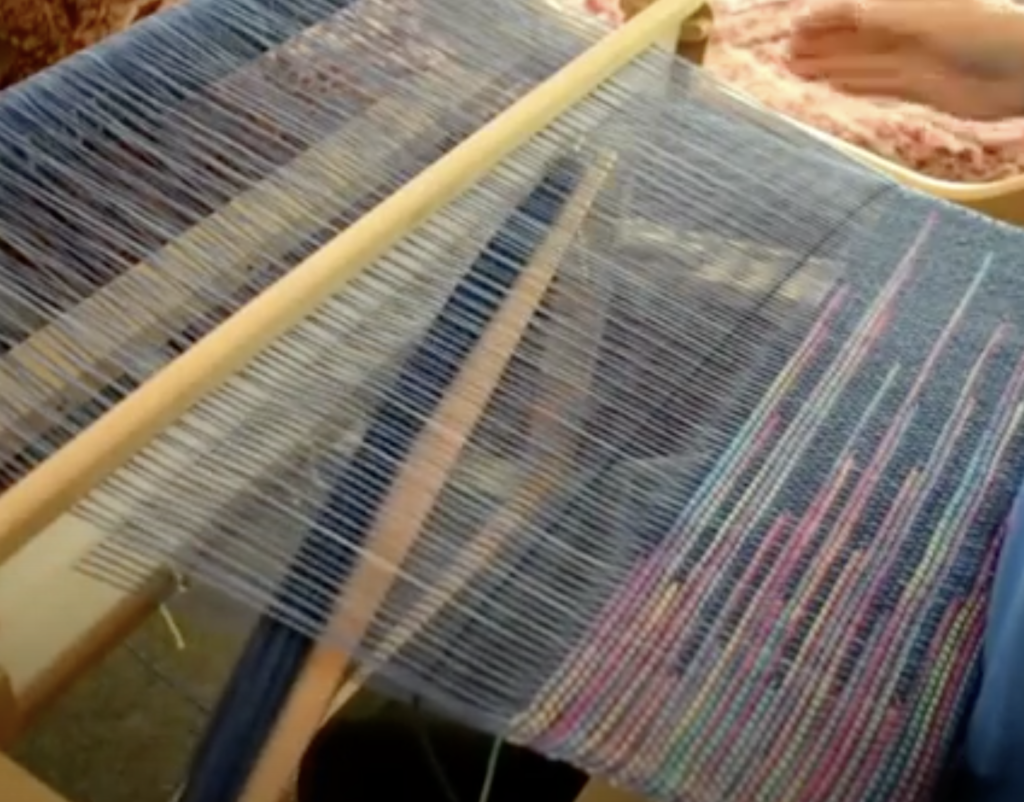
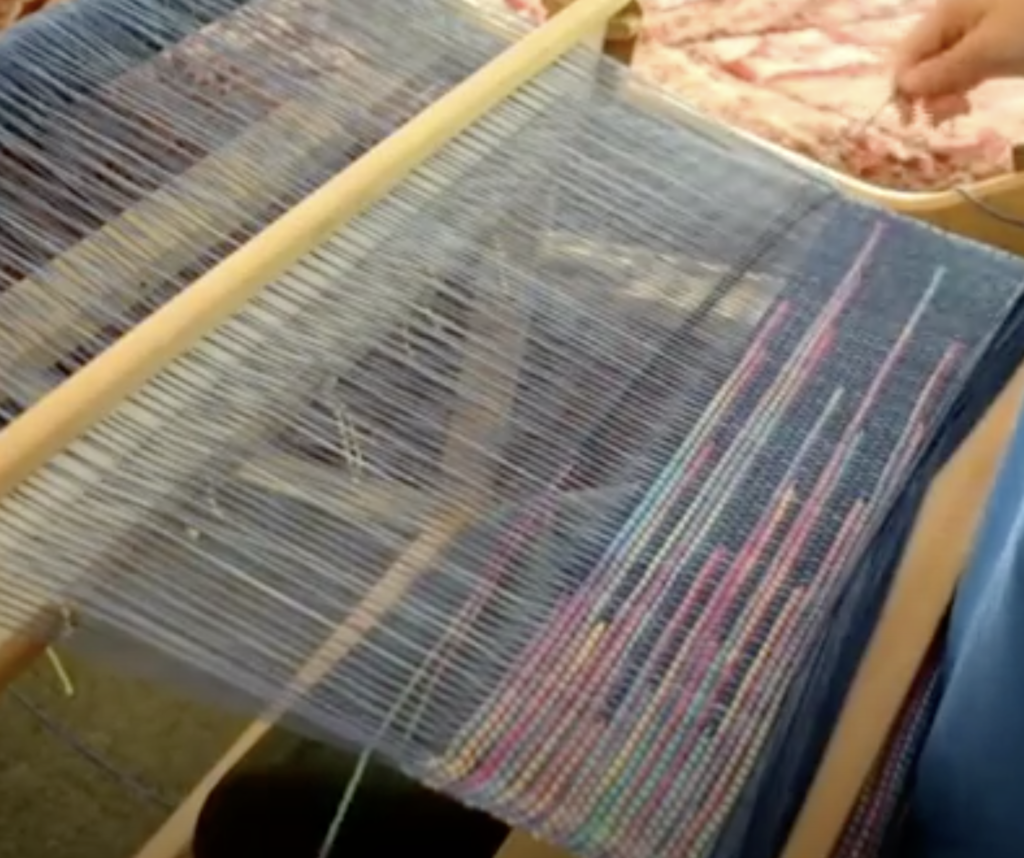
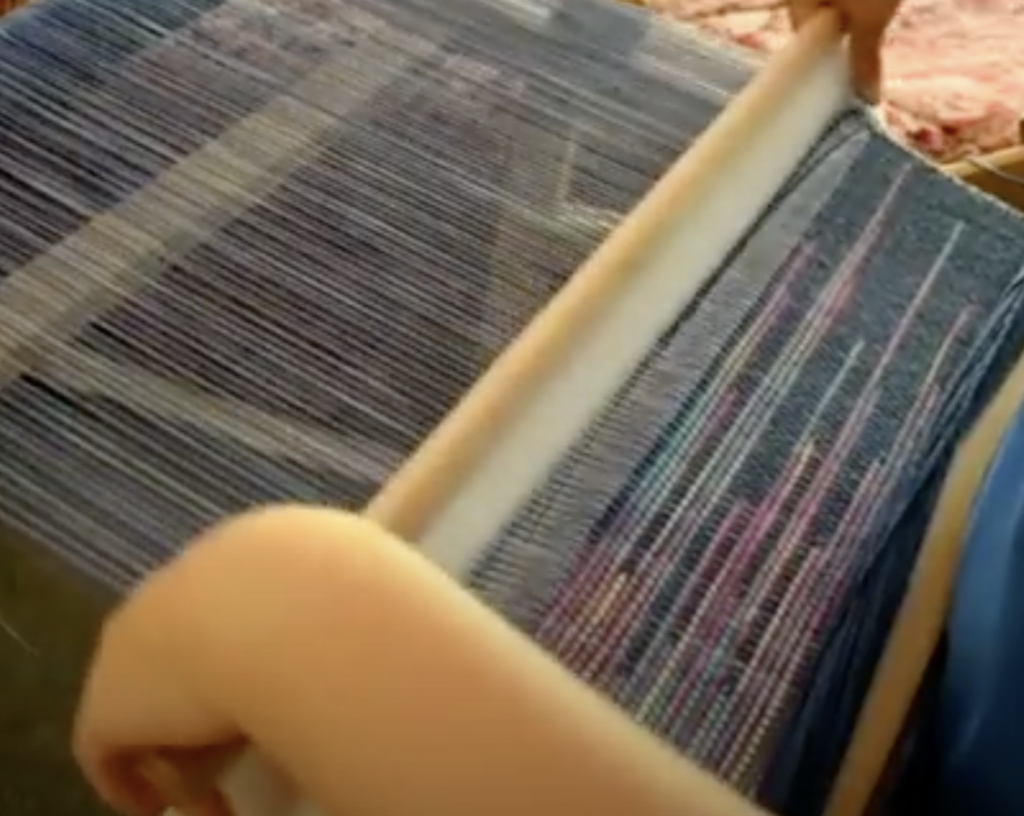
On the right hand side (where your shuttle entered), tidy up and prepare your weft yarn as though you’re going to beat the pick in. If you’re not familiar with how to do this, watch my free video on How to Weave Neat Edges.  DON’T BEAT.

Take the shuttle straight back into the same shed. Don’t change sheds, and don’t beat! Take the shuttle through, back to the right where you first entered the shed.
As you return the shuttle to the right, you will find that the navy yarn is linked or clasped with the contrast yarn. This means that the contrast yarn is pulled into the shed. Now you get to decide how far you will pull the contrast yarn into the shed. A little? A lot? Your choice, depending on the effect you want to achieve.
Hold both yarns under tension on either side to manipulate where you want the two yarns to go.
When you’re happy with the yarn positioning, beat the picks into place. You will notice that both yarns are now doubled in the shed.
Change to the next shed (in my case I had been working in the down shed, so I go on to change to the up shed).
Continue weaving in the exact same manner in the new shed and repeat until you’ve finished weaving.
Isn’t your head just swimming with all the possibilities of this wonderful technique?
Clasped weft can be extremely planned or extremely random. It looks wonderful both ways and is just so much fun to weave.
Here are a few recommendations for best results:
1. Use contrasting weft colours.
Light and dark will make the weaving pop. 
2. Use the same weight yarn for both warp and weft.
You will get better results and avoid the not so pretty lumps and bumps that can occur at interlocking points.
3. Variegated yarn is perfect for this.
For the 2 colour clasped weft technique, a variegated yarn with a contrasting yarn looks really cool! (See photos below and above).

              4. Using the same colour as the warp for one of your weft colours works great.

Too much colour can confuse the contrast of the clasped weft lines. In the tutorial, I used the same navy yarn for warp and weft no.1. I then used a contrast yarn for weft no.2.

If you like the look of clasped weft as much as I do, I have some great news for you! I have 3 free Youtube video tutorials that will teach you each of these techniques. Start with video 1 so that you can practice the technique, before moving on to the others. 

Clasped Weft with 2 colours
Clasped Weft with 3 colours
Clasped Weft with 4 colours
I mentioned that the clasped weft technique can also be used for other weave structures. This can create really interesting and impressive special effects. One of my Etsy patterns, The Cityscape Scarf is a perfect example of a clasped weft combined with a twill.
Try it out and let me know what you think. Leave me a comment here or under any of the Youtube videos, I love to hear from you!
Until next time…
Happy Weaving!

Filed Under: 4 shaft weaving, Free Pattern, Free tutorial, Inspiration, Online Weaving School, Rigid heddle weaving, Rigid Heddle Weaving Patterns, Tutorials, Weaving Tagged With: clasped weft, my youtube channel, rigid heddle weaving tutorial, weaving

Monk’s Belt Magic!

by Kelly 9 Comments

Sampling can be a sensitive topic among weavers. Why, when it takes you so long to set up and weave a piece, would you subject yourself to dressing your loom “just for a sampler”? 
Believe it or not, as a newer weaver, those were my thoughts exactly. When I read or heard a teacher recommending sampling before beginning the actual project, I would secretly snicker to myself “yeh, right, as if that’s ever going to happen, I just want to get to the REAL weaving!”


But if there is one thing that weaving has taught me over the years is patience! Oodles of patience. And, I’ve messed up enough times to know that, at least for some projects, sampling is a super good idea.

*This post contains affiliate links. For more information, please see my disclosure policy.

So, that brings us to my recent Monk’s Belt sample. Monk’s Belt is a very old weave structure and has been used in a variety of ways, according to time period and types of looms available. 


My sampler used 4 shafts and 6 treadles. The threading is quite simple, as you thread in blocks, which means there is plenty of repetition. My warp is 8/2 cotton, sett at 20 epi. The finished sampler measures 7 x 44″. Tabby is used throughout.

Monk’s belt designs are usually instantly recognisable, due to the bold, geometric shapes created by series of floats (these are where the block threading comes in). My aim in doing a relatively long sampler was to give myself plenty of time to experiment with treadling, but especially with yarns. I started out with yellow, mercerized cotton. I quickly found that this was not ideal, as it tends to sit quite straight as a float, rather than blooming and blending with itself. I also found that a single weft was not sufficient to make the pattern pop, so for each subsequent yarn type, the weft was doubled, to a much better effect.
The blue in the above photo is bamboo, which I found to be one of the most optimal yarns due to the thickness, sheen, softness and beautiful bloom.
The multicoloured weft above is hand dyed tencel, which gave a lovely effect, but like the mercerized cotton, doesn’t quite stack up in the “bloom” department. 
Bamboo again, and you can really tell the difference, it’s as though it was made for this! I had been following some standard treadling, but for this one I started branching into my own treadling, writing it down as I went.
I had been using single colours and decided to try 2 colours for the blue/green part above. I love the effect of 2 colours! Technically, I was using 3 colours if you include the purple (warp colour) I used for tabby.
Ah, silk! I combined orange and magenta 60/2 silk and my own treadling pattern for this one. Even though the silk is very fine, as a doubled weft it gave very good coverage. The blend of colours is also very eye catching.
For this one, I went back to my green bamboo for the pattern weft, but instead of using my purple 8/2 cotton for tabby as I had previously, I changed to my 2 strands of silk. This gives the effect of cute, luminous dots among the main pattern.
I have had some gold chenille sitting on my shelf for a while, and thought “aha!” Perfect time to try it, this will look brilliant. Except it doesn’t! I had pictured something quite sophisticated looking, but instead got strange. furry caterpillars that look slightly “off” in colour.
Not that I mind, this is the beauty of sampling – now I know that I don’t like chenille in a block weave!
The blue at the top is bamboo once again, but this time I swapped out the purple tabby for green bamboo. It gave an interesting effect but the green bamboo was a little too thick and kept my weft floats apart more than I would like. However, the texture is pretty cool and really changes the look of the weave.
The versatility of Monk’s Belt is awesome. Because you are set up for plain weave (tabby) as well as the pattern, you can break them up and just use the pattern as a border if you wish. I think plain weave towels with a border such as the one above would be really striking.
More treadling and yarn experiments, there is just so much you can do!
The big test was how the fabric would feel after wet finishing. I suspected that it would be quite stiff and more suited to cushions, bags etc. But, happily, I was wrong. The fabric softened up wonderfully and has a lovely drape. It looks great on the back too. It struck me that a sampler like this, with a bit more length, would make an amazing scarf!
I hope you enjoyed this post. I have made a companion video just for my Weaving School members, where I go over this blog post in more detail. If you are a member already, you will find the video HERE.
If you wish to join up, I would love to have you! Monthly  , 6 monthly and Premium memberships are available and include hundreds of hours of classes, access to a private Member’s group on Facebook, giveaways, live videos and a wonderful community of weavers.
I also now have a Monk’s Belt course just for table loom weavers. 
And, just before I finish up, I have a couple of book recommendations for you. These are affiliate links, meaning I get a small commission if you click through and purchase, but I do actually own and love these books.
The Handweaver’s Pattern Directory by Anne Dixon.
Anne has a couple of pages on Monk’s Belt, different threadings and treadling options, as well as excellent photos to show you how the weave looks.
A Handweaver’s Pattern Book by Marguerite Davison
Marguerite has quite a few pages on Monk’s belt with a lot of different drafts. The drafts in this book can be a little more difficult to read if you are not accustomed to reading older drafts.
Until next time…
Happy Weaving!

Filed Under: 4 shaft weaving Tagged With: 4 shaft weaving, floor loom weaving, Kelly casanova weaving lessons, monk's belt

Baby Blanket Project

by Kelly 6 Comments

I finished my baby blanket just in the nick of time, the day after my gorgeous new nephew was born. I already knew the baby was a boy and chose the colours accordingly. 
 
I told Nicky from Thread Collective what I wanted to weave and she recommended Venne Organic 8/2 cotton. I’m so glad I went with it, it may be a little more expensive, but for good reason! It is soft but I didn’t have a single broken warp thread, it was strong and just lovely to weave with. 
*This post contains an affiliate link. Please see my disclosure policy for further information.
 
 
I warped with the royal blue. I’m not sure why, but I started discovering errors from this point on. Too many distractions perhaps?
 
Error 1: I missed a part of the threading sequence in one spot. 
The fix: I had missed threading 3 heddles, so I made the missing heddles out of tapestry cotton and inserted them in place. Then, I measured out the missing warp threads, threaded through my string heddles, and weighted them over the back of the loom. Not ideal, but it worked!
The weighted threads.
Error 2: I re-sleyed the reed 3 times (yes, 3!!) because I kept missing a slot or doubling up. This was really frustrating as I just wanted to get weaving at this point. Even after the 3 re-sleys, I still ended up with one slot doubled up with threads. So, the blanket has a fault running through vertically. Rather than go back and re-sley again, I decided to just live with it!
My idea for weaving was to experiment with the weft, initially I thought I would do one shot of turquoise and one of green. I didn’t like the way that looked though. I experimented further (this is why it’s always great to warp a little extra for sampling) and decided on 3.5 inch stripes of blue, alternating with 1 inch stripes of green. It has a nice balance.
 
Here you can really see the hearts, aren’t they cute?! This is one side.
And this is the other side. Originally I had planned to back the blanket with flannelette once it was off the loom, but in the end I couldn’t decide which side of blanket I liked better, so no backing. It will be a light blanket instead 🙂 
You can find a copy of this draft here. It is also pinned to my Weaving board on Pinterest.
The weaving draft is very easy to follow, both the threading and treadling follow repetitive, simple to memorise sequences.
 
The dimensions of the finished blanket are:
Width – 27.5″
Length- 44″
 
The approximate cost of the project:
I used almost a whole 250 gram cone for warp. For the weft, I alternated between the turquoise and green cones, using less of the green. I estimated the total cost at around $55AUD, which covers the threads, postage cost on the threads, sewing supplies and label.
 
What I learned:
*I don’t work well with deadlines. On one hand, needing to be finished by a certain date is a good motivating factor but on the other hand, rushing causes stress and mistakes. 
*I learned that I definitely want to work with Venne organic cotton again.
*I would also like to use this draft again and I think it could be adapted to all sorts of projects. 
*I already knew this, but this project reminded me that weaving with quality threads is expensive!
*Perhaps most importantly, I learned that, once again most mistakes or errors in weaving are totally fixable if you can just find or think of a work around.
 
If you are interested in floor loom weaving or are a newbie floor or table loom weaver, be sure to check out my Introduction to Floor Loom Weaving course to get you up and weaving!
 
This pattern draft is not from a book, but if you love to weave baby blanket’s, I recommend 
Hand Woven Baby Blankets by Tom Knisely.
 
There is a huge selection of blankets, from 2 to 8 shafts and many different yarns and colours. It’s a lovely and inspiring book. 
 

Filed Under: 4 shaft weaving, Floor Loom Weaving Tagged With: 4 shaft weaving, baby blanket, floor loom weaving, hearts, organic cotton

Towels just for moi!

by Kelly 3 Comments

 I recently completed a project that I undertook just for me. Most of my weaving is for classes, patterns or customers, so to set aside the time to weave something for myself was pretty special!


As you may already know, I make bread for my family. I use kitchen towels to cover the rising dough and to cover the finished loaves as they cool. Perfect! Bread towels were what I needed!
I warped with 22/2 cottolin in natural with a red cotton stripe to accent.

Then I decided on M & W threading and some 2/2 twill variations.


I changed up the colour for each new towel so that some have bold patterns and others subtle.


For this one I changed both the colours and the treadling for a feature border.
To finish off, a little embroidery.


I am very happy with my new set of towels. Being hand woven with quality yarn, I know these will last many years in my kitchen.

How about you? Do you find that you’re always weaving or making for someone other than yourself? Perhaps you want to follow my lead and put aside some time to make something special just for you!

Filed Under: #weaveforme challenge, 4 shaft weaving, Floor Loom Weaving, Weaving Tagged With: 4 shaft weaving, floor loom weaving, weaving

Overshot uh-oh!

by Kelly 1 Comment

I tried overshot on 4 shafts for the first time. I put on a massive 8/2 cotton warp (my first mistake – too wide, too long!) thinking I would have a couple of table runners or plenty of baby blankets by the time I was done.
The threading was somewhat complicated, but I got through that and started weaving.
I don’t know, maybe I just don’t enjoy weaving overshot or maybe it’s a bit of inexperience, but this project became a struggle.
Some threading errors became apparent and then the breaking warp threads started. My progress was slow, very slow!
The errors stick out like a sore thumb, but I still wanted to share these photos, firstly to share the disappointments and imperfections, but also in appreciation of the pattern, which is actually pretty cool. The above piece was woven with black bamboo for the pattern and white bamboo for the tabby.
The back of the same piece. 
This was my favourite piece, I used a hand dyed, variegated tencel for the pattern and a mercerised cotton for the tabby.
The back of the same piece.
And this piece I quite like also. I used a thicker hand dyed cotton (8ply) for the pattern and a white bamboo for the tabby.
 
So, what did I learn from this humbling experience? That I’m not as good as I thought I was? Definitely. That my slow progress on the floor loom is starting to frustrate me? Uh huh. That I want to do something about it? Yes!
I’m not giving up, I’ll keep trying and I think that, for now, that is the best I can do.

Filed Under: 4 shaft weaving, Floor Loom Weaving, Weaving Tagged With: 4 shaft weaving, floor loom weaving, weaving, weaving yarn

  • « Go to Previous Page
  • Page 1
  • Page 2
  • Page 3

Primary Sidebar

About Kelly Casanova

Hand crafted boat shuttles

Categories

Archives

Meta

  • Log in
  • Entries feed
  • Comments feed
  • WordPress.org

Copyright © 2026 Kelly Casanova Weaving Lessons on the Foodie Pro Theme