• Skip to main content
  • Skip to primary sidebar

Kelly Casanova Weaving Lessons

  • Hi! I’m Kelly!
    • Disclosure
  • Online Weaving School Class Index
    • Common account issues
    • Common technical issues
    • What do I get with a membership?
  • New to rigid heddle weaving? Start here!
    • Never heard of the rigid heddle loom?
    • How to weave neat edges on the rigid heddle loom
    • Rigid heddle weaving
    • Rigid Heddle Weaving Patterns
  • Patterns
  • Subscribe

4 shaft weaving

How to make the most of your membership

by Kelly 2 Comments

Have you ever purchased a gym membership?

Let me guess, when you signed up you imagined yourself on the treadmill or pumping iron regularly. A few days a week, if not every day! You took out a 12 month membership because everybody knows that this will be the clincher – once you’ve paid you have to get your money’s worth!

A gym membership (you thought) was just the motivation you needed to get going and finally get fit and stay fit.

Young woman exercising at the gym with weight

What happened next? One of two things:

  1. The first day you went was great, you felt awesome and on top of the world. Day 2, rolling out of bed early to fit in a session, you didn’t feel so crash hot about the whole thing. Day 3, you decided you really needed that sleep in, but you would definitely get back to the gym tomorrow. That was 6 months ago.

2. You made a plan and started slowly. You decided that 3 sessions a week was realistic for you and that you needed some guidance to start with. You wanted to build gradually towards a good level of fitness, free of injury or exhaustion. 6 months later, you maintain this plan and feel really great about your health and the steps you took to achieve your goals.

All of this is hypothetical of course, especially considering that I myself have never so much as stepped inside a gym – the very notion makes the hairs on the back of my neck stand up. Give me a healthy walk in the fresh air any day!

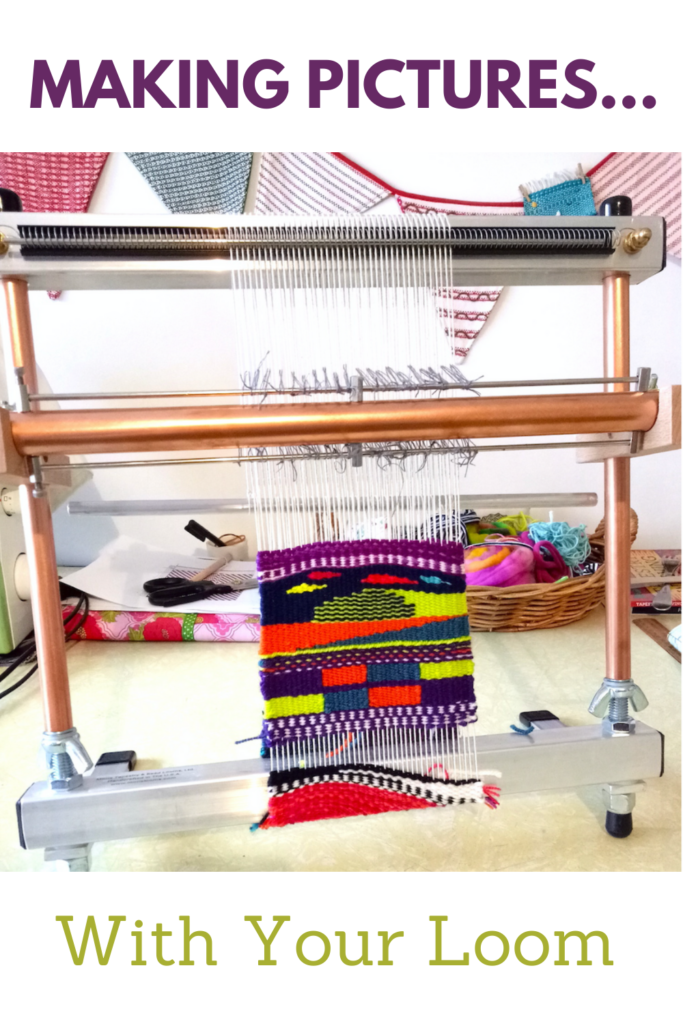
But I wanted to use the gym analogy today because it coincides pretty well with what I want to say about my Online Weaving School.

What does working out have to do with learning to weave? Quite a bit, actually.

  • Both require a commitment. And not short term, just as you don’t achieve fitness overnight, you don’t become a great weaver overnight.
  • Both take effort and patience.
  • Both involve goals setting and time investment.
  • Both are extremely rewarding and produce wonderful results if all of the above are adhered to.

I will be the first to admit that I absolutely love the fact that memberships in my Weaving School are thriving at currently over 800 students. I’m amazed and so grateful that so many new and seasoned weavers want to learn with me.

But, I have to tell you that the figure of over 800 students is only a vanity metric if most of those students are not actually engaged, making the most of their memberships and learning exciting new techniques.

Because this is not all about how much money I can make from the volume of students I have. That is not why I started all of this (you can read more about my story here and a more recent version here) and it’s not why I work so hard to make my school the best it can be.

The thrill and enjoyment that I get seeing a student have a lightbulb moment, weaving something beautiful or falling hopelessly in love with this craft, is why I do what I do. You really can’t put a price on that.

If you are already a member, please, use the tools that I’ve provided to make your membership the very best learning experience I can provide. Join the membership community, interact with the other students, plan your class list and start working though them.

Know that if you are having trouble, there is support available. Members receive personal support from me when needed, and also from the community of other members.

So, what will you get with a membership?

You will get a HUGE variety of weaving classes to choose from that you can work through in your own time, in your own way. You can stop the videos any time you need to and rewatch again and again. There are countless printable PDF information sheets.

You will get to join a friendly and helpful community of weavers at all different levels. Some are absolute beginners, others have been weaving for years. And they will all cheer you on!

What won’t you get with a membership?

You will not get a babysitter. I don’t mean that to sound harsh, but just like a gym membership, the results are up to you. You will see improvement and success if you put in the time and effort it takes. But you have to show up, have a positive attitude and be ready to learn.

If you are interested in taking out a membership or perhaps checking out one of the free classes available at my weaving school, here are so links for you to have a look at:

Gold Membership

Yearly Membership

Monthly Membership

6 Monthly Membership

Free classes:

Stashbuster Notebook Covers

Kitty Cats on a rigid heddle loom

Waffle Weave for rigid heddle loom

Wave and Zigzag shuttle weaving

Heart wallhanging

Calculating Warp for the rigid heddle loom

Honeycomb on a rigid heddle loom

Cardboard Loom tutorial

Honeybee Cushion

Do you have a membership already? What are your strategies for ensuring you make the most of it? Share in the comments below, I would love to hear from you!

Until next time…

Happy Weaving!

Filed Under: 4 shaft weaving, Floor Loom Weaving, Inspiration, Online Weaving School, Rigid heddle weaving, Tutorials, Weaving Tagged With: learn to weave, membership, online learning, online weaving school

Making pictures with your loom

by Kelly 10 Comments

Something that really captivated me before I even started weaving, was the idea of using artistic creativity in weaving.

When I was younger I loved to draw and paint. In my adult life, I have not made a lot of time to devote to making art, but I have been happy to discover that there is a huge crossover with art and weaving.

This post contains affiliate links.

One of the most obvious forms of weaving that this crossover takes place in is tapestry weaving. In tapestry, the weaver can have total artistic licence through the use of colours and shapes. The shapes can be basic or complex. Colours can be blended on the loom. And, tapestry can be woven on many different types of looms.

I purchased a Mirrix Big Sister last year, as I wanted to develop my tapestry techniques and also have a dedicated tapestry loom. It is an excellent loom for tapestry, as even though it’s small, I find the available weaving room quite spacious and the tension is awesome.

Before I bought the Mirrix, I wove tapestries on my rigid heddle loom.

I had a lot of fun using different yarns and styles. My most popular Youtube series details how to weave in a free and unplanned style with a variety of yarns and colours.

I’ve also explored more tradition tapestry techniques on the rigid heddle loom. I particularly enjoyed taking my Sampleit on vacation, which enabled me to sit on the beach, watch the kids enjoy the waves and weave. What bliss!

My adventures with tapestry on the rigid heddle loom gained so much interest on social media, that I developed a course to show others how to do it! The course includes all the basic tapestry techniques you need to know, plus how to use all of these techniques to weave a finished project. If that sounds interesting to you, the course is available here.

Another way to get started in tapestry without breaking the budget, is with a more affordable tapestry loom. Depending on your budget, you could opt for something like the Schacht Tapestry Loom, or even just an el cheapo like a Melissa and Doug simple frame loom. Some people choose to make their own by building a simple frame or repurposing a wooden picture frame or similar. Just be aware that the more tension the loom holds, the better it is for tapestry and if you go down the cheap route, well, you tend to get what you pay for.

A resource that I found to be great when starting out with tapestry, and still use for inspiration, is Kirsten Glasbrook’s book, The Art of Tapestry Weaving.

Aside from tapestry, are there other ways to make pictures with your loom. Oh, yes indeed!

If I haven’t already gushed about krokbragd on this blog enough times, here I go again! If you’re interested in going down my blog rabbit hole on this topic, start with this post. Krokbragd is a weft based, most of the time but not always 3 shaft, weft faced weave. You repeat the same order of treadling over and over, but can vary your yarn colour combinations to produce simple and complex shapes and images. It is seriously cool, and that is why I’m always gushing about it.

Many of the shapes are open to interpretation, as they can be slightly non specific, but there is really so much to explore. One of my goals for this year is to weave a striking krokbragd wall hanging using my floor loom. Can’t wait for that one! Debby Greenlaw has written a terrific book, Krokbragd: How to Design and Weave.

I have a number of Youtube lessons on krokbragd using my rigid heddle loom, but if it’s new to you, start with the above video.

Boundweave is another weft faced weave that is very adaptable and versatile. It can be woven on 4 or more shafts (so it’s possible on a rigid heddle loom). The picture possibilities are endless. I have been playing around with bound weave on rose path threading and 6 shafts recently on my floor loom.

I’m using Nancy Arthur Hoskins’ Weft Faced Pattern Weaves book for guidance. My goodness, what an extensive book – so much to learn! This was my first attempt and I’ve now branched out with some more random designs, which is all very interesting. Slow, but interesting.

There is a lot more to be said about making pictures on your loom, but I hope this post has inspired you with some of the possibilities. Have you tried any of these techniques? Which is your favourite? Let me know in the comments!

Until next time…

Happy Weaving!

Filed Under: 4 shaft weaving, 8 shaft weaving, Floor Loom Weaving, Krokbragd, Rigid heddle weaving, Tapestry Weaving, Weaving Tagged With: boundweave, pictures, tapestry

Table loom options

by Kelly 27 Comments

When it comes to selecting a table loom to purchase, we are not as spoiled for choice as we may be for rigid heddle looms.

This can actually be a positive rather than negative thing, as it can be easier to choose when the selection is more narrow.

In this post I’m going to provide details for table looms currently available commercially (if I miss any brands it would be because they are obscure and not easy to obtain.) I will also give the retail prices of each so that you can compare.

*This post contains affiliate links

As a little disclaimer, the only brand of table loom I have actually used and am really familiar with is Ashford. So, I’m not giving an opinion or appraisal on the other brands, but rather providing available information and pricing.

Most of the looms I mention here do not come with extras like stands, benches or raddles. These things are available as separate purchases.

Let’s dive in!

I’m going to start with Ashford table looms, for the reasons already given above. There are quite a few options with Ashford and pricing is quite reasonable by comparison. Please note that the photographs are all courtesy of the manufacturers and all prices do not include stands.

All prices are in US dollars.

The entry level table loom from Ashford is a 4 shaft and is available in weaving widths of 16, 24 (pictured) and 32 inches. Prices start at around $840USD for the 16″.

The cool thing about a 4 shaft is that there is room on the castle front to upgrade to 8 shafts later if you choose to, so if you’re not sure you can always start out on 4 and see how you go.

There are also stands available separately, and these come with the option of also purchasing a treadle kit for more of a floor loom experience.

Then we have the 8 shaft range, also available in 16 (pictured), 24 and 32“. 8 shaft prices start at $890USD.

There is even a 16 shaft table loom for those who love the idea of having lots of shafts to play around with.

All the Ashford table looms have a folding castle for compatibility, meaning they are a good travel or teaching loom. The beater is overhead and easy to use. Each loom comes standard with a stick shuttle, threading and reed hook, 10 dent beater and 640 texsolv heddles to get you started. All Silver Beech wooden pieces come lacquered and ready to assemble.

If you need help to assemble your new Ashford table loom, I have instructional videos:

Le Clerc has several table loom options. Their looms look to me to be made in a more traditional style with dark wood, straight lines and metal heddles plus a boat shuttle included.

The Dorothy table loom comes in 15.75 or 24″ weaving width and may have 4, 8 or 12 shafts. Starting price is $750USD. Le Clerc also make the Voyageur, which goes right up to 16 shafts. You have the option of buying a stand with these looms and I must say that I really like the way their stands are basically a sturdy little table with side shelves – shelves are a great thing to have with any loom in my opinion! There is also the option here to purchase a treadle stand.

Your options for table looms with Schacht are a little narrower, to be the best of my knowledge they just make one model of table loom, but in a variety of weaving widths and a choice of 4 or 8 shafts. These looms are constructed with maple wood and you actually get a choice of reed size, which is a nice bonus! Prices start at $742USD. A stand is available for separate purchase, as is a double back beam kit.

Glimakra makes the Victoria Table Loom. Once again, there is not a lot of variation as this is their only table loom and it is only available in 4 shafts with a 27″ weaving width. Something I find interesting about this loom is that it doesn’t fold and isn’t very portable, but just looking at it you can see that it’s a solid, sturdy loom. The starting price for this loom is $1,100USD and once again you have the option of purchasing a stand and treadle kit.

Toika makes a table loom in only one size (23.6″) but with a choice of 4 or 8 shafts. It comes with an 8 dent reed and 200 texsolv heddles. The levers for this loom look a little different as the ends that you grip on to for shaft manipulation are rounded pegs. At first glance, I wonder whether the shape of these pegs cause hand fatigue for the weaver, I do think that would be a possible problem for me. Prices start at $825USD. This loom can apparently be mounted on a stand, however I don’t think Toika actually make a stand specifically for this loom.

Lastly, Louet make a few different table looms. I have to mention the Klik Table Loom first, as it’s such a different concept to your regular table loom. The shafts are actually operated (raised) from the side based on a spring and click system. Then you beat with a swinging beater. The loom comes with 4 shafts, but up to 16 shafts can be added to the space. This loom looks very lightweight and portable, which would make it an ideal “take with you” loom. A couple of thoughts that spring to mind though. 1. You have to lean around to the side to operate the shafts, possibly not good for back or shoulder injuries? 2. The loom looks like it would sit flat on a table, but at the same time the shafts look lower than the bottom edge of the loom? And what about those handles, could you not do a full rotation if the loom was on a table? Therefore, would it possibly be necessary to purchase the stand to use this loom effectively? So, while the concept is very interesting, I would definitely want to try this loom before buying. Price for the Klik is $750USD.

Louet also make the Jane (pictured) and the Erica table looms. I have heard very good things about these two looms and they are definitely gaining popularity. The Erica starts at $555USD for the 4 shaft or you can start with the 2 shaft at $370USD and upgrade to 4 later. The Jane comes standard with 8 shafts in 2 different weaving widths, and a built in raddle (no separate purchase for that) starting at $1,195USD. These looms fold down and are light weight to transport.

The links I’ve provided in this post are from Amazon and The Woolery.

If you are in Australia and interested in purchasing an Ashford loom, I recommend Tracy from Knit Spin Weave.

If you are in Australia and it’s a Louet you’re after, I recommend Nicky from The Thread Collective.

Have I missed any table looms that should have been mentioned? If so, please tell me in the comments below.

If you are interested in table loom weaving or already own one but need help to get going, my Table Loom Weaving course would be perfect for you!

I hope this has been useful to you!

Until next time…

Happy Weaving!

Filed Under: 4 shaft weaving, 8 shaft weaving, Table loom weaving, Weaving Tagged With: table loom weaving

What is a table loom?

by Kelly 39 Comments

A table loom enables multi shaft weaving without the space or financial investment that a floor loom requires.

*This post contains affiliate links.

A table loom usually comes with four or more shafts. Four and eight shaft looms are the most common, but they can have more. Ashford, for example, manufacture a 16 shaft table loom!

Ashford 16 shaft table loom. Image from Ashford website.

Table looms are often favoured for their portability and affordability. They make a great loom to take along to workshops, or anywhere you want to take a multi shaft loom. Some will come with a handy carry bag and many will fold down to be even more space efficient. They are also often used for sampling, as you can test out your yarns or pattern before committing it to the floor loom.

Table looms come in a variety of sizes, meaning that if you only require one for sampling or you have a very small space to fit the loom, you could choose a 16 inch or lower weaving width. This size would also be suitable if you only wanted to weave narrower pieces like scarves.

The mode of operation for weaving on a table loom differs to other looms and makes it instantly recognisable. The shafts, rather than being operated by raising or lowering a heddle/reed (as in rigid heddle weaving) or being foot controlled (such as treadling on a floor loom) are raised by the manoeuvring of levers that sit at the front of the castle (the upright part of the loom) and are tied to the shafts underneath. These levers are very simple to operate and as lever 1 corresponds with shaft 1 and so on, it is visually simple – you are actually looking at the levers right in front of you, making it difficult to mix up and get the pattern wrong.

Table looms are also adaptable. In the last paragraph I explained that the levers are hand operated, however if you want more of a floor loom experience, you can purchase a stand along with treadles. The treadles are tied to the shafts in place of the levers, allowing you to lift the shafts by depressing treadles with your feet.

Some looms can be purchased as a four shaft and upgraded to an eight shaft later on. This is a terrific option for those who:

  1. Wish to start out on four shafts only OR
  2. Don’t wish to make the financial commitment of an eight shaft loom right away.

To weave on a table loom, you will need a few things apart from the tools that come standard with the loom:

*A table space to keep the loom on whilst weaving (unless you also purchase a stand, which is available separately). If weaving at a table, some weavers choose to stand. My back is no good for standing so I like to use an adjustable height office chair that I find comfortable.

*A warping board. A table loom is warped indirectly, so you make your warp on the board and transfer it to the loom.

*A raddle kit. This is necessary for spacing your warp before taking it to the loom. You can buy the raddle kit that fits your size of loom. Some weavers choose to make their own.

You can see a short overview of the Ashford 8 shaft, 32″ table loom here-

And you can see a demonstration of me using the loom here-

I have some exciting news regarding table looms too! I recently purchased the Ashford 16″ 8 shaft table loom to use for teaching. My husband and I made a two part video that shows you how to assemble it.

But that is not all! My primary purpose for buying this new loom is because I have had so many requests for a table loom class and I am happy to say that I’ve put together a very comprehensive class, Weaving on a Table Loom.

I hope this post has been useful to you, let me know in the comments if you have any questions or simply want to leave me a comment.

Until next time…

Happy Weaving!

Filed Under: 4 shaft weaving, 8 shaft weaving, Table loom weaving, Weaving Tagged With: table loom

Should I buy a larger loom?

by Kelly 19 Comments

One of the number one questions I’m asked by either brand new or seasoned weavers is “Should I buy a larger loom?”

In this post I will take you through the main points to consider when you’re wondering whether a size upgrade is the right choice for you.

*This post contains affiliate links.

The first consideration is what type of loom we’re talking about. Most people who ask me are rigid heddle weavers. So I’ll cover rigid heddle looms first, specifically Ashford looms, as they have the largest sizes available.I often recommend my 24″ loom as a great starting point for a beginner who wants a decent, but not huge width. It is wide enough to weave smaller width items like scarves but just large enough to weave kitchen towels and bags.

You can, of course weave yardage to sew with (to make your own clothes and larger items) but that involves sewing panels together to make wider widths. Depending on the item you plan to sew, this may or may not work well.

Beyond the 24″, the next size up is the 32″ rigid heddle loom. The largest currently available is the 48″ rigid heddle loom.

When considering a larger loom, consider the following points:

  • Do you have the physical space for a larger loom?

If you buy a rigid heddle loom 24″ (that is the size I have) or above, I would definitely recommend to also purchase a stand with it.

I personally would not enjoy using a larger loom trying to lean it on the edge of a table or similar, and I don’t think that this would allow you to maintain a beneficial weaving posture. A good posture is really important – even if you have no physical injuries or problems, know that you could develop problems long term through repetitive poor setup and practices. So a stand is well worth the investment.

But, this means that your loom will be free standing rather than packed away. Do you have a space where you can set up a loom of that size and leave it on the stand when finished? Or does your living space/s dictate that your loom would need to be packed away in between uses?

  • What is your budget?

This is a pretty important consideration for most of us! Naturally, the larger your loom, the more it will cost. And not just the initial outlay for the loom, but addition tools or pieces that you wish to add along the way. Every time you buy a different sized heddle/reed, a pick up stick, a stick shuttle – these are all going to be larger to compliment and fit your loom and that will cost more.

Here are a couple of examples as a comparison. I’ll list the 24″ loom specifics as compared to the 48″. All prices are in US dollars.

24″ RHL and stand – $394 USD (you can sometimes find a combo deal of the loom and stand together for a slightly cheaper price).

24″ 10 dent reed/ heddle – $37.50

22″ stick shuttle – $7.50

48″ RHL and stand – $695

48″ 10 dent reed/heddle – $89

48″ stick shuttle $40

Uh huh, big price differences!

  • What do you intend to weave?

Some new weavers don’t really consider this when purchasing. Not being familiar with the possibilities or not having used a loom before, it can be very difficult to know what items you will end up enjoying weaving. If you only intend to weave scarves and smaller items, why go to the expense of the largest loom?

On the other hand, you may find that your absolute favourite thing to weave is baby blankets or afghans, therefore making the larger loom well worth your consideration. What if you make the decision to buy a smaller loom but after a little experience find that you want something larger?

Well, the good news is that rigid heddle looms are easy to resell. If you have kept it in good condition, it should be easy to find an eager new weaver willing to take it off your hands for a fair price. You can then use this money to invest towards the larger one.

  • How is your back?

Back or shoulder problems? Neck trouble? Then you need to consider carefully whether a larger loom is the right choice for you. A larger loom means a much wider reach with a shuttle.

As an example, I can sit very comfortably at my 24″ on it’s stand, extend each arm out to insert the stick shuttle and not have to move forward in my seat.

As someone who has a back injury and regular flare ups, if I had to lean forward or to the side every time I wanted to throw a pick, that would be a real problem for me. It would be a much greater strain on my body. I prefer to accept my limitations and be grateful that I am able to weave on the 24″ and plan my projects accordingly.

That brings me to the next related topic, the table or floor loom.

I’ve written a large number of articles on this topic, here is a list of those posts if you’re interested in researching more.

When I had my 8 shaft, 32″ table loom it was a little more difficult to weave on when I had it fully warped, but with the correct height adjustable chair, it was more than manageable. I still miss that loom, I sold it to make space and provide extra funds for my floor loom. I’ve since replaced it with a smaller 16″ table loom that I can use for teaching purposes – perfect!

Now that I have my Louet David 2, 35″ floor loom, even though it is the widest loom I have owned, it is a good fit for me width wise. It is wide enough to weave baby blankets and wide shawls.

Recently I wove yardage on it for my Clothtober project, which was a tunic for me and it worked out well. So, why is this loom not a problem for my back? Well, I always use a boat shuttle with this loom.

Because the tension is excellent, I can shoot my boat shuttle back and forth with ease. I am also seated on an adjustable piano bench and find that I develop a slight rocking motion as I get into the weaving rhythm. Although my shoulders do get a little sore if I put in a long weaving session, it is not excessive and generally my back is fine as long as I’m not in a dreaded flare up phase.

The action of throwing a boat shuttle is quite different to passing a stick shuttle. Yes, you an use a boat shuttle with a rigid heddle loom too, but I generally don’t because it can’t hold the same tension so I end up mostly passing the boat shuttle through anyway.

I should also add, if you do have a rigid heddle loom that is a little smaller than you would like, you always have the option of double width weaving. Although somewhat limited, it is a really terrific way to double the width of your fabric. I have two classes that teach you how to do this – Doubleweave Baby Blanket and Weaving with Two Heddles. I also have the Rainbow Lap Blanket, which is woven entirely on a Sampleit loom.

I certainly didn’t intend to write such an epic post when I sat down to address this topic today, but there is a lot more to be said about it than I realised! I hope my ramblings have been of use to you.

As always, leave me a comment with any questions or additional points you may have to add. I appreciate your input!

Until next time…

Happy Weaving!

Filed Under: 4 shaft weaving, 8 shaft weaving, Floor Loom Weaving, Rigid heddle weaving, Weaving Tagged With: buying a loom, floor loom weaving, rigid heddle weaving, table loom weaving

My completed Clothtober project!

by Kelly 20 Comments

I’m so excited to be finished! A little overdue perhaps, but isn’t the nature of slow cloth?

I went through quite a few of the weaving details like yarns and weave structure in last week’s post, so please check that out if you’re interested (and read of my nightmare-ish warp!)

*This post contains an affiliate link

I’m happy to say that the actual weaving was fairly plain sailing and enjoyable with the simple 1&2, 2&3, 3&4, 4&1 order of treadling.

So, once removed from the loom I had a lovely long length of delightful cloth without serious errors (I’m happy to say that the double threading error referred to in the last post does not even show in the finished garment!)

I made a lovely big vat of indigo and tested it with the neck facing pieces I had cut out of a light commercial cotton. The colour was even better than expected, so I felt very good about submitting my long piece of cloth to the vat.

Have you ever dyed with indigo? It is a wonderful, peaceful and relaxing process. While I was standing at my laundry sink, I had the door next to me wide open and a blackbird hopped right up beside me. He didn’t even notice I was there! I thought to myself “perhaps this is the very best way to live. Quietly, slowly, making beautiful things”. It certainly struck me as a beautiful moment in time.

I took my cloth outside (indigo is very messy!) to let the magic happen. As oxygen hits the cloth, it turns from a glorious green to a wonderful blue. The blue is much darker when wet, so I took that into account. I wanted a dark blue. So, I went back to the vat for a total of 3 dippings. On the last dip, I left the cloth sitting in the vat for at least half an hour.

I absolutely love the colour in this shot. I would have preferred that it stay this dark and rich as it dried, but alas that was not the case. I still think it came out a beautiful colour anyway. That is another of the charms of indigo, even if you obtain a very light colour it is bound to be a really beautiful blue – I don’t think an indigo vat can produce anything ugly!

As an aside, I have just begun work on my Journey to Japan course. One of the focuses of the course will be learning to dye with indigo, so if that interests you, be on the lookout for that.

The next step once my fabric was dry was to cut out the pattern. I’m not scared of cutting my handwoven fabric as it all turns out well as long as you take the right precautions. For this project I cut the pieces as I would for commercial fabric but got them quickly to the serger without disturbing the fabric too much, and it was fine. If you’re worried about cutting your handwovens, you may want to check out this video:

There was a hitch with cutting out the pattern though. The fabric had shrunk more than I calculated for. My front and back pattern pieces didn’t fit the folded fabric! Aaaaagh!!

These are the things that feel horrible at the time, but later I am really grateful for. Why? Because I learn! Not only do I learn what to do by thinking about all the possibilities, I also learn that I might be more capable than I thought, which is a great confidence booster! So, I ended up with some odd little shapes and pieces that I tacked on here and there to make up for the lack of width. And it worked!

I now have a comfortable, special garment that fits really well. Unfortunately we are coming into warmer weather here in Australia, so I won’t get much wear out of it this year, but I expect it to last many, many years. If the indigo fades at all, I’ll do as the Japanese do and re-dip it. Only I know the work that went into making this, but that makes it all the more rewarding.

The little voice in me says that the neckline is too wide and so are my hips. But I told the little voice to shut up please, I want to bask in the joy of having woven, dyed and sewn a garment from scratch just for me.

I don’t know if any of you decided to make your own garment for Clothtober, but I’m thinking I need to make this an annual thing, even if it’s just to push myself to do something just for me again.

Until next time…

Happy Weaving!

Filed Under: 4 shaft weaving, Clothtober, Floor Loom Weaving, Inspiration, Sewing, Weaving Tagged With: 4shaftweaving, clothtober, hand woven, handmade, indigo

Clothtober progress

by Kelly 5 Comments

I would rather be here to tell you that my Clothtober project is completely finished, but alas, life is not like that. Life is busy, distracting and full.

So, instead of showing you my finished project I am here to update you on my progress. Because I have made progress, and sometimes that is more important than the finish line.

I started with a 10/2 weight cotton. I wanted a light weight and soft fabric for my finished garment. I had woven samples with Full Circle Australian Cotton previously and felt that it was the perfect fit for this project.

I decided on a 4 shaft, straight draw twill for a couple of reasons.

  1. It’s an easy and familiar threading pattern that doesn’t take as long to thread as 8 shaft straight draw.
  2. As I’m using all one colour, I didn’t want to weave a pattern that would not be seen all that well after dyeing.
  3. I wanted a really good drape for my garment, and felt that twill would be more suitable than plain weave.

I chose a sett of 25 ends per inch, meaning that for my 10 dent reed I sleyed 2,3. If that is gobbledygook to you, it means that I placed 2 warp threads in the first reed space, then 3 in the next, then back to 2 and so on. I did this because I only have a size 10 reed for my floor loom.

As soon as I had my warp chains on the loom (800+ ends!) I started having trouble. Was it the yarn or was it me? Hmm, probably a mixture of both. As mentioned, I have used this yarn before, but only as a short, narrow warp for a sampler. This one is full width on my 90cm loom. I had so many snags and tangles, and by the time I was finally ready to weave I had quite a few broken threads. Certainly, this 10/2 cotton is very fine and perhaps not as strong as the regular 8/2 cottons I’m accustomed to.

So, the warping took a really long time and I got to exercise a lot of patience. I also learned (yep, still learning with every single project!) that this yarn may be more suitable next time as a weft if I intend on a wide warp again.

If you have ever struggled with a difficult warp, you know that special moment of being threaded, sleyed, tied on and ready to weave. Oh, the joy!

I noticed after a couple of inches of warping that I had doubled up on ends in one of the reed dents. This means there is one small section of fabric that has a thicker section and stands out as a stripe.

I could have unwoven, re-sleyed and then re-woven. But I didn’t. I decided I could live with the fault and hence forth consider it a design element.

I’m more than half way done weaving and can’t wait to finish up and take this long length of cloth (4 yards or so) off the loom.

I’m now considering which dye process I want to use. I want a dark blue, so I’m considering indigo or a fibre reactive blue. We shall see. As I weave, I have plenty of time to ponder these things.

To read more about the dyeing and sewing of the cloth, click here.

Until next time…

Happy Weaving!

Filed Under: 4 shaft weaving, Clothtober, Floor Loom Weaving, Weaving Tagged With: 4shaftweaving, clothtober, floorloomweaving, weaving

Clothtober!

by Kelly 48 Comments

I’ve been thinking a lot about clothes lately. How dissatisfied I am with my current wardrobe and why. What I might be able to do about it.

I don’t have all that many clothes, and I tend to wear the same things over and over. Once I’m comfortable with something I don’t want to give it up and I really do wear things until they’re completely worn out. This means I don’t have to go shopping too often.

I’m one of those strange women who actually hate clothes shopping. It’s like a vicious cycle on repeat. I head out to the local shopping centre, sometimes the op shop. I have a list of what I need (I never randomly buy clothes, that is just not my personality type!) And the search begins.

I go through a series of predictable steps. I can’t find what I actually want or need, so I compromise, because I need it, because I’ve worn my other clothes to death. I start to try things on. I start to feel hot. Physically hot. Is it the act of trying on one thing after another, or the building anger that nothing fits or looks right that causes this overheating? Probably an even mixture of the two.

I leave the shop. Sometimes I leave with a purchase, which is never really something that I love, it’s just something to get me by until the next thing wears out and I’m forced to come back.

My body type just doesn’t seem to exist on a clothing rack. I need 3 different sizes, 1 for my chest and waist, a larger one for my upper arms, and an even larger one for my hips. So nothing ever fits.

There is something good about all this, I’m coming to that!

It has forced me into a place of action. I’m tired of not wearing clothes I like. I’m tired of being uncomfortable. I’m tired of feeling like I have not style because I can’t buy what I really like. I want to change this.

So, here is my line of thinking. I’m a weaver. I can sew. Pattern drafting is my weakness, but perhaps I can use existing patterns as a template and change them to fit my body? Perhaps, through putting in the extra work and time and effort, I will be able to produce something I enjoy wearing? And perhaps I will even enjoy wearing it more because I know how much time went into it! Instead of junky, off the rack, ill fitting clothes, I can build my own wardrobe of special pieces! Bingo!

I have already begun. I sketched ideas first, then started looking for a sewing pattern that might fit the bill.

I started with the “Esme tunic dress pattern” from Lotta Jansdotter’s book, Everyday Style. (Affiliate link) This book has so many wonderful, classic designs that I would love to build a wardrobe from. I cut the tunic out from the largest size and sewed up a quick muslin from an old bedsheet. The problem was when I set the sleeves in. They looked terrible! No amount of tweaking and re-sewing could make it look better.

After plenty attempts to change my muslin and plenty of sage advice from Instagram and Facebook friends, I decided to look for a different pattern with a raglan sleeve instead of a set in.

I stumbled upon the It’s Always Autumn blog and found a free Raglan tee pattern. She has a lot of really good free patterns, so be sure to check them out if you head over there. Using that tee pattern I started tweaking and changing to get the dress tunic I had in mind. It took hours of cutting, placing darts, sewing, ripping apart, sewing again and then doing it all over and over, to finally get a tunic pattern that fits me properly and in a style I like! Here is the muslin.

Semi fitted, yet not clingy – perfect! And did I mention that it fits?!

OK, so now onto the fabric. I’ll give more of my warp details next time, but the basic idea is to weave the fabric from an undyed cotton and then dye it to a colour I like. Yes, I want this garment to be as customised as possible!

A lot of my social media followers seem to be right into this idea, so I thought “why not make a thing of it? I can encourage other weavers to make an item of clothing with the same aims in mind. And, if we do it through October, then I can name it Clothtober!” Win, win!

So, I’m going to be sharing more details of this project as I go along (and lets face it, with over 800 ends to warp and thread, this is not going to be over in a flash!) And I hope that I may inspire some of you to choose an item of clothing you want to weave for yourself. According to your skills and what you need in your wardrobe. I will be weaving on my floor loom, but you can do what you like.

Ideas?

A skirt, a fitted blouse, a poncho, a jacket, a top, pants, a hat?

If you feel you need some extra help, here are some classes that may interest you:

Clasped Warp Quechquemitl Wrap

Garment making on a rigid heddle loom

Wrist warmers

I’ve also been eyeing the Bias Top sewing pattern from Sarah Howard, which looks terrific.

What do you think, is this something you can do? Are you fed up with crappy clothes that don’t fit?

Let me know in the comments if you want to join in. What will you make? Or perhaps you just want to follow along with my project for future inspiration, that is fine too.

Next time I’ll be talking about finding your own individual style, so be sure to check that out.

Until then…

Happy Weaving!

Filed Under: 4 shaft weaving, Clothtober, Floor Loom Weaving, Sewing, Weaving Tagged With: clothtober, tunicdress, weaving

Is a table loom the answer?

by Kelly 34 Comments

One of my most commonly asked questions relates to physical conditions.

No, I’m not a physician, but I am a weaver and I do have physical restrictions. I’ve also found ways around the restrictions and I’d love to share some of them with you.

This post contains affiliate links. This means that if you click and purchase, I will receive a small commission at no extra cost to you.

My first multi shaft loom was an 8 shaft, 32″ Ashford Table Loom.

Image from Ashford website.

My decision to buy this particular loom was based on a few things.

  1. My physical capabilities
  2. What the loom could do
  3. Price
  4. Size

Addressing number 1 first. I have a back injury that causes daily pain and discomfort and limits what I can do physically. I desperately wanted a multi shaft loom but thought it probably wasn’t going to be possible for me to physically use one. So I started researching (a lot!) and found that a table loom could be a very good option. And it was! Here is why:

  • My table loom was operated by levers rather than treadles. This meant no getting down on the floor to tie up treadles.
  • The raddle was separate to the loom. This meant that if I was doing a narrower warp, I could sit at the table, away from the loom to place my warp chain in the raddle ie. less time standing.
  • I had my loom on a table rather than a stand. I also had a height adjustable chair on wheels. So I could adjust my chair to the right height, then roll right in under the table and get close to the loom. Many table loom weavers weave standing up, I couldn’t do that, so the adjustable chair was very important.
  • The loom had a slung beater. Effortless to use.
  • Because the table was at a good height for me, I found warping easy, not having to bend to the height of the loom.

On to number 2 – what the loom could do.

Well, it could do anything that an 8 shaft floor loom could, but there were some differences. I could never achieve as good tension on the table loom as I can on my floor loom. It wasn’t a really huge deal, but could be frustrating at times when my boat shuttle would dive through the weaving. The other thing that bothered me was not being able to remove or add heddles from the shafts once I had a warp on. Once again, not a huge deal, but annoying at times.

The all important number 3 – the price!

Table looms are really affordable considering the abilities they have. If you can find a used one with all the pieces and in good condition, even better! For those who really can’t afford the outlay (which can be massive!) for a floor loom, a table loom can be 1/4 to 1/2 the price. You also have the option of starting out on 4 shafts to reduce the initial outlay. You can either stay with your 4 shafts or upgrade to 8 later on.

Finally, number 4

If you simply don’t have space for a floor loom, a table loom can be the solution. Whether you have it sitting on a table or on a stand, it is more compact than most floor looms.

As I mentioned, I do now have a floor loom. Testing myself on a table loom taught me many things. One thing was that my body could handle it if I was careful and that greatly influenced my final decision to buy a floor loom. It was also the perfect learning ground for weaving with multiple shafts, so that moving up to a floor loom was a short, rather than steep learning curve. I had to sell my table loom in order to finance and make space for my floor loom, but many times I still wish I had the table loom as well.

If you are interested in learning more about table looms, I have some Youtube videos that will help.

I have also written about table looms in a previous post where I discuss Which loom to buy?

I hope you found this post informative and helpful. Please let me know by leaving a comment, and be sure to ask any questions you may have.

Until next time…

Happy Weaving!

Filed Under: 4 shaft weaving, 8 shaft weaving, Weaving Tagged With: 8 shaft, disability, table loom

Darn it! Mending hand woven towels.

by Kelly Leave a Comment


It’s bound to happen. That moment when you realise there is a little or large or even gaping hole in one of your hand wovens.

I love using my hand woven towels in the kitchen. I mean, if you’re spending a lot of time doing menial tasks ie. dishes, you might as well be doing it with something special and beautiful.

We don’t have a dishwasher, and with 6 family members we tend to wash and dry a lot of dishes every day.

The first time it happened, I may have gasped, my eyes may have goggled a little and my head may have drooped. Just for a moment. But, one thing you learn through being a parent is to not be too precious about your material possessions. It’s likely they will get broken or damaged at some point. I would still rather use things than have them sit in a drawer somewhere.

Towel 1 was the worst with one large hole and one small hole.

So, anyway, two of my not very old, fairly recently finished hand woven towels had, shall we diplomatically say, “person inflicted holes”? Likely pierced by a sharp knife in the act of drying it?

I began contemplating what could be done about the said holes and I thought of the wonderful old art of darning, something our Grandmother’s did all the time and my own mother avoided like the plague. Needless to say, this art was not passed on to me. But, since having children, I’ve done my fair share of mending clothes with usually passable results.

Towel 2 was in better shape with just one smaller hole.

The trick with handwovens is to try to trace the original path that the broken or snapped threads took. Easier to do if you have a good understanding of the weave structure you used, but you can still get on alright by observing the threads that are still intact.

Once you’ve observed the pattern of the threads and determined how many warp threads and how many weft threads are broken, you can start tracking where these threads should have been and try to follow their original path.

*This post contains affiliate links, meaning if you click on one of these links and purchase, I receive a small percentage of the sale at no extra cost to you.

Using a needle (I used a tapestry needle) and matching the original threads as closely as possible, (I wasn’t able to do this as I had run out of the original threads, but I found some pretty good matches amongst my stash) start your thread 1 -2 inches out from the hole. Doing this also usually allows you to follow the path of the original thread up until it reaches the hole where it is broken.

It doesn’t matter whether you start weaving in warp of weft threads first. After you have woven through and past the hole (hopefully in a pattern very similar to the one that was broken) you continue to follow the pattern with the needle for another inch or two out the other side. Leave tails hanging out from where you began and finished.

This technique worked really well for my smaller holes. Although I didn’t get an exact copy of the original pattern, I was able to replace the broken threads in a way that didn’t look terrible!

Not perfect, but not too shabby!

For the gaping hole I needed to try something else. Subtle mending was not going to suffice for this one, there were many severed warp and weft threads and the gap was wide. I tried. I really did. But it was ugly – perhaps uglier than before I started trying to replace the threads.

At this point I decided to embrace the “Visible Mending” movement. I didn’t have any matching fabric, having woven just this one towel with those particular threads and structure. I hunted in my scraps and samples pile and came out with a couple of pieces that were acceptable – at least they had the same colours!

I cut out the patch sizes I needed – one for each side of the hole and serged the borders of each piece. I used the wonderful sewer’s helper Heat n Bond to attach a patch to either side of the hole. When cool, I machine zigzagged around the edges. Not perfect, but at least I don’t have to look at my botched mending job anymore and the towel is functional in my kitchen once again!


Once I completed the surgeries, I put the towels through a hot (60 degrees celsius) machine wash, dried and ironed. I cut all the tails (including the original leftover broken threads) as close to the fabric as possible, without cutting the actual fabric. Don’t accidentally snip too close and undo all your hard work!

Oh, and in case you’re wondering, I’m very grateful to have children who wash and dry dishes for me, even if there are occasional accidents!

Until next time….

Happy Weaving!

Filed Under: 4 shaft weaving, Sewing, Weaving Tagged With: darning, floor loom weaving, kitchen towels, mending, towels

  • « Go to Previous Page
  • Page 1
  • Page 2
  • Page 3
  • Go to Next Page »

Primary Sidebar

About Kelly Casanova

Hand crafted boat shuttles

Categories

Archives

Meta

  • Log in
  • Entries feed
  • Comments feed
  • WordPress.org

Copyright © 2026 Kelly Casanova Weaving Lessons on the Foodie Pro Theme